Dwight
-
Posts
5,236 -
Joined
-
Last visited
Content Type
Profiles
Forums
Events
Blogs
Gallery
Everything posted by Dwight
-
Google is your friend, . . .
-
One source for stitch markings might be a hacksaw blade. Many of them have 12 teeth per inch, . . . and other derivitives. A short piece, . . . maybe 1 inch long, . . . could be affixed to a wooden dowel, . . . and used to mark the stitch placement. Sometimes you gotta be creative, . . . May God bless, Dwight
-
On the streets: "What goes around, . . . comes around" Buddhism calls this idea Karma. Christianity says, "As ye sow, . . . so shall ye reap". Funny how the same concept is seriously universal, . . . excepting maybe muhammedism, . . . Good post, Handstitched, . . . look forward to pictures, . . . it's always fun to see what other people are doing. If you get over to the gold coast, . . . tell it Dwight said "Hello", . . . been over 40 years, . . . but was some of the best days of my youthful life. May God bless, Dwight
-
If I'm not using my standard 346 thread, . . . the only other one I use at all goes on my other sewing machine, . . . I buy it at JoAnn fabrics, . . . it is called upholstery thread in their store. It is one strong thread, . . . would do wonderfully for smaller stitches (I do 5 spi with the big machine, . . . about 8 spi with the upholstery thread) if you are sewing by hand. May God bless, Dwight
-

How Do You Finish The Flesh Side Of Your Straps?
Dwight replied to FoamerAce's topic in How Do I Do That?
I assume that you have leather that has appendages hanging off the flesh side of your leather. First rule, . . . never buy that cheap of leather. Second, . . . take a sander to it, . . . yeah, . . . the wood sander sitting on your woodworking shelf. No sense in trying to explain how, . . . you play with it a while, . . . it'll come to you. Then you just finish the flesh side the same way you do the hair side. Now some folks don't dye the flesh side, . . . I'm not one of them. Dye jobs at my place are a baptismal effect, . . . dunked till they bubble. Add the appropriate finish, . . . I'm partial to Resolene, . . . mop & glo works, . . . as well as others. Hope this helps, . . . may God bless, Dwight -
I'll be deadpan honest with you, . . . never saw or heard of such a rig. Been doing this for several years, . . . but I guess it's never too late to learn a new trick. My "commercial" gun belts run almost 1/4 inch thick, . . . but the holsters either thread on through slots, . . . hang on with clips, . . . or something of that nature. If it were mine, . . . I'd get a good solid 9/10 oz blank belt, . . . and another 5/6 blank, . . . both 1 1/2 wide. The thin piece will be your "liner" which goes from the tounge end to where the buckle end is folded over and Chicago Screwed together to hold the buckle. On that liner, . . . sew your velcro wherever you want it. Then use Weldwood contact cement to cement the two pieces together (flesh side to flesh side). From my velcro experience with other projects, . . . I'd probably bevel down the edges of my liner, . . . buy a piece of velcro that was 2 1/2 inches wide, . . . wrap it around the liner and sew it in place. It will make that portion of the belt a bit thicker and bulkier, . . . but not enough to cause a problem. Sand the edges smooth, . . . bevel and burnish them, . . . stitch groove them, . . . sew them, . . . stain and finish, . . . VOILA, . . . done ! I'd like to see the finished product as well as a picture of the holster you intend to use with it. Look at my website, . . . you'll see one of my finished ranger belts, . . . www.dwightsgunleather.com May God bless, Dwight

-
A shearling skin from Springfield leather will cost you $99 + P&H. One pint of Weldwood contact cement will be about $8. Simply dissassemble the saddle until you get the skirts off, . . . remove the old, . . . glue on the new, . . . sew the edges, . . . trim, . . . re-assemble, . . . ride on, cowboy, . . . ride on. Like Tom said, . . . it can be done in an afternoon, . . . but if you don't start until Noon, . . .and you've never done anything like this before, . . . I wouldn't plan on watching much of anything on TV before the late night news. May God bless, Dwight
-
Sewing in toe plugs is sorta like changing a flat tire on the freeway, Friday night, in the middle of a rain storm. There ain't no real easy way to do either one, . . . you just do it. Will's way will definitely work, . . . and yours looks reallygood to me. And, . . . when you stand back 36 inches or so, . . . who is going to know how you did it? May God bless, Dwight
-
i did it one time, . . . but then again, . . . I only tried once. Needed a black pair of boots, . . . had two brown pairs. Took good old USMC black, . . . the rest is history. Course then again, . . . I was doing the whole boot, . . . you'll need to be careful. May God bless, Dwight
-
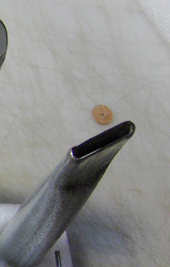
Now I don't know, . . . don't look like my spot setters. Have you tried using one of them to set a spot? That might settle the question real good and quick. May God bless, Dwight
-
Can't tell for dead certain, . . . but the center one and the one on the right do look like round spot setters like the ones I have. Maybe side view pics???? May God bless, Dwight
-
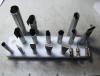
Get or make a punch, . . . or get a belt sander ($50 at Harbor Freight). Either will give you a fairly uniform and good looking end. They will also give you the ability to quickly finish the "end" problem. I make those kinds of punches, . . . conduit, . . . sharpened on a disc sander around the outside circumference, . . . then cut the edges to achieve the punch I desire. May God bless, Dwight
-
Yessir, . . . been there, . . . done that, . . . what Renee said is on the money. No, . . . you don't want to know how I know for sure what she said is right May God bless, Dwight
-
Ya ought not to be doin' them, benlily, . . . you are going to be the cause of our Seals all sitting down on the job. Can't have that !!!!!!! Seriously, . . . good job as usual, . . . just figgered I'd aggravate you a bit. May God bless, Dwight
-
What Oz Of Leather For Standard Belt?
Dwight replied to zaynexpetty's topic in Leatherwork Conversation
Take a dial caliper, . . . go to Walmart, . . . find the kind of item you want to imitate, . . . measure it. For me, . . . my belt, . . . it is 2 pieces, . . . measures 16 oz (.250 inches). The word "standard" means so many different things to so many different people. May God bless, Dwight -
Go to the hardware store (or Harbor Freight if they are nearby) ask for a cheap (emphasis on cheap, cheap, cheap) 1 inch bristle brush. HF has them for about 50 cents each, . . . in quantity. Anyway, . . . thin it down 50/50 water and Resolene. Dip the brush in & get a good brush full, . . . start stroking it on the project, . . . add more, . . . add more until as you are brushing left, right, up, down, and crossways, . . . you are developing what looks like a froth, . . . not too deep, . . . just a bit of a froth. Now, quit adding material, . . . brush it out. Make sure you are in a good light, . . . tip it back and forth a bit, . . . make sure you wetted it all down real good. Keep brushing until all the little bubbles are gone. Brush left, right, up, down, crossways, . . . continuously until the bubbles disappear. Use light strokes, . . . you are not painting, . . . you are petting the thing with a paint brush as you finish up. For holsters, . . . I do the inside first, . . . then stick my fingers inside (wearing a latex glove to keep that sticky stuff off my hands) and hold it up to the light as I continue my work. NOW, . . . here's where the fun comes in. I cannot explain how much to use, . . . you'll have to make up a couple sample pieces to test. Make sure you dye them the most used color you run across. Follow the obove instructions, . . . hang it up, . . . let it dry for about 24 hours, . . . THEN, . . . bend the devil out of it. If your topcoat breaks like the chocolate covering on an ice cream bar, . . . you put too much on. Back off a bit. If it is nice and flexible and doesn't break, . . . you did it right. At least that is my method, . . . YMMV. May God bless, Dwight
-
Just Bought An Old New Saddle Tree
Dwight replied to St8LineGunsmith's topic in Saddle Supplies, Tools & Trees
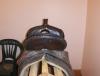
Whoa, . . . I saw it over on CAS, . . . thought by the time I got here, . . . you would have something done, . . . Seriously, . . . I don't know if I'd ever do it, . . . though I would like to. I found an old Jumbo stock saddle, . . . probably at least as old as I am, . . . I'm most likely going to spend part of the spring "re-juvenating" it, . . . take it to my cousins later on, . . . check it out. Keep us posted on this one, . . . whenever you do something to it, . . . send us pics, . . . I would love to be able to see the progress. May God bless, Dwight -
That is it for sure, . . . I could make out the u the m and part of the b in the Jumbo name, . . . but noting clicked until I saw their logo. Now if there were only some way of figuring out what year it came from. it has usable white wool on it that isn't torn or anything, . . . but the leather is dried out pretty bad in a couple of places. One thing for sure, . . . I enjoy it, . . . if it never does anything more than sitting in my shop, . . . adorning the place, . . . it's like a painting for me, . . . I enjoy it. Again, . . . thanks for the suggestion. May God bless, Dwight
-
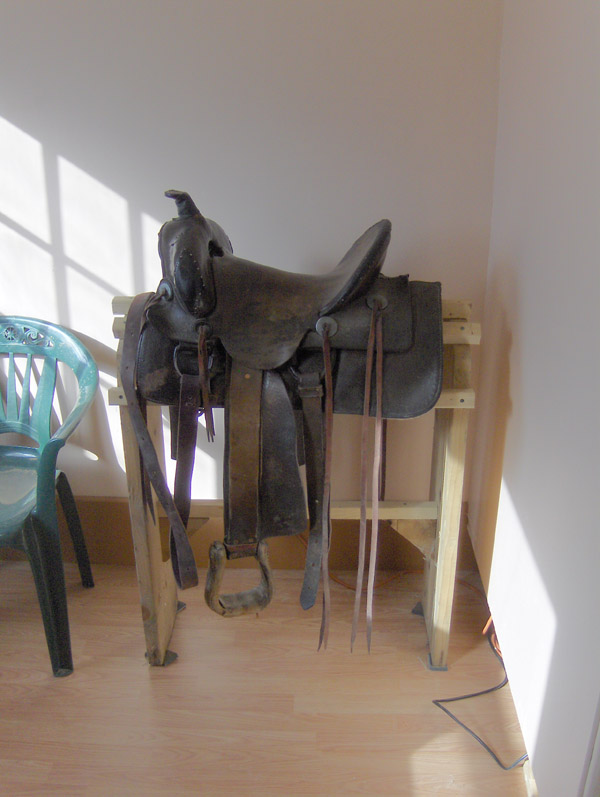
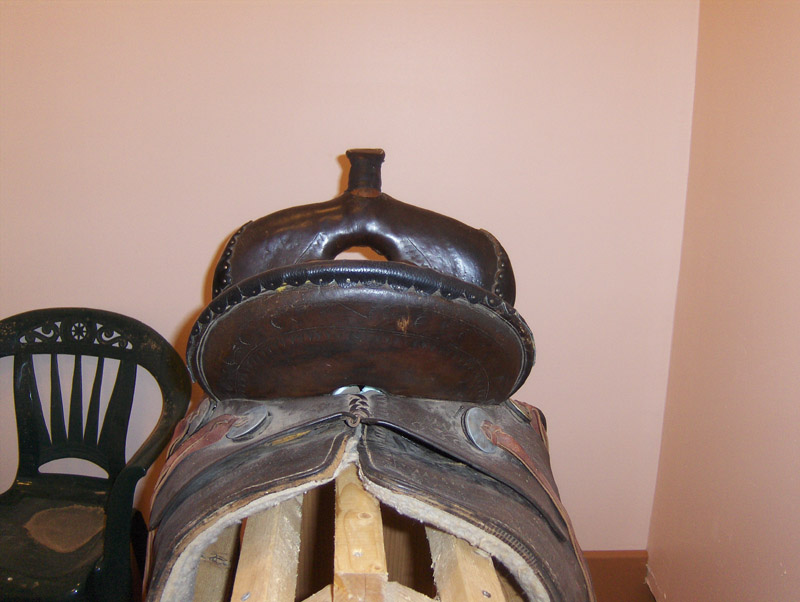
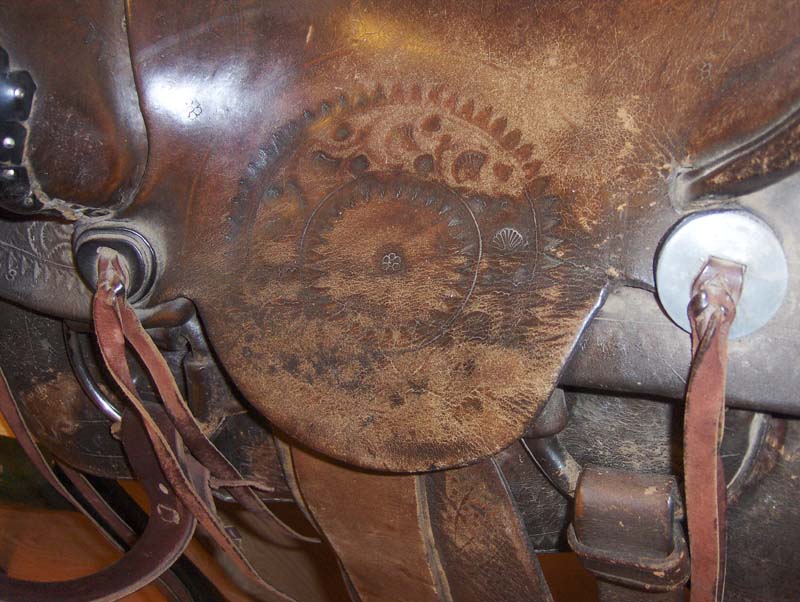
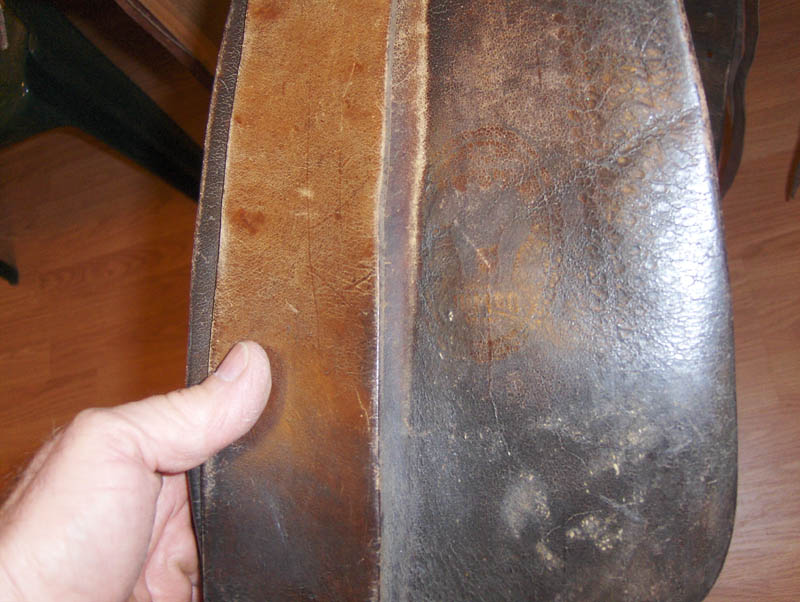
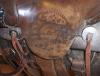
Since I last posted above, . . . I went looking, . . . and I found one for me. I'd sure love to get some information on it, . . . but so far it's all been a blank. Anyway, . . . enjoy the pics, . . . the one with my thumb in it shows the makers mark. . . . trouble is it is all but gone. It's an oval, . . . maybe 4 inches tall, . . . some kind of image in the upper 2/3 of it, . . . with a block written name below the image, . . . in the shape of a frown. Anyway, . . . it's a good old saddle as far as I can tell, . . . be taking it to my nephew's to go riding probably in May, . . . maybe earlier if the budget and the weather will allow it. Been thinking about totally re-doing it, . . . been thinking about just enjoying the treasure as it is. Decisions, . . . decisions, . . . May God bless, Dwight

-
First Wallet. Need Some Tips.
Dwight replied to zaynexpetty's topic in Purses, Wallets, Belts and Miscellaneous Pocket Items
Honestly, . . . you probably should start out using kits, . . . like from Tandy. First, the products will have the right sized leather, right hardware, right directions, and right ideas. Kudos to you for initiative, . . . and E for effort, . . . but for instance, you put on resolene, . . . then added some preservative. In an analogy, . . . that is like first putting on a perfect fitting raincoat, . . . then adding a 50 gallon garbage bag over your head so you don't get wet. The resolene is a FINAL finish product, . . . needs absolutely nothing, . . . and will for all tense and purposes, . . . not allow anything to penetrate it. The only thing one should ever do AFTER resolene is perhaps some neutral shoe polish. Also, . . . the design itself was badly flawed. Go to Walmart, . . . look how their wallets are formed, . . . you will not see the continuous piece of leather you used on the inside of the bill pocket. It will be a piece on the left, one on the right, and a slim one in the middle, . . . that is what allows a commercially produced wallet to easily fold in the middle. If you want, . . . you can continue without proper instruction, . . . and learn all the tricks the hard way, . . . but picking up some leatherworking books at the library, or Tandy's, will save you a lot of frustration, aggravation, time, and money. You will also see a greater improvement, . . . much quicker. May God bless, Dwight -
Belt Slots In A Holster
Dwight replied to Tommy217xxx's topic in Gun Holsters, Rifle Slings and Knife Sheathes
It just depends on how handy you are, . . . I made this punch in all of about a half hour, . . . It's nothing more than a short section of 1 inch galvanized tubing, EMT to be exact, or better known as electrical metallic tubing, conduit. Lay the edge up against a sander, . . . and sharpen the edge first, . . . then flatten it out to suit your taste, . . . mine came out as 1 1/2 inch long, 1/4 inch wide. It makes one really nice continuous slot, . . . with no jagged edges that comes from trying to cut or drill your way. May God bless, Dwight
-
Take a look at my website, www.dwightsgunleather.com and you will see other things I have crafted. I don't do many wallets, but I do love doing custom items. If you are interested, my regular email address is on the website, you can send drawings or pictures of what you want. May God bless, Dwight
-
An old carpenter mentor's favorite saying (one of them anyway) was that the expert was NOT the one who did not make mistakes: he was the one who figured out how to do something with it so it didn't look like a mistake. Your black "2nd effort" proved that point. Good job, . . . May God bless, Dwight
-
Hey, Red, . . . this is one of my happier ideas, . . . had originally planned on laying them all flat, . . . just didn't have enough room, . . . so I designed this. I only have the box built so far, . . . and the door (4 x 8 sheet of 1/2 inch OSB on 5 hinges), . . . but the idea is pretty simple. The box is a 2 x 12 thick, . . . 8 feet tall, . . . and about 44 inches wide. There are going to be arms that rotate out, . . . heavy leather to the front, . . . thin stuff to the back. I'm actually doing a smaller version of this with nails on the inside of my leather closet door now. Makes selection so, so, so, so much faster and better. I'll put a small rack on the back side of the door for smaller pieces. May God bless, Dwight
-
Use Un-Threaded Sewing Machine To Punch Holes?
Dwight replied to Flattracker's topic in Sewing Leather
I don't do it very often, . . . but there are times that I do, . . . and yessir, . . . it does work. If I did it a lot, . . . I'd put in a smaller needle, . . . then punch the awl through for the final sewing hole. It makes it look better if you do that, . . . but mostly only leatherworkers will note the difference. May God bless, Dwight