Dwight
-
Posts
5,247 -
Joined
-
Last visited
Content Type
Profiles
Forums
Events
Blogs
Gallery
Store
Everything posted by Dwight
-

Whats The Hardest Area Of Leather Construction To You?
Dwight replied to DavidL's topic in How Do I Do That?
I work with leather between 3/4 and what would amount to 48 oz (3/4 of an inch) thick. My Harbor Freight belt sander and my Menards oscillating drum sander are my chosen sanding tools. I have on occasion made both pieces bigger, . . . deliberately, . . . so when they were glued together, I could trim the excess with a knife, . . . but only on some special pieces do I do that. I prefer the belt sander. Air brushing the dye does a "pretty" job, . . . but the dye is only on the surface. Any real good scratch and you are down to bare leather. I prefer to dip dye, . . . will only airbrush for special effects. May God bless, Dwight -
My Tippmann Boss never squeaks at Kydex, . . . unless it is a whole bunch thicker than this stuff. Treats it like leather and just goes on through. I've actually sewn leather in excess of 1/2 inch thick with it. May God bless, Dwgiht
-
Whats The Hardest Area Of Leather Construction To You?
Dwight replied to DavidL's topic in How Do I Do That?
The part that aggravates me the most is cutting out the pieces. The rest is kinda, sorta, almost maybe fun, . . . but cutting out the pieces (along with determining which old dead cow to cut up) is the one part that aggravates my gizzard. I don't do enough of the same identical thing to warrant a clicker cutter, . . . mostly custom stuff, . . . so it is cut, whack, chop till ya get a piece of it to work with. I also generally follow: cut out, . . . glue together, . . . sand edges, . . . bevel the edges, . . . stitch gouge, . . . sew, . . . burnish edges, . . . mold, . . . dye, . . . re-burnish edges, . . . finish, . . . add bling as needed. Sometimes sewing goes after dye, . . . if customer wants white stitches. May God bless, Dwight -
New Guy From Texas
Dwight replied to lobo leathers's topic in Gun Holsters, Rifle Slings and Knife Sheathes
That is some pretty good looking work, . . . and I don't mean to rain on the parade, . . . but: There is another "lobo" who has been around for a bunch of years, . . . www.lobogunleather.com Might be bad to get confused with each other. May God bless, Dwight -
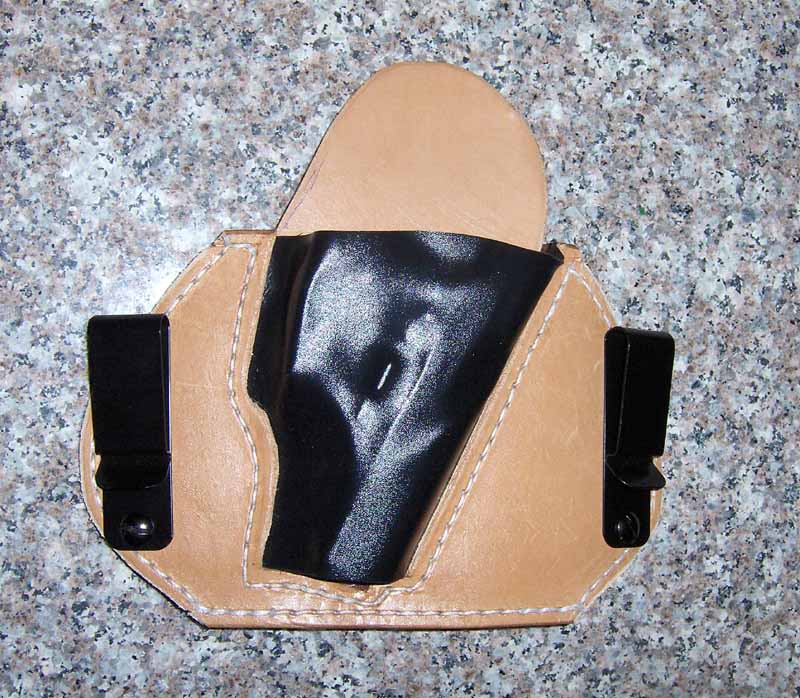
Well, . . . first report is in, . . . he liked some of it, . . . some of it needed work. I had to go back and chop the ears off it above the clips, . . . and put a sweat shield on it. Thought of ripping it apart and re-doing the whole thing, . . . knew I'd never hit the same holes in the kydex, . . . so I just, . . . uhhh, . . . modified it. It's a prototype anyway, . . . having fun, . . . thanks to you. Thanks again, . . . and I probably mentioned it before, . . . but if I didn't, . . . you do beautiful work. May God bless, Dwight

-
#2 Of 2 Charity Rigs
Dwight replied to Eaglestroker's topic in Gun Holsters, Rifle Slings and Knife Sheathes
I will not be a critic, . . . course then again, . . . could not find anything to be critical of. Great job, . . . and as a fellow vet, . . . thank you, . . . thank you very much. Words are not able to convey the appreciation. May God bless, Dwight -
Is This A Thread Tension Issue? Tippmann Boss
Dwight replied to RoosterShooter's topic in Leather Sewing Machines
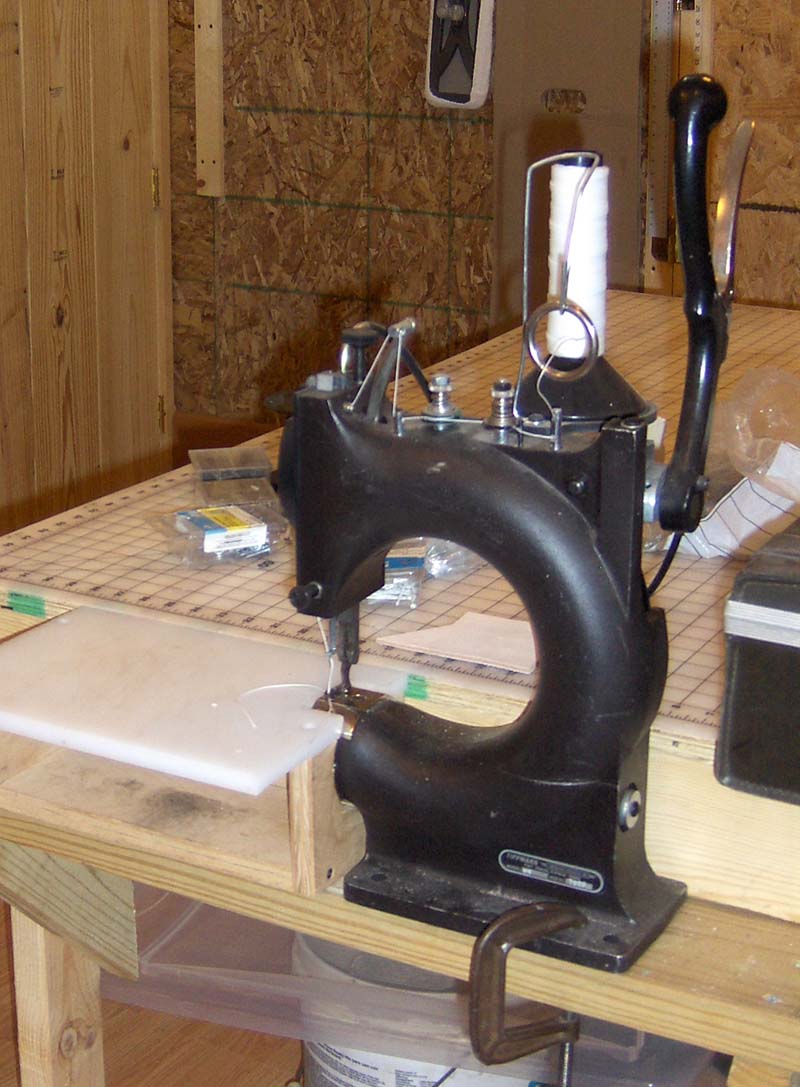
And here is how I have mine set up, . . . it causes me less problems. May God bless, Dwight
-
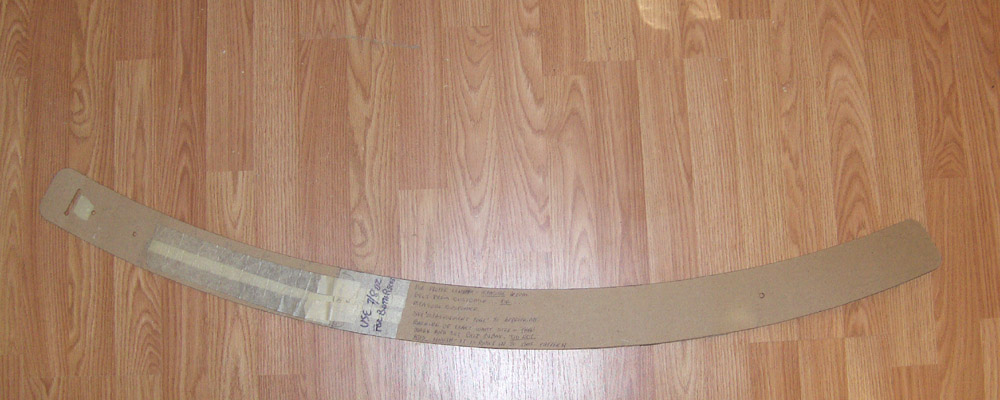
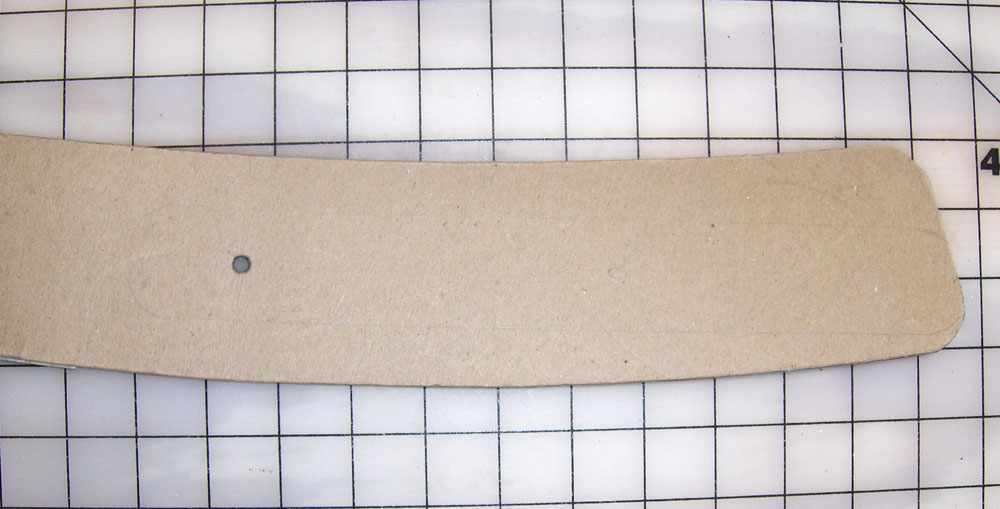
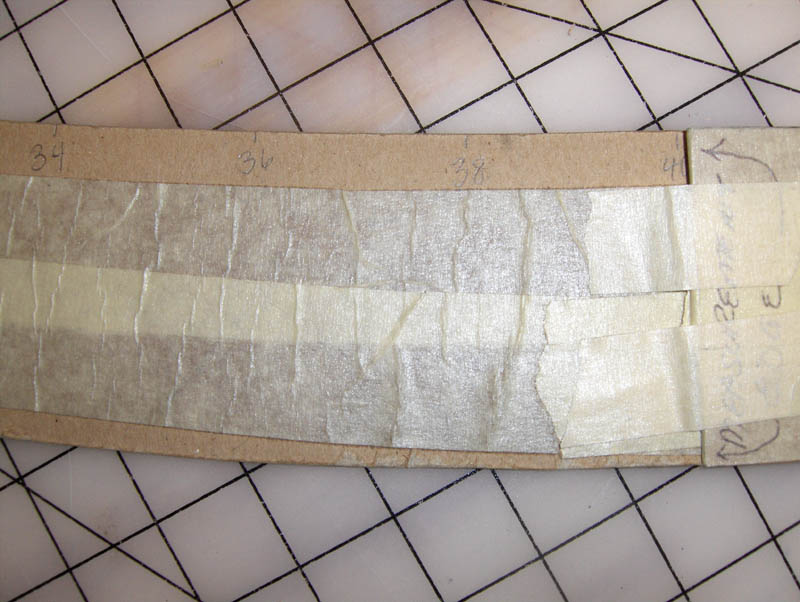
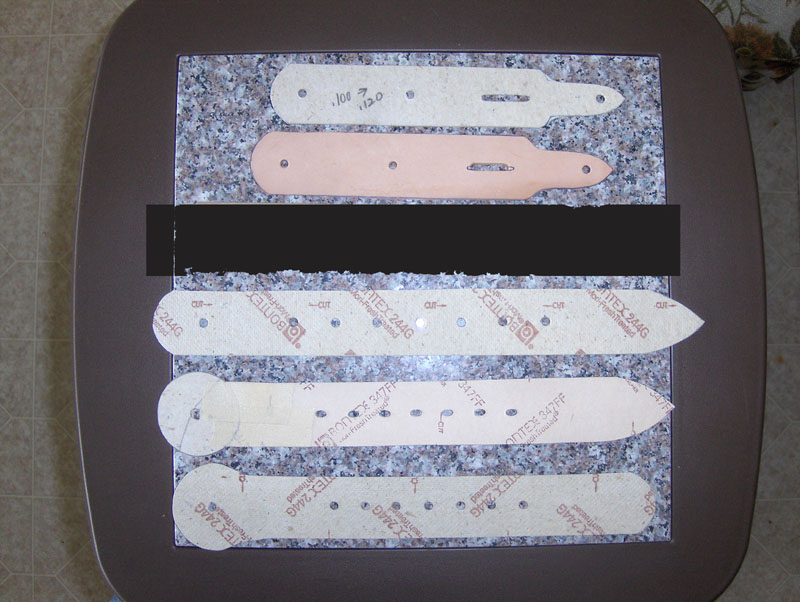
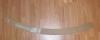
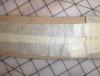
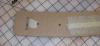
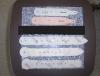
Well, . . . I was out in the shop earlier this morning, . . . just happened to have my camera, . . . so here is what I use. # 1 is the whole thing laid out on the floor # 2 is the tongue end, . . . with the place where I pop the hole for either a Chicago screw or concho, . . . # 3 is where the two pieces come together, . . . this time it is set for a 40 inch waist. Again, it will make a 44 inch belt, . . . but that is adding the necessare "extra" so the gunbelt fits over the hips like it is supposed to. # 4 is the buckle end, . . . showing where I pop the holes for the buckle retainer # 5 is the templates I use for the tongue or buckle end. These are standard ones from which the customer can choose, . . . if he wants something different, . . . takes more time, . . . costs more $$$. Anyway, . . . that's how I do it, . . . set the belt pattern, . . . mark it, . . . cut the front, . . . mark and cut the back, . . . punch the holes, . . . and go for it. This is a direct product of John Bianchi's VHS series of tapes on how to make a Western gunbelt. May God bless, Dwight

-
Awww, . . . c'mon oltoot, . . . gotta have some good reason to come back in the house. I mean, hey, . . . those cookies will go stale, . . . the mice will get the swiss cheese, . . . and that left over bag of Hershey kisses from Easter will just get gobbled up by the crumb crunchers, . . . if I don't have a reason to go back in and check on them. May God bless, Dwight
-
Is This A Thread Tension Issue? Tippmann Boss
Dwight replied to RoosterShooter's topic in Leather Sewing Machines
I agree with all Wizcrafts said except for this one statement. Back after I got mine, . . . I posted a query on this forum, . . . and I really wish I could remember who it was that answered it. We sat and talked on the phone for about an hour one Sunday afternoon, . . . and the very first thing he brought up was how the thread was feeding off the spool. i told him, . . . factory specs, . . . and he indicated that was the very first thing I needed to change. I bent my thread arm down so the eye was parallel to the middle of the spool, . . . added a ring to the eye that had no edges on it, . . . and I pull the thread through it first, . . . It makes the spool turn around on the post, . . . like the spool in a regular sewing machine, . . . The thread will either wind tighter, . . . or unwind (depending on the direction of twist) if you leave it as per factory specs. It only makes a difference on a long run like the outside of a purse or a belt, . . . but it can and will make a difference. May God bless, Dwight -
Is This A Thread Tension Issue? Tippmann Boss
Dwight replied to RoosterShooter's topic in Leather Sewing Machines
I have occasionally seen the same thing, . . . VERY occasionally, . . . and not lately. Generally, . . . I have chalked it up to a harder / softer piece of leather in the affected areas, . . . and it seems to be the answer, . . . though I would not bet the world series on that answer. Try tightening up the top tension a good solid 2/3 of a turn, . . . then adjust the bobbin accordingly. Also, . . . make sure the needle you are using will slide freely down a piece of the thread you are sewing with. A needle with a smaller hole will give you fits too. I found shortly after getting mine a number of years ago, . . . the instructions point you in the general direction, . . . but you have to walk the course. Play with it. And, . . . go get a couple of 1/4 x 20 wing nuts, . . . and a couple of 1/4 inch lock washers. Use the wing nuts & lock washers to lock your top adjustments in place. I've had em move on me during a big holster or belt, . . . and it is some kind of aggravating. May God bless, Dwight -
My new shop area is 12 by 22, . . . and I had outgrown it the day I turned the lights on in it. I just have to deal with it, . . . as I cannot afford to do any more. One thing the USNavy taught me, . . . storage (as much as possible, in plain sight) is the key to making the most out of limited space. Right now I have about a hundred bucks worth of shelving boards (#2 white pine) that have not gone up yet, . . . they will, . . . and it will then make things better. For sure, . . . insulate the thing, . . . especially the roof, . . . keeps the sun out in the summer, . . . the heat in during winter. Mine has a mininum of 2 inches of foam all the way around, . . . 6 inches in some places, . . . even the floor is insulated w/2 inches of foam. May God bless, Dwight
-
I'm not sure where you got the idea that water will help with a spirit or oil based dye, . . . believe me, . . . it will not. If anything, . . . it will make the job even worse. For lighter colors, . . . cut the dye with the appropriate thinner product. I have cut them up to 90% (1 part dye, 10 parts thinner) for a special effect one time. Turned out beautiful. And when you put it on, . . . put it on, . . . if it is not WET, . . . it is not enough dye. I actually quit the dauber, sponge, wool square idea, . . . got a couple of flat pans, . . . everything is dip dyed, . . . and I don't have dying problems. Period. May God bless, Dwight
-
Sharkey, . . . Smith and Wesson makes about as many revolvers and there are hats for the Queen to wear. Get a model number, . . . or at least the frame designation, . . . somebody should be able to fix you up. I have one for a S&W 5 shot snubbie, . . . made for a lady who would do all right with it against 6 bad guys. She'd shoot the first five and beat the last guy to death with the empty gun. Let us know, may God bless, Dwight
-
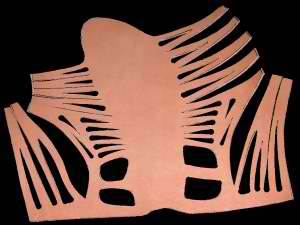
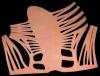
Once you make your pattern, . . . punch each end with a round hole, . . . then razor cut or roller cut (be careful !!!) between the holes. We do the same thing to make Roman sandals,............ the picture is the pattern used to create the sandals. May God bless, Dwight
-
I've always been the guy who believed in "What goes around, . . . comes around", . . . Karma, . . . "as ye sow, . . . so shall ye reap". Yeah, . . . I've probably done more and given away more for others than I have received, . . . but I feel good about it, . . . am at peace with myself over it, . . . and do not have any problems with it. Sometimes, I have found, . . . that something done as a kindness or friendship or even as charity, . . . has a way of paying more dividends than the bank book can hold. But again, . . . that is my whole philosophy of life, . . . and it has kept me up until 69 +, . . . so maybe it is pretty good after all. As a caveat, though, . . . I am careful not to become the "go to" boy for freebies. There is a limit. May God bless, Dwight
-
If my math did me well, . . . you have what I know as 4/5 oz leather. I personally find it a pain to carve, stamp, decorate, . . . but it is because I'm a bit ham fisted when it comes to that kind of work, . . . and 4/5 is just too delicate for my club fisted way of working. Also, . . . I've found those double shoulders to be sometimes a bit hard on the outside especially. Try a piece of the leather more toward the upper neck area, but away from the edge, . . . or the spine area below the shoulder itself. I have wonderful "luck" with them for holsters, belts, etc., but if I'm going to be doing much decoration, . . . I prefer the bends in 7/8 or thicker. Hope this helps. May God bless, Dwight
-
An electric drill, . . . drywall screws, . . . goes together fast, . . . if it needs changed, . . . comes apart fast too. AND, . . . you can beat it with about anything you want, . . . the screws WILL hold. May God bless, Dwight
-
Newbie Question About Using The Flesh Side Out
Dwight replied to Willie0's topic in How Do I Do That?
Welcome, WillieO, . . . Hey, . . . what you are talking about is in fact a very smart way to use your leather. Flesh side out in leather lingo is "rough out", . . . and if you have ever seen any of Clint Eastwood's spaghetti westerns, . . . in most of them (if not all) his holster and gun belt were roughout. John Wayne also had a roughout money belt he wore in a western or two. Using full grain leather with the rough side out, allows you to rely on the strength of the hair side to maintain the item's basic shape, . . . yet have it appear to be suede. You can finish suede with several different products, . . . I use Resolene in a 50/50 mix with water, . . . it will stiffen the leather at first, . . . but it can be "broken in" to about any flexibility you want just by manipulating it. May God bless, Dwight -
I don't remember where I got it, . . . but I understand that some of the old cowboys of yesteryear would punch a hole in a silver dollar, . . . and use it for the rowel in their spurs, . . . that way they always had 2 dollars on their person. When I looked for different rowels for mine, . . . "IKE" dollars were just the right size, . . . and you guessed it, . . . Dwight has "Ike" dollar rowels in his spurs. Hang in there LTC, . . . if they come and get you, . . . they'll probably already have me in the wagon, . . . we can chat till the lawyers get there May God bless, Dwight
-
My only problem with doing it by pants size, . . . I had a feller one time ask me to make him a belt. i asked what size, and he said he wore size 36 Wranglers. Being a bit cautious, . . . I measured his belt, . . . and found that the hole he used most was between a 39 and 40. The 36 Wranglers had "stretched" so to speak. If I had made him a gunbelt based on his say so, . . . it would have buckled only in the very first hole on the billet, . . . if at all. That is the reason I insist on a belt measurement, . . . but if the other one works, . . . that's great too. May God bless, Dwight
-
I actually have a 2 piece "pattern" I use. I made it so that it allows for a 4 inch additional length, and is marked for waist size. One piece is the billet end, the other the buckle end, . . . they come around together to form a pattern for the belt. I directly trace the belt blank off this pattern. I can measure the buyer's belt he is wearing today, . . . (say a 38 waist), . . . set it at the mark for 38, . . . it will lay me down a pattern for a 42 inch belt. It already has the hip curve, . . . holes punched for tongue and billet, . . . makes life easy. Guy comes in wanting a cowboy rig, . . . if he has to turn around in my driveway before leaving, . . . I can have the pattern set for him before he is on the road, . . . 600 feet away. And so far it has only had one problem customer, . . . he gained 2 inches while I was making his rig. I would imagine Jim's is similar, . . . but just make sure what you do works, . . . and when you get it working, . . . write it down, make a pattern, take copious notes, . . . so you won't forget by the next one you do. Now "YOU" may not have to do that, . . . but this old redneck would forget most anything not done in the last few days. May God bless, Dwight
-
Although we all love leather, . . . (obviously ), . . . and other natural materials, . . . it is a given that pretty much all natural materials will soak up oil from any source, . . . and any metal firearm will have oil on it in varying proportions. Since you will not be able to see in this thing, . . . it could become a trap for oil, . . . then dust, . . . creating a bad environment for really fine weaponry. If it were mine, . . . I'd make sure the lining was one of the plastic fantastic man made thingys that does not absorb oil or other liquids. That should be a very positive protector for the contents of the bag. The alternative would be a leather only bag, . . . and hand wrap the contents with a clean rag / cover / whatever. May God bless, Dwight
-
An inexpensive, yet useable tool I sometimes use: take a piece of steel tubing about 3 inches long (in this case, 1/8 inch tubing). Lay it against a sanding wheel, . . . sharpen the outside edges of it like you would do sharpening a pencil. Put it in your 1/4 in electric drill, . . . drill your holes. I usually do 5 or 6 holes, . . . take it out of the drill, . . . use a wire to push out the pieces, . . . Every other hole or every 3rd hole, . . . touch the tip to a block of beeswax or parrafin, . . . makes the going through a bit easier. May God bless, Dwight
-
Old Belt, New Holster
Dwight replied to Red Cent's topic in Gun Holsters, Rifle Slings and Knife Sheathes
Hey, . . . there's one just like that one over on CASCity........... Still good looking though, . . . even on the second go around. May God bless, Dwight