BearMan
-
Posts
710 -
Joined
-
Last visited
Content Type
Profiles
Forums
Events
Blogs
Gallery
Store
Everything posted by BearMan
-
Tina, That is FANTASTIC!! I love it,,, But You always do such nice stuff anyway!! Ed
-
Thanks Kevin, I really apprecite all the compliments!! It's nice to make things,,, anything,, for people that really appreciate all the time & quality materials that go into them. Thanks again,,, Ed I picked these up the other day from the post office. They are exceptional - much better than some of the other mauls currently available in the marketplace. I got to use the larger one yesterday for a bit, and it was a welcome relief (in weight) from what I had previously been using. Thanks again, Ed. You did yourself good here.
-
Simply Stunning!! Great expression on the Tigers face also. I used to work with a few Tigers at Lion Country Safari, in West Palm Beach Florida,,,, Wayyyyy back in the 70's-80's Great Job!!
-
Hi Mark, Very Nice Job!! Ed
-
Thanks Vince, I REALLY appreciate that!! I do what I can, after all,,, we're all in this together,,, right?? I would love to see leathercraft, leather art as a whole help all it's artisan get better,,, & better. Ed Ed, Your work is fantastic as always. You do quality work on your tools and are a man of his word. It is great that you do this for your fellow leatherworkers. vince
-
Thanks everybody. It was fun making these even though the wood was extreamly hard to turn. Kevin was great to work with, & hopefully he will get them by Sat. Thanks again, Ed
-
Brenda at LaserGifts did mine also,,, She did a Great job,,, & very quick also!! Ed
-
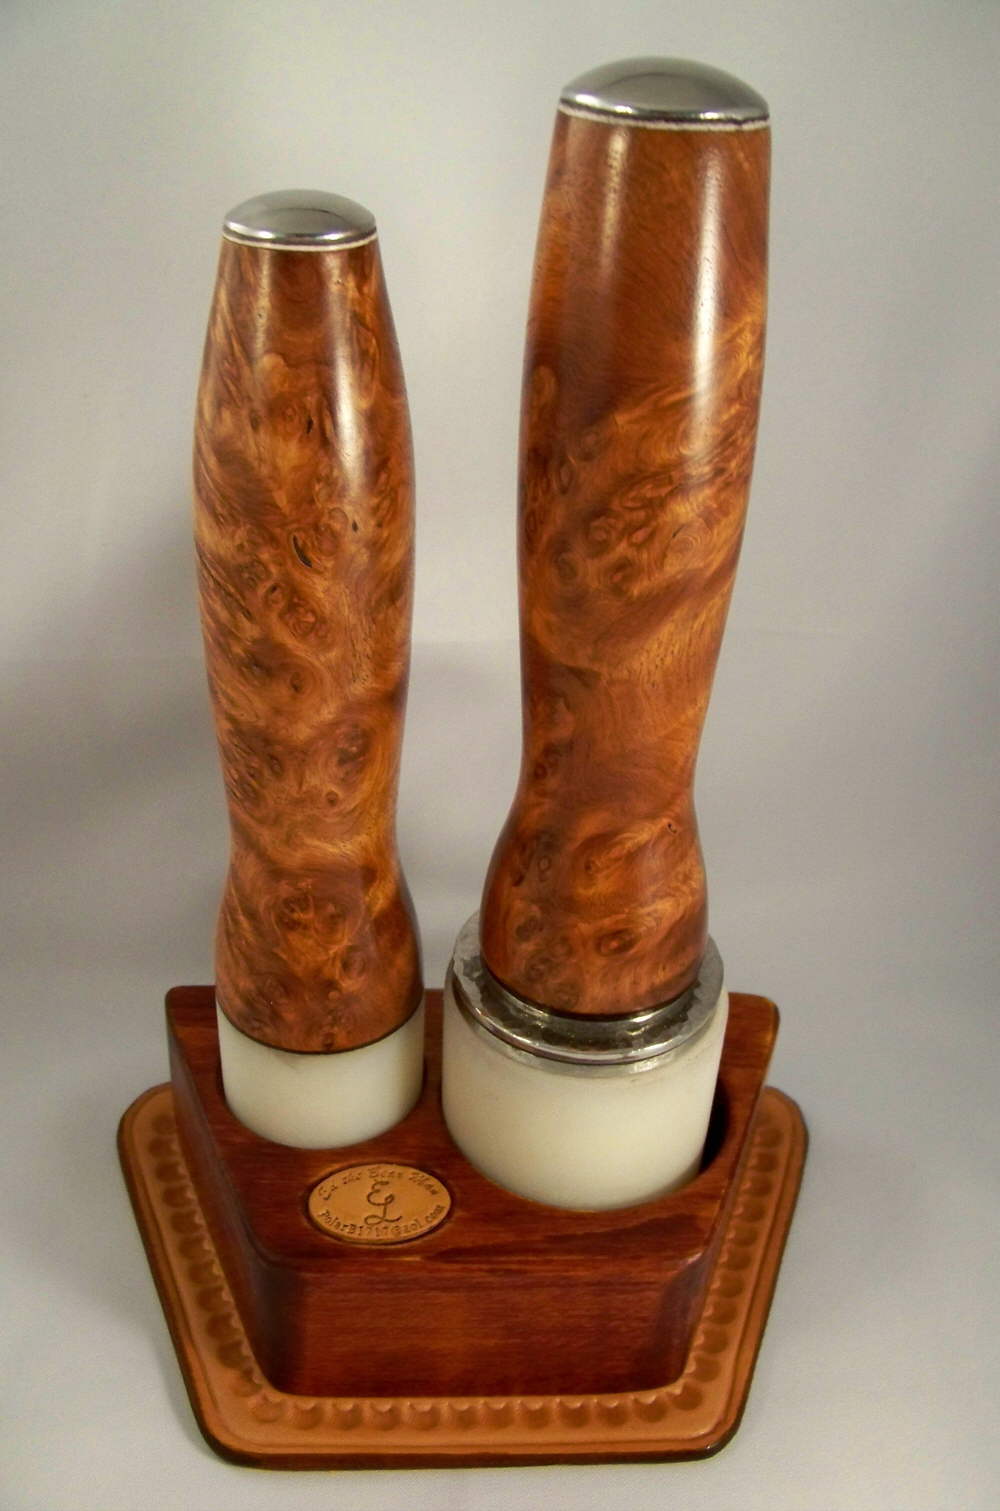
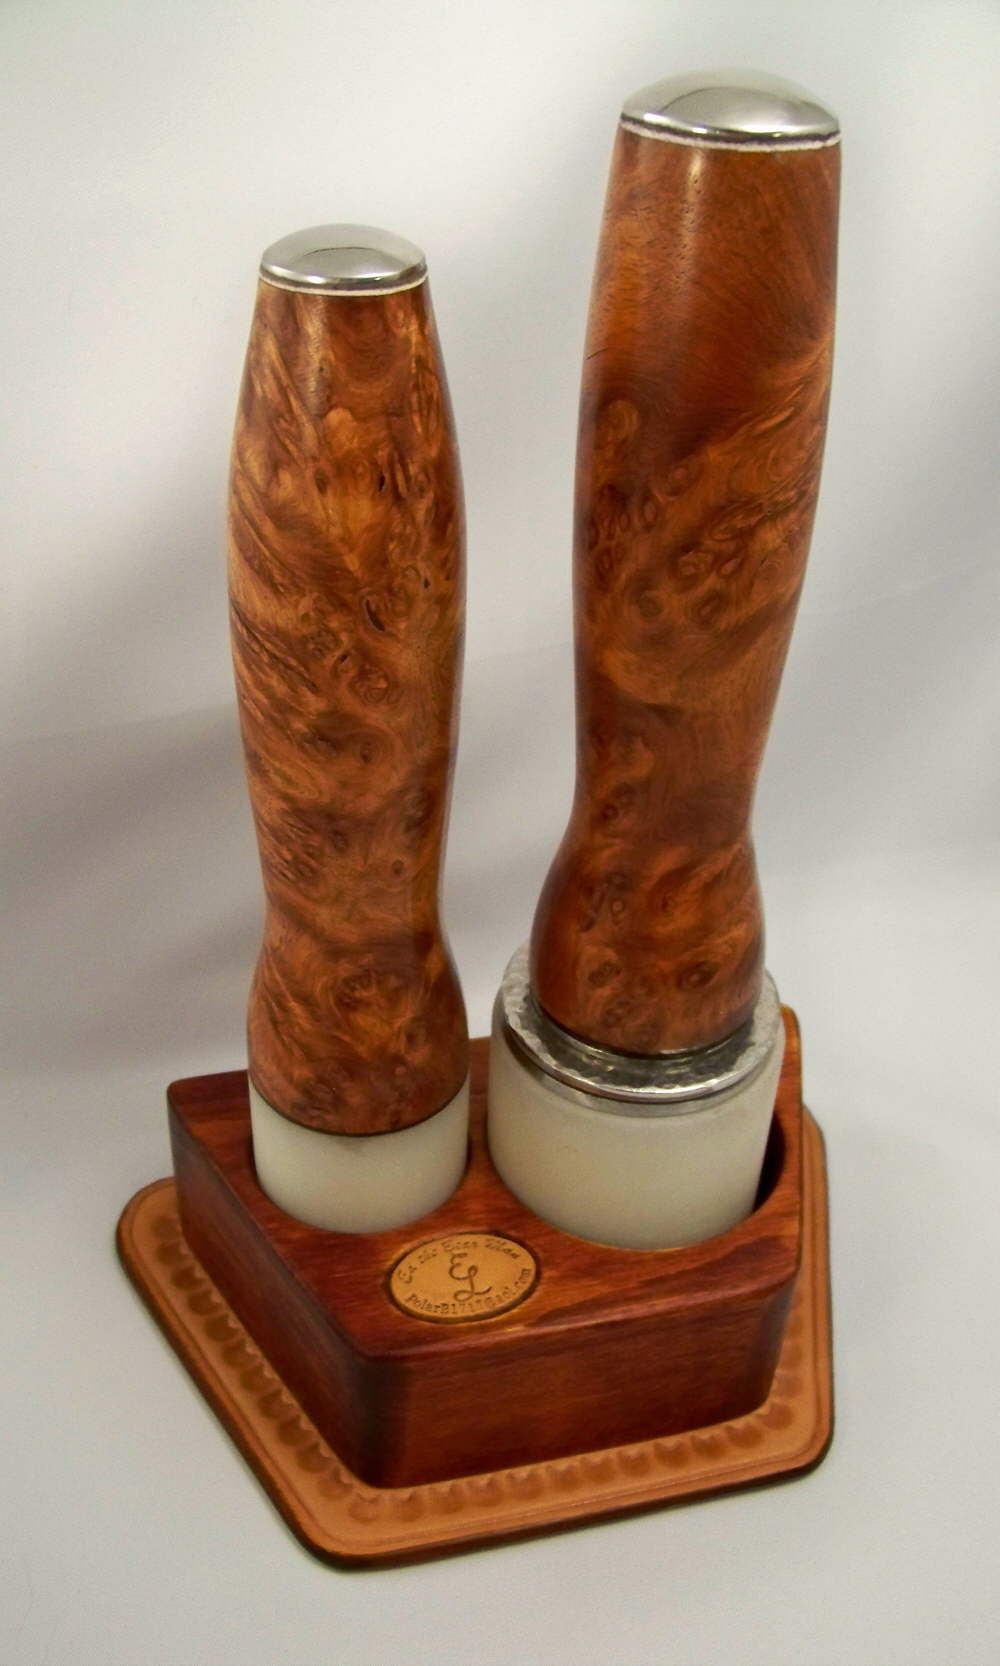
Here are a pair of Mauls I made, for one of our members on here. They are a 16oz, & a 10oz, with a stand. The handles are made from some beautiful Amboyna burl, which was supplied by the member. This design uses a hidden retaining nut, to hold everything together, it's a lot cleaner design, than having the acorn nut hanging off the end. The stand is Maple, dyed to look somewhat similar in color to the handles. What do you think?? BTW, The member said I should post the pictures here. Thanks,,,, Ed the"BearMan"


-
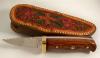
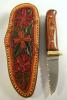
Small Knife & Case
BearMan replied to BearMan's topic in Purses, Wallets, Belts and Miscellaneous Pocket Items
Hi, Thanks Bob, I kinda had to think about that, to keep from stitching over the terdrils. Thanks Max... Weaselrunner,,, No, I didn't make it,,, I just kinda "tweeked" it a bit. Ed -
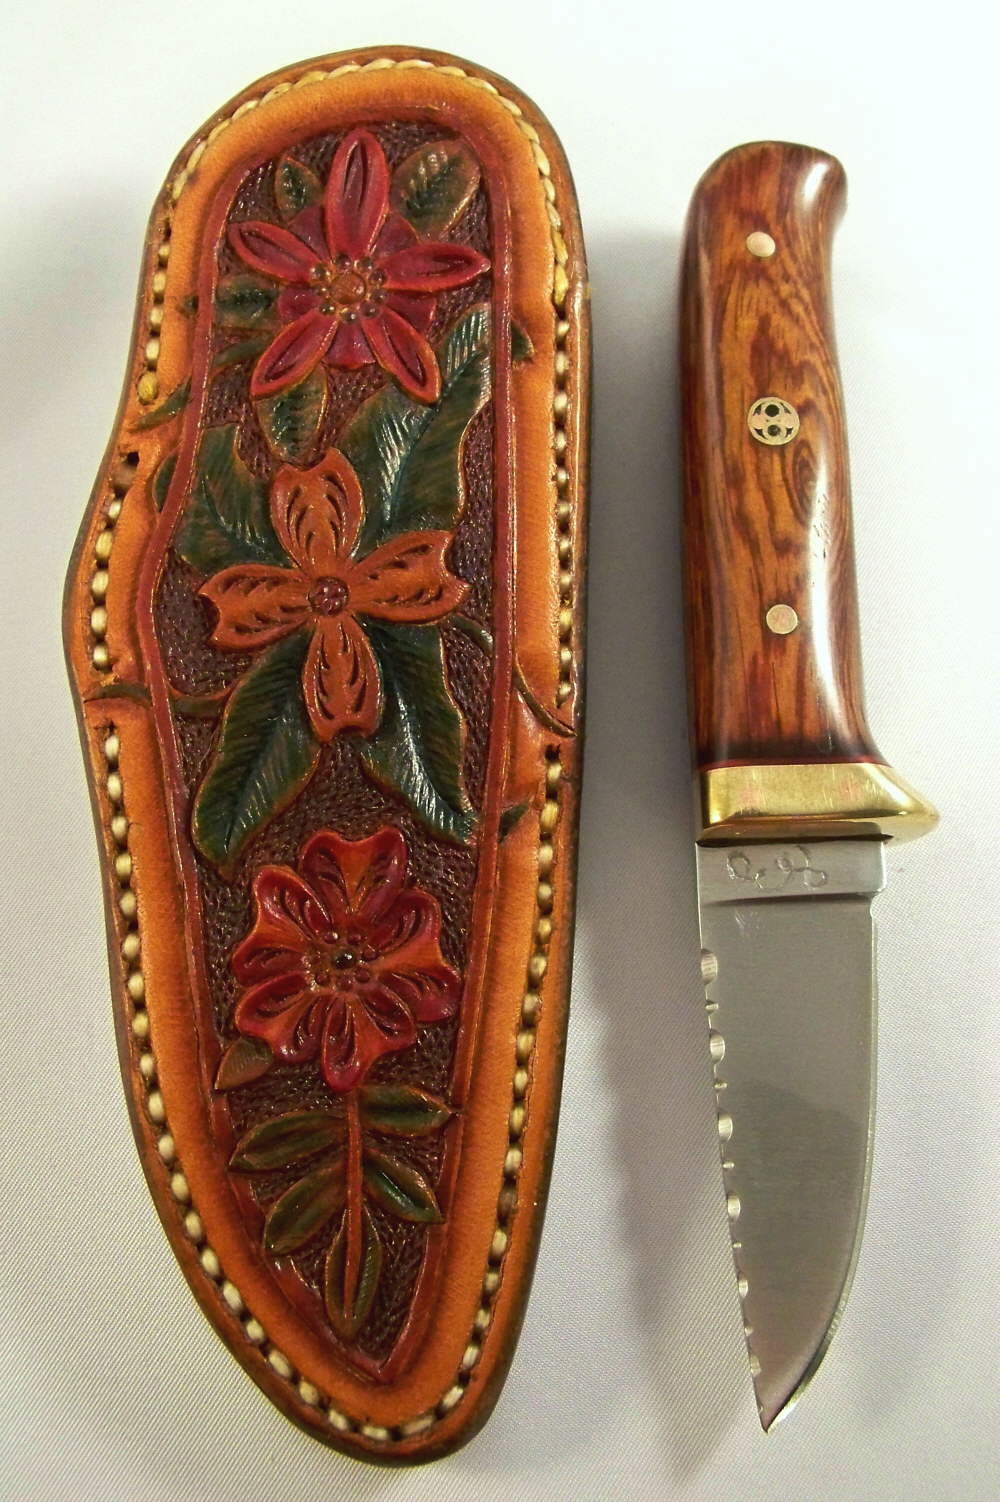
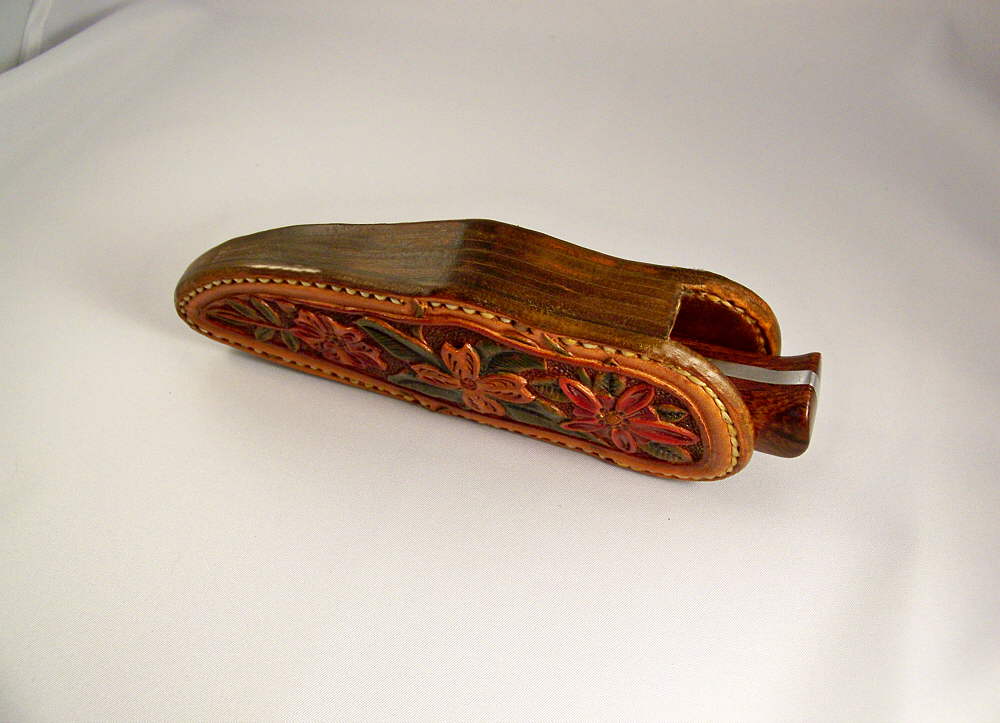
Hi Everybody, Here is a Small Knife & Case I just finished. The case is about 5 1/2" long by about 1 7/8" wide, with the widest tooling area about 1 1/4" wide. At the thickest point, the edge is 7 layers thick, just under an inch. The edge burnishing was done with my canvas cloth. Aprox. 8 stitches per inch, with "skip Stitching" in the areas where the tooled tendrils are in the way. I just couldn't stitch over them. The stitch is actually hidden behind / under the surface. The tooling on this one goes on top of the thin border,,, & under it. The colors didn't cove out quite as bright as I wanted, as I made this out of a piece of fairly dark "chestnut skirting". The knife is 5" long, with Bolivian Rosewood handles, decorative center pin, & brass & copper retaining pins. The knife has decorative file work on the top of the blade. Thanks for looking,,,, Ed the"BearMan"

-
As Always,,,, Outstanding!!!
-
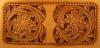
Progress Photo - Full Size Organizer
BearMan replied to hidepounder's topic in Floral and Sheridan Carving
Hi Bob, Outstanding work,,, as always!!! I kinda like the darker background color, I may try a shade or two darker on my next project. I really like Your version of the flowers also. Nothing outside the lines,,,, I don't know if I could have resisted!! hehehe Another inspiring job!! Thanks for sharing,,, Ed the"BearMan" Here's a progress photo of an organizer I'm currently working on. I decided to draw some new flowers (my version of some flowers that have been around for a long time), and try them out on this project. I was getting tired of tooling all the little flowers I've been using lately. It was kind of fun to tool something that was standard size for a change! Please let me know what you think.....critiques, suggestions and ideas always welcome. Bob -
Bardge or Master
BearMan replied to craftsman827's topic in Dyes, Antiques, Stains, Glues, Waxes, Finishes and Conditioners.
Hi All, I've been using Weldwood for several years now. It works good, it's cheap, & it's readily available. Only problem I've found is, I don't know of anything to get it off my fingers, when I get messy. Ed -
My Goodness Al, For a first project, you did great!! If you set it out in the sun for an hour or so, it may help with some of the un-even oil marks. Keep an eye on it though, the sun will make it darker, if you leave it out too long. Ed
-
Hi Everybody,,, & Thanks for all the wonderful comments!! Matt; if you don't have a petal lifter,,, get one! It makes alot of difference. But to really do it right, you'll need a petal lifter beveler also. Tammy & Tina,,,, Running your fingers over it, with your eyes closed, feels like High relief wood carving. ) Andy,,, even though it's only 5/6oz leather, as you can see, you can get alot of depth. Bob,,,Thanks for all the complements! With some suggestions from you, I was able to figure out what step I was missing before,,, Thanks!! Aaron, Yes, I almost always draw all of my own designs. Just get some books, & pictures of inspiration, several sharp pencils,,, & a Good eraser, take your time,,, & have LOTS of patients. Draw it,,,, & then draw it again, & it will get better each time!
-
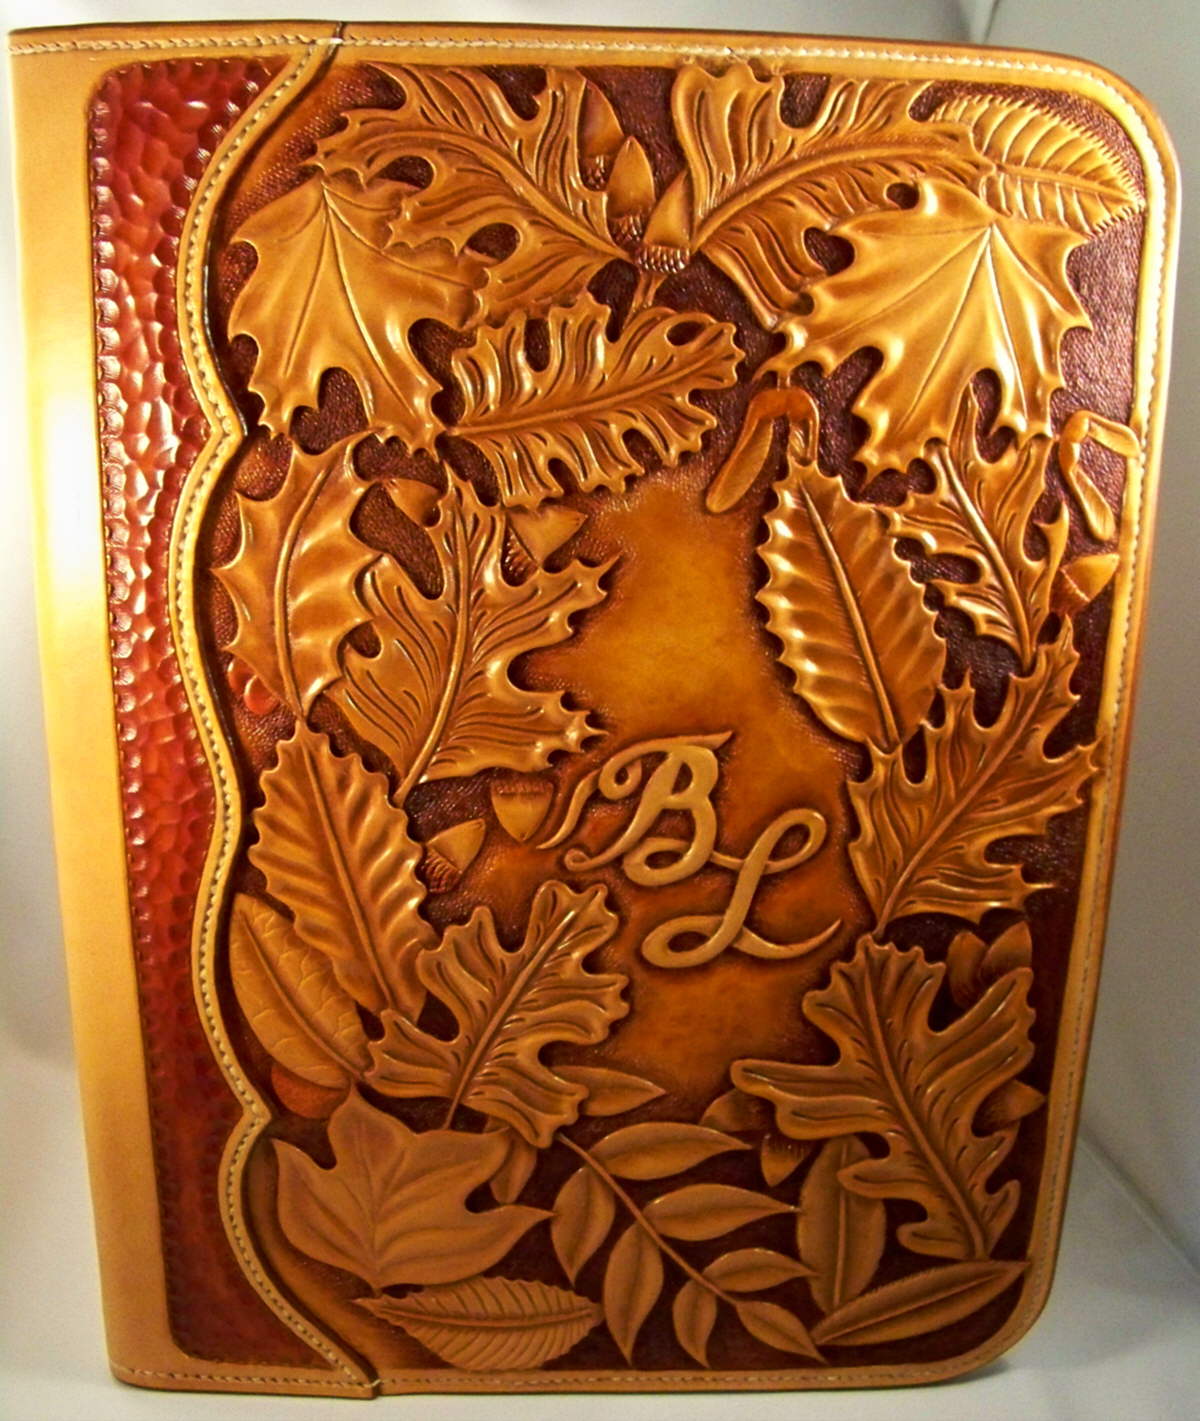
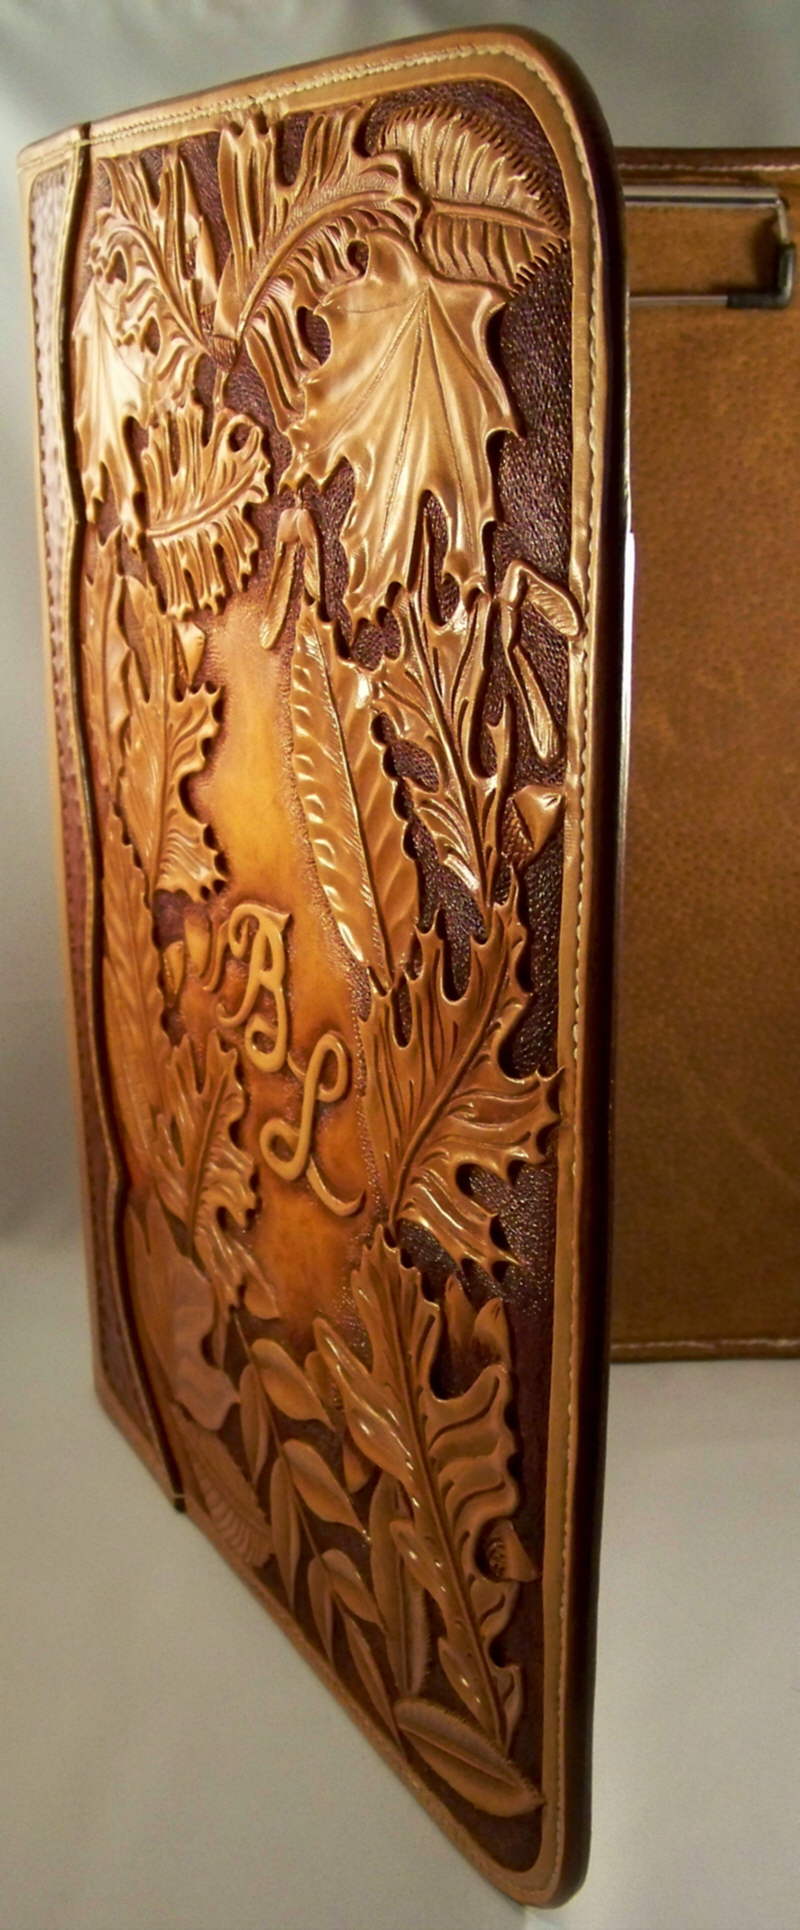
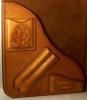
Hi Everybody, Here is my latest project. It's a notebook for my Son. It holds a regular size note pad, a calculator, pencils, and a place for business cards. This is more of my style of tooling,,, a more Natural design. I've actually been doing similar designs for many years, until I started getting into some of the "Sheridan style designs. I'm glad to be back, doing some of this again. I'll still be doing Sheridan designs,,, just not as much. This design includes: American Holly, Beech, Bur Oak, Cherry, Chestnut Oak, Elm, Hickory, Osage Orange, Pin Oak, Shumard Oak, Sugar Maple, Tulip (yellow) Poplar, Walnut, & White Oak, Leaves. All of these wood species are used in woodworking, which is what my Son does. It's aprox 10" X 13 1/2" closed. It's finished in my "signiture" process. Oil, dyed background, suntan, NeatLac replacement, Lots of time on the edges, & Tankote. Thanks for looking! Ed the"BearMan"


-
Hi TerryN, I'm finishing up a project I hope will give you some inspiration. It's totally covered with Natural design leaves. I should have some pictures posted on here in a couple days. Just keep an eye out for it. Ed I am looking for outlines of maple and oak leaves small enough to fit on a 1 1/4 inch belt. Does anyone have something I could use? TerryN
-
Very nice !! I really like the color too,,, too bad some of it is hiding behind the edge of the frame,,, Ed
-
Bear Man - Ed copy cat
BearMan replied to jbird's topic in Purses, Wallets, Belts and Miscellaneous Pocket Items
Lookin' pretty good there Josh!! Keep up the good work. I bet each time you do it,,, You'll see improvement everytime! Take Care,,, Ed Howdy all so heres a copy of sorts of that great wallet ed did what do think. Josh -
You're right Ben, I wound up doing 6 per inch, I would usually do 8,,,, but the "Gremlins" must be hiding that spacing wheel. Yes, I feel very honored, to have Bob, compliment me on the edges. His edges are always impeccable! There for a while I had tried a wooden motorized burnisher, but as you can see, I do alot better with my ol' canvas cloth. Thanks, Ed It looks good and you received a great compliment on your edges from the "Edge" man. The one thing that looks a little out of place with the rest of the wallet is the stitching. It looks to be a little heavy. Good work... Regards, Ben
-
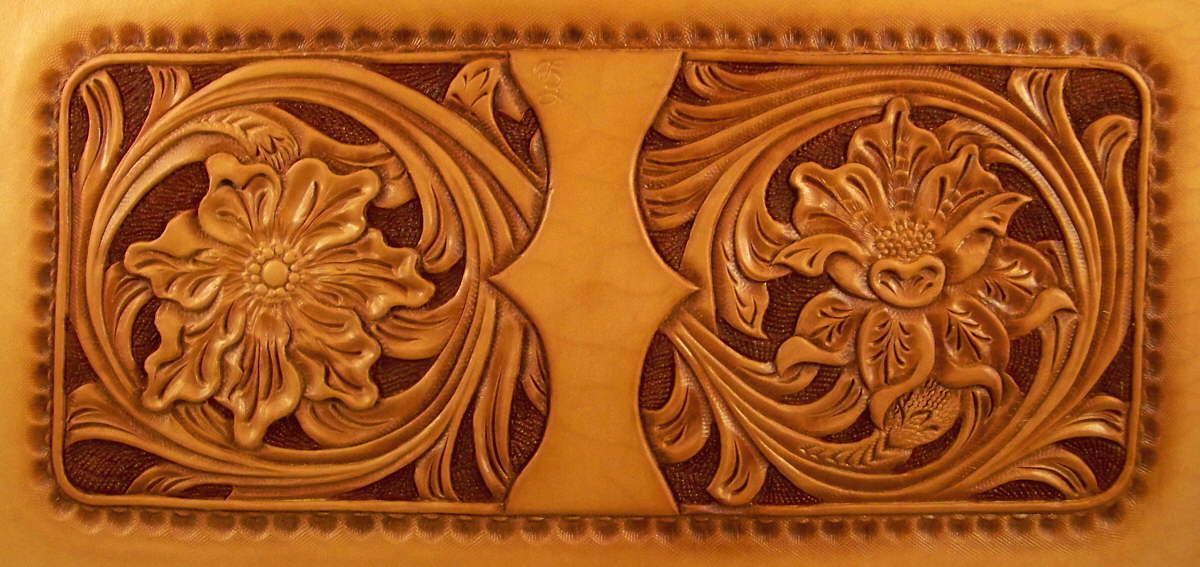
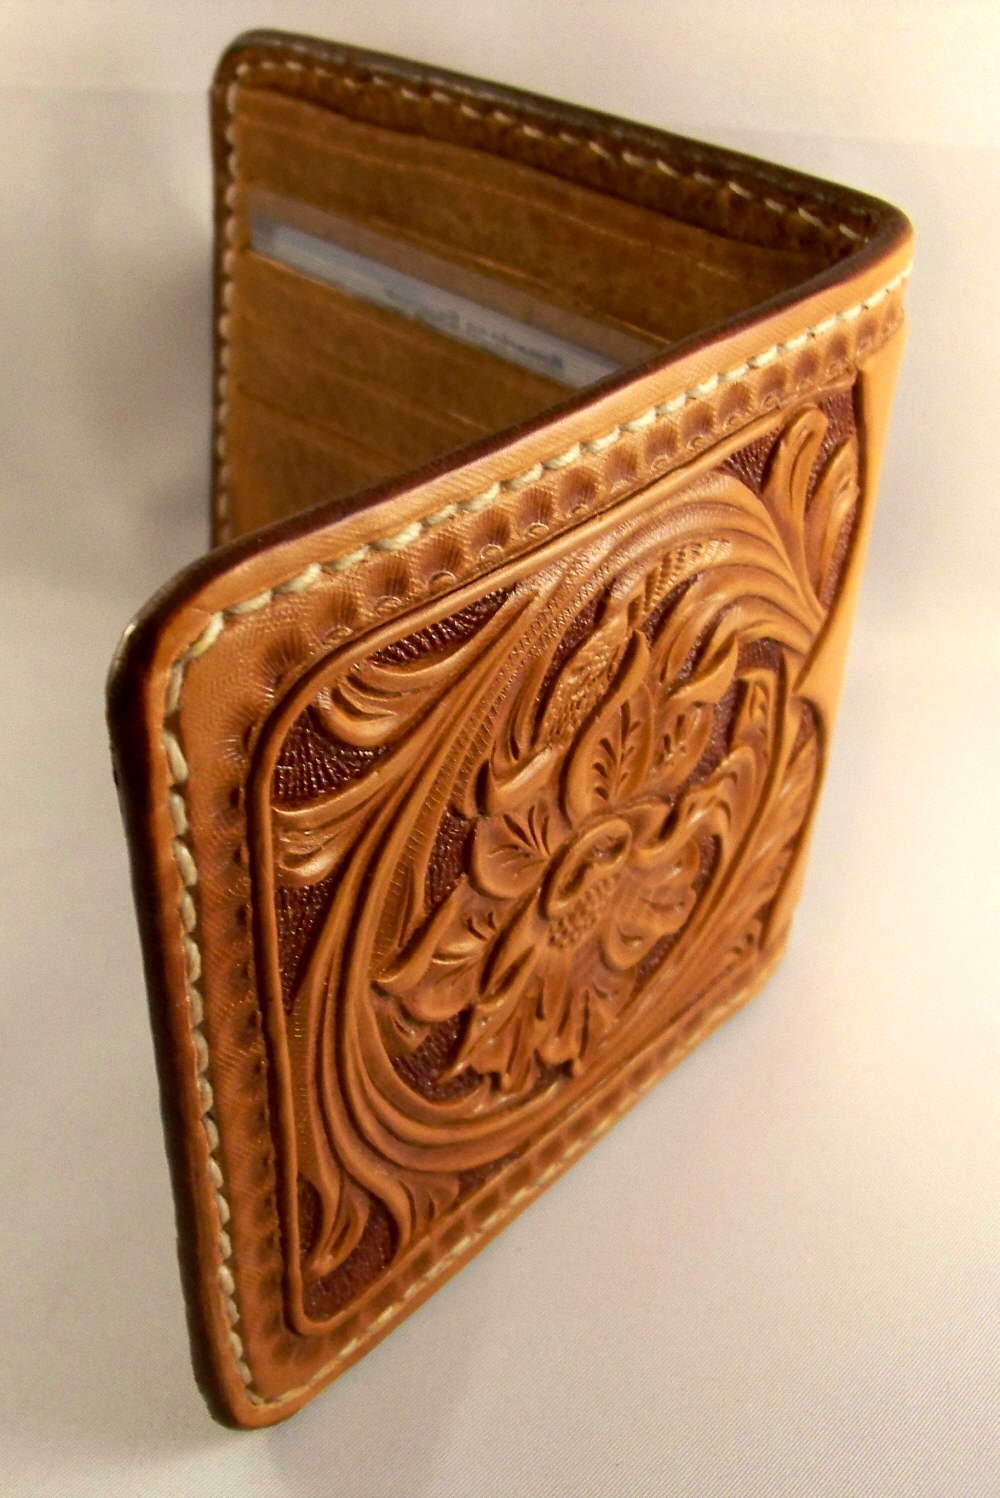
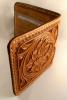
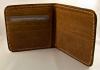
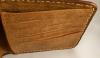
Hi All, Thanks for all the wonderful compliments!! They inspire me to do better with each & every project!! Josh, You're right I forgot to give the size, it's 4" x 8 3/4". Yes, I made the liner. & Yes, Ray, the liner took almost as much time to make as the outside. The inside of the Credit Card pockets are made out of Tyvek, House Wrap, or the un-tearable shipping envelopes from the Post office. I'm not suggesting that You get them from the Post office, but it's the same material. Tyvek, fold & creases very nice, & it dyes Very well with Spirit dyes, to match your project. As far as the design goes, I did have some Very good suggestions from Bob, to help me with the final design. Thanks Bob, You knew exactly what I needed! CraftsMan, I wouldn't say that the carving is exceptionally deep,,, I always,,, well usually carve somewhere between 1/2 to about 2/3 the thickness of the leather. Alot of the time, it may look deeper than that because of the use of petal lifters, & matting. Bree,,,, Hmmm maybe the next time we have a Pay it Forward on here,,,, I may just do something like that! Thanks to Everybody not mentioning my wiggly sewing machine lines on the liner. I need LOTS more practice on that Devil machine!! hehehe Thanks Again,,, Ed the"BearMan"
-
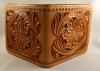
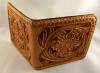
Here is something, that I seem to do about every 30 years or so,,, hehehe Make something for myself! Here is a wallet I'm working on, I think it's called a "hipster" style, with credit card slots on both sides, & a deep money pocket, not that I have much to put in it. I like this style because it's usually thinner than most. Anyway, it's my own design, (with some help from Bob )) with my signature colors. Hope "ya'll" like it. The insides are a pig skin that kinda looks like very close pattern ostrich. It's been so long since I've made a wallet like this, that I forgot how much of a pain it is making all the credit card slots. Thanks for looking, Ed the "BearMan"
-
Johanna,,, You are soooo lucky!! Bob,,, as always does Increadable work!! I'm sure you will always treasure it! Ed
-
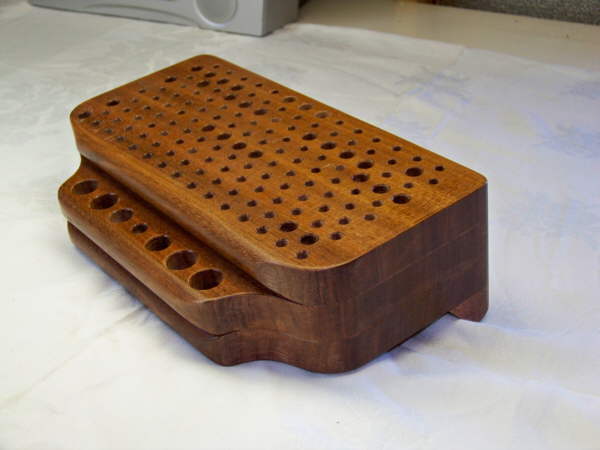
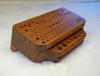
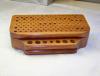
Good Morning Ray Here is a tool rack I made a little while back. It's made of Mahogany, & has enough room for a little over 100 tools. Well,,, it's been about 3 months since I made it,,, & it's getting too small. But as far as design, the only thing I'd change is the spacing of the tools, just a little too close for my big fingers. What do you think?? Ed I have been struggling for some time to contain my constantly growing collection of embossing tools and pointy bench stuff and wondered if anyone had any good ideas about the best kind of rack to build. I looked at pictures of Peter Main's bench and realised that I was never going to need something as big as that although the overall style and ease of use is exactly what I had in mind. At the other end of the spectrum, I have seen and used the block of wood with holes in it type supplied by TLF and even built a bigger, version of my own; but now I need to make the ultimate tool rack. What should I be doing? Have you got a tool rack that really works well - if so can you please tell me about it, why it is good and what you might have done differently? Pictures would be really helpful and worth a hundred words of description. Does anyone already build an elegant, functional tool rack? If so tell me; better still show me a picture and I'll gladly send money!

-
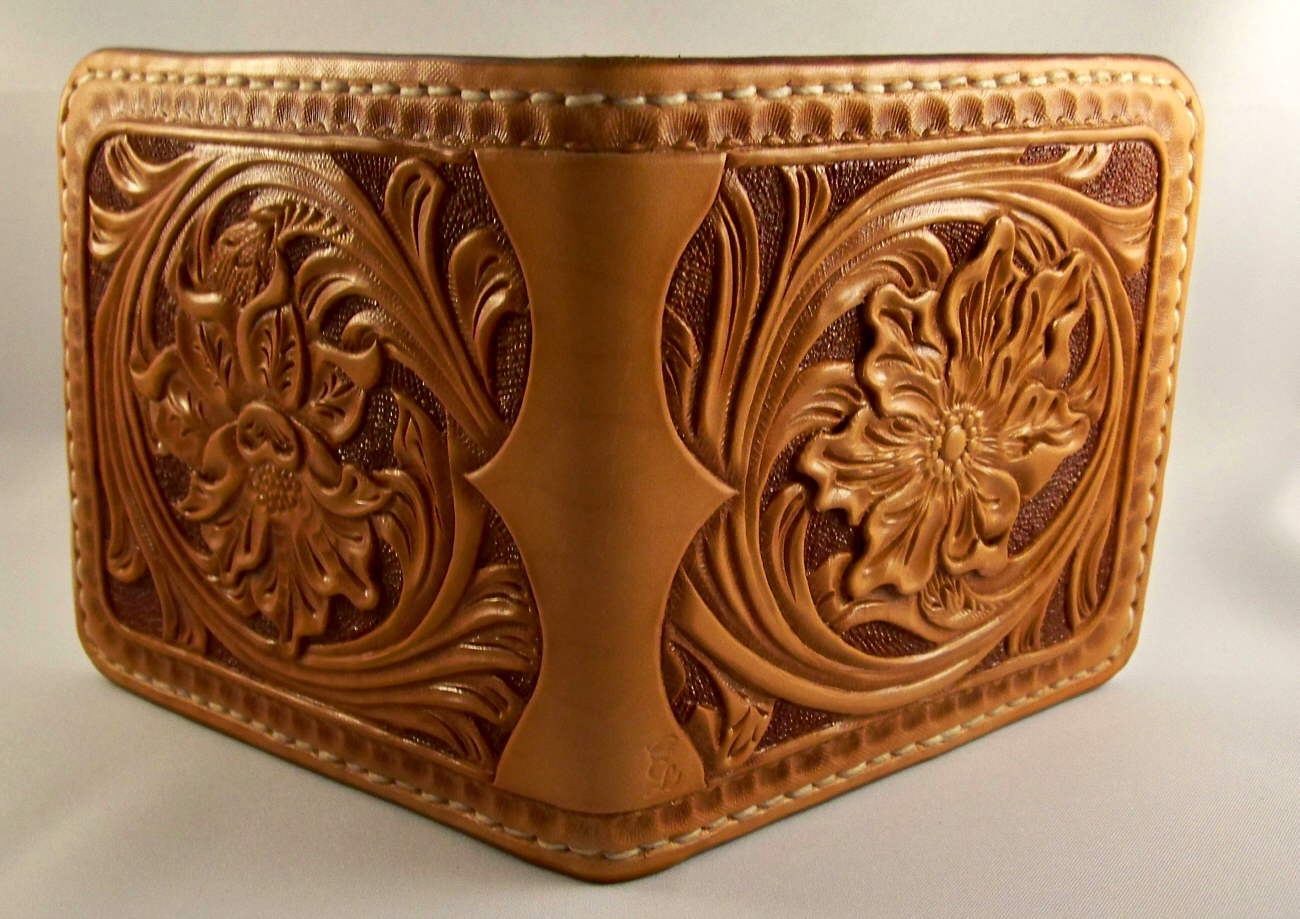
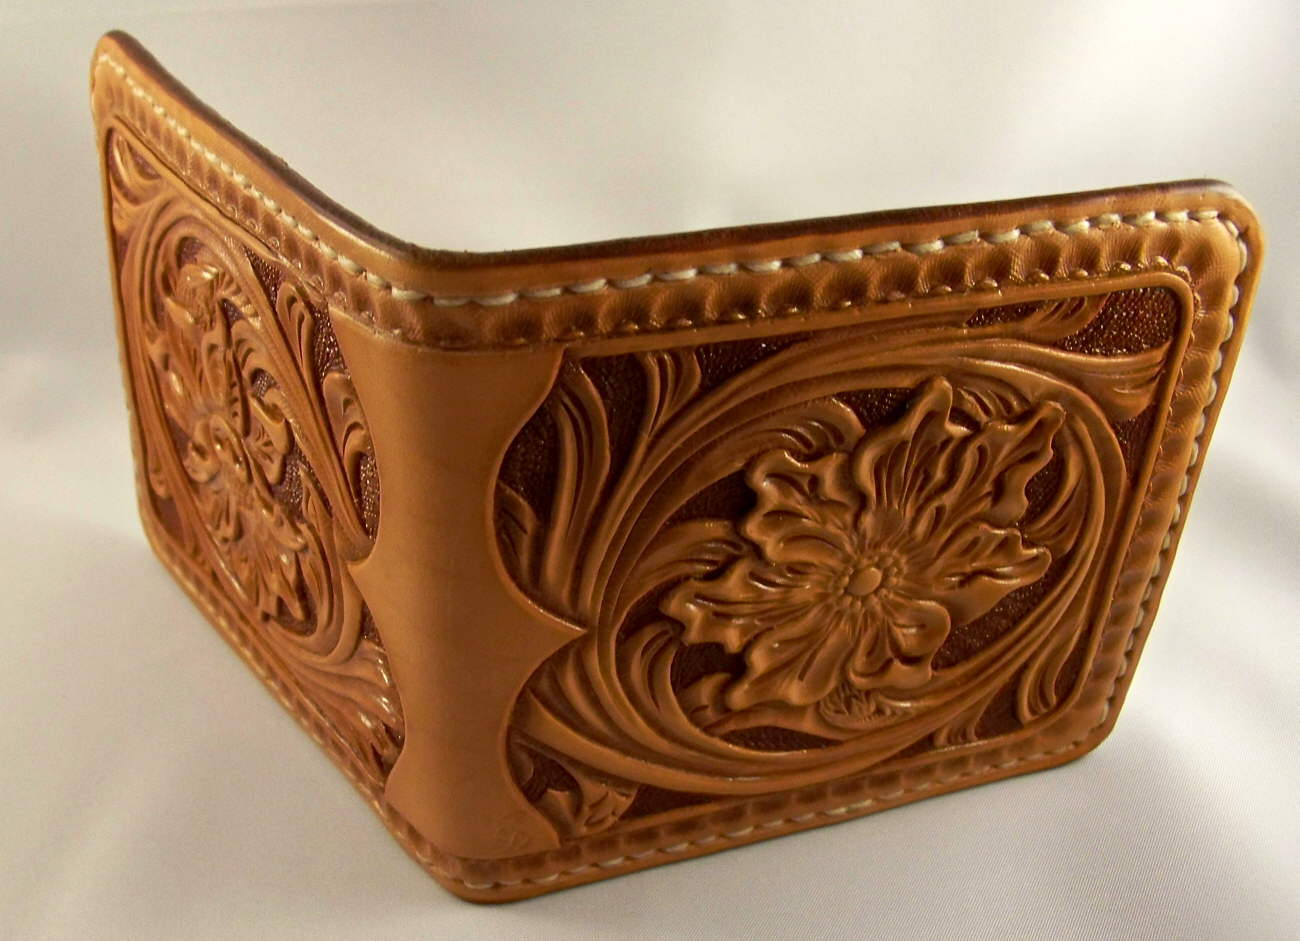
Wallet similar to Roper style
BearMan replied to BearMan's topic in Purses, Wallets, Belts and Miscellaneous Pocket Items
Hi Tina, & Thanks!! For the background it's Febings, Medium brown, diluted 2 to 1 with alcohol. The rest of it is, just some oil,,, & about 5 hours in the sun. Ed Awesome tooling and colors Your work is always beautiful, wood or leather...I have to ask, what did you use to get the that color, I love the depth and the warm tones in it