BearMan
-
Posts
710 -
Joined
-
Last visited
Content Type
Profiles
Forums
Events
Blogs
Gallery
Store
Everything posted by BearMan
-
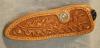
Hi, One thing you might concider is: when you get to the ends, where it crosses, instead of just one row of lacing holes, have two, that are in pairs, that way you could just continue around. Ed OK so I wanted to try one of my rifle slings with a edge that was laced. Now I was gonna lace the entire portion that is padded in the back. So this would entail lacing along the edge (ok no big deal) but now when I come to the point that I gotta cut across the project at both the top and bottom is where I have the issue. How do I continue around and keep it somewhat good looking? I edited one of my pics to point out the area that I am talking about. I know how to do the sides along the edge but once I get to the point of transition I get totally flustered and am not sure how to proceed. None of the books I have really show anything on how to do this. THanks for any help.
-
Ipod Nano case for a friend
BearMan replied to BearMan's topic in Purses, Wallets, Belts and Miscellaneous Pocket Items
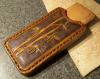
Hi Allen,, Doesn't everybodyhave the "Leather Nano"??? It's just designed to fit in her purse, or back pocket. She swears that she hasn't broken any in her back pocket,,,, maybe the leather case will protect it better than those little silicone wraps. Ed The little piece marked Ipod Nano is a technological wonder. You made that nano look just like a piece of leather! Absolutely amazing. But in all seriousness. The case looks great. Is it designed to slip into a pocket or does it have a belt/pocket attachment? Allen -
Hi Tina, That's Absolutely Beautiful!! He had better be Proud to get that!! I don't see any Boo Boo,,,, besides,,, us Humans aren't suposed to be "perfect" anyway... Great Job!! Ed
-
Hi Kate, Yes,,,, I believe that's what they are,,, I really like the look of them too! Ed, those markings look like fat wrinkles to me. Personally, I LOVE them! They add so much character to a project. Nice carving, by the way. Kate
-
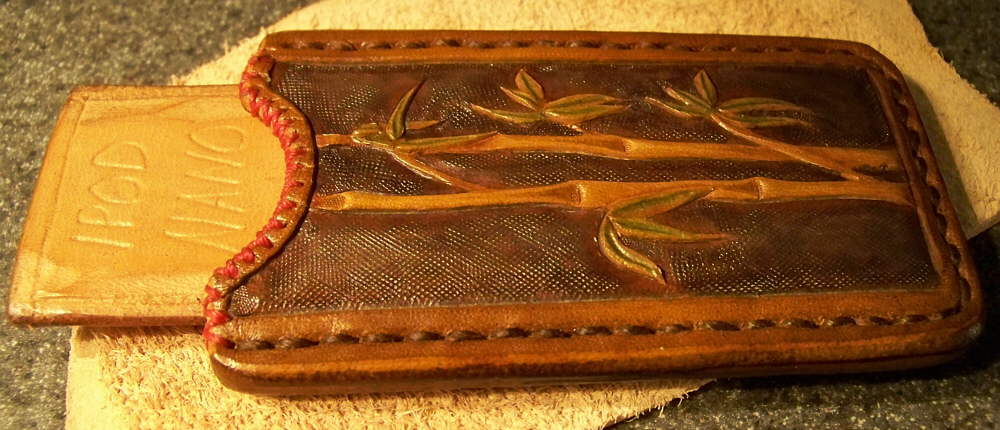
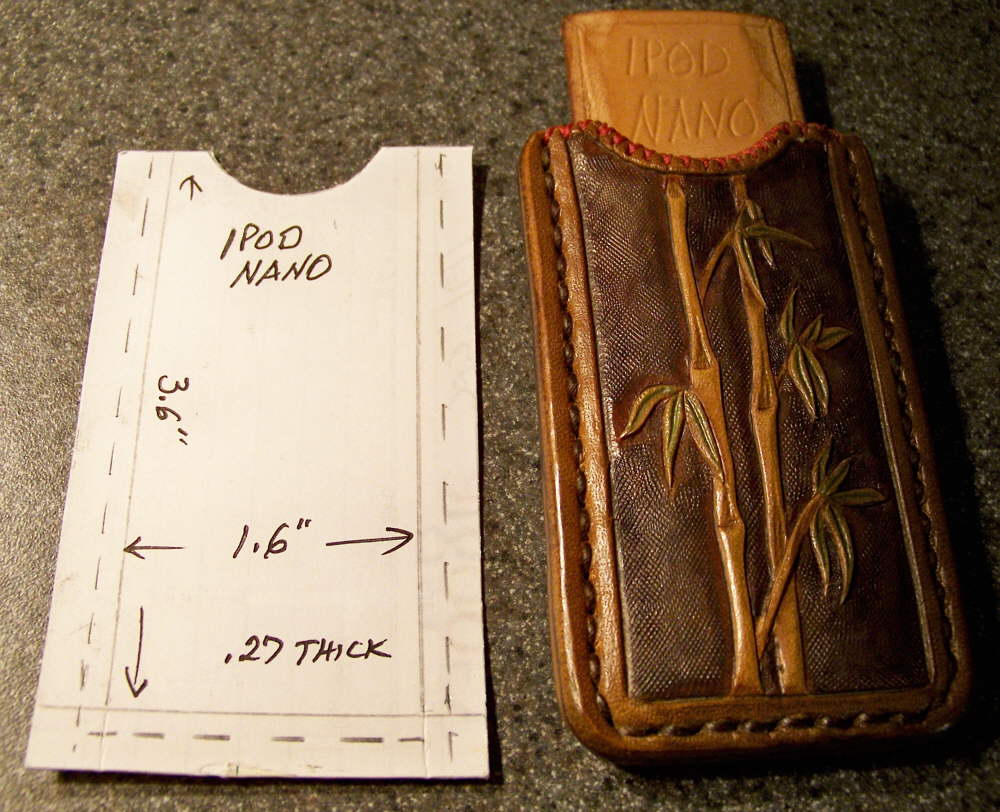
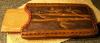
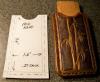
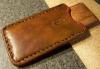
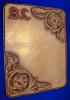
Hello everybody, Here is a Ipod Nano case I just finished for a friend. It's a fun little project, & very simple. It's lined with soft grey pig skin. The internal dimentions are in one of the pics. She likes Bamboo,,,, soooo ,,, I hope she likes this. It's done with spirit dye, & finished with some of my finish. What "Ya'll" think??? Have a great dry day,,, it's been pouring here!! Ed
-
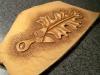
Hello everybody, I just recieved my first order of Choice 5-6oz tooling leather from Zack White. When I unrolled the leather, it has a quite visable compression,,, or vascular kind of pattern on the surface, which kinda had me concerned. So, I cut off a small piece, to do some test tooling on it. After dampening the leather, I drew a quick design to tool. The leather cut like "butter" , very easy & clean. While tooling, I noticed that the tooled areas burnished very well while stamping. The leather took the impressions very well, concidering it is only a 5-6oz piece. Overall I am very pleased. The only drawback I could notice, is that the leather wanted to "grab" the tools somewhat,,,, BUT,,, that could be just that I didn't case the leather properly first. The pictures here are of the test piece,,,, no oil,,, no finish. I will be ordering more!! Just thought "Ya'll" might like to know... Ed
-
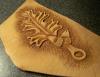
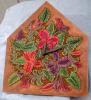
Great Work!! Something we all can strive for. Ed This was made entirely with swivel knife cuts. No other tools were used in the making of the picture. There is also no color or finish on it. I originaly made this to enter in a contest that required only knife work. It did well in the contest and I told several members that I would post it here. I plan to bevel and background it soon. Doing a "fingercut" picture was a lot of fun and I will be doing some more of this type work. Questions? Comments? Thanks for looking. Randahl
-
Neatlac Replacement
BearMan replied to rickeyfro's topic in Dyes, Antiques, Stains, Glues, Waxes, Finishes and Conditioners.
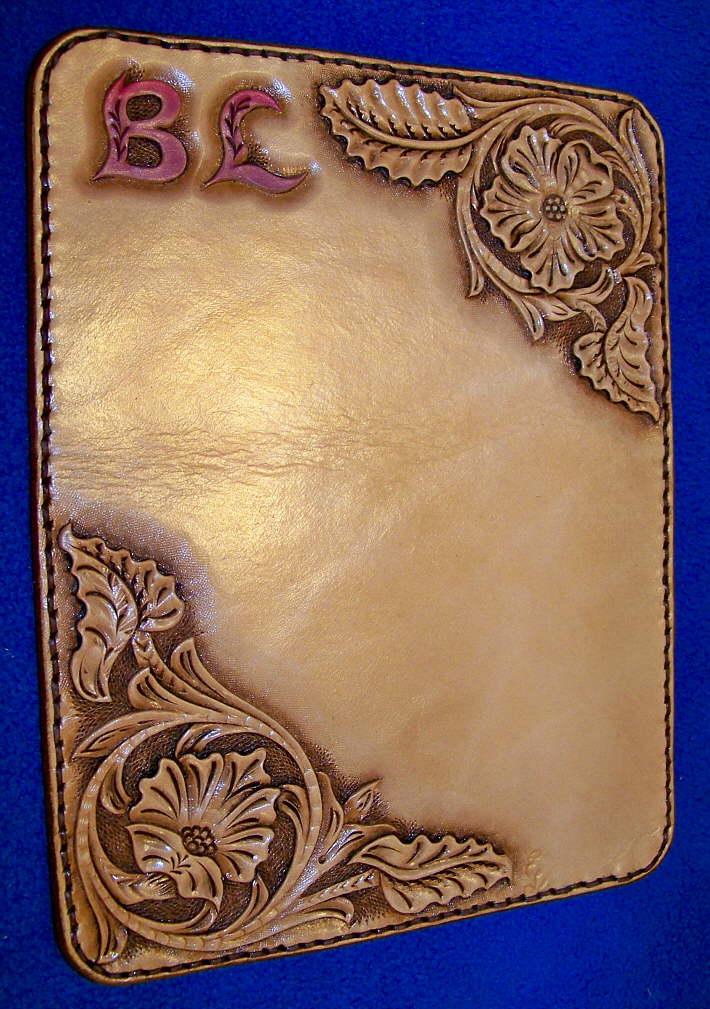
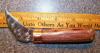
Hi, I was able to find the original chemical breakdown for "NeatLac". I also found out that the reason that everybody has stopped producing any products like NeatLac, is because of just how harmful they can be to us "Humans". Tolulene, which was part of the original Neatlac, is a pretty bad Carcinogen. Also, later on they replaced Tolulene, I believe with xylene. Which is just about as bad. So the manufacturers of NeatLac decided to stop production, just to be "safe", at least that's what I was told. Anyway, I have been able to duplicate a version of something very similar to NeatLac. Smells the same, & works the same, & I'm sure, is just as hazardous! Here are a couple items where I used "BearLac". & Before you ask,,, just to protect myself,,, I will not make or sell any,,, of provide any info about how it's made! I'm sure you can realize just how much liability I would open myself up to if I did,,,,,, Sorry!! I hope you'll understand. Ed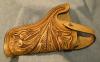


-
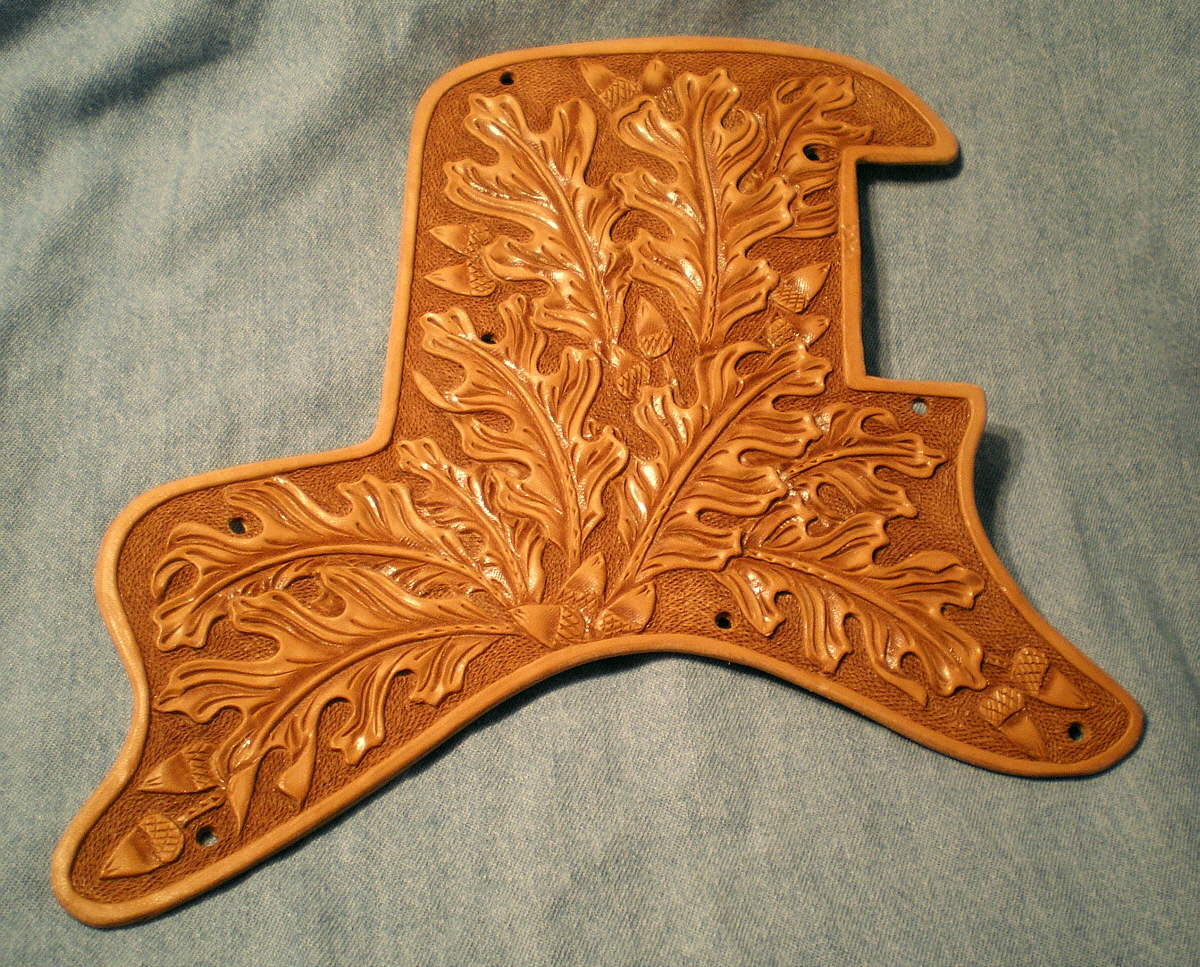
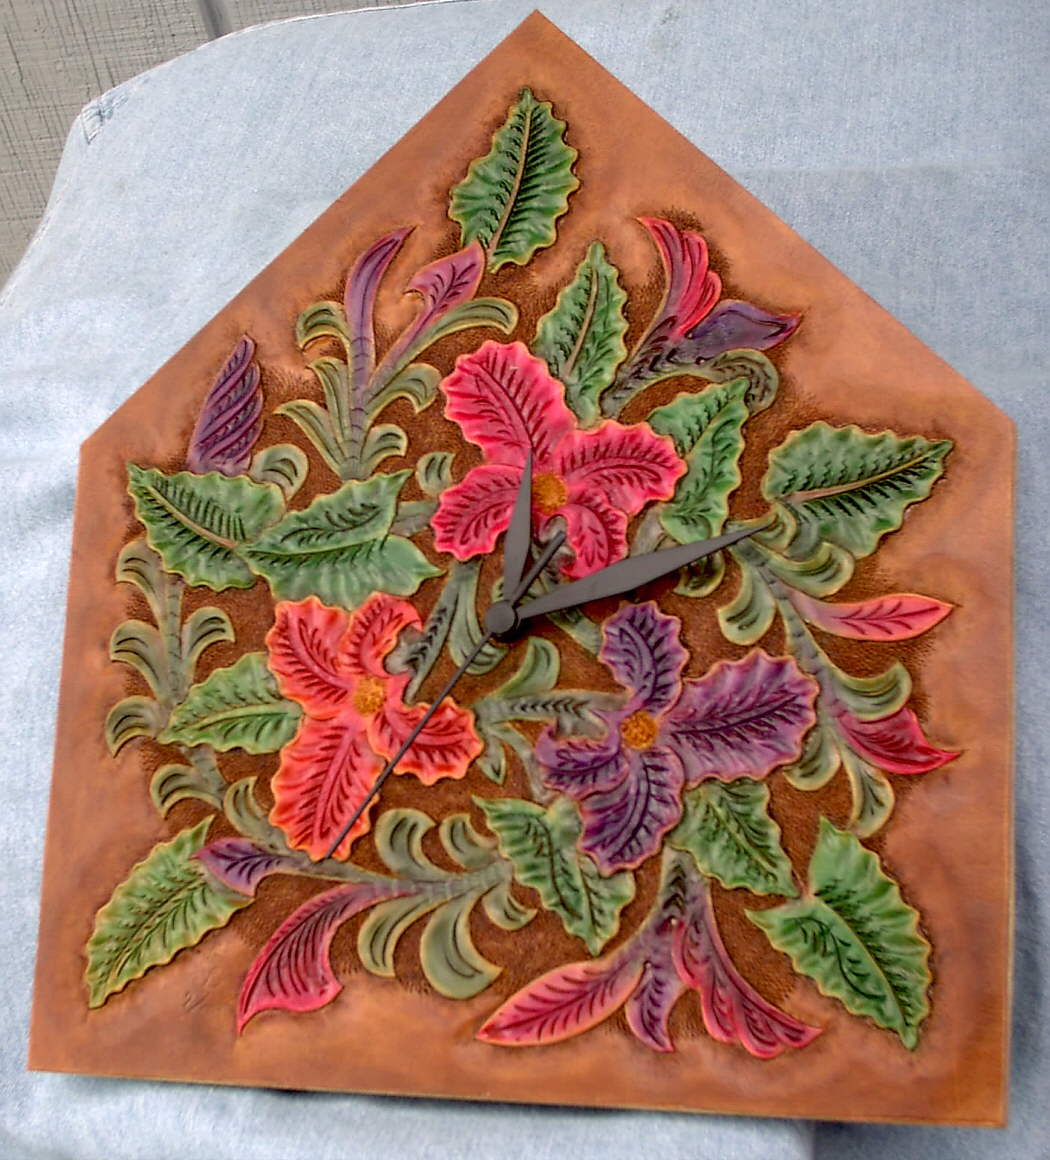
Hi, Here is a project I did using mostly Rit dye's disolved in alcohol. The light russet outside, & some of the green was spirit dye, but most of it was done with different shades & strengths of Rit dye's. What do You think?? Ed
-
Congrats Tom, I'm sure You'll do Great!! Ed
-
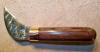
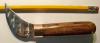
Hello everybody, Here is my latest updated version, of my "Half Breed" knife. It's about half, of a Head knife, about half of a streight knife, & about half of a trimming knife. Hmmm 3 halves?? Well anyway, I use it to do rough cuts, finer cuts, & as a push & pull skiver. I've found this design to be very versitile. It's made out of an industrial knife blade, very hard, a file won't hardly touch it. It has a Cocobolo handle with a copper ferrell & brass pin. It's just over 5" long, with about a 2" blade. The top 1" & the bottom 2" edges are sharpened. A new "Toy" to add to my collection! Ed
-
Hi Clay, Thanks for the advise. I've never done it that way, but I'll sure give it a try. One thing that I've noticed by applying a second coat, after the first is completely dry, is that the second coat does seem to disolve the first coat slightly. Which, now that I think about it means that,,, if it's doing that anyway,,, maybe the long wait might not be needed. But Yes, I always give it two coats, for a resist. Thanks again! One thing I was told a long time ago was that you should put two coats of Neat Lac as you say to make sure it's sealed, but to do the second coat right after the first. The reason given was that if you let it dry completely first, the second coat wont soak in, and will have a tendency to crack and come off. I've been putting on two coats right away, with the sheep skin like you do, and haven't had any problem that way. Not saying either way is right or wrong, just wanted to pass along what I was told.
-
Hi, First if you haven't done it already, the picture needs to be converted to a sketch. After that, layout the pattern on the leather, & if you're not comfortable with the swivel knife, just do it with the modeling tools. Alot of Peter Mains Fantastic work is done that way. Give it a try,,, it just takes practice! ED the"BearMan"

-
Good Morning, The way I do my "Resist" is: after tooling, oiling, dying, & letting the leather completely dry, I will apply a good coat of NeatLac, with a piece of trimmed sheepskin, in a circular motion. After that is completely dry,,, could be an hour, on an overcast day, could be 20 mins on a nice hot sunny day, could be overnite. I prefer overnite, if possible. Apply another lighter coat of NeatLac, just to make sure it's sealed. After that is completely dry again. Then You are ready for the Antiquing. After, antiquing, I apply a good coat of TanKote. If it's an item that could get rained on, I will apply some Neautral shoe polish over top. I hope this helps,,, Ed the"BearMan" Here is a piece using that meathod. I have tried just about all the sealers I can find both acrylic and some Neatlac I had left over as a block out. Even after an overnight drying time, They seem to pick up a tint from the antique gel as I wipe it off. Is there any way to prevent this? I have a customer that is really bent because the white on a bald eagle isn't snow white. While we are at it. Is there ever a point where you can wipe a piece with a wet paper towl and not damage the finish? Am I not putting enough sealer on? I usually spray satin sheen on with an airbrush. I hope I'm not just beating a dead horse!

-
Hi, It needs to be dry before you add the sealent coat. If you're not sure if it's dry, touch it with your fingers, if it feels dry & not cooler than the room, touch it to your cheek, if it feels cool, it's still damp, But, if it feels like room temp. it's probably dry. After a couple hours, it should be dry. Just check it & proceed. Ed I'm new to leather work, and I can't seem to find this information anywhere on Fiebings or Tandy's websites or product containers. How long should you wait in between dyeing and applying a top coat finish? If it makes any difference, I have dyed a knife sheath with Fiebing's Dark Brown Pro Oil dye, and the finish I'm using is Tandy's Satin Sheen. It's very dry here, and about 80 deg F today. The sheath was dyed about 2 hours ago, and is dry to the touch but still smells of dye (solvents still coming out?) Thanks in advance!
-
Hi, Yes, it's pretty easy to remove the chrome. All you need is a torch, & a wire brush. Just heat the tool enough to make the metal expand a little, NOT red hot, & then wire brush while hot. Be sure to wear eye protection, & not near anything flamable!! By heating the tool, it cracks the chrome, making it easy to remove. Chrome, by it's nature, kinda fills in the recesses, & grooves of the tool, making it less crisp. Once removed, & polished, you will see the way the tool should be. One thing to concider though. Steel by itself, will blacken damp leather. Thats the reason they need to be polished well. Even after polishing, it still happens a little. Not a big problem. If it still happens, just wipe the affected area with Lemon juice, & the stain will disappear! I hope this help,,, Ed
-
Vinegaroon progress
BearMan replied to mikeymoto's topic in Dyes, Antiques, Stains, Glues, Waxes, Finishes and Conditioners.
Tom, This is an old time way to create a very deep dark black, that doesn't rub off onto clothing, like regular black dye will do. It is VERY permanate, to anything pourous! It's used to create an overall black color, it doesn't work well for dying just a background, or parts of an item, as it's a chemical reaction, & it will overshadow, other "Dyed" colors. I hope this helps,,, Ed -
Vinegaroon progress
BearMan replied to mikeymoto's topic in Dyes, Antiques, Stains, Glues, Waxes, Finishes and Conditioners.
Mikey, Before you put the steel wool in the vinegar, did you clean it really good with laquer thinner, or brake clean first? Steel wool come from the factory with a bit of anti-rust agent applied. That has to be removed, otherwise, it will take 3 weeks or so for the vinegar to disolve it completely. Also I've found that by using 2 or more steel sources, ie. steel wool, old rusty bolts, rusty nails,,,, ect. works better as well. I hope this is of some help. Ed -
Hi I agree with Kevin,,, somewhere around a 16 to 20 oz maul would be a good choice, for average weight leather, like belts, knife scabards, ect. If you were doing Heavy stamping on Heavy leather, more like 30-40oz. But if you use lighter weight leather, like for bilfold backs ect. a lighter 10-12oz would be better. The correct maul makes tooling so much easier, & better. Ed
-
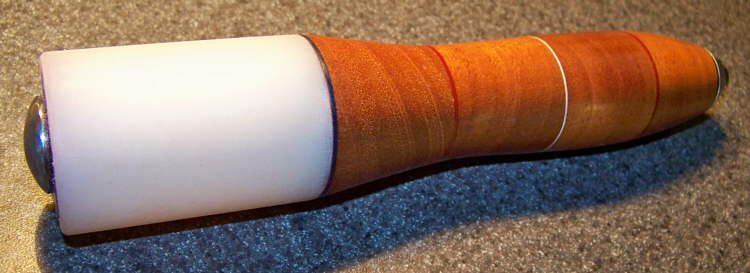
Hi Everybody,, Thanks for all the nice compliments! Yes, it's something I make. The first one I made was about 7-8 years ago. I ordered the Nylon bar stock fom a supplier, where I only ordered 2 pieces, in different diameters, 3" long each. Somehow they sent me 3 feet in each of the diameters. After calling them back, they said to just keep the "extra". I still have quite a bit left. Maybe I should make some more? I believe the larger one comes in at around 14-16 oz. Bob, I don't know who Wayne Jueschke is,,, but it's nice to have something compared to somebody elses work. Thanks,,, Ed Beautiful maul, Ed! Did you make it? The shape of the handle reminds me of Wayne Jueschke's mauls. Very nice. Bob
-
Here is my new 9oz maul. I actually broke my stamping stick, that was only about 30 years old. It died sooooo young!! My new little maul is 8" long, & 1.5" in dia. it has a segmented Mahogany handle with colored spacing material. The head is made out of Nylon. This handle shap fits MY hand just right. I've had some in the past that were too smallin the narrow part, making them kinda hard to hold on too. I'm sure I'm gonna get alot of use out of this one. I still think I'm gonna make a new Stamping Stick anyway. I have a Long,,,, way to go to catch up to Bob's (Hideponder) maul collection! Maybe one day... hehehe Take Care,,, Ed


-
Clay, As always,,, a Very good description!
-
Here you go,,, http://leatherworker.net/forum/index.php?showtopic=15051 I think he may have just what you want..
-
Hi Tk, The slicker, helps alot in the prep. for tooling. It helps to even out the surface, & close the pores, somewhat, making the leather more even & consistant while tooling. I've also found that a piece that has been slicked & cased, will hold moisture longer, that a cased piece that hasn't been slicked. Which is a good thing! Also, it seems to me that a slicked piece just seems to carve better, & smoother. Plus, in the process of slicking the leather, you are also adhearing it to the backing better. My proceedure is: applying the anti stretch backing, wet the leather, slick in all direction, re wet the leather, & case. If somebody does it differntly, Please let me know. Ed P.S. I made my slicker about 30 years ago out of 1/4" Lexan, with a leather half wrap.
-
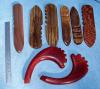
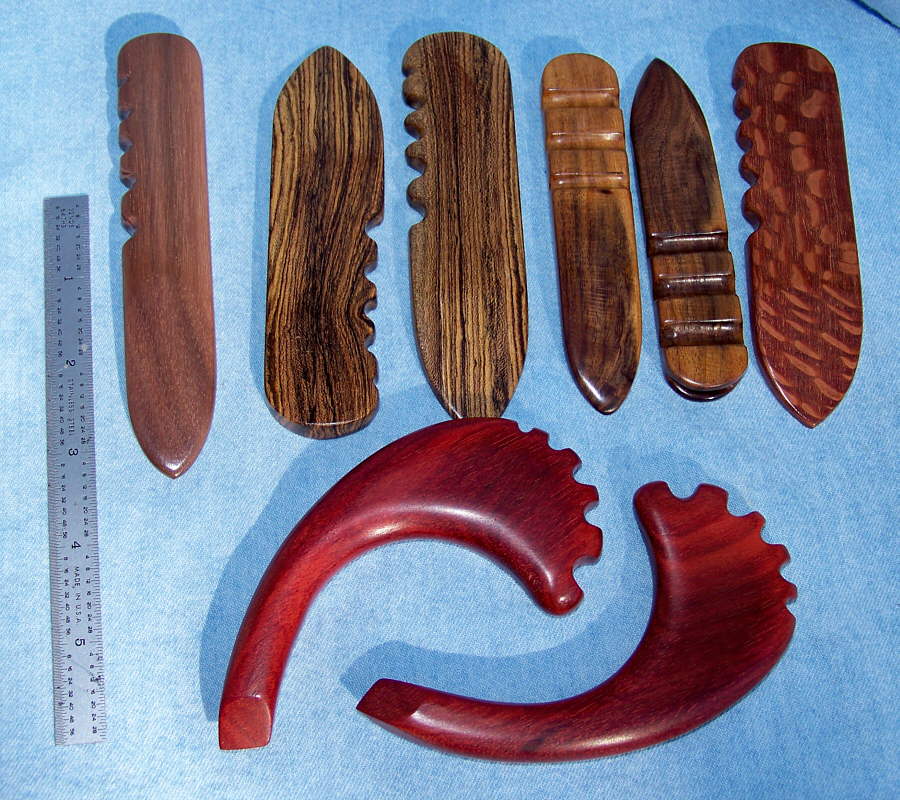
Hi Tk, Here are some edge burnishers/slickers I've made, & still make from time to time. Yes Cocobolo, is a very good wood for that purpose. If interested, just get back with me. Ed