RockyAussie
-
Posts
3,265 -
Joined
-
Last visited
Content Type
Profiles
Forums
Events
Blogs
Gallery
Store
Everything posted by RockyAussie
-

Backlash issue with Juki 1541 & bonded thread
RockyAussie replied to aslfkjaslfkjasflkj's topic in Leather Sewing Machines
I will just add also that it appears in the first picture that the thread does NOT line up with the hole above in that stand. That will give you a slight loosen and tighten in your tension as the thread is pulled off of the spool. I think that your problem is the thread return spring is perhaps a little strong and could be adjusted off a little and I think it may behave better if you don't hook it in to the first holder just above the thread return spring. -
Nice professional looking work, Congratulations.
-
In times more recently I have seen some edge paint sellers recommend building the edge paint onto a flat edge. I have never found that to be very successful myself and do prefer to keep the edge coat thickness minimal and ironed in to toughen the paint up as well. Burnishing can be a lot quicker and give a similar look on the right sort of leather (mostly veg tan) but can not keep the smooth polished look for as long sometimes. Many products like the crocodile skin products I make can not be bevelled with hand tools and can not be burnished well in most cases. To not bore you with a whole lot of whys and wherefores I will give you a link to a post I did awhile ago that shows pretty much the process of doing edge painting the way I do it.
-
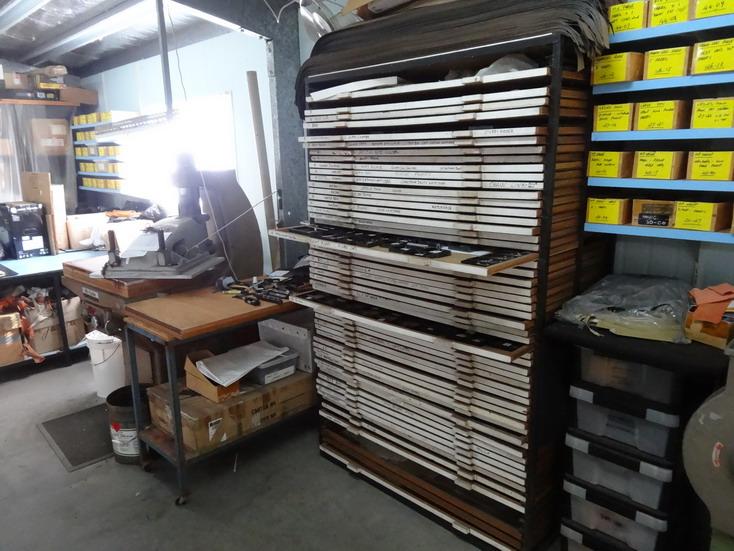
There are a vast variety of heights and thicknesses available depending on what your needs are. The majority I get done are 19mm (3/4") by 2.5mm thick. They cost less than the 32mm 1+1/4" knives and I find that they don't get bent out of shape so easily as the taller ones. Sometimes I have to use the taller ones where there is a lot of thickness to get over but thankfully that is rare. Another reason I like the 19mm ones is they fit in the draws I made that you can see next to the clicker presses. One good thing of late is that a lot of the parts can be cut out on my laser and only if the product get to repetitious do I get the knives made. One good thing about the laser there is NO error in the cutting size at all. This the little diode laser I built which has cut my knife making costs by at least 1/2 This is an example of how the laser can do cutting accurately and better than what most knife /die makers could dream of making.


-
Trouble getting started with Seiko STW 8 help please
RockyAussie replied to bigsig11010's topic in Leather Sewing Machines
The pin is there to keep the tension discs located and stop them moving around with the thread going through. If the tension discs were allowed to rotate then it is possible depending on the given set up that the tension applied could become erratic or the thread could be more likely to work its way out of the discs. Long and short ....the thread does not go over that pin. -
The part cover that goes over the bell knife in the first one I don't like. The cover in the second one is a full cover but all the same you sometimes have to do a bit of fiddling around to get the clearance down to as close to the bell s possible. Less than a mm and about the thickness of a piece of paper is great. The second has an end cover which you need for good waste material extraction but how effective the extraction is I could only guess. If you can see it in action would be best. The reason for the pneumatic switch set up running down to the vacuum set up is a mystery to me and I can only think it is there as a safety to stop the vacuum working whilst any sharpening of the bell is being done. Stopping any sparks getting into the waste bag with a set up like this would be important I think. The Fortuna and FAV ones I have, the vacuum set ups are drawing after the collection points. I would be getting the second one myself. I would ask them why the pneumatic switch is needed because if you can do without it I would. It also may be an air driven impeller as I can not see any electrical connections to it up close.
-
For belts and wallets and a machine that If I had to pick only one to start off with..... I would have a hard look at one of these. They are here in Australia and the price is good. There are a few more videos I have done using this machine on purses and such as well .
-
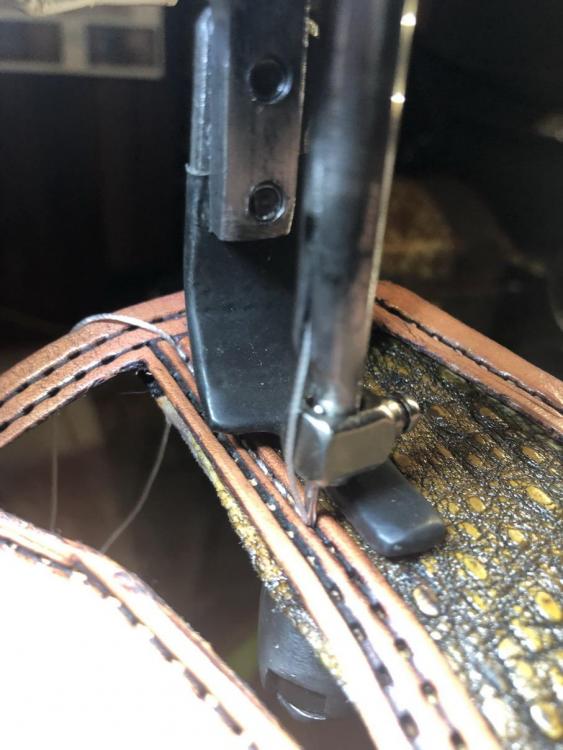
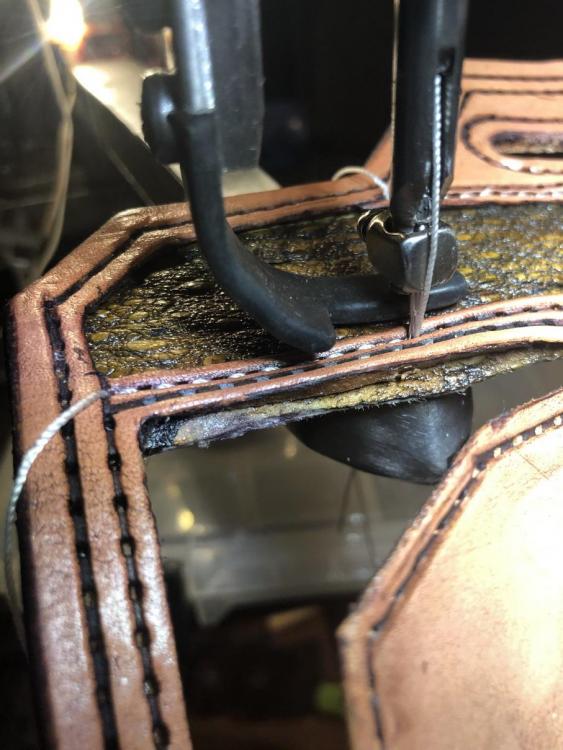
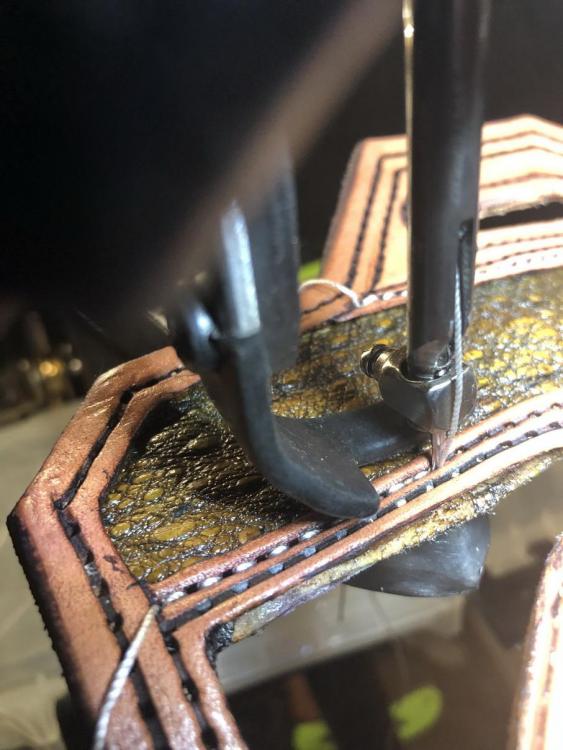
It looks to me like you have used the 25 needle with that 138/90 thread mix.(Bad choice) Particularly in firmer veg type leather when you use an oversize hole you give the knots very little resistance to set in a predictable way. I would recommend using the 23 needle with 138 top and bottom as a starting point. If there is still inconsistencies then check that the bobbin shaft has no threads or burs that stop the thread pulling out smoothly. After that pull the top thread down by hand and watch the primary tension plates for even movement. There should be a couple of felt washers in there on either side of the centre piece and some times it can help to dissemble them and check for any catching burs and the like then give them a few drops of oil before reassembling them.
-
Really!!!!!!!!! They must be awful cheap if that's the case. Even my first cut knives that don't matter much could not out by that much. If I get a knife out by 1mm (less than 1/16") I would be moving on to another knife maker. I would happily pay twice the price because at the end of the day every piece you cut is going to be a reflection of your work.
-
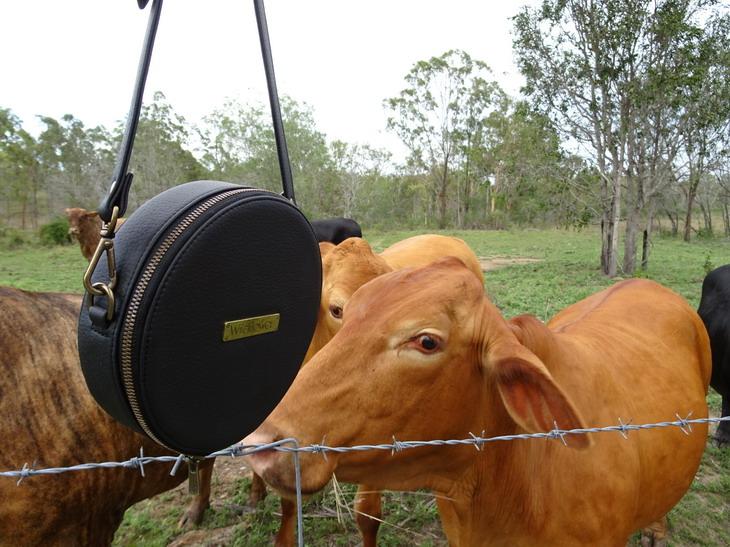
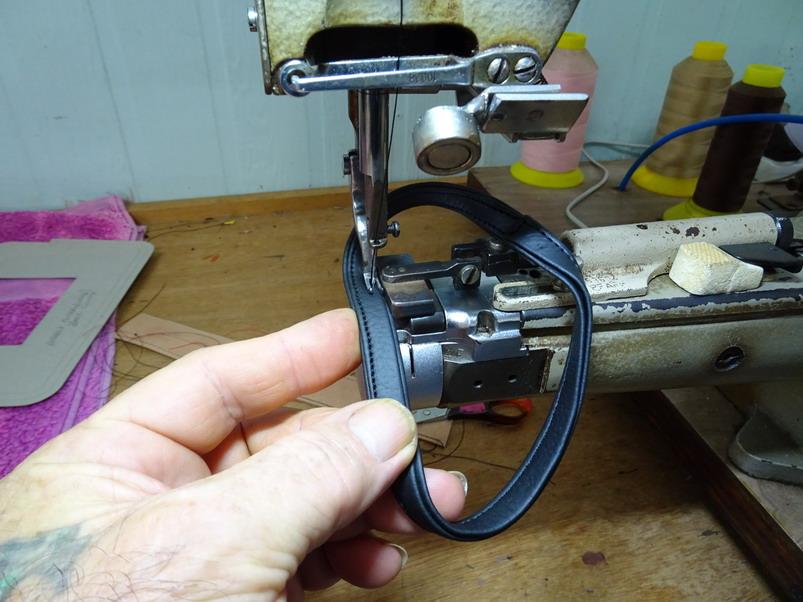
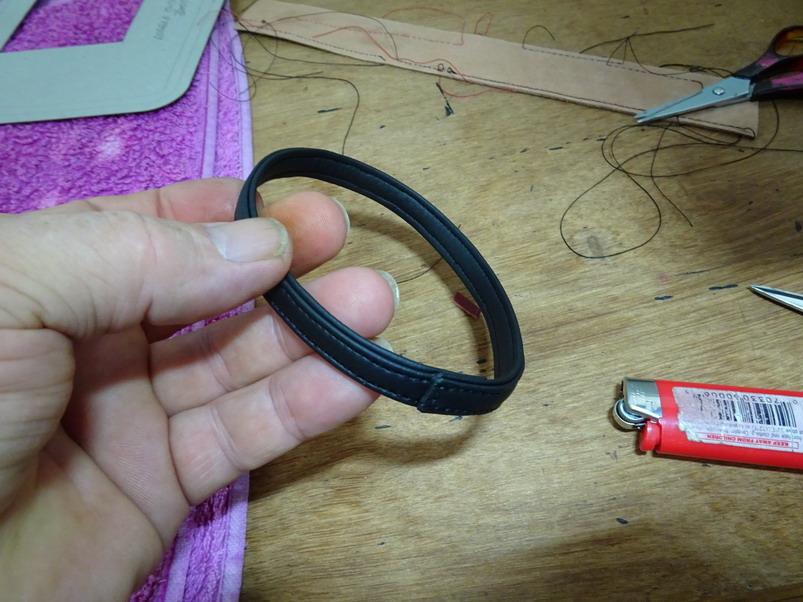
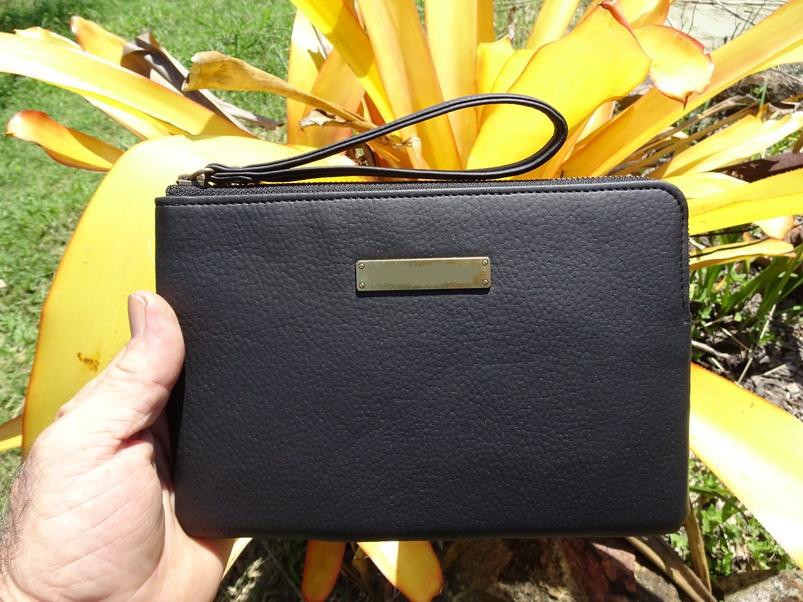
Over the years I have used a lot of different ways to make the straps for purses and hand bags and a lot really depends on the looks, price point and machinery at your disposal. In the past I mostly made straps that were just 2 pieces combined and edge trimmed followed by sanding, edge painting, ironing in and further edge painting and polishing and generally doing a lot of work to achieve a nice result. One thing to point out here is that a single folded strap can be weak in the middle where a buckle is used both where the tongue goes through its hole and where the buckle crew punch hole goes. I prefer normally to double up on my folded straps for that reason. Having a band knife splitter I have the advantage of being able to make the thickness I want in MOST cases quite quickly and therefore I can easily make a folded strap to whatever thickness I want. That said I also employ the use of various folding guides I make and these days a Cowboy strap cutting and folding machine. This link shows a video I made of the said machine and guides. https://www.youtube.com/watch?v=LLIGfR1ehFI&t=397s Just recently I was asked to make a range of products out of vegan leathers. Basically it is just a vinyl type of substance and should not be given the use of the word leather any more that almond juice can be called almond milk.. Although I can still skive the edges fairly well on a bell skiver it does not split so well as real leather. I decided to use a couple of different techniques that you may find useful. The vinyl substance in use here is about 1mm. In this camera and round type bags I have used 3/4" folded strips combined together that if measured in the middle would be about 4mm (10oz). Just getting my cows approval The camera style bag Now in order to get a thinner look I used in this clutch purse a 13mm strap covered with a 10mm strap on top (1/2"+ 3/8"). This give the impression of a thin strap whilst still being quite thick. Hope that helps some.
-
Hey John, Thanks for letting us know. Since you have posted this I already have a couple of other Cobra 4 owners wanting them. I owe you @jrdunn I think that about answers your question.
-
Thanks for the mention @dikman. We have developed the same narrow needle plate/dog foot set for the CB 3200 as well. I do have to point out that the extra thickness the 4500 can handle is its major + point and if you ever want to put in a holster plate or stirrup plate set then you will need that extra lift for sure.
-
Mmmmm.... interesting.... nothing hanging out the back of that big flywheel side
-
To answer this more thoughtfully I have to ask what other if any, types of work you might want to do with a machine. A post machine would likely be best if that is all you want to do and they have a wide range of applications as well but ......some other jobs may be better with a cylinder machine and some with a flat bed and even one of those cheap Chinese patches may suit your budget better.
-
Finished up another Bible cover
RockyAussie replied to YinTx's topic in Books, Journals and Photo Albums
Just a tip if it helps...if I have a drop of say 1mm or 2oz if you like, I turn the main tension knob back 1/2 turn and tighten again when it gets thick again. Practice on a few scraps and you'll get it pretty quick. -
Good looking job @YinTx Happy to see you have it nearly all working now.
-
You just beat me on that almost word for word.
-
I am sorry @TomE that I have not received your earlier Email. I have had some trouble in the past getting the notifications going through our website and I thought it was fixed up. Thanks for letting me know, I will look into it again. I just wonder how many I don't get through that system. I have replied to you on the pm messaging here.
-
At the moment I know we have sold a couple to the Cobra class 4 owners and have not heard back that they have had any fitting issues. If anyone can confirm please share your findings. Great feedback @WolfteverGunleather Thanks for sharing Only in the drawing up design stages yet and just curious as to the likely interest. I would use it but I always love pushing the limits. They would cost a fair bit to produce so numbers are pretty relevant. If the current sets keep selling well I will give them a trial.
-
Warning now @Wizcrafts this set can lead to spoil you. More productivity and production gives more time for ........ Question, what would you think of a sort of a cross of the stirrup plate and the holster plate with an extended height dog foot??? I am thinking for tight gussets and stuff like that. Could be an answer for that tight lot of stitching you get coming up to a tight bend (stirrup) and the big jump gap when you get over the bend.
-
Good news and thanks for the feedback. Would you be so kind to post some pictures when you finish? You wont be crying for long once you have it in use mate. Is this with the new needles and needle plate set? I found on mine that I get far less problems with miss stitching than with the original sets. other than timing it could be you may need a shim which Jess will have in stock. I have not needed any on mine but all the same some suede's can sink down in the hole with the needle enough to stop a decent loop forming for the hook to catch well. How far away is your needle from the needle defector you reckon when they are along side? I get away with a gap of 1/2mm (normal printing paper folded over into 4 layers) on a 160 - 23 LR point needle on just about anything you like. That gap means I get all the way out to a 230 - 26 needle without any touching. That gets me right for a TK 350 size 8 metric thread if I wanted to go that thick. Another think I just thunk......check that your thread return spring is not over travelling.
-
When You're Not That Into Leatherwork...
RockyAussie replied to Sheilajeanne's topic in Archery Quivers and Bow Cases
WOW that is Booteful and heelarious to boot -
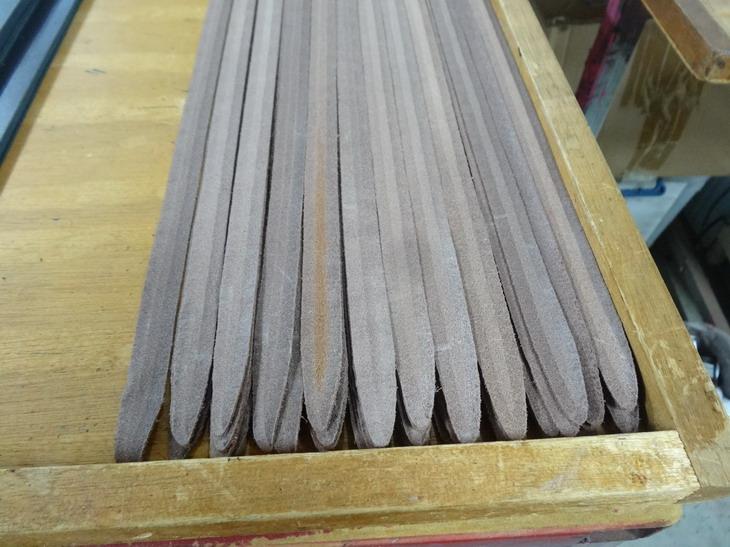
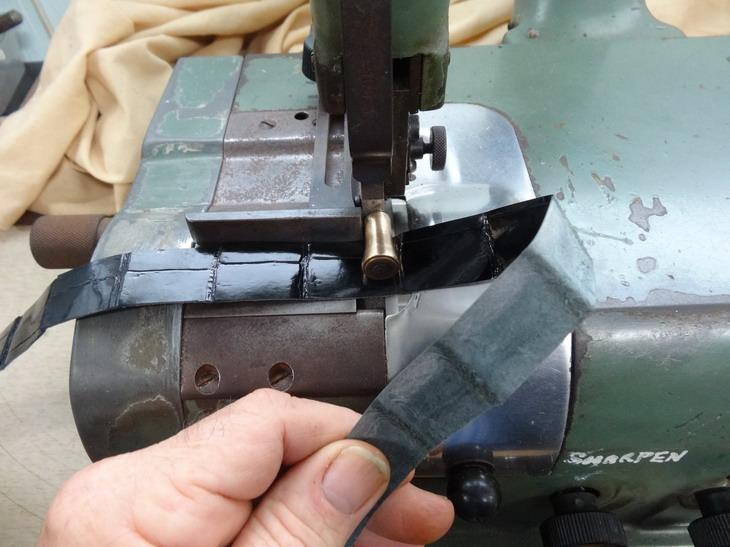
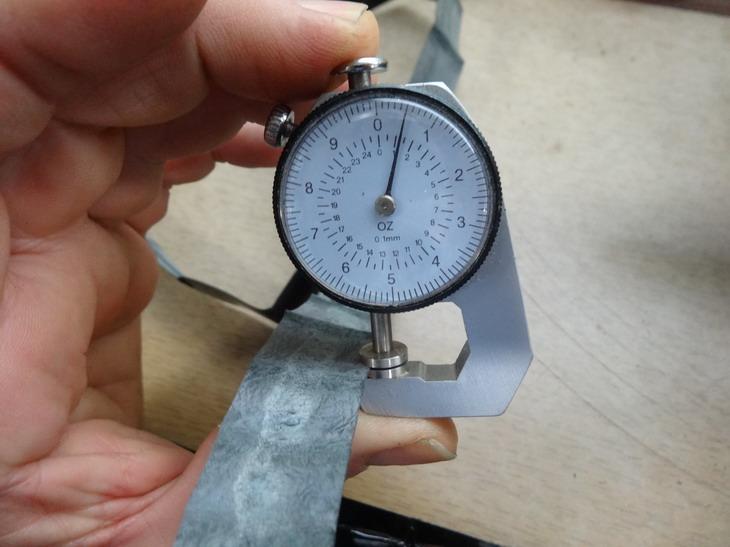
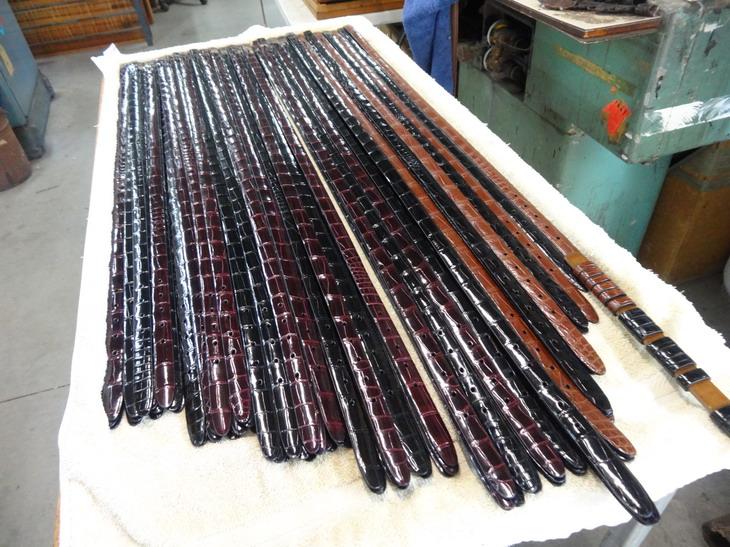
If you wanted to do a large piece that is not easily bent ...with the guide removed you can go back untill you reach the overhead arm at the back which is about 8' or 200mm so if you turn it around you would be able to double that width to 16". The roller or presser guide though means that you are limited to doing each pass at around 30mm or 1.2" at a time. Most stuff like belts and that take one pass either side which can be bevelled or flat if you want. I do have one video where I am doing up 100+ croc belts which I think I have to get around to loading up sometime soon. Here are a few pictures that show one of the typical uses this machine is used for- Here this croc top pieces are ready to skive Here are the leather fillers that are skived This is showing the croc being skived Edges at .5mm What some look like when nearly finished

-
Like you I think I bought a lot of howlers when I first started off. I bought a roller type for a way lotta money and found that I then needed to become a master at sharpening to get anywhere near to predictable results. That also takes a fair time to do. I have had the boot repair style cutter/skiver and for shoe repairing hard sole leather but not any use for general leather goods making. I would suggest you keep an eye out for a good priced bell skiver. I have band knife splitters but early on I did a lot of my splitting requirements with a bell knife skiver and they have the advantage of being able to be sharpened by the machine within a few seconds normally. I would recommend either a Fortuna or a Fav AV2 machine as my first choices and you can see in this video I did awhile back a little of what I am talking about. There are a few others as well if you check while your there. They are not hard to resell if you decide to later on.
-
Will my sewing machine work well with leather?
RockyAussie replied to Warhauk's topic in Leatherwork Conversation
This what @kgg says I believe to be true. I have had many years of experience using patching machines of one sort or another and they are not a machine I would recommend to start off with if you are doing leather work. Shoe repairs yes. I should point out that at 3 minutes 58 seconds into the video above you can see the stitching average that a patcher is normally capable of. (Not good enough for my work) Your skills with a patcher are very high indeed, so much so that I had to check your profile and see the pictures in your albums. I am curious to know what method you used to make the holes and grooves ahead of the patcher needle. Is this done by a laser or have the leather been stitched ahead first with a heavy weight machine or what? Here a a few of the pictures I am curious about.