RockyAussie
-
Posts
3,265 -
Joined
-
Last visited
Content Type
Profiles
Forums
Events
Blogs
Gallery
Store
Everything posted by RockyAussie
-
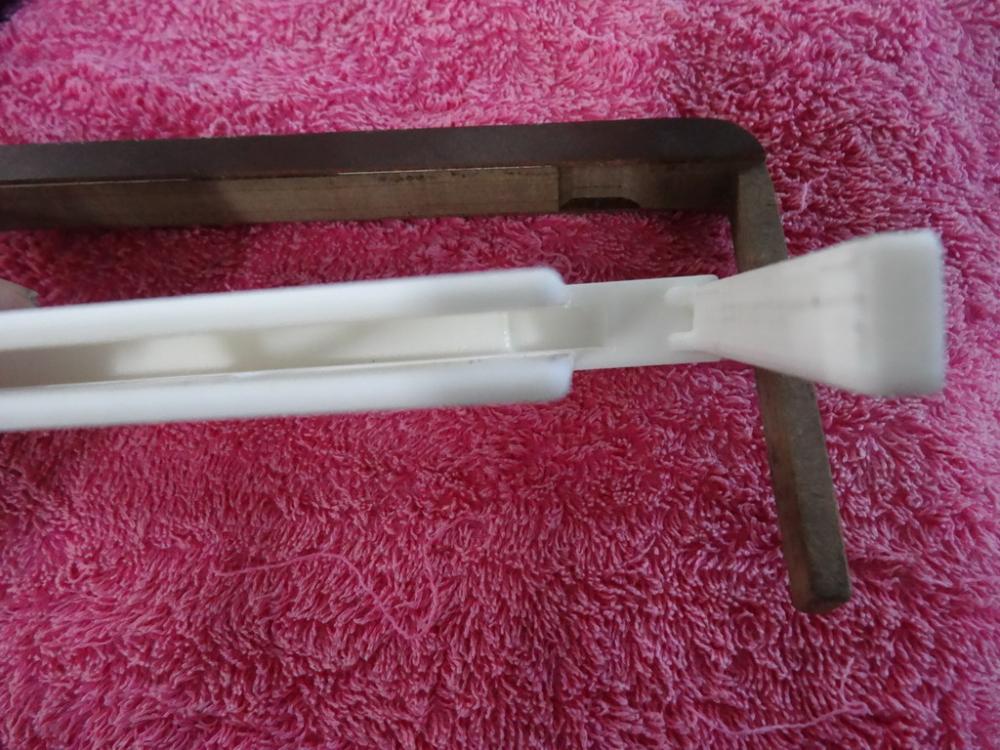
 Lot more tricky. I will try to explain. The main barrel part of bag is about 12mm longer before folding. This is skived from 12 or 13 down to near 0. I built up some 100 drain pipe with some 3mm leather to get the internal dimension I wanted. This barrel mold is about 10 or so each end (20 in total) shorter than the finished bag length. Cut out some 2 or 3mm mm veg about same as the pipe diameter and then cut out the lining leather about 24mm diameter larger. Glue the veg into the middle of that. Sink this into end and glue in place. Then fold the outer bag ends over and in. You should then have a hole about 10mm deep. This gives room to get over the sewing machine end assuming you have a cylinder machine.Sew this around and then.... I found the prototype and here some pics may be better. That is an 8 or 10 mm eva rubber with design over top and glued in. Hope this helps. Regards Brian
-
Hi Gigi No special attachment. The lid is done with a french edge. The best way I find is get a long strip of supple leather and skive the start off 1/2" or so and free hand hold it against the guide both the lid and the binding and stitch it around. Finish stitching 1 or 2 inches short take out and trim of level with the first skive and then skive that piece similar to the first skive. Contact glue these 2 pieces together and proceed to finish the stitch line. Put some contact only over the stitch line and and when tacked off pull the leather out and over the edge and tap into shape a bit in corners if needed. Another line of contact in about 4mm or so from under edge, stick down when tacked off and then proceed to do the next stitch line tight against the edge of the binder. The thread is a polyamide multifilament thread called strongbond size 20. The lining is an upholstery type made for car seats I source from New South Wales Leather Co here in Australia. We use it a bit for soft tote bags and like. Hope that this helps and just ask if you need more. Regards Brian
-
Have you had luck on this yet? I may be able to help if not.
-
Fortuna 121 Band Knife Splitting Machine Manual And Part List.
RockyAussie replied to Trox's topic in Leather Machinery
Hi Trox, I only have a comoga and an old albeko so maybe not much help. I like my albeko as the waste comes out the front and therefore makes it easier to dispose of. I tried finding on line some info on the Fortuna 121 and came up dry. Would you post a pic or 2 of it sometime? I have done many modifications to mine over time and would be happy to swap notes anytime. Brian -
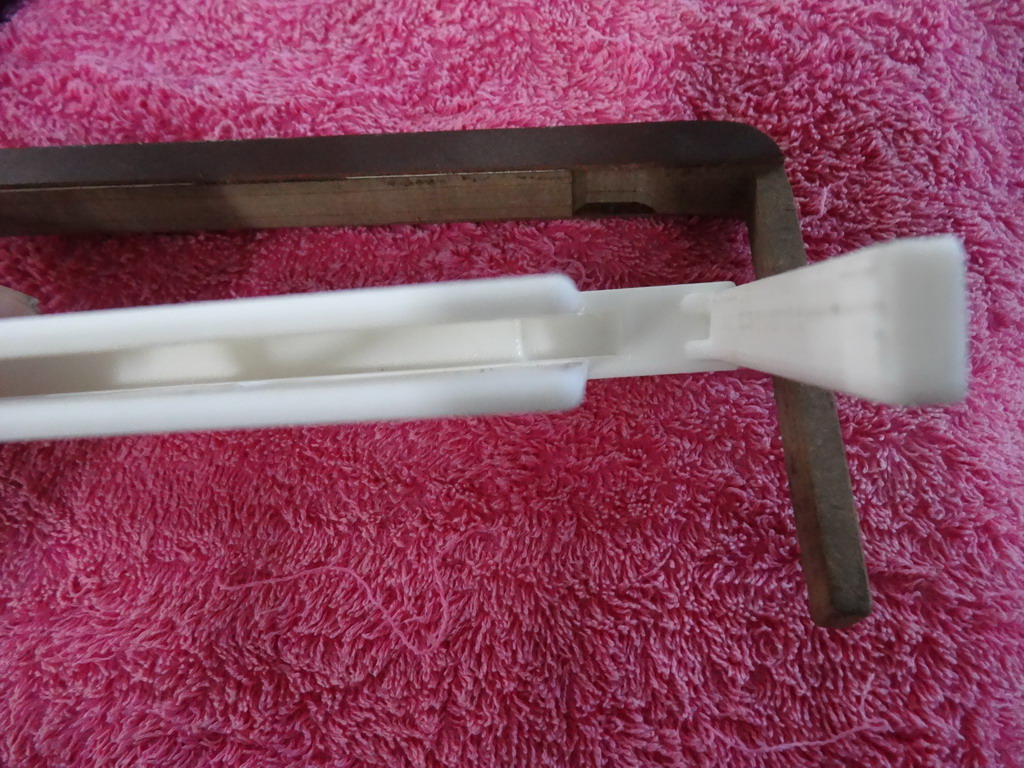
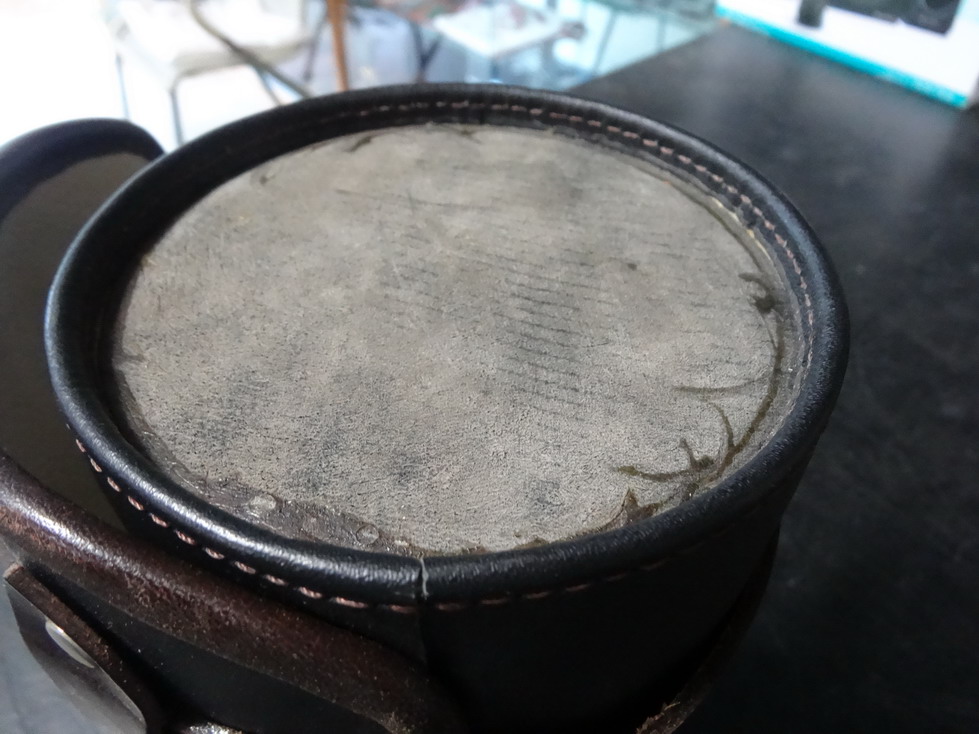
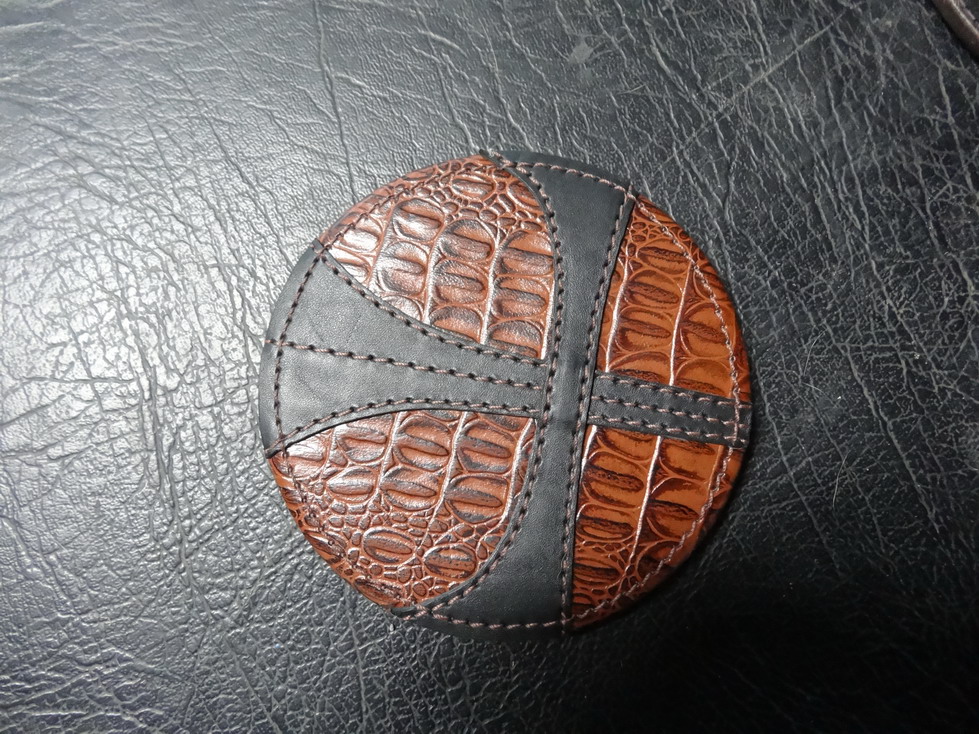
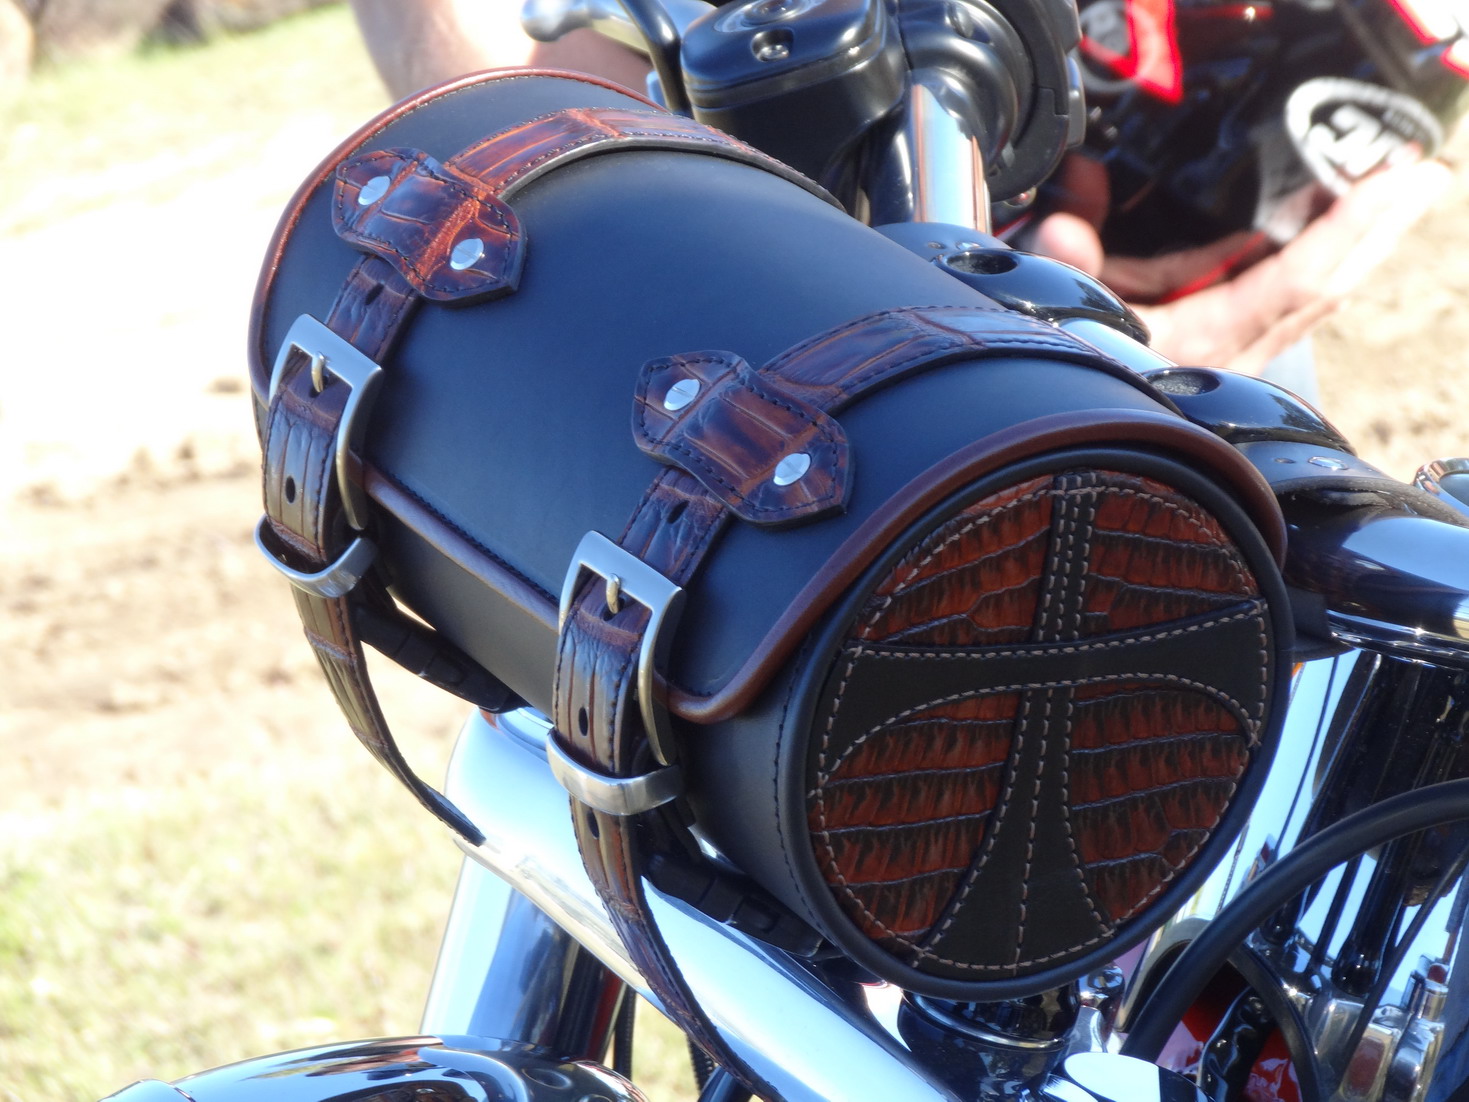
Not sure if this will help but this was my solution for something similar. You could replace the catches with a M+F magnet fitting and that may do. This tool bag I designed for a friend who is a Barrister and the design on the end is my idea of the scales of justice and the handlebars with the long road ahead. Really it was for his sunglasses etc like a glove box. Best of luck and look forward to seeing the rest of your nice work. Regards Brian

_resize.thumb.JPG.29c19b024e33f55dadbb626b8901eab4.JPG)

-
Good quality subtle leather for seats
RockyAussie replied to MADMAX22's topic in Motorcycles and Biker Gear
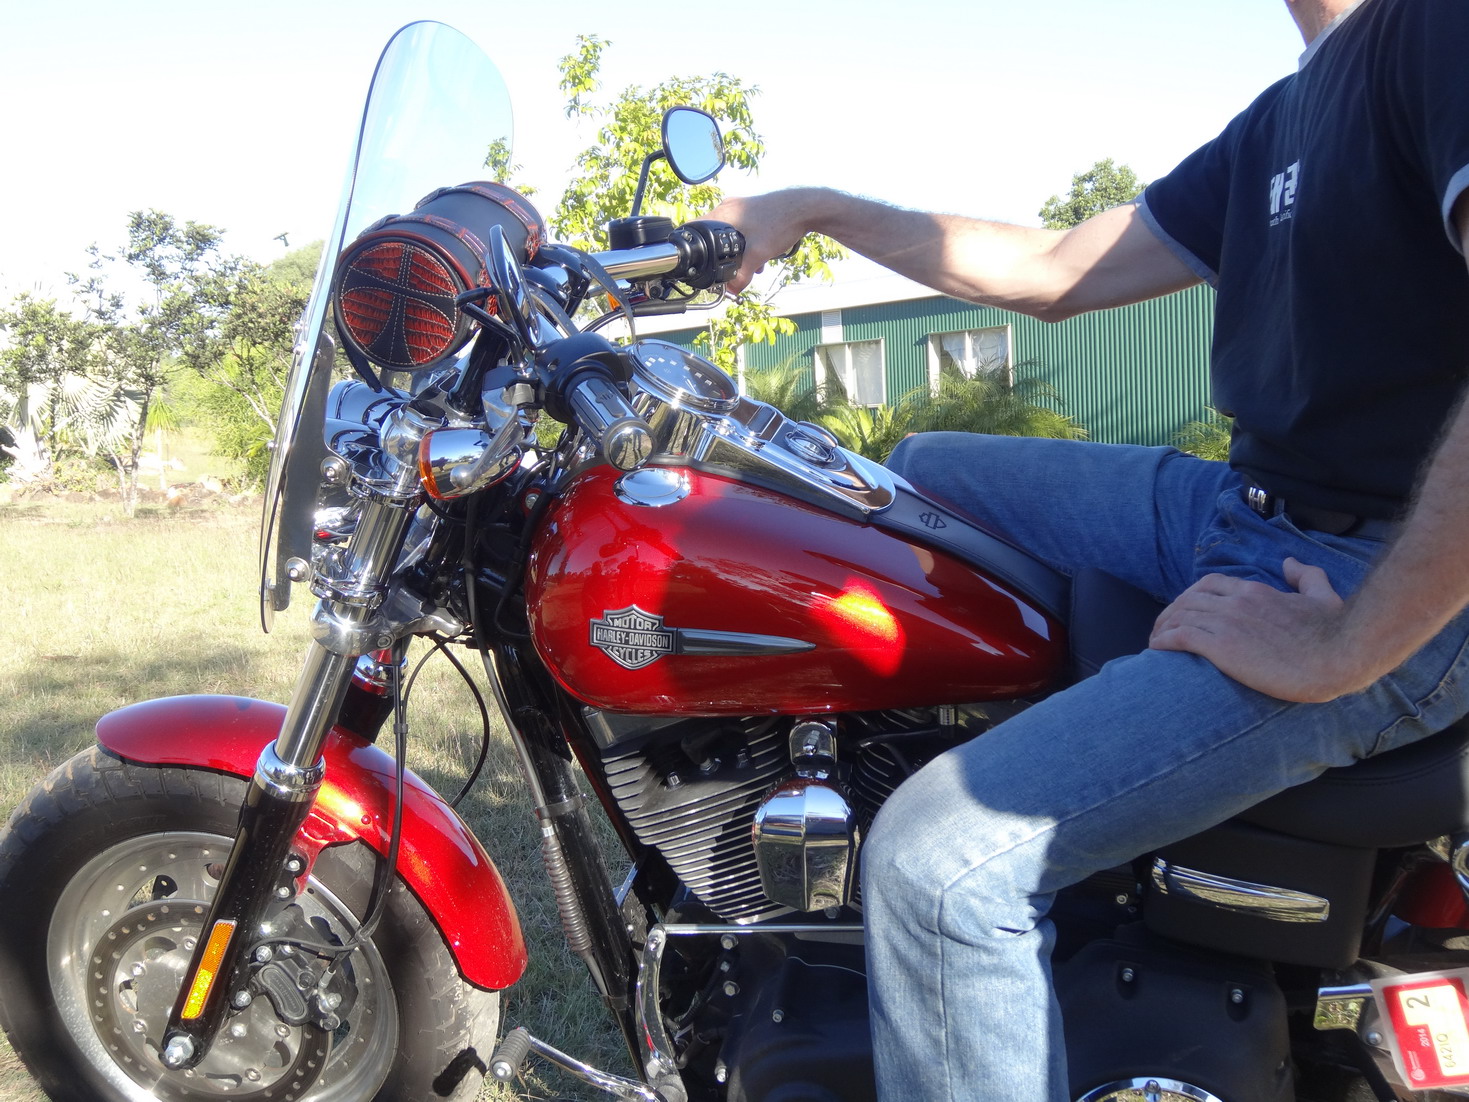
You said cafe racer seats. You will find high quality weatherproof leather out there that is not a problem. The problem is that a vinyl seat in my experience offers way better grip and wear. I did it once and first fast pull up I thought I was a gonna be a unich. I have refused to do them ever after. If you hate someone armor all his bike seat. -
Just found this not great pic in my files but it may help
-
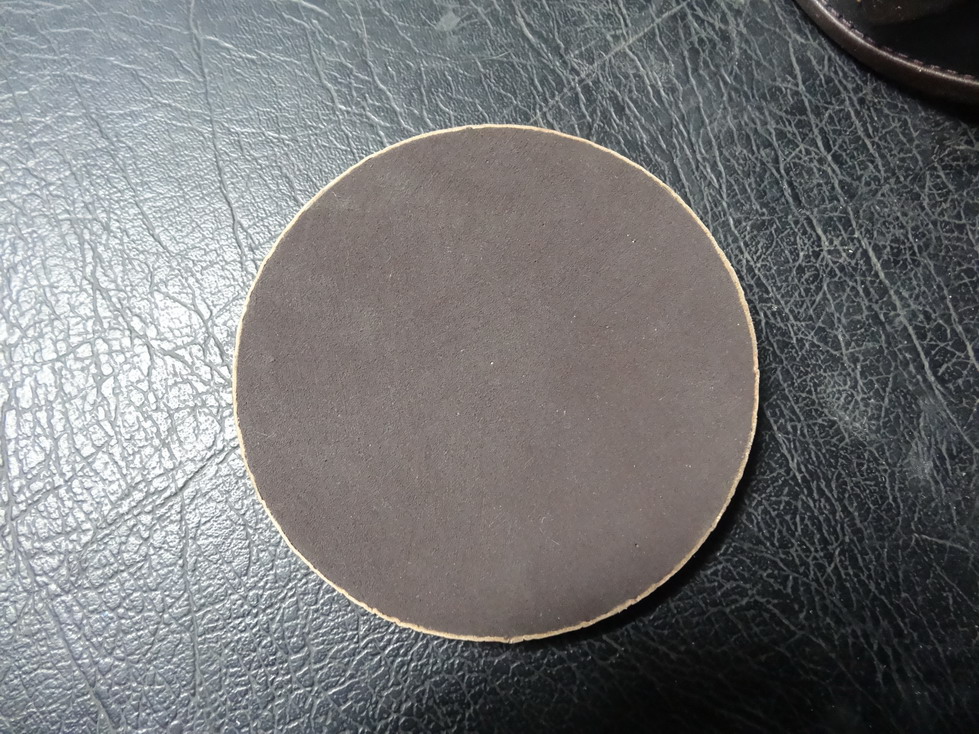
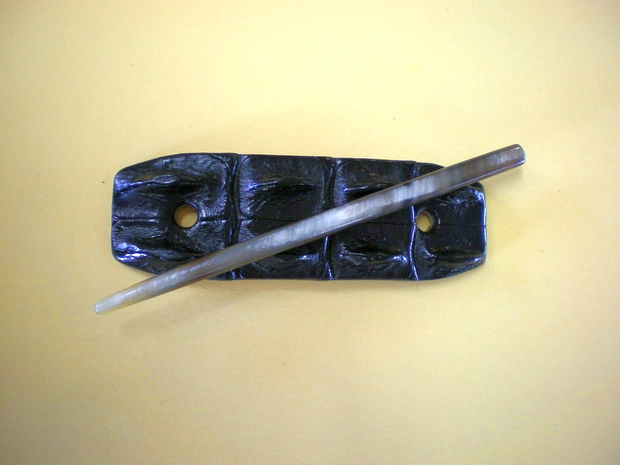
The technique I worked out goes like so. Rough sandpaper followed by Light sandpaper and so on until fairly smooth. Luckily I have some pretty good and fast sanding machines.Then with a 6" rag wheel in a good size bench grinder I polish with Tripoli wax until I am happy. When I make leather or croc hairbars I usually use a tapered cow horn stick about 1/4 round about5" long. Hope this helps Regards Brian
-
Before going into leather goods manufacturing I was in the buis of shoe repairs.On our finisher machines (sands and polishes) they came with an attachment for burnishing in the edges of soles.They are made from steel and worked pretty well. As i have a lathe I made up one in Brass the sizes I was chasing and at first it was no good. I went back and looked at the big old steel ones and saw that there needs to be some small flats filed in to the circle to make it hammer a bit or hold the resin or polish. It then worked fine.The brass I used is about 1+1/4" dia and the 4 flats are about 2mm deep evenly opposite of course. I think most decent shoe repair shops would have one to check out If you need pics let me know. Regards Brian
-
Machine/foot for padded belts and other tricky edges
RockyAussie replied to HVLW's topic in Leather Sewing Machines
Hi HVLW, I don,t know if I can be much help here but for what it is worth I will try. It would help if you could show a picture of the reversible belts you are trying to stitch.I make a lot of 30mm dress belts. Unfortunately i mostly work in mm but my reckoning says that 2oz is less than 1mm and thus your combined edge thickness is less than 2mm. When you say a lining size (I would call filler) is 18mm at about 2 to 2.5mm thick I would say you are going to have a very thin edge with a quite thick filler. My fillers would be 22mm by 1.5mm thick normally. I would think you would have to have an edge thickness no less than 2.5mm to take thread around 20 (138). At any rate mostly I use machines that have a roller on the left preferably a feeding or live roller. Trouble is getting a machine that has a bobbin big enough for using that thickness thread as I only get 6 to 8 belts per bobbin on a 40thread with my Adler 268VG post or Pfaff 331-33 cylinder (not a walking foot)but similar to the 335. I make a lot of wallets also and and for the refined work I have more luck with the Pfaff331-33 than I do with the 335. Mostly the advantage with the lazy foot dragging foot or whatever you want to call it, I can grind the feet thinner on the right side to get the guide closer to the needle or grind upward etc if i want on offset rise lift etc. Although I have gone to the trouble to make my own feet from scratch many a time I have found buying a few of the common feet and just grinding away at them works most of the time. (Finish them off with the metal polish and rag wheel when done) By the way I do all my edging before stitching and thus have no movement problems. I am hoping that some others with good experience like Wizcrafts or Gottaknow can be of better hel[p than I. Best of luck Regards Brian -
Hi LumpenDoodle2
Glad to see someone else is exploring 3d printing world as well. I cant wait to see some guns and knives and other useful jigs and molds on thingiverse. I have attached a link to it in case you don,t know of it.Like your site to by the way.http://www.thingiverse.com/
- Show previous comments 2 more
-

Ahh... Don't worry, it will be me pressing the wrong button or something.
I'm pretty new at this 3D game, and got myself a CTC Chinese knock off of a Makerbot, and love it. I also love Thingiverse, and printed out the Colt Walker. Very impressed. What machine are you using?
Well, better get myself away and working.
Maureen
-
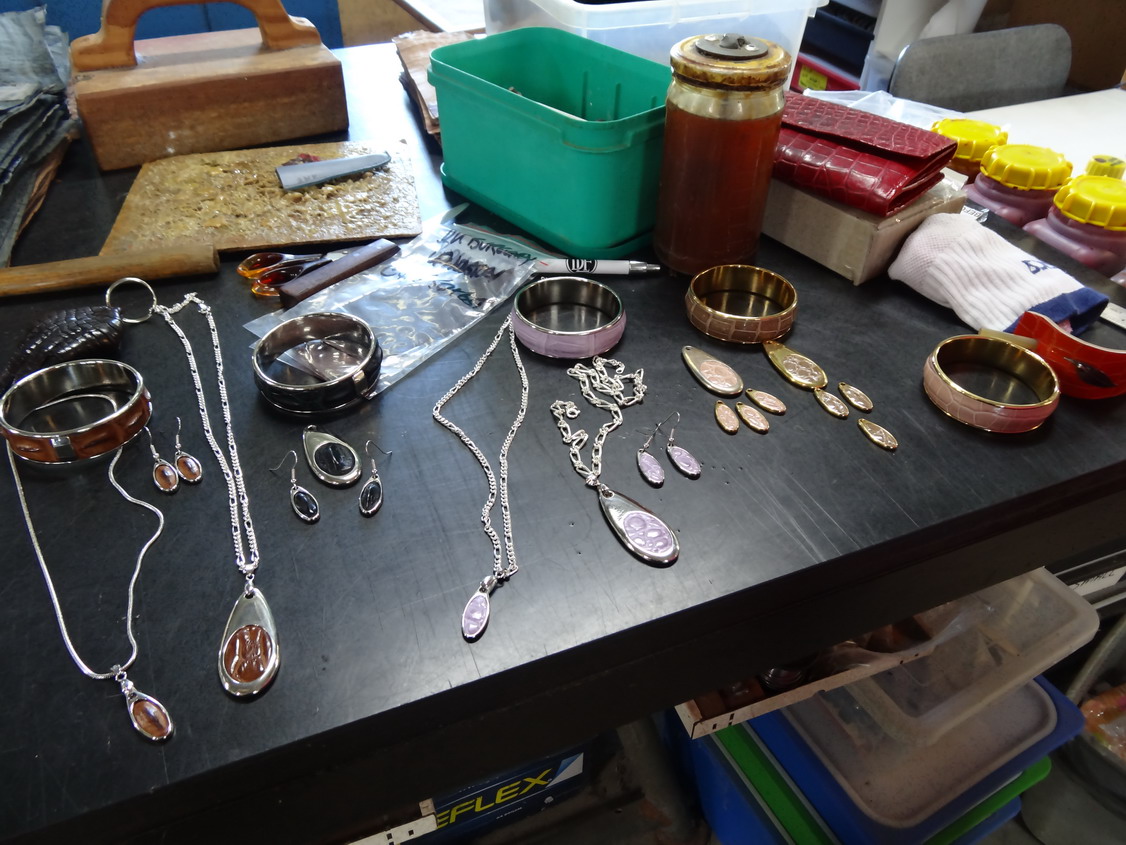
I picked up a second hand prusa i3 on ebay for $400 about 6months ago.
I have been using Auto Cad for years to do my patterns for the knife makers, so it was just a bit of learning how to think and draw in 3d. Until I got it I had no idea how many applications it would come in useful for. You have done well picking up something like the Makerbot. Time allowing I am planning on making myself my own variation of the Makerbot. Testing for jewellery designs size etc has been so much easier now. See my first bracelet design now going well in the shops here and a few others.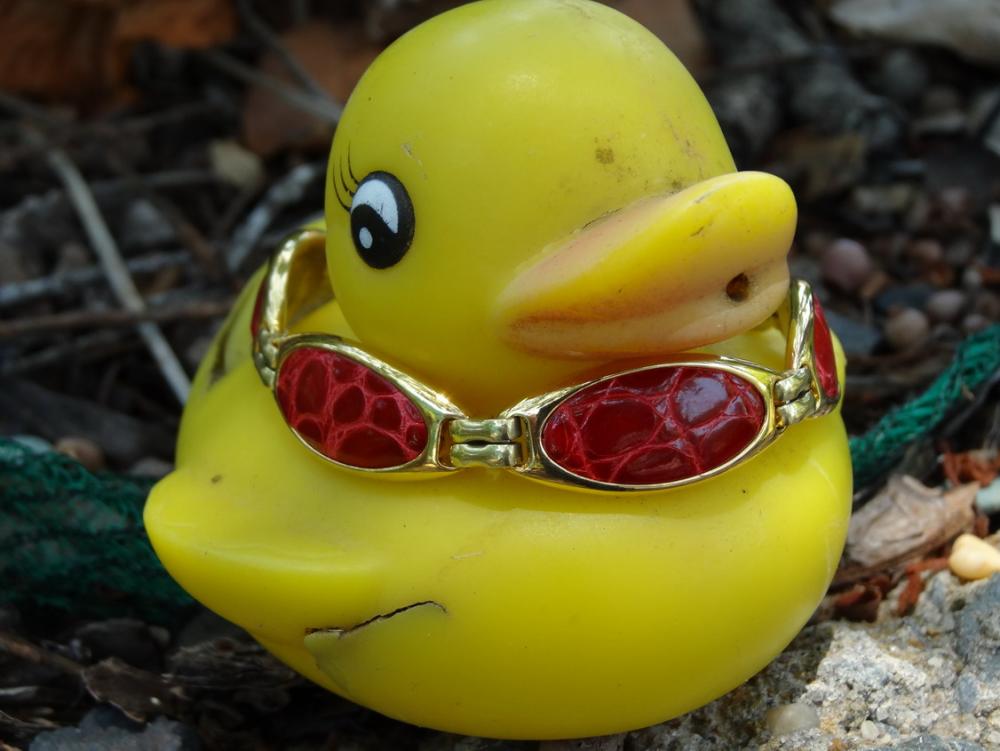

-
Very nice, I'm impressed.
And I remember when prusa mendels were fairly new technology, and the most exciting things being printed were clothes pegs, and coat hooks.
Things have really moved on in the last 5 years.
-
Uwe's and dikman's advise is great but just a thought sometimes the best of us has put a needle in back to front and this in my experience this will show the same problem at least in hitting the hook,but please follow dikman's advise and As Uwe said, best thing is to have someone who knows what they're doing look at it. That is a big needle in there. Regards Brian
-
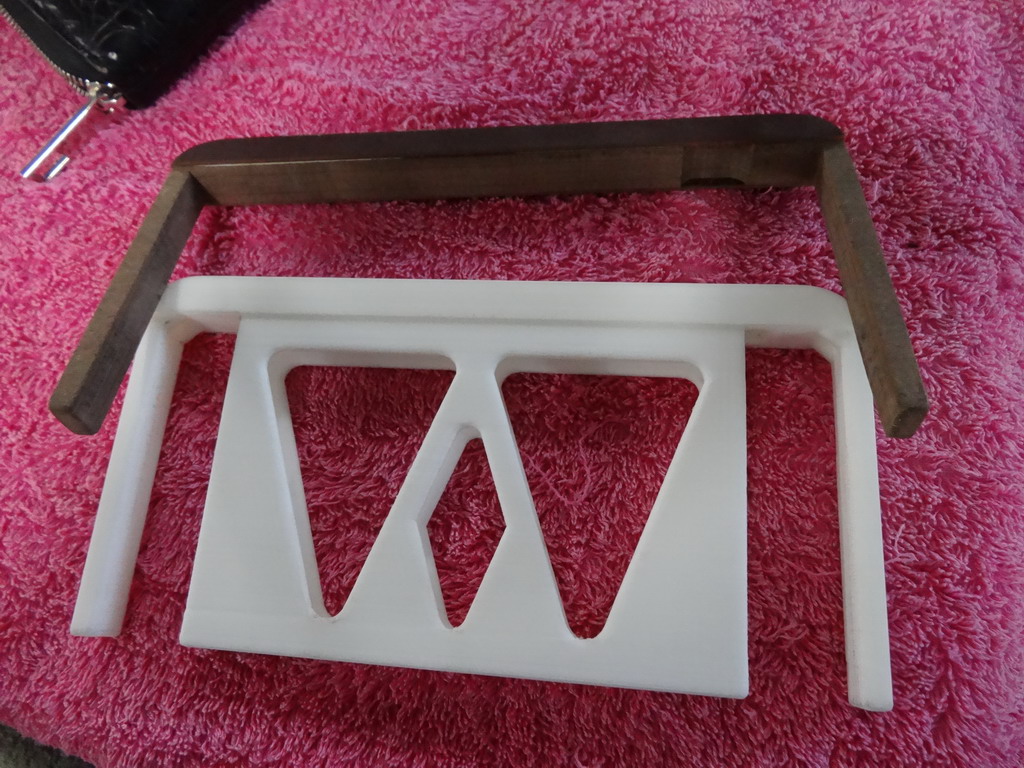
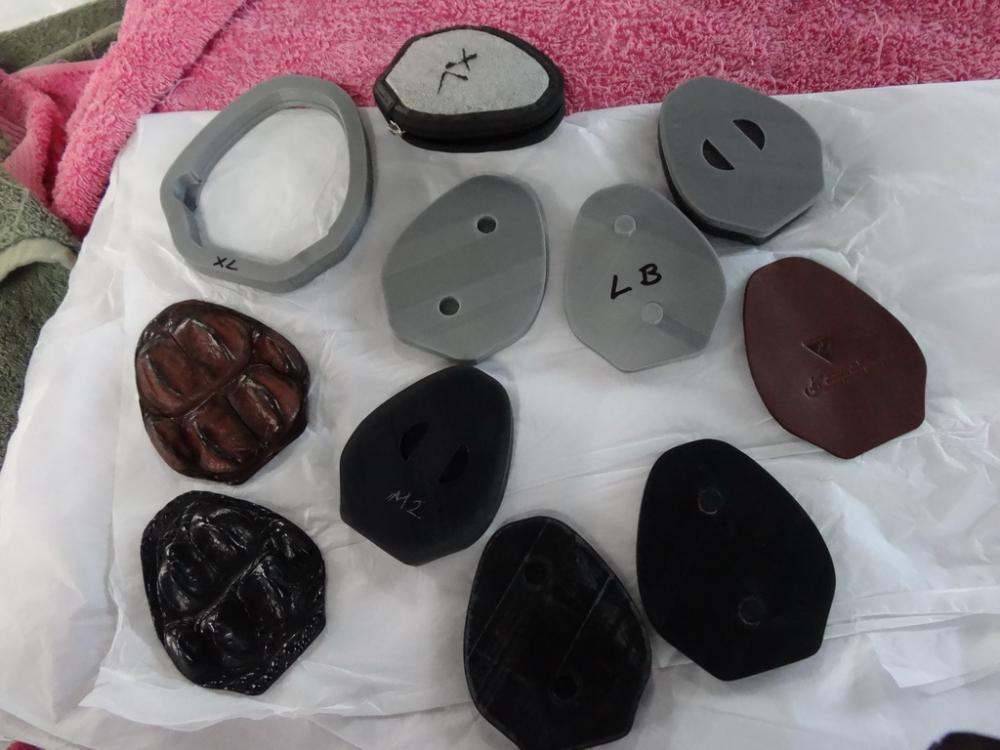
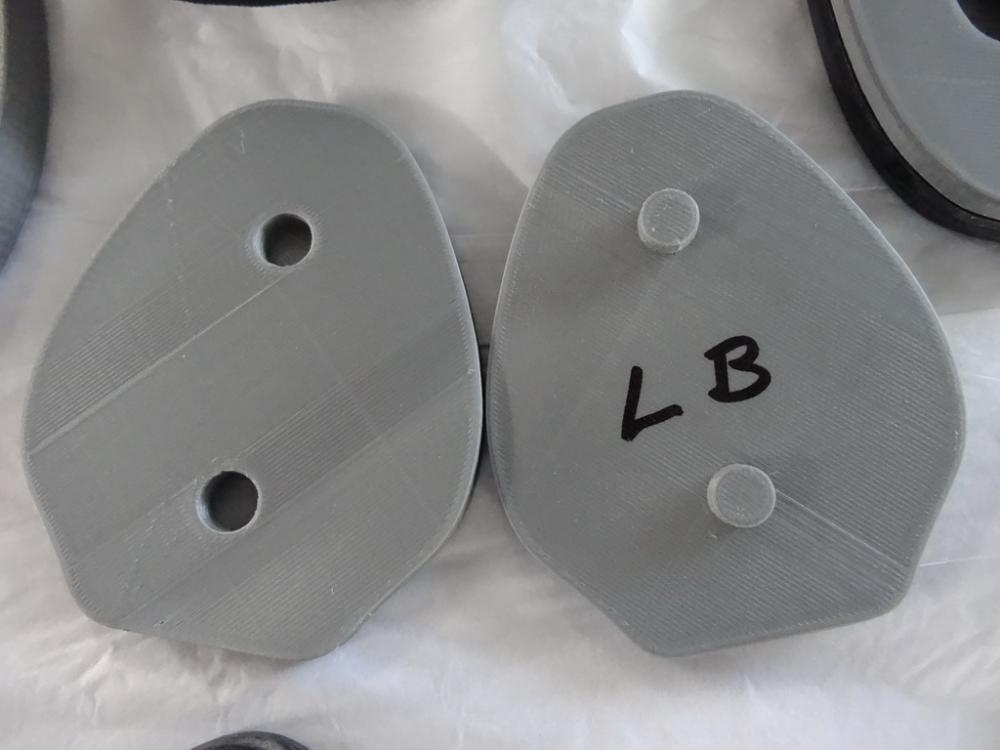
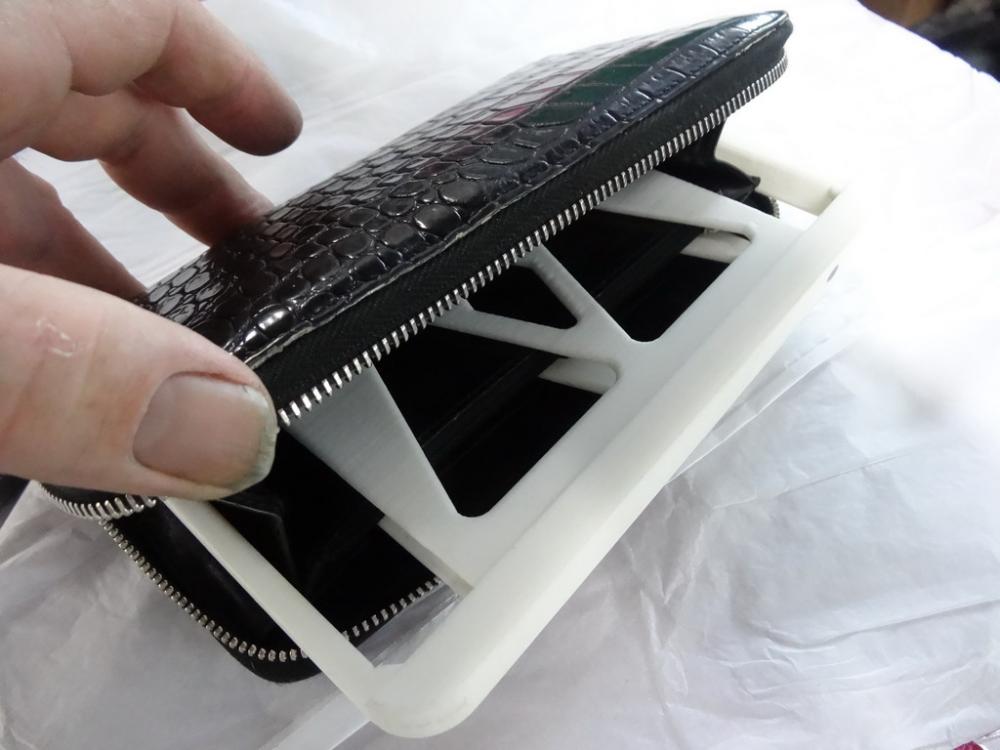
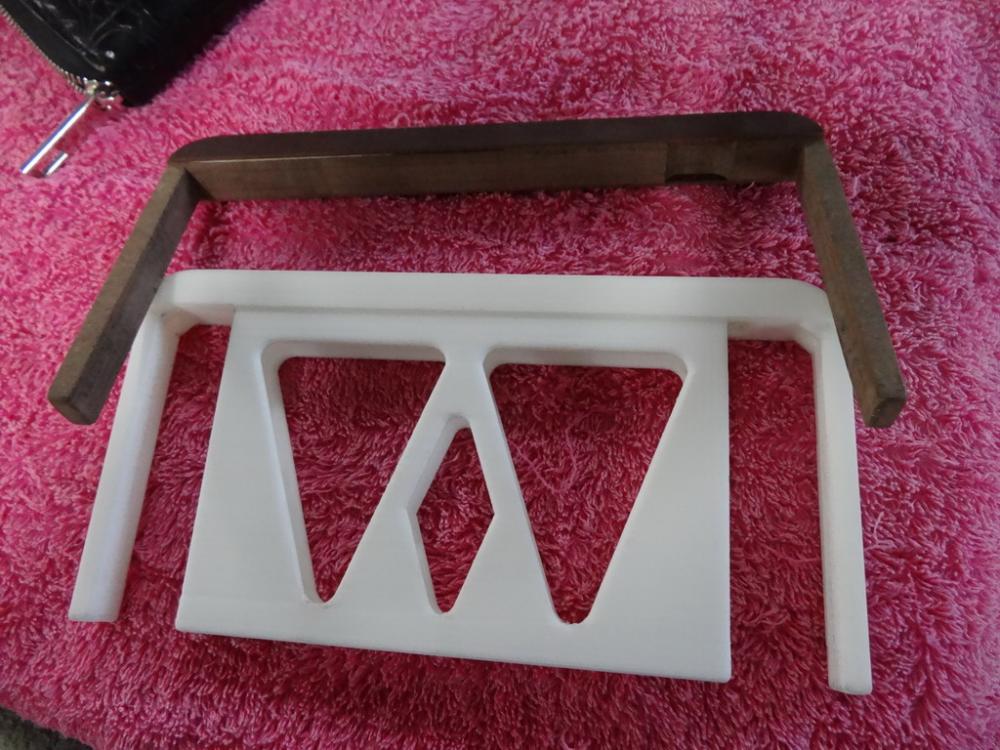
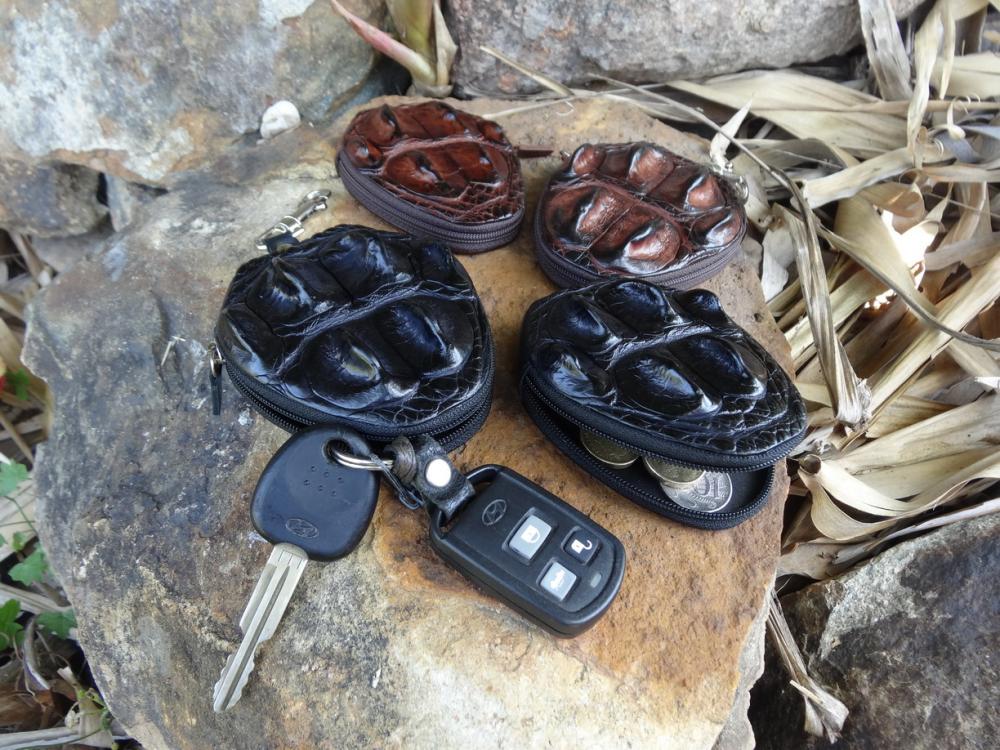
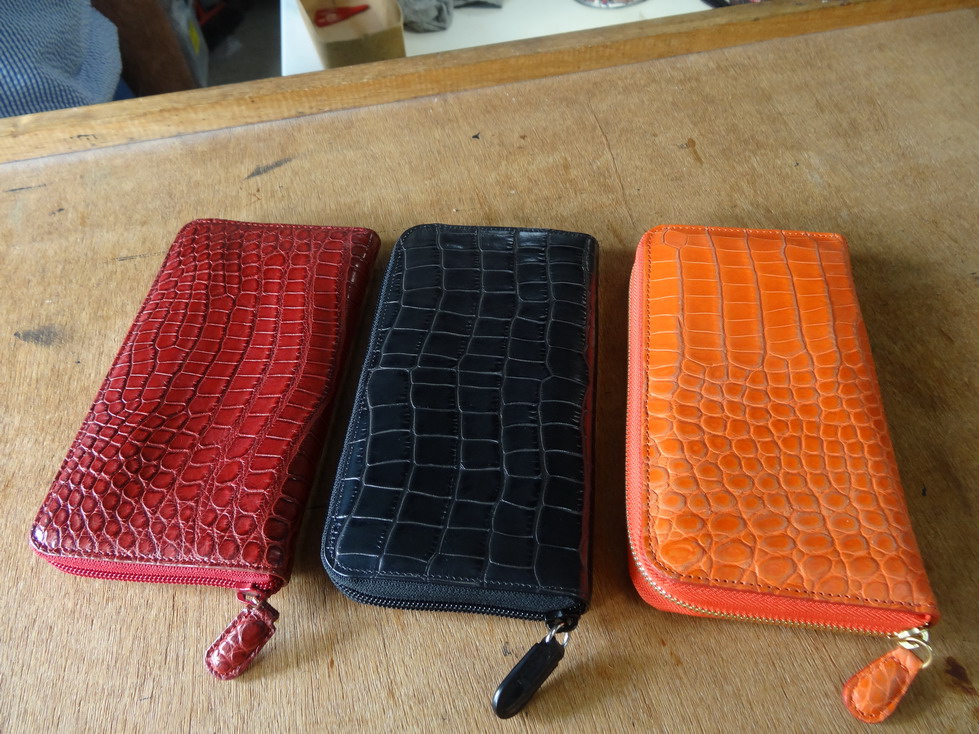
Here as promised are some of 3d molds I said I would take today. If you look carefully you will see a recess hole to accommodate the small internal zip slide and the older mold done in layered Masonite. Near to impossible to make without a 3d printer as you see the newer model comes with extra support legs to aid in keeping the whole purse supported when attaching the outer zip to the internal. For the little crown zip purse you see the advantage of printing molds that be uncliped and even with finger recess to make removal easier. To the left at the top you should see a outer piece for pressing in all the edges at once on the zip when pushed downward. The crown is what we call the center piece on the back of the crocodiles neck/head. I guess a lot of my fun is developing machinery and tools that make the making easier and more profitable. Just found this link which is also interesting. http://leatherworker.net/forum/topic/66260-3d-printing-and-leather/#comment-430777
-
Have you looked at the fiberglass tent poles? You get 4 in a pack for about $12.00au. Rays camping and heaps of others online local. Best of luck Brian F
-
Same as Ferg said Great work. Brian F
-
Interesting and nice and I like the bee and hive theme. perhaps a strange lid choice but it makes a strong contrast between refined and rugged. PS. I just received a whole bunch of fittings from your country (Sun Enterprise) in case you don"t know them already.
-
Pics worth a thousand words they say. Mostly as I am a contract manufacturer I need to produce things in larger numbers like 20 or a hundred at a time and I need to have therefor a large number of molds. The advantage once the drawing is done and converted to an stl file I can set the printer to print the mold or molds while I can continue to work on. To line up zips straight in a product when you put them is a lot easier if you have a mold inside with a center line mark to follow. The lipstick pouch and the key purse and coin purse mold are done in 2 clip apart sections so the zip can be folded over onto 1 lining then uncliped and then folded over the other side lining. I don't do much casting type stuff but the advantage here is 1 the multiple molds all the same and 2 the ease of making the outer cover section to press down over the leather. Imagine having your logo pressed in at the same time as the rest of the casting.(no good on croc skin unfortunatly). I will try and get a couple of mold pics for you tommorow or at least this weekend. Look up shapeways over there they can print steel brass and all sorts and you can find the pricing there as well. http://www.shapeways.com/how-shapeways-works?li=nav. Or yeah to answer your question I use a press for some things and a roller for some others. Regards Brian F


-
Something I haven't seen before -- how to clean it up?
RockyAussie replied to llucas's topic in Leather Sewing Machines
Hi llucas Sorry to see your still having problems. I mostly don't use a lot of the veg leathers like English bridle but it occurred to me that that these leathers are a lot more oiled than I am used to and contact glue can stay quite tacky for ages.Do you have thinners for the barge? Like Madmaxx22 I also spray and usually I have to thin the glue by about 1/3 thinners to be able to spray it. Some veg jobs that in the past I have had to repair are still sticky after years. The thread I use is a polyamide multifilament called strongbond and is perhaps worth a try. It is good to burn off the ends and is very strong and long lasting. If your leather is waxy or greasy your crepe will only be good for 1 or 2 wipes. If all else fails get some silicone spray and give the belt a very light coat before stitching. (crepe will not work at all then) Best wishes Brian F -
Hi Bikermutt, For what it is worth I would encourage your son to get interested and adept at 3d drawing. No matter how many robots there are taking over jobs you still have to have people create art and that is to be able to conceptualize something and find the best ways to create it. The bloke who has heaps of robots will still prefer to pay for some artists works than any robots work. Your carpentry and your wife's art skills will assist him greatly in time and with arthritis coming on perhaps your self as well.I use 3d a lot these days, to make moulds for casting leather with the 3d printer and jewellery designs to receive inlaid crocodile pieces and supports for zippered purses and so on. Think about printing the outer part mold with all of the pattern on and pressing it all in one go. I know a lot here would be horrified at the thought but when a basket weave punch was first made was it then considered that it would not be right to do the whole stamping in one go in the future? The future can be bright and I believe the concept as a whole and quality and affordability of the end product is what is most important. As for marketing I do very little as I find that mostly they find you if your worth finding. Most people don't know me and that is my preference but I can proudly say that I contract manufacture crocodile leather goods for some of the biggest brand names in the world and have done so for years. I wish you and your family better luck in your future. If you are interested to see any pictures let me know. Regards Brian F
-
How much logo stamping do you need to do? The embossing machine Sonydaze shows here is a good investment for small stamping and as you mentioned getting a plate done with logo on, it would be best to use a machine like this. We have 3 embossing machines that get quite a lot of use and many customer logos for different products and so for us it is for sure the way to go but if your just starting out you could get your plate/ stamp made and with a press, stamp your logo into some veg leather. If you have a clicker press this quite easy. Cut out your piece and sew it into or onto your product. A bit of heat on your stamp can help to darken it but not as you have said about heating your leather with a heat gun. Stamping leather like the soft leather pictured in your skiving problem will be very difficult without an embossing machine and also a very well spaced lettering etc particularly with foil application. Hope this helps for now Regards Brian F
-
Skiving Machine ripping my leather
RockyAussie replied to SonderingSusan's topic in How Do I Do That?
What type of skiver have you got? A picture of the machine close up to the foot and the feed wheel would help a lot to best answer your problem. Soft spongy leather will often not feed through without occasionally gathering up and doing this problem. A (little) silicone spray will help.I have a fortuna and a fav but because of the scraping I got with normal feet on glazed crocodile I have adapted up feet to have a brass roller at the front part of the foot shaped opposite in shape the feed roller. This then rolls instead of sliding and helps a fair bit with soft leathers as well. Also I have replaced the steel grooved feed wheels with the fine stone type. After sharpening and before skiving soft leather get some middle firm scrap and very slowly take it through this help to smooth out any roughness a bit like polishing your knives after sharpening. If you need pictures let me know. Hope this is of some help. Regards Brian F -
Hi Tom G I suspect that the leather shown is perhaps quite stiff and can sometimes be difficult to get the bottom to pull through and sink in nicely. If it is hard and dryish try dampening the leather a bit first or oiling the day before. If it feels supple enough try tightening the top tension 1/2 a turn but I would try tightening both top and bobbin tensions until they pull together better. AS Ferg said also a bit more foot pressure could help also. Hope this is of help and Regards Brian F
-
Hi Jimmy Eng I am up in Rocky and have 1 or 2 of these machines. I have always found very helpful, Peter at this address http://www.wmcjackson.com.au They are in Victoria and I have always found very reasonably priced. Say hello to Wayne senior at brooks for me and he will let you know who I am and how to contact me if you like. Regards Brian F
-
Help- Opinions On Fortuna Skiving Machine
RockyAussie replied to E L's topic in Leather Sewing Machines
A fortuna skiver is a very good machine but in my experience without an aspirator (a sucking device that pulls the leather away from the bell knife) they will continue to jam up regularly. I have had several including 1 without an aspirator and I was most glad to be rid of it. Keeping the flesh side of the leather a little waxy or siliconed up does help but if you want any serious production get one with an aspirator. -
Several problems... The needle size looks a little to large which makes the drag of the knot too easy to pull to the top but from my experience the design is more the red flag. Always on thinner type products design where you stitch to be of a similar thickness. Either skive around the outer edges of the 2 credit card pockets or whatever to about 1/2 thickness if you have a skiving machine or design a bridge section into the middle of the same thickness. Most of my wallet designs have a short filler at the bottom of wallet (skived a bit and tucked under) and a full length strip about 20mm or 3/4" inch wide at the top. I hope you find this of help and note that softer leather liners will help a bit also. Regards Brian
_resize.JPG.7210f05e3bc5b07a1f1f80d336363b92.JPG)