RockyAussie
-
Posts
3,265 -
Joined
-
Last visited
Content Type
Profiles
Forums
Events
Blogs
Gallery
Everything posted by RockyAussie
-
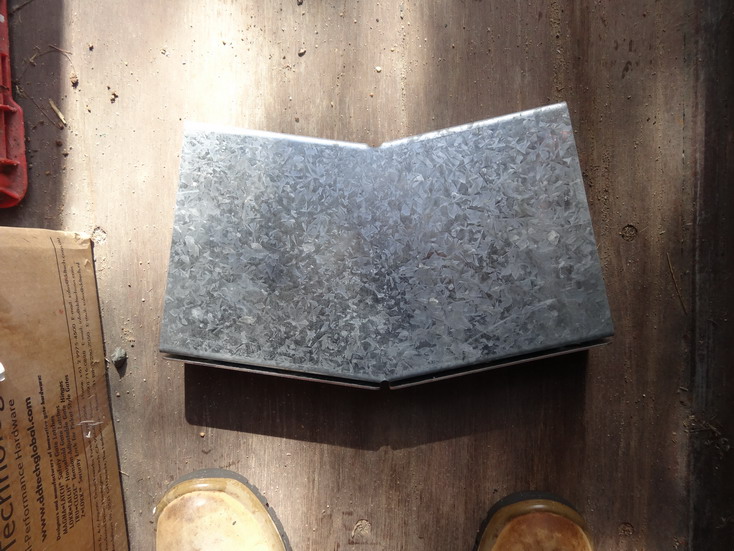
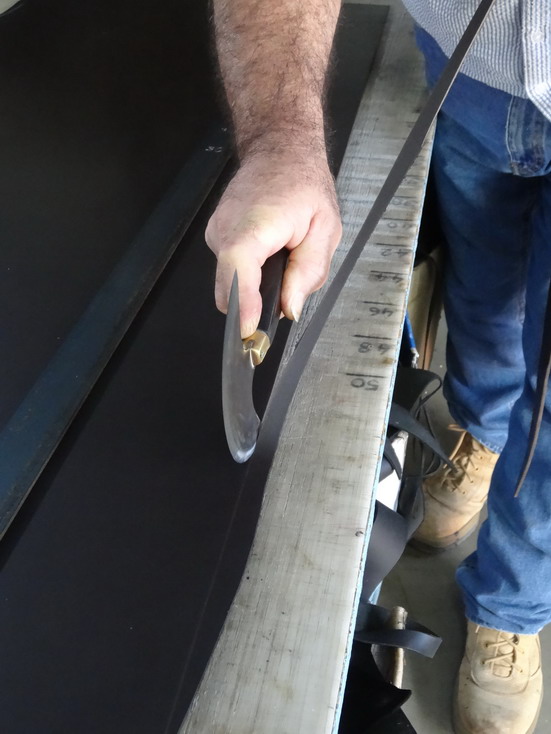
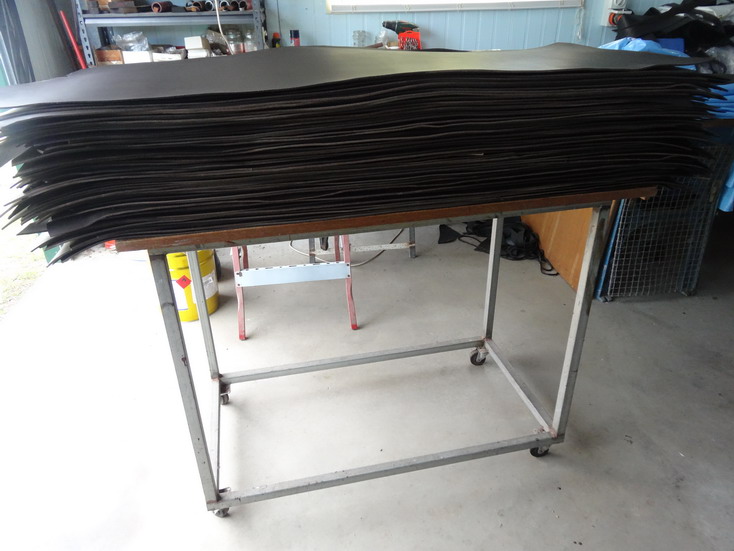
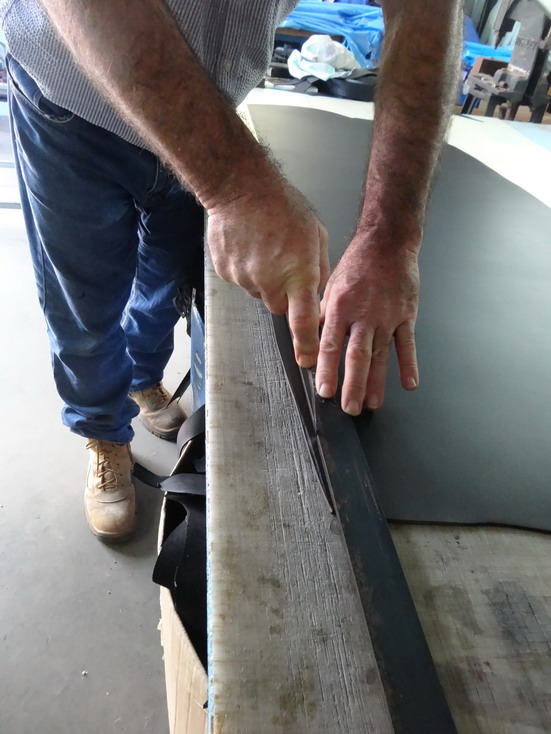
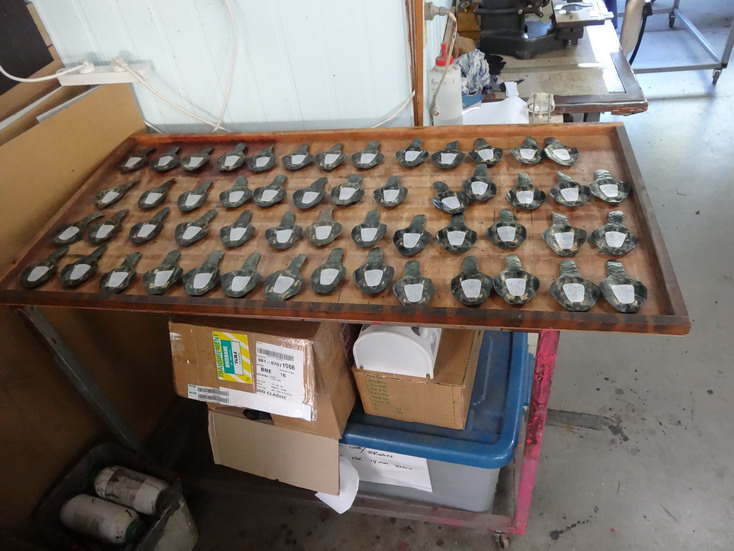
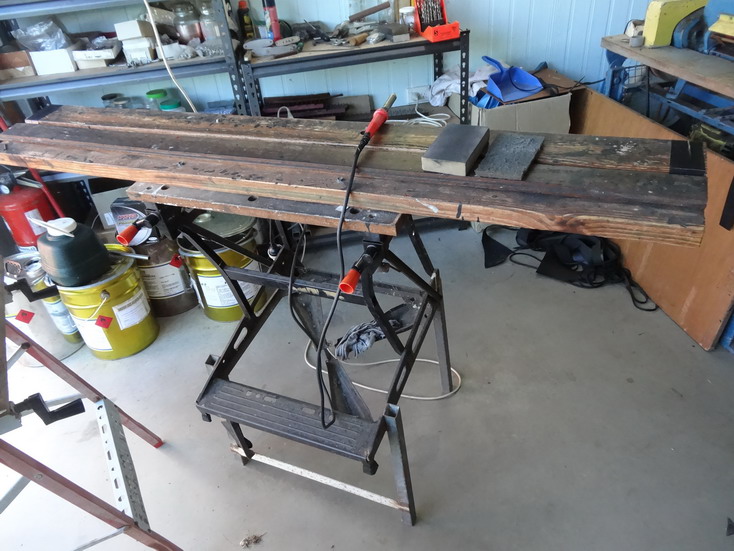
Please see attached pictures of how I am presently straightening up these 70 shoulders. I have to do this reasonably straight to next feed into the strap cutter and then split all to 2mm thick. Presently I am scribe cutting with the back of a pointy boot making knife and following this with the curved knife. This helps to keep my curve knife sharper longer due to it barely touching the cutting surface. I polish sharpen it once in this lot.The time to straighten this lot has just taken me 105 minutes(1.5min per). This time is to take of the trolley, straighten as shown and put onto another trolley. Any ideas appreciated and possibly rewarded.
-

Sewing a lining into leather bag - help needed
RockyAussie replied to jakc3's topic in How Do I Do That?
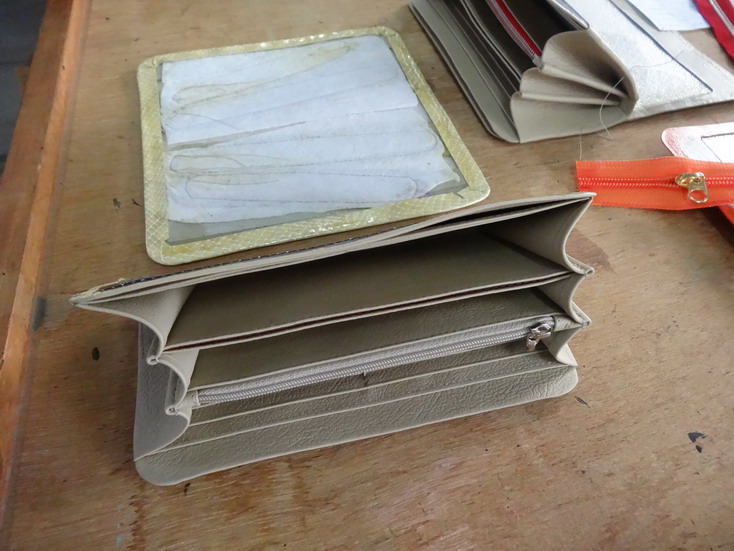
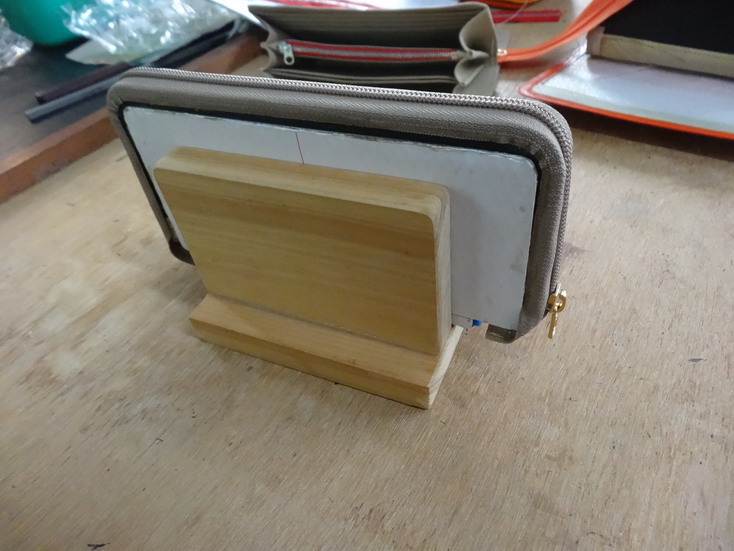
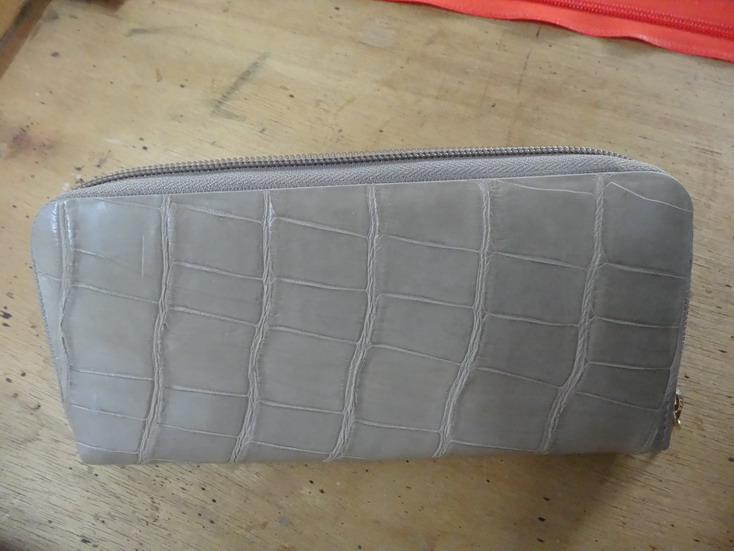
This may help,we have been making some of these purse designs today. They are not bag pics but are a little similar in construction.


-
Sewing a lining into leather bag - help needed
RockyAussie replied to jakc3's topic in How Do I Do That?
I would make up the lining as a separate piece with stiffeners in the 2 outer walls.If possible glue your zips to the outer edges of your liner first. Make up your outside like a bucket and insert your liner and glue to zip again then stitch around zip and through liner. -
Is there any reason the press could not be substituted with a moderate Drill press. A little dearer but could have a advantage by having a turntable for more intricate lining up and a variable height table as well. A jug cord type set up and it could revert to a drill press again if needed. Some times it helps to be able to have a lot more clearance for some jobs such as over the top of small product box lids that are already made up. Many embossing machines do not have much of a clearance gap. I just had to do today a lot of mods to get my embosser to be able to do 200 of the box lids as shown.

-
Serafil is no good by me and gives a lot of headaches with tension. I find it too slippery and shreds easily. Coats poly is better but try Strongbond from Shann it was called Venus and in my onion is the best by far. It is very strong and burns off well.I use it in all sizes. http://www.shann.com.au/product/amann-strongbond-thread-bonded-nylon/84
-
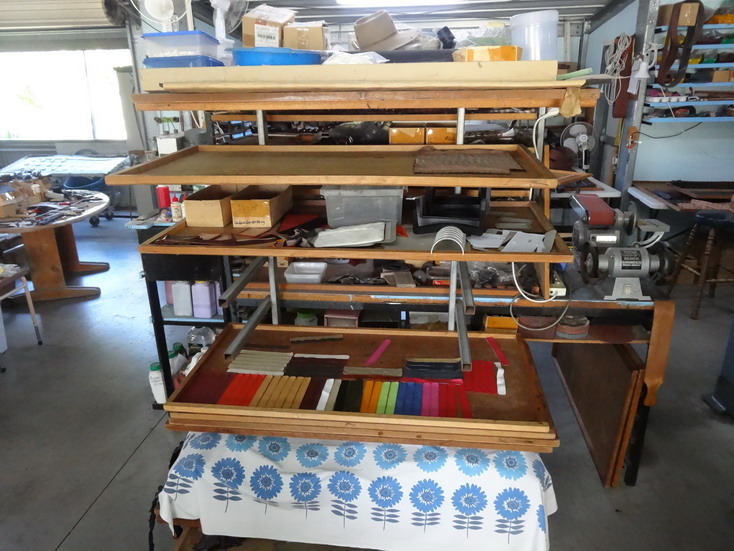
Hi Mike please see attached pics of various ways I use the trays I have made up.


-
Hi Mike 516, No for a lot of my production I have made up Trays that start as 8'x4' plywood and cut into 4 pieces making them 4'x2' then they get a 19mm or 3/4" quad border glue and attached to the top of each ply. I use the same trays for knife racking and general stacking of product pieces in processing.I will send some example pics this afternoon. When running the belts through I take from 1 trolley on the left and stack and build onto a right trolley. They normally take about 1/2 hr to dry between runs so I prefer to do runs of 50 to 100 at a time.
-
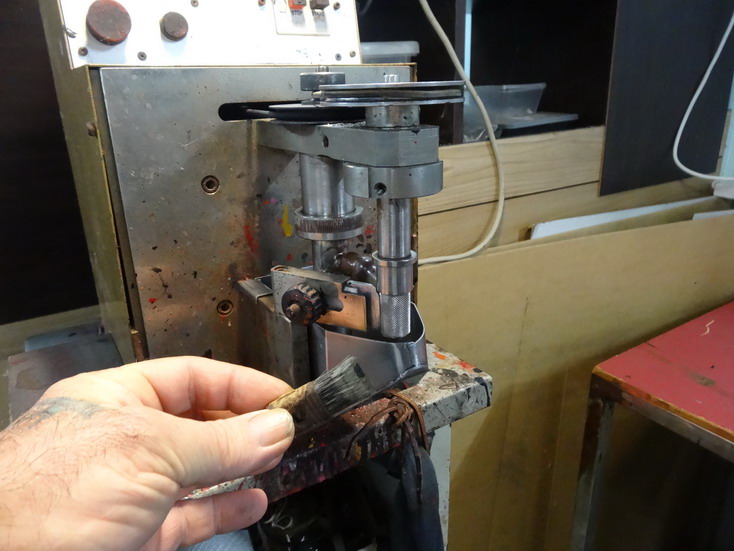
Hi WoodsideCo again, please see attached pics of single edge machine with my modifications. With the aluminum wiper I don't need to take it off to clean it and a wet paper towel work fine to just wipe off any paint.This keeps a more even layer of paint up and down the shaft.Shown in my hand is the type of brush the machine would normally be supplied with.

-
Hi Cjmt, Texon Australia obtained them for me from Italy. If you check OMAC and GALLI S.p.a.you should have some luck. If you want to see the biggest range of leather working gear in your life see this link and download the catalogue http://www.tancompany.com/en/index.html
-
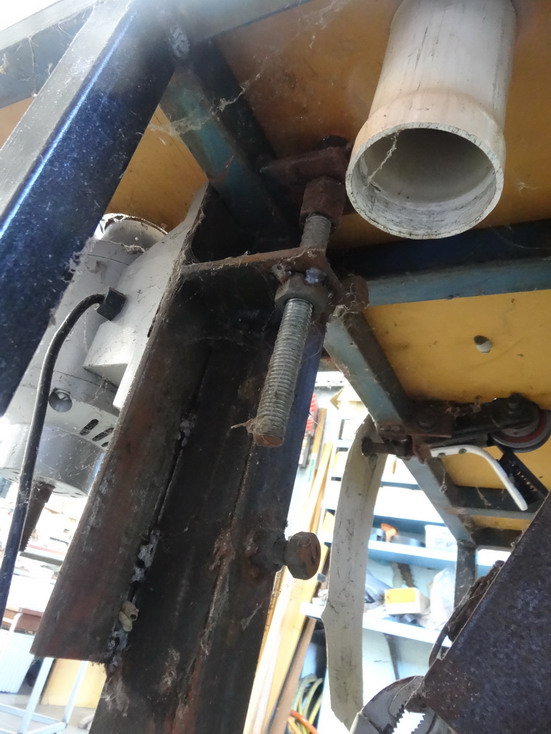
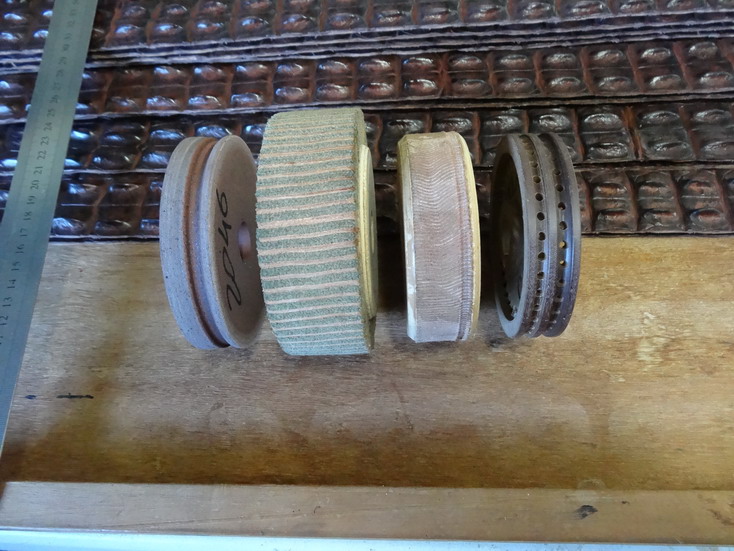
Hi WoodsideCo, The wheels are aluminum about 90mm dia and 23mm thick with knurling on the paint edge. The brass plates attached to the paint buckets are adjustable to allow varience of the paint thickness.These are held in place on stainless shafts with nuts which I undo for cleaning up purposes. Single edge machines are not all that expensive and a lot more available so I have not bothered to make one up before.The only thing I have done on single edge machines is to replace the brushes with an aluminum wiper instead. This makes it way easier to clean up and and get better control of the paint thickness. I will get some pics done and send later today.
-
Biro doesn'5 mark the F5 key but a pencil does. Thanks for the tip. Fingers are too big.
-
Help! Reverse stitch too long or forward too short??
RockyAussie replied to kwalk20's topic in Leather Sewing Machines
Kwalk I don't know this machine but You mentioned adjusting the position of the needle. What did you do when you did that? There is in my experience no way that the needle should be touching the bobbin unless perhaps your needle is too long (wrong needle) or not pushed up all the way. If you are on very thin leather or material the bump may be just your feed dog needing to be lowered down a bit. Sorry if I am not much help, I hope someone familiar with this machine will jump in soon. Best of luck Brian -
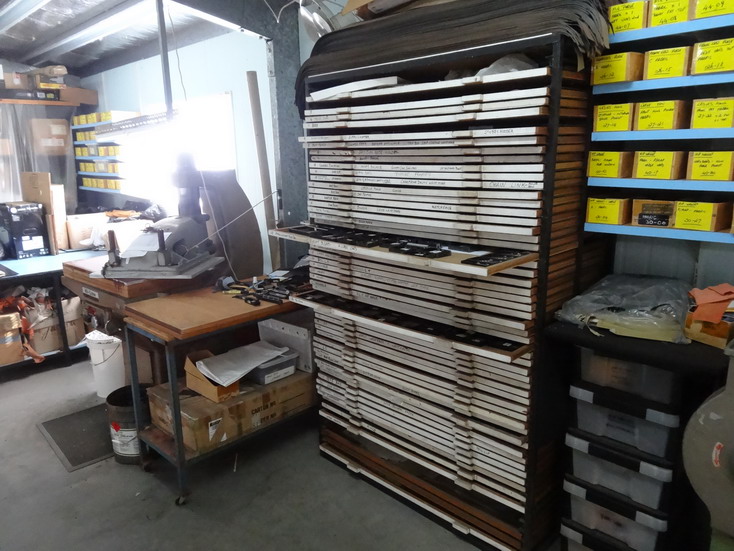
Weather wise then now would be the best time, as its bloody cold by our standards. AT least it doesn't rain much here in winter. I admit that I mostly use for my dress belts a 40m (#69) thread due to them having a 1.6 to 1.8mm filler which makes mis stitching a common thing to watch for. These dress belts are coc top and chrome liner.Can I ask what type of thread you are using and needle style? A terko satin M25 may be a better option if you want a thicker look as being softer than Strongbond (ex Venus) it tends to lay down flatter and appears near as wide as the M20 (#138). There is a spare double bed in the factory next to our cabin if you want to find a weekend sometime.We are about 20 k out of Rocky and 3k short of the Caves area on our property.Google Garn Hatch Lane Etna Creek and you should see a map showing where we are. This is an easement on our place. See pic of the factory. Regards Brian

-
Do you mean by this that if a person had arthritic hands,fingers and wrists, what would be the easiest method for cutting leather to an exact size? What medium are you wanting to cut and what sort of shapes? Cutting straight lines or parallel lines or or glove shapes?Unfortunantly there are a LOT of different methods for cutting leather and among them I have not seen any sliding compund saws used. I have seen a blade about 4' round like in a sawmill without teeth for cutting like huge amount of thick leather. That was in a place that made round leather strapping as used in some machinery.Lasers and water jet cutters no doubt would be easy on the hands but equally so would a clicker press.
-
Help! Reverse stitch too long or forward too short??
RockyAussie replied to kwalk20's topic in Leather Sewing Machines
Hi Kwalk20, The speed reducer should not have done anything to affect this. My first thing here would be to 1 check that my bobbin is smooth and the tension is not over tight for whatever material you are using and 2 My top tension is not to tight for this weight of material. Check that the top thread start to finish is not caught up anywhere.I am sorry if you have already done all this but most often a problem comes down to some silly little catch up in the thread line. -
Dremel cutting blade and polish mate. When turning at belt tip corners and against the guide remember the force against the needle presses it away from the hook. The angle of the belt here also needs to be held upward more than every where else.Anyway why not use the post for this it helps with the curve around. STOP laughing I am serious I do but i hate flat beds. Regards Brian.... PS come up to Rocky sometime and swap notes.
-
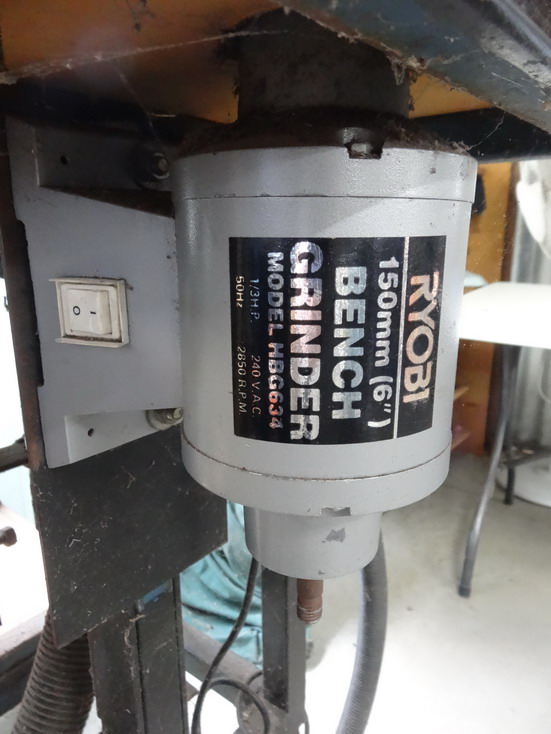
An L shape about 1/4" thick minimum with little corner supports can be adapted on to the flange area and attached by the 4 Allen heads OK. There are a few things you can make use of with the tapered spindle but for under $50.00 to $100.00au here a good bench grinder would be an easier option giving a more useful horsepower rating.
-
Hi Woodside Co, Yes they would be the same type of wheels but mine are from Italy. I have found it a big advantage being able to move the whole grinder up and down to get the groove to pressure exactly. Also by having the extra table room at front allows me to put in a swiveling pressure pusher so to speak. This allows a more even pressure than just pressing by hand and when you have to 100 belts at a time like me it sure saves the fingers. Having the variable speed would be an advantage at times I think. .Be careful not to lathe up your 20mm piece until after you have all the wheels you want to use as they are not all quite the same size.As for belt edging machine I made that about 20 years ago before for I stated using Auto Cad for all my drawing. Basically it has a chain inside that by using a jockey wheel and a spring tensioner the back side of the chain allows the wheels to spin in the directions opposite. That was the hardest part to work out. Having a variable speed here would be Bull S. The adjustable wipers are not brushes like some have,as I found they do not give an even enough thickness to the edging and crocodile stuff has to be extra precise in the finished quality.You need a single edger for doing the tips with any finesse. Cost of materials without the motor and gearbox about $100 to $150au and box and motor I would guess about $250 approx. I am happy to give a few measurement and internal pics etc but if you want Cad drawings and fuller instructions I'd need a week and would like $100 in my bank for the time.(The CAD stuff would only be to you personally) You would need a good size drill press or mill if you have it,and a good competent welder as the back and front plates have to be dead square and in line with each other. Also a long reamer for the sintered bronze bushes front to back. (about 100mm spacing) Hope that helps and let me know if you want to know more. Regards Brian
-
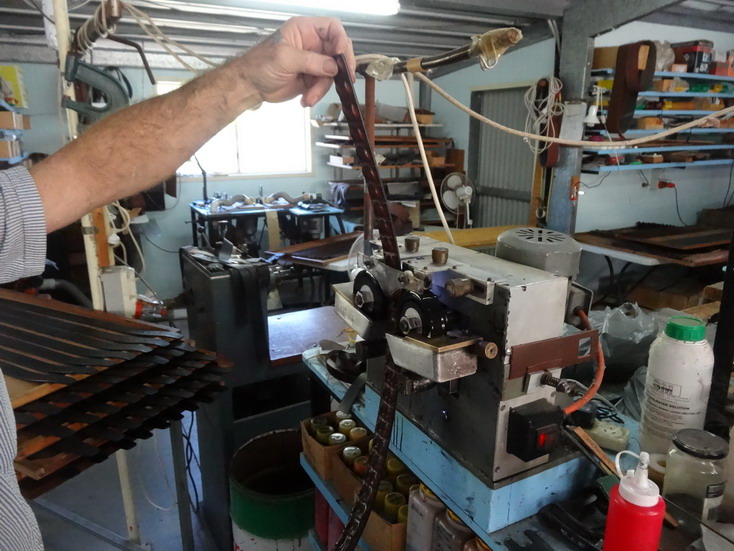
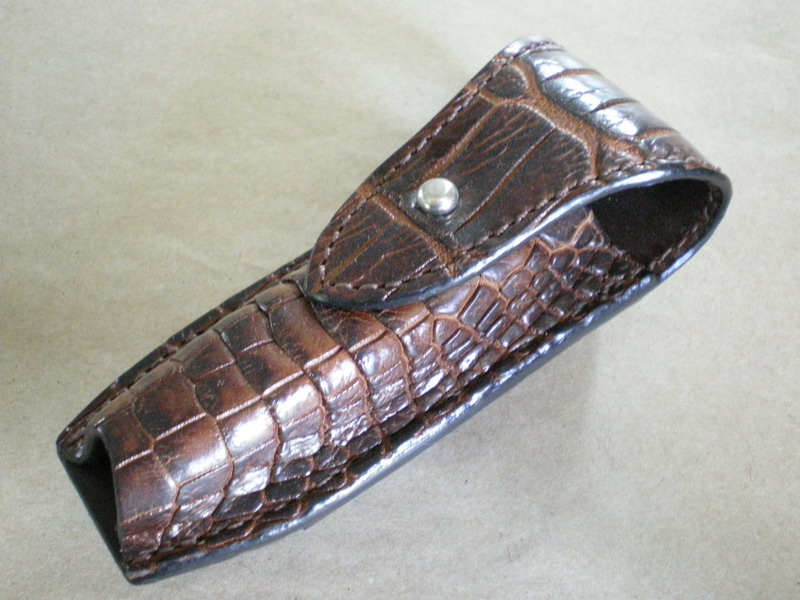
Yes The grub screws can work but make sure the hole to shaft is quite a firm fit. The machine is helpful for doing a lot but not in my experience for finishing of on the edge paints. Wax type finishing yes.Motors like this normally come with foot attachments to enable bolting down. By the picture below you should see I use a lot of this edging for its strength and stretch properties.The machine shown is another of my own that I have built due to other machines not being suitable to the horn-back crocodile structure.
-
These are for the fabric on the back of the credit card pockets? what does the long one do?
-
What I was trying to say is I don't think you can use a rotating wheel and get any joy on those type of edge paints. Some finish grinding before edging application yes. I have found the iron and other stuff I've shown in the pictures will work better and quicker. I think if you don't have it a polishing set up would be more worth spending your time on. I would love to be proved wrong and if so please inform me.
-
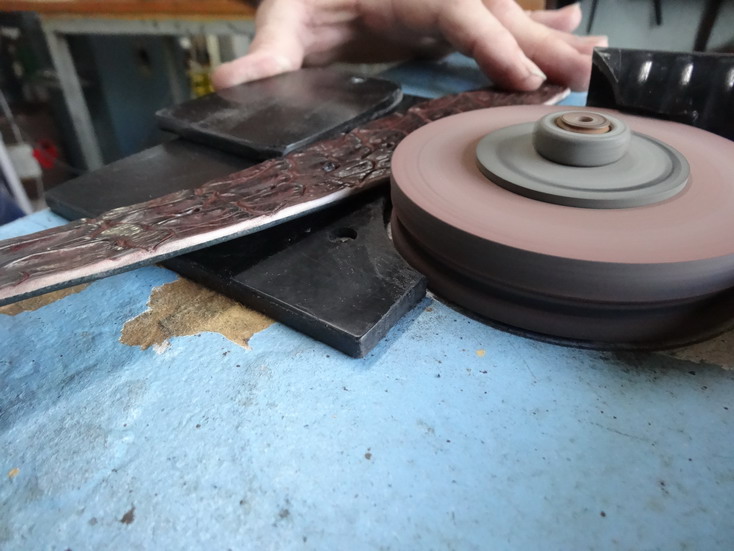
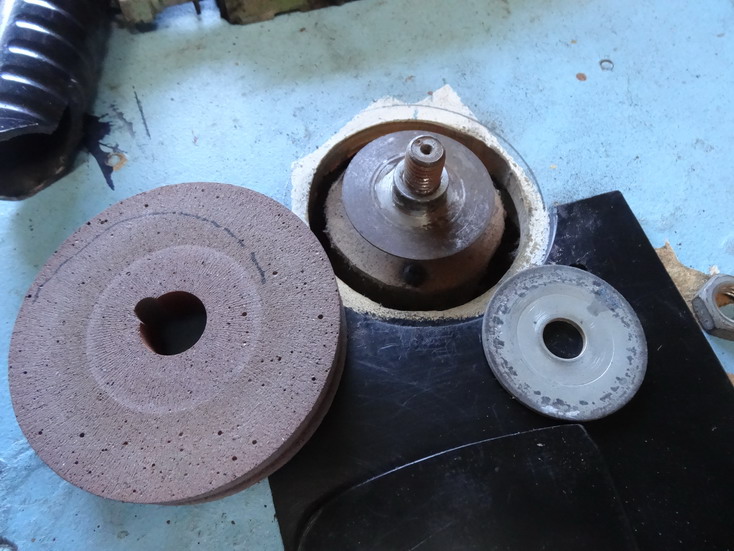
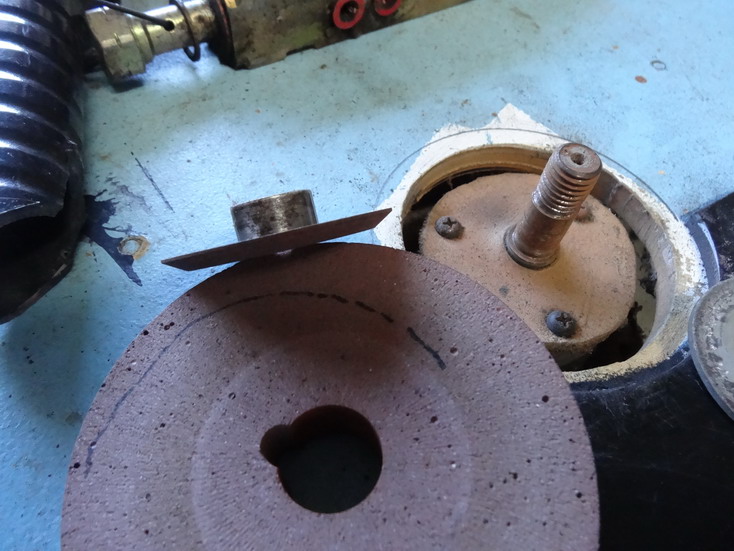
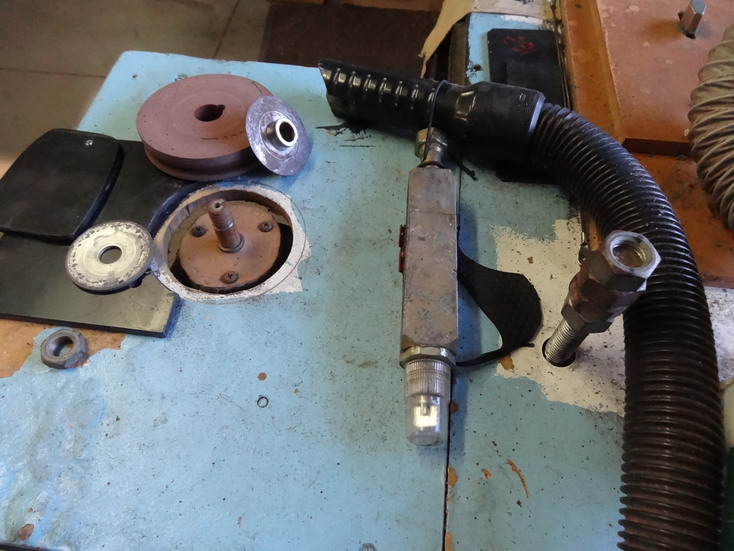
Hi Johnnywalks, I am sorry that I had not read your entire post on this before. Now I think I see what you are trying to do. I wish I knew what other machinery you have, but what you have here as far as my judgement goes will be fine to do an edge grinding machine. I have attached pics to show how I have made something similar. Mine my look rough but I can move the whole motor up and down to apply pressure in the best place easily.Problem though is that using these type of edge paints in my experience is not much help with these type of wheels other than the 80 grit rubberized wheel. If you get the leather too smooth and shiny the paint will peel of easily. I use these edgings every day and you have to remember that the leather in the first instance needs to be sanded inward toward the middle or the pressure will flair your edges out. After I have finished my bevel sanding I then sometimes mostly on thicker materials like my belts use the grinder to nicely round out the shape. The horsepower of your motor would not be much use for polishing and you would be better to look for about a 2 hp motor for that. I'll cover that in a later post.This motor has a receiving hole that you can make use of the thread. Therefor you only need a flange made up to neatly go over this shaft and shaped a bit like mine shown. Get an engineering shop to lathe it for you and make sure the height allows you to put in the screw and put pressure down.No grub screws needed. One direction it will want to undo so make sure that switch can not be used in the wrong direction.Note the leather piece made up to stop grit getting down into the bearings.If you don't have a small belt sander grinder set up I would be getting this first.The pics showing the soldering iron (light dimmer switch)and the smooth sanding pad and the grey scotch brite material which is the smoothest are some of the most useful tools you could ever want for these type of edging. The workhorse with self made attachments is for doing belt lengths. DAM I hope this is of help.

-
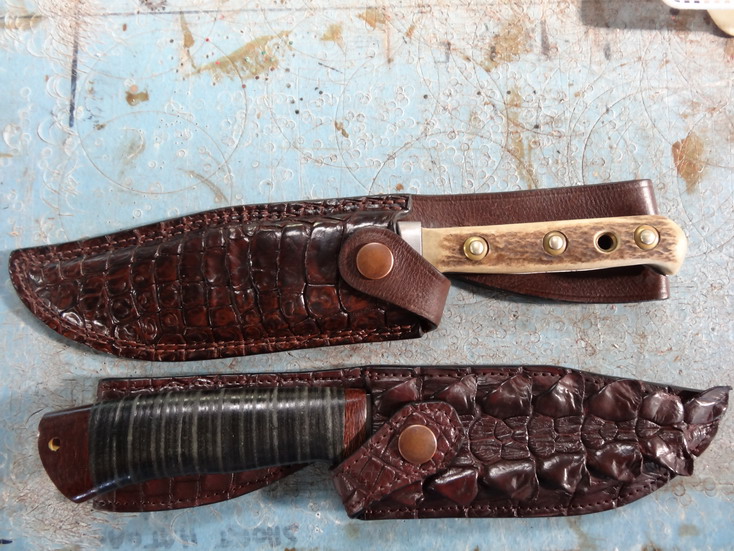
Hi Two Feathers, I have read that there is ways to do that but I have not ever tried. I always wet mold my veg as a lining so to speak and thin and stretch my exotic and attach over once the veg is dry and set. See attached pic as an example.
-
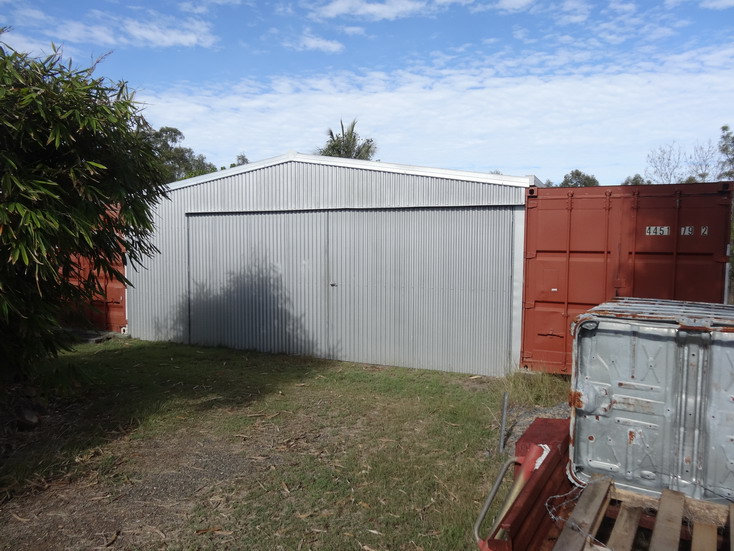
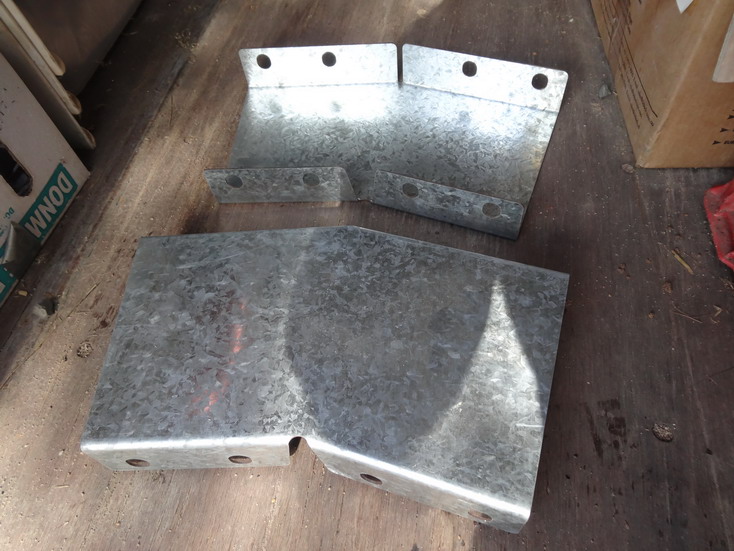
I always run out of room but here is my latest solution to needing more space and security.I built it myself from two 40 foot shipping containers which cost second hand about 3,500 each (The big ones work out a lot cheaper per square meter) and the steel for the rest cost about $11,000. The apex joins I copied the design from my larger factory and got them laser cut and folded. They are for 200mm C channel and in total I went 7.5meters wide between containers.I can send the DWG files for the laser cutting if needed. This is for a cyclone area and was put to the test at the highest rating on Feburary 2015 and came through fine. It may be of some help to think outside the norm. Regards Brian