RockyAussie
-
Posts
3,265 -
Joined
-
Last visited
Content Type
Profiles
Forums
Events
Blogs
Gallery
Store
Everything posted by RockyAussie
-
What country are you from? Sometimes I use insole material from shoe manufacturing suppliers and more often I use polypropylene sheeting due to being able to flex and spring back to shape and totally waterproof of course. The insole board for coasters as like the pic.
-
 I'd Say just take out the key and get a extension adapter with the right hole size and grub screw it on. What horsepower have you got there and what is the shaft diameter?
 -
Belt Leather Cracking At Buckle Fold - How To Eliminate It?
RockyAussie replied to CustomDoug's topic in How Do I Do That?
TRY this trick. If it is crap leather it will break anyway and you perhaps should not use it. Get a scrap piece and practice first this, warm up a soldering ironquite hot, and put the flesh side against the upper shank (not the tip)and pull it around for a couple of seconds.Then hold firm for a few seconds and quickly fold the leather over tight and keep held for about 10 seconds. It should now want to stay in this folded position.The flesh side will show a bit of singeing but in this position should not matter. I use heat to soften and shape with a heat gun a lot but it does take some practice. Regards Brian -
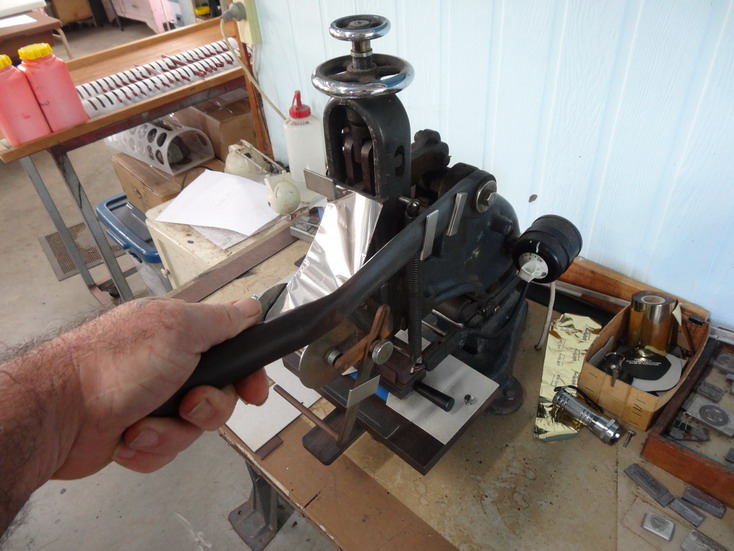
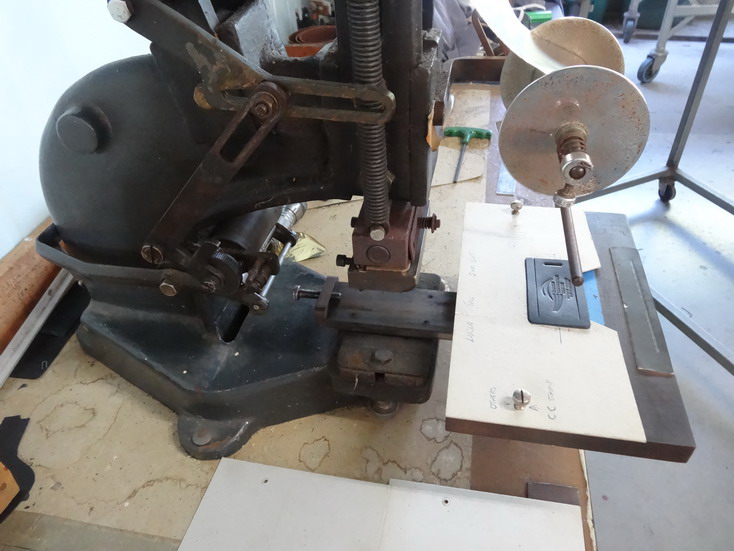
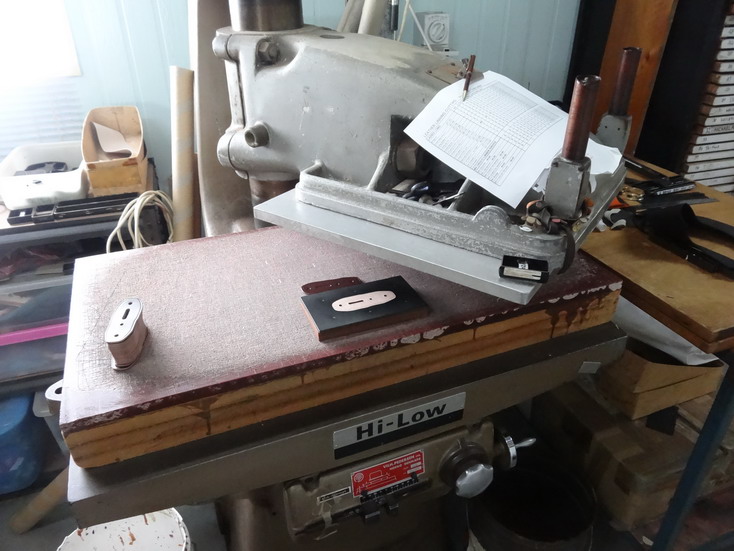
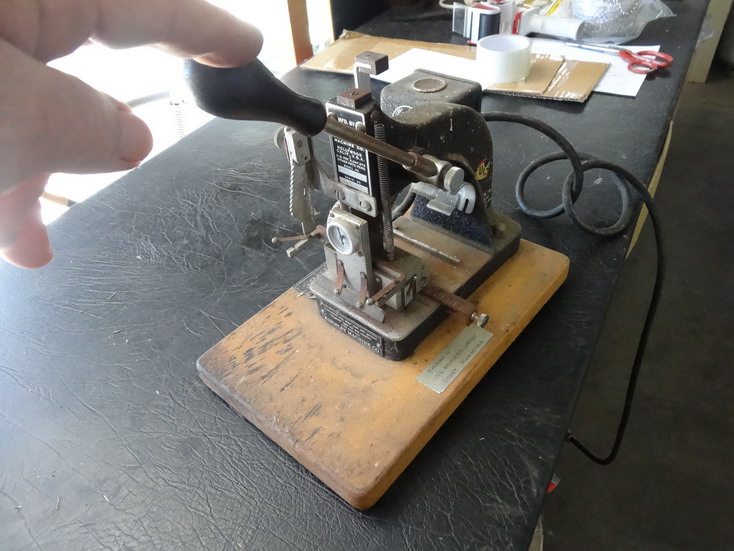
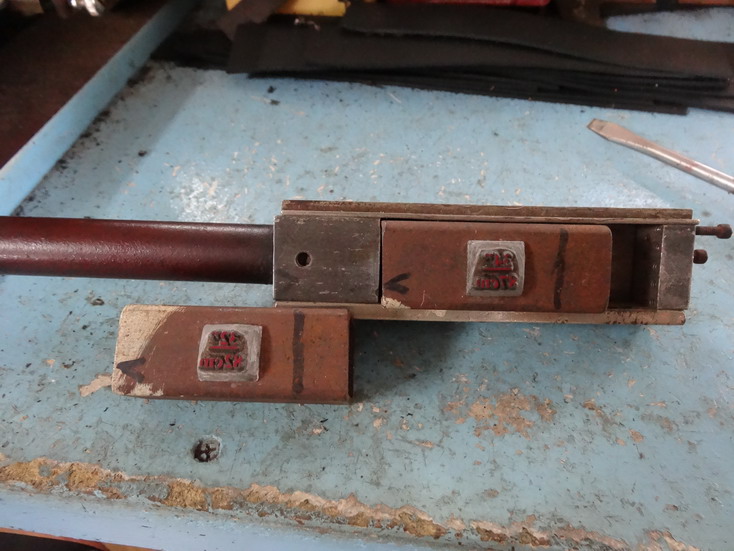
Love it Mike, I've been thinking about making one up out of a drill press and I see now it would be a good idea especially with the turn table being able to spin in the center. Well for now dclok1 I cant see your pics.Here are some of mine and another idea that may be useful.I do have an air driven one with automatic timer but its packed away in one of the shipping containers at the moment. I threw in the clicker press to show that pressure only on a good veg leather works quite OK for some applications.I just get a knife made about 3mm smaller and sand down the blade until I have about the thickness I want and glue it into some firm veg high enough to cradle the extension piece. With the large first shown I hope press I have put in on the bottom table a couple of thumb screws which I just undo to change to different cut out boards.The wheel at the top allows fine pressure adjustments and the design allows extreme pressure to be applied quite easily.The last pic with the size stamps is there to show how I quickly change size stamps for the belts. I put in a large magnet which stays in the block so I don't need to undo screws every change over. The stamps I get made up in a long row at the embossing plate maker's and I just cut them down to size and attach to the box tubes. Talk to Spiro or John at TEXON Australia in Melbourne I think they should know how to help you. H Leffler + son maybe as well. John will have my contact details if you want them. Regards Brian first


-
None of the stamping shown by Mike above would be done by a hand held machine. Where in Aus are you mate? I have a few machines that I will try and send a pic or 2 by tomorrow. Can you show a pic of what you are presently using?. My favorite machine I can adjust the pressure down to what I want and it is easy to set up a vast different amount of jigs for holding different pieces. Oh and welcome.
-
Installing speed reducer on Friday Hope it goes well
RockyAussie replied to Gregspitz's topic in Leather Sewing Machines
I have replaced the aorta in several patients so I am hoping this is easier. So long as they weren't there to get a tooth pulled or something else I'd recon it should turn OK! Did they Live? just wondering. -
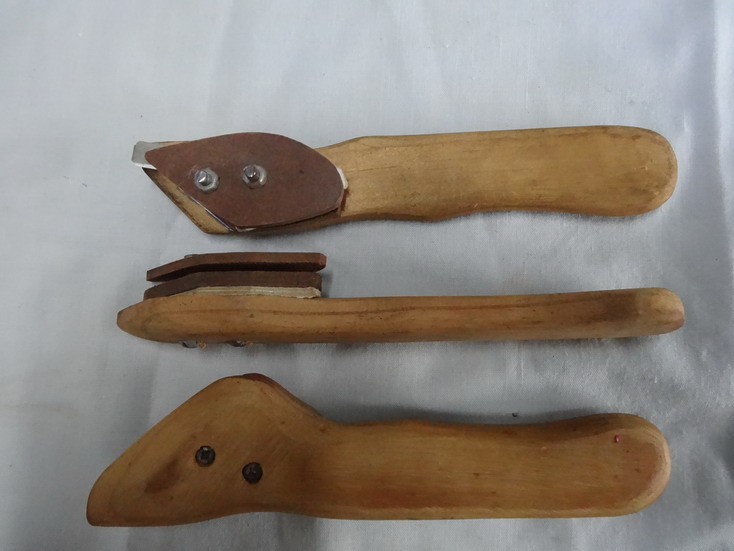
HI Zuludog. The tools in the pics are just something I came up with when I had to do a few hundred french edged wallets and once I made 1 and it worked they only took about 1/2 hour each to knock up.
-
My advise is to take it in to a shoe repair shop that does this type of work as different leathers require different procedures to achieve the correct results. For many years I did this type of work including making shoes and I would not think about advising you without seeing the real shoes first.
-
Check that your bobbin is not catching or very tight to pull. If it is hard to pull loosen the little spring on the bobbin 1/4 turn and try again. If it is catching find out why. If the bobbin is good the First thing is to tighten top tension knob clockwise until you see the knots cumming to the top and then back of until they are middleish. Tension disks are like you gripping the thread between your fingers, the tighter you hold the more it will come in that direction. Thick and stiff leathers tight top and bottom. Thin and softer leathers less top and bottom.
-
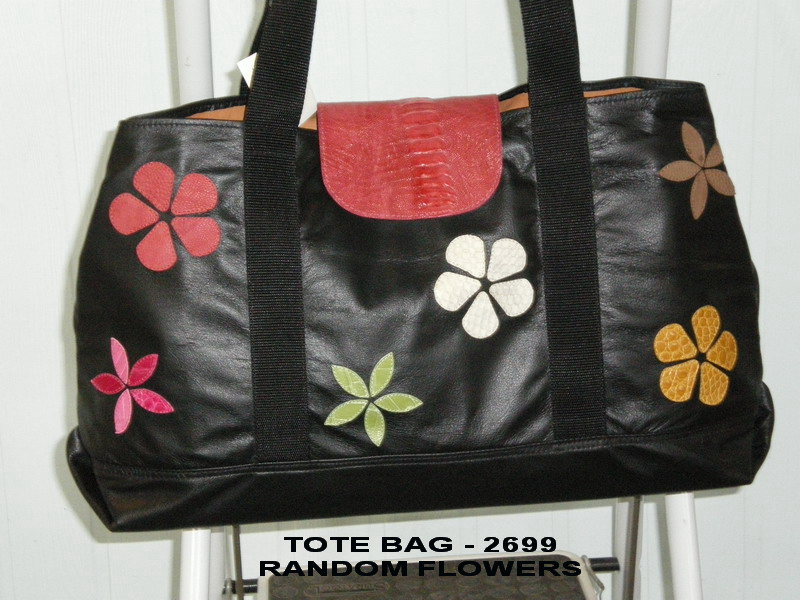
From what I understand you have been trying it and it is going to fast. I would like to see a picture or 2 of the underneath side. Seldom will a binding machine be set up with a reducer in standard form and that MAY be the way to go. I would suspect though if you can find the extra $ get yourself a set up like the one in the video you had in. They should allow you to 1 stitch then stop with the needle still in and believe me that lets me get away with some very complicated stitching at times. Please see pics below of two of the tote bag styles we make. Without the vari stop type of control I would not bother with any thing like this level of maneuvering. Without a reducer a trick that can help when learning is to put a block of wood under the speed pedal and if needed a bit of foam attached to it as well. Bottom pulley on motor should be around 50mm (2")

-
Can we just be blunt about this? Sorry NO
-
Just recently I saw a french edge discussion and thought I would share one of the many tools I developed over the years which some might find helpful. This one starts off as a piece of pine timber around 6" long by 1+1/2" x 3/8' (180x40x10mm) and a couple of bits of Masonite or whatever. To alter the width wider just stack stiff cardboard bits until you have the desired cutting width and tighten the razor blade down on an angle to allow easy cutting.Until you become proficient in its use put something like a piece of plastic under to not cut into the underneath piece.


-
Hi Jackmitch, If you have the setup as shown in the vidio. I would have easily payed double that amout here. To slow it up try turning the black large knob anti clockwise. I am not sure of the other flip up and down ones but I think they should allow you to have needle stay down when you stop which is handy for corners. Gottaknow's gottaknow. Look after it and it will look after you.
-
My Latest Cellphone Case
RockyAussie replied to bob21804's topic in Purses, Wallets, Belts and Miscellaneous Pocket Items
-
I've been waiting for over 2 years for Tandy to wake up to the fact that there snaps are now made wrong. To be specific I am talking about the segma type snaps. All that has happened here in Australia is the price has gone up near double. I buy them by the thousands and that means nothing. The female part or should I say receiving part if you look at the slots and revolve it around you will see the slots don't stop equally all the way around and therefor when compressed they end up skewing sideways. This means that on 1 side the metal will be trying to push the male part out. Also to compound this problem now the male part is almost straight and has no knob. I am thinking if this goes on this answer will have to go into the adult section. Try the snaps from Ohio travel bag I think they could be better. Let us know if not but I get mine from a supplier over here.https://ohiotravelbag.com/
-
OK this driving me mad now. I don't often get this problem. I went and checked a couple of my machines and the vari stops are set to stop just as the needle is coming up a bit. If i twist the leather around a lot the thread can come out of the needle groove and I get a very small pull to the bottom. Then I tried just putting the needle barely in but enough to spin the leather about quite safely and no problems at all. I noticed that the thread tension check spring is under tension at this point but lifting the feet did not effect it. Maybe that might be a safer way? I respect all of your feedback and look forward to your thoughts.
-
Loose Stitching backside on corners ?
RockyAussie replied to littlewing6283's topic in Leather Sewing Machines
Not sure of the machine but do you fully lift the foot or feet between doing the turn? When most machines lift the feet all the way up they loosen the top thread discs. If you are lifting all the way up try lifting just enough to not open the discs. -
You said anything that will make my job easier and FASTER---- Now I feel like a torment. Oh well Rock on
-
Juki 1541S bobbin case problem
RockyAussie replied to stickandtin's topic in Leather Sewing Machines
Now that is something worth learning and I must say that gottaknow's input and Uwe"s into this forum alone makes it worth visiting. That tip is well worth remembering. -
What is this leather edge binding techniqhue called?
RockyAussie replied to Colt W Knight's topic in How Do I Do That?
I ground down a spare foot to enable it to get closer to the roll but if you grind back to far it will have a tendency for you to put the needle into the roll. So grind and try,grind and try. I've seen your work and know it will be no problem. Also try a plastic tapered ruler under the line when your trimming it will help. -
Juki 1541S bobbin case problem
RockyAussie replied to stickandtin's topic in Leather Sewing Machines
Just carefully try it without the disk I have a pfaff which I use with a disc like that and 1 without the disk and both work fine. The disc just takes out some of the free play and if it has become bent than it will be no good. Make sure there is no catching on the bobbin without the disc in.Does the bobbin turn anticlockwise when you pull the thread? -
What is this leather edge binding techniqhue called?
RockyAussie replied to Colt W Knight's topic in How Do I Do That?
The picture you have shown is what I call a french edge and some would call a french rolled edge. It is easier if you don't make your corners too sharp and don't pull the corners to tight as you pull the strip around them. I usually work out my width of strip needed, skive 1/2" back about and start face to face and free hand stitch it around on the sewing machine with the 2 edges level. Finish stitching an inch or 2 short, cut off to match the skive and skive the top piece.Glue together and finish the stitch. Then just put a line of glue along the stitch all the way around and pull the strip over and flog it down until it takes up the shape. I normally stitch then up against the roll but pick where you like the picture you supplied shows it some distance away from the roll. I normally do a bit of glue after hammering down to hold everything in place. Sometimes you may want to trim up close to where you have stitched and that can be a bit of an art in itself. Hope that helps -
@Sovran81 I Did do the hole through and quite a lot of other as well and like you was convinced it would work BUT the top thread has to be able to completely go over the bobbin some how or you get a chain stitch which is all I could ever get. If there were a way of doing it, it would be worth millions I know. Please study the full process before spending to much on it. Trust me I wish you the best of Luck.
-
MOD without bobbin--- I tried a hole through the bottom and all I got was a chain stitcher.
-
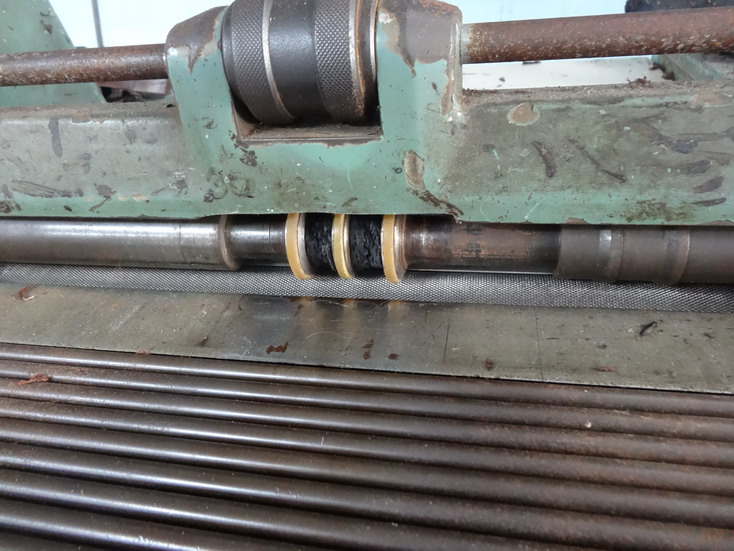
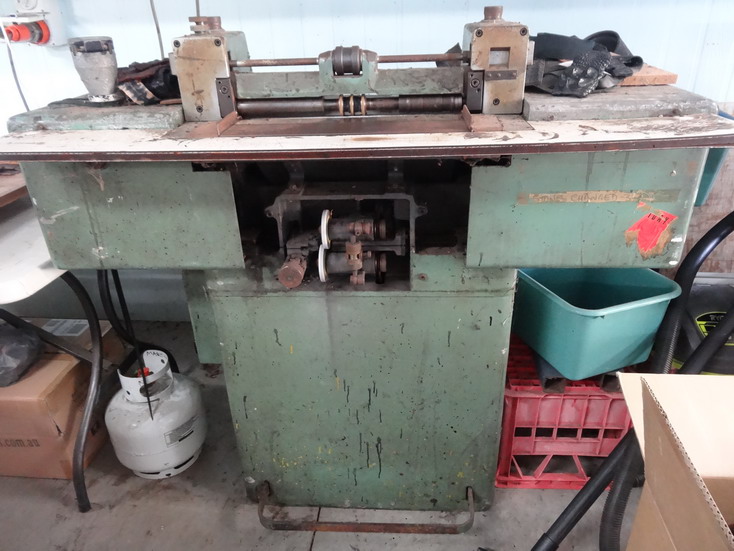
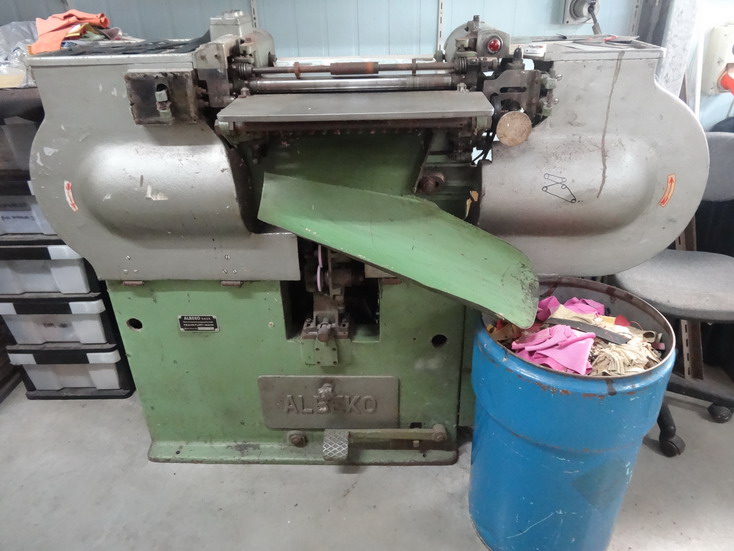
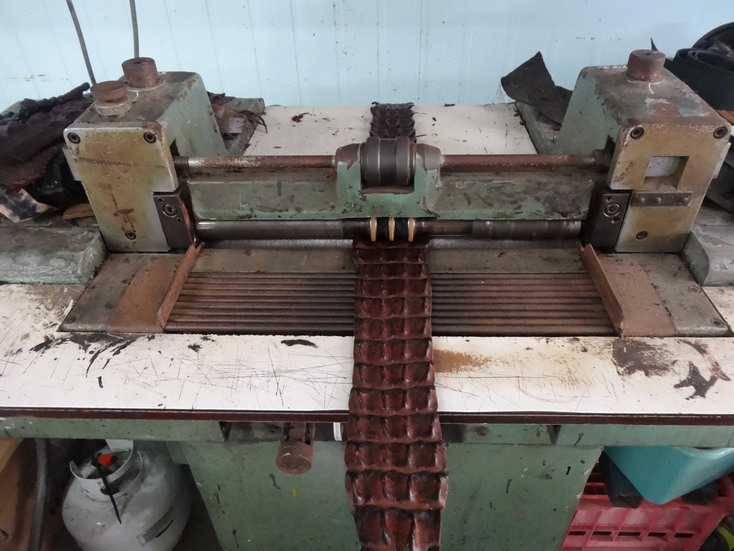
I have been lucky to pick up both of mine 2nd hand for about $5,000au each About $4,000us dollars at a guess. Both are pretty old and done a lot of work but they are built to last and have served me well. I do tend to butcher machines a bit as necessary and it helps to be mechanically minded but a couple of pics should help. The Comoga I mostly save for doing the croc backstraps and here you see the special shaped rubber rollers I made to enable me to run these backstraps through. This part I can alter for various width belts. The Albeko is great in that the waste comes to the front for ease of getting rid of. This one does most of our work for splitting wallet pockets etc but also handles heavy belt backing leather. Both have sharpening stones that enable you to bring the blade forward to touch which normally is done within a few seconds. Thickness is done by moving the roller at the top. I must say that the time saved in sharpening and splitting time (about 10 secs for a belt) makes these a very good investment.