


RockyAussie
-
Posts
3,265 -
Joined
-
Last visited
Content Type
Profiles
Forums
Events
Blogs
Gallery
Store
Everything posted by RockyAussie
-

Quality and presentation of stitching
RockyAussie replied to Spyros's topic in Leather Sewing Machines
What @Constabulary said is true but also softer type upholstery type leathers done on a non toothed dog foot (you should have one on the cb4500)and not too thin top feet and good thread tension you would be hard pressed to tell the difference. A machine with the right foot pressure and right dog foot hole size can be hard to tell except for the stitch angle on the bottom side can sometimes give it away. -
VERY talented design work and a video well worth a look.
-
For what its worth I have found on most of my machines that when the bobbin is below 1/4 full and I am sewing light stuff I have to turn the top tension down to compensate. This is on the metal ones. Normally I go back about 1/4 to 1/2 a turn. backlash springs may help but the direction the bobbin is loaded in the clockwise or anti clockwise will make a fair difference as well sometimes.
-
The laser is quicker and the acrylic is harder than the pla+ and therefore does a crisper neater cut into the leather. keep in mind that a 2.5 watt laser is still pretty slow and a 5 watt would be 2 times faster and a bigger tube type as @PastorBob showed above would likely do the job in only a few minutes. I have not tried it yet but I think it MAY be possible to even make a press knife out of this acrylic for light weight leathers. I have been able to get an impression left behind in the hdpe cutting board and that surprised me a lot.
-
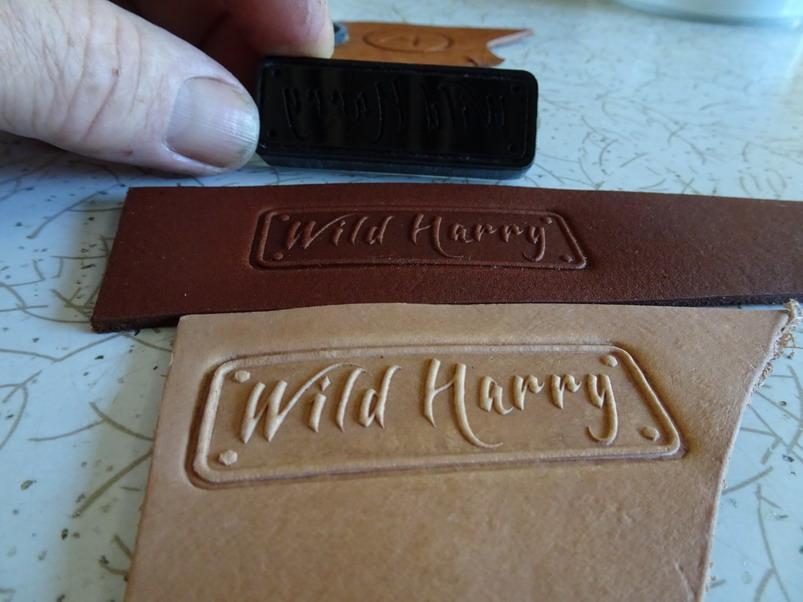
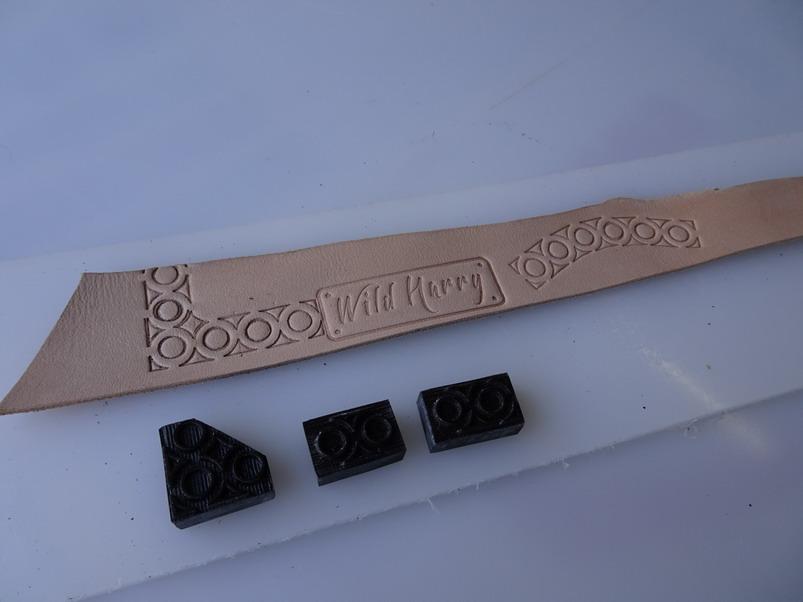
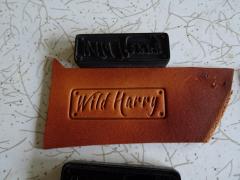
And the design has a lot to do with it as well. In the Wild Harry pictures above you will see where in one the letters are pushed in and the other where the letters are protruding out. There is something like 3 times more pressure needed to press the background in. Good thing though is that it costs maybe a one $ of material to find out against $100 for a metal one you cant push in either. Also great for testing the design before committing to getting a metal one made up. Also great if you want to print the font of your choice out and make your own letter set. WAY more options to explore.
-
Very good indeed. I think you gunna master this process real quick and save a whole lot of $$$$$ on stamps as well.
-
I think you may have forgot the link there Tom. Was curious myself and found this vid which may help some -
-
The only way I would be doing this would be by using an edge paint. You let the first coat or 2 soak in and fill all the voids and then start sanding or sometimes using an iron to smooth out the roughness before applying some further coats. Some people use PVA wood glue as well but I think that would depend on the end use application taking into account the amount of flexing it needs to withstand and so on.
-
Clear will not work with a diode laser but is good with the tube ones.
-
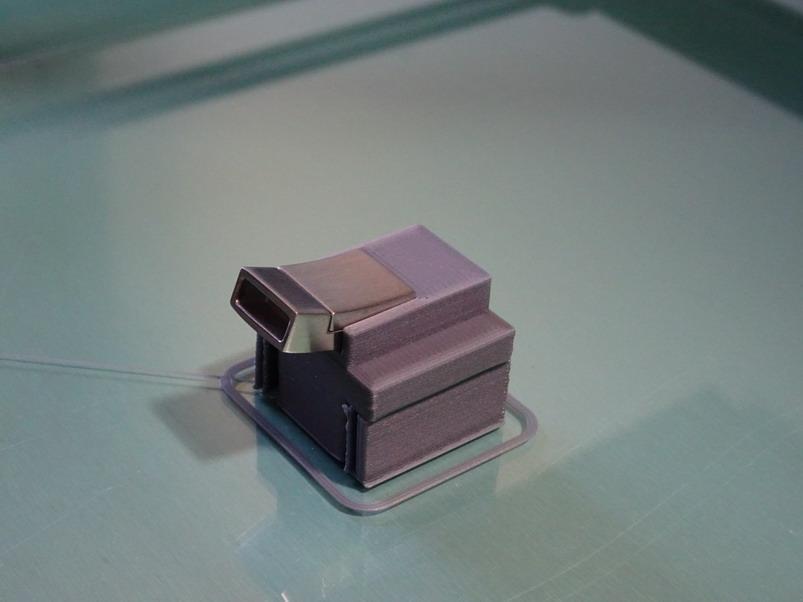
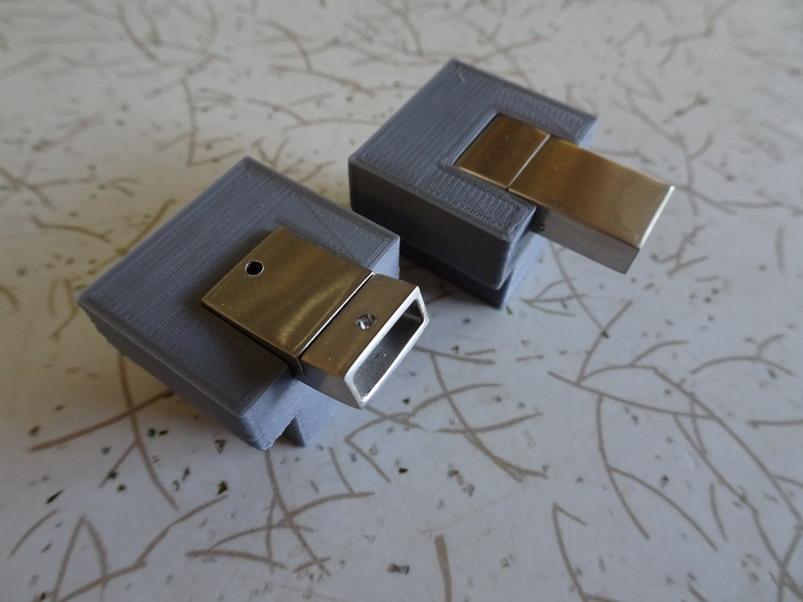
I think if you glue the braid ends first you could still use the drill and pin method for the extra security. here are a couple of pics that show how I 3d printed up some holders for the drill press this weekend. The rod I have used is a 1.5mm alloy welding rod which fits the hole nice and firmly and taps down nice as well. Note that for the curved style ones they need to have the angle put in to keep the shape square when you drill.


-
Let us know how you go with the 5 watt. I have one as well but have not tried with it. The narrower beam on the 2.5 watt could be better for the detail but the faster speed would be nice. Try 400 mm per minute should get you close. Thanks @battlemunky I wish I had more time for more posts like this and I have a whole lot more that I need to get loaded backing up.
-
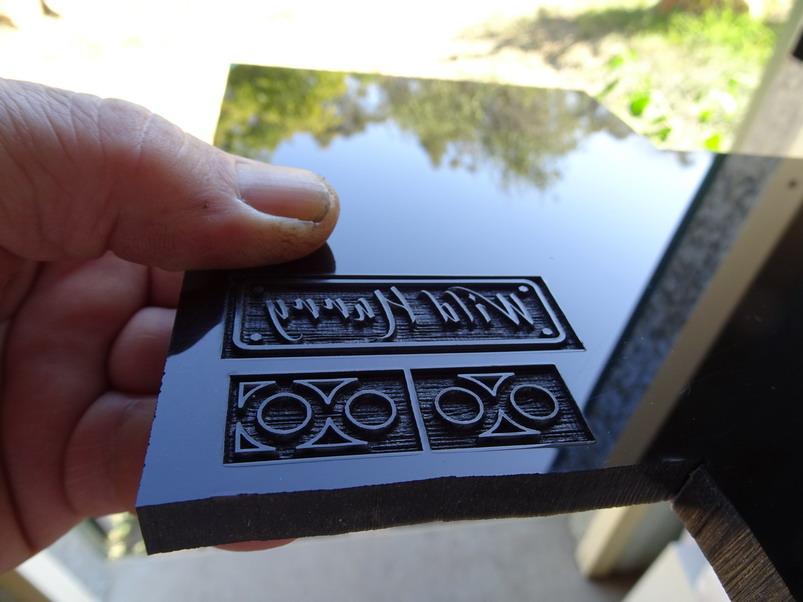
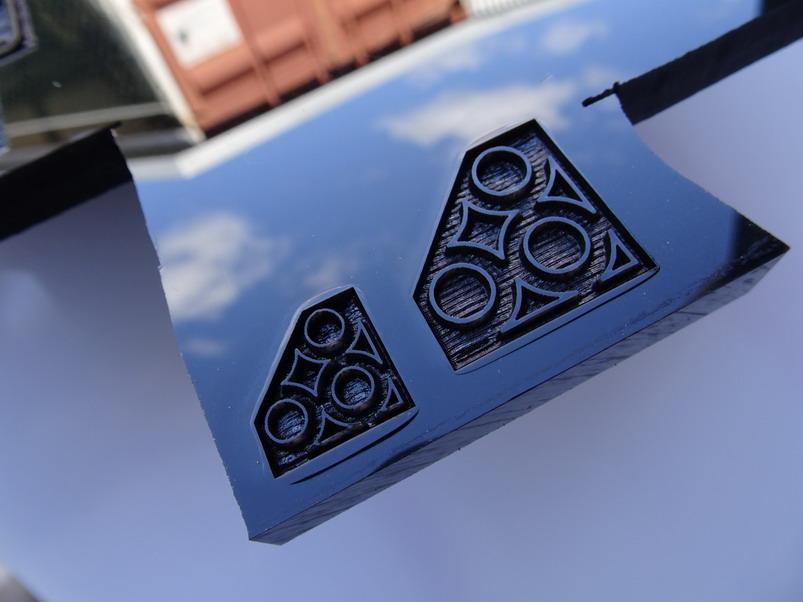
First up before I start ...I am not a laser expert. I mostly only use a small 2.5 watt diode laser and T2 Laser software. I was asked to share my settings for cutting the acrylic the way I have and what type of acrylic. The local supplier advised me that the 10mm thick black non transparent acrylic is manufactured by Titan Poly Tech Co Ltd. Link - http://titanptc.com/products/cast-acrylic-sheet/ This is just something I tried out like a lot of things and found it worked pretty good. I decided to start with a simple bitmap file and set the resolution to .05mm (that is 20 lines to the mm). For the speed I started with 150 and full power and on some 3mm acrylic it burnt right. A couple of more tests and speeding it up I managed to get a pretty good result as shown below I then got the 10mm acrylic and to get about 1.5mm depth I ran the speed at 200mm per minute at full power with z taken up for the extra thickness. These pics are the result at this stage showing our brand in the positive and inverted styles. Today for this post in an terrible hurry I came up with a sort of geometric pattern to try out which cut out alright but in my hurry did not line up so well on the leather unfortunately. Now to finish off I have to warn you that I have modified my diode laser module with a 50 mm fan on top of a shroud to give some better cooling and a little air assist. Most diode lasers only have a silly little fan on top and are not able to run for more than 20 minutes on full power. I have been able to often use mine for 2 hours or more at a time without any overheating or failure issues. This is an earlier post of mine that shows some of the mods I have done. I hope that is a bit of help for now Brian

-
Consew 277 R3 - Not picking up bobbin thread
RockyAussie replied to Escobar's topic in Leather Sewing Machines
I would guess they adjusted the distance of the hook from the needle size to be ideal for the thread you said you wanted to use. It should still work fine on the the thinner threads but thicker you will need to check if the hook is touching the needle too much. If so learn how to adjust the hook back a bit. -
Broken stop on consew dcs-s4 skiving machine
RockyAussie replied to JR Potter's topic in Leather Machinery
Would you be able to post a picture please. I have never heard of a problem of this nature before. Remember pictures need to be reduced to under 1.4 mb in size before loading. -
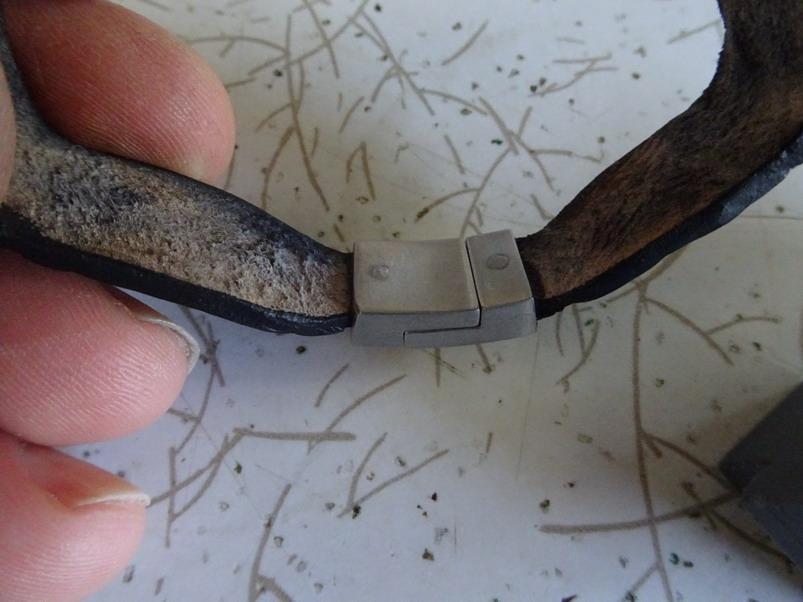
Contact is a no go. Weld Bond is ok on Zamak depending on the leather. Super glue sometimes good but on smooth stainless inside not so good. Think about drilling and pinning.
-
 I will do a post this weekend explaining anything I think can be of interest in it.
 -
 I will have to contact my mate who supplied me the product. I have made some stamps quite well with pla+ before but this acrylic stuff is Much harder and so far surprisingly durable. I will make a topic post about the process this weekend for ya all and try and give you any answers then.
 -
Very much so. Thank you...I can see a lot of different graphic and logo combination arrangements coming into play soon.
-
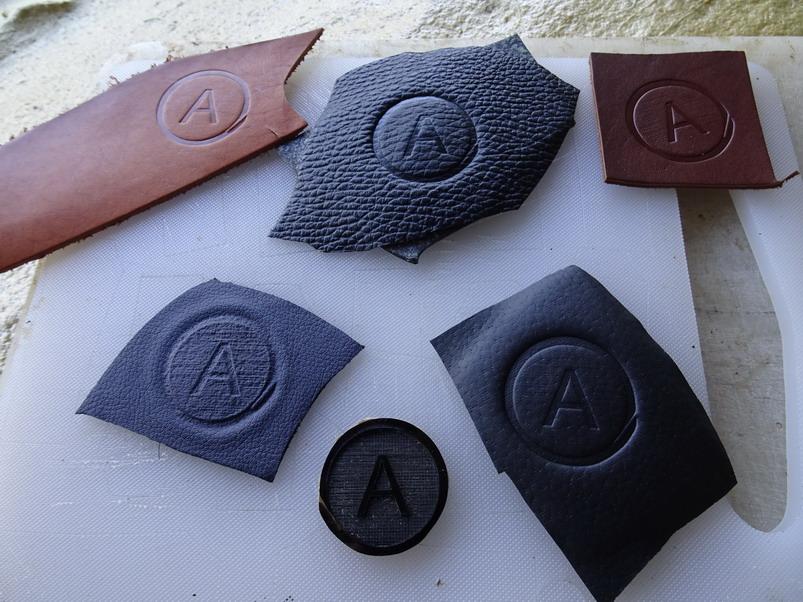
This shows the results using an acrylic stamp pressed into dampened veg.
-
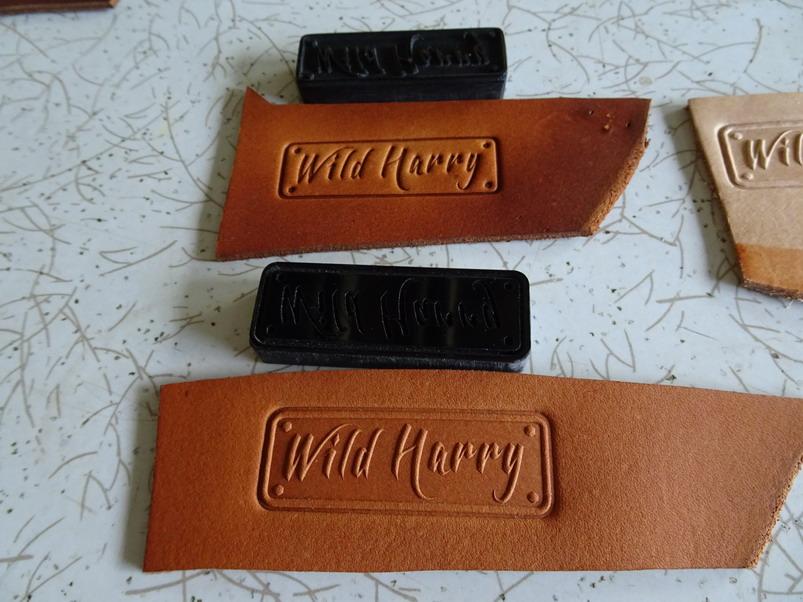
 This is another acrylic stamp not inverted and requires less than half the pressure of the inverted stamp with also good results
 -
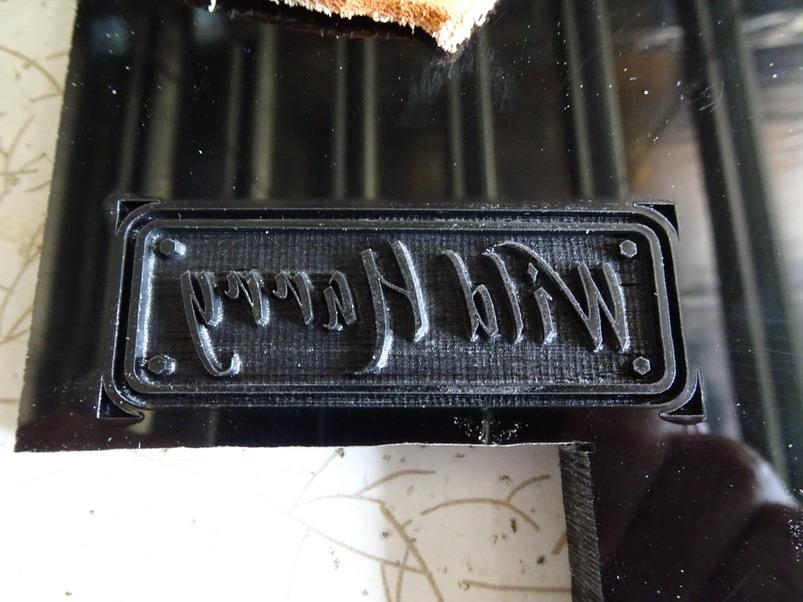
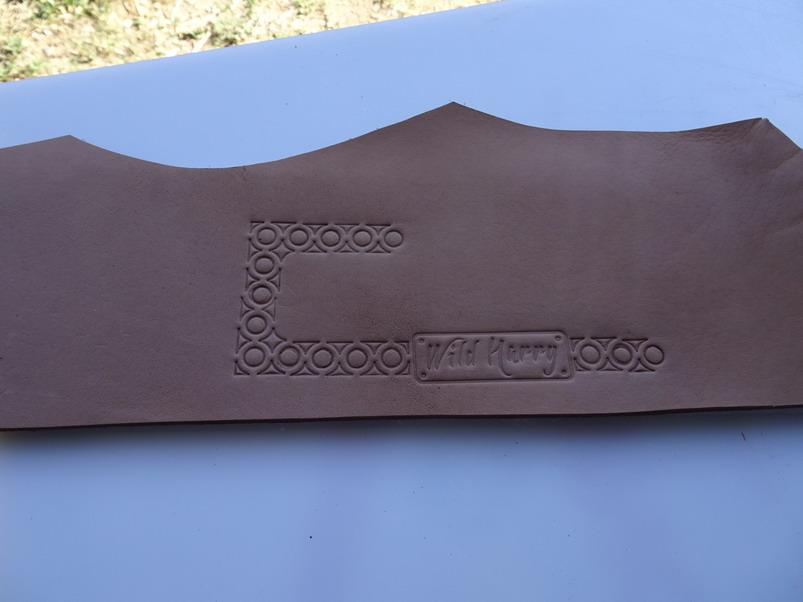
The inverted stamp on veg leather. Lightly dampened no heat.
-
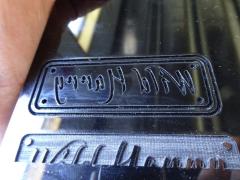 This is an inverted stamp of my logo in 10mm acrylic done with my 2.5 watt diode laser
 -
Inside Bevel on a Fortuna 50 Skiver... is that my problem?
RockyAussie replied to WeekendHobby's topic in Leather Machinery
I have found the original Fortuna bells seem to sharpen and hold the edge longer than the atom ones. Last maybe 2 times longer but the croc I do is pretty nasty on blades sometimes. -
Something is off with this leather...?
RockyAussie replied to HondoMan's topic in Leatherwork Conversation
Looks beautiful to me. If you were trying to get it.... you probably wouldn't. Though I mostly do croc skin where people pay a lot more for the multi tone effects.