


RockyAussie
-
Posts
3,265 -
Joined
-
Last visited
Content Type
Profiles
Forums
Events
Blogs
Gallery
Store
Everything posted by RockyAussie
-
Close to true but not quite. Here's an old picture video I did way back showing how I use it for shaving and I do use it a lot for belt length size cutting. With it I can cut straight down through 5 straps at a time which is pretty handy when you gotta do 50+ at the same size length. https://www.youtube.com/watch?v=K7xMEtBUl6s shoot I forgot to say I'm the good lookin one on the right at the end
-

Inside Bevel on a Fortuna 50 Skiver... is that my problem?
RockyAussie replied to WeekendHobby's topic in Leather Machinery
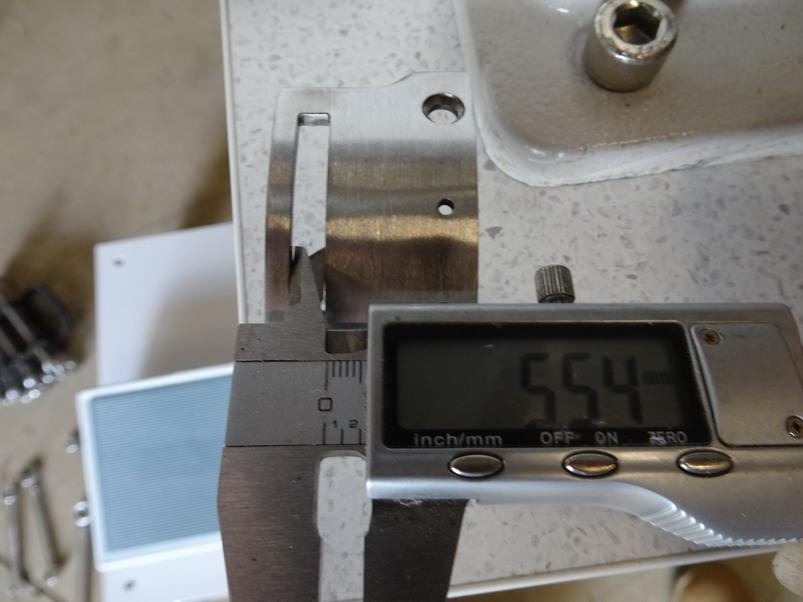
Once the bell gets down to about an inch long I replace them. It may pay to replace the sharpening stone at the same time. When the sharpening stone wears down too much you get a short blunt sharpen on the bell and then it does not feed the leather through very well. Pink stone is normally the best. When sharpening the blade make sure you keep getting plenty of sparks without too much pressure. When the sparks drop off you need to clean the stone again. When the bell is nearly sharp back off the sharpening to just touching for about a minute to get it a little smoother on the edge. Make sure the brass deflector sits about 1/2 to 5/8" in away from the bell edge. Too far in and it won't get rid of the scrap well and too close will foul on the feed stone. YES the previous operator had let the feed stone bevel inside the bell. (Good thing it wasn't a steel feed wheel or rubber one either) -
Thanks @garypl I am still trying to find time to put some stuff into the Maker supplies section. Got heaps of stuff but trying to match up every thing with video's is a massive job to say the least. One you could be interested in is this narrow dog foot and needle plate for the CB4500 which I intend to do a better video showing how you can get to less than 1/8" from the edge which makes it great for wallets and other stuff like that. This one shows a bit on the advantages - https://www.youtube.com/watch?v=a83lCJe4JKo This is still in the development stages a little but some are ready to go now.
-
Inside Bevel on a Fortuna 50 Skiver... is that my problem?
RockyAussie replied to WeekendHobby's topic in Leather Machinery
There should be NO inside bevel. After a good sharpen you need to dress away the burred edge and then I normally give a little light extra sharpen. If you are doing some soft stuff then get a little veg leather and feed it through VERY slow to in a way strop the edge. Any bevel inside the bell will make the leather want to bite in and go too deep. Make sure the distance of the bell is not Too close or too far to the edge of the foot. Thick leathers take the bell back a bit and thin keep it a bit closer if needed. For light leathers try backing off the spring pressure with the knob at the left rear at the very back. ( get plenty of scrap and experiment) -
Best I have found so far...is dye if you want then follow this with a few coats of clear sealer the laser engrave. This leaves almost NO char to clean up. After a quick clean and wipe I recoat again with a couple more clear seal coats and maybe a polish. Example here- https://wildharry.com.au/collections/stubby-and-drink-leather-coolers/products/stubby-coolers-made-from-leather-with-laser-engraved-dad
-
That's a good point....for a point
-
Come on guys....steady on up. What do you think VEG tan leather is??? I am noticing more and more lately that members are inclined to get narky with each other unnecessarily. Looking for differing points of experience is something most are wanting to see and experience by coming to LW.
-
This is the one I was mentioning above. What do you think?

-
On another forum the other day I saw an odd knife where the owner was wanting a sheath made. This knife was heavily sharpened on both sides at the tip end and had no stopper or shape to the handle end which made me recommend a plastic end stop inside the sheath. I suggested I could print one out in pla+ and I know this will hold glue pretty well but I would do it so that the plastic would be fully inside the stitch lines of the leather. I would also think to bring the shape around enough to make the blade make the contact further up than the tip. The shape of this knife would easily allow little pressure to push right through the leather welt bottom I think.
-
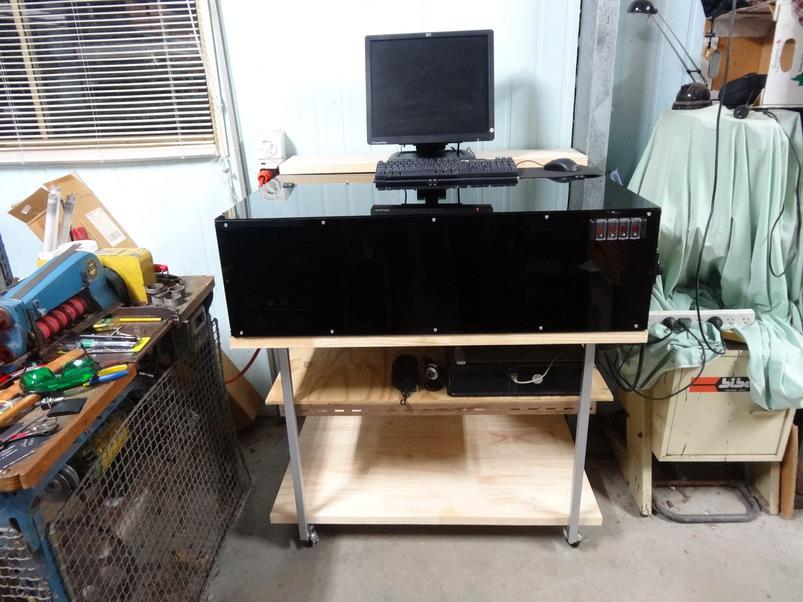
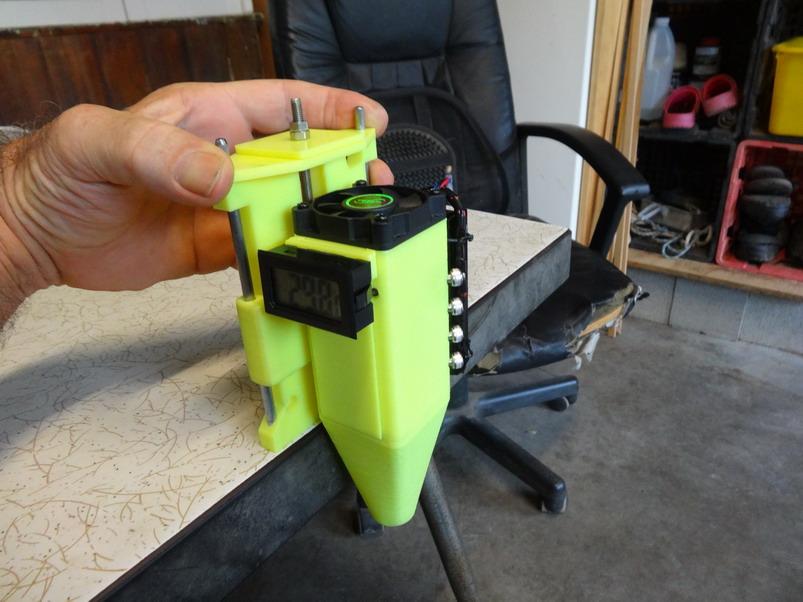
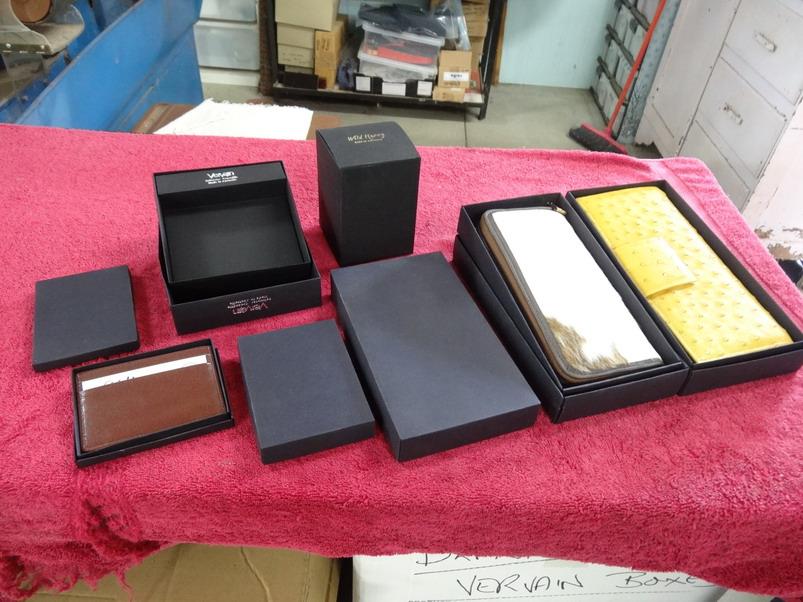
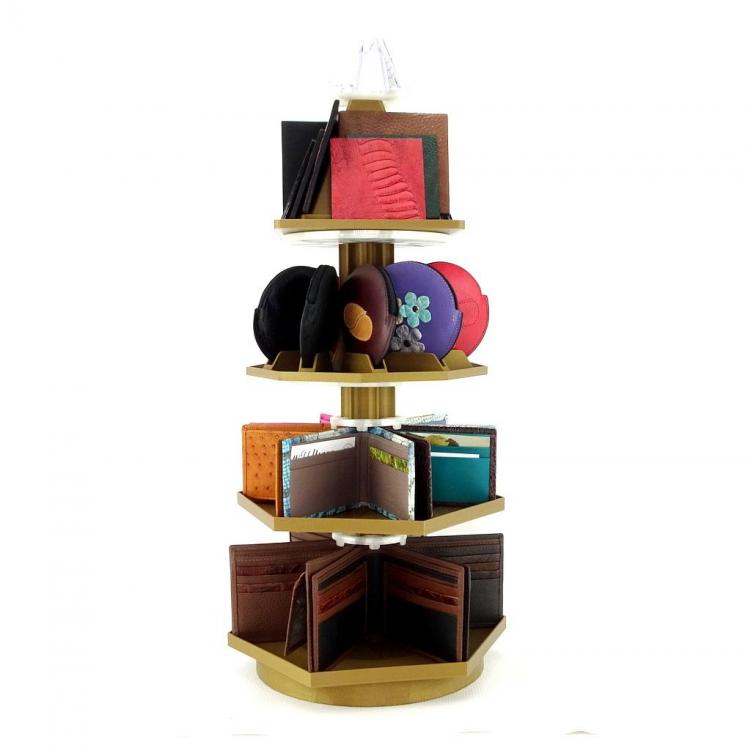
They are both very handy technologies to have in your arsenal these days. I think I do more laser work on patterning stuff and cutting out product boxes than doing much on the leather itself. @Lobo advise is very worth taking note of in regards to using in the way he mentioned he did. I do a little of the easy stuff like monogramming onto existing models like coaster and drink coolers as with those I can have a template to set up on and a name change can be done in a couple of minutes (maybe 5). The 3 d printing side comes into use nearly every day for dies. moulds, tools and line up jigs and heaps of other stuff. What watt size is the laser you have and what software does it use. I am mostly using a 2.5 watt Eleksmaker with major modifications and T2 laser software. Most of the engraving on leather would be 1000mm per minute at somewhere between 50 and 60 power. Top power in T2 laser is 255. If you are using 5 watt then either double that speed or 1/2 the power. (same thing). Here is a couple of pictures of my little converted Elksmaker which shows it fully enclosed with fume extraction and able to now do poster size work which is great for doing bulk jobs at the same time. This is a z lift I designed and printed which has a lot larger fan the the original which keeps the diode cool enough to run for hours at a time. This pic shows some of the product boxes that need to be cut nearly ever other day. This one is a product display stand I 3d created and printed which has a Christmas tree lighting inside it. Hope that helps some and have some fun.
-
Why you selling may I ask?
-
Best tip I have learned is try and stick with light coloured leather and give it a couple of coats of sealer before you do the engraving. A good blast of air followed by whacking the engraved surface against a clean cloth removes most of the carbon dust. The sealer does a lot to stop the carbon spreading and darkening everything. I generally use a lightly dampened cloth as a final prep before a follow up with a couple of more coats of sealer spray applied. Here is a link on my web page should help see the results - https://wildharry.com.au/collections/stubby-and-drink-leather-coolers/products/stubby-coolers-made-from-leather-with-laser-engraved-dad How you going with the 3d print side?
-
I believe in this video he is using edge dye (not paint which is what edge coat is). The man in this video likes the effect he achieves but to be honest it is way to long a process for my own purposes. Burnishing an edge whether it is pre dyed or not is and should be a fair bit faster than a painted edge can be done for the same high quality finish. That is so long as it is a veg tan leather. Most of the products we make get done with edge paint and that can be used on veg or chrome tan leather equally well but as we mostly do crocodile leather products that can be quite time consuming. At no stage do I recommend any burnishing either before painting ,during or especially after. If we mostly did veg products I would burnish in preference. I would check through the discussions in this previous post to help make your own decisions as to what is best. https://leatherworker.net/forum/topic/87437-edge-kote-rubbing-offsolution/page/2/
-
Here is another video I just loaded that shows what can be done with the bigger Cowboy CB4500 or CB3500 with a narrow needle plate and dog foot installed. These machines can do near double the thickness of the other machine but do have a bit bigger end to get around if you need to get small stuff done.
-
The machine looks good and having a needle positioner is a good plus but....the table is not good. Keep in mind that you will often want room to spin the job around and with the table shown you have no room to do that. Even the cut out tables are often no good either and you may be better to have a full open table instead. I have to do a table change on my CB6900 this week and show you some pics when I do it.
-
Juki is a great brand and many other brands clone them as best they can. The Cowboy 4500 and many others are clones of this machine. The Cowboy CB 6900 (1341 in the USA I think is a clone of ......the Juki LS 1341 and will handle work up to 10mm very well. This is a video I did on one a couple of weeks back. There are several other ones showing some light stitching as well if you check my you tube channel.
-
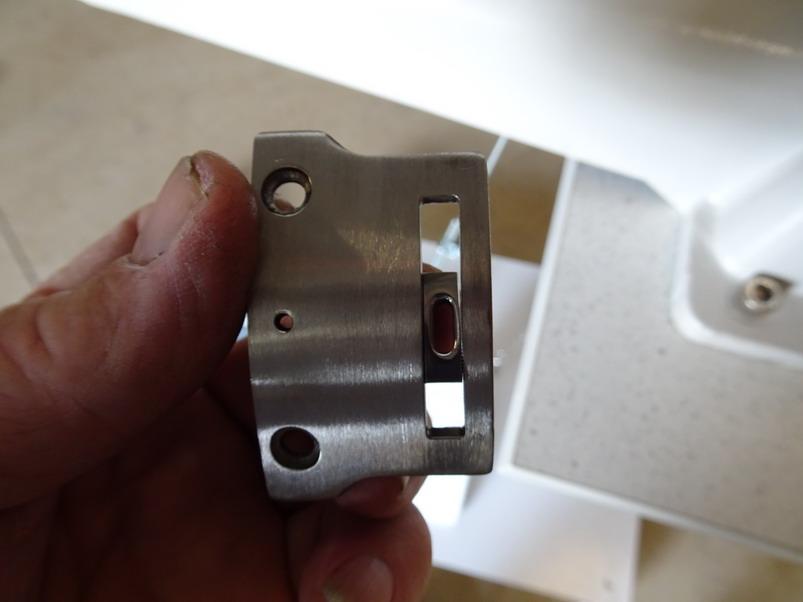
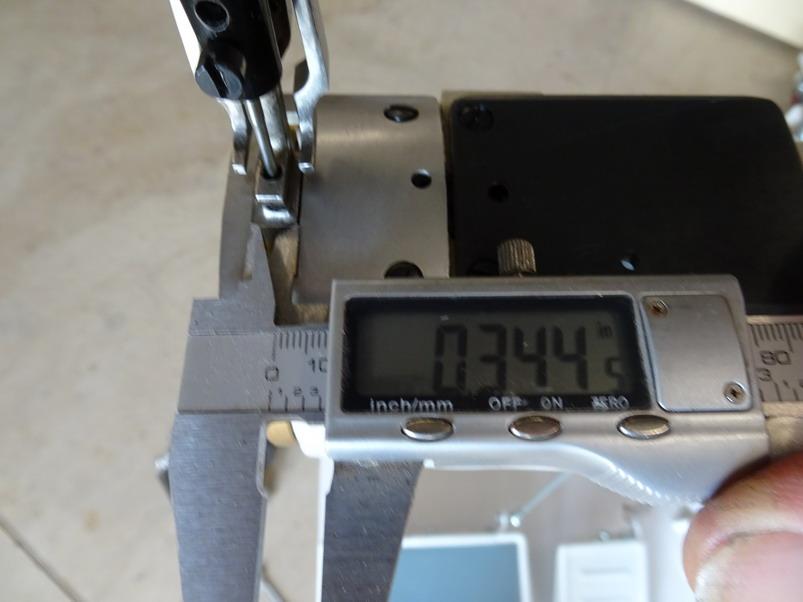
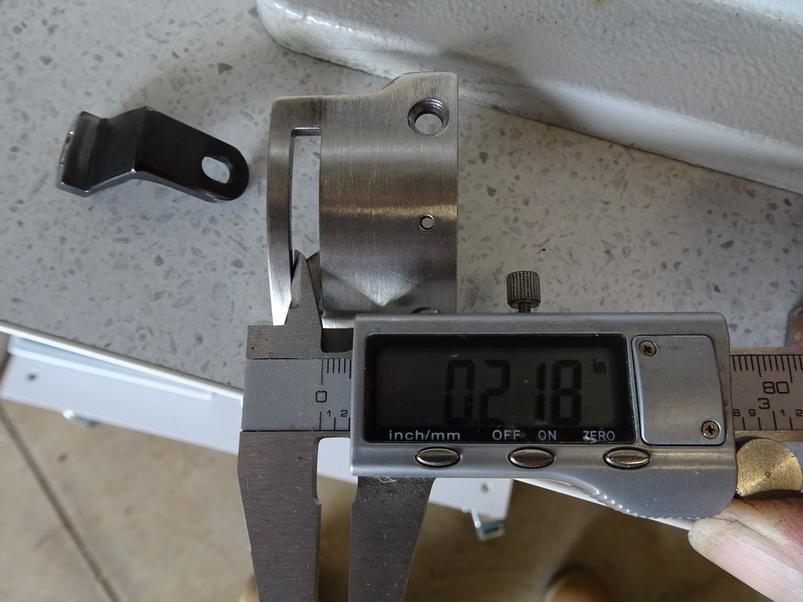
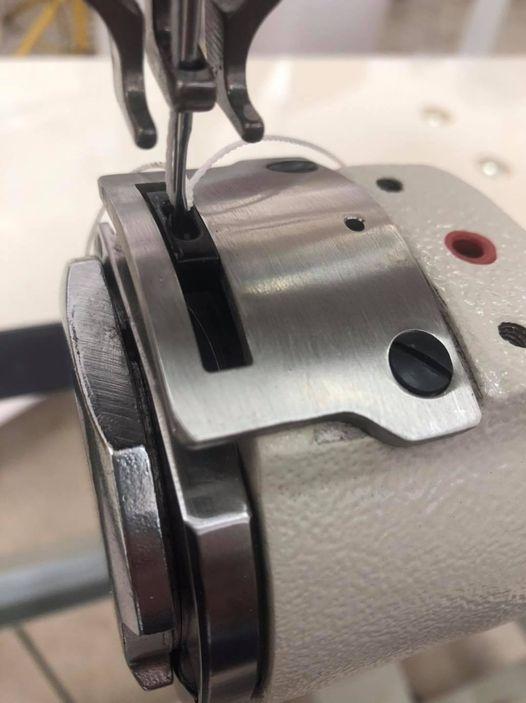
I figure to answer that best I would do a few pics to explain better the overall advantages. This picture shows that the whole plate is different to the original in order to improve the distance from the outer edge for gussets and such and reducing the curve at the same time. This is the original needle plate and feed dog (near to 9mm) This is our new version Here as you see I now have no problem getting just 10th of an inch from the edge Over the next 2 weeks I will do up a video to post showing how I can go from upholstery leather up to 3/4" veg with very little adjustments . A little top tension and maybe foot pressure. PM me your address details caus I reckon you should have a set Wiz.
-
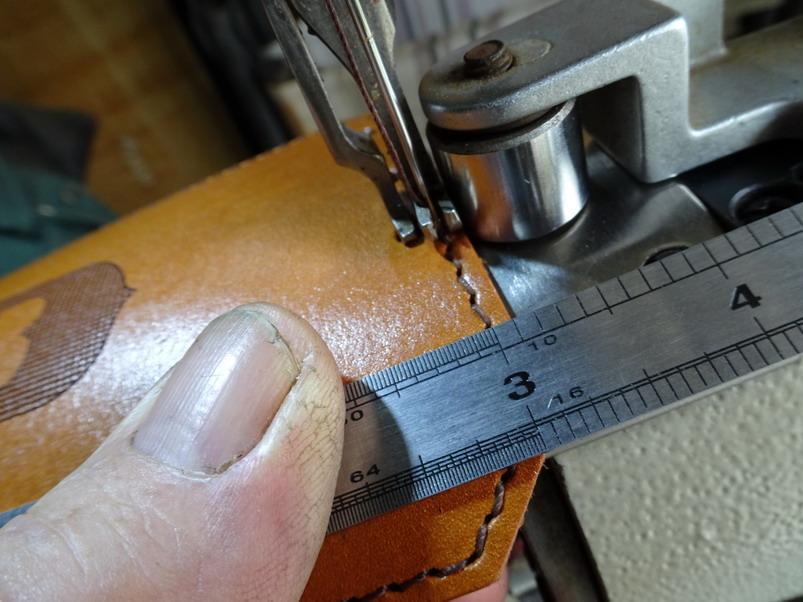
Better yet.... with a narrow foot and needle plate combo we now make you can get down to this thickness shown here with 138 thread on single layer upholstery leather. Also means you can get the guide right up to the centre foot and it stitches fine at less than 3mm from the edge. Also made for the CB3200 and CB3500 CB4500. $120 AUD +freight if you want a set.

-
Most machines it is that simple but good to check out a parts list diagram on the particular machine just in case. Its not really all that scary to have a look anyway. Caution...do not over sand the length as they do not move very far. The OP in this case has a Adler 267-373 I believe and if you check this video out on one of these you can see that the tension discs open every turn he does and at the 1min 20 sec mark you can see the stitch miss when he does a sharp corner. Dunno maybe I'm wrong but I don't get that problem myself. On soft leather as used in this video it is rare to see the knot show at the top on a corner but missing is another thing. That is where a bigger needle helps as it allows the stretchy leather to clear the thread better in the needle slot and allow the loop to form better for the hook to catch it.
-
Just remembered I took a few pictures on that machine when I shortened the pin. 2 screws is all it took to get it out - Note: in the parts manual you can order three different size pins if you want. DO NOT do more than 1/2mm sand before you test as you may easily take off more than you want.

-
I know that for an average sort of leather that needle and thread size would be recommended but........For firmer leathers sometimes the hole remains open and offers very little resistance when the knot is formed especially if the thread used is a slippery thread. I would try a 110 needle and that means you will need to increase your top tension 1 or 2 turns to make the knot form more predictably. Second thing is try adjusting your thread return spring. Although it is normal to have the spring stop going down just as the needle is about to enter the job sometimes it can be better to let it keep going down until the needle is nearly all the way down. Sometime not. Thirdly... the tension discs opening up when you lift the foot a little can look like they are not releasing and that can be not true. I ALWAYS sand back the little pin that pushes the tension springs open until I can lift the foot nearly all the way up before they open. This means it does not matter where the needle is when I lift the feet. WHY would you want the tension discs to open before you finish the job???? Many machines start letting the tension loose when the foot is only 2 or 3mm off the needle plate and that is wrong in my opinion. Always get scrap of similar weight and thickness and set up your machine before you start any new job. Make sure you can do corners without any thread lifting when you raise the foot and that your tension is perfectly centred. This is a video I have done recently which shows what I can get away with on corners - and another using 138 (20m) thread. Hope that helps some
-
Consew 277 R3 - Not picking up bobbin thread
RockyAussie replied to Escobar's topic in Leather Sewing Machines
Check that you have the long slot of the needle on the left. I have myself made that mistake more than once. Here is a link may help - https://www.consew.com/files/112347/InstructionManuals/277ROpMan.pdf -
Standard technique for me is to spray on a light spray onto the back of my pattern and let it air dry for at least a half hour. Here is a link to a project I did awhile back that gives you a fair explanation. If you check my profile section in the "about me" part you will find a few more similar ones to this as well.
-
Have a look at this link which will show you one of the best ranges of parts that will fit most of the bell knife skiving machines.https://www.campbell-randall.com/shop/FAV - Fratelli Alberti The bell is the same size to the best of my knowledge and the feed stone and to some degree matching presser or roller feet come in the 50mm or 34mm size ranges. Go with the 50mm. I would not want a steel wheel unless I was doing very heavy saddlery type work myself. If you accidentally adjust the feed wheel up too much you can destroy your bell edge. They will also give you a rippely thick thin edge on thin leather, sort of corrugated. Likewise the poly type wheels will dig in a wreck the poly feed if you adjust it into the blade as well. You can get fine and coarse feed wheels and I find that the fine ones have the extra benefit of being able to remove the burr after a hard sharpening on the bell. For fine softer leathers go with the fine stone and if going for average medium weights go with the coarse. I use fine for anything though. Last thing get a roller presser....I use one on everything.https://www.campbell-randall.com/product/fav-1498c-roller-foot-with-30mm-1498-roller Check out my youtube channel for a few other tips.
-
UNBELIEVABLE a..hole. Hope this manual helpsFortuna 50 p ag.pdf

