RockyAussie
-
Posts
3,265 -
Joined
-
Last visited
Content Type
Profiles
Forums
Events
Blogs
Gallery
Store
Everything posted by RockyAussie
-
For the screw tightness check this Solar Leather link
-
Bloody hell ......You've done this tooling stuff before haven't you Tim I hope to see the finished dopp kit one day
-
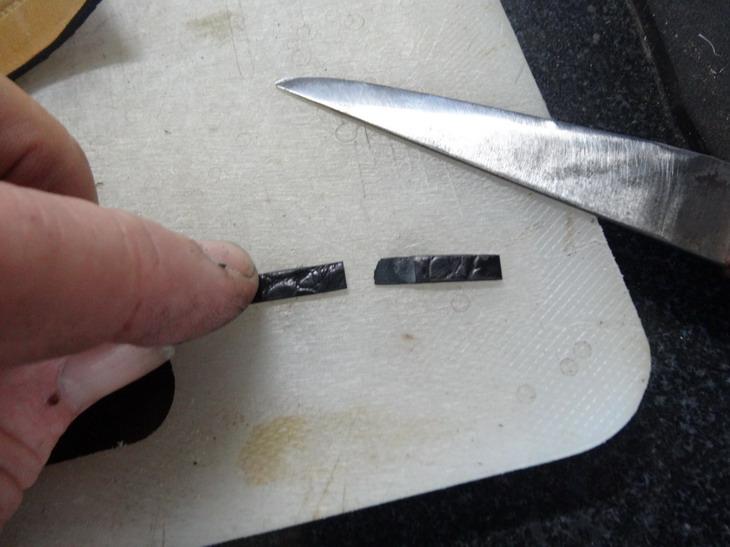
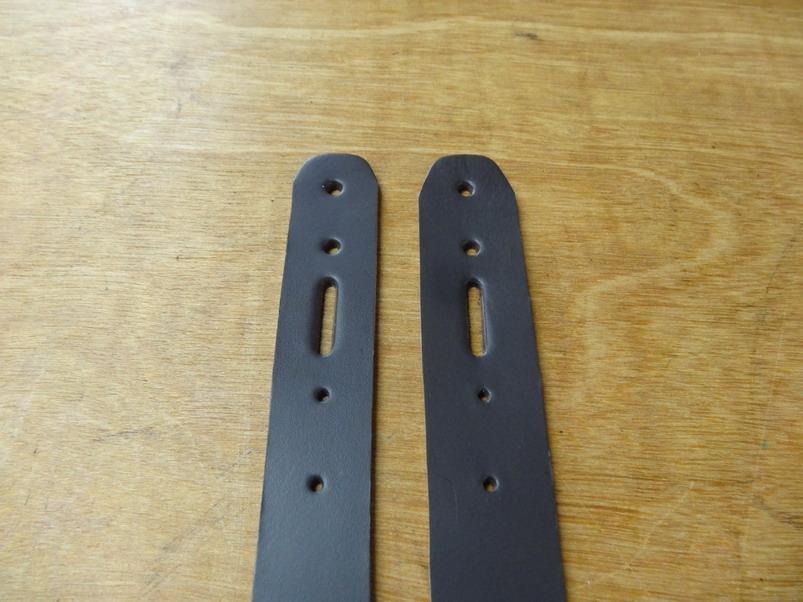
The knife thickness is 2.5mm and when you have that on the 2 sides to cut the tip that becomes 5mm that has to be pushed somewhere in order to get through the leather. It is more noticeable on the 30 mm pla printed one because the knife is made to go out to a 38mm wide belt. Notice though that the leather belt piece still fits in tight once past the arrow head cut out in order to get both sides cutting equally. An advantage with the 3D printed jig is that it is the same drawing for each different belt strip except for the cut out section. Being able to use the one knife for several different width belt strips also saves the $$$$. Another advantage also with the printed version is that my first print was .6mm too tight and by taking another .3mm off of each side in the drawing it was printed again without all off my usual #%*^<> etc. I had forgot to allow for the edge coat thickness. The latter one has done now over a hundred belts and still looks like new.
-

Heat embossing machine, anyone with experience?
RockyAussie replied to Bluzoom's topic in Getting Started
A fair bit of info got covered on this in this post that you could find of help - -
Another thing may be worth a check is that the 2 screws with springs that hold the shuttle race body are not screwed in all the way or too far. The springs should be just showing visible and the shuttle can be pulled in and out a little by hand. Also check that the bobbin is unwinding smoothly and not catching intermittently.
-
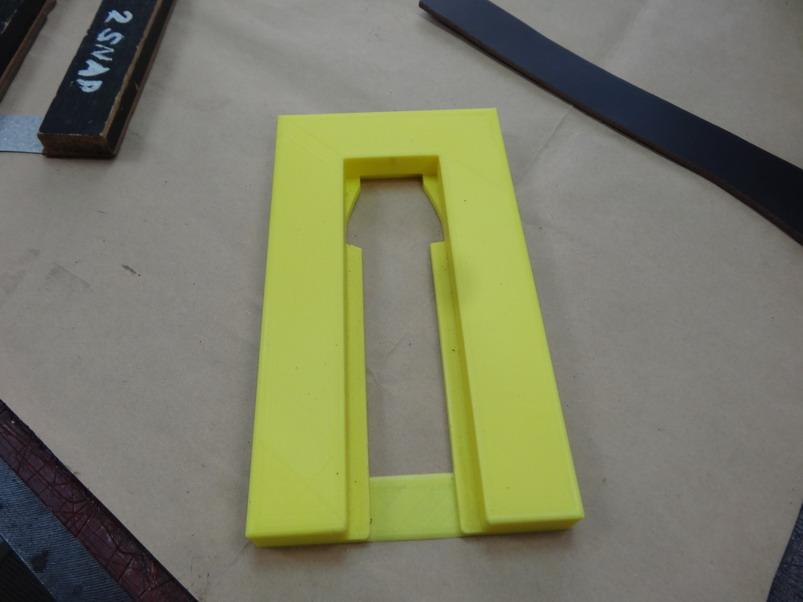
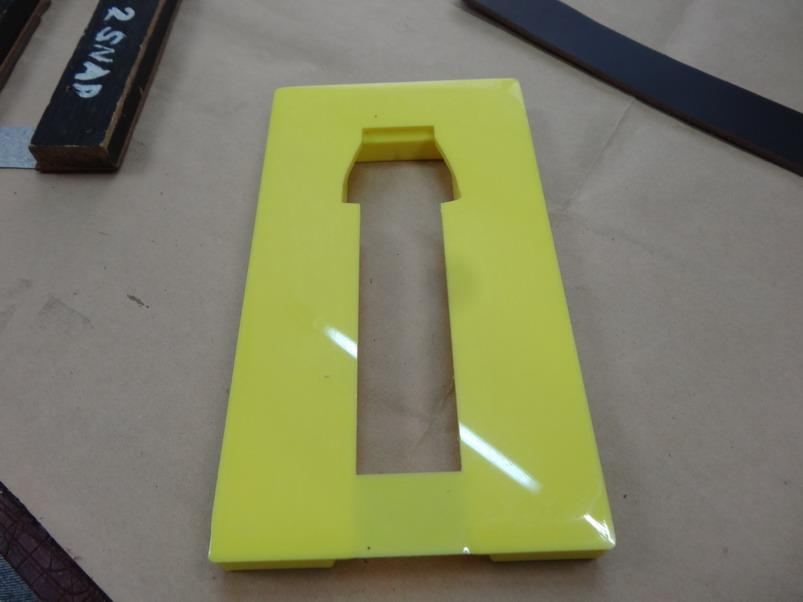
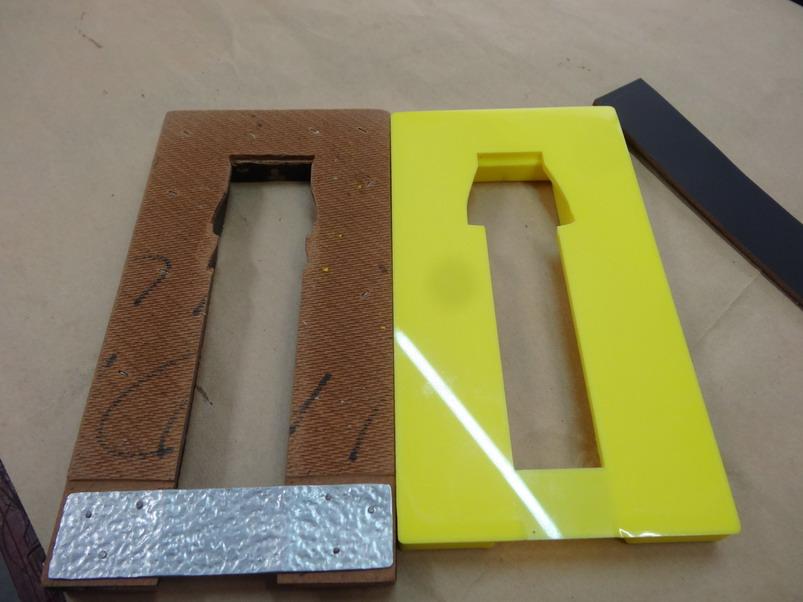
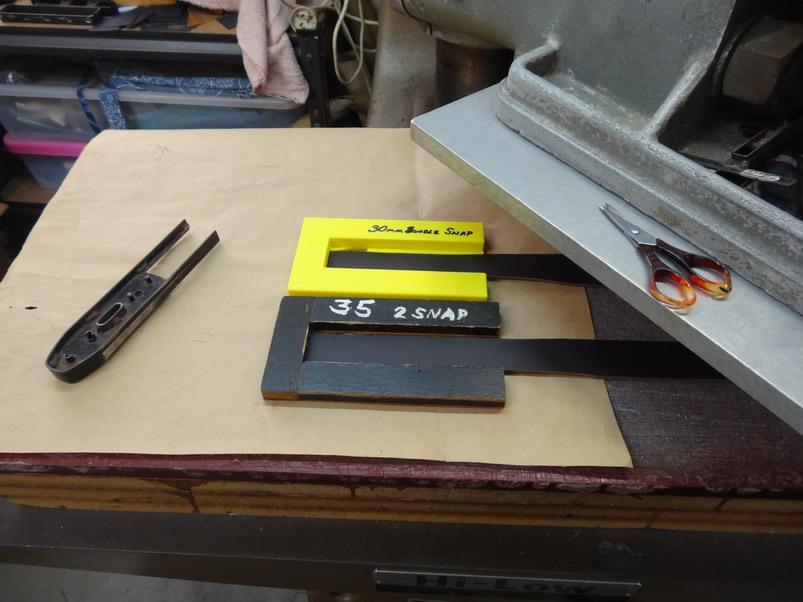
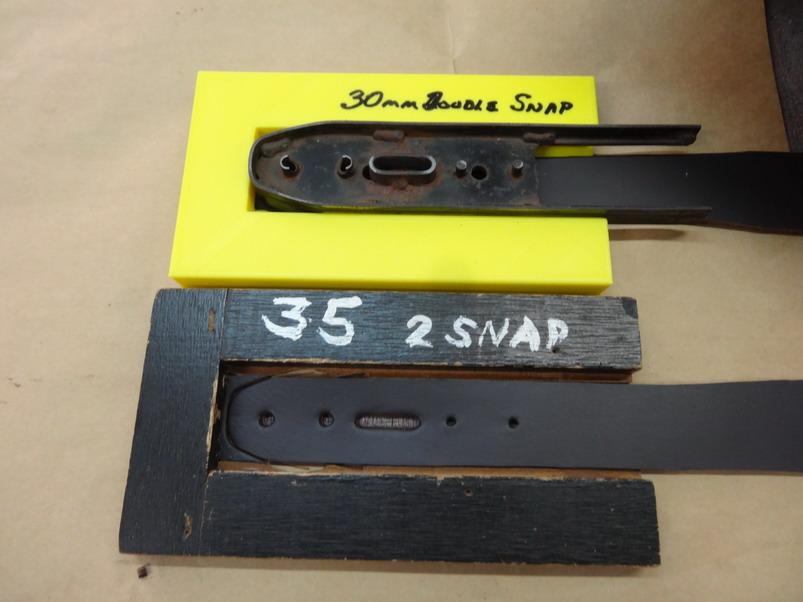
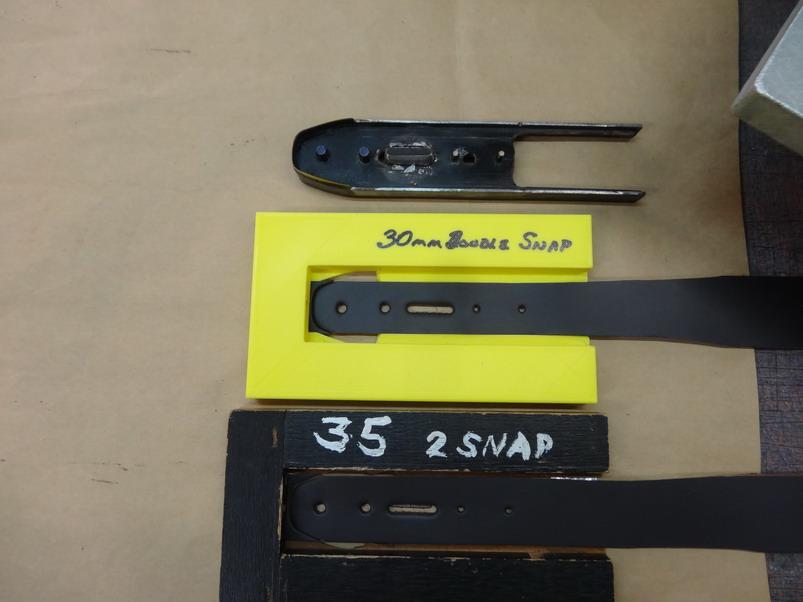
Now for those that have a 3D printer or access to one this can be a whole lot easier. In this I had to do a new version of a 30mm belt with a double snap connected buckle. I already have a knife for doing this in 35 and 38mm belts and determined that the same shape could be used here as well. A similar construction was done as the jig above except the 3mm Masonite was done in pla but without the need for any cutting out as shown below This continues up now with a 30% fill and the wall thickness I went with is 1.6mm Under view and notice the recess for the belt end cut off This shows my old 35mm jig alongside the new 30mm one The 35mm one with knife view in place Here I am showing both jigs about to be used Both now cut using the same knife A better view And that I think is it. Feel free to ask any questions and I will do my best to answer. Remember to keep a watch out for my upcoming dress belt manufacturing tutorial. I do not pretend this is how everyone else in the trade does this sort of thing as I don't know ......This is just how I worked out to do it for me and if something could be better then please say so. I go with this method because each cut takes about 30 seconds and is reliably the same and the cutting is not limited to the one cutting spot which tends to wear out after repeated use. Thank you for reading and your comments are all appreciated.


-
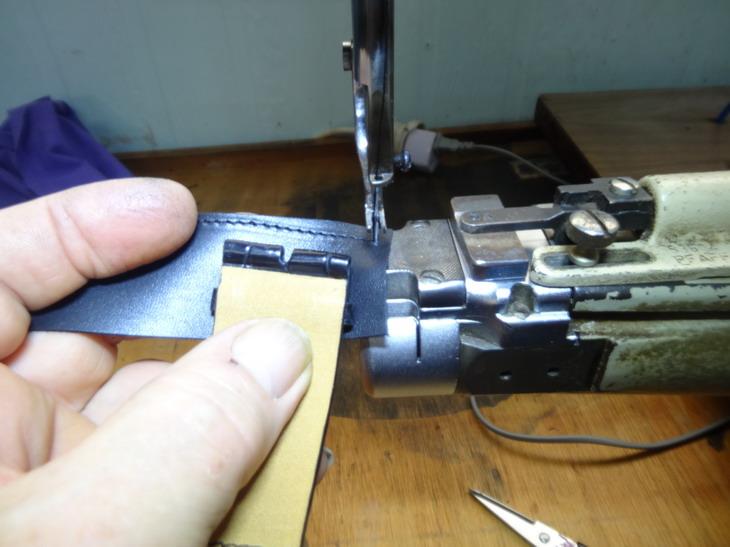
For many years I used this type of machine for doing shoe and bag repairs and eventually became quite proficient in how to use one. For stitching on badges it is invaluable but for most manufacturing they don't do that good a job. What I would say that will be of help is to set aside a couple of full days and cut out a large heap of square bits of leather of some various thicknesses and stitch around the outsides WITHOUT turning the leather. The purpose of this is to learn the importance of keeping the thread positioned on the same side of the needle with each and every stitch. Play around with the thread tensions until it all becomes automatic and this includes the thread lift lever which most operators have not a clue how to set. In my opinion the only time to use them is when no other machine can do the job for some reason and with good designing that is almost never. Some jobs if designed like this phone pouch below may tempt you to try it out, but a lot of practice must happen first. Products that can be turned inside out meaning the stitching is not visible would be fine as well.

-
Thanks Matt, I thought that it might be of some interest at least to us that try and earn a living from it. Thank you
-
dog collar Finally done! Carved dog collar
RockyAussie replied to YinTx's topic in Collars, Cuffs, Leashes and Leads
Absolutely beautiful and that has to be some of the best stitching I have seen. I think the pink touch in the flower centre is a master touch. I hope that you do manage to get some pics with LuLu wearing it. -
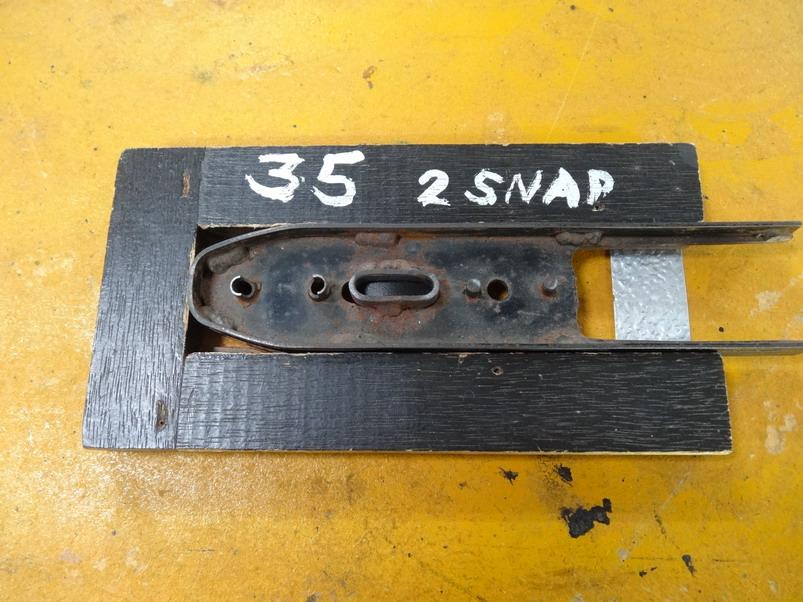
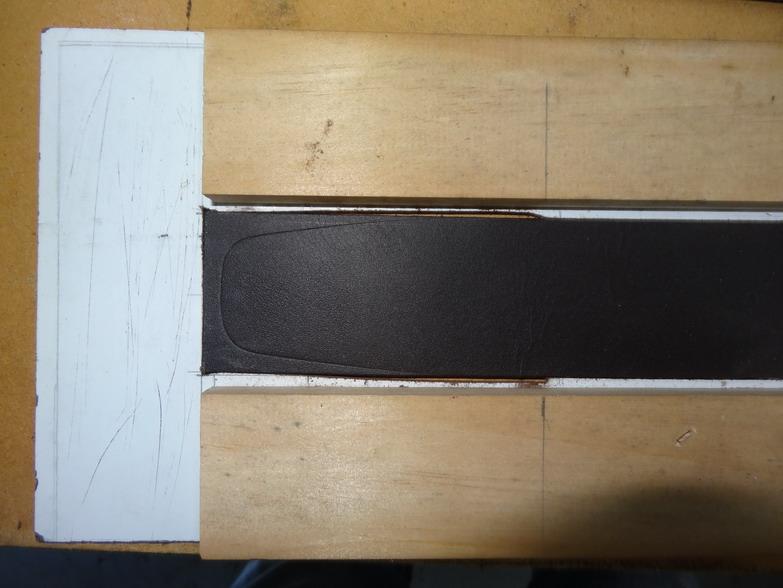
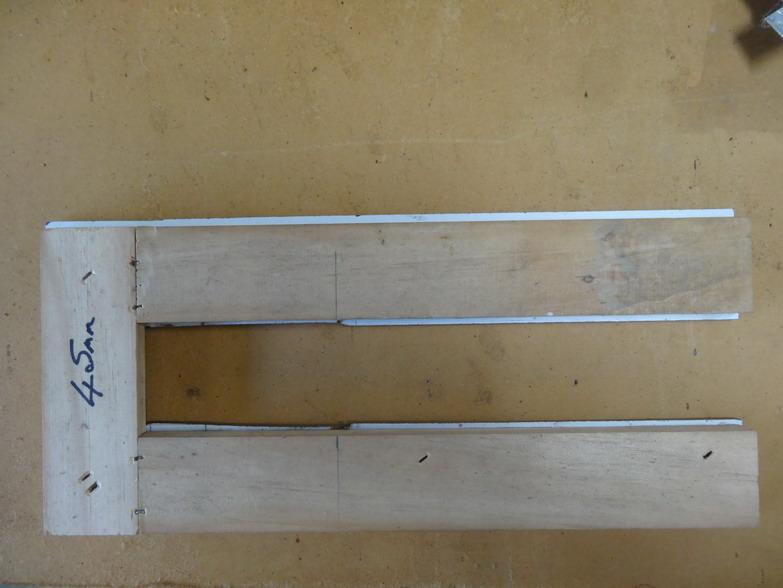
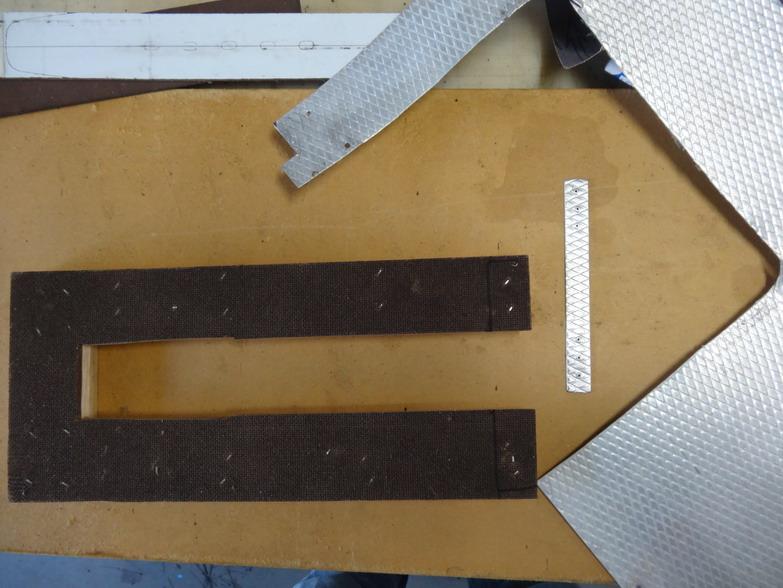
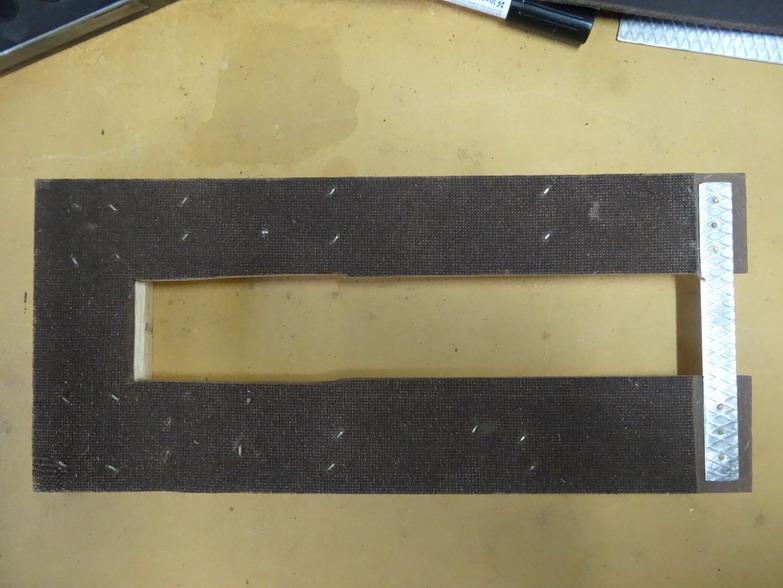
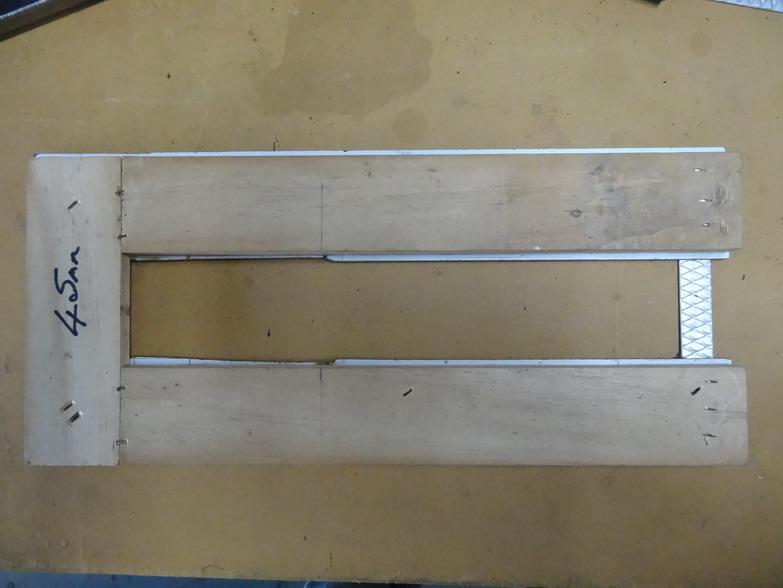
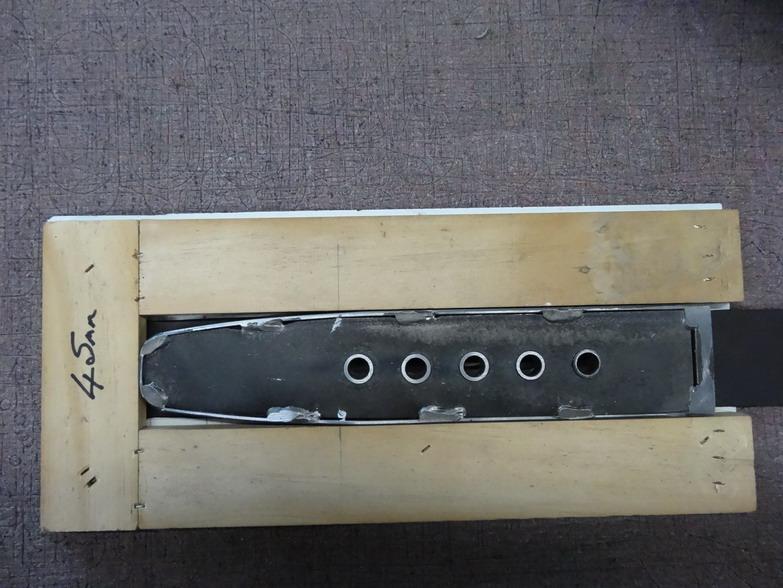
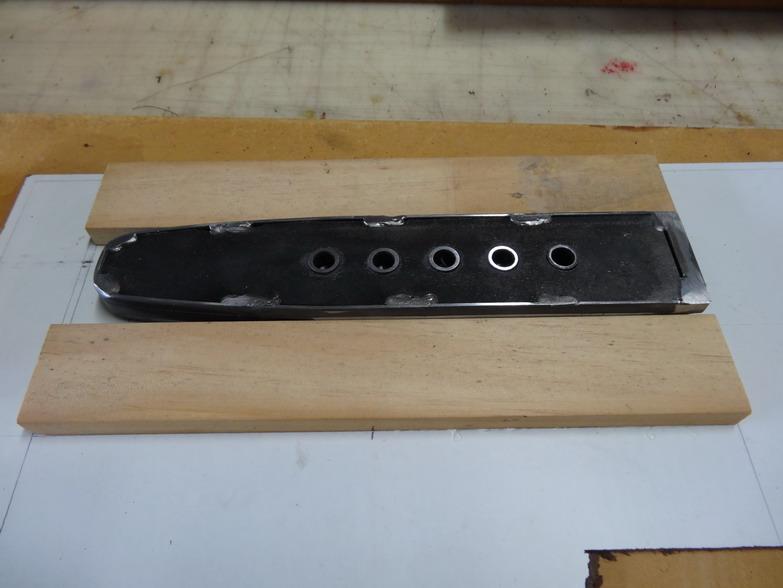
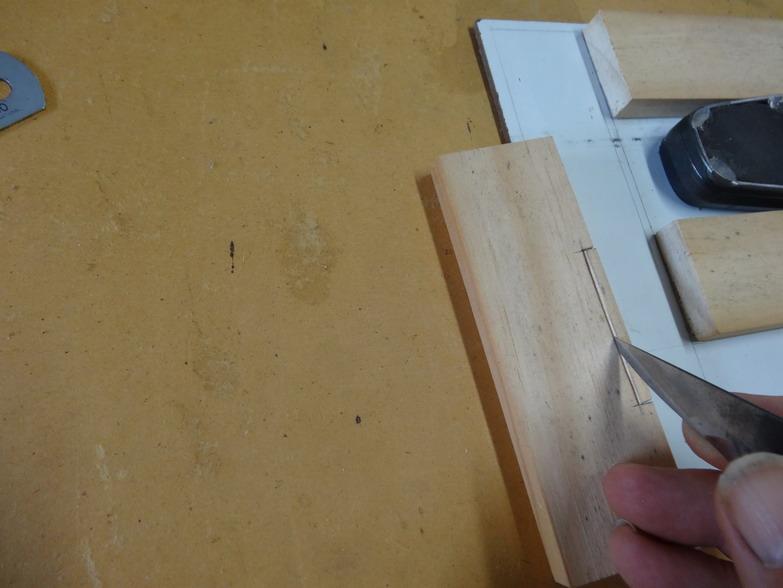
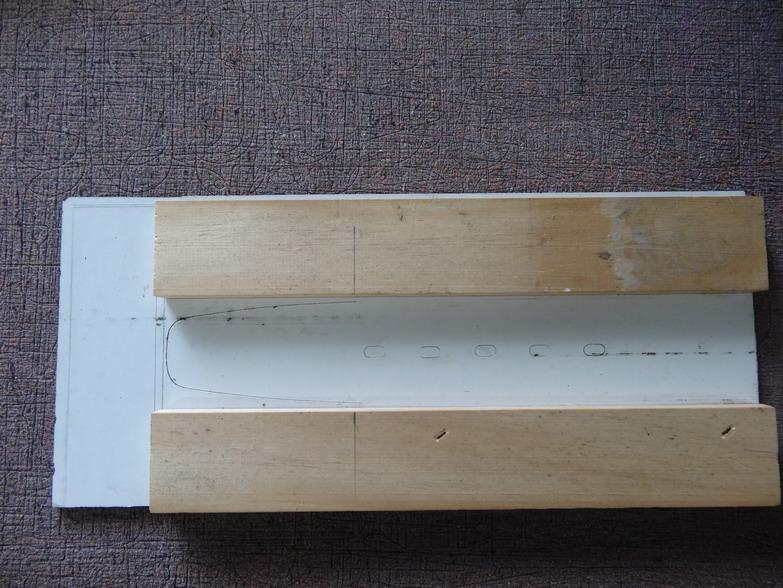
After that the tip end needs to be cut out wider to allow for the knife thickness and a dry check done to be sure the end allows enough of the leather to go up in under the end stop pine board. Once done the end stop strip can be glued and nailed in. Now from past experience I have found that with out a support strip up the other end the jig will stress enough with the cutting that it will splay and become useless so I worked out to use a thin strip of aluminium as shown. I then sand away the Masonite enough for the strip to fit in and then nail it into place as shown below This shows the top view now Ready for testing ....... And Yippie she works This one shows other jigs for this width belt that were done similarly. How the buckle retainer piece is made is shown in another earlier post here - and Note: there is an attached pdf file in that post that shows how to do it with descriptions... I will go over how I do this cutting jig with the new 3D printing process tomorrow morning if I can. Brian

-
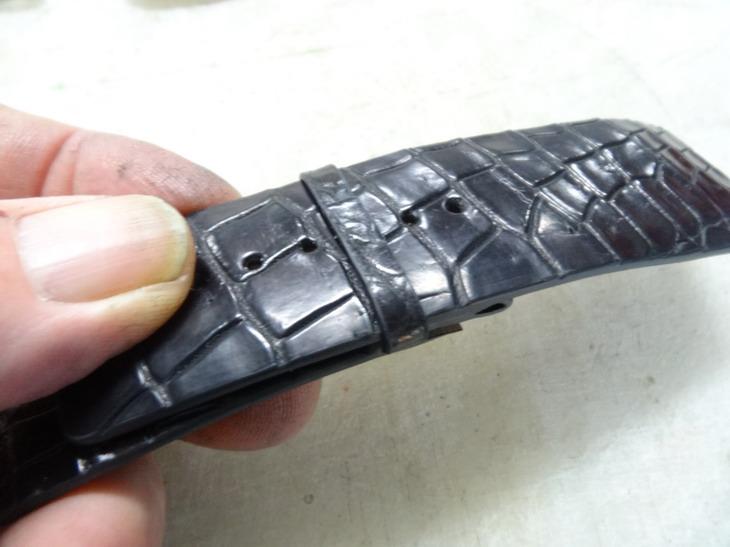
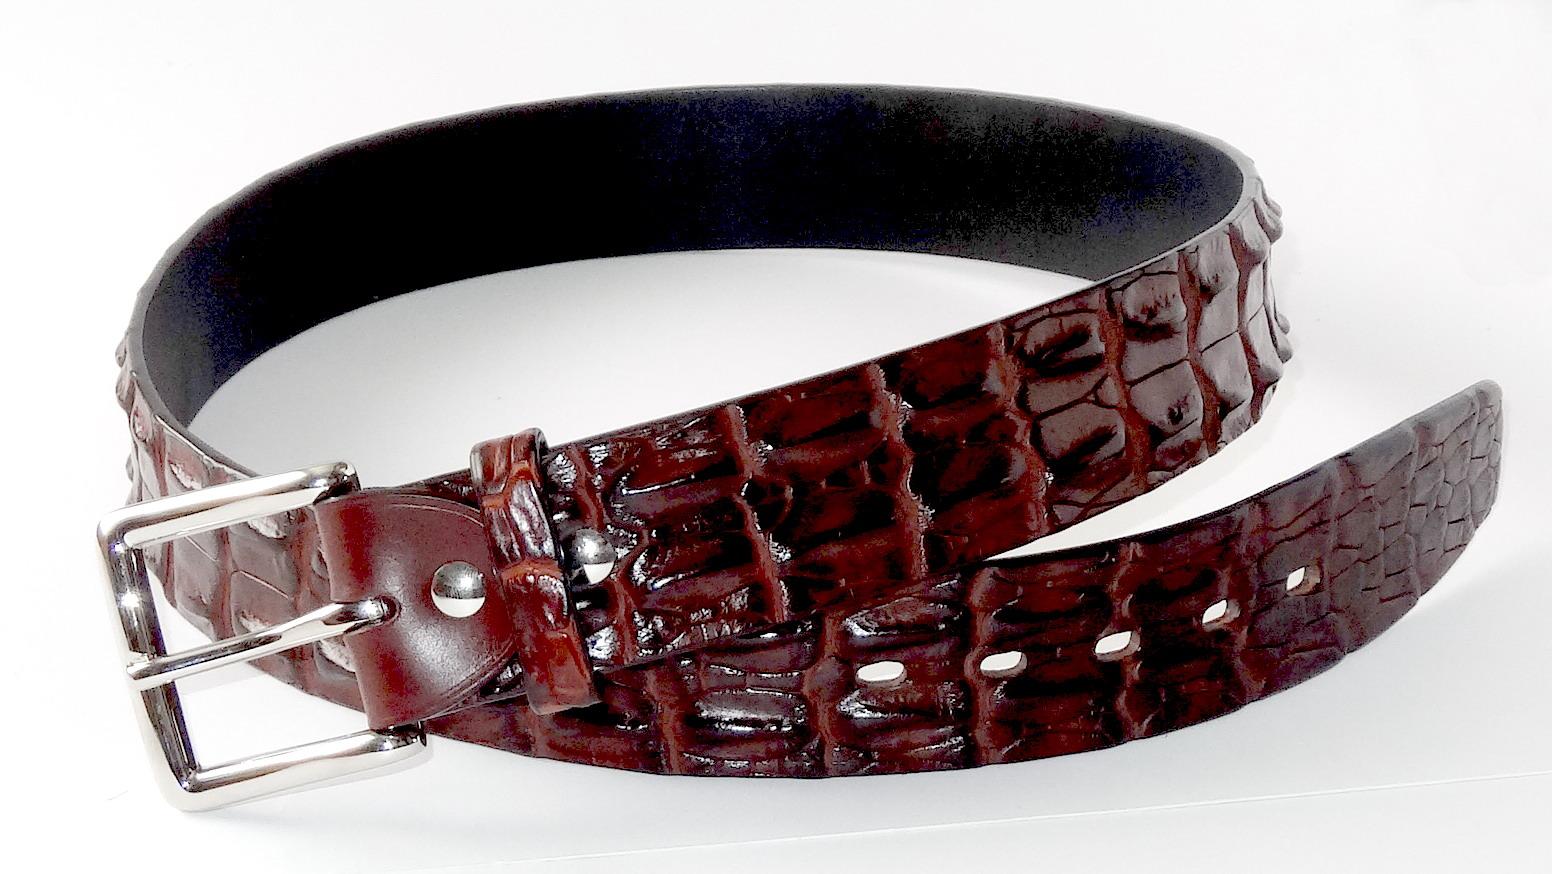
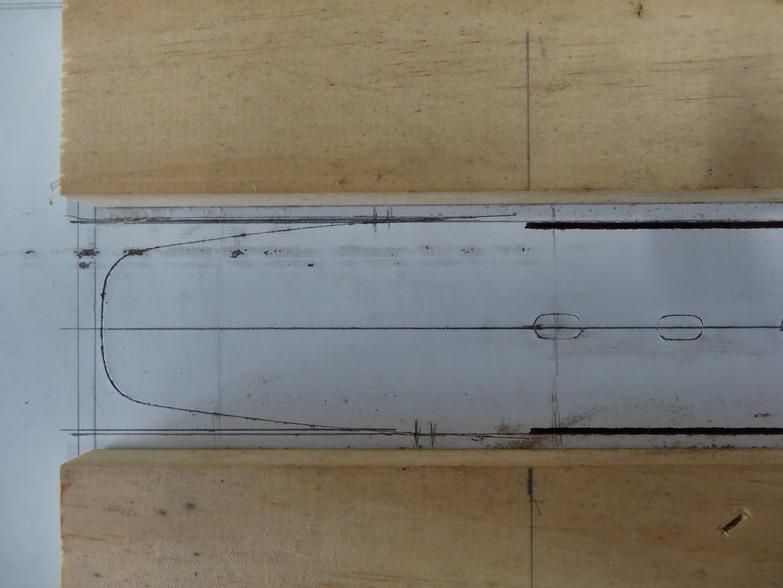
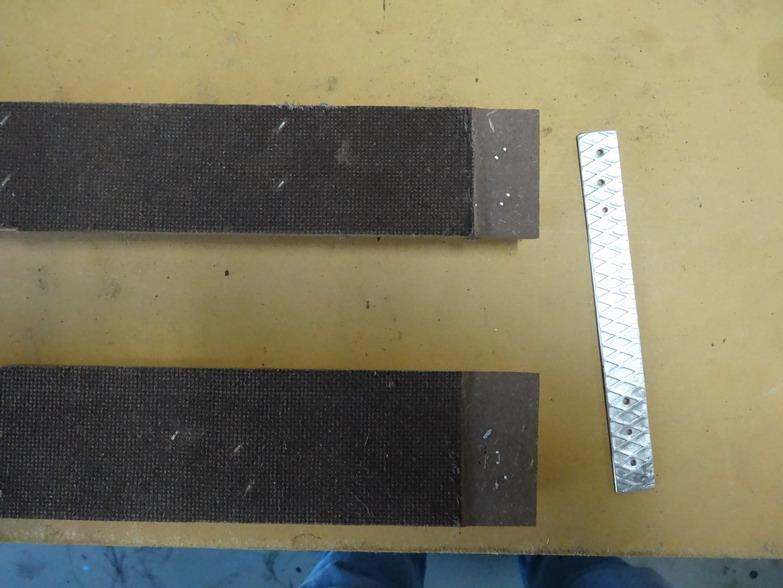
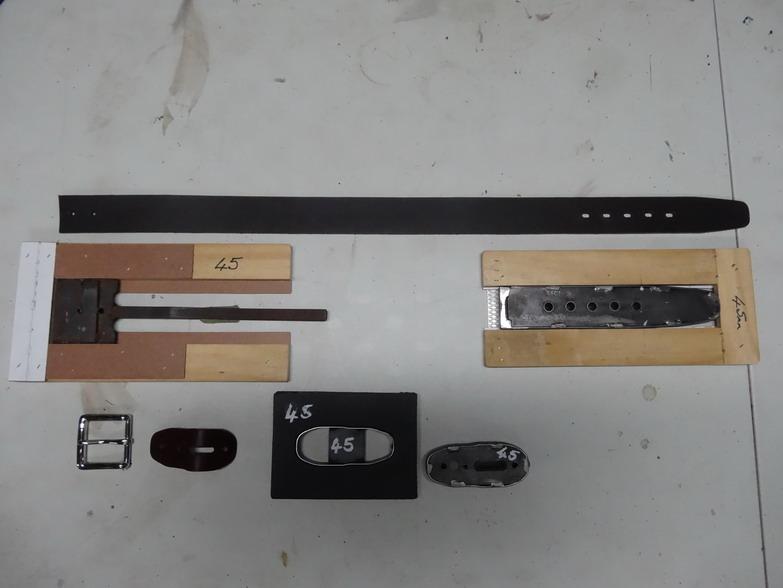
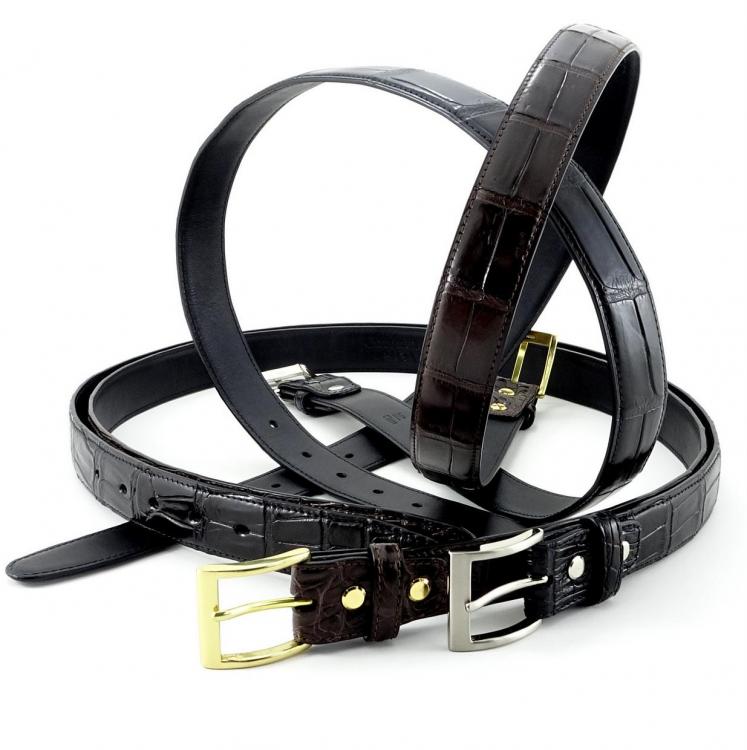
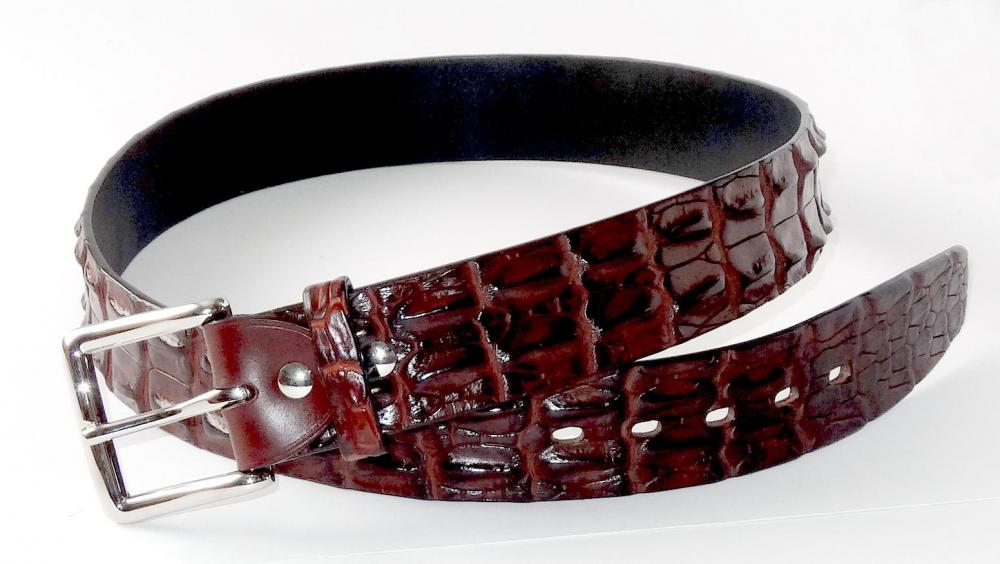
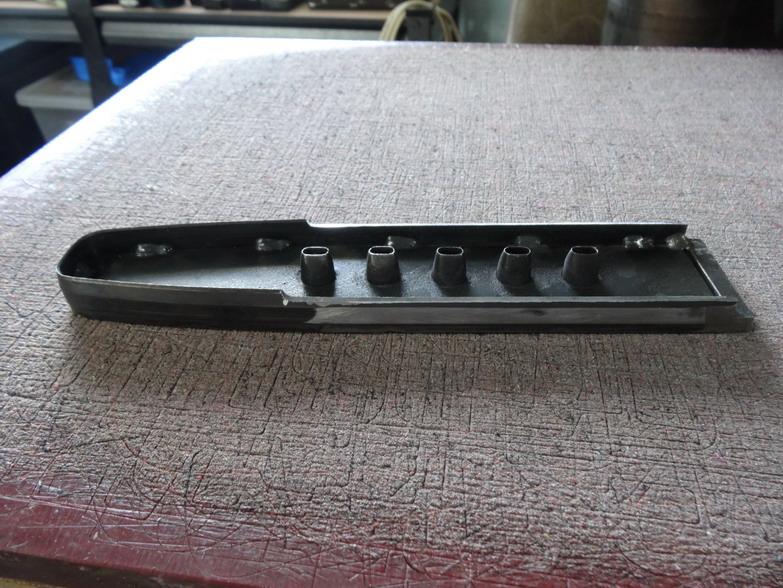
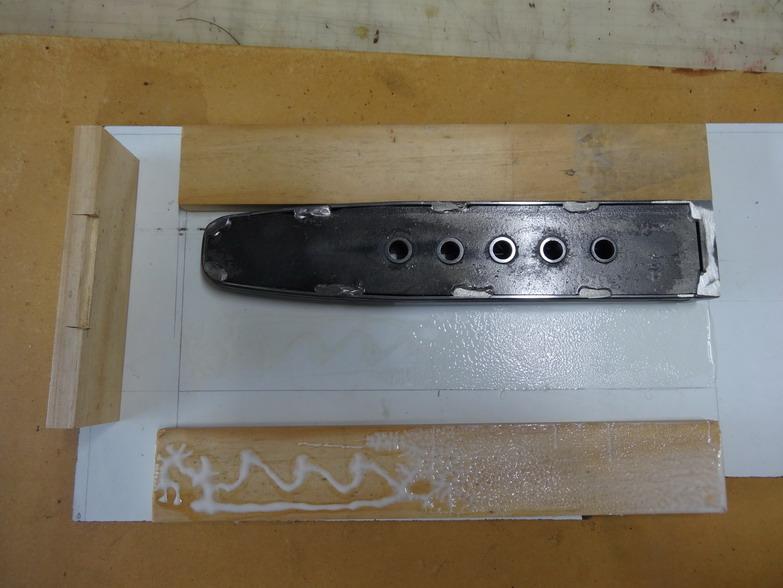
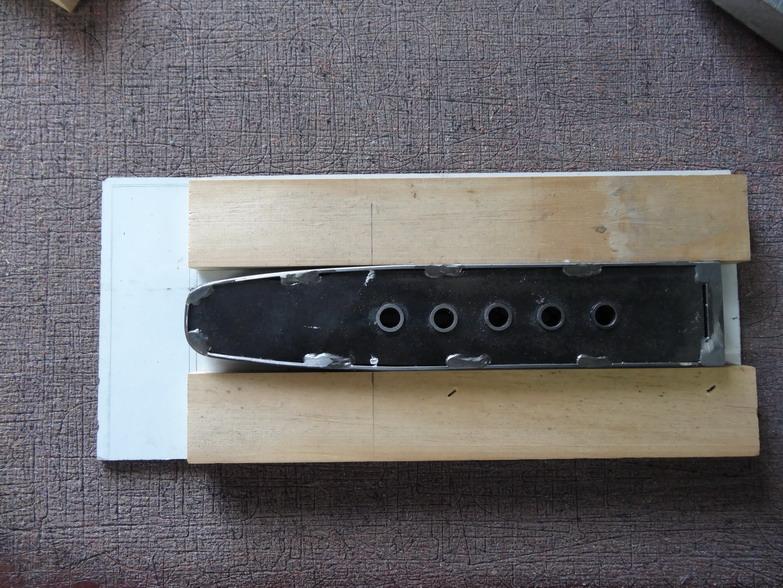
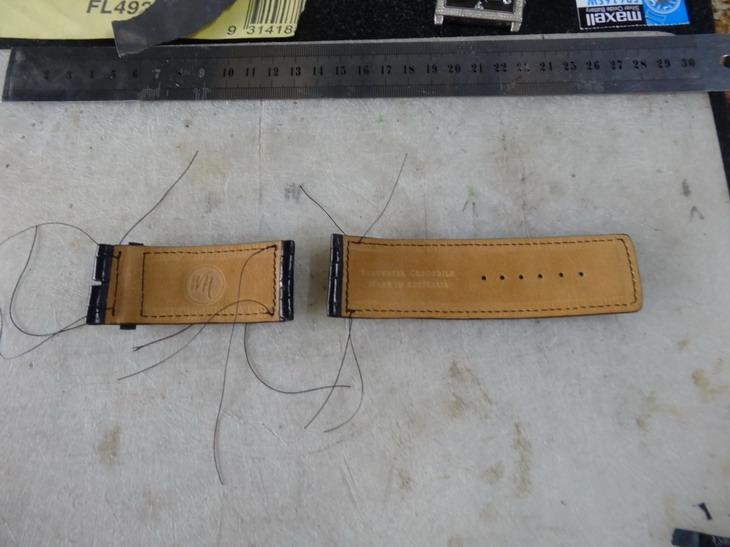
This is a method of cutting out the belt holes and tips together and perfectly every time. In the following I will show how I go about making a jig/alignment tool the old way as well as the new 3d printed way. Because I do mostly production manufacturing, time and quality are always important factors to be considered. As I am working on a tutorial on how I make combination dress belts shortly I thought best to do this one in order to cut down some of the explanations in that later one. I will start this with a couple of pictures of the type of belts I make to show off how the tongue holes and buckle holes and tips are done. This first one is one of the styles of the dress belts I commonly make. It is the 30mm version with a removable buckle retainer. I like this style mostly because the buckle retainer can be taken of the belt easily shortened which means if a customer is buying a gift for someone else they can safely get a long one and get it shortened. This hornback version also has a removable buckle retainer and is for a 45mm (1 3/4") buckle. This version is what I am going to show how I make up a jig for doing the holes etc. I use a clicker press and knives for doing this job but some workable inexpensive presses can do this work as well. Some of these can be found in this earlier post I did awhile ago and note that they are also useful for wet moulding, stamping and other things. After I have done my cad drawings and sent the patterns to the knife/die maker, he sends back a pretty good knife that will cut out the shape. One with the tongue tip and holes like this below should set you back about $150 AU or a little over $100 US dollars. This is done on 19mm or 3/4" steel rule die and will last for many years and many thousands of cuts. Once I get the knife back and in hand I grind away the edges so that only the tip and holes will be cut. Care must be taken not to touch the hole punches when doing this grinding process. After this step I construct a jig using 3mm (1/8") painted Masonite board for the base and normally some skirting pine that is typically used in internal door surrounds. That is normally around 30 to 40mm by 12mm (1 1/4" to 11/2" by 3/8"). I cut 2 pieces of the pine to the same length as the knife and with the knife held in between these I scribe a mark to cut the Masonite width and similarly the end stop smaller piece of pine. I then with a sharp knife carve out a recess for the belt tip leather to go in under for the tongue line up cut. Around 3 or 4mm normally will work OK. following this I cut the Masonite to width and glue and attach with small nails the 2 side strips of pine. Before attaching the end stop pine piece I tap down the knife enough to mark the Masonite well in order to get centre marking for cutting out. Once a clear centre line is drawn in and the width of the belt to be held is marked in place I proceed to do cut lines with a band saw or handsaw. (Back shortly)
-
How to make a watchband with edge coating tutorial
RockyAussie replied to RockyAussie's topic in How Do I Do That?
@Bluzoom thanks Dwight, I am working on some belt making stuff you may find useful for you so keep checking or follow me. -
I am not sure what you mean by stamp press and die size. Are you trying to emboss a logo that size or cut something that size? If it is for embossing does it have to be heated as well? 6" x 1 1/8" is pretty big and I would normally resort to using a clicker press for that sort of tonnage depending on how much detail in the stamp there is, but there are some other ways as well. A picture could help if that is possible.
-
That is some real nice looking stamping the Bob. If I may say it when using a sewing machine and you can feel an extra thickness coming up you will notice that it starts lifting and that is where the needle will go close to coming off the edge. As soon as you feel that rise, force it down and in to stay level and you will overcome that problem generally. I reckon they will love it for many years to come.
-
I would think that if a piece of thin foam with a slice half way through could be placed just before the first stand eye the thread could then have any backward movement stopped thereby not allowing the thread to ever drop to the underside of the cone. For some cones it would be easy to print out a reverse cone that had a springy centre to fit within the the thread cone hole but some only have small holes and some large. The large holes would be easy to fit up but the smaller ones would be a little more complicated. I do think stopping the thread from falling back would be the main issue and that may need something shaped like this >.
-
Mate that just looks tooooo good to use I would be always be stopping myself before I'd be game to stick that knife in there. Beautiful work.
-
How to make a watchband with edge coating tutorial
RockyAussie replied to RockyAussie's topic in How Do I Do That?
Thanks you , I think compared to your work it will pale and I think many here will get to see and appreciate this from you. Thanks I am glad to hear that That was my main goal and I will do some more using some machinery in the near future. I have to do a couple of hundred 3/4" belt in a whole range of coloured edging sometime this month in case you might want to follow me for a bit. Hey ....would I post anything but....??? I would like to thank all of the people that follow me for their patience and all of the notifications they must have gotten while I multi posted into this post. -
-
 Tutorial on making and edging found in my profile About Me section
 -
Past posts linked into my profile ..about me
RockyAussie replied to RockyAussie's topic in Leatherwork Conversation
Here is a link to my latest one that shows some on how I use edge paint - -
How to make a watchband with edge coating tutorial
RockyAussie replied to RockyAussie's topic in How Do I Do That?
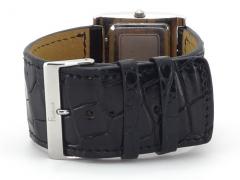
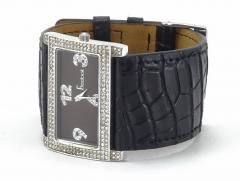
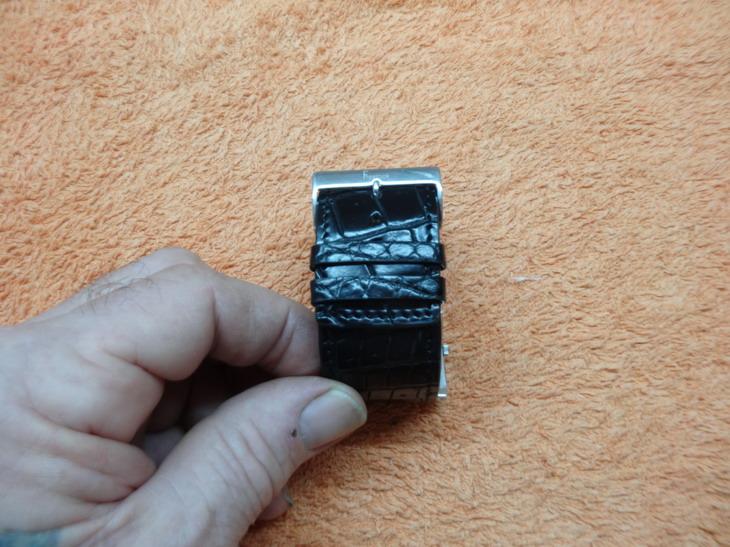
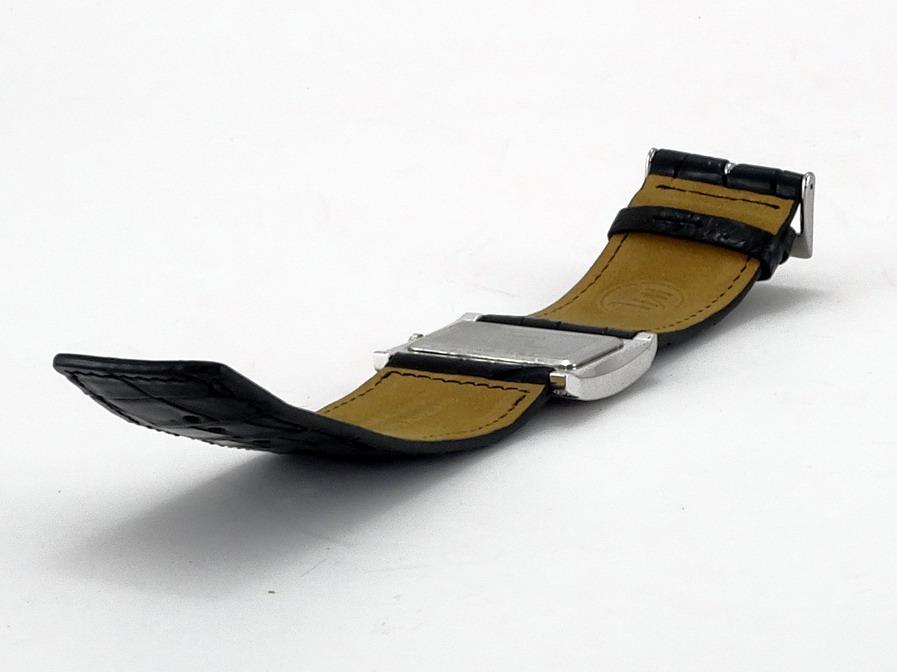
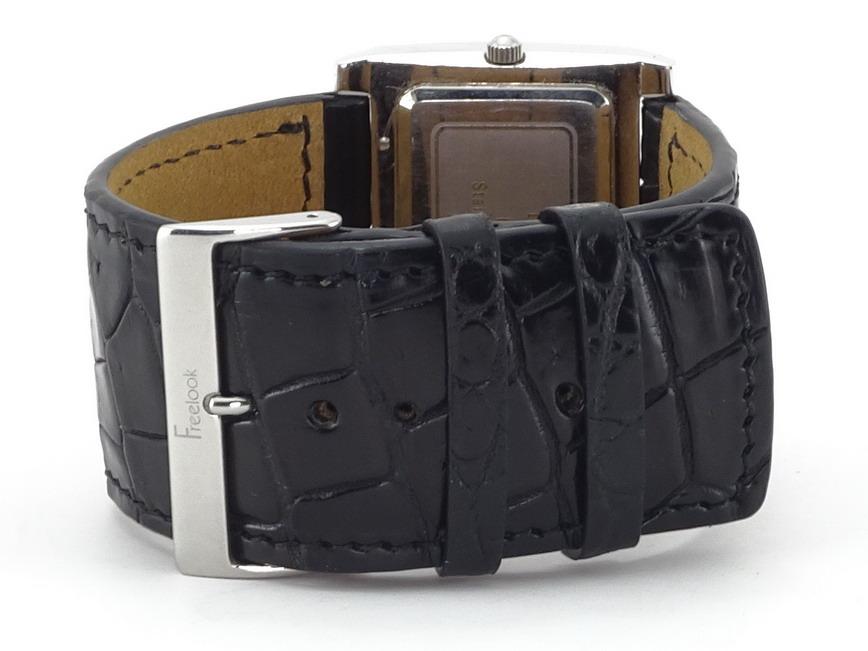
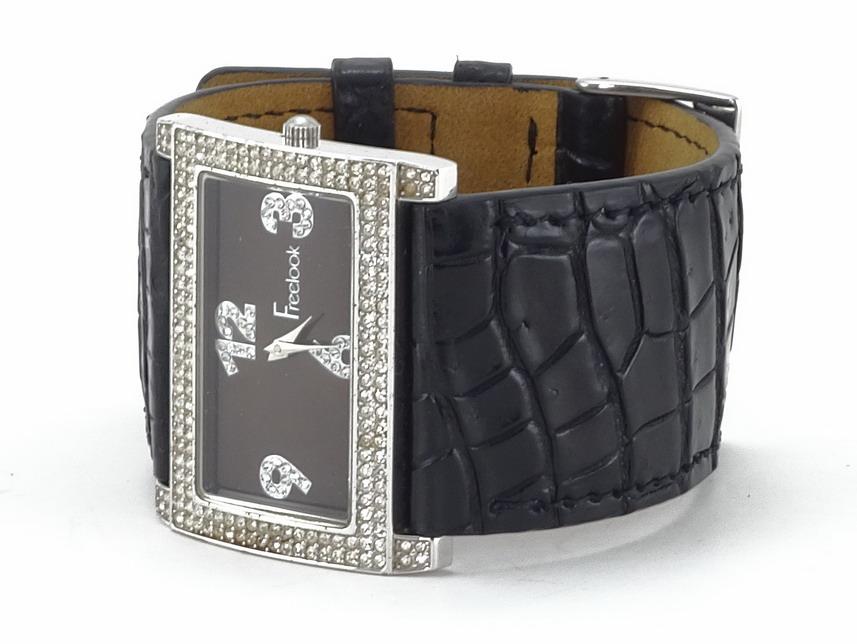
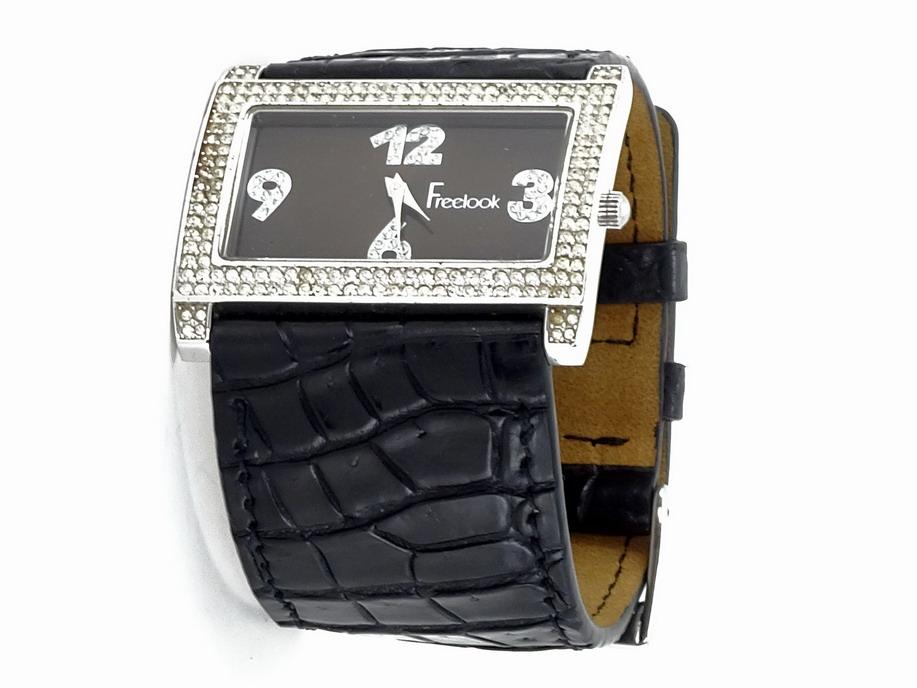
Well its done... The first 2 are from my crappy old camera which I have to now take 3 shots to maybe get one in focus and the others are done by my wife's camera in a light box. I am not allowed to touch it..... This is one job where I wish I had smaller hands and fingers That is all for now ....next one will be a phone pouch I think.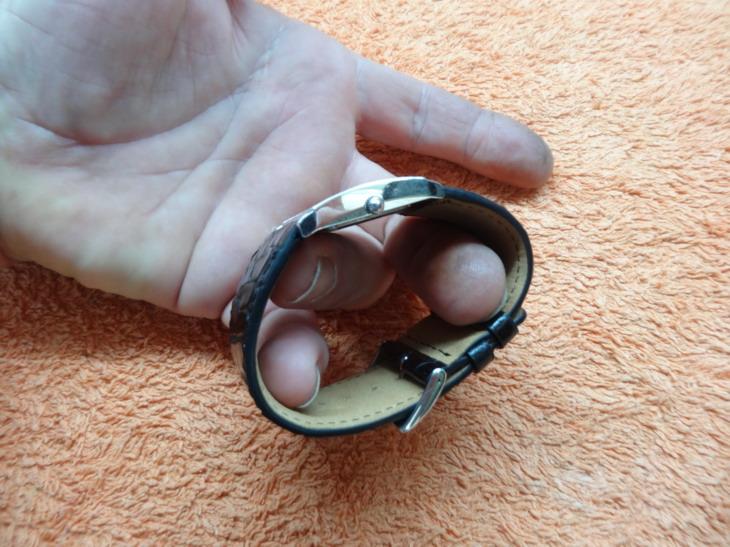
-
How to make a watchband with edge coating tutorial
RockyAussie replied to RockyAussie's topic in How Do I Do That?
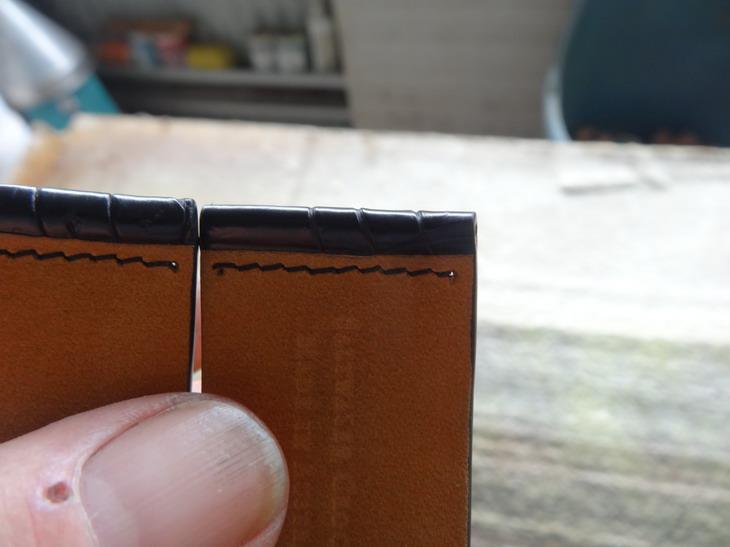
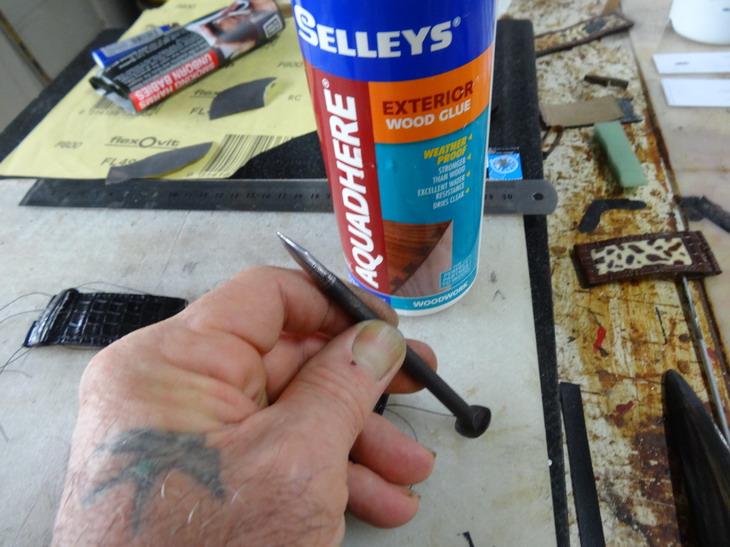
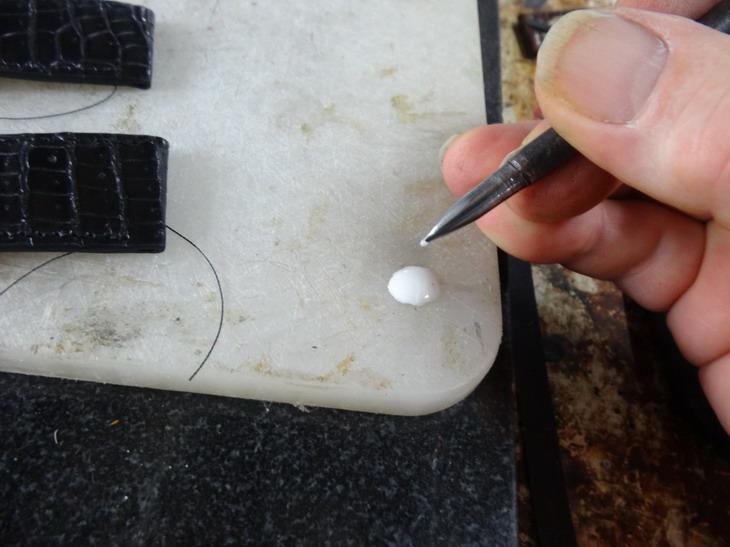
To get the stitching right I have to mark out where I want the start and stop holes to be. This I do with a sharp ended spike as below If you look carefully you should see where I have poked holes right the way through. This is so from the top side I can see where to stitch to and from As I am an expert at going crooked when doing this I have put a scribe line across to follow Now as I ALWAYS do I do a test to get the tension and stitch length where they should be. Not perfect but its Ok with a slightly blurry camera Now we have to clean up all of the threads This I do with a little dab of wood glue and a cup head bolt that I have sharpened to a point that has the end a little squared off After cutting the threads back I put a dab of glue down to poke the spike into. As the glue tacks off I push the spike down into the hole and check for any overrun. Well ...thats about it. I will post some pictures when I finish polishing and putting it together.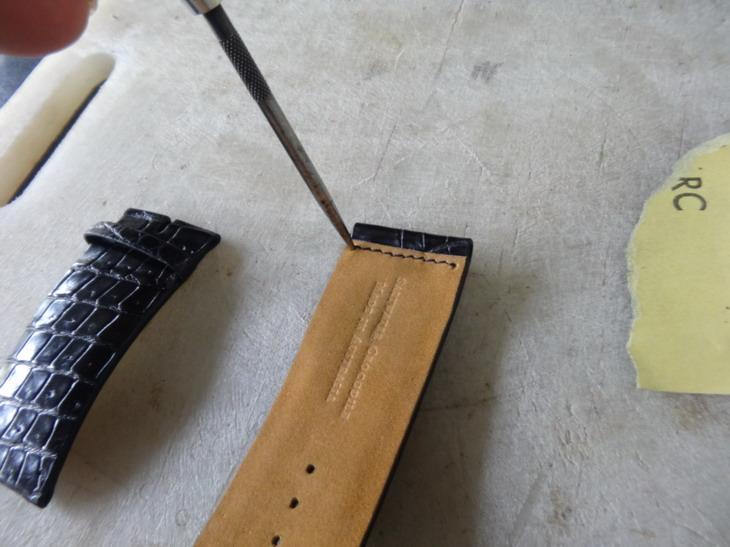


-
How to make a watchband with edge coating tutorial
RockyAussie replied to RockyAussie's topic in How Do I Do That?
Same principle , it one of those things left over from my shoe making/repairing days. This link shows more info that may be of use to you -https://www.ebay.co.uk/p/5-X-Kabi-Gluemaster-KA25B17-Patented-Brush-Oil-Can-Brass-Pump/28023986721 The one I call spiky is my own idea where I have pulled apart an old worn out brush and inserted a brass tube into the supply hole. -
How to make a watchband with edge coating tutorial
RockyAussie replied to RockyAussie's topic in How Do I Do That?
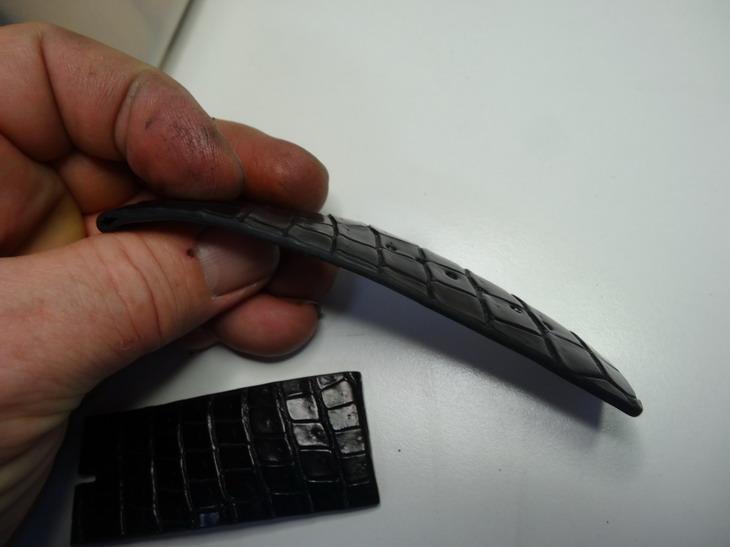
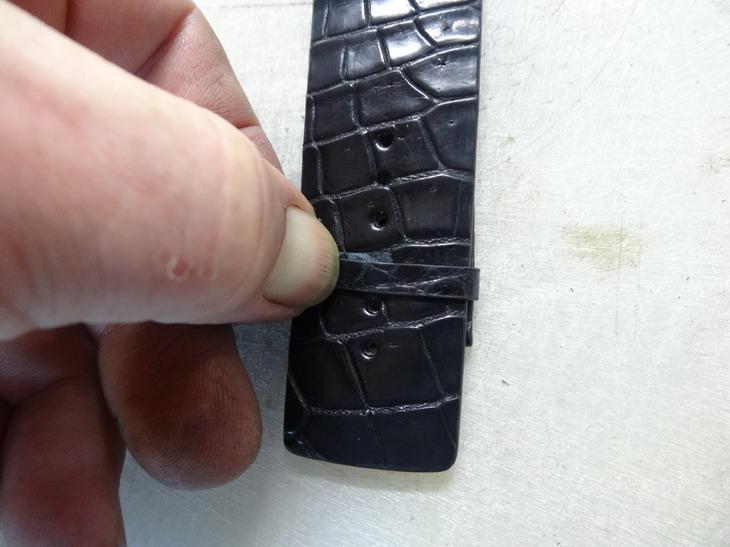
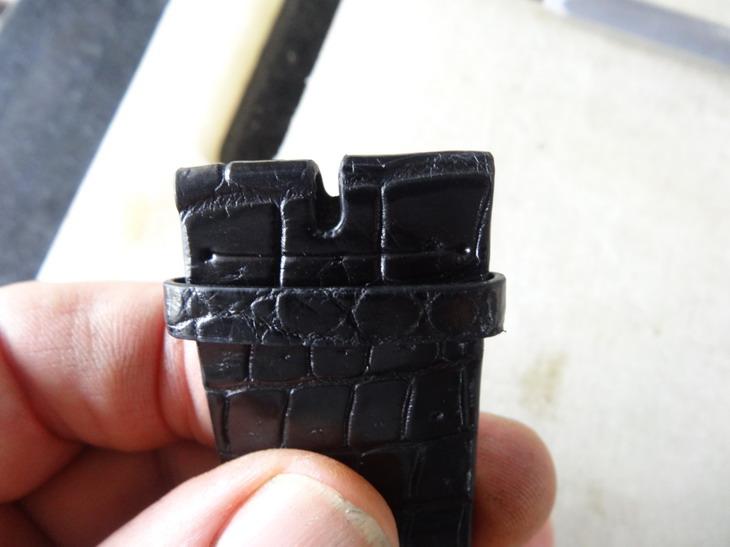
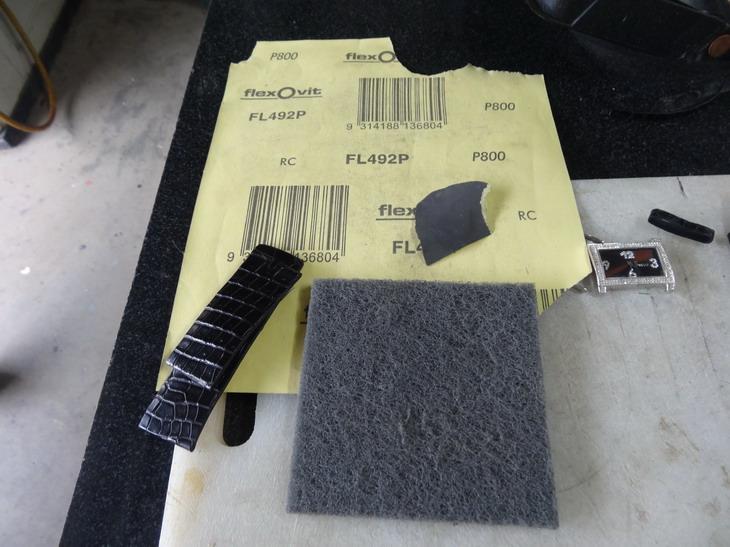
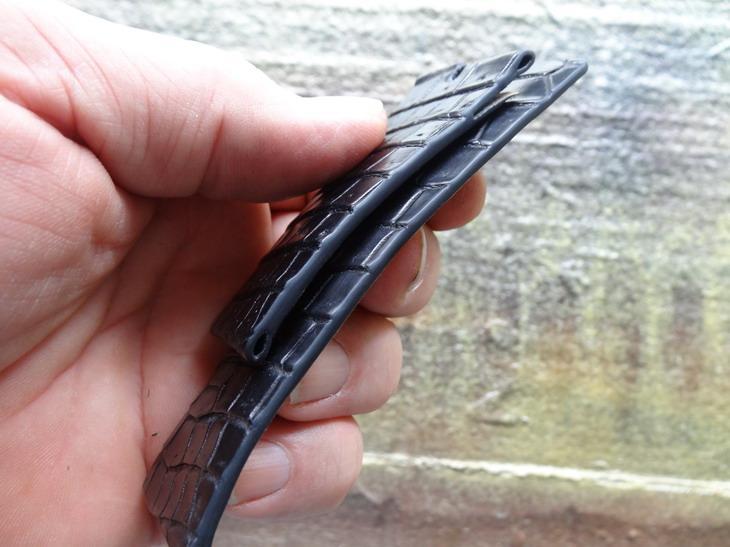
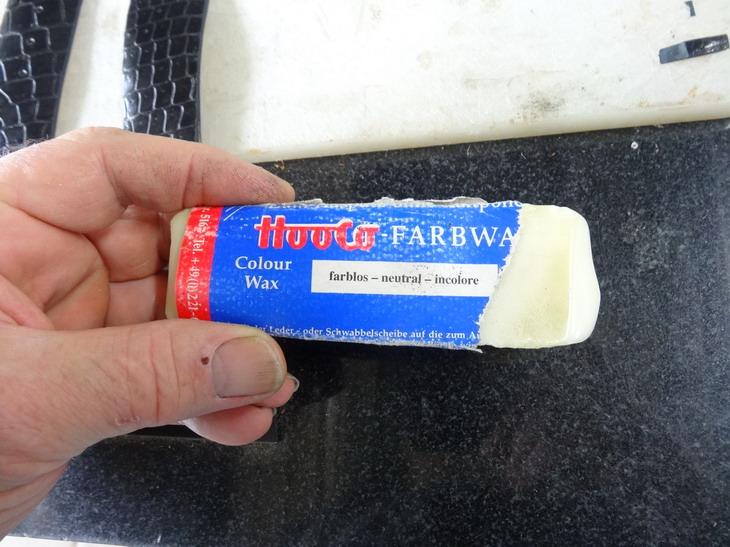
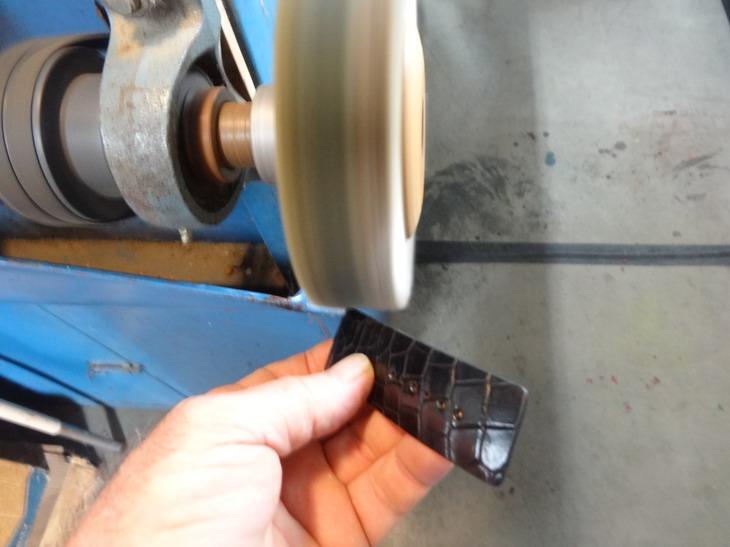
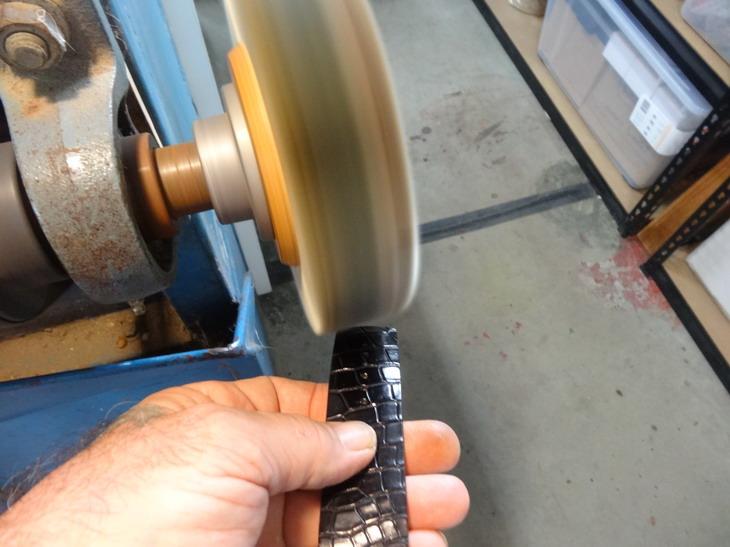
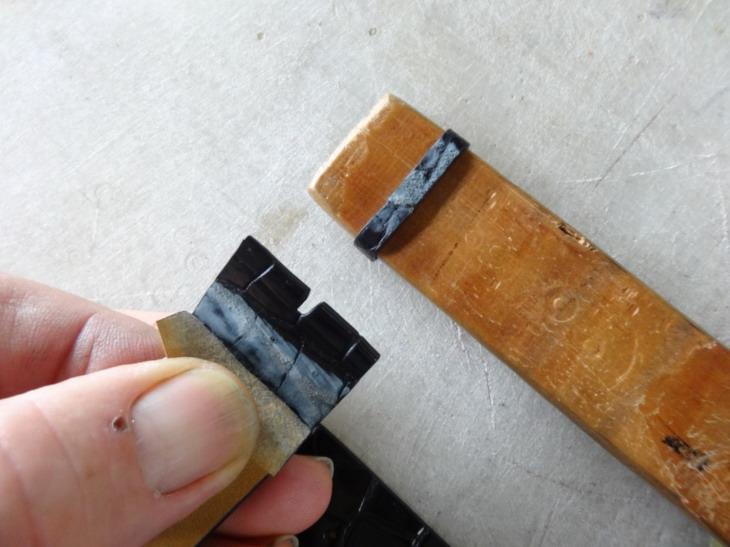
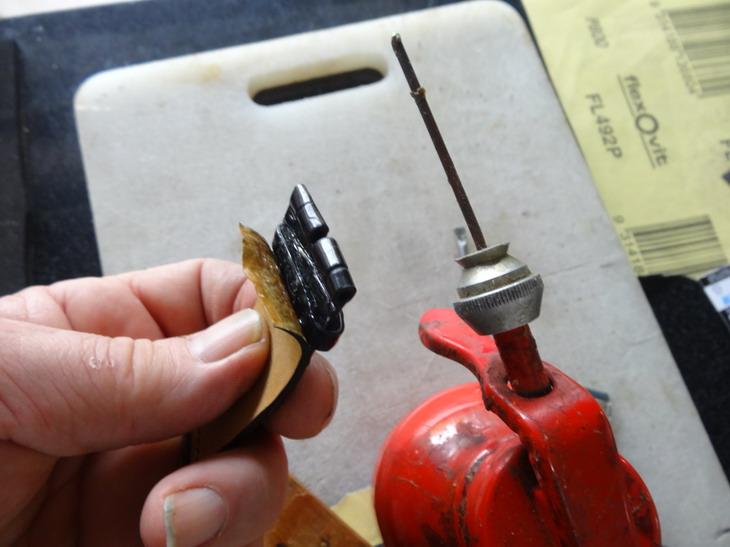
Yeah ...I'm starting to get amazed myself....might have to throw this egg cup up your way. Again with the egg cup I give it 1 or 2 more coats and let that dry for a few hours Sometimes after drying they still may need some extra work. This pic below shows the edges are still a bit split line looking This is now tackled with some very fine sandpaper and light rubbing with the grey Scotchbrite Now it looks smooth but quite dull The next step is to apply some of this HooCo wax This I do on a finishing machine with a soft horse hair brush I also like to give the top a good polish at this stage as that helps to avoid glue sticking to the needle when I stitch the bands This picture shows the difference between a polished edge and one that is not. Now it is time to place the keeper into place and I have sanded it all to make sure the glue holds it all in well. Here shown it is glued and ready to stick down Now it is ready to set up for the stitching Time for a coffee -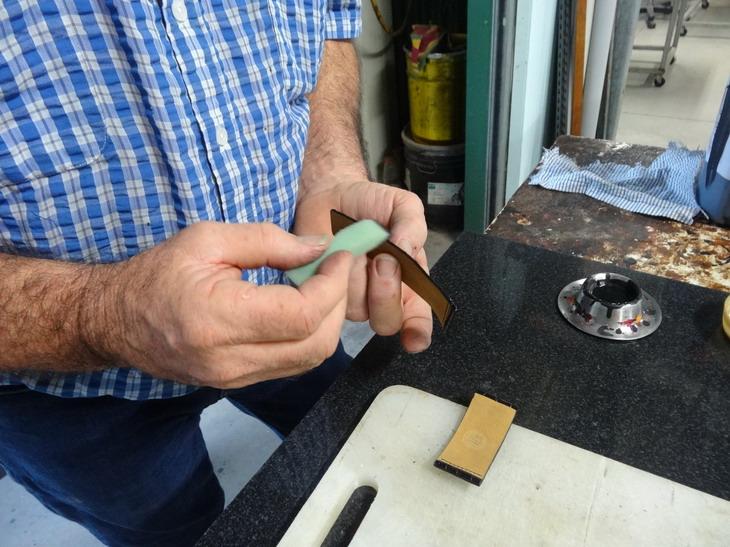

-
How to make a watchband with edge coating tutorial
RockyAussie replied to RockyAussie's topic in How Do I Do That?
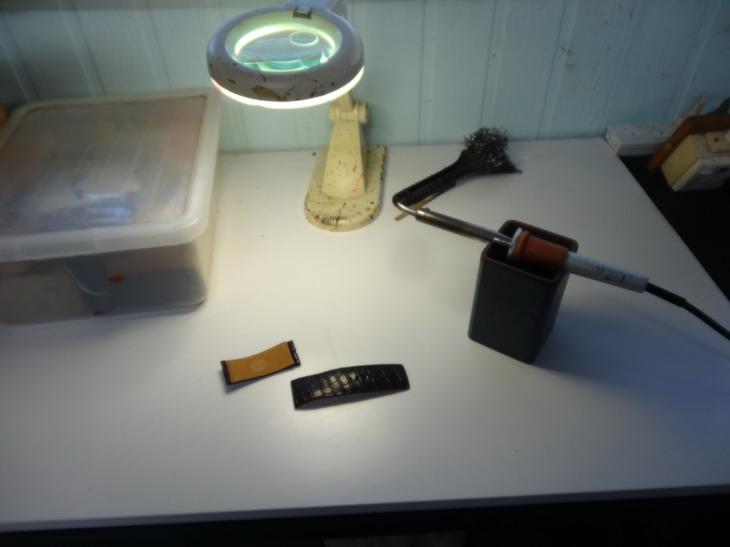
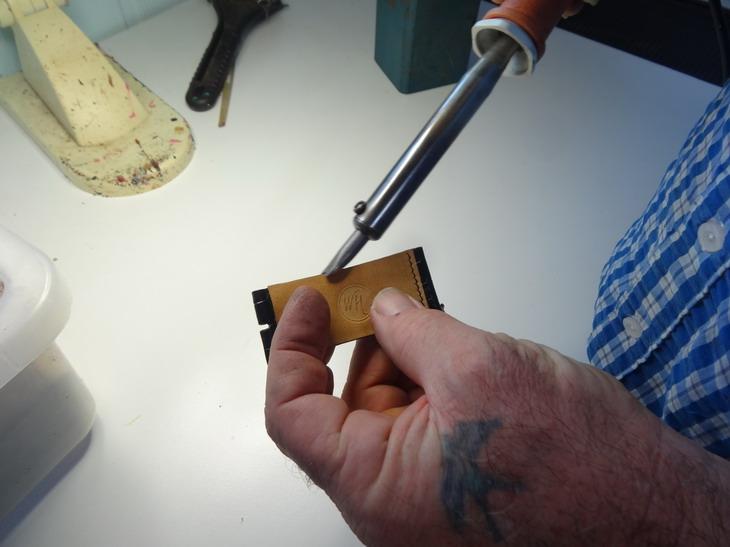
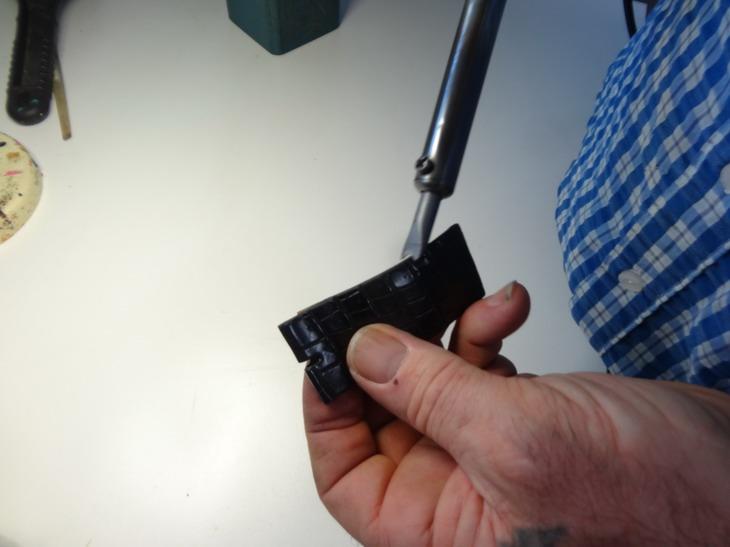
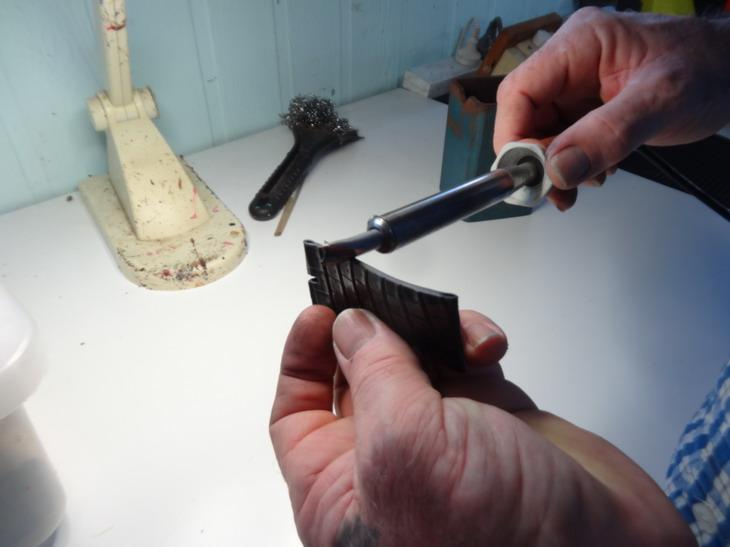
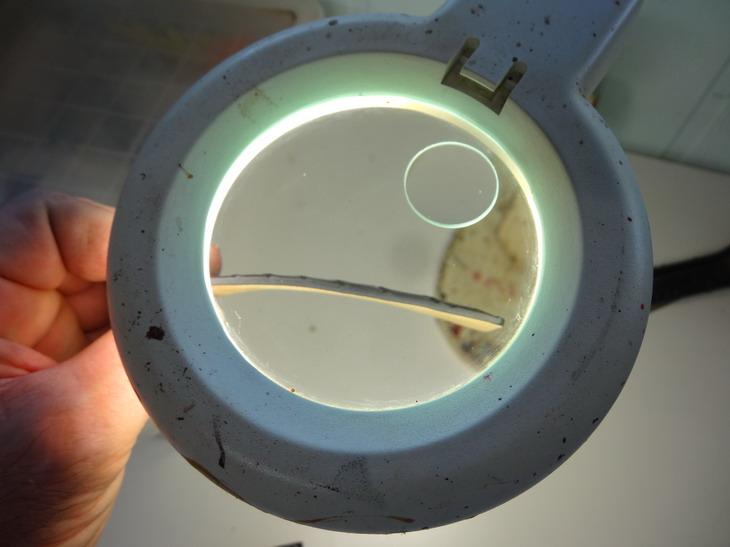
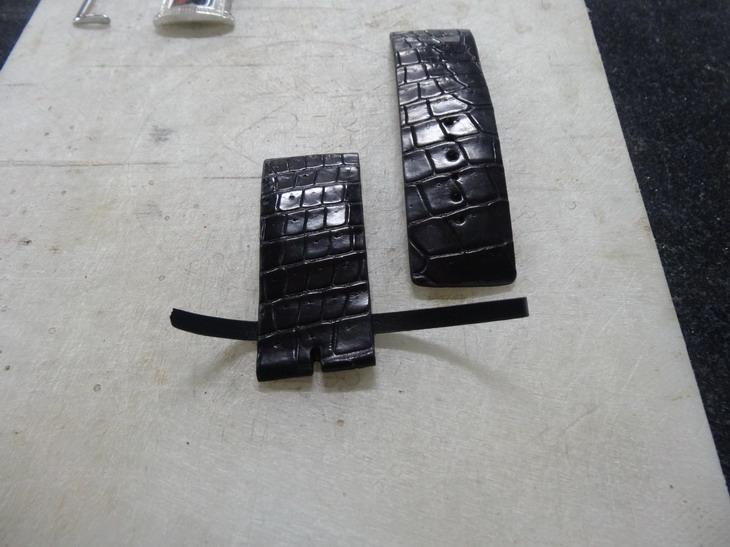
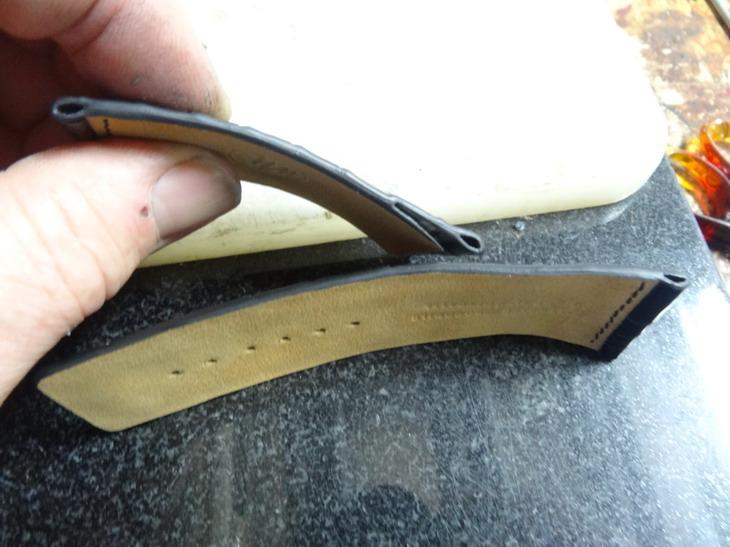
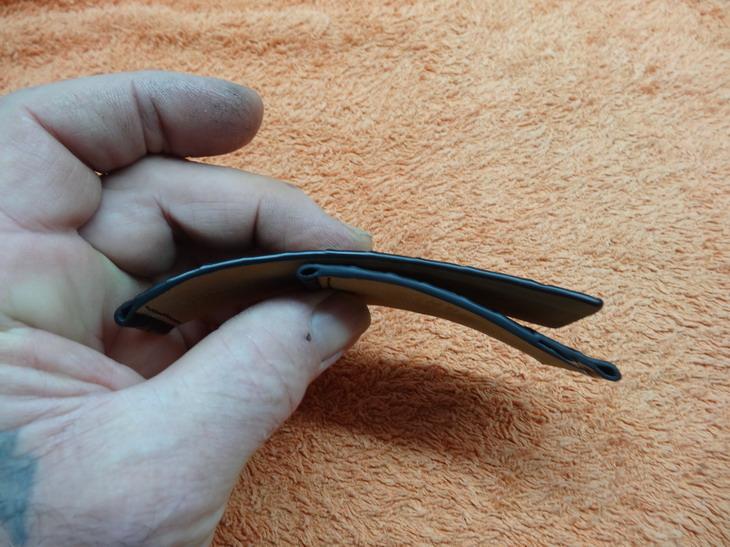
you OK now it is time to iron in the rough edges. I do this with the help of a 60 watt soldering iron that I have shaped the tip into a curved shape. This iron is temperature controlled by a light dimmer switch which I have been using this way for many years now. I use a piece of box channel hollowed out on one end to hold the iron in between steps. A magnifying viewer with a light helps to check and spread a bit of light as well. Here I am pushing the iron away from me and sliding it along the edge Now the same is applied to the other side of the same edge If there is any trouble getting the centre down smooth you can also use the edge of the iron as shown A quick check under the magnifier shows its good enough for a finish coat At this stage I decided to get the fixed keeper joined up I position the other band on top and determine the length needed A sharp knife is needed for a good skive The keeper is now contact glued up with the help of my spiky glue pot and now it is pushed down over the top at this stage Next step will be how I do the finish edging