


RockyAussie
-
Posts
3,265 -
Joined
-
Last visited
Content Type
Profiles
Forums
Events
Blogs
Gallery
Everything posted by RockyAussie
-

How to make a watchband with edge coating tutorial
RockyAussie replied to RockyAussie's topic in How Do I Do That?
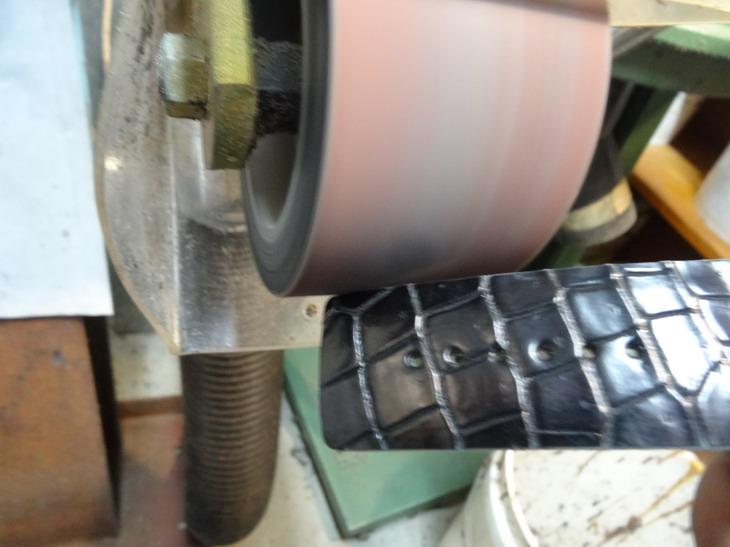
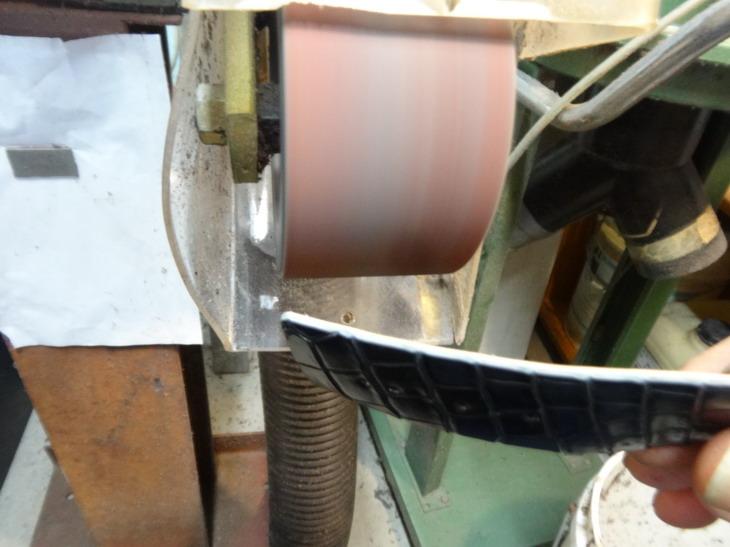
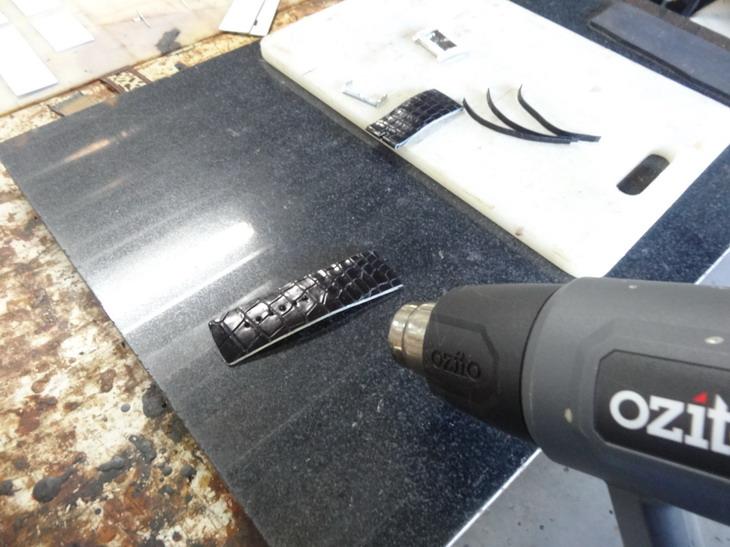
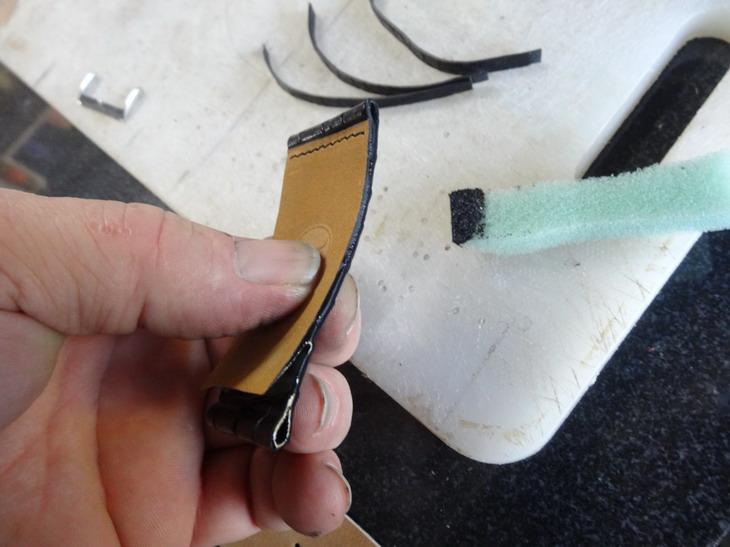
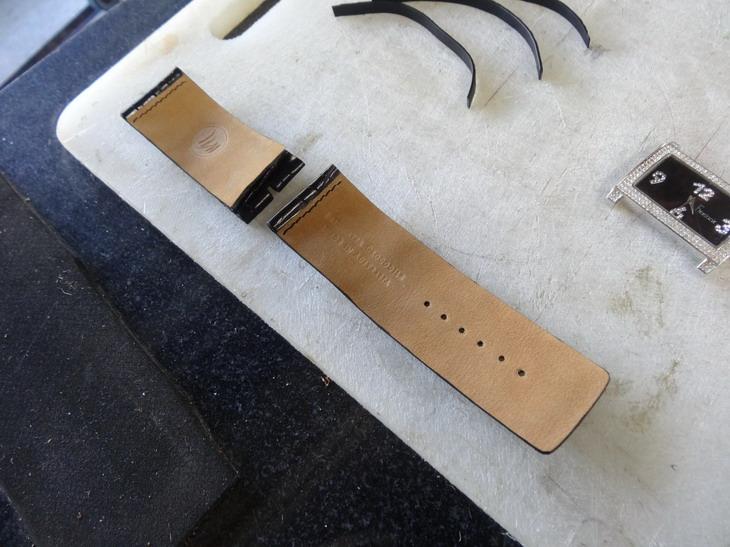
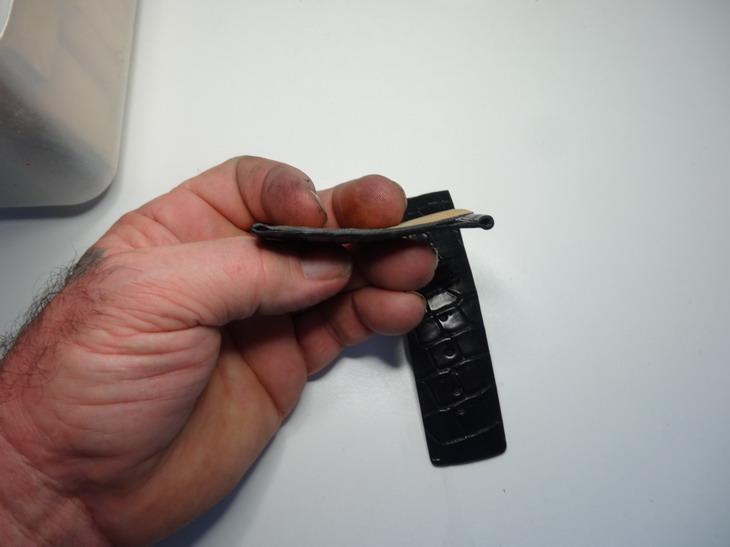
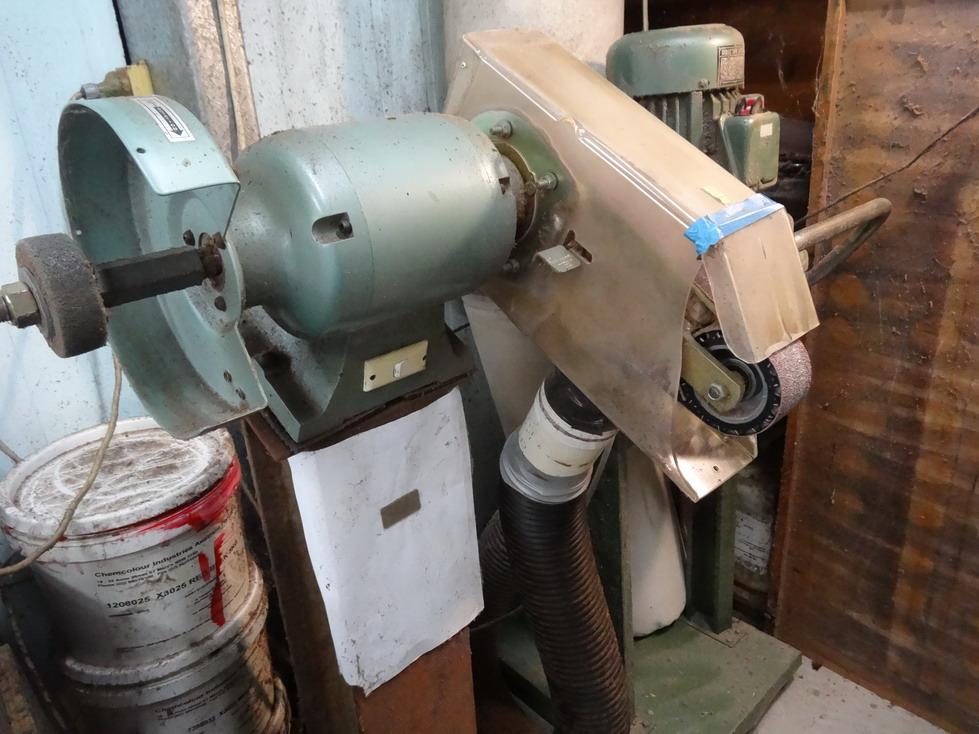
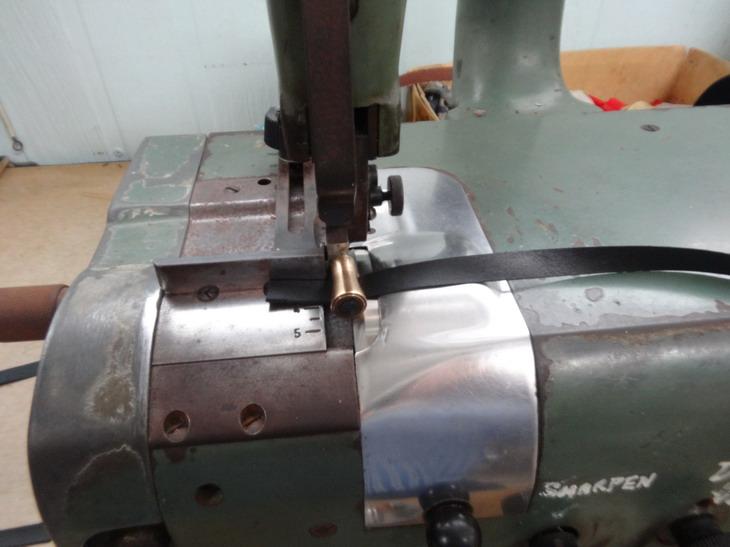
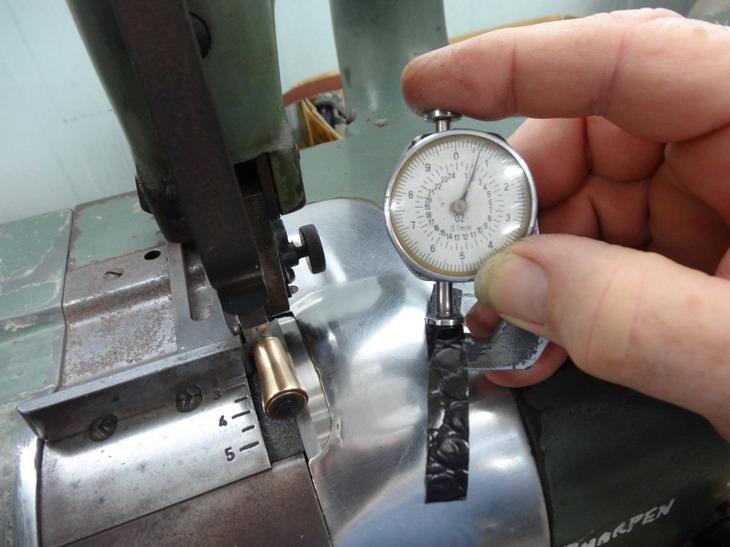
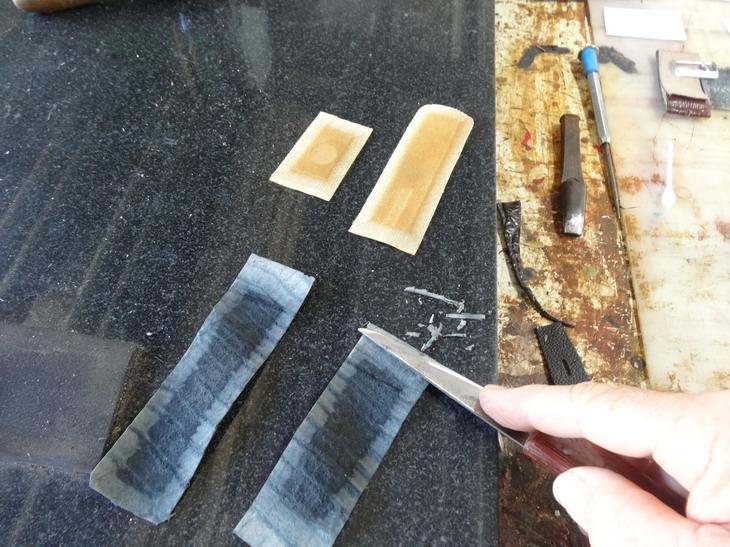
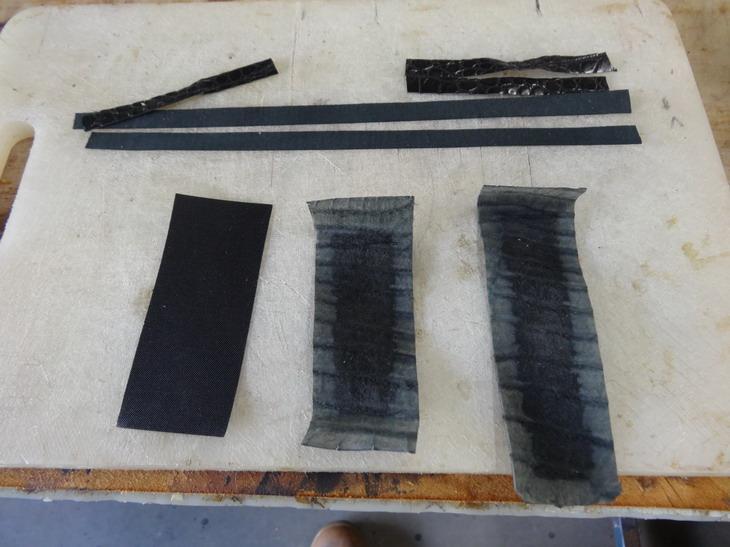
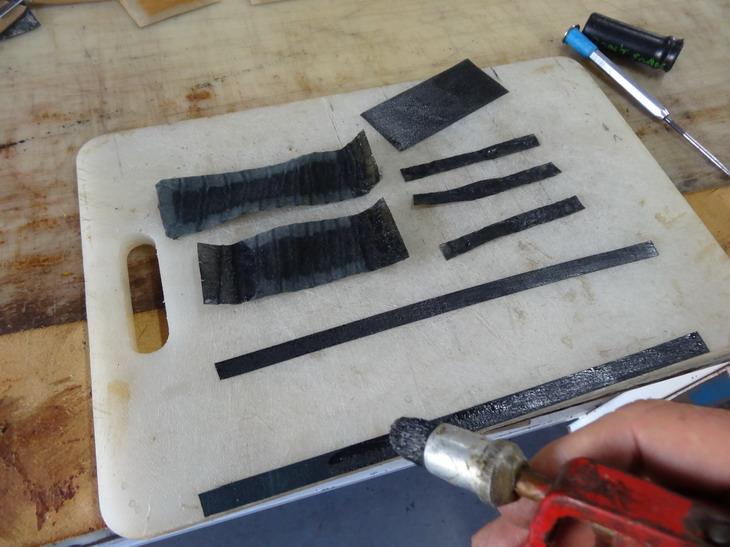
Thanks for the comments Gary and Brian. I just thought I would throw this picture in to show how well the tack coat can help when second cutting. Most leather are Ok with this but some oil tans can leave little blotchy marks but they normally rub out alright. Now I like to use a fast speed Multi Tool sander with some fine 180 grit belt for this sort of job. You can use a fine grit sanding block as well it just takes a lot longer. This shows the machine and how I have made up an extraction cowl with some Perspex and a piano hinge to assist with the dust. This is the angle I would hold it on while taking a bevel off of the edges. It should start to look like this after sanding A little heat carefully applied with a heat gun takes care of some of the fuzzy fibres Now I do a check and make sure it is going to fit into the watch and buckle and leave a little room for the edge paint. Now after giving the keepers another coat I start applying the edging along the straps. This requires a steady hand and should be lightly touched on NOT push and dragged on. The first coat should be kept fairly light and seals off and goes dry quickly. In this case I followed with a second light coat after about 5 minutes. As you can see from the back the edging is a bit drunken sailor but the ironing will give that a straighter appearance later. Once dry this is what the edging looks like prior to ironing. You could sand it and re edge coat and sand it again as well instead of ironing if needed. Back soon -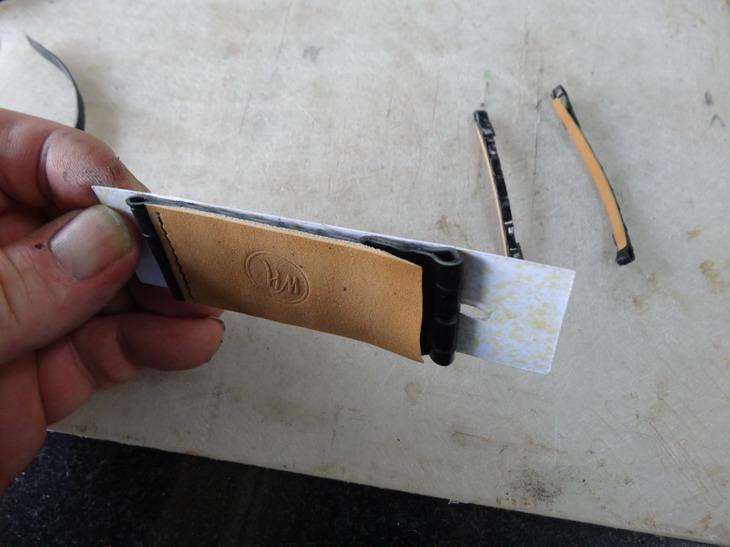
-
How to make a watchband with edge coating tutorial
RockyAussie replied to RockyAussie's topic in How Do I Do That?
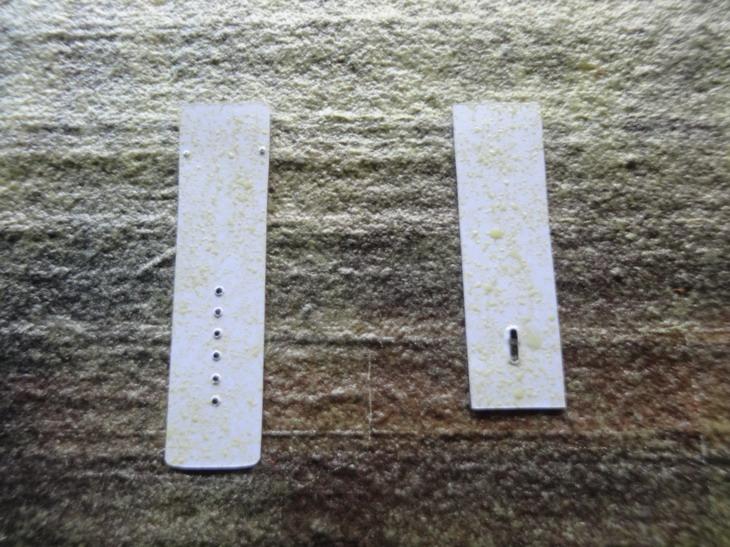
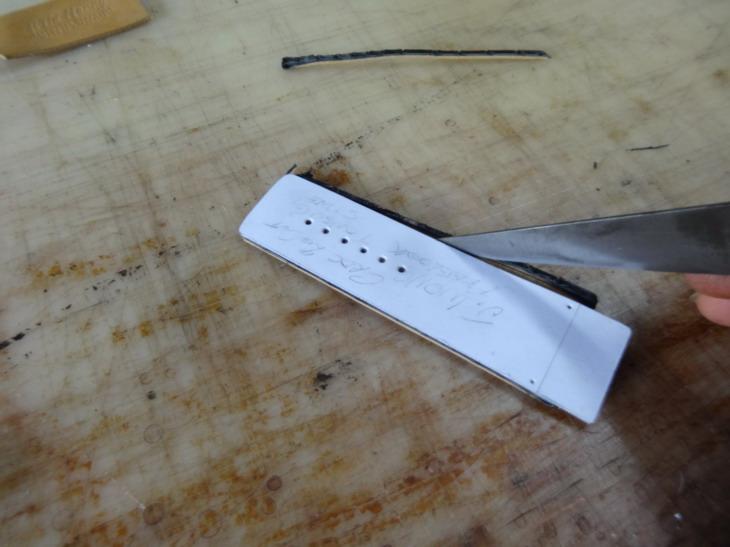
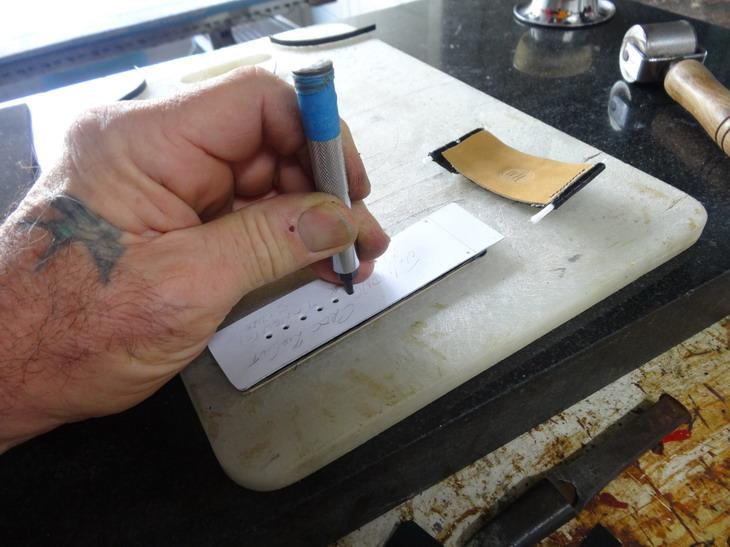
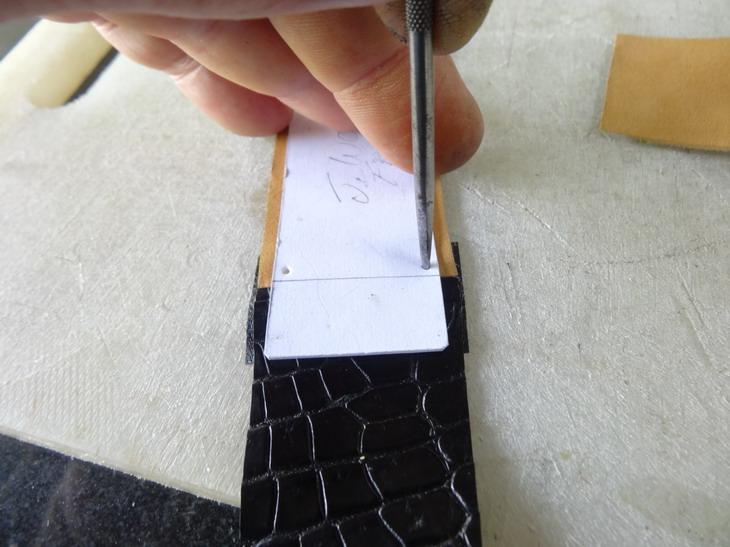
Next step is to stitch the connection Then pull the threads through to the back, glue them then tie a knot to keep them firmly held Next step is gluing up and I have run a graphite lead pencil all in the middle to help the pins slide in later if it gets too tight. Here they are now attached except for the backing near the buckle end. This is where I want to put in the first keeper later on. To make the second cutting easier I like to glue up my cardboard patterns and let it tak (dry) off for a while. this helps to stop any moving around as I cut. As you can see it helps Now the holes get marked with a hole punch Note: that the holes are only marked as yet. This is because going through the cardboard pattern and the strap ruins the cardboard pattern. Now the holes can be punched out. Sanding and edging will follow tomorrow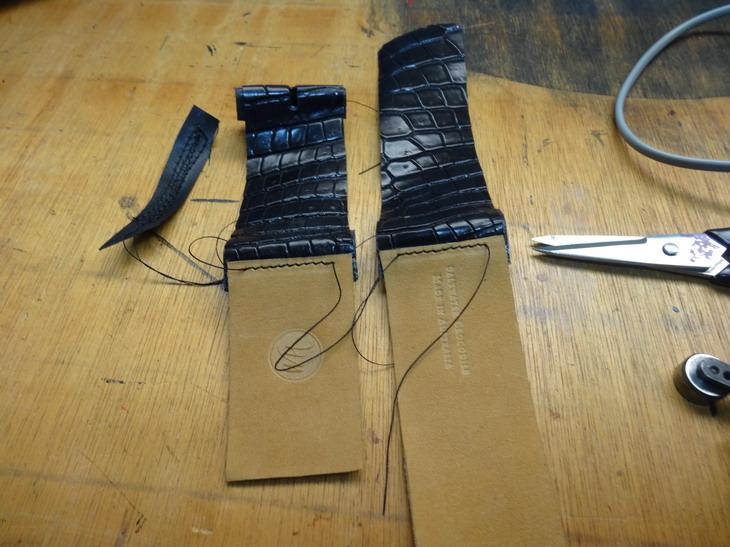
-
How to make a watchband with edge coating tutorial
RockyAussie replied to RockyAussie's topic in How Do I Do That?
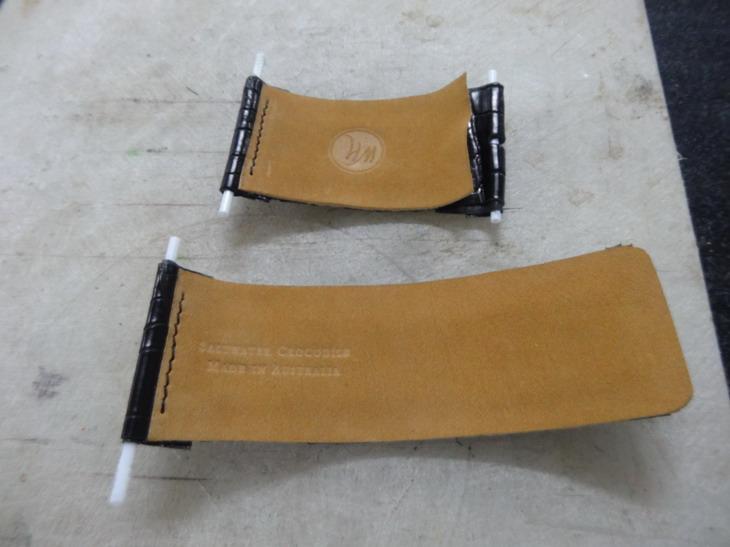
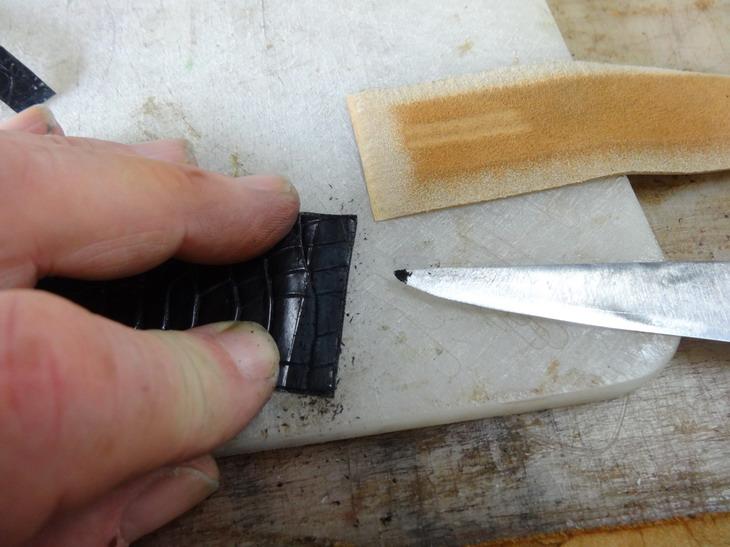
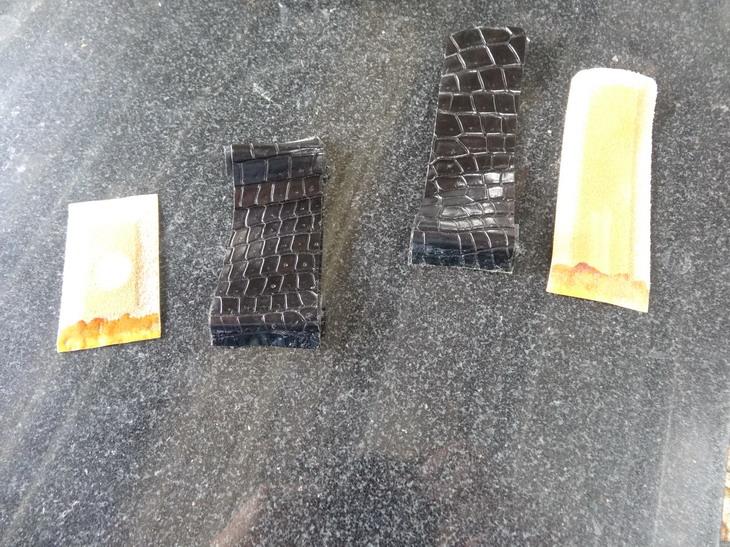
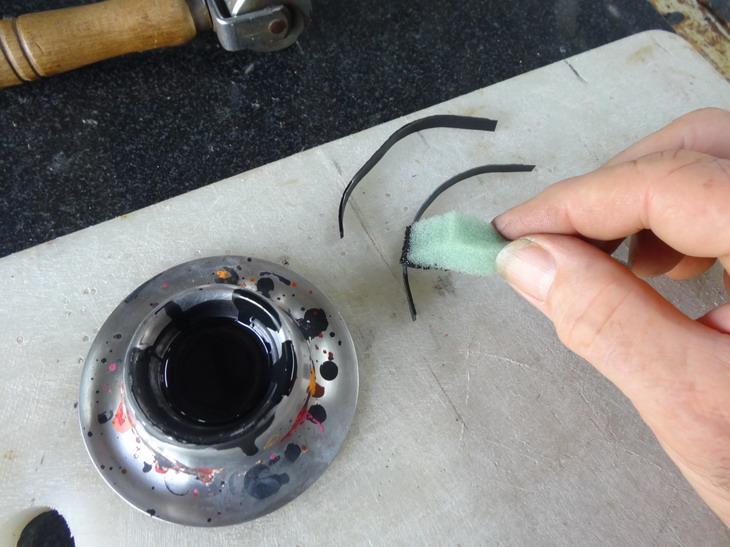
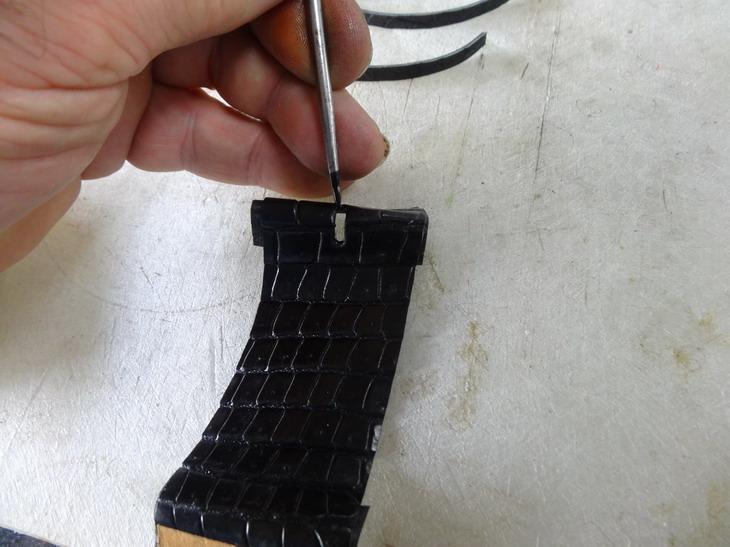
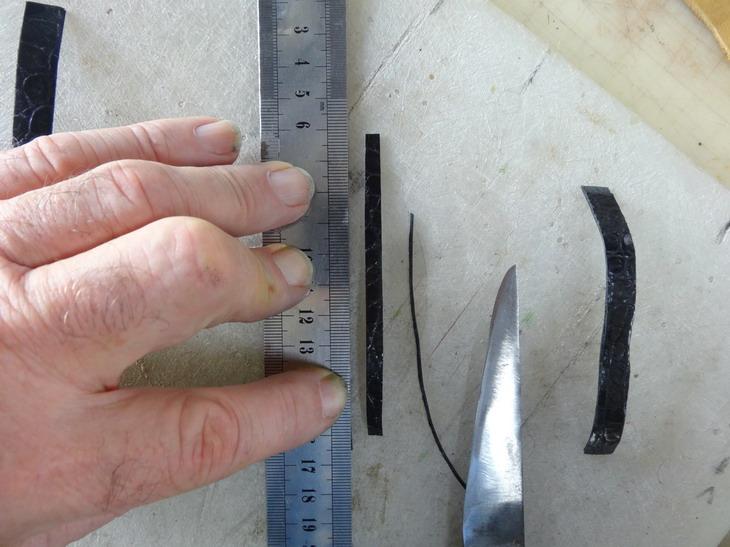
Now I mark out where the backing has to be attached to the crocodile. This is then scratched up to be sure of good glue adhesion. Followed by gluing up the pieces After the strips are attached I like to get the crew punch hole cut and ready for edging The keeper strips are now second cut to the correct width to be edged together with the crew punch. Note that a stainless steel egg cup is used here. Now I mark out where I want the stitches to start and stop on the backing connection. A light scribe line could then be applied if wanted. Back soon -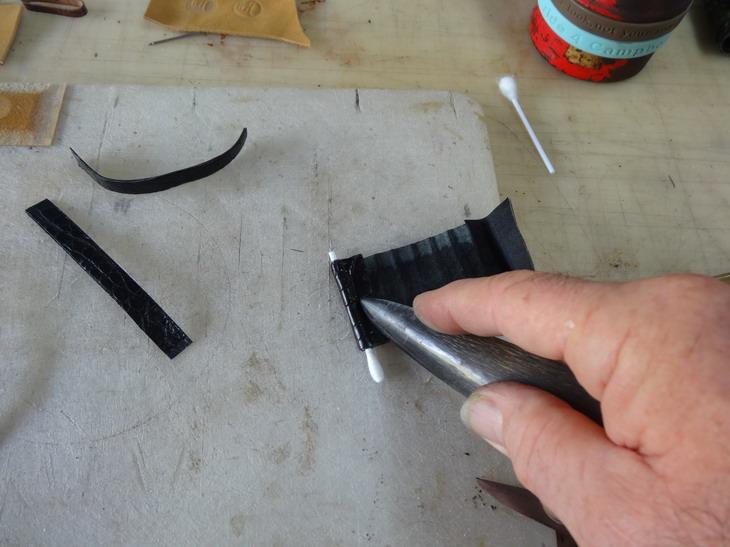

-
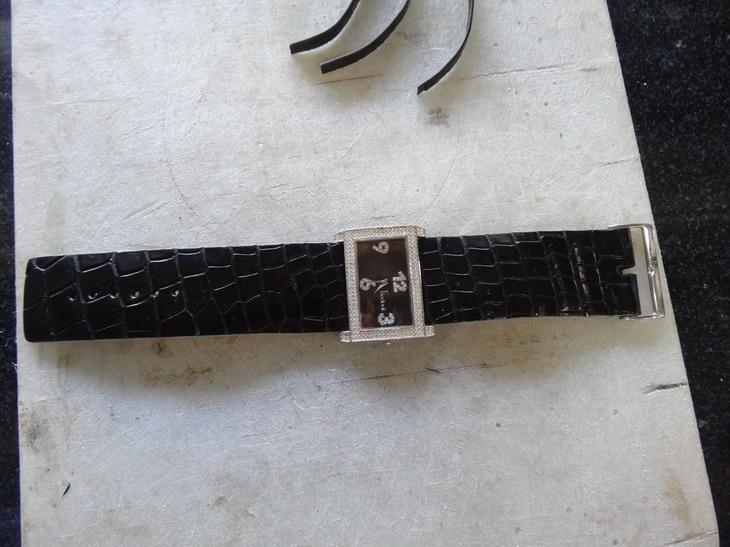
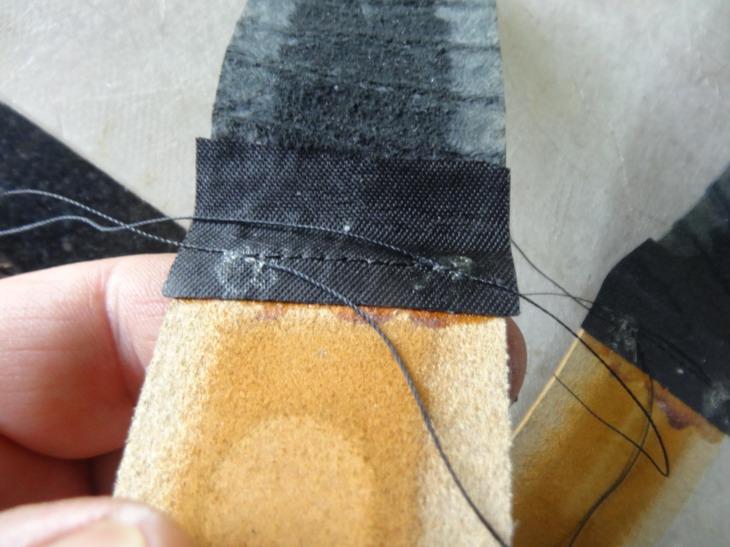
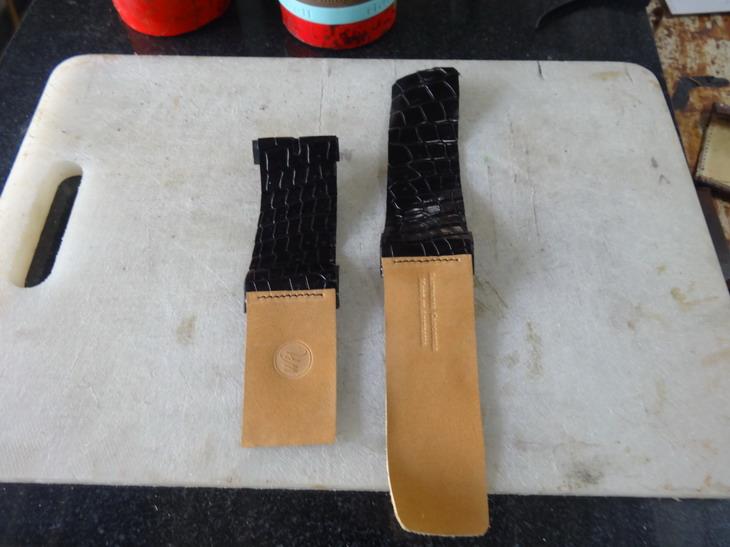
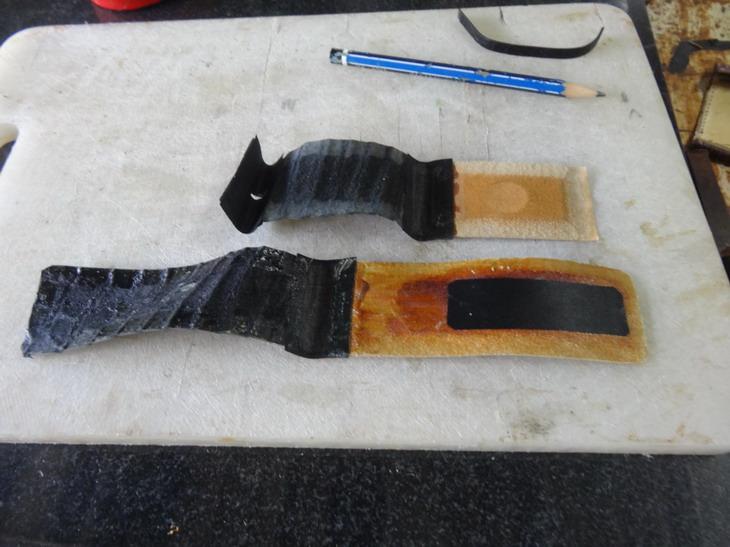
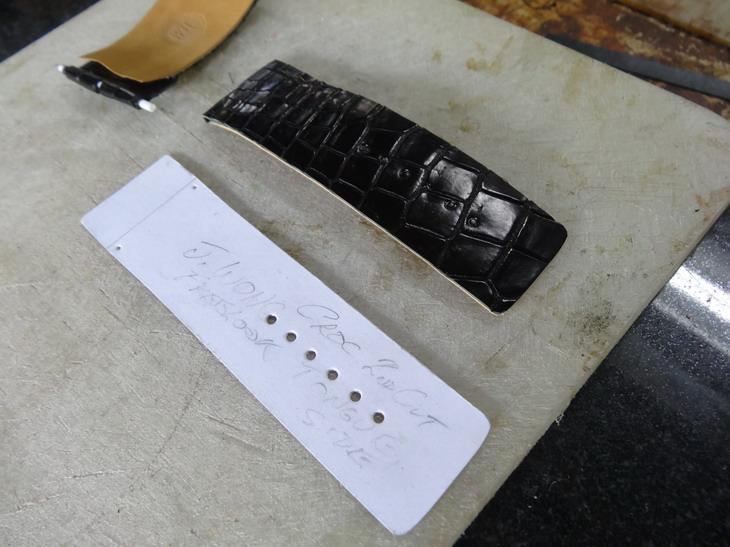
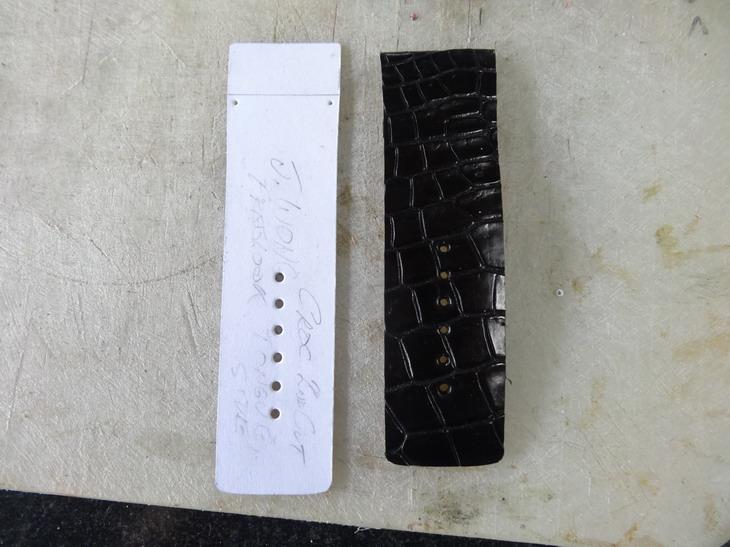
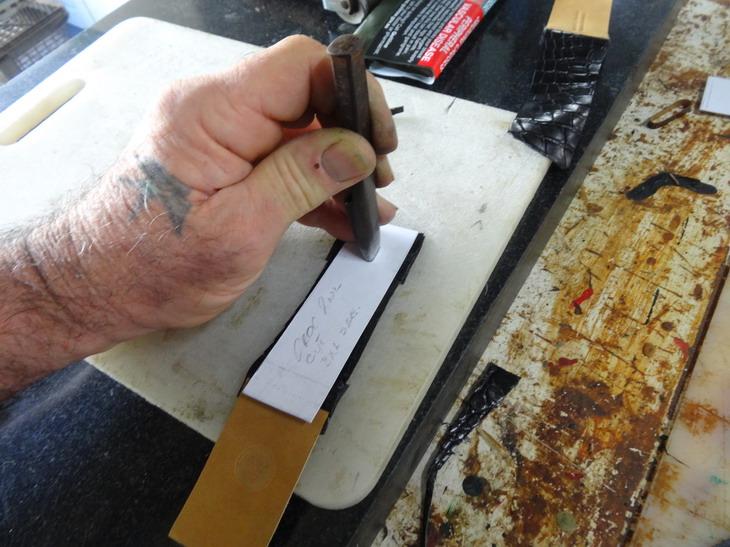
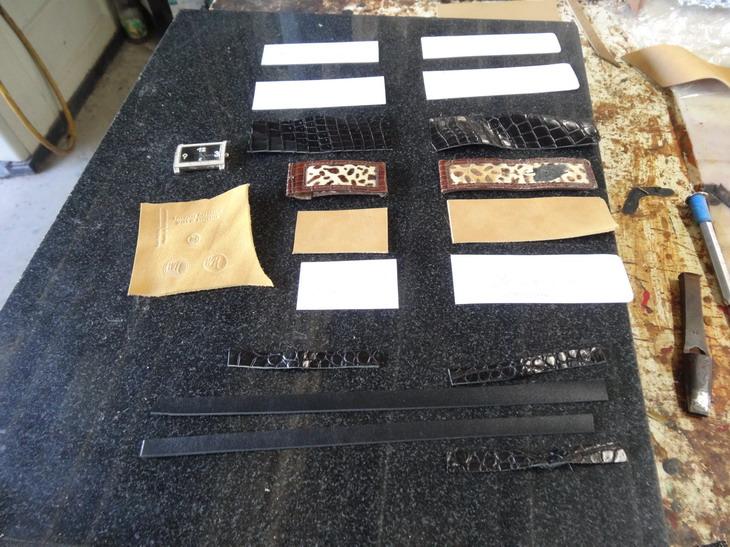
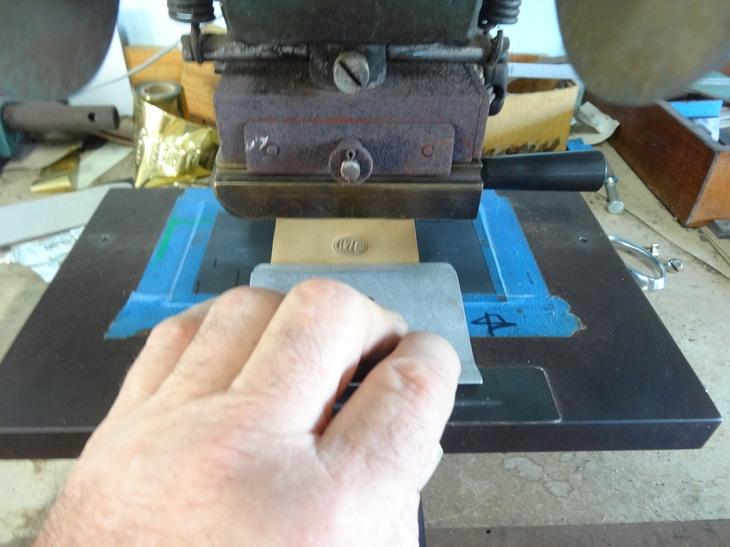
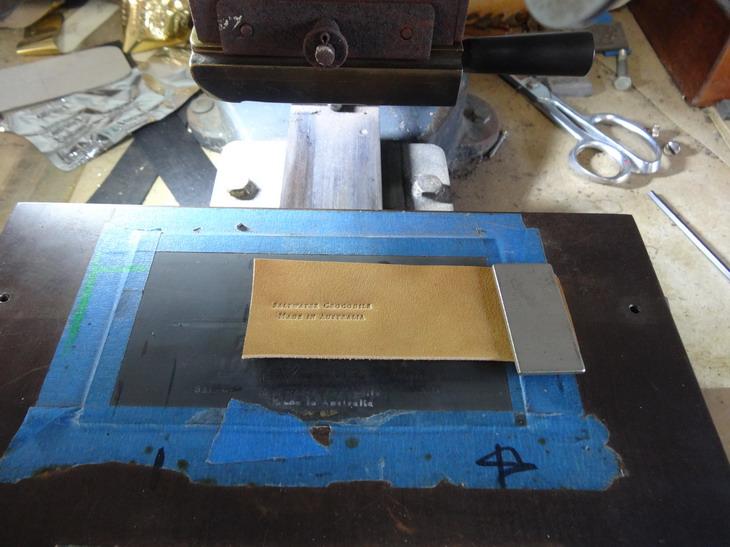
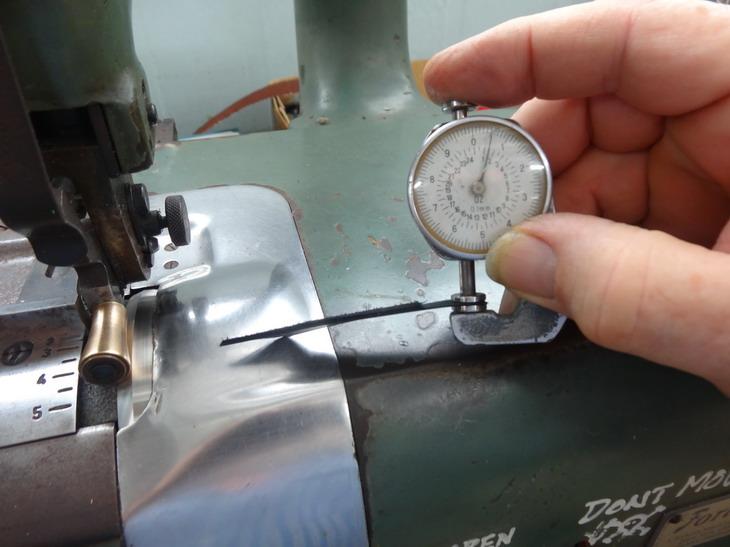
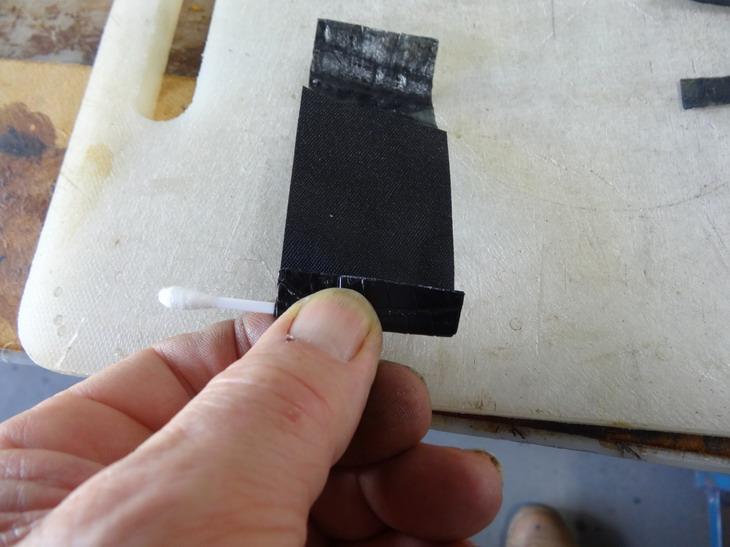
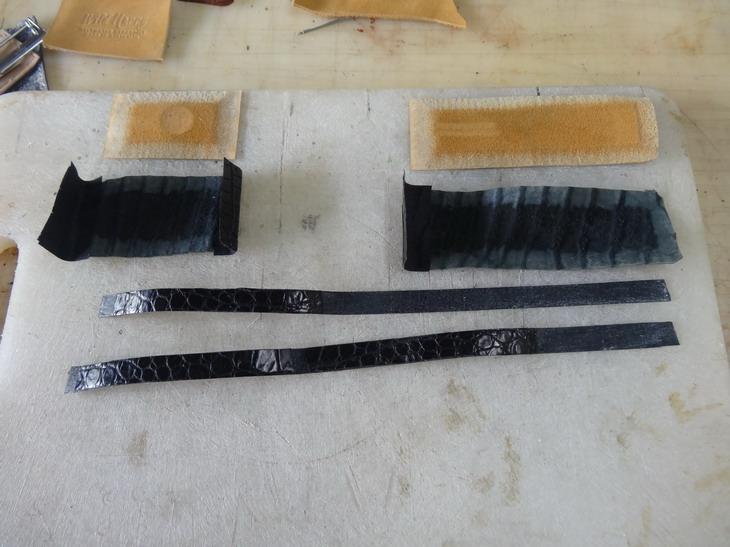
I have had this watch band floating around here for awhile and thought it might be a good time to do a how to make, along with one of the methods I use when I only have a small job to edge coat. The original band was inset with some short hair skin of which I could find no suitable substitute so as the picture below shows I managed to talk her into using crocodile. At this stage I have cut out all of my patterns and pieces and for the backing and I have gone with some 2mm thick nubuck camel skin I think. The black matt croc is about 1.5mm in thickness. Although there is only 2 keepers needed I do show enough croc strips for 3 keepers and that is because I'm just not that good. If one stuffs up along the way I don't have to reset the skiver etc to make another. This pic below shows the embossing stamp I decided to use and how with a bent metal plate I use to hold the leather still in case I think it needs more stamp/heat time. This shows the other strap stamped and this case held down with a magnet instead. As the keepers have to have their edging done earlier than the rest of the strap I have to split them down to obtain a finished thickness around 1.2mm firstly. For the firm backing I am going for .5mm and have decided to do this on my Fortuna skiving machine. Below shows me setting the height on some scrap first. showing the backing strip running through and now the croc a little thicker at .7mm This one below shows the skiving done on the straps with the Fortuna and a little hand skiving to achieve no thickness on the ends. This is done to minimise getting any holes in the valleys. This is showing all the pieces ready to glue up and attach some reinforcing fabric for where the watch pins go. The one piece of fabric (front left) will be cut into 3 separate pieces as they are applied. Here I am applying contact glue with the aid of glue gun. It is best to attach the fabric in a rolling fashion over something a little larger than the watch pin. In this case I use a cotton bud stick. This one shows what it should look like with the fabric's attached and the croc keeper strips stuck down. That is about how many pics will load in one go so I will be back with more later.
-
Past posts linked into my profile ..about me
RockyAussie replied to RockyAussie's topic in Leatherwork Conversation
Thanks for that. I hope I can get better at doing it as I go. My old camera is about had it now so I'm going to have to see if I can find one that is simple enough to get my head around. Yeah ....I should put something in the "about me" section along that line I guess. Whether its interesting or not ....... I suppose a good story teller could make it sound that way. I had to ask didn't I Soon as I get a new camera sorted I will do a run down on how I apply edge paint on to the products and wax finish at the end etc. For the moment.....Paint does not stick to oil or wax and hangs onto a rough surface better than a slippery smooth surface. Trust me caus Now I'm an ejumicator .... -
My first pair of shoes
RockyAussie replied to Vmiranda's topic in Shoes, Boots, Sandals and Moccassins
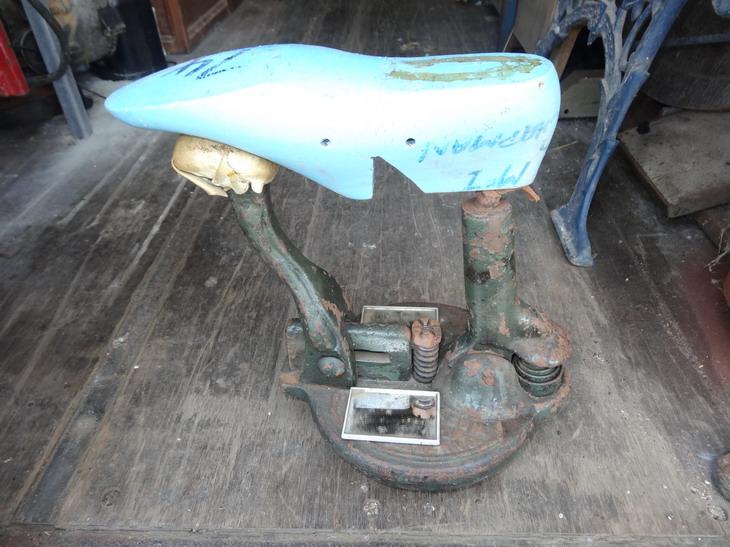
Its been a long time now since I've made any court shoes but I can remember the headaches of trying to get my centreline straight and not pull the inside (medial) or the outside (lateral) of the vamp too much one way or the other when I first started off. What I found helped on these is when I got a lasting jack and I glued down the bottom of it a couple of mirrors, they showed up if I was pulling too much one way or the other. The picture should help show what I mean. Another thing that helps is a fine tip set of lasting pliers that help a lot with the little pleating/pulling around the toe area. I cant seem to find mine at the moment but the tip measures about 1/4" wide or a little more. Warning ...do expect to rip the toe leather out a couple of times until you get the hang of how tight you can pull with them. I look forward to seeing more when you get your new lasts.
-
Quick cell case
RockyAussie replied to plinkercases's topic in Purses, Wallets, Belts and Miscellaneous Pocket Items
Looks pretty good to me and I bet he will be most pleased with it. Is it a sewn on retainer or clip on? -
Searching machine for sewing boots.
RockyAussie replied to Gusta1's topic in Leather Sewing Machines
There are 2 different long arm types there and I think you are wanting the 7411RL-37 Feed up the arm sewing machine for transverse seam. There are 2 videos there showing the differences. -
Past posts linked into my profile ..about me
RockyAussie replied to RockyAussie's topic in Leatherwork Conversation
Thanks for that ....without any comments I was starting to wonder if they were visible to anyone or not. It will save me some time at least as I wont have to spend ages trying to find them when I want to refer to them now. With the new site changes all of my old bookmarks would only take me to the main forum page and then I had to do a search for the subject from there. Now I can get back to making some more ......hopefully better postings .....and know where to find them Question......I am thinking of making a new post on how I apply edging to products and all of the associated steps involved. Any other thoughts or requests ?? -
Past posts linked into my profile ..about me
RockyAussie replied to RockyAussie's topic in Leatherwork Conversation
Can anyone tell me if the links are working alright from here and in the profile? -
Past posts linked into my profile ..about me
RockyAussie replied to RockyAussie's topic in Leatherwork Conversation
Thanks @bikermutt07 I love doin it ....I just hope that others love it too. -
I have noticed I have a few new followers of late and I have been trying to find an easier way to refer them to some post or other that may be relevant to their questions. At long last I think I have found a way to do it by posting them into my profile section under the heading "About Me". So whether your a new or old follower or just curious you may find find something that you have not seen before. If there is anything in them that you would like to know more about please ask the questions within their post and I will try and answer it if I can. Please feel free to advise anyone to check them out if you think that it may be of help to them. https://leatherworker.net/forum/profile/71895-rockyaussie/?tab=field_core_pfield_14 Brian
-
Leatherpro Ak-20 Leather Strap Cutter Spacers
RockyAussie replied to Anubis78's topic in Leather Machinery
Having gotten used to using a 3D printer these days I suspect that it would be possible to print out some spacers quite easily to whatever length wanted. I would think about making the wall thickness a bit bigger than the steel or aluminium ones to perhaps about 5mm or thereabouts. I might just give it a trial sometime soon. -
You may find something of use in this post-
-
Yea I get some occasionally glad you like it.
-
It may help if you were to become a member here perhaps as then it is possible to private message from here as well. Check my web site out and if it is interesting enough make contact. I have to say that your skills are great but a fair bit different to the type of work we do here.
-
Left foot/open toe blanket set for 441 clone
RockyAussie replied to Parott1's topic in Leather Sewing Machines
@Parott1 It would help to know what country your in. The centre foot can be opened up with a dremel cutting disc qite easily. If your in the US there are plenty who can help and I think show up in the banner adds. In Australia you got Steve from @Singermania -
Juki 441 User Manual and oiling points
RockyAussie replied to tariqbeg's topic in Leather Sewing Machines
This one is all I got - Juki 441 Engineers Manual.pdf -
Can't help you with the criticism constructive or any other sort......I think you might have gone and got the hang of this and on such a little bit a that.
-
Faaannntastic. I think that the best work will always come from what you like doing best. I love the frog a lot.
-
Female Hinges for a Singer 112w139 Sewing Machine
RockyAussie replied to tmitch's topic in Leather Sewing Machines
Very clever and well done there Mizzy. -
Adjusting "pattern" for thickness of item
RockyAussie replied to ebdavison's topic in How Do I Do That?
As a rue when I have to work out the correct length for something along this line I get a strip of leather generally about 1" wide the same thickness as the leather to be used and I wrap it around the job and mark where the stitch lines should start and stop. The reason I do it this way is that you can better estimate the stretch of the leather and how tight it should be. After that you can measure it out and do your drawings and cutting patterns etc. Do remember if you are putting any linings into it that you will have to allow for their thicknesses as well. -
How I now straighten leather for strap cutting
RockyAussie replied to RockyAussie's topic in How Do I Do That?
No they are not all mine. I normally cut these and split them for a customer who goes through a fair bit more than me. These hundred normally turn into around 1200+ 1 1/2" strips and that comes through generally every 2 to 3 months as a rule. Believe it or not they are for my biggest competitor in the hornback belt sector but they cant figger out how to use their splitter and I suspect they could not do them as cheap or quick as I do for them. -
I often make up shapes from brass but you can do a lot with the spare copper tips you normally get with the soldering iron. The one shaped like a flat blade screwdriver can be shortened and the tip bent back a bit to then take a wide groove on the face. Once yo have a shape sorted out its best to take out a little flat where the screw holds it in in order that screw can hold it more securely from twisting when applying side pressures.
-
You could just do some stitches like a doctor would and make a mean feature of it I guess.