-
Posts
276 -
Joined
-
Last visited
Content Type
Profiles
Forums
Events
Blogs
Gallery
Store
Everything posted by Hennessy
-
From the album: pete hennessy custom leather
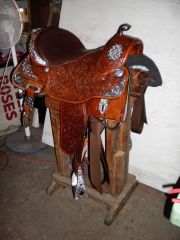
saddle made on special composite tree, engraved silver show horn .special balanced rig,ostrich 1/2 seat.fully hand tool'd and montana silver all around made for a world champion show. horse won her class, ist show enter'd.although nothing spared this saddle finished out rather light. pm for inquiries . -
From the album: pete hennessy custom leather
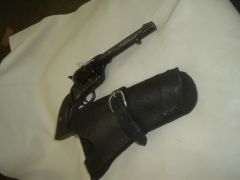
old antique pistol holster, made from old saddle leather,this was a decor type, but was functional -
From the album: pete hennessy custom leather
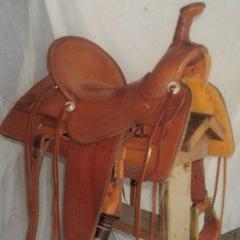
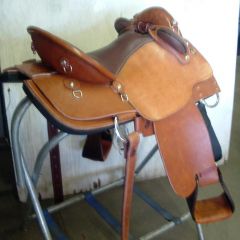
custom endurance saddle made light/ texalian style , a touch of texas n australia mix. saddle seat and skirt liner special foam for additional comfort to horse n rider.wide wooden n foamed stirrups add even more comfort. pm for more information and availability. -
From the album: pete hennessy custom leather
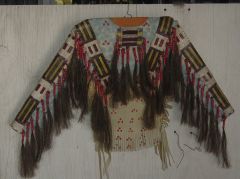
war shirt copy of a smithsonian collection , souix circa [1860 ] bead work is tool'd leather n hand painted, horse hair locks, all hand made and mtd on a cedar wood frame. a wall hanging,front of shirt only ,small man size.brief history attached on a laminated card. pm for inquiries,shirt still available -
cowhide n leather period chaps [1920 ] circa
Hennessy posted a gallery image in Gallery- Our Leatherwork
From the album: pete hennessy custom leather
these chaps were made with the guy who has one heck of a ''man cave'' in mind .also they are functional,with lots of adjustment on waist n leg fits a 5/9 guy just right.styled from a pix of a bronc rider at ol cheyenne in 1920's belts are hand tool'd pm for priceing -
From the album: work variety
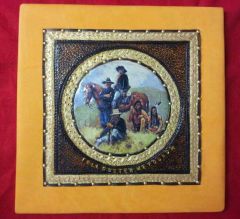
i do photo transfer images on leather,horses dogs family ,anything deserving of this presentation.various ways to finish,framing etc etc this one i mtd on a light cedar board.priceing is based upon personal selection so will vary with each piece. -
-

Found Some Old Tools And Haven't Got A Clue What They Are
Hennessy replied to rubymcnugget's topic in Leather History
stone th crows,ruby looks bloody foreign to me eh ! -
i've owned two 42.5 n i had a good run with both i still own th first ,i purchased in 73.ferdco out in idaho were very helpfull in my getting parts and a manual which is very helpfull. they will sew a belt and liner with easr but 2 layers of skirt is a bit of a shove .
-
looks like a machine to throw clay targets for trap shooters !
-
over the years i've heard th opinion that a loose saddle [no pad under saddle\let th horse stand ,he'll move it where it should be ?sounds logical,surely off the scapula area.saddles that slide forward can easily be controlled with a crupper,a common tool in australian saddlery esp in hilly terrain.however makin a saddle stay put by attachments is not the way to solve a problem, not all saddles fit all horses ., eh
-

Sewing Machine Dealer In Idaho, Washington Or Oregon?
Hennessy replied to sstouder's topic in Leather Sewing Machines
ferdco in idaho are good folk -
about th previous advice all is good,i've set thousands by hand here is my suggestion ,a solid bench, a flat piece of steel 4 wide 8 long n at least 1 inch thick. th new setter is not doming as was pointed out because of dome height you could grind down surface of domer slowly till you get a nice dome goin.i allways prefered a ball pein hammer to strike th steel domer it domes nice if you dont rear back on th hit but firm it n move th domer around with each hit.[steel on steel is not right but ] i've actually wore down 2 domers n my fav one i had a new shaft weld'd back on.its 1/2 down again.flat end out on jobs,get a tandy snap setter domer n dome th flat side thats out looks nice n not hard to figure out.
-
by lin thread i assume its linen n not poly or nylon ? in th old days when i was a nipper growin up in australia,we made our own thread using linen .we waxed 3 or 4 or more strands n rolled 1/2 th distance around a nail on bench.rolling down th thigh until th twis was sufficent,then holding that twist tight in other hand n rolling th other 1/2,a li'l more wax n you have a nice thread.we then 2 needled our stitch and at th end we back stitched two holes n nipped thread as close as we could.when rolling we had a square piece of firm pig lea 8x10 or so that we could belt and hang it where it cover'd thigh top.hadna done it in years i like nylon more now .
-
i've told this procedure several times and never had any one come back with a grateful thank you !kinda makes me think,they think i'm pullin their leg.] believe me this works every time !.wash [acid] your finished work,then a good coat of lacquer or a acrylic shine then apply yer black oil or alc base dye onto work /// no residue at all.i've done this with all colors in oil dye but black allways cursed me ''no more '' get a piece of scrap leather n see fer yerself it works and it made my life better eh !
-
HOWDY ive owned one,good for belt lineing n dhaps up to 3 layers of chap lea. ferdco in idaho u can find them in lw can really help you with advice n thread etc etc [tell m i sent ya]they have freely help'd me many times hood luck pete
-
once in me younger days back in australia i made some clamps from wooden barrel staves, they worked orright too..not much work getting them up to workin status just a li'l imagination eh !
-
howdy no mouthpiece hackamore more n likely.
-
try this wet edges with a piece 2x fake sheepskin,run finger surface down edge n find nap direction.turn s/kin over use coarse cloth side n slide down edge in th lay down nap direction.make sure edge is wet,you can slick down edge this way. now rub soap bar along edge in same direction,good layer,then wood burnish or blue jean rag it to your satisfacyion.keep soap bar from overlapping up off edge,that tends to effect colour a bit n effects dye too.
-

Double Fringed Rodeo Chaps
Hennessy replied to Double U Leather's topic in Clothing, Jackets, Vests and Chaps
awsome work n neat shaps ol' chap. -
a ton of observation and a wealth of knowledge can be had from repairing other peoples work , good stuff fer th memory bank.


![cowhide n leather period chaps [1920 ] circa](https://leatherworker.net/forum/uploads/gallery/album_1704/sml_gallery_7581_1704_32367.jpg)
