Danne
Members-
Posts
772 -
Joined
-
Last visited
Content Type
Profiles
Forums
Events
Blogs
Gallery
Store
Everything posted by Danne
-
Working area in progress (Will keep updating here)
Danne replied to Danne's topic in Leatherwork Conversation
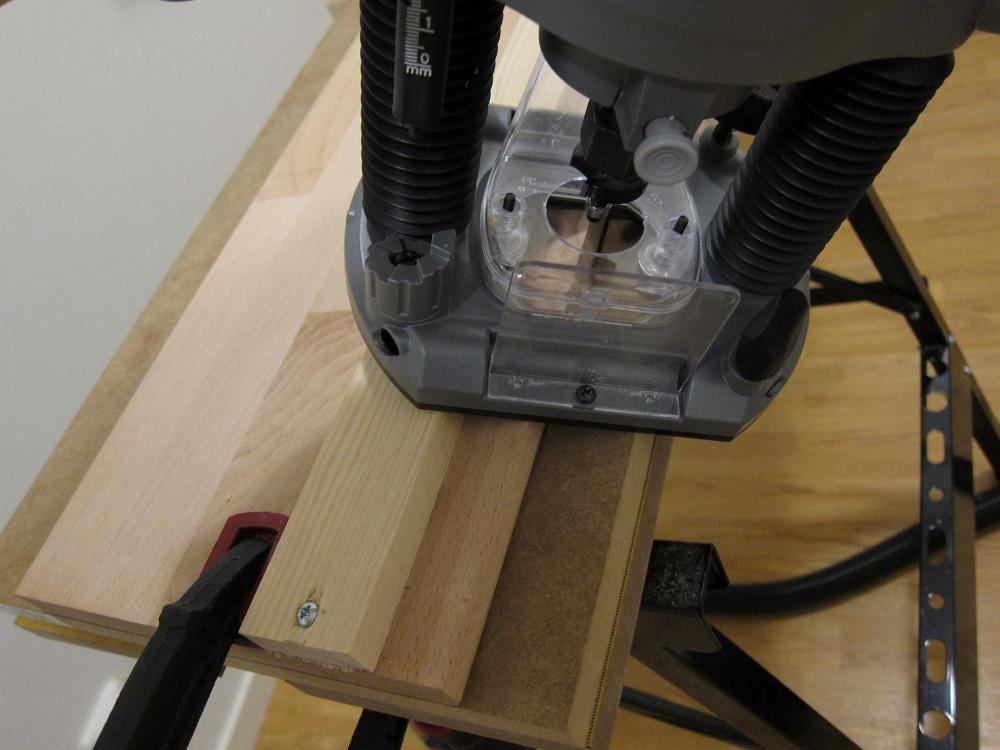
Thank you. Of course I have no clue what tools you have access too. But the only machines I have are a plunge router and a circle saw and drill press. If your situation are the same and you plan to do a 60 degree jig. This is how I did the setup for the chamfer. (Not the correct bit in this photo) I did route the radii before. -
Working area in progress (Will keep updating here)
Danne replied to Danne's topic in Leatherwork Conversation
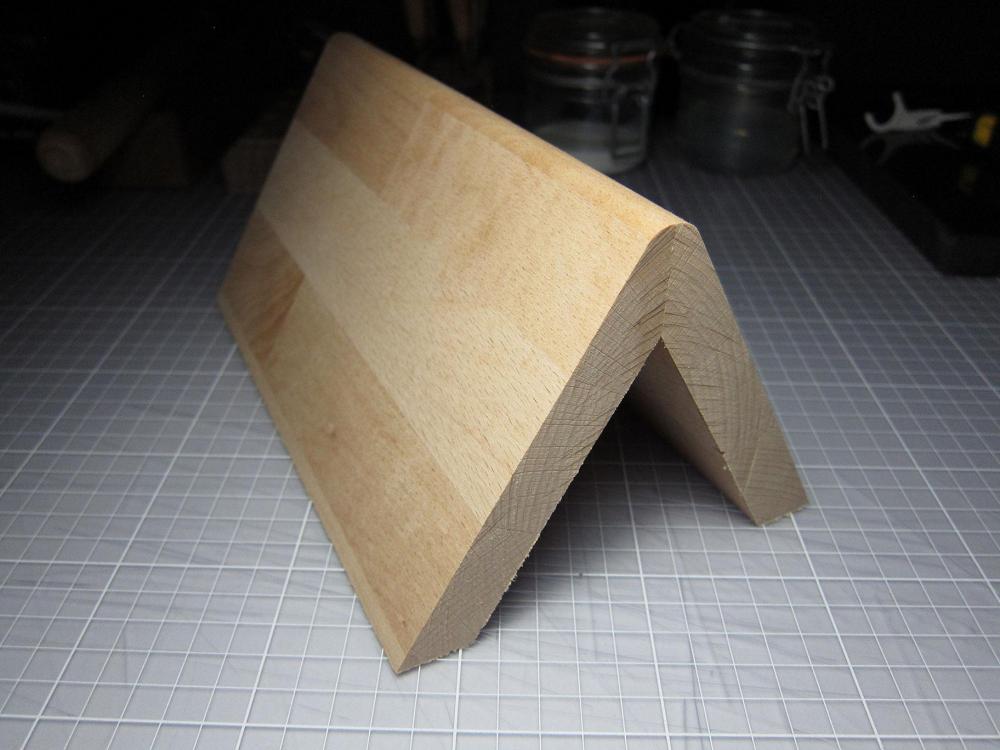
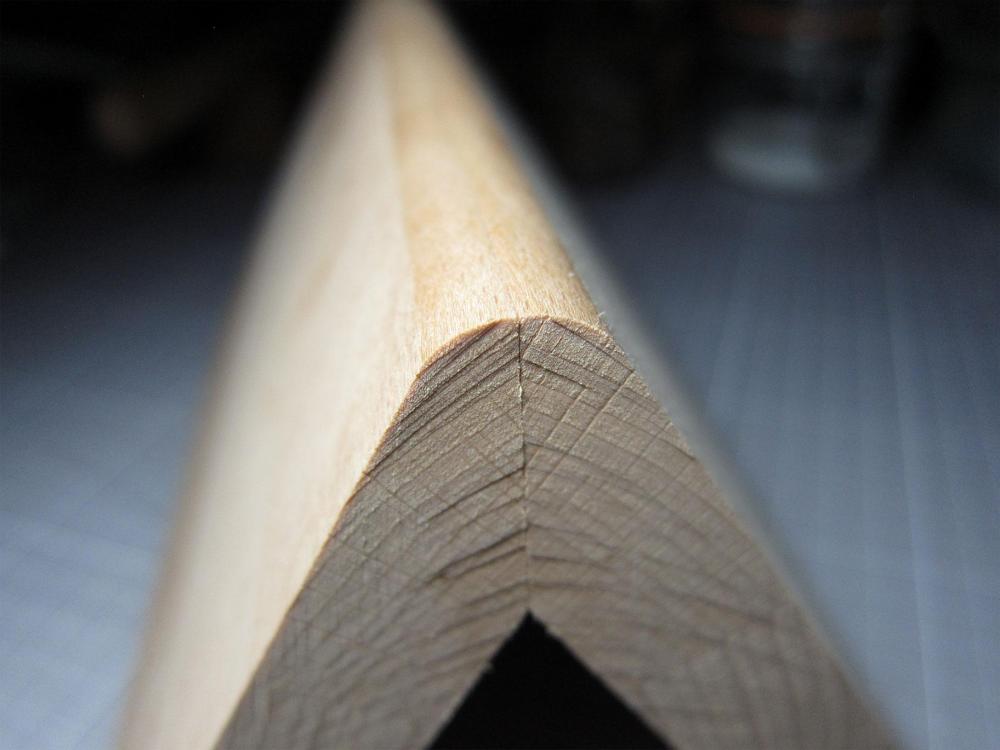
More updates. I didn't get exactly 60 degrees (I measure it to 65 degrees) but it doesn't matter. My setup for routing the chamfer (with a plunge router) wasn't perfect, but at least it's straight, and 60 or 65 degrees doesn't matter. Plan for the 60 degree fixture: A couple of photos of my jigs oiled and drying: And a mistake. (My work table slipped away a little bit, and I changed the angle of my router a little bit) I tried to fill this with glue and wood dust, but I didn't get it deep enough so I sanded it away once dried. When the oil is completely dried, I will sand it down slightly and try to fix this better before the next layer of oil. -
Working area in progress (Will keep updating here)
Danne replied to Danne's topic in Leatherwork Conversation
When they are opened it's a gap between exterior leather and lining yes. I can't see how other crafters that only glue the edges would do it in another way than around something flat. Because it would instantly start to bulge and wrinkle if glued around a degree jig. -
Working area in progress (Will keep updating here)
Danne replied to Danne's topic in Leatherwork Conversation
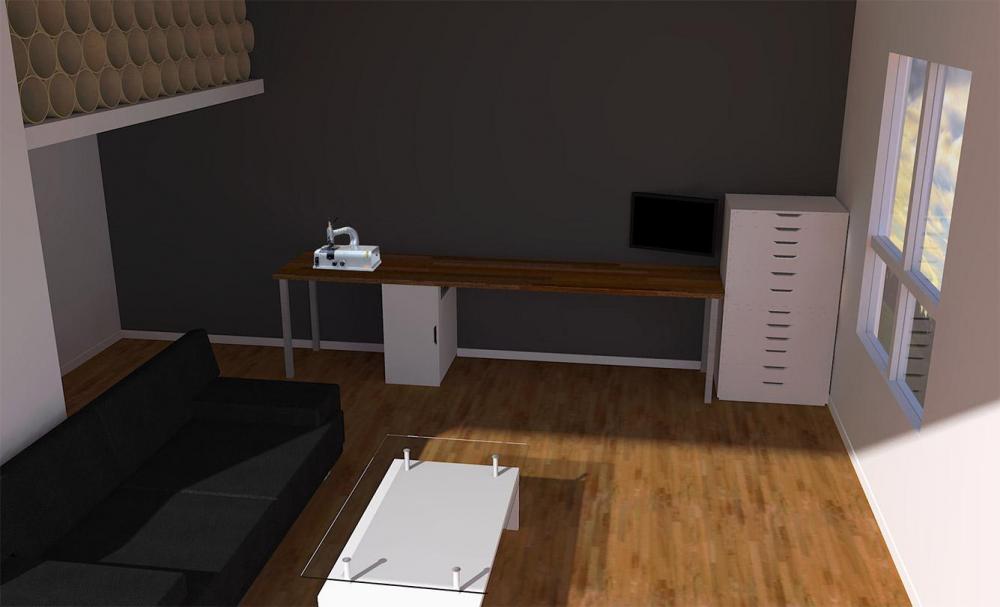
It's Sketchup, and I think I used Twilight render (it's free) or it might have been V-ray, I know I did experiment a little bit with V-ray for a while, but it's quite complicated. Twilight is not that advanced. The skiving machine is just a cropped photo I put in with Photoshop. -
Working area in progress (Will keep updating here)
Danne replied to Danne's topic in Leatherwork Conversation
Sorry if it did sound as I was rude. It wasn't my intention. So I usually glue my wallets around a 10mm thick cutting board, but I only glue edges. This way the wallet folds really nice, and when you open it there is not stress on the exterior/lining, exterior "bulge out" a little bit, and edges open with a slight curve. Most of my wallets are made that way. But I plan to make alligator wallets, and wallets with exterior in other leather that are a little bit softer and some of them "stretchy" so my plan is to glue let's say 0.7mm alligator against ~0.3mm Salamander salpa around a 60 degree curve, and then I will glue this against the lining (only edges) on another jig that is like a cutting board in thickness. (I will show you that jig here when it's finished.) Why do I prefer a tighter curve than 90 degree? because I find that 90 degree result in a little bit of wrinkles when exterior and lining is fully glued. And also the wallet wont stay closed (depending on the type of leather) if not put under pressure for a while. And I haven't decided how to make my alligator exteriors yet, but I will probably not fully glue them alone against lining, because I don't want visible scales through lining. So why do I spend a lot of time making a 60 degree jig, if it may not work? because I have seen other good crafters use 60 degree jigs with good results, so it's a good start for my tests. -
Working area in progress (Will keep updating here)
Danne replied to Danne's topic in Leatherwork Conversation
I will use it for wallets, we all prefer different methods. -
Working area in progress (Will keep updating here)
Danne replied to Danne's topic in Leatherwork Conversation
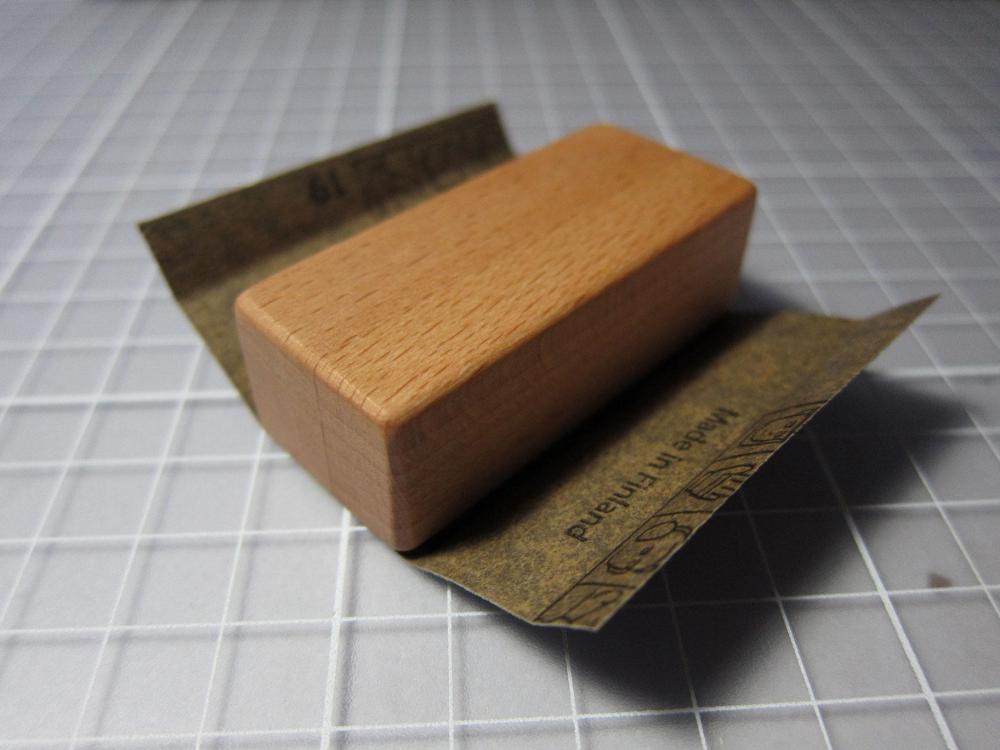
A small update. A sanding block, and a 60 degree gluing jig (in progress) just machined o these photos. -
Exotic suppliers for UK and importation.
Danne replied to Stone14's topic in Exotics, Reptiles, Furs and others
Aacrack have Croc and I think also alligator from HCP (Hermès cuirs précieux) Also contact Marcus Gear they have exotics. https://www.marcusgear.co.uk/exotic-skins/ The problem with ordering from Vietnam (From what i've heard) is that they ship it without CITES because it's complicated. And then you can either loose it in customs, or you will have problems if you make something and plan to sell it outside of UK (since YOU can't get any CITES for export.) -
Working area in progress (Will keep updating here)
Danne replied to Danne's topic in Leatherwork Conversation
No, I will not make any otter gloves or watch straps lol. -
First, both the exterior leather and lining have to be vegetable tanned to be possible to burnish with good results. (Some combination tanned leather do burnish decent if it's a thin lining between layers of vegetable tanned leather.) Now I rarely burnish edges, but if you look in my post history I have both a tutorial for edge painting (which is suitable if you use chrome/mineral tanned leather) I also have a post where I show how I burnish leather (But there are better guides for burnishing, it's not something I do very often) But a couple of things that are important. 1. Don't put on to much glue, or you will have a very visible glue line. 2. Make sure your glue is dried before you burnish, or you will push in the edge. I'm not really sure what you mean with cutting the lining smaller than the exterior. For example a wallet exterior will have a shorter lining than exterior. But in that case you have to choices. Either you cut your exterior to the finished dimension and glue it around a curve, and trim the lining against the exterior edge. Or you make everything oversized and glue it around a curve and lay it flat and cut it against your pattern. If you don't do this and it's a tight fold like on a wallet, lining leather will wrinkle at the fold (Not always, if the leather is very thin both exterior and lining, and depending on the type of leather it can work without gluing around a curve. And some leather wrinkles more than other when folded, like box calf wrinkles a lot when folded.
-
Working area in progress (Will keep updating here)
Danne replied to Danne's topic in Leatherwork Conversation
Thank you, yes I will update -
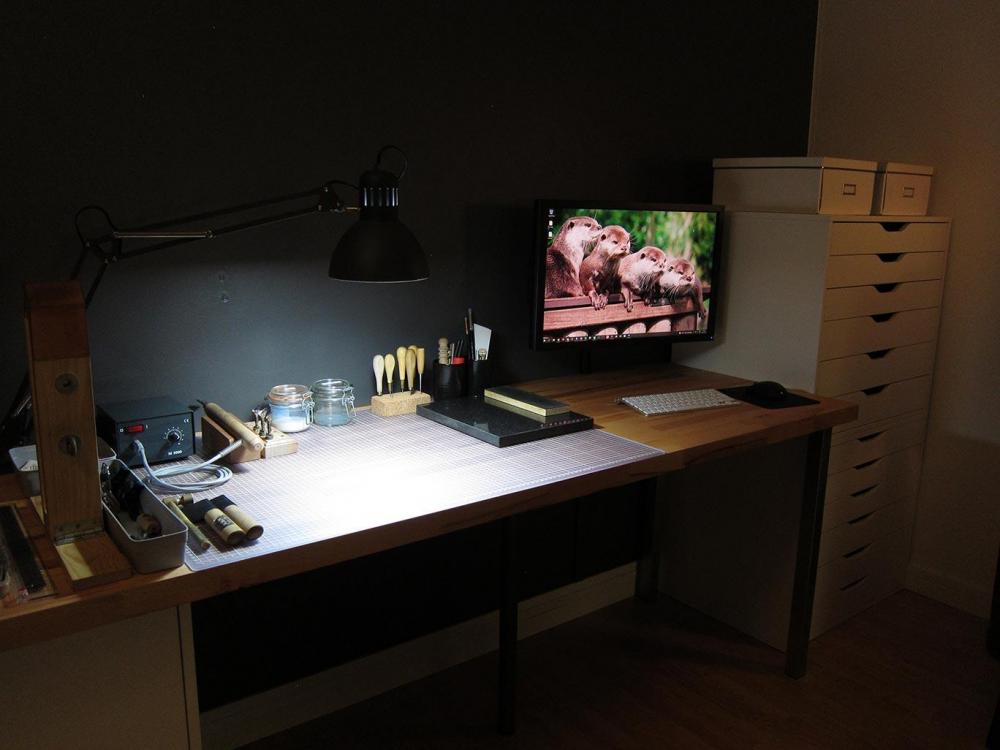
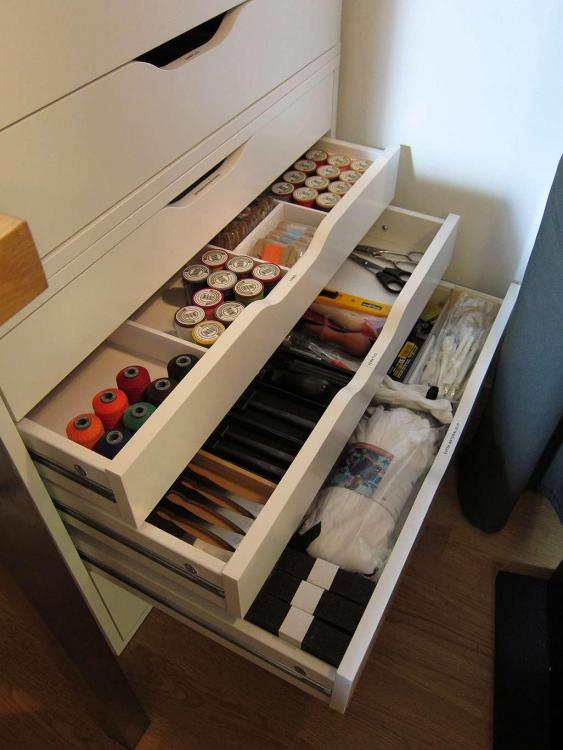
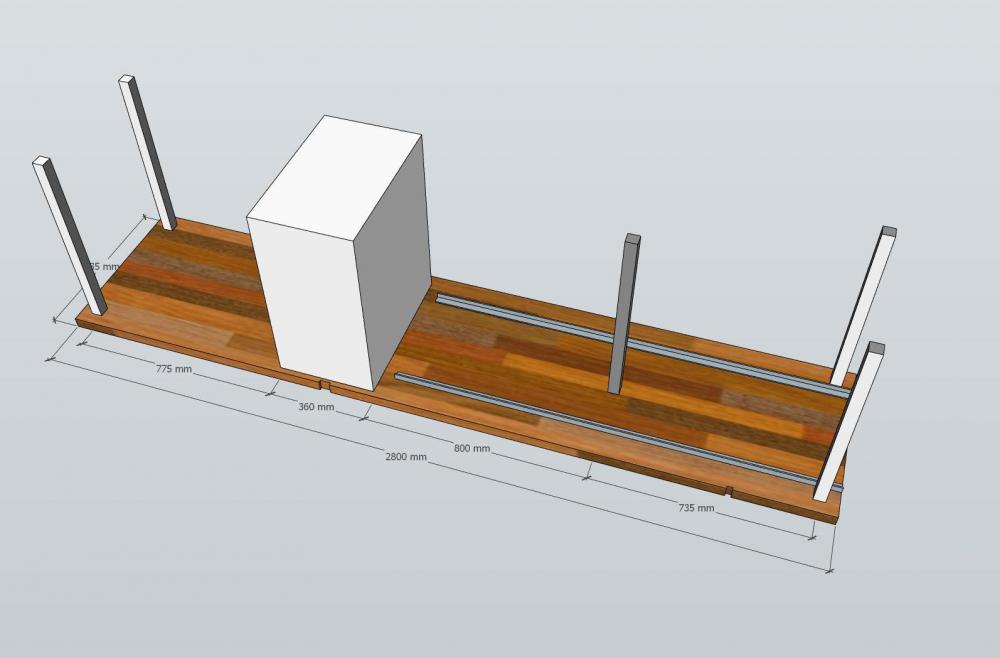
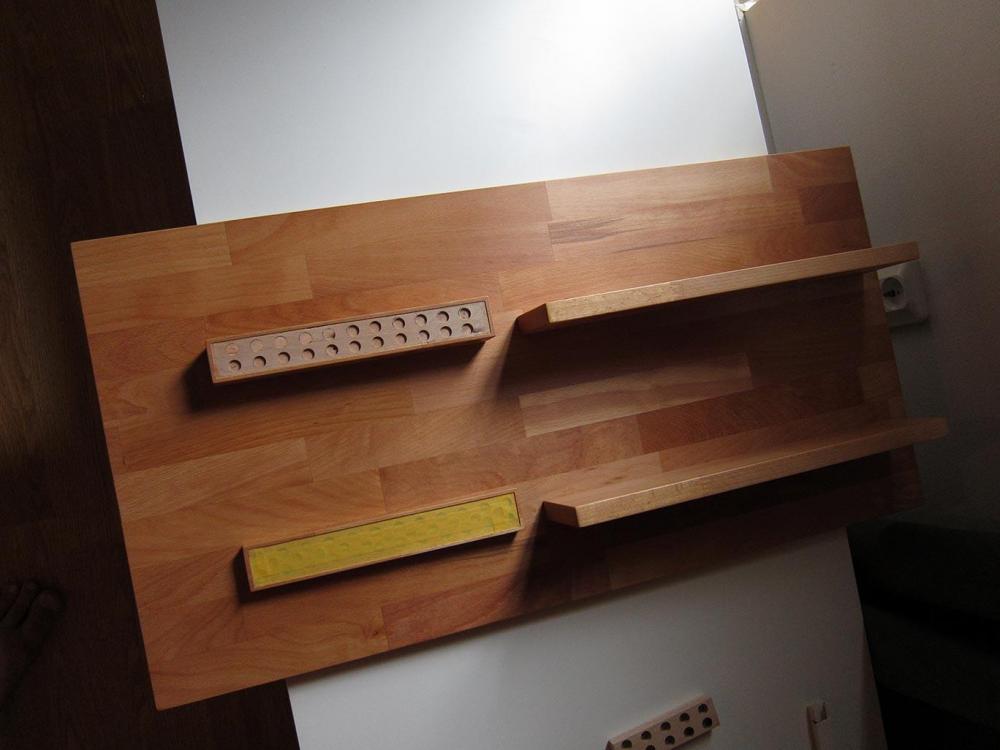
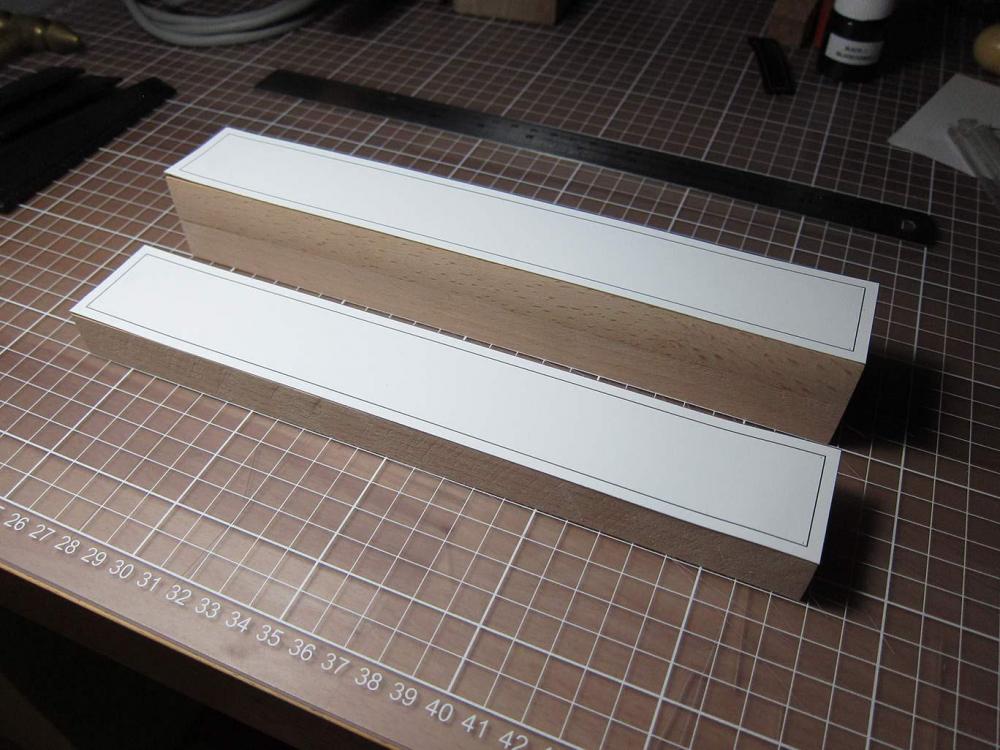
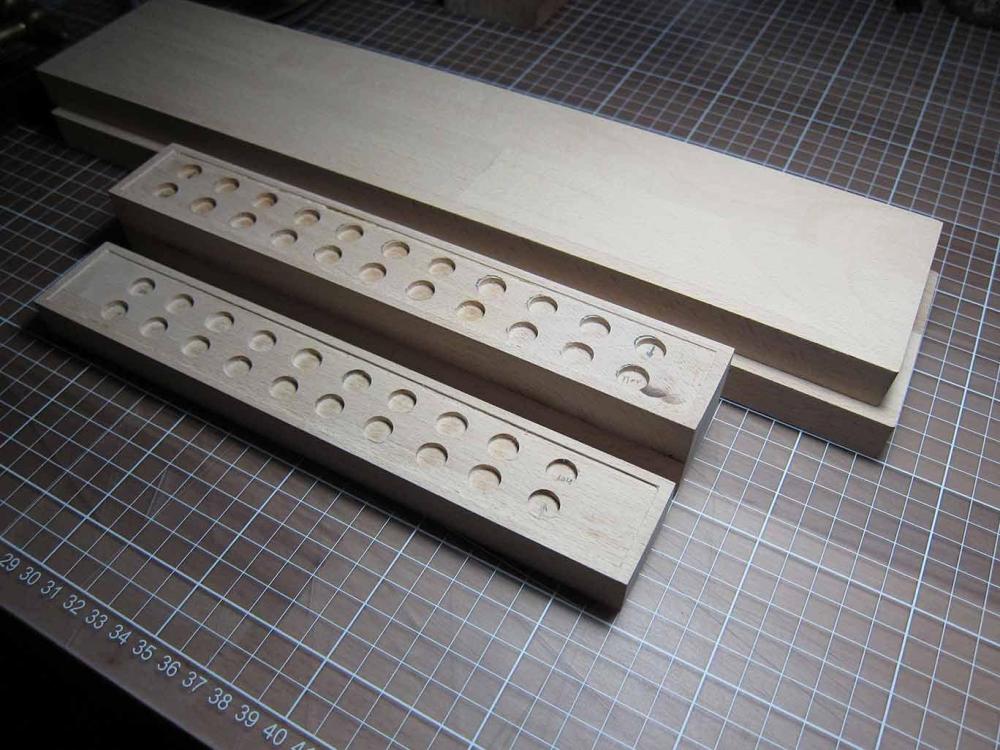
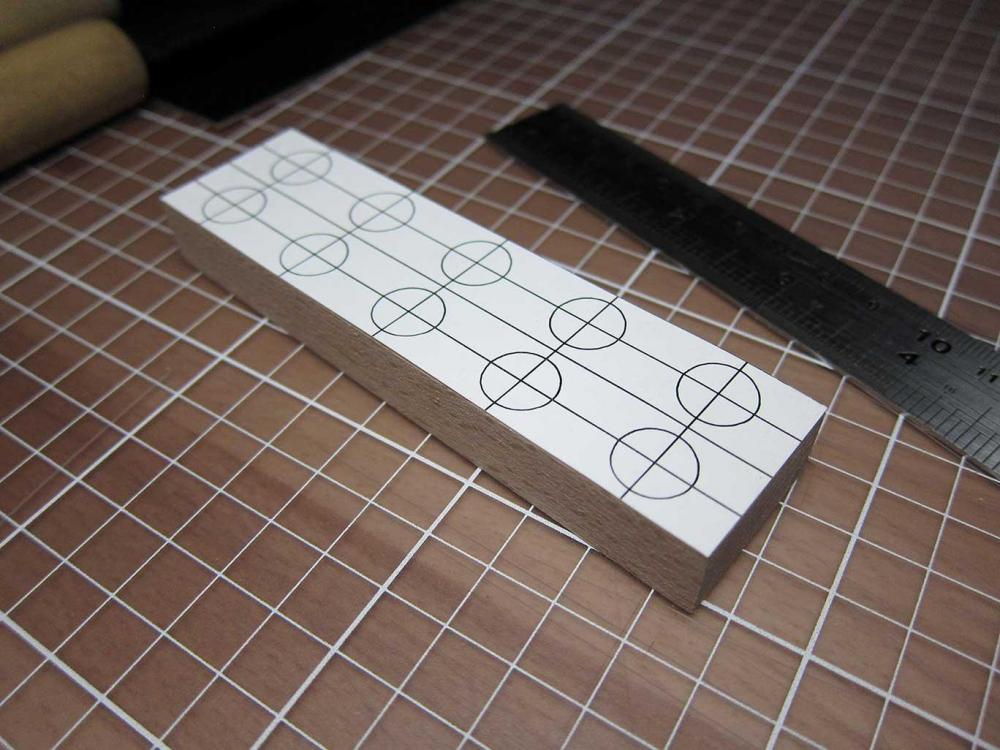
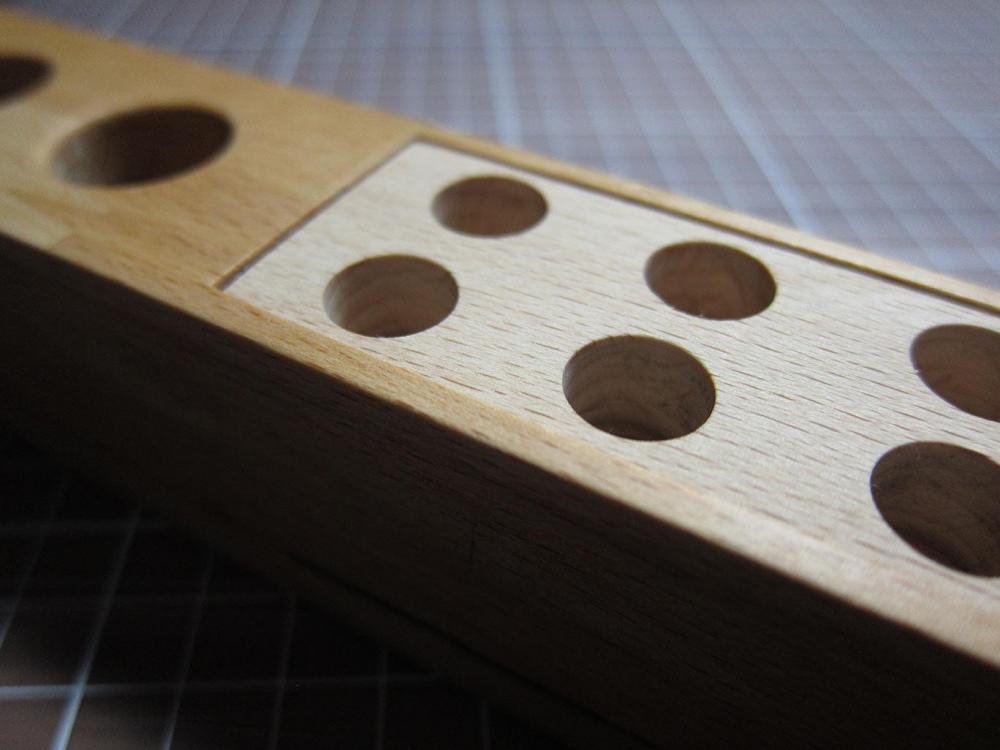
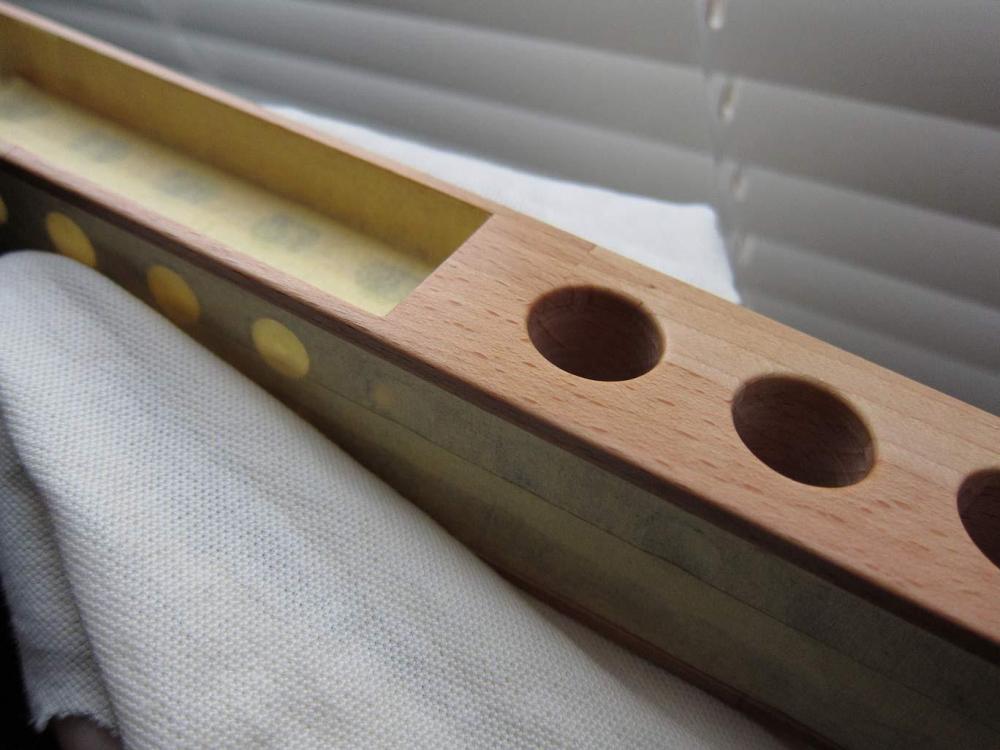
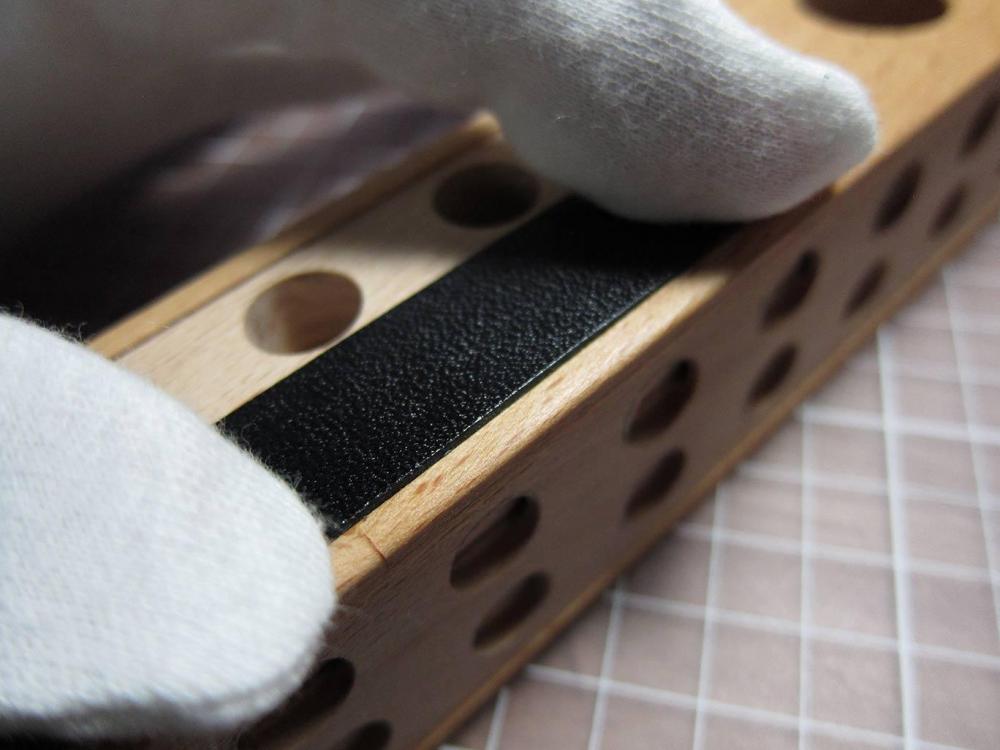
I'm not sure if anyone is interested, or if it's ok to share here, since it's also some wood working photos during the progress. but it's still leather related since it's my working area, and maybe it can give other inspiration, or give me ideas what I can add to my working area. (Keep in mind that I have no experience working with wood, and it might not be perfect since I had to work with hand held machines like circle saw, plunge router, and chisels and other hand tools. Since I had to buy those tools, I now understand that a small circle saw table would have been more useful for me, because it was far from easy to plan the cutting of small parts with a circle saw. I'm updating my working area a little bit, replacing desk, building tool board, leather storage, skiving machine, new tools. The plan is to have most of the tools on the tool board in black, for the tools with wood, I will go for African blackwood/Grenadilla for some of the tools from Palosanto or Okada. Some tools I don't feel like I need to update since i'm happy with them, like skiving knives from Kyoshin Elle will get their handles ebonized with India ink (Probably the same thing with my handle for my Regad Fileteuse.) First a 3d-drawing of the plan. The card board tubes up at the roof on the left side is to store leather, it will be a perfect place since it's space I don't use, and I have a smaller apartment, so planning is important. I had a smaller setback, I bought a 2.8m long glulam board, but it was really warped. But the desk will look similar to this. I'm just waiting for my Ikea Karlby (Custom size take a while to get delivered) Two Ikea drawer cabinets for storage, here is the thread storage and some tools and material. Dividers is made with foam board glued together with a hot glue gun. Here is the plan for my new table top. Five legs (The middle leg positioned under my granite plate) and two steel angle iron 20x20x3mm that will be screwed to the desk. The desk will also be screwed to the wall (concrete) with angle brackets. (If anyone have any input on this solution, feel free to share) And some photos of the tool board, it will be two shelves, and two magnet holders. The upper magnet holder is thicker and have larger holes for edge bevelers and such, and ten ~11.1mm holes for Ksblade hole punches. The holes on the magnet holders are for 0.9kg neodymium magnets. (Tested so they have the correct strength for my tools) they will be covered with leather. Not assembled here just placed on top. A couple of photos from the making of the parts for my tool board. I made a mistake on one hole when I drilled the holes for hole punches (I decided to do an insert, and I drilled the insert on a drill press instead) Satisfying clip? Video clip (magnet holder insert) This is a slow project, but I will keep updating until it's finished (If you are interested to see of course)
-
Thank you, I will check with them.
-
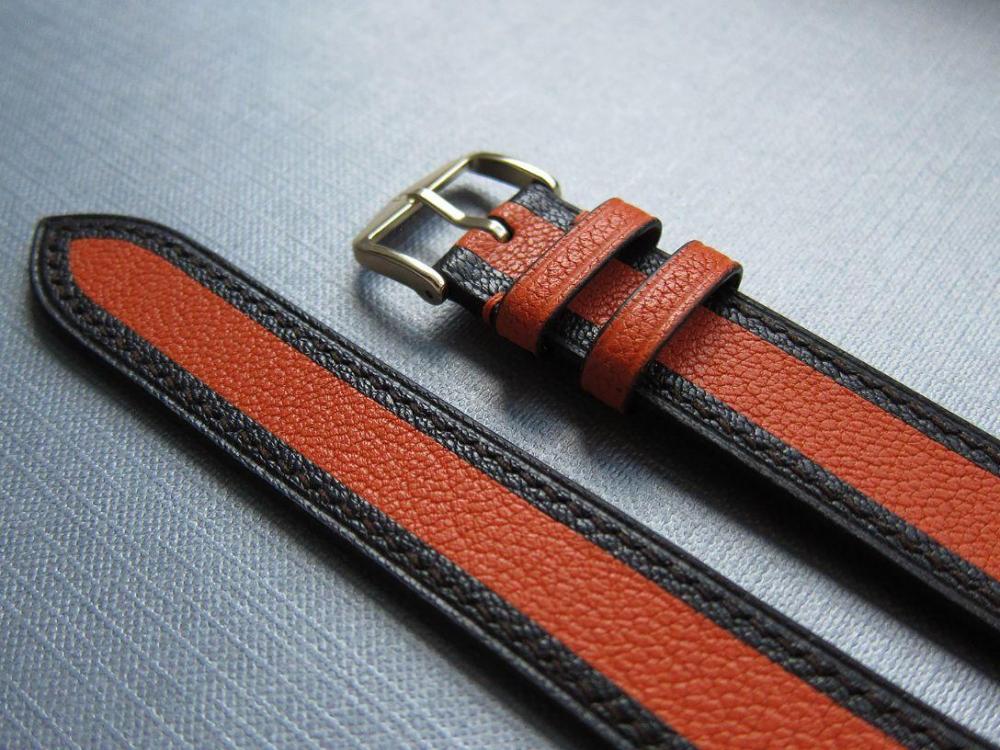
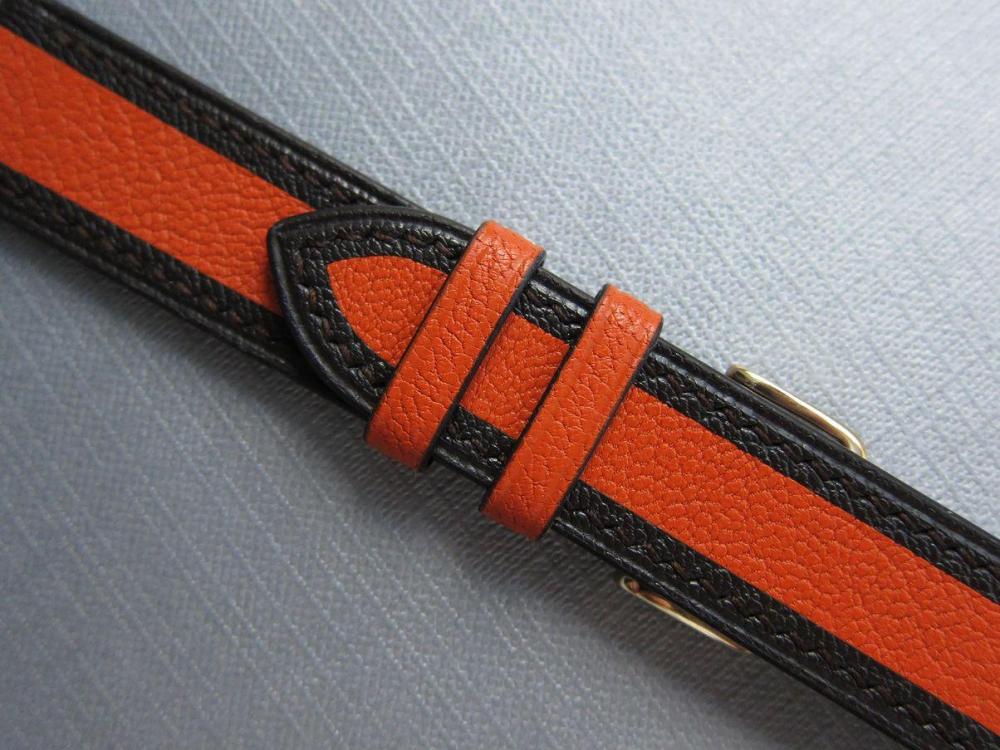
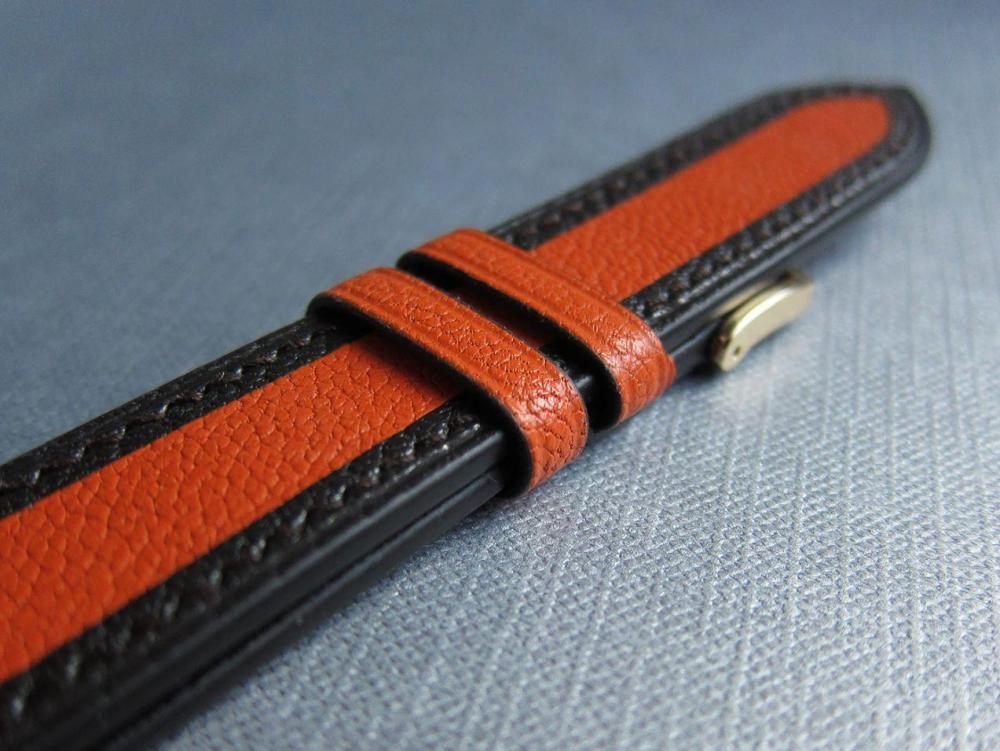
Brown/orange watch strap
Danne replied to Danne's topic in Purses, Wallets, Belts and Miscellaneous Pocket Items
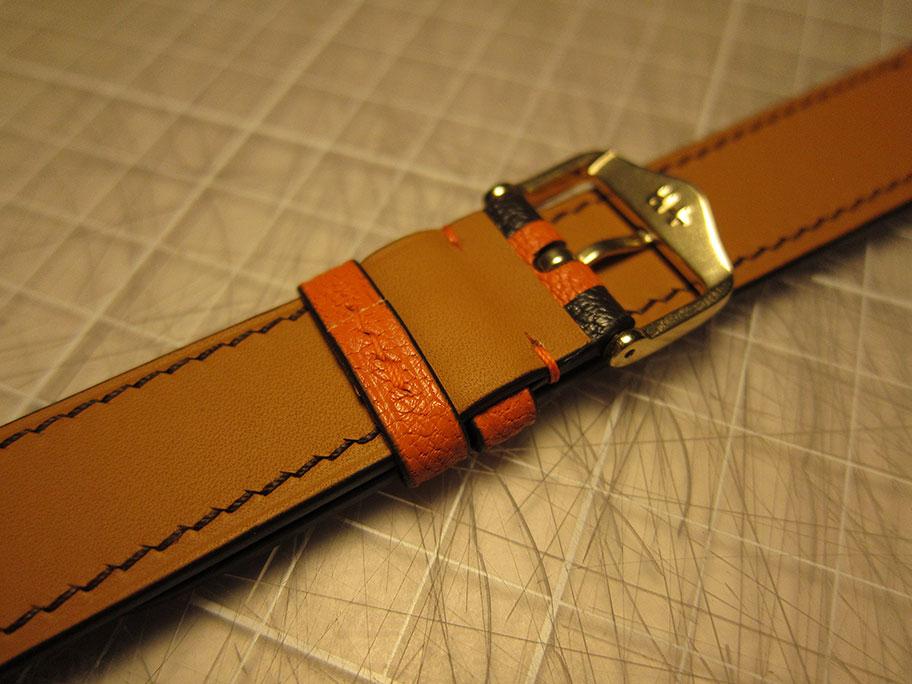
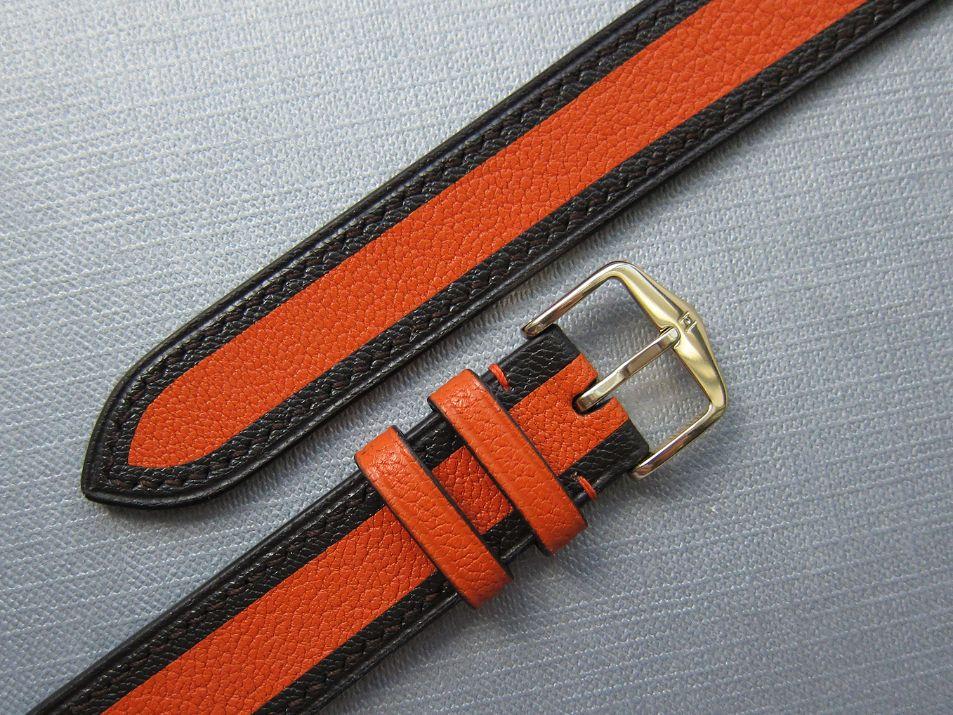
Thank you. Thank you for your kind words. Yes, and if the exterior was black, then it would suit KTM It was a challenge to glue it so it doesn't become a gap, because I felt like I had to use solvent based glue for this construction. So I only got one chance. (To answer how I made sure it was no gap, I pushed the exterior (Brown part) against the interior (orange) between two rulers, and put a piece of tape on the top layer. Because this leather have some finish I was able to use regular clear tape. If you look carefully on the first photo in my "build album" you can see how the leather is a little dull in the middle, but a little polish with Saphir Renovateur solved that. I don't really have equipment for that, or want to spent the time for making video clips. Sorry. -
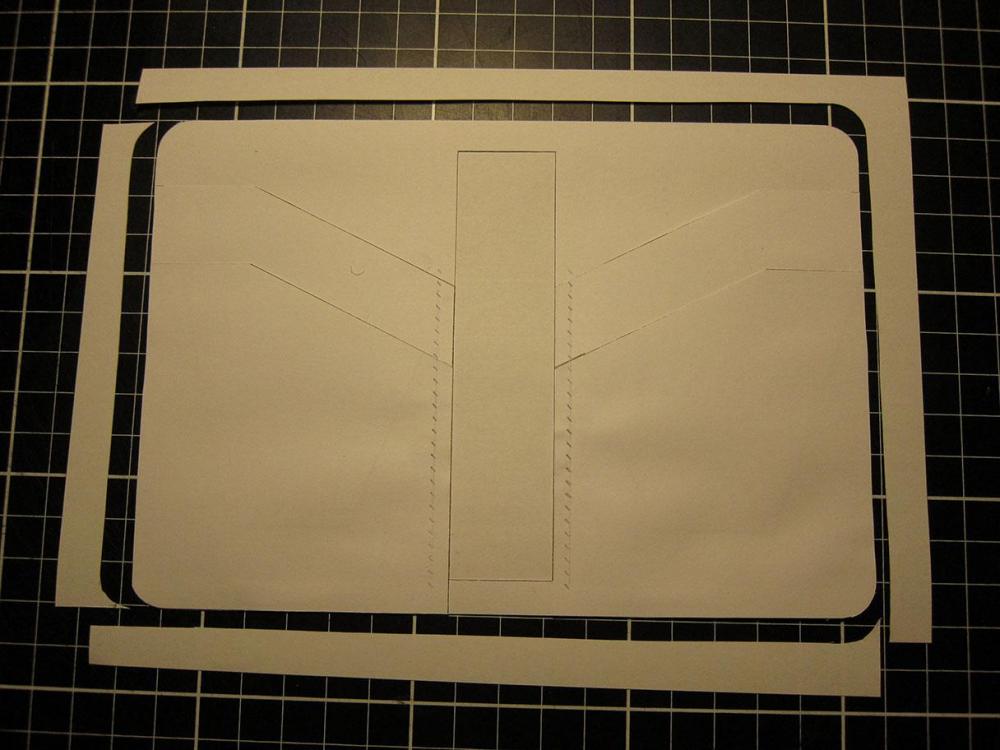
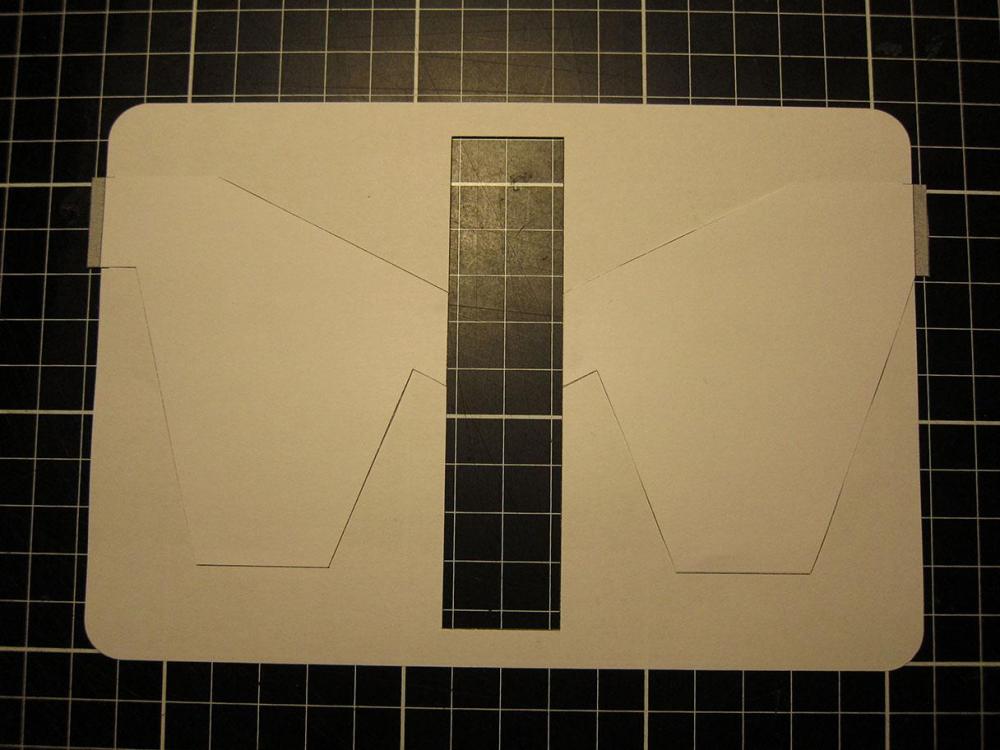
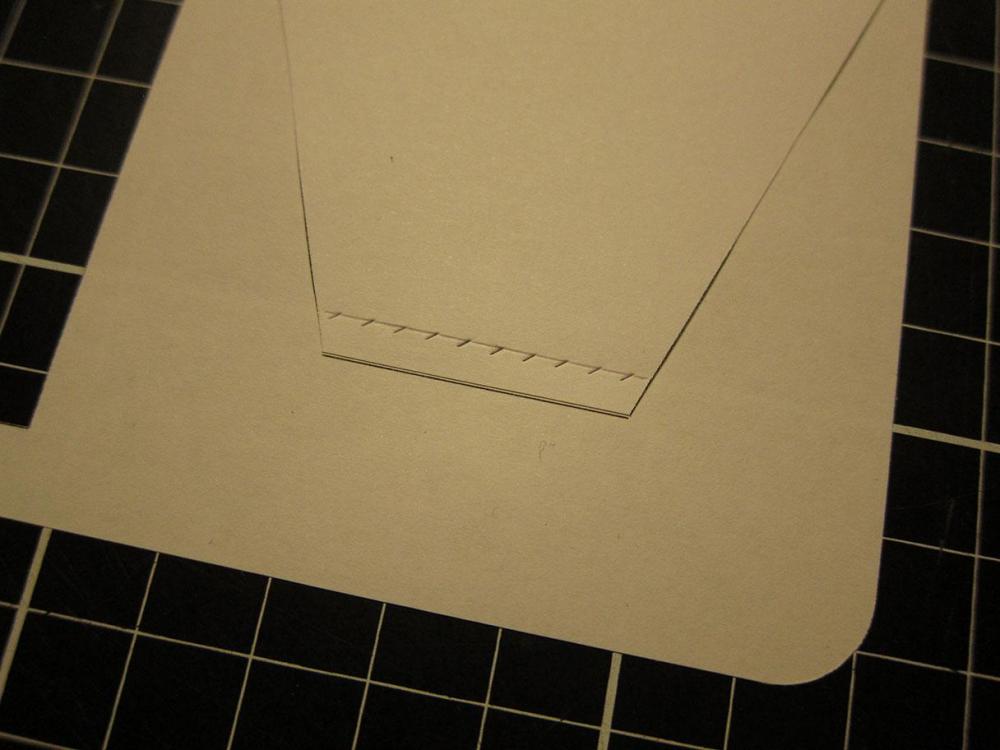
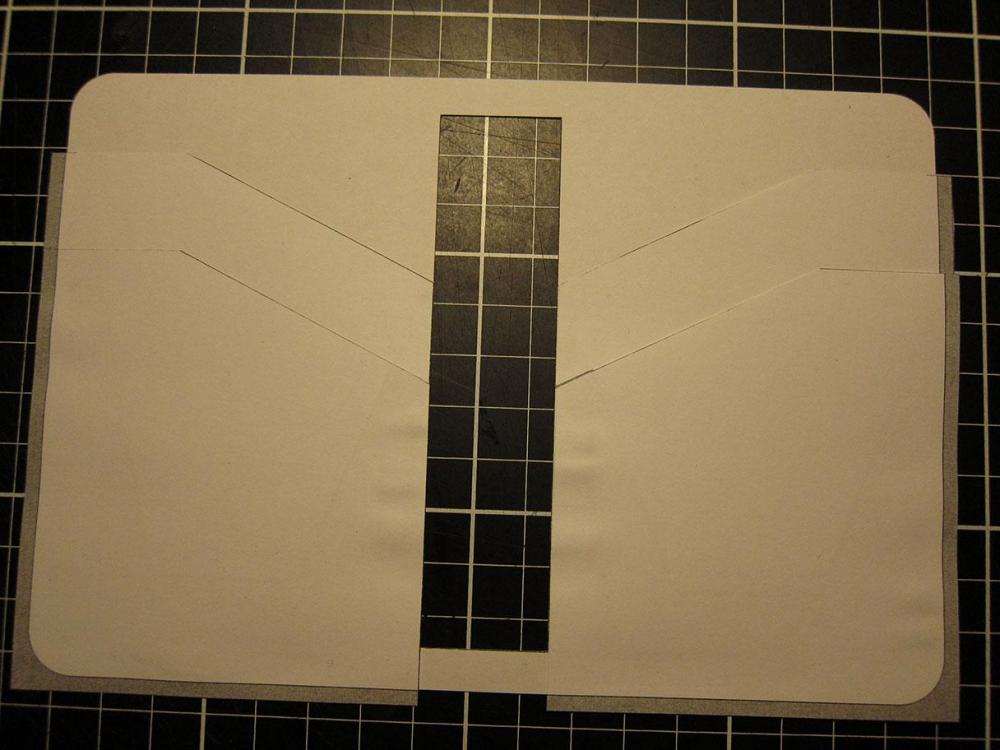
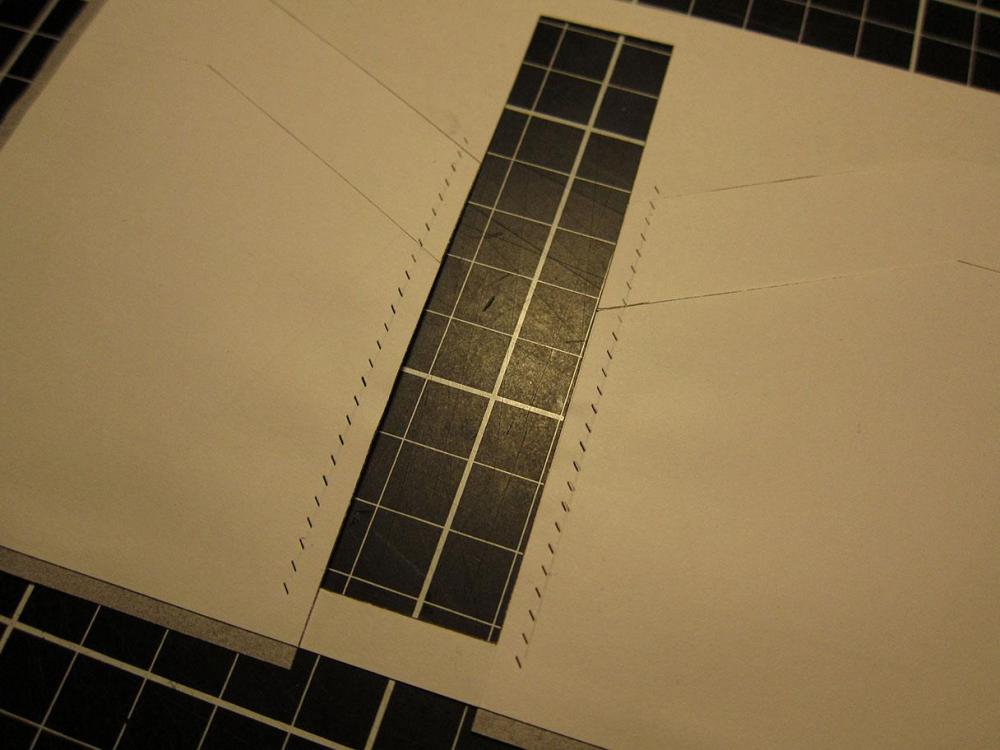
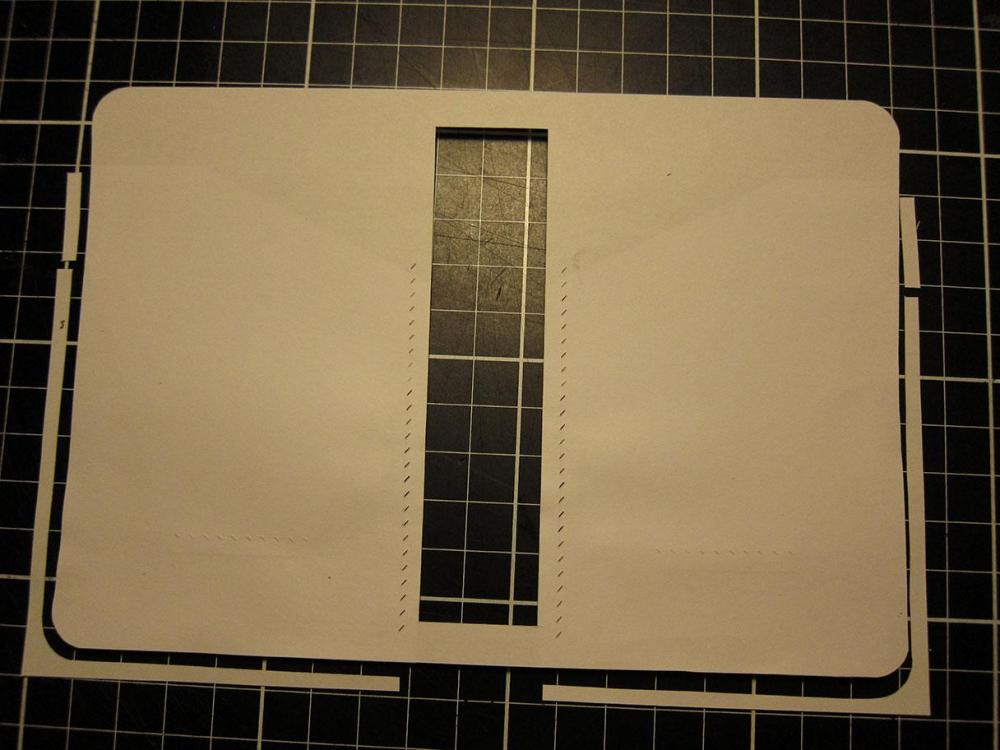
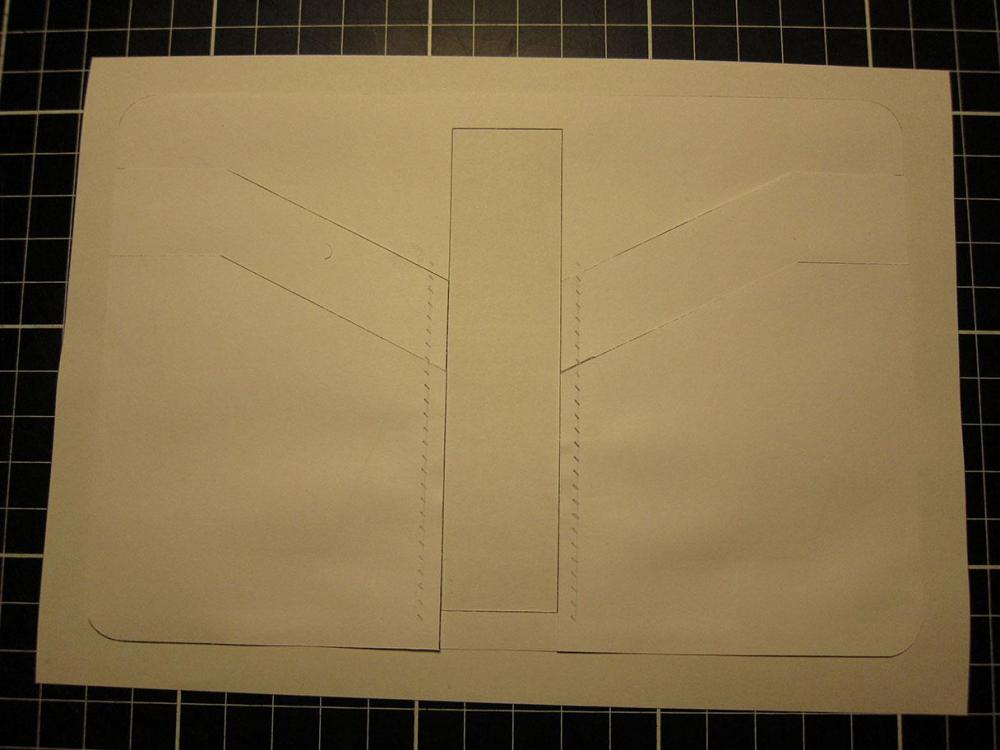
Wallet dimensions 1. Cut out all parts. 2. Finish top parts of pockets (crease? burnish, edge paint? whatever suits you) 3. Glue top pockets in place, align them carefully with the inner opening edge. (Optional: skive the bottom part edges for a smoother look (will not be visible through the bottom pocket, and wallet will become slimmer) 4. Stitch the bottom part of the pockets (4mm from the edge. 5. Glue the bottom pockets in place. 6. Stitch the inner part of pockets. 7. Turn the assembled piece around and trim pocket overlaps. And finish the open center part with (crease? burnish, edge paint?) 8. Glue edges (4mm) against the exterior. 9. Trim. 10. Stitch exterior edges all around, and finish edges. Did I miss something? Just comment.
-
Letter size: (Haven't tried to print them since I have an A4-printer, any problems just tell me) letter_bottom_pockets.pdfletter_top_pockets.pdfletter_overview.pdfletter_lining.pdfletter_interior_base.pdf
-
A wallet i've seen a couple of times. And I thought I make a template, and also instructions. (I didn't feel like making this wallet myself, so glued paper together for instructions.) Suitable stitching irons is 3.85mm/#7 or 3.38mm/#8 (In my photos I used 3.0mm/#9 because I don't have any larger. (Hence the reason it doesn't match up between pockets. Center of stitch 4mm from the edge. A4: A4_bottom_pockets.pdf A4_interior_base.pdf A4_lining.pdf A4_overview.pdf A4_top_pockets.pdf
-
I think this was what I was looking for. Which may be the same type as you use. https://www.rmleathersupply.com/products/dye-sponges-3-pack?variant=35473366723
-
It might be suitable for my purpose. Will have to look around here in the city, so I don't have to order something like that online. They are cheap, but shipping will cost a lot for that low amount.
-
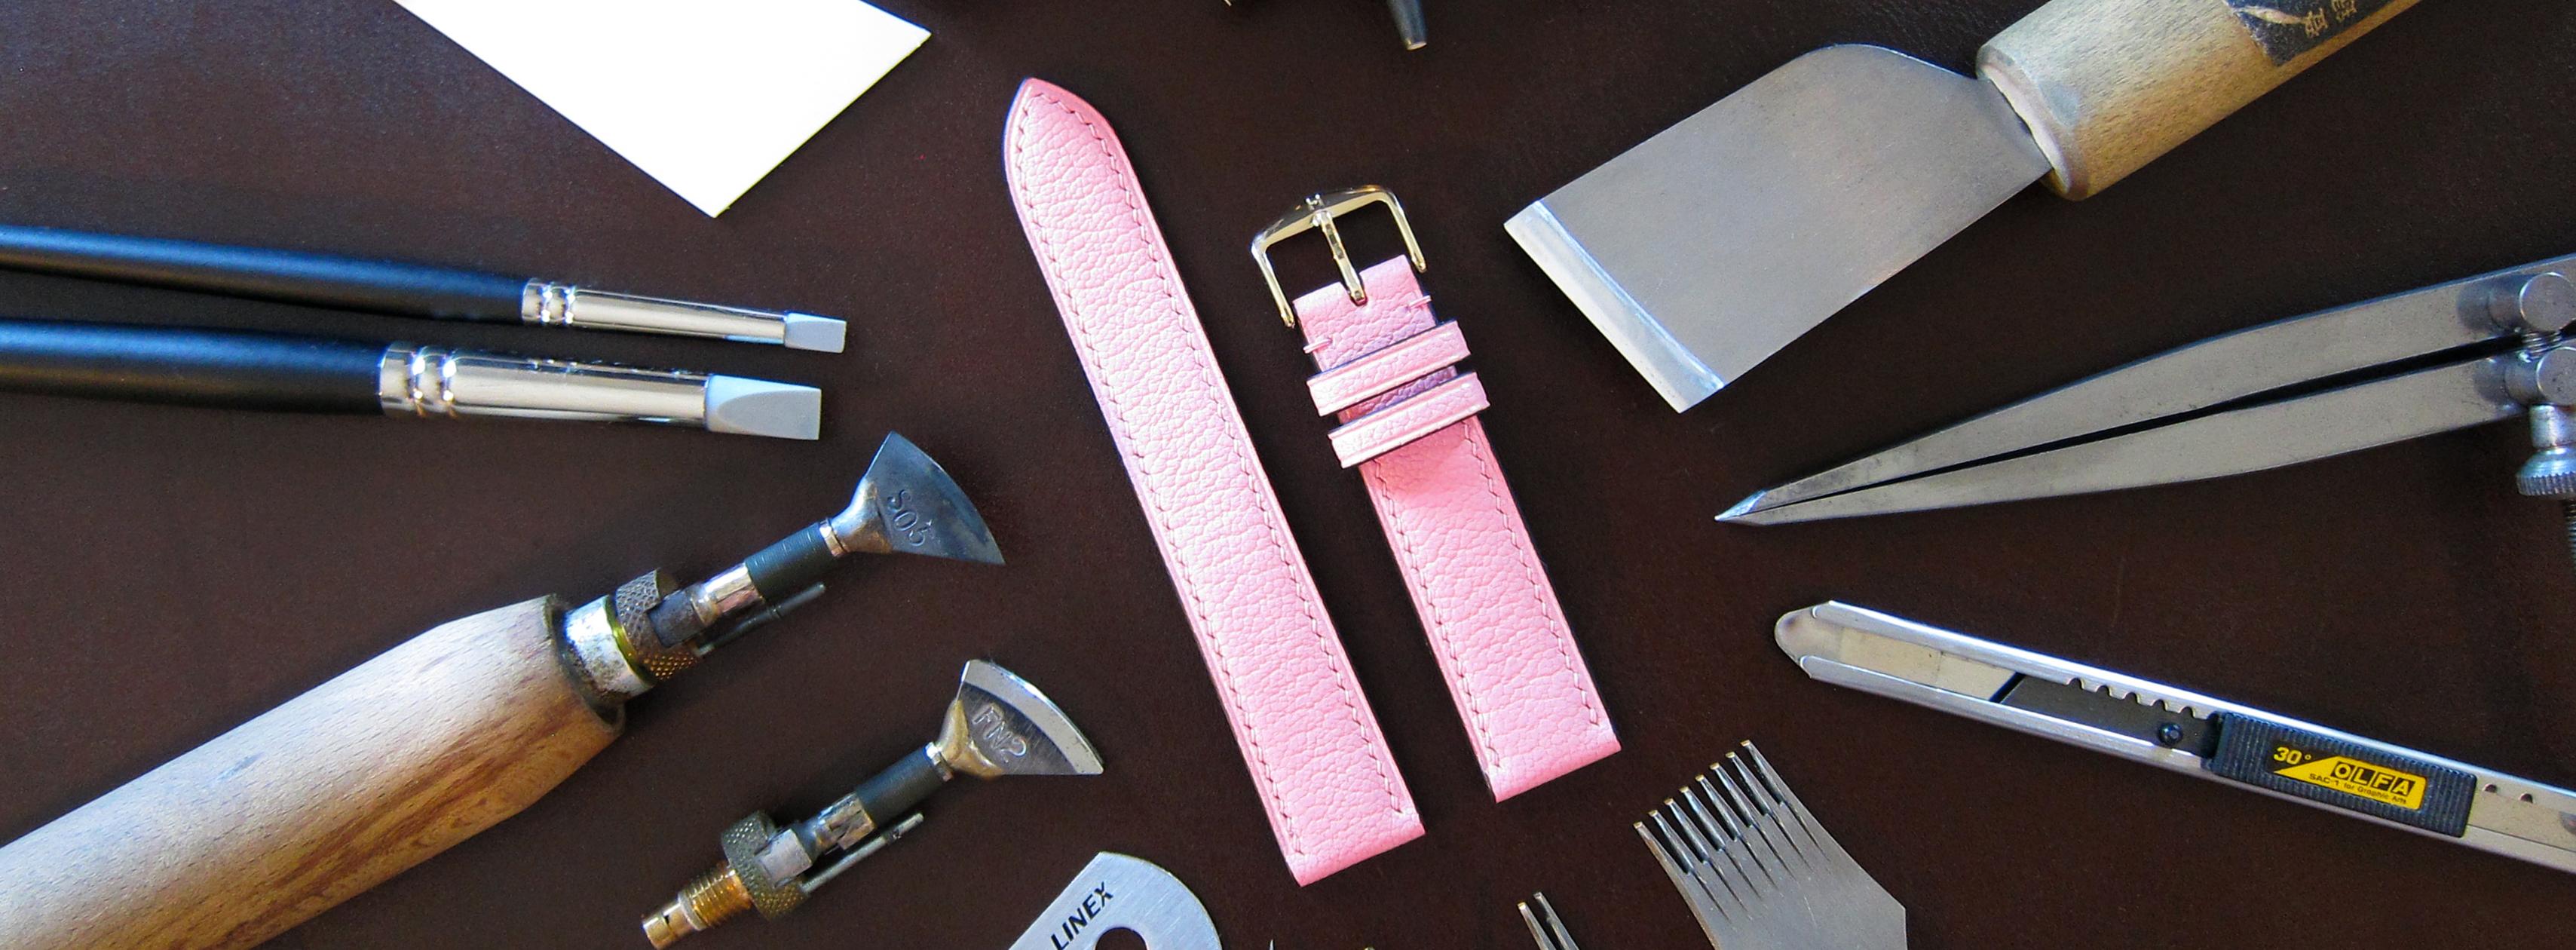
@ipcmlr I will give some tips on cheaper alternatives on some of the tools and motivate why, and also some tools/brands I prefer. This is of course my opinions, and we all prefer different tools. exacto knife $6 I have two snap-off knives. One 18mm (cheap one) I use this one to cut thicker things, and to cut out leather pieces from the leather hide. I also have a Olfa SAC-1 which is cheap and I like it because it's very little wiggle in the blade. I use Olfa Black Max blades for both knives, they get dull quicker, but they are super sharp and cheap. ruler $10 Don't buy a really cheap thin ruler, I did that at first and it was very annoying. I would recommend a thickness around 1mm (I use Linex) needles $9 I would recommend John James 004 (Up to around 0.6mm thread) depending on the type on the style of products, if you would use for example Ritza25 0.8mm or other thread around the same thickness John James 002 is more suitable. If you use very thin thread like 0.3-0.35mm you can benefit from System S+U 953-7 But John James 004 work fine for this thread. thread $7 - For small leathergoods (depending on style of course) Meisi is a very good choice, and I would recommend you to pick up their free sample pack (You have to pay shipping costs though, but you get a couple of full spools, and a lot of samples of different thread types. + a color catalogue. I prefer Meisi linen M40 (0.45mm) for 9spi (European style irons) and Meisi linen M35 (0.35mm) for 10-11SPI (Which I usually use for watch straps) I also use their Xiange twist in the same weights. It's a polyester thread with a linen feel, I like it for wallets and card holders, because it's so much more durable compared to linen. http://www.meisi108.com/product-17210-23781-85397.html Contact them on instagram to order: https://www.instagram.com/meisi108/ stitching irons $215 - I just put the most expensive one for computation. KS Blade Punch 2+10 3mm I really like my Ksblade, they are so easy to align to a scribed line. dividers / leather groover $10 - a tandy stitching groover Do you need a stitching groover? I have one, I have never used it, and never seen a reason to use it. Maybe if I someday would make a gun holster or something where I want quite thick thread, maybe I would use it. stitching pony $120 - dream factory. I'm sure there's a cheaper option. Make your own? I have no woodworking experience, and used a plastic miter saw box and a cordless drill. I did add a looking mechanism with a metric thread insert and a "eye screw", I placed it quite low to avoid thread getting stuck. https://imgur.com/a/5hWQk beveller 80 - I put the palosanto #2 here. I'm sure there's cheaper options I have Kyoshin Elle the ones with green handles, and have never felt like I would need anything else. Palosanto is probably a lot better, but the ones I have make a clean beveled edge, and I don't have to sharpen them that often (A steel rod and fine grit sandpaper is included to sharpen them. And you can strop them. card for templates $15 I use card paper from pizza boxes, a good reason to eat some pizza lol. https://i.imgur.com/WFKw6Ql.jpg sanding block/sandpaper $8 I use paper from Mirka (And really like that brand) 180 grit (dry paper, the yellow one) and wet/dry 400 grit, 800 grit (for final sanding of edge paint before polishing) When I dye and burnish edges I go a little higher as finish) For sharpening my skiving knives I use 1000 grit and finish with 2500 grit. To hold the paper I just cut apart a sanding block into a smaller piece so I can wrap my paper around the edge and hold it. maul/hammer $75 - barry king maul. You plan on doing tooling? if not a regular cheap hammer. Something equivalient to this with plastic heads cost like 10-15usd. https://images-na.ssl-images-amazon.com/images/I/61AH4em4rHL._SL1500_.jpg skiving knife 50 - a friend is selling me a palosanto japanese knife which might be a good option. Palosanto have a good reputation so it will be a good knife. I use the cheaper ones from Kyoshin Elle and i'm very happy with them, and it's around the same price, so I would choose the one from Palosanto.
-
I recently saw someone using isopropanol to even out the last layer of edge paint. (It was a story clip on Instagram, but can't find it now) he used a small white "sponge looking thing" and he held it with some tweezers. It almost looked like magic eraser. Anyone know what I talk about? I would guess this is also used by some people to dye or paint edges.
-
Maybe you can find a nice bracelet lock also https://leatherworker.net/forum/topic/96459-bracelet-hardware
-
Thank you
-
Brown/orange watch strap
Danne replied to Danne's topic in Purses, Wallets, Belts and Miscellaneous Pocket Items
Thank you. Yes, sure it's easier to cross the tip, because I can choose if I want to "toe or heel" with the creaser around the tip. But I find those small details important.


