-
Posts
136 -
Joined
-
Last visited
Content Type
Profiles
Forums
Events
Blogs
Gallery
Store
Everything posted by Alaisiagae
-
I pulled out and redid the stitching on the brown pouch, got it to mostly zigzag correctly except for that errant vertical hole (facepalm). Having my stitching pony would have been helpful! But it's not quite ready to be used until my dad and I finish putting varnish on it (he insisted on using the slow drying varnish with an air brush, which I have no idea how to use), it needs one more coat.
-
I watched the Armitage video and I think I know how to do it correctly now. But I also have a choice - I can make the stitching line a "proper" zig-zag, or I can do a straight line, which is probably what most laypersons think of as "regular/proper" stitching. When you make stuff for other people, do they like the zig-zag or are they all "why is your stitching slanted"? Because I'm thinking maybe I will purposefully make the stitching line flat/linear so it looks "normal."
-
@Tugadude I have the Craftool diamond hole chisel set. It comes in three spacing widths, with 2, 4, and 6 teeth (and a single 1 tooth). I used the tightest width (3/32") for the brown pouch, and the middle width (1/8") for the black pouch. I did use the 2 tooth chisel when making the corners, but I may have lined it up poorly or at a suboptimal angle along my stitching line (I'm thinking of the left front radiused corner on the brown pouch. The right side looks good). Okay, so it's normal to have the front and back stitching look different? That's a relief, at least I know what to expect now. I think the pieces I worked with are in the 4/5 oz range (I'd have to use my thickness gauge on it to be sure). Much thicker than the thin veg tan that came in the Tandy kit, and thus why I opted for a single pocket rather than a bulkier 2 pocket pouch. I could buy thinner oil tan (I really enjoyed working with it, so flexible and pretty!)... I plan to give them to my uncle for the holidays, and fill them with those chocolate coins you see at Christmas time. ^_^ I admit, I was wanting for a better cutting implement when cutting out the leather. Keeping my scissors from skewing (yaw or pitch?) was hard, and I don't like using my utility knife (pull-cut). But those round/head knives look intimidating with a hard learning curve. Even the tools I used for these pouches had their own learning curves that I'm still working on, and they are not as finicky as a knife blade. Are 1/4 round/head knives easier? I saw Jo on JH Leather use one, it didn't look as scary as a head knife. I will try to watch some Armitage videos. Sometimes I like watching videos, other times it is hard for me to sit still (depends if my meds have worn off or not).
-

Biker Wallet
Alaisiagae replied to DustinSmith's topic in Purses, Wallets, Belts and Miscellaneous Pocket Items
Wow! That looks fantastic! I really like the two colors of thread, how it matches the overall color scheme. Very well designed and tooled. -
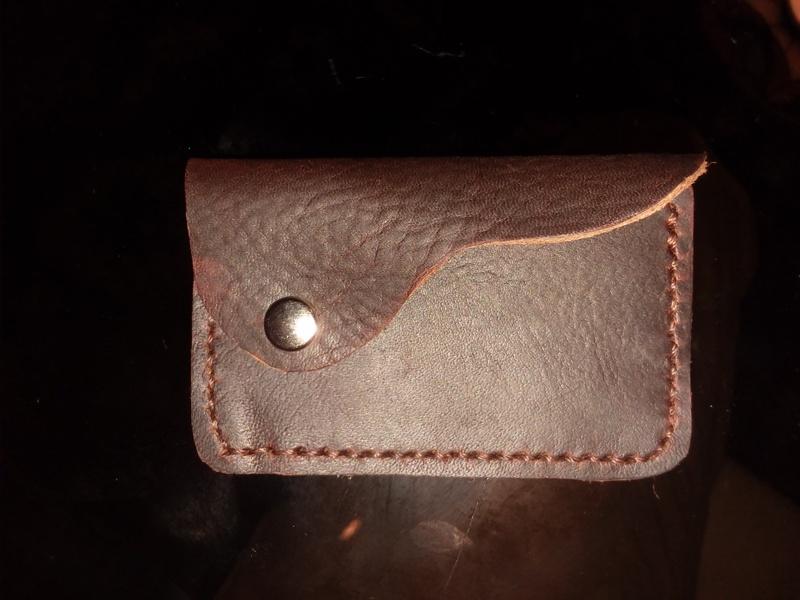
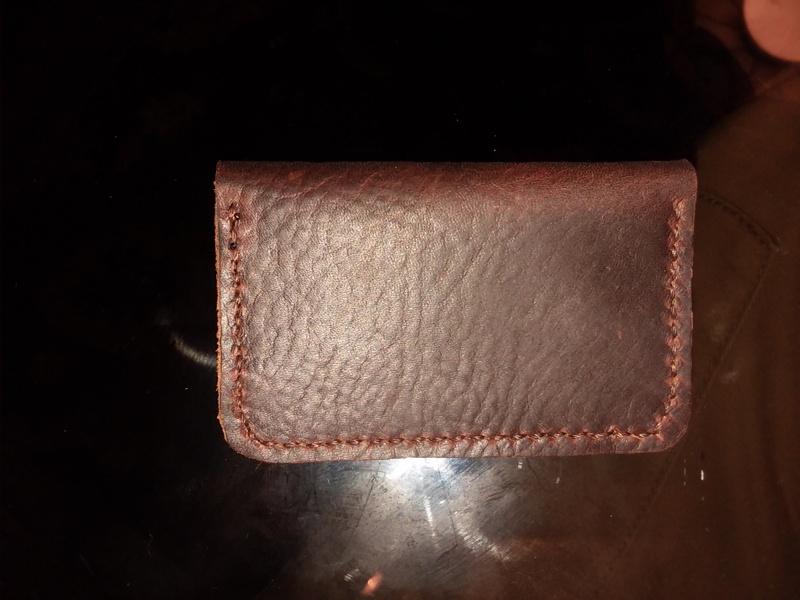
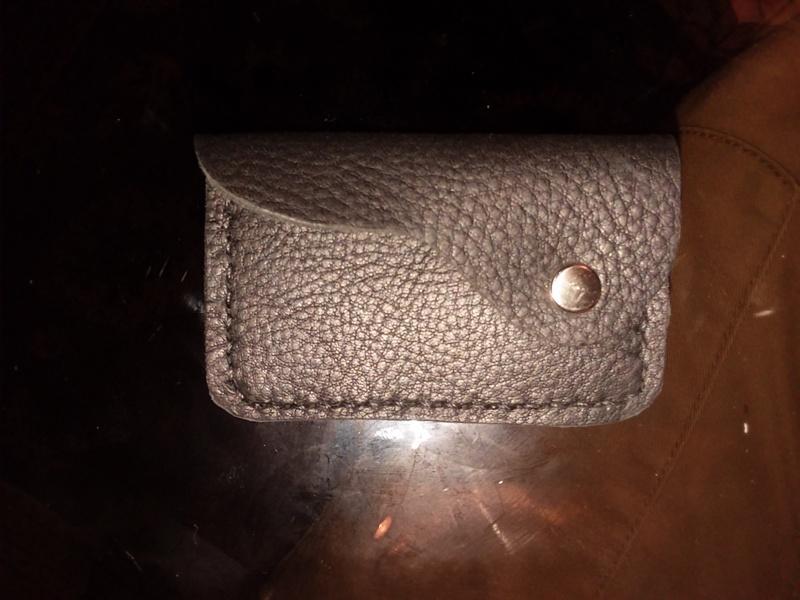
I made two coin pouches. I used the Tandy "2 pocket coin purse" as a template, but only did one pocket because I wanted to keep the thickness down. I used some oil tan scraps I bought at the store and cut them out using razor scissors. The first pouch I did is in black with black thread. I wasn't happy with it because the margin on one side is wider than the other side. So I made a brown one (after 3 failed attempts). I used diamond chisels to make the holes. The thread is not anything special, just what I bought at Tandy. Despite reading many tips on how to make the holes in the corners, it is much easier said than done! Despite using my oversitcher wheel, I did have to fudge some holes along the bottom right of the brown pouch, and when I used my single-point chisel I was not aware that I was holding it the wrong way and thus have a vertical diamond hole. Oops. Question: why does my saddle stitch look like zig-zags (slanted with a gap) on one side and normal (straight, no gaps between stitches) on the other side? On the black piece, the stitching looks normal on the back and zig-zag on the front. On the brown piece, the stitching looks normal on the front and zig-zag on the back.The only thing I can think of is that I did the "cross over" of the needles wrong. I did not put them in the hole simultaneously, because in the past I have broken needles that way. So I threaded one hole first (needle #1), and then played "catch up" with needle #2, while holding down needle #1's thread so that it didn't get in the way (both needles' threads being on the same side of the hole when I started to "catch up"). On the black pouch, I did this on the front of the piece; on the brown pouch, I did this on the back. Do you think I should get more leather and try again? Or do you think these are okay enough to be gifts? I am my own worst critic!
-
Beautiful craftsmanship!
-
I use Ballistol when I worry about rust. Website.
-
I used my improvised sanding sticks and was able to get 90% of the blade nicely polished. The tip is ultra pointy and extermely sharp. The sides aren't as sharp as, say, my utility knife - should they be that sharp? I tested it on that thin leather, and it goes through it very easily now.
-

Help! New leather smells like fish!
Alaisiagae replied to Markallheart's topic in Leatherwork Conversation
Ask a friend or coworker to take a sniff, see if they also think it is fishy. I really don't think leather should smell fishy, could it just be rancid? -
Nice score! A little Bar Keep's Friend or Flitz should help remove corrosion and rust, or you can spring for a heavy-duty rust remover from the hardware store. Let us know about your progress getting things fixed up!
-
yeah, I've ordered some lower grit sandpaper (100, 150, 200) and I'm making some snading sticks using popsicle sticks. I'll give it another go today (depends when the new sandpaper arrives). My first attempt, I put my sandpaper on top of a wood block, like how the Leathertoolz video did it. Then I used Niel A's method of sharpening each side on the sandpaper, like how he used his carborudem stick/block. I did notice that it was difficult to make contact along the entire length of the awl blade, so I focused on the tip, which is nice and polished. I checked the awl blade a lot but never felt a burr, so perhaps I did something wrong. Also, the spine (shoulder) shifted slightly to the side, despite my best efforts to sharpen each side the same amount. I'm not sure how to fix that. EDIT: the 320 and up grits were from 3M, their automotive line of sandpaper. The lower (100 to 200) are 3M general purpose sandpaper.
-

Couple Purses Done
Alaisiagae replied to Treed's topic in Purses, Wallets, Belts and Miscellaneous Pocket Items
Superb tooling, a level of skill I can only aspire to. Those roses look great. Your choice of coloring agents really makes that horse pop, the shading looks amazing. The backgrounding must have taken quite some time, but the texture looks great, it's an interesting contrast to the smoothness of the floral shapes and the horse. -
Have you had luck looking for small dog/puppy harnesses/vests? If you are somewhere hot, I would think a fabric/textile would be less insulating than leather. You could use neoprene sleeves on your current harness to provide extra padding, though neoprene doesn't tend to breathe very well either. Hmm. I wish I knew more about textiles and sewing, but I can barely sew on a button. Edit: you know what was easy to put on my corgi was a small lifevest for swimming. You could consider emulating some of that design.
-
Yes, I noticed the sale, too - too bad there's nothing on sale that I really want to buy! I guess I'll have to wait until the next sale (probably Black Friday, but who knows if they will do in-store deals this years - I imagine they would not want to have tons of people in the store). What does DFS stand for?
-

Only my 3rd holster...
Alaisiagae replied to Jaan's topic in Gun Holsters, Rifle Slings and Knife Sheathes
I like how the color of the holster matches the grip of the gun. The tooling is simple but elegant. The lighter colored thread really shows off how neatly you did the stitches. Thank you for sharing your project with us! -
-
Thanks, @fredk, I'll give that a try. I'm also wondering if the leather is extra tough because it's been dyed and glued and I'm trying to pierce the glued part. Once the numbness in my thumb goes away (hope I didn't just give myself nerve damage from all that sharpening), I'll give it a try. I don't have cork, do you think a thicker piece of leather might work instead?
-
So, I spent the past 1.5 hours working on this, started with 320, then 400, 600, and worked my way up to 2500 grit. I mostly followed Niel A's method. I tried rounding the tip, but then it wouldn't pierce the leather, so I made it pointy again. It goes through thick belly very cleanly, but I'm still struggling on some thin dyed veg tan. Well, at least I got a polished awl blade for my trouble.
-
I do that all the time with my own pieces (I focus on the imperfections and what I could do better), though my work is a far, far distant cry from yous! Your bifold looks superb, thank you for taking the pictures and sharing your progress. I'm still amazed how you got those creases in the pockets, and your edge painting is gorgeous. The dark orange really stands out, it's very vibrant and bold.
-
@YinTx Thank you for the information about which parts of the blade to focus on. @zuludog I have the 31218-01 awl from Tandy. It pierces pebble grain pretty well, but veg tan is more difficult. JHLeather and Niel A. both file/polish/sharpen each face of the diamond by stroking down the length of the awl blade. I did see one video where the man filed in a side-to-side motion (perpendicular to the blade axis). What kind of tool could nip off the tip of the blade? I don't have a lot of options - my dad has a ton of tools, but I don't know what they are and wouldn't want to damage them. I have 300, 400, 600, 800, 1000, 1500, 2000, 2500 grits sandpaper. @McCarthy Oh, the illustrations are very helpful, thank you! I don't have pricking irons, but maybe I can use my diamond chisels as pricking irons. @jcuk It's not a new awl (I bought it at most 12 months ago), but it has seen only scant use. I tend to use my smallest drive hole punch from a Mini Punch set because I have a lot of thicker nylon braided cord, rather than thin thread that can fit in an awl-made slit. But, since my diamond chisels were giving me some problems, I wanted to see if I could have better results with my awl. I want to make a small leather coin pouch (something you can put in your pants pocket) for my uncle. I'm not even sure veg tan is the best choice of leather, it's a bit more stiff than I want, so I've also been looking at other types of leather with a slightly firm "hand" but not too firm - I worry that if the leather is too soft, it will be very floppy and annoying to open the front flap (fastened with a glove snap).
-
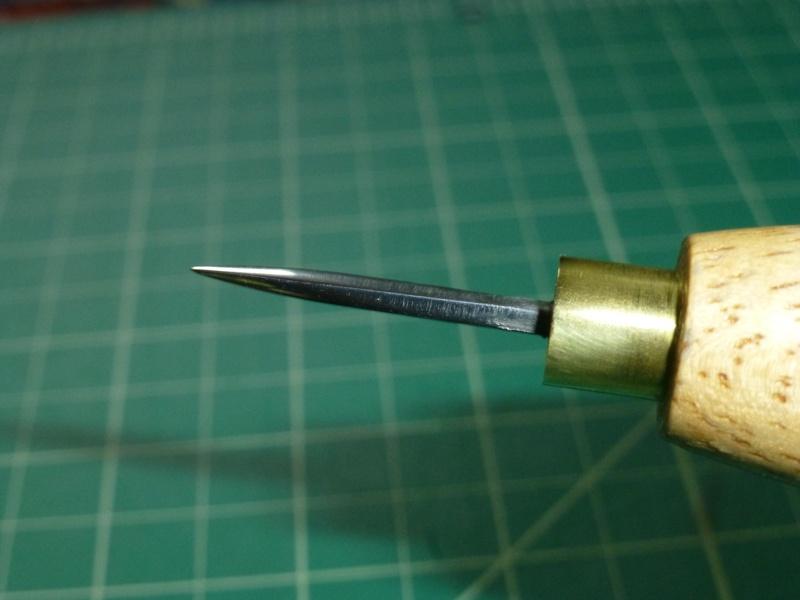
I'm going to attempt to sharpen my awl blade, following the video by Niel Armitage on how to sharpen a saddler's awl. His process is similar to JHLeather's video. I'm still a little fuzzy on what exactly my sandpaper is supposed to do. Am I sharpening the edges of the awl blade and/or am I reducing the "shoulder" of the blade? Any tips or suggestions? It's a cheapie Craftool diamond awl that I'm working with.
-
That is difficult for me to guess, though others might know. Is there any additional information you can provide, such as the maker of the bag? Some makers/manufacturers tend to use certain types of leather, so perhaps knowing who made the bag will provide a clue. I am no expert in leather, but the grain looks large, kind of like what I have seen on bison leather. I think the straps might be a different kind of leather from the bag's leather. It is a mystery!


