Brokenolmarine
-
Posts
592 -
Joined
-
Last visited
Content Type
Profiles
Forums
Events
Blogs
Gallery
Store
Everything posted by Brokenolmarine
-

New feather in my hat ....
Brokenolmarine replied to Gezzer's topic in Clothing, Jackets, Vests and Chaps
Very nice work... -
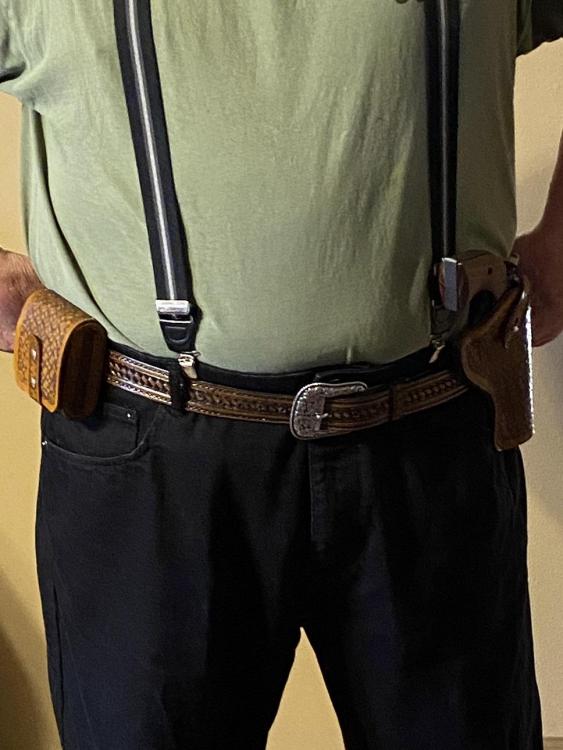
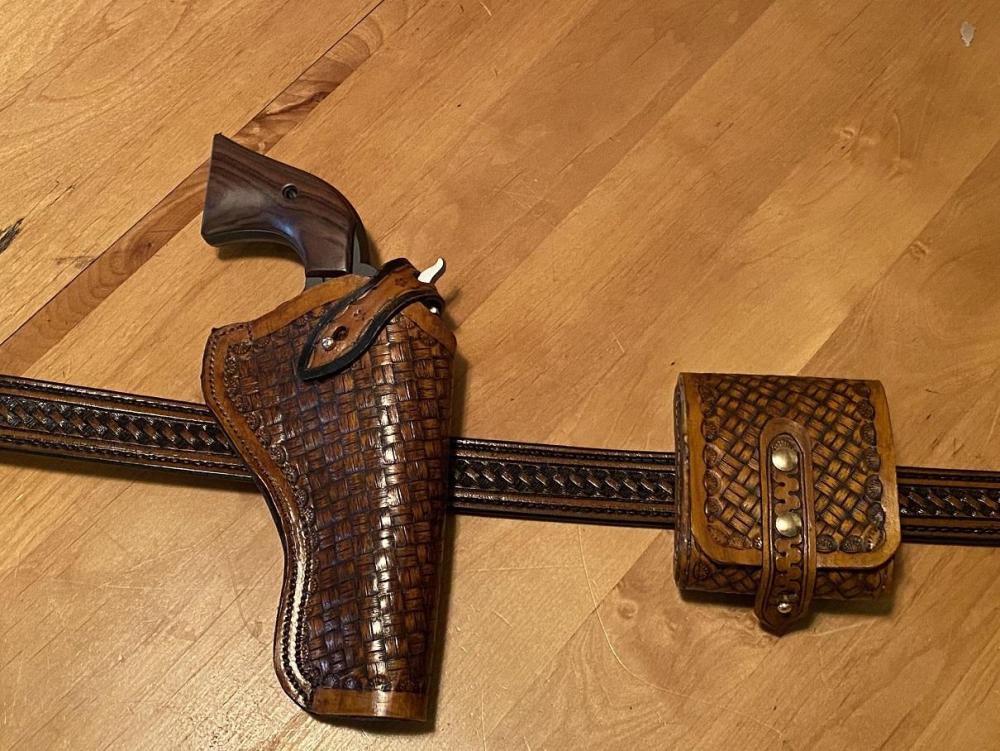
I didn't make the belt, had it for some time. I will be making the gunbelt for the next one.
-
Here is the pair worn. Fat Guys might not be able to look cool, but if you are lucky, your gear can.
-
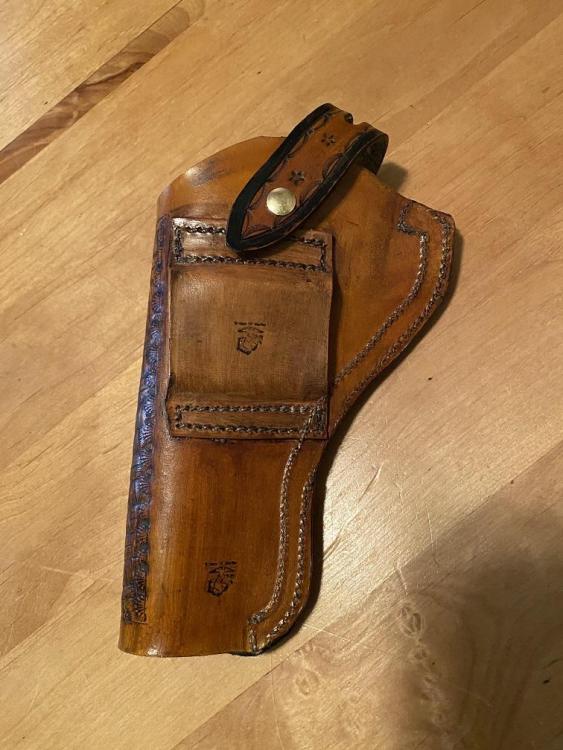
The waxed pair: Back view: The Wrangler in the holster. A Very Tight fit now, but I'm sure the leather will stretch. That's what we want, right?
-
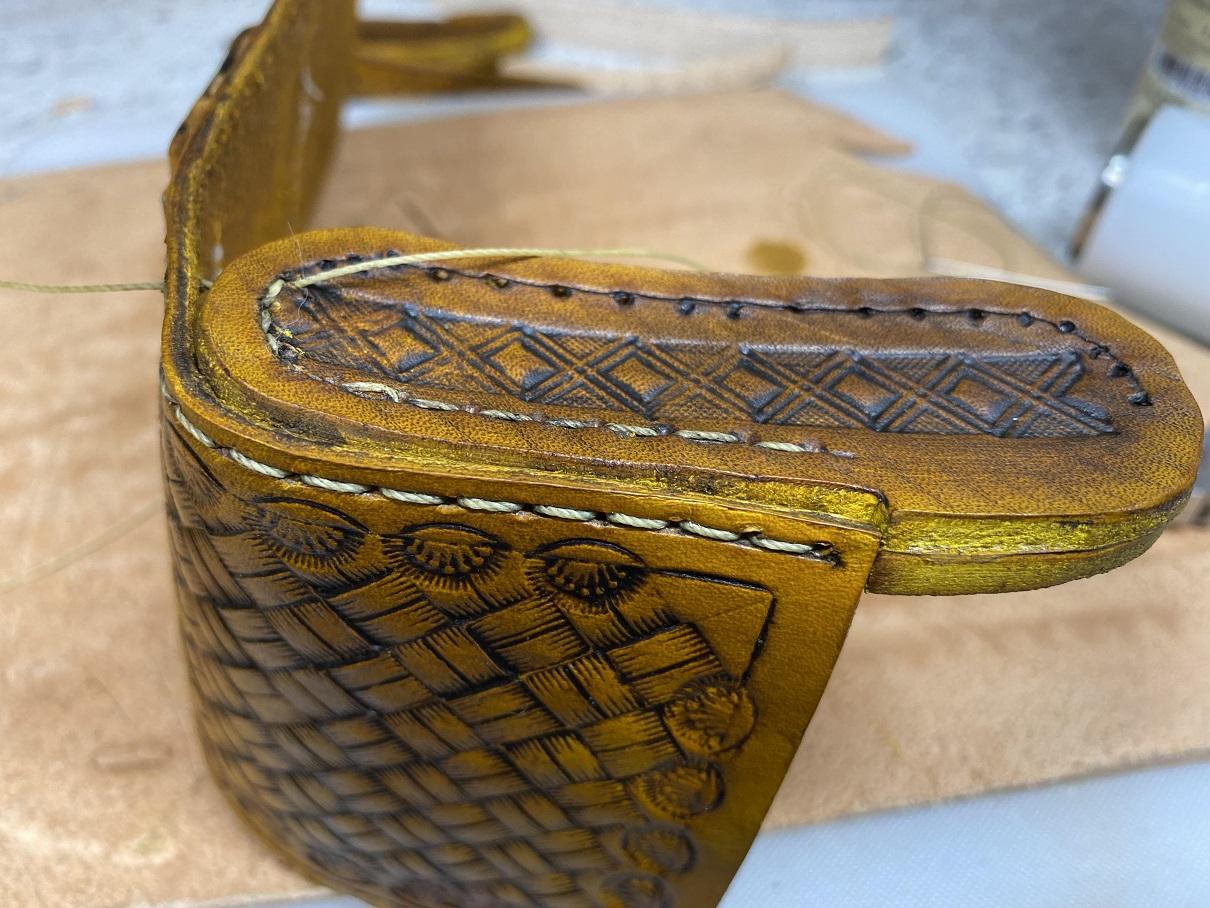
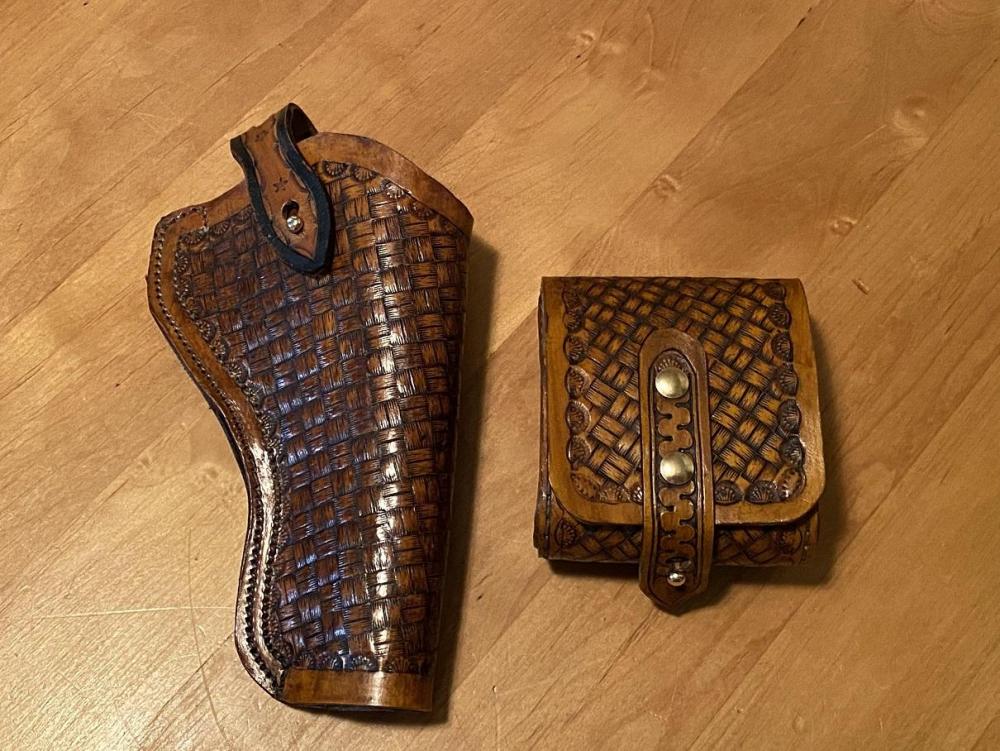
I made a 22 ammo pouch a month or so ago, and noted I planned to make this holster. I had hoped to make it sooner. It was to be a practical application, as well as practice for a much more involved project in the near future when I make a more detailed Rig for my Uberti Birdshead .357. I made a few mistakes along the way here, but it turned out okay. I learned from them, and this was the FIRST major project where I was comfortable enough with the Cowboy 3200 to sew the holster. I went VERY slow, as slow as it will go.. but did okay. I KNOW what I did wrong there and will correct that in the next build. The holster was dyed with yellow, then antiqued with dark brown. Matched the pouch I made several weeks ago, and I think it will be fine. It was lined with a soft leather to protect the Wrangler .22 from the brass hardware. Feel free to comment.
-
Rifle scabbard
Brokenolmarine replied to Pappys Leather's topic in Gun Holsters, Rifle Slings and Knife Sheathes
I bought a machine, and it's taken some time to get confident in it's use. There are so many things going on, and with a machine, things happen quickly. I finally felt confident enough today to sew a major project on it, instead of practice. It's nice, but my pucker factor will be high for a while, and I will be sewing slow. -
Wife says I am a redneck .....
Brokenolmarine replied to Gezzer's topic in Gun Holsters, Rifle Slings and Knife Sheathes
I might do one with bear claws or teeth... It IS Oklahoma.... Good work on yours. Funny thing, I spent the last week getting my press ready to load. Haven't needed to load anything since the move from VA, loaded a lot before we started packing, but bought the wife a new EDC and of course it's a caliber I didn't have practice ammo loaded for. Plenty of factory duty... Ah, carry ammo, only fifty rounds of practice loaded. -
Minimalist Geometric Leather Stamps I Made
Brokenolmarine replied to texasleathertools's topic in Leather Tools
Could you make the eagle globe and anchor shown to my left. I haven't found a decent one yet... A quality stamp would probably sell. -
Couple of knife sheaths...
Brokenolmarine replied to bladegrinder's topic in Gun Holsters, Rifle Slings and Knife Sheathes
I really like all of it. The blade blanks are gorgeous, the hint of red in the scales on the one knife really catches your eye. The sheaths are neat and cleanly done. I just got my 3200, so I too am just learning the machine. Good work all the way around. -
New Shelf Unit Over My Bench Tool Bar
Brokenolmarine replied to Brokenolmarine's topic in Member Gallery
The wife neatened my home office desk right after we were married. We had a conversation about personal space. She also used a japanese flush cut saw to try and cut a 2x4. She said it was crap and bent into an accordion. That was $40 down the drain. I told her it was my fault. I organized my high end tools into a special box, and she doesn't open it. We have tools she can share, tools she can't. She's cool with it. She wouldn't want me going into HER quilting / sewing shop and using her "Good" scissors to cut sandpaper into squares. -
New Shelf Unit Over My Bench Tool Bar
Brokenolmarine replied to Brokenolmarine's topic in Member Gallery
I try to keep things organized. Comes from my stepfather, an anal perfectionist contractor. His work was so good he never had to advertise, always had jobs waiting from word of mouth, customer to customer. He taught me that every tool and every item had it's place. Put it back, you'll find it THERE the next time you need it, not waste time looking for it. Then Marine aviation reinforced that lesson. I try to keep my entire shop in order. Even my stamp block has them grouped by type. Shaders, bevelers, basket weave, etc. I try... But I can't say it works 100%. -
Arrow Quiver Art
Brokenolmarine replied to Doc Reaper's topic in Gun Holsters, Rifle Slings and Knife Sheathes
Very nice. I need to work on carving skills. My carving is normally a hot mess. -
My Second 22 Pouch
Brokenolmarine replied to Brokenolmarine's topic in Gun Holsters, Rifle Slings and Knife Sheathes
I thought doubling the side panels would make stitching easier, boy was I wrong. I think striking a line around the edge of the side panel on the show face and the side for a consistent angle would increase the ease of box stitching. -
My Second 22 Pouch
Brokenolmarine replied to Brokenolmarine's topic in Gun Holsters, Rifle Slings and Knife Sheathes
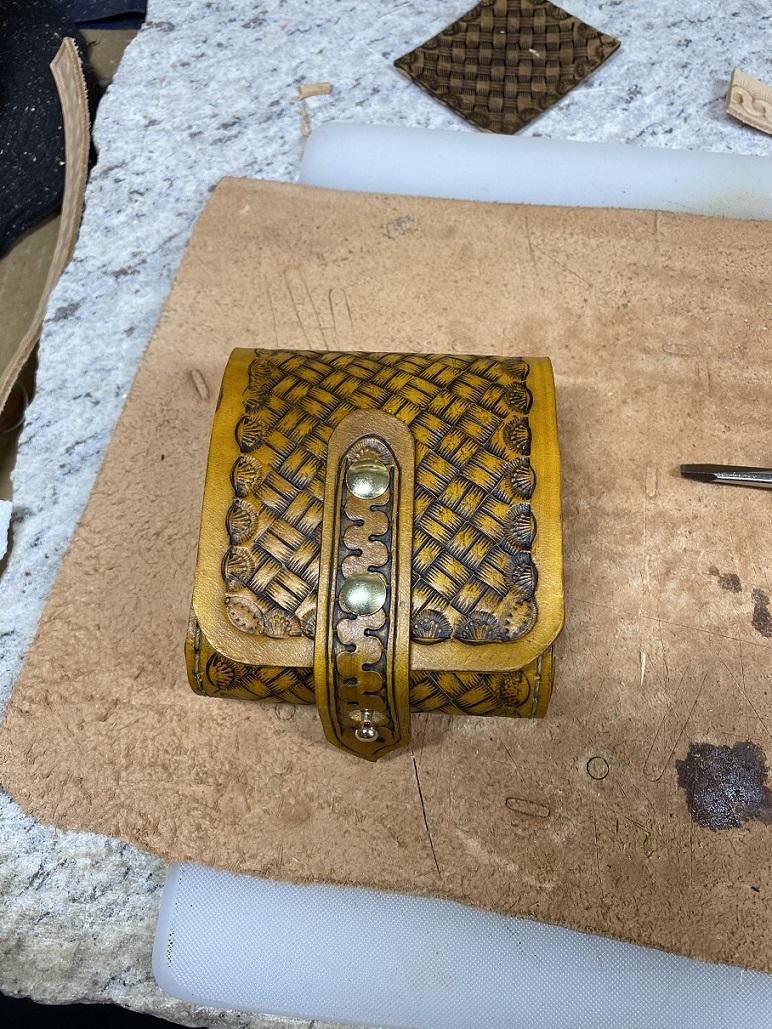
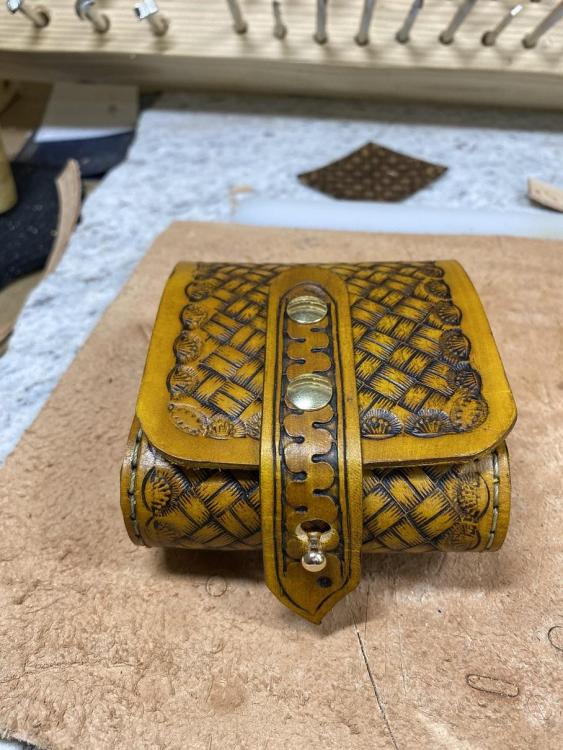
I waited by the phone until 4:30 local time, when the VA staff would have gone home, then went to the shop and finished the pouch. I am pretty happy with the way it turned out. I'm thinking it came out pretty close to the plan in my head. It's pretty crowded in there, but I'm thinking this is what I had in mind. As always, I learned a few things, made some mistakes, and hopefully will be able to remember them the next time out. I will still have a few touch up things to do, but the pouch is usable now and I have the feeling it will last a long time. Color this project ... Done.
-
My Second 22 Pouch
Brokenolmarine replied to Brokenolmarine's topic in Gun Holsters, Rifle Slings and Knife Sheathes
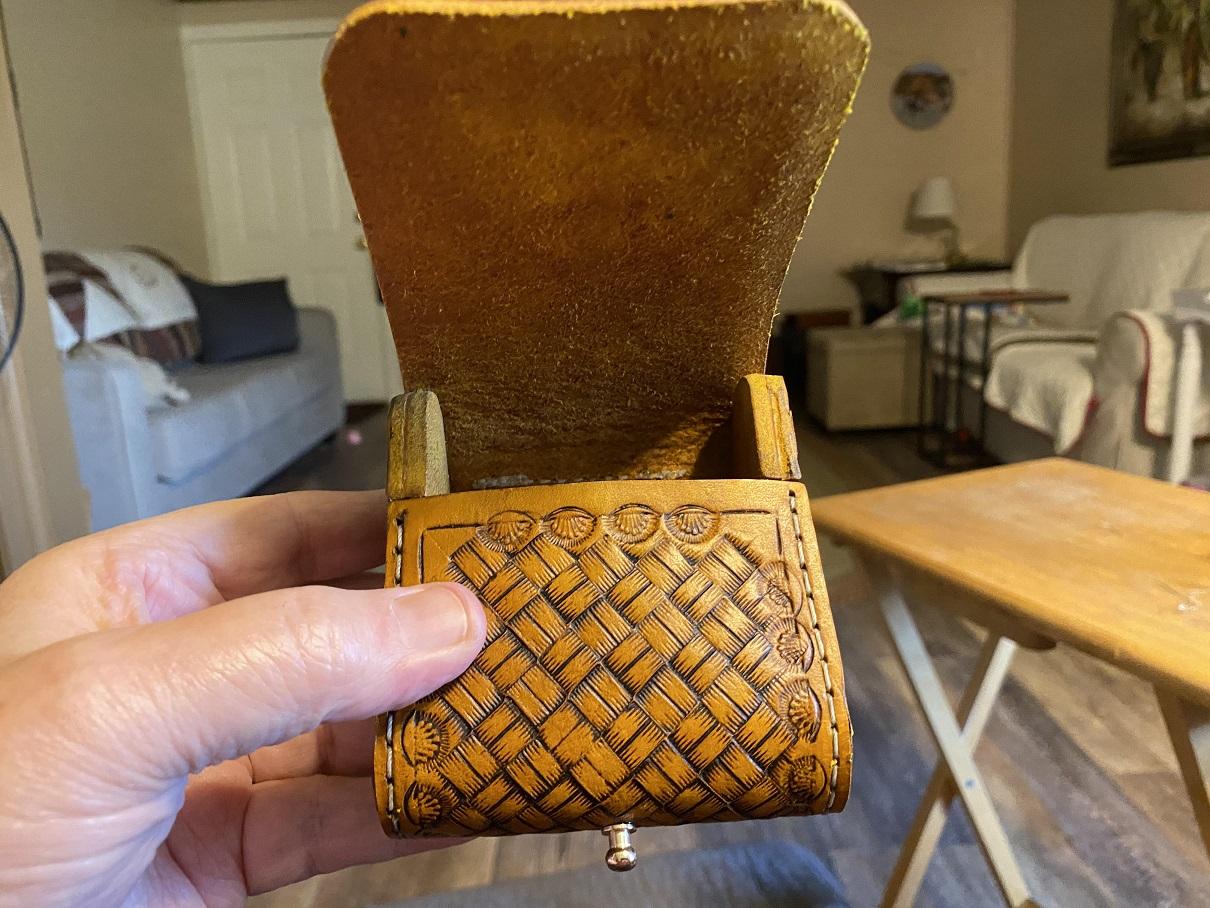
Waiting for a callback from the VA, so I brought the pouch in the house to sew. I got 'er knocked out. Still have cosmetics to do; and the closure strap to attach with chicago screws in case I need to replace it later. I'll slip out to the shop this evening and get that done. Overall, I'm happy. A quarter view. You can see the post installed at the bottom center for the closure strap. Here is the front view. I'll use TWO chicago screws on the strap to insure it's pulling tight. Last but not least, an open view... I will post a view of the pouch once I have done the touchup on the dye, finished the edges and put the closure strap in place. But, you get the idea....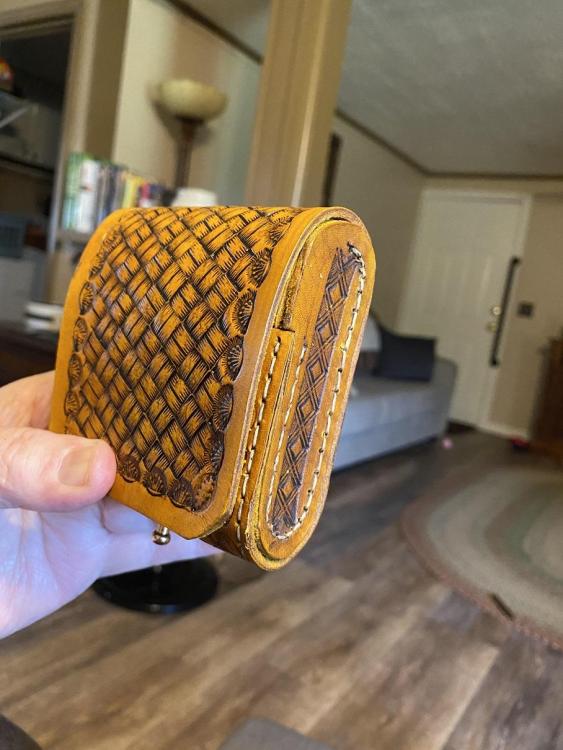


-
I enjoyed the video, and will look back at it before starting my holster. Very nice work, and great quality video.
-
My Second 22 Pouch
Brokenolmarine replied to Brokenolmarine's topic in Gun Holsters, Rifle Slings and Knife Sheathes
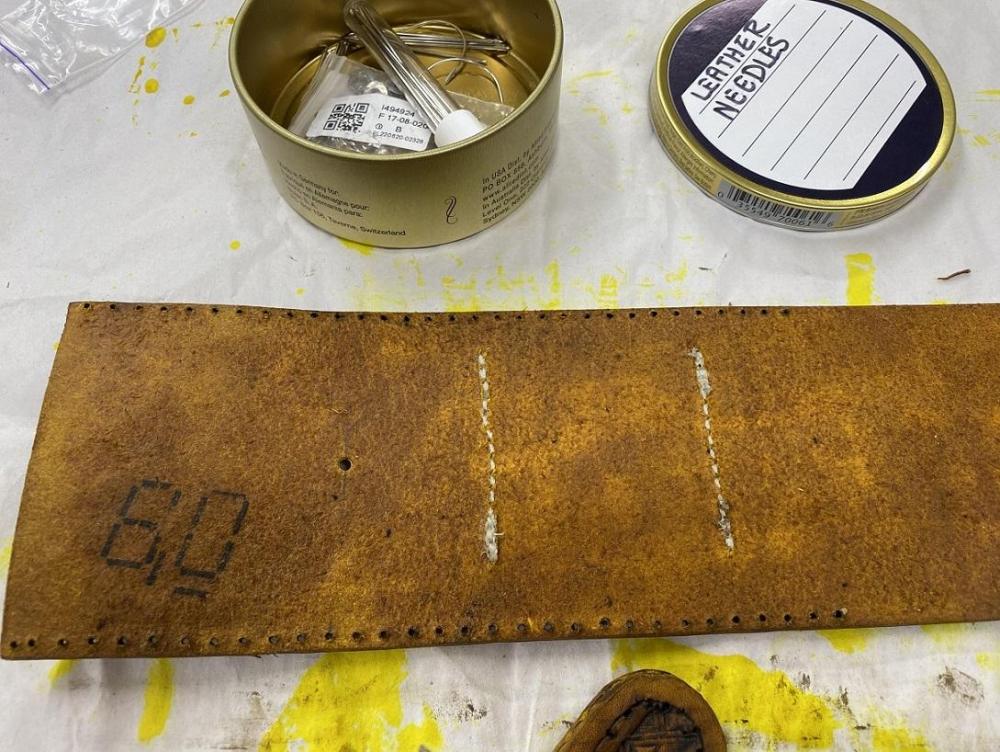
Got back to work on it, and it was time to sew. Rolled out the Cowboy and checked the bobbin before beginning. Almost empty. This is a new machine to a rookie to sewing, so I looked up "How to fill the bobbin on your Cowboy 3200." The owner's manual did a good job and I figured why not fill them all, if I had to set up and fill one. There were eight, I filled five with white thread since I do more of that than black. The remaining three I filled with black. After the detour to bobbinville, it was time to sew. I used a scrap of old belt the correct width to keep the wet formed loop in proper orientation and sewed 'er down. Yeah, sounds like it went smooth as silk. It did, but at a snail's pace. I made a small mistake, but I'll bevel the edge and hide that enough that it won't keep me up nights. Besides, it's the belt loop, it will be on the back. Next I had to remark the position for the hole for the post for the strap that will act as my closure for the flap. I had it marked, but try as I might, my x-ray vision couldn't locate the original marking thru the dye. Old Batman can't see so good these days. I got 'er done, and then punched the hole from both sides to insure neatness, even though the hole will be covered by the post. Anal... guess it is a good thing. Now, finally, as Johnny Five would say. Assemble. I had ordered a set of leather needles, specifically for the two pairs of CURVED needles in the set. I was sure they would make the box stitches easier. I threaded up the larger of the two pairs and started stitching. After a couple pairs of holes, I discovered I was wrong. Okay, maybe the smaller pair of curved needles. I threaded them up instead. I stitched up three more holes. Nope. I gave up and threaded the original smaller straight needles I have used all along and got busy. PITA can be my nickname for the next few hours. But I knocked out about half of one side before my neck, shoulders, and back began whining like a six year old girl who missed her nap. I did get back out after a couple hours break, and knocked out the rest of this side, installed the post, and then started on the other side. I forgot my phone so no pics yet. I'll get some pics and an update later. We are getting close to the end. Once she is all sewn up, I'll attach the strap and do some minor detail work and touch up with the dye... and done.

-
My Second 22 Pouch
Brokenolmarine replied to Brokenolmarine's topic in Gun Holsters, Rifle Slings and Knife Sheathes
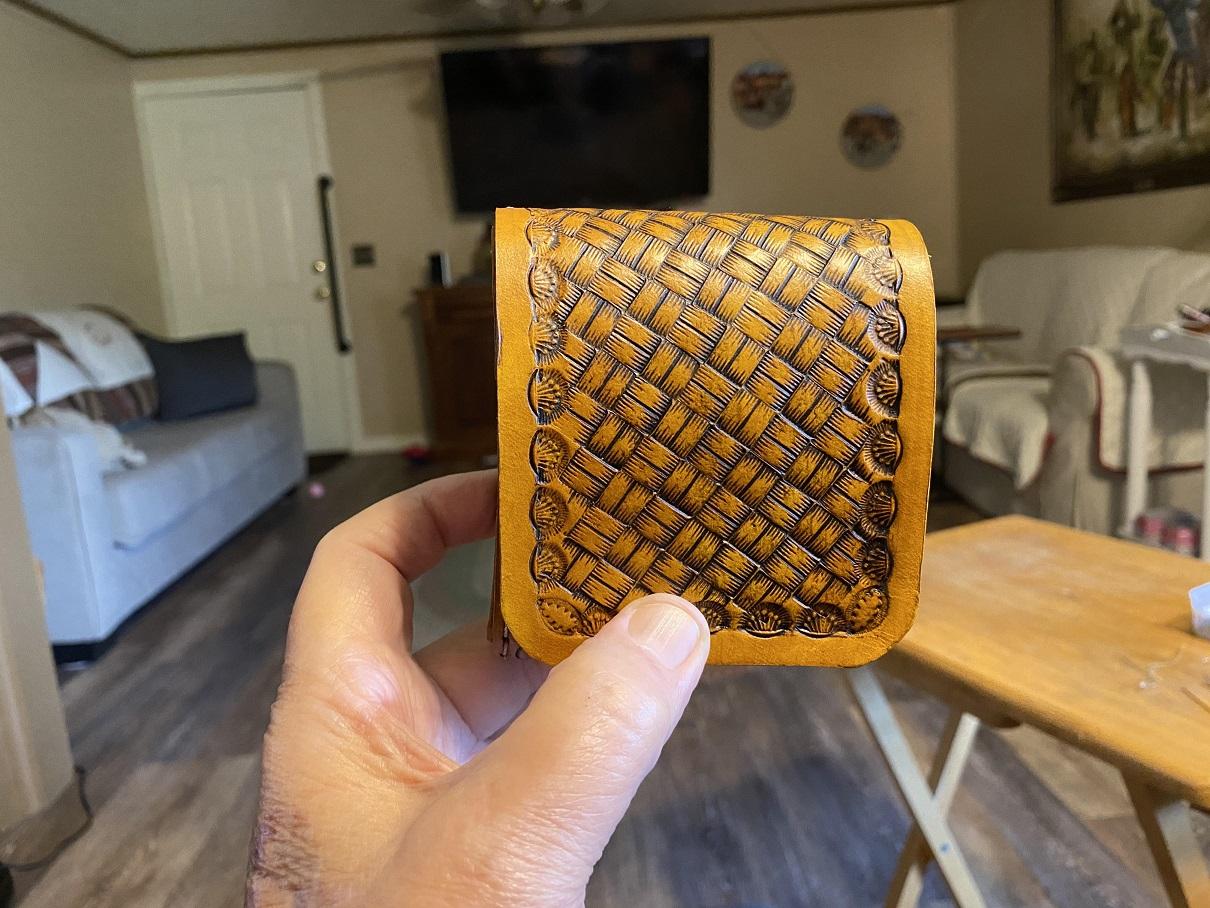
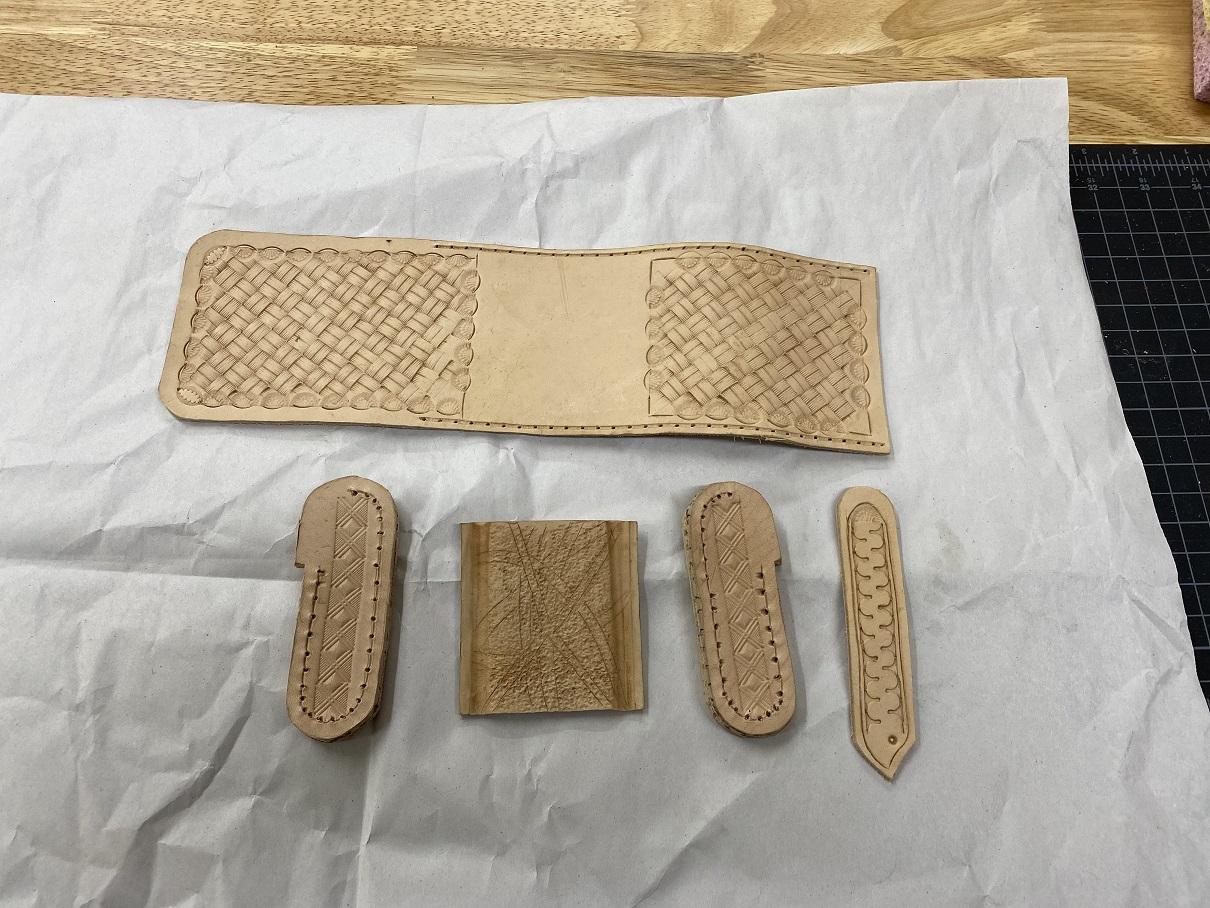
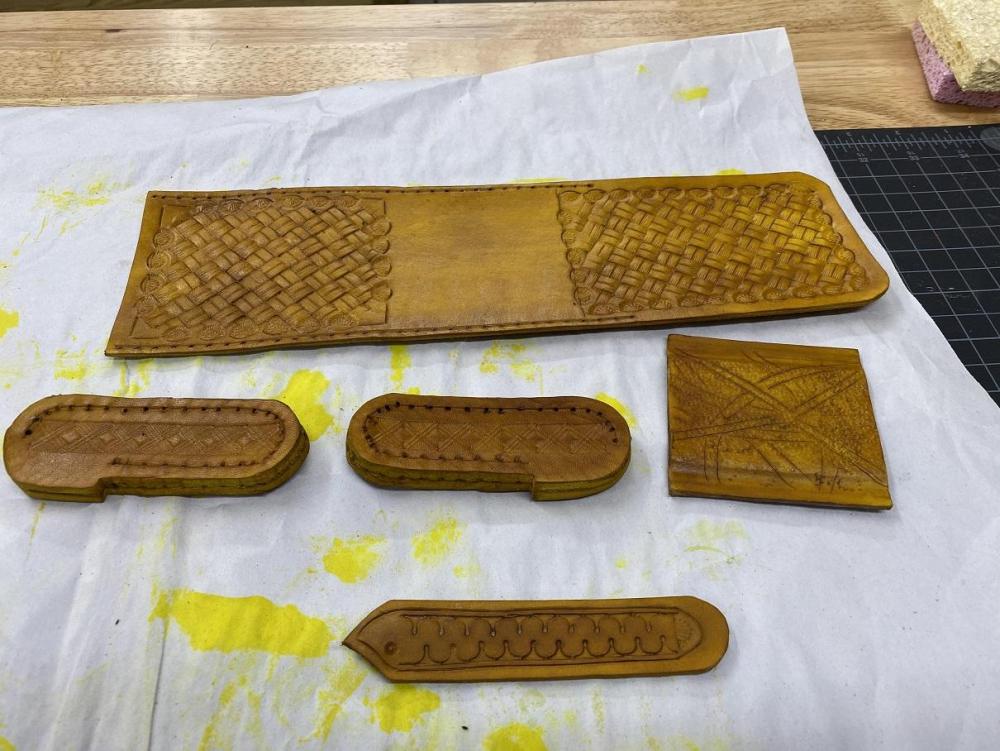
While waiting for the barrier to dry, I pull another scrap and the angled Basket Weave Stamp. This stamp has always given me trouble and practice will be the only way I'll master it. Practice makes Perfect... yeah, Right. The key here is a solid reference line and not slipping when you match the angles. While I was stamping my heart out, the dye finish dried and I would apply the antique. Apply, wipe, reapply as needed, wipe off the excess, shoot. Ah, Reapply, and wipe. I'll leave that to dry overnight so it will stay where it's at unless wiped with a damp cloth. Wow, that antique really makes that basketweave pop! Came out this morning and wiped the antique as needed with that damp cloth, mainly on the various edges where needed. Then applied a sheen finish to lock it in. Once that dries I'll begin assembly with sewing on the belt loop and attaching the post to the bottom of the main panel, then sewing. The pull strap can be attached after.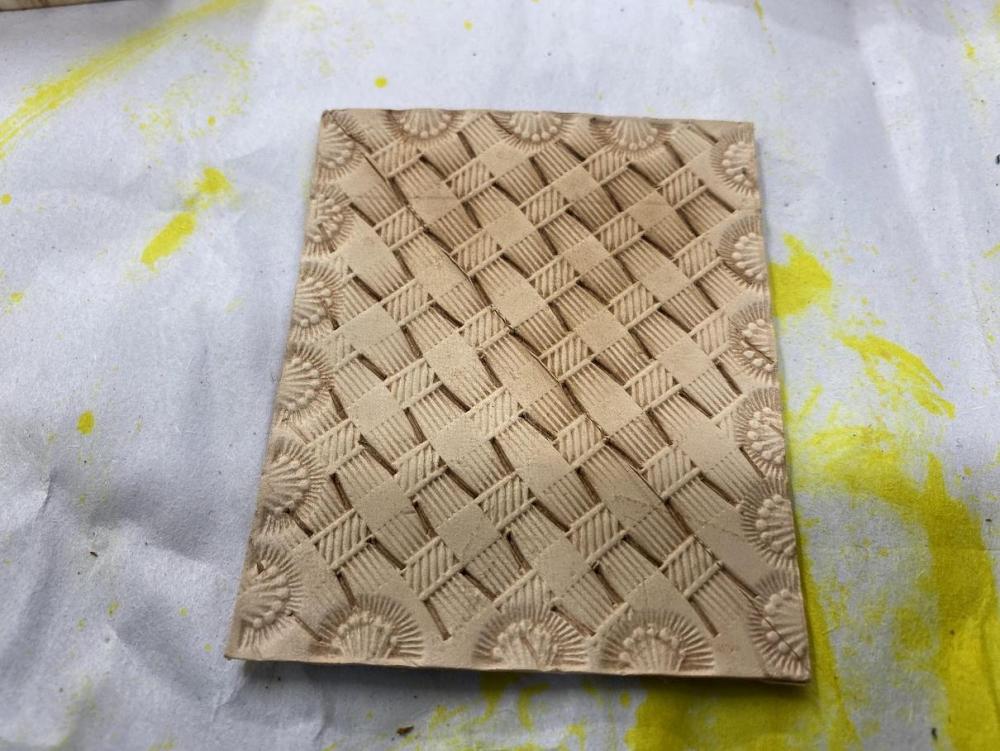


-
My Second 22 Pouch
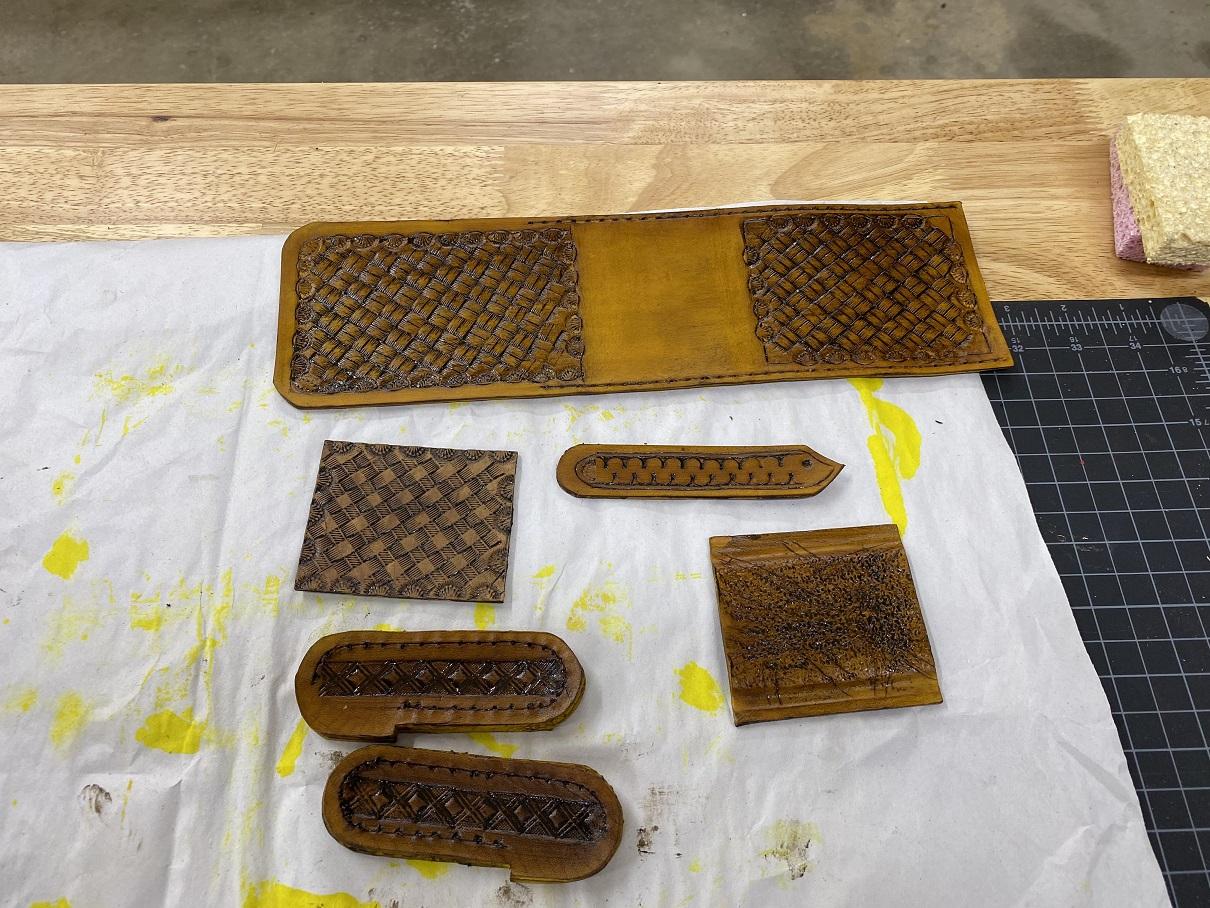
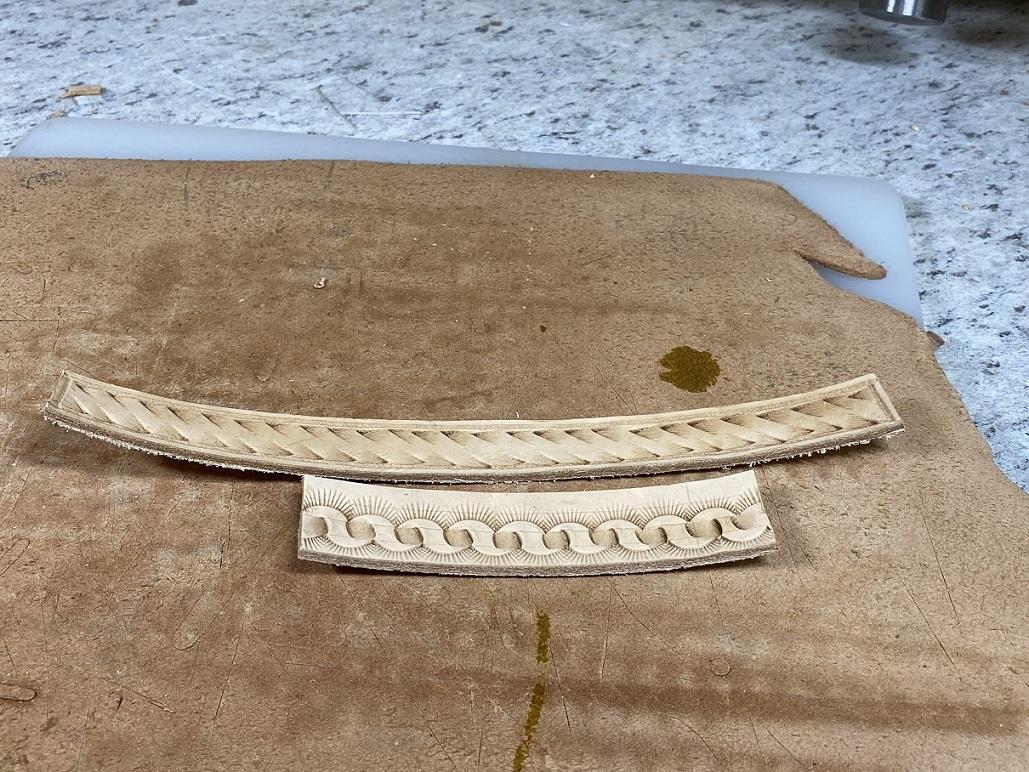
Brokenolmarine replied to Brokenolmarine's topic in Gun Holsters, Rifle Slings and Knife Sheathes
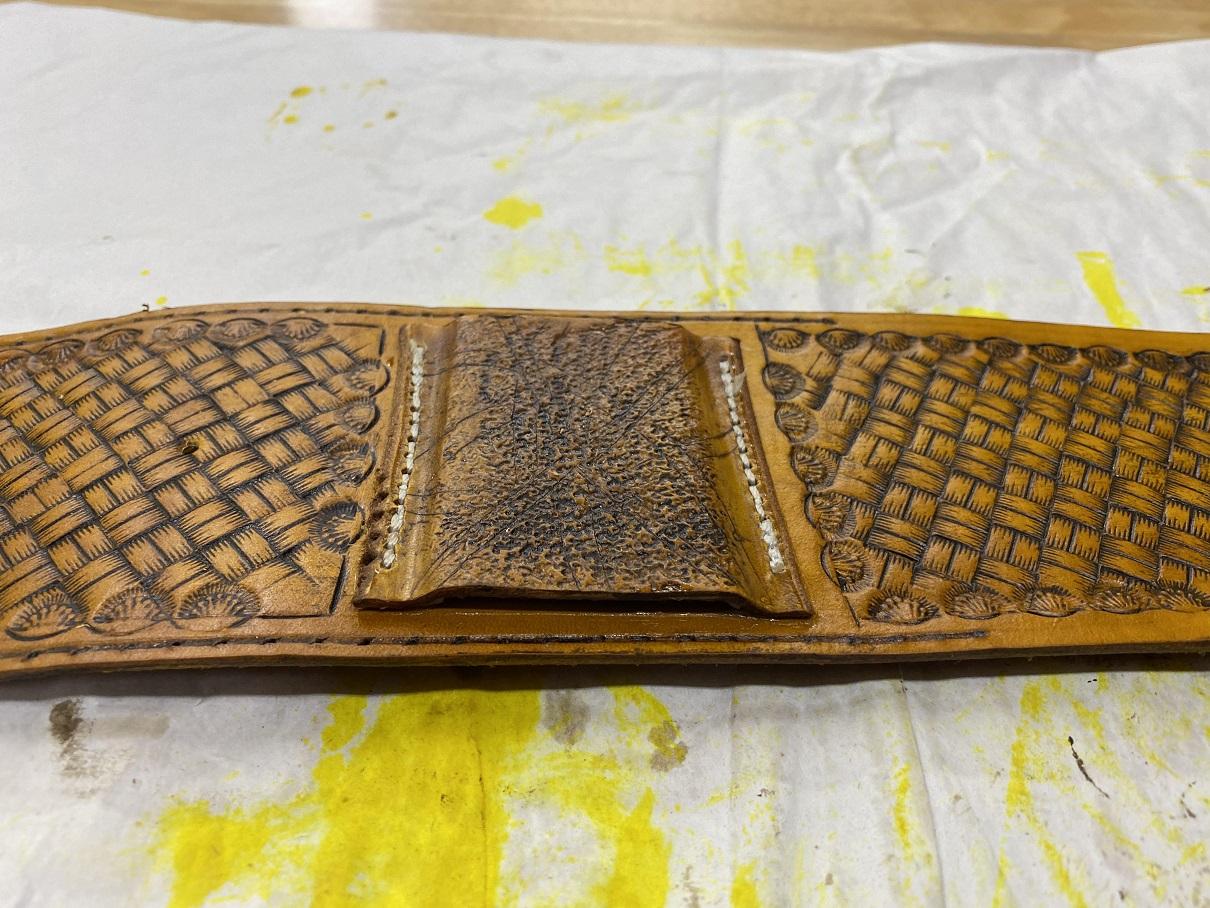
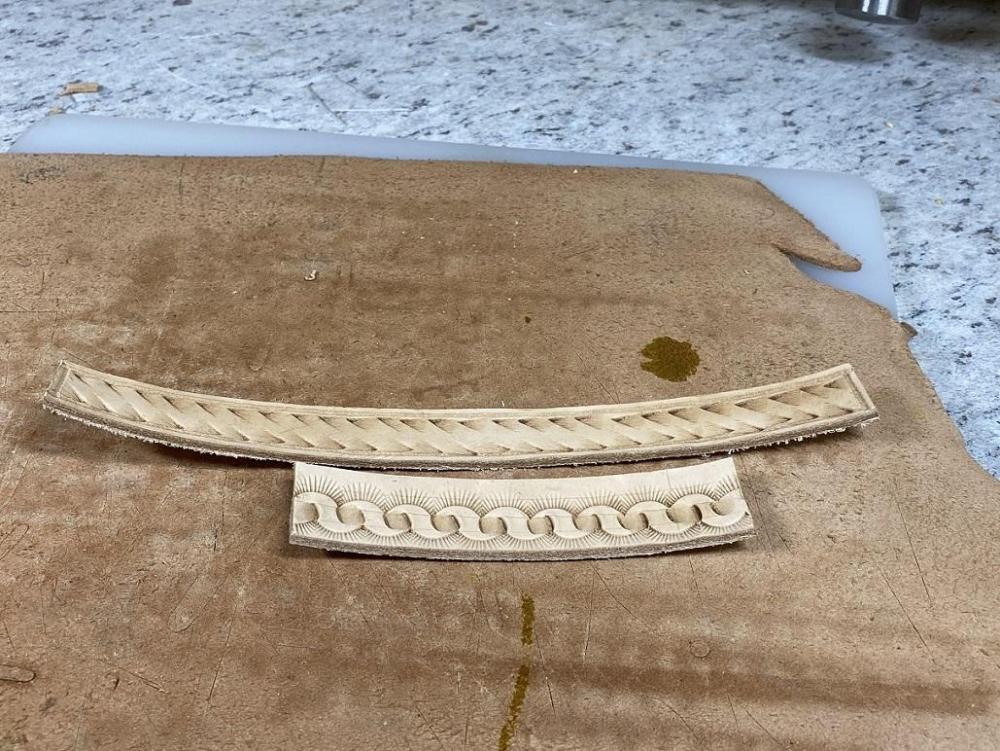
I knew the look I wanted, so I dyed the project pieces with Yellow dye. The first coat was way too bright on that light leather, but the second coat darkened up to a fall leaf color when dry. I knew I was going to antique later, so I was good with two. While the dye dried, I practiced on my border work using scraps. The top is a Rope design, and the bottom is a technique called Ribbon. Practice, practice. The Ribbon is still eluding me a bit, but a lot better than when I started. Then it was a hot mess. At this point I apply the first finish to the leather with the dye dry, to create a barrier between the dyed leather and the antique to come. This way wiped away antique doesn't darken the areas I want clear.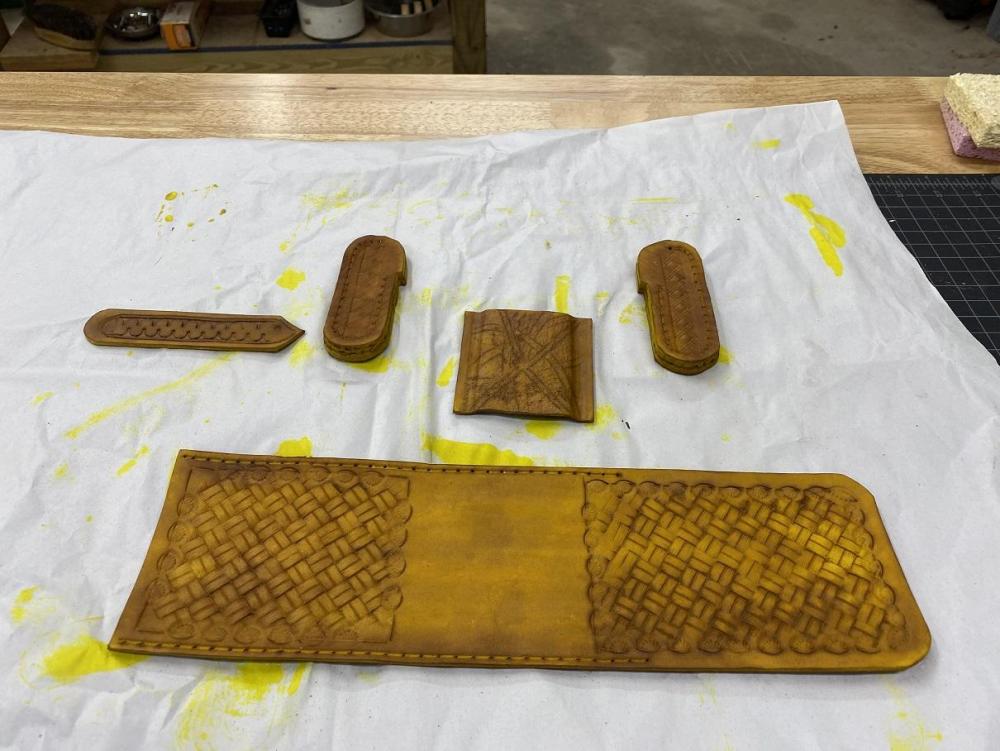
-
My Second 22 Pouch
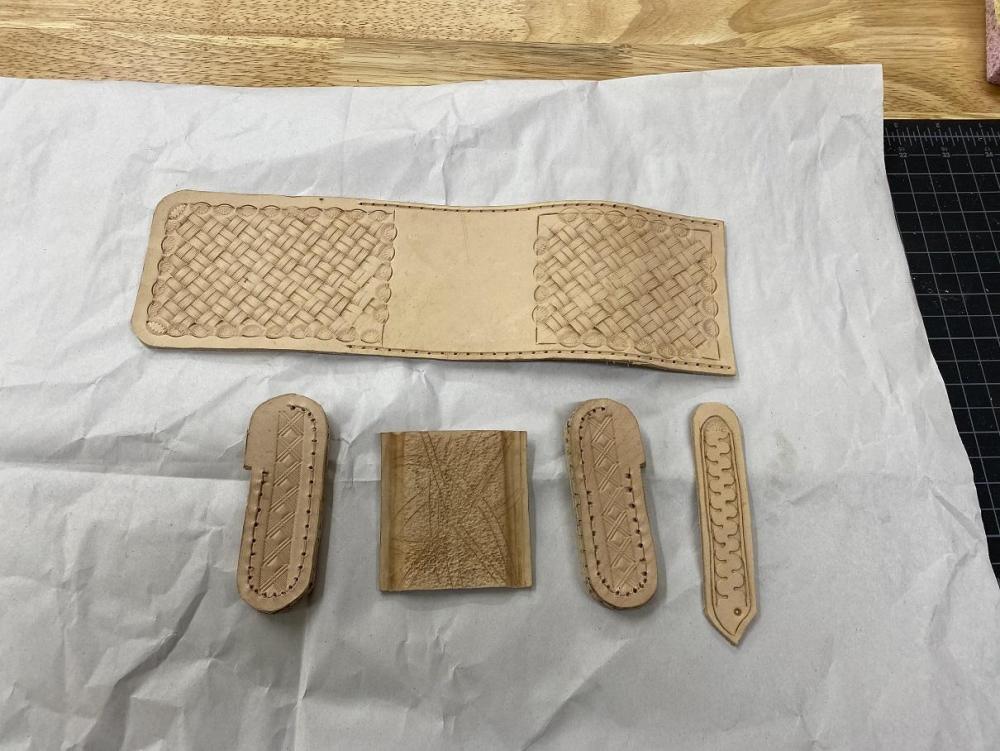
Brokenolmarine replied to Brokenolmarine's topic in Gun Holsters, Rifle Slings and Knife Sheathes
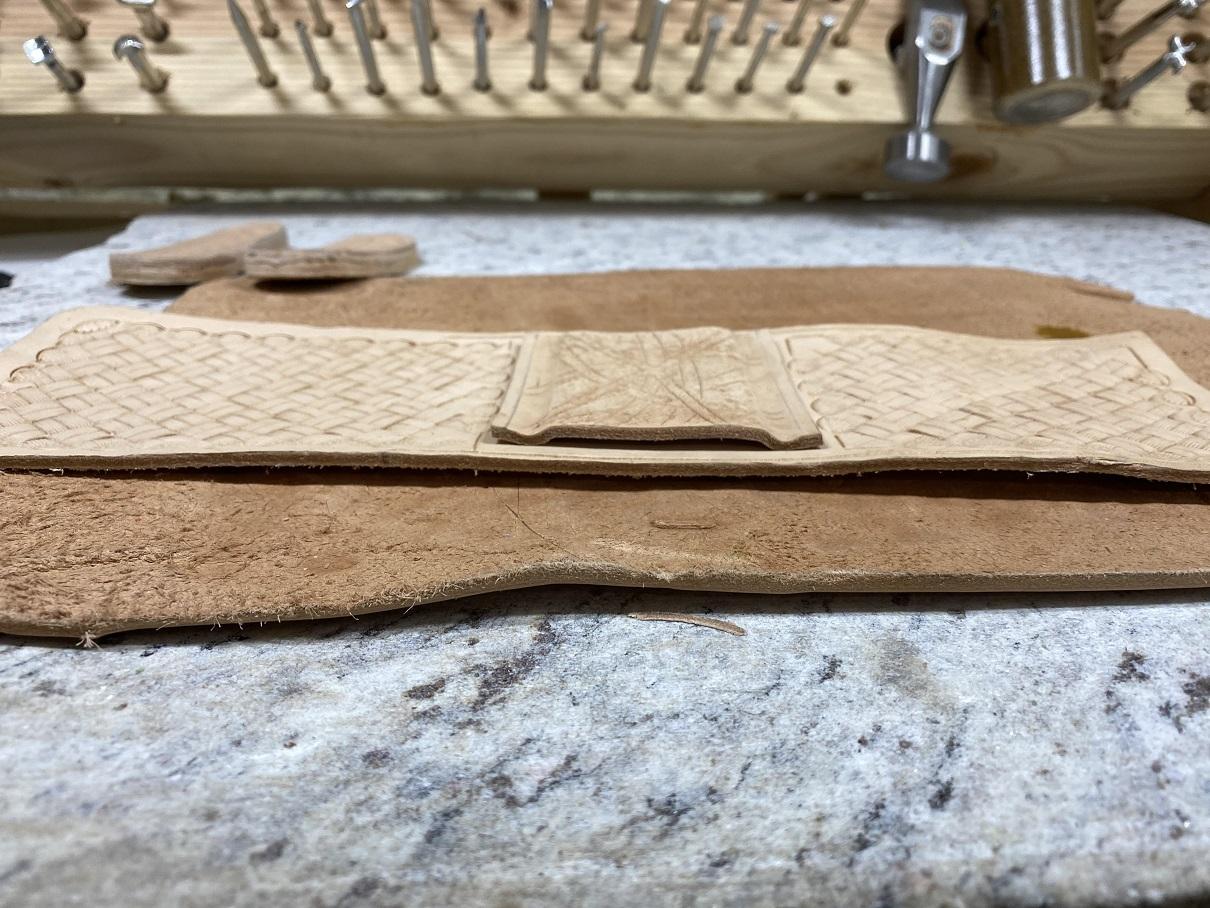
Back at work the last two days. I started by wet forming the belt slot for the back using my glass burnishing tool. Worked out very well. I continued to work on it and will eventually sew it into position after finishing. Next, I had made the decision to use a strap and post closure on this pouch, so I worked on making the strap. The first few didn't work for me, so I set them aside to use as test beds for the hole and slot cuts. The final one is in the far right of the picture below. It will be attached with a chicago screw so it can be easily replaced if it gets worn or torn out. Reading about their use in the civil war, they were often replaced on the ammo pouches on both sides. Next I punched both sets of holes for sewing. The straight holes in the main panel are never an issue, but the angled holes are always a PITA. Those took two sessions. Slow and careful. They crowded a bit in the turns. Meh, You won't see the sides that much. I'll keep telling myself that.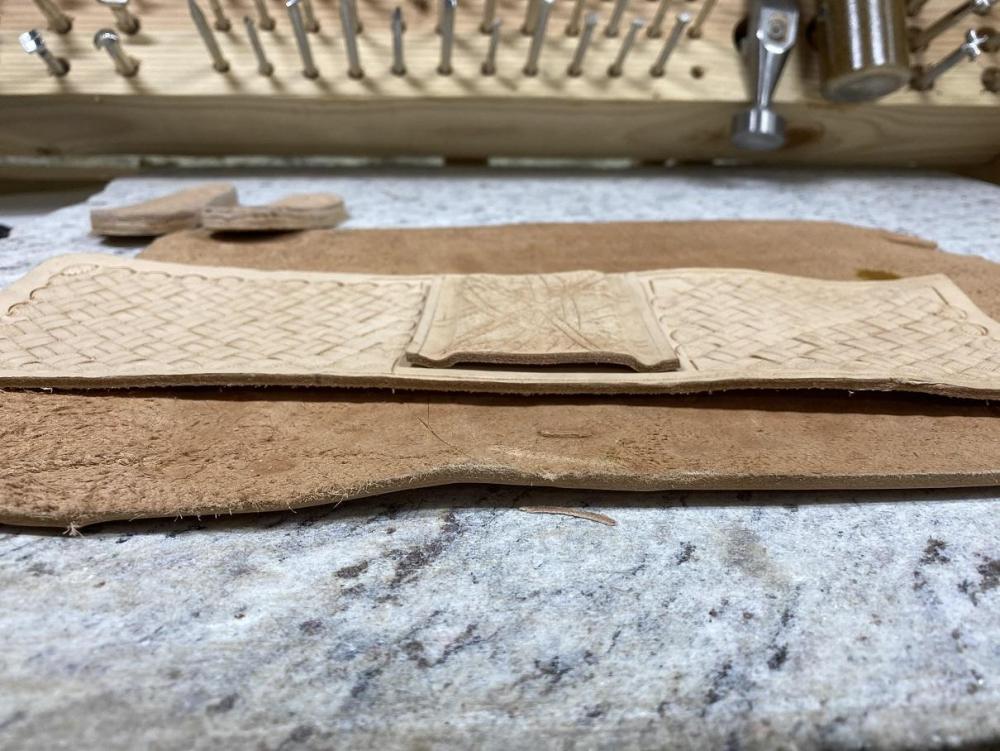
-
My Second 22 Pouch
Brokenolmarine replied to Brokenolmarine's topic in Gun Holsters, Rifle Slings and Knife Sheathes
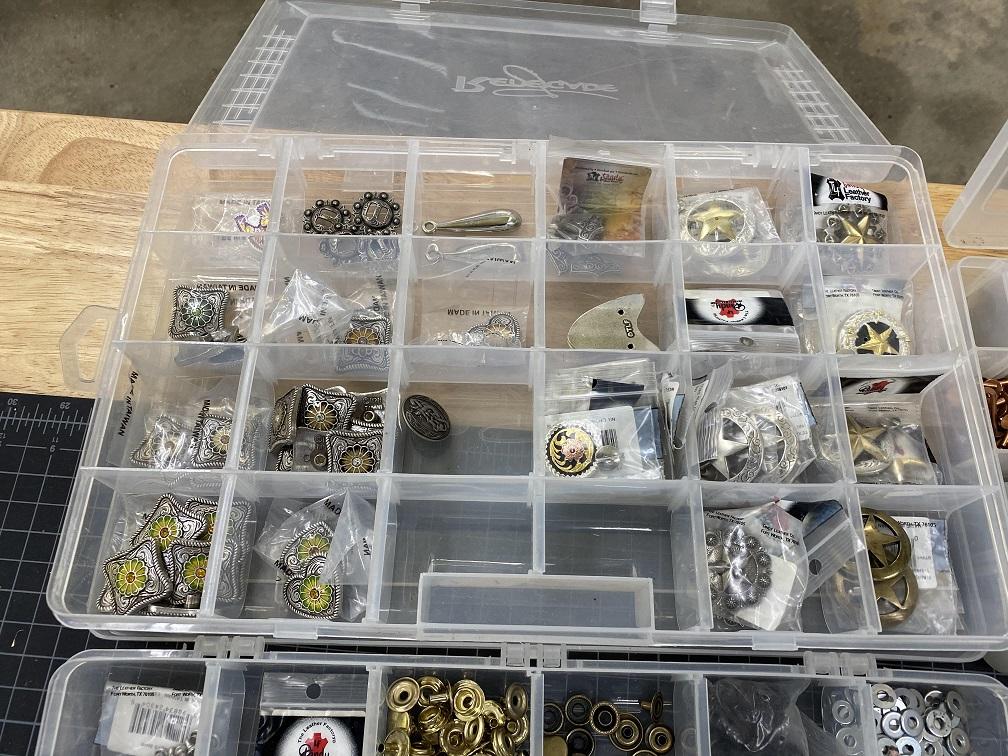
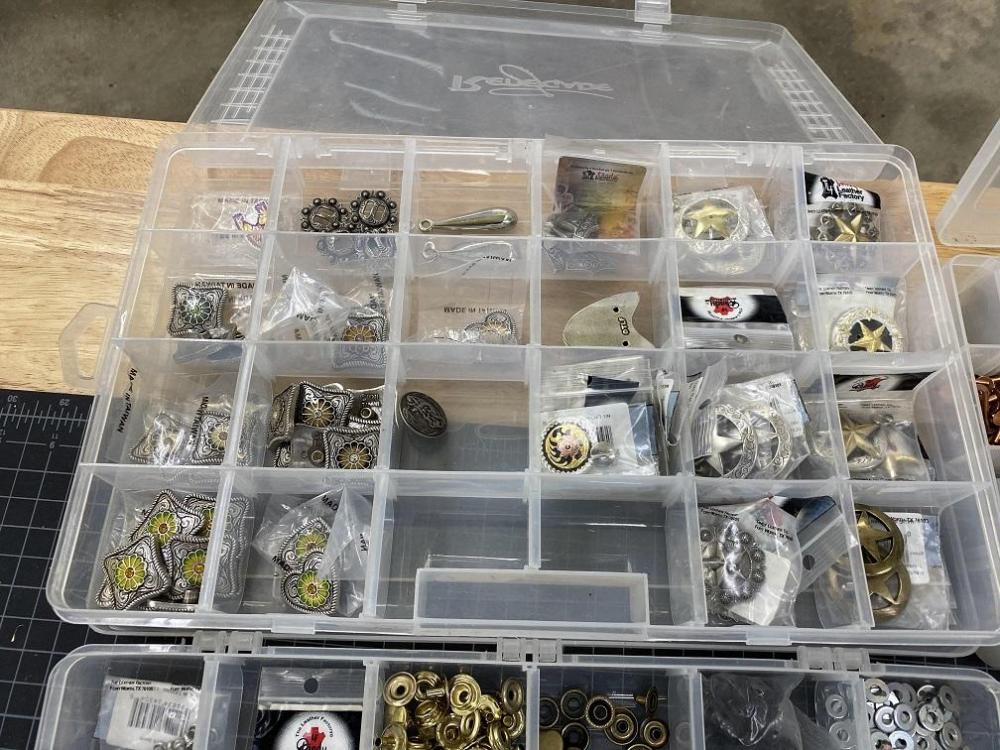
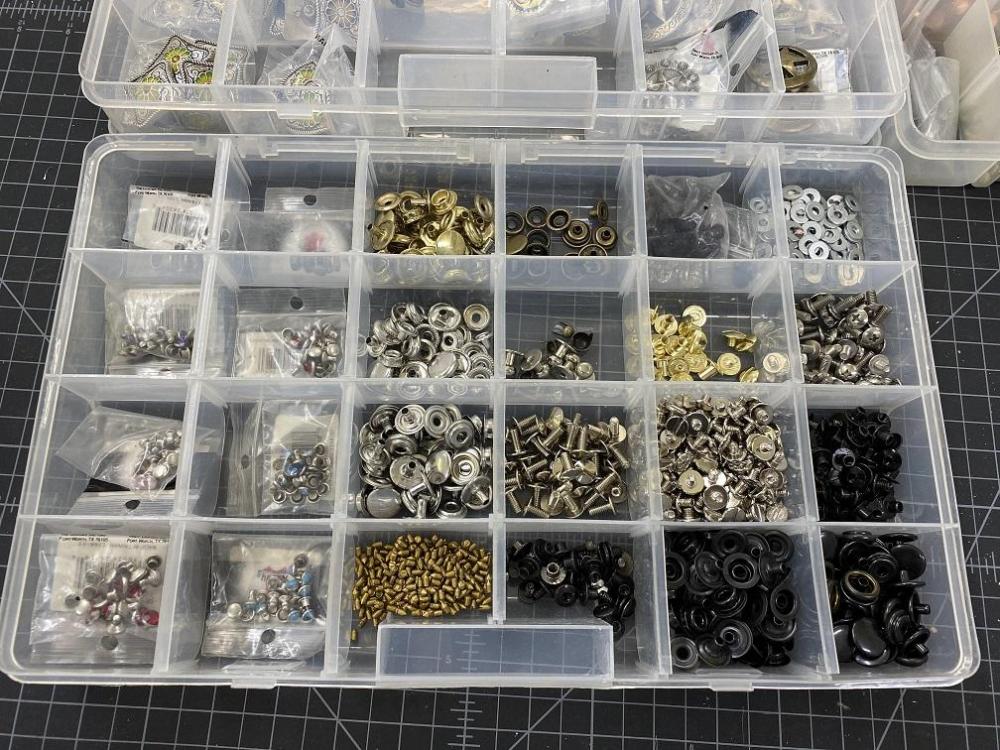
My guests have left, and it was a great week, but not only did the Daughter come up from VA come up with her family for five days, but halfway thru her visit; the Daughter from Southern OK came up with her family. The little farmhouse was busting at the seams. None of them had seen each other for years, and the BILs and Granddaughter's had never met. Good visit all around for the most part. On Saturday, we visited a Antique Shop Warehouse Sale (Junkshop, call it what it is...) but I think I scored. The guy buys storage building units when they auction them for non payment. I found a stack of leather working stuff. I made an offer on the contents of three trays, and he names a price. I had recently spent that much for a small bag at Hobby Lobby so I jumped on it.... $150. MOST of the things were still in the Tandy Bags, but some of the hardware was in slots in the trays and had become mixed and disorganized. I brought the trays home and spent a couple hours sorting and organizing them. I did the math, I'm pretty sure I got my money's worth in the concho tray at least. There were also five or six sets of Rivet / Snap setting tools and some needles etc, not shown. There are items in here I know I'll need in upcoming projects, and some I might not use for a good while, but nothing I can't see using later. There were a few fancy decorative items like silver beads and things, belt tips and buckles that went into another tray not shown.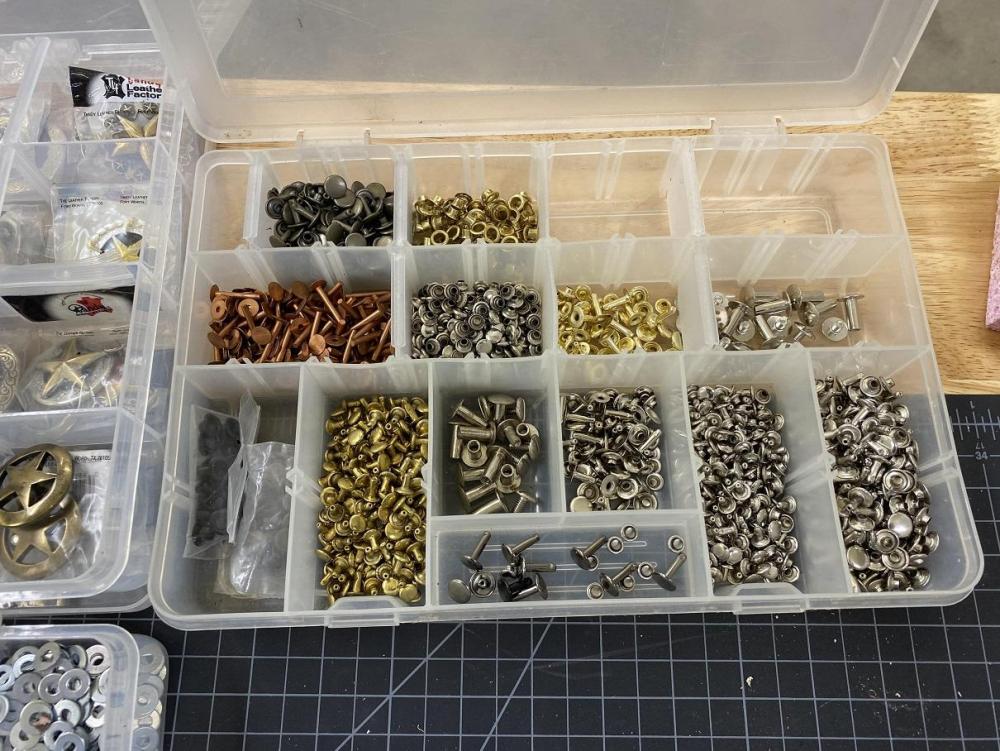
-
The twins
Brokenolmarine replied to chuck123wapati's topic in Gun Holsters, Rifle Slings and Knife Sheathes
I like em. Recently got some reptile skins, but need to soften them, they are stiff and hard. Bought some conditioner. When I finish the project on the bench.... -
Ren Faire Armor Set - holy cow it's a lot of work
Brokenolmarine replied to donohueleather's topic in Leather History
You are right about always learning. I was asked to make a pouch to hold epi-pens by my daughter. Then I realized saddle stitching wasn't going to work in this application. You-tube to the rescue. Several videos, scrap leather and practice, and... Tahdah... another skill set in the quiver. -
That would be cool, I find I like the fine adjustment offered in my setup. I was/am always worried I'll damage tooling. I'm thinking of making one with "long narrow gar" jaws to hold narrow or hollow projects like a small sheath or ammo pouches being box stitched.
-
Pistol Grip Wraps
Brokenolmarine replied to hashtagartz's topic in Gun Holsters, Rifle Slings and Knife Sheathes
Excellent job. Reminds me of the hogue sleeve on my G23 only way cooler.