Search the Community
Showing results for tags 'sharpening'.
-
An old Rose head knife I picked up for next to nothing. You can see why from the first picture, she was a little rough. That being said I'm a firm believer that if it's beyond repair you may as well try and repair it because it can't get any broker! I know that's not proper but broken won't work and broked ain't a word for that sentence either. The first picture shows the knife as it was when I got it. The second shows the handle removed. It's a 5/32" steel pin for those interested in knowing the pin size. Picture three shows it back together. Picture four is just closer so you can see I did not remove every pit down flush from the blade. It is also not sharpend yet. The inlays are Ivory from a late 1800's piano keyboard they are 3/8" and cover a repair to the handle. The pin holding the blade has been replaced by a 5/32" brass rod. The missing wood around the pin was replaced with epxoy mixed with sanding dust from the handle. The handle is walnut and I chose to repair it rather than replace it. I tried to keed everything as original as I could on this. Total time invested was about four hours. That's actually working on it, not drying time or breaks from sanding out rust pits. I have a lot experience with restoring old woodworking tools and I am a woodworker with all the tools to build whatever I need. I'm saying that because doing this sort of thing can overwhelm folks who are not prepared. It's also not a cheap way to get a tool if you charge an hourly rate for your time. Having to buy all the tools would really make the price jump. I used Ivory key from piano Two 1 x 30 belt sanders 120 through 2000 grit 1 drill press 4 sizes of drill bits Shims and scrap boards to level handle for drilling I 3/8" drill hole punch made from pipe to cut inlays Wet/dry sandpaper from 80 grit to 2000 grit Mineral oil for sandpaper lube Bolt cutter Dremel tool Dremel grinding stones 5/32" brass rod Buffer 4 different buffing wheels with different compound on each wheel Epoxy Bodied linseed oil/varnish/mineral spirits 1/3, 1/3, 1/3 mix Rubber gloves Lots of blue tape on edges ( even dull they cut flesh) Band-aids Safety glasses A bunch of other stuff I forgot Lots of patience The last one is the most important. Stop and leave it alone. Think through the problem and go back to it. I'm working on a few more. Each manufacture did things in their own way. I'm sure over the years the methods vary within the same manufacturer. The Dixon I'm working on has a rosewood handle that is simply driven on the tang. Two brass tacks hold the ferrule on and have caused the wood to split out over the years. You can see that handle in picture three in the background. I'm pointing that out so anyone who wishes to do this will take the time to figure out how to take the one they have apart.
- 24 replies
-
- knife
- head knife
-
(and 3 more)
Tagged with:
-
So I sharpened my swivel knife blades and I feel like the cut should be a bit wider and I may have sharpened it at a low angle. What angle to others use when sharpening.
- 3 replies
-
- sharpening
- swivelknife
-
(and 1 more)
Tagged with:
-
I bought a new Blanchard 10cm plough gauge and find it pushes the strap so hard against the guide that it takes a great effort to cut 8-10 oz veg tan. This is most noticeable with narrow straps, 1 inch or less. The strap has a tendency to ride up on the guide to relieve the pressure as it exits the blade. I understand that the one sided bevel on the knife is designed to keep the strap against the guide but it seems excessive. I sharpened and honed the blade and it is quite sharp by my standards. It easily slices through 12 oz HO veg tan when using the knife freehand without the plough gauge. The bevel on the new knife was a bit rounded and I worked on flattening the bevel (20-25 deg. taper) as well as the flat backside, finishing with a 4000 grit waterstone and stropping. This didn't relieve the pressure. Next I tried shimming the blade a slight amount, moving the point away from the guide. No improvement. Finally, I put a tiny (barely visible) taper on the backside of the blade edge. No change. I'd appreciate suggestions about sharpening and using a plough gauge. Previously I've had good results using a draw gauge and a wooden strap cutter. I bought the plough gauge to cut wider straps consistently, although most of my strap work is in the 3/8 to 1-1/4 inch widths.
- 15 replies
-
- plough gauge
- strap cutter
-
(and 1 more)
Tagged with:
-
I've been Surfing on YouTube over the past couple of weeks as I'm thinking of making a kiridashi (a small Japanese knife), and I'm always interested in seeing any methods of sharpening I came across this video, using home made knives from old hacksaw blades, and they certainly look pretty good 'The Best Leather Cutting Knife' by Leathertoolz The guy obviously knows his stuff, and he's done lots of other videos, on Japanese leather knives, awls, sharpening, and various reviews of other leather tools
- 7 replies
-
- sharpening
- home made
-
(and 2 more)
Tagged with:
-
Hello all! So I had an incident with my French edge skiving tool the other day.. I recently moved up to using top grade hides and the level of toughness compared to the Tandy special is amazing! But... That being said my edge tool is no longer refined enough to cut the high end hides and I ended up slipping off the leather and getting a nasty gash on my finger. I like to keep my tools sharp and up too this point I thought it was sharp enough. I strop the bottom edge and use Dremel buffer wheel with green compound to get to the hard to reach upper edge. Upon closer inspection I realized the top bevel isn't even and I need to do some significant material removal to true up the edge. Does anyone have any suggestions on how I can't modify the bevel without ruining the tool? Any sharpening and honing tips would very much be appreciated! Thanks and God bless!
-
Hi, I recently bought a Barry King swivel knife and want to make sure that I keep the blade in the right condition. I'm new to the craft and I don't trust myself to manually hold a consistent angle on a stone. Previous posts I've seen recommend a Chuck Smith Big Red jig. Though, I'm having trouble finding a place selling these online. Does anyone know a good source for these? Or, is there an alternative jig that would work?
- 5 replies
-
- swivel knife
- barry king
-
(and 2 more)
Tagged with:
-
I received a card from Amazon and was wondering if anyone has gotten any good sharpening stones or strips off here. Mainly just sharpening swivel knives so was wondering what grit y'all use and the compound. I have red jewlers rouge but was wondering if the different colors meant anything?
-
Hello, I purchased a Weaver Master Tools round knife a few months back and recently started cutting out some 8/9 oz veg tan using it. Didn't work too well so I ended up following the leather wrangler's video on sharpening the round knives using 1200 grit + 8000 grit diamond stones and a strop with green compound. After going through that sharpening process the knife cuts through leather like butter...for about 30 inches or so and then it slows down and considerable pressure is needed. I re-strop and it's great again for the same length. I then re-sharpened it over again spending much longer on the 8,000 grit and longer on the strop, but still have the same experience. The burr is gone after sharpening and I don't feel it after cutting the leather, so I don't think that would be the problem. I've read through many posts about the new osborne and tandy knives using poor quality steel that wont hold the edge very long - but my question is - does anyone know if that also applies to the Weaver Master Tools round knife? My experience would say yes, though I am not 100% sure. I did place an order for a Leather Wrangler's knife but it is several months out so I may have to do with the one I got for now. Originally I thought the Master Tools were a step up from the regular tools which is why I bought it. Thanks!
- 12 replies
-
- dull
- sharpening
- (and 4 more)
-
- 1 reply
-
- c.s. osborne
- round knife
-
(and 2 more)
Tagged with:
-
Does anyone have information on the sharpening of bissonette edgers?
-
Does anyone have information on the sharpening of bissonette edgers?
- 1 reply
-
- sharpening
- edgers
-
(and 1 more)
Tagged with:
-
Hi! I'm going crazy here! I have a 1000/3000 whetstone and stropping block. I have two Japanese skiving knives. I can get my knives sharp on stone. Then I strop..then test..still sharp. But, when I pass the knife a few times through my 3.5 oz chrome leather (on top of treated granite..and tried glass) the knives dull! I've tried not stripping...and my sharpness still doesn't last. I can't possible have to sharpen throughout the day..I must not be doing something right. Any tips from anyone? Thanks!
- 37 replies
-
- sharpening
- japanese knives
-
(and 1 more)
Tagged with:
-
I've had a pair of scissors for a couple of years, still cuts well. Just wondering if they ever start to dull, which I'm sure it's inevitable. How would you sharpen them?
-
Hey guys, I've got a question regarding skiving machine sharpening. Usually this part didn't cause trouble until now. I simply can't get it sharp and the blade leaves these ridges which then also show on the surface if you bend the leather. How I'm sharpening: - First I move the blade into the required position (almost next to the foot) - After that I paint the bevel with a marker - Then I move the grinding wheel into position and grind until the bevel is nice and to the edge (the grinding wheel is almost new, so is the knife which I replaced not so long ago) Am I missing a step? This usually worked but for some reason it doesn't today. I did notice however that when i painted the bevel, if I sharpened it ''gently'' there were 3 depressions in the blade remained painted. Due to this I sharpened a bit harder and I think they flattened out. Here's a picture of leather I skived:
-
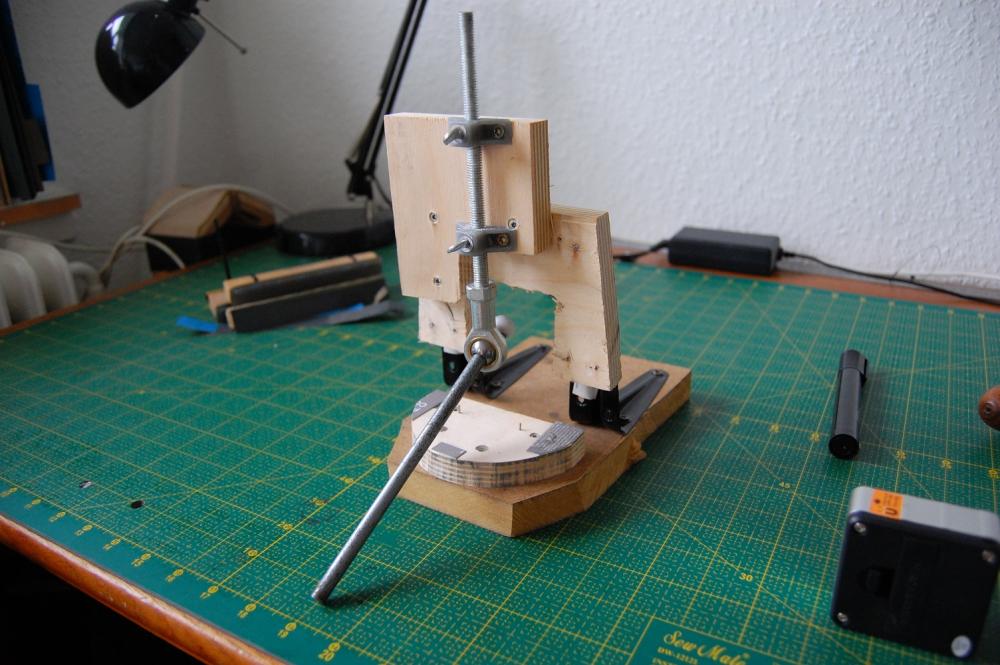
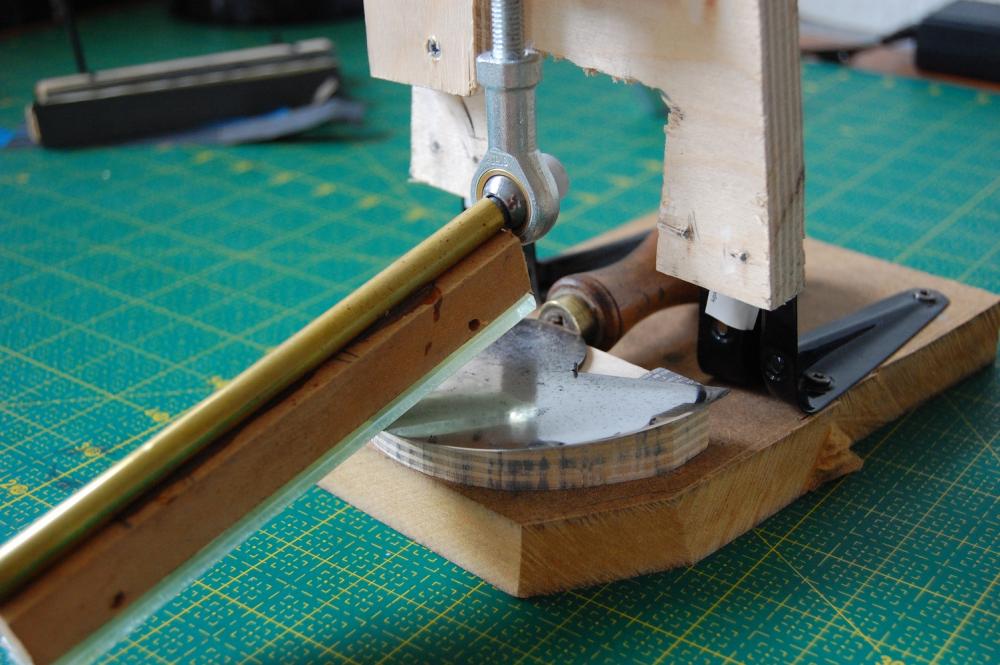
I have made a couple of sharpening jigs for round knifes before. This is version 3 and so far it works out great. It is not pretty as it was build with very limited tools. For a bit more information go here: http://andersenleather.blogspot.com/2016/08/round-knife-sharpening-jig-version-3.html
- 2 replies
-
- round knife
- sharpening jig
-
(and 2 more)
Tagged with:
-
I was idly searching YouTube recently when I came across these videos Obviously English is not their first language, and there are other, similar videos, but nevertheless they are helpful and add to our knowledge & experience 'Sharpening leather knife by sandpaper, no have whetstone' 'Making knife by HSS blade in home, Homemade & DIY' 'Leather Skiving by Leather knife include FAIL' 'Leather Skiving by Leather Plane' all by dori thasi
-
The Edge. The business end of a knife or cutting tool. The perfect edge occurs at the intersection of two planes, which are the sides of the knife that intersect each other; the perfect edge formed by the two planes would a one dimensional line of zero radius. This is just not attainable, because the planes are made of something whose molecule has a radius, and where they intersect an edge is formed by at least a single molecule that has a radius. In practical terms, this ain't a going to happen. Maybe in a lab, maybe. But there is a downside, it is a fragile edge that won't hold up and will round over to the point that it is less sharp but more durable. That is the scientific claptrap. Our best edge is going to be rounded to the point that you and I can see it with a loupe. I have four loupes, a 5x, a 10x, a 20x, and a 30x, and some comparator scopes that go way beyond that. If I take a brand new Irwin Utility knife blade out of the box and look at the edge under 5x, I can see the edge. At 10x the edge is obvious, and a 30x it looks like a landing strip. Quality scalpels are somewhat better, but still a highway at 30x. Quality of the plane grinds (facets, bevels) and polish are an important in attaining a small radius, but included angle of the edge (plane 1 degrees from centerline + plane 2 degrees from centerline) is as important a factor. The size of the radius will increase with the size of the included angle. Unfortunately, the durability (how much strength or metal is behind the edge) decreases with the decrease in included angle. We are always fighting the metal to get the best balance between edge radius and durability. Utility knives, razors, scalpel,s and anything of that ilk sacrifice durability for sharpness. Sharpen often or put in a new disposable blade. So edge angles are going to be minimal, but these things will really cut; for a while. So what is the proper angle for a knife edge? I feel a range of 20° to 50° is about right, but covers a lot of territory. I guess some examples might be appropriate. Bench Knife or skiver -- 20° to 25°, maybe even 30° Shoe Utility Knife -- 25° to 30° Pocket Knife -- 25° to 30° Kitchen Knife -- 25° to 35° Head Knife -- 20° to 25° Wood Chisel -- 25° to 35° depending on use Planer Blade -- 40° Axe -- 40° to 50° Lawnmower Blade -- 90° or a bit less Art
- 30 replies
-
- sharpening
- knife edge
-
(and 4 more)
Tagged with:
-
The illusive Secondary Bevel, what and why is it? The secondary bevel is another bevel on an edge that is at a greater angle of incidence than the primary bevel. Huh? Lets say you sharpen a tool edge to 25°, which as we know for an opposing bevel edge (bevel on each side) will be 12 1/2 degrees per side. This will be a pretty sharp edge and will cut leather well; but it is a delicate edge and will require a lot of care, stropping primarily, to maintain it, still not too much of a problem for leatherworking knives, but it will eventually wear out, no amount of stropping will bring it back to bleeding sharp because the edge isn't there anymore. This is the same for any edge, eventually it goes, and you have to put a new edge on the tool. For the same thickness of blade, the "ramp" from the body of the blade to the edge will be longer the less the angle if incidence; 25° has longer ramp than 30°. We can take the dull 25° edge and change the angle of incidence to 30° with very little removal of metal and still have a sharp edge that will have more metal behind it. Of course, if you keep adding 5° every time you sharpen, you will eventually approach the geometry of a cold chisel (not terribly sharp, but tough as nails). So what we do is use that 30° bevel (15° per side) and "ride" it back with subsequent sharpenings. You will have to remove a little more metal with each sharpening as you "ride" the edge back, the heel of your bevel will increase each time you sharpen the secondary, but a whole lot less than going back to the primary. Eventually it takes as much or more time to sharpen the secondary bevel as it would to just go back and sharpen the primary, or the secondary becomes in effect the primary (obliterating the original primary), and at this point you can add another (the "new" secondary) bevel at a higher angle, or drop back and sharpen at the original primary angle. The nice thing about the secondary bevel, is that oftimes it requires using only a fine and then extra-fine stones to attain the edge because most of the work has been done when the primary was established. This technique is used quite a bit when sharpening chisels and other working tools that may be sharpened a couple of times a day. They often are micro-beveled at a degree or two increase over the primary and another degree or two over the last secondary when a new edge is necessary. Other knives, especially head knives and other weird profiles are difficult to sharpen this way, but it can be done, although the increase of angle between the primary and secondary may have to be somewhat greater when hand sharpening. I don't use the primary/secondary system on head knives. I sharpen to a convex (teardrop) edge using a slack belt (although there isn't a lot of slack) and finish with leather or a sewn buff and .50 micron compound in the strop or the buff. Art
-
- sharpening
- knifemaking
-
(and 1 more)
Tagged with:
-
This thread is sort of my knifemaking/sharpening blog. I make the occasional knife, most of them tactical ones for friends kids and grandkids who are just graduating from basic or advanced training. I mostly sharpen scissors (from standard to technical stylist scissors/shears, to a pair of Fiskars), knives, hand and power tools, leatherworking tools, most garden tools (please don't bring a 1,000 lb garden tractor over here with the mower blades attached), Dog and human hair clippers and blades (sharpening and repair), I'll tackle most anything if you are in a bind, but I will send out saw blades and end mills as there are others who can do them better. That being said, I am retired. I don't have to do anything If I don't want to, I do it just to do something that I know how to do. We all like to feel useful, but I ain't going to work myself to death. This is kind of the see something, say something of a knife shop. Everyone is welcome to add to or ask questions. Art
- 14 replies
-
- knife
- knifemaking
- (and 8 more)
-
We get a lot of interest on leatherworker.net about the subjects of knifemaking and sharpening. This applies to pretty much all leather edged tools. This forum is here to collect all of this information for use by those who want to know sharp from dull, and from screaming (or bleeding) sharp to just adequate. I will be your forum sponsor and moderator, as such, I am pretty freewheeling, and will participate as much as needed and also as much as possible. We have a lot of well known knifemakers and sheathmakers who lurk in the other forums and who I hope will find a home here. I got into leatherworking because I needed sheaths for my knives; and nobody ever made one for me that I liked. I also got into sharpening when a few of my friends in the food service industry asked me to teach them how to sharpen; it went crazy from there. I was doing that after work and on weekends to the point where I couldn't take on any more work. So come on aboard and ask questions or whatever, help when you can, everyone needs to learn. Art
-
I just received and began working on another set of three Rose knives from W. Philadelphia. I thought I would do some informational posts as I rework them. The pictures show close ups of the edge and part of the face where the knife is etched Rose. This edge shot is a good reason why rust pits do not allow for sharpening to the level you want in a knife for cutting leather. The edges must come together to form the sharp edge we all need and as you can see a pit will prohibit that. All of that has to be ground out in order to obtain any sort of cutting edge. It takes a lot of time and patience to remove all of that even on a small knife like this one. The Rose knives are very hard tempered and that adds more to the work required to bring one back to life. They hold an edge really well but they are a bear to sharpen because of the temper and that makes getting pits out especially difficult. Some of the knives by other brands I've worked on are easy to clean up and that comes as a trade off because then you have to strop it of sharpen it all the time. I thought perhaps the first one of the Rose knives I bought was an anomaly and was unusually hard. This one is my seventh and they have all been hard tempered and challenging to bring back to user level when pits are present. I really like fixing these old tools up and using them. I'm not much on the Patina (rust) adding value to tool. I really doubt many of the craftsman who bought these tools a hundred years ago considerd rust an added value. I'm betting they took pride in keeping them in working order. Clearly you can see from the pit on the edge of this knife caused by patina that's just not going to happen until the patina is removed. The close up on RO part of Rose is interesting, looks like it may have been etched not stamped. It makes sense to me since the blades are so hard. I imagine pounding a steel stamp into a blade that hard might be a bad thing.
- 1 reply
-
- sharpening
- rose knife
-
(and 1 more)
Tagged with:
-
I've just been browsing through YouTube and found this video, well worth watching. 'Preparing and Sharpening a Woodworking Chisel' by Paul Sellers Obviously for a chisel, but the techniques could also be used for leatherworking tools, especially a skiving knife. He includes a cheap method using wet & dry paper on a glass plate. I already have a glass plate, it was the glass oven door off an old cooker; I got it originally for skiving.
-
I thought I found a perfect solution for fast and efficient knife sharpening in an older thread with links that described the use a 1x30 belt sander with various grit and leather belts. I bought a Harbor Freight 1x30 belt sander and the prescribed belts. I can get a nice polished edge, but nothing as sharp as with my diamond hones and hand strop. Certainly not razor sharp. Sometimes the edge is downright dull! The process does not seem like rocket science, so I am puzzled about what I am doing wrong? Several things occur to me. Maybe the belt is too slack and my edge is too round? I sharpen just below the top wheel, and have tried other positions too. Maybe I keep pushing the wire edge back and forth and break it off? I tried grinding at less than a 20 degree angle too. The other thing is the belt on the HF sander is a bit concave from side to side (not flat) because of the concave wheels spinning the belt. Basically, the middle half of the belt gets used, and I have to be careful a the tip of the blade to not round it back when I hit that concavity. Please help! I am about the chuck the thing and go back to the diamond hones.
-
I've recently acquired two manual skiving / splitting machines. Both are very old but in very good working condition. The blades on both I would like to source spare blades. I would say there is no chance of 'off the shelf' blades. One of them looks about the same size as a woodworking plane blade. The other, which has two holes in it to mount the blade, is a lot squarer but could be similar to a large spoke-shave blade. What I would like is either 1/ blades I can cut down to size 2/ blade stock I can cut to size and sharpen 3/ somewhere in UK that can make me blades to fit The sizes are (width across blade x length x thickness) 1/ 1 3/4" x 3 3/4" x 1/8" 2/ 2 1/2" x 2 1/4" x 1/8" As these are both old English machines the sizes will all be imperial. Can anyone help? Claire PS I haven't the facilities to retemper or put in a temper of anything.
- 18 replies
-
- replacement
- spare
-
(and 5 more)
Tagged with:
-
I am looking for some opinions on an experiment i am trying. I had a couple of Osborne punches(1/4,1/2) from garage sale that were not real sharp. I stamped the punches 1/2 way through the leather, then rubbed stropping compound in the impression left by the punch. Then I put the punch in the impression and rotated it back and forth and it stropped the punch inside and out at the same time! Has anyone else tried this? It seemed to do a very good job so I'm curious what you all think. Paul
- 3 replies
-
- sharpening
- round punches
-
(and 1 more)
Tagged with:



.jpg.8235aea71112aa02577505765079edd0.jpg)
