Search the Community
Showing results for tags 'stitching pony'.
-
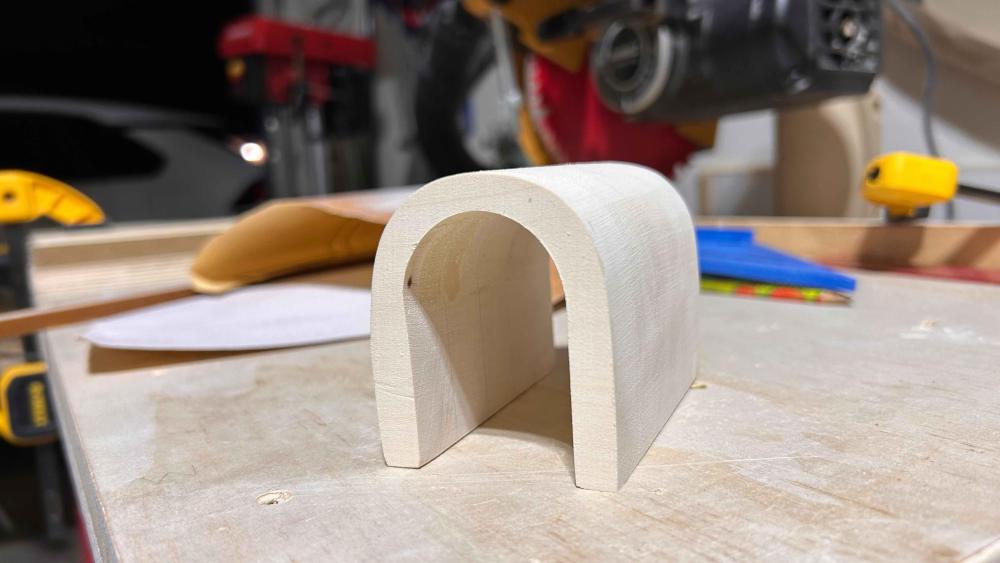
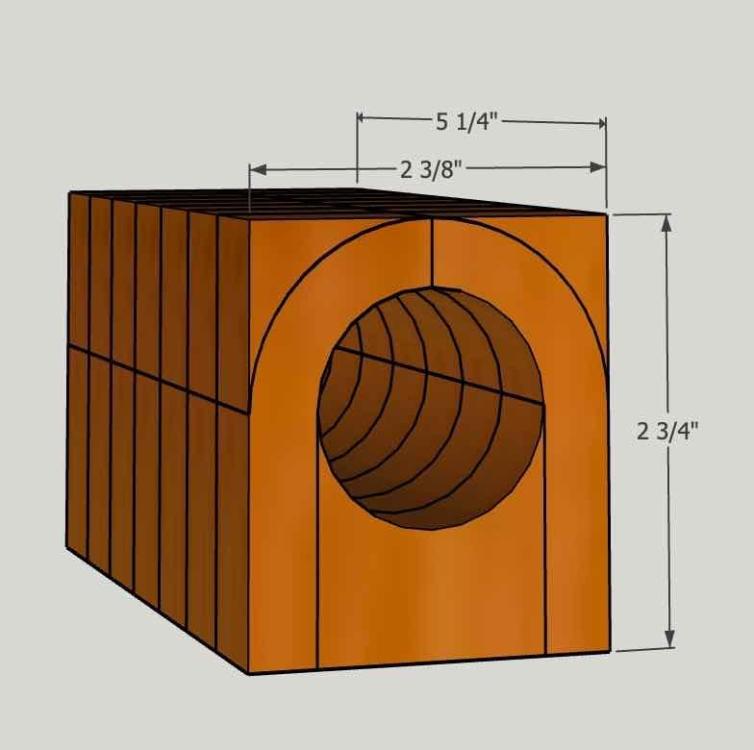
Just started the build of my first stitching pony. The overall height will be about 16 inches. I'll use two cam clamps, one for closing the clamp, and one for locking the rotation to the base. I'll wrap and glue veg-tan around each half of the clamp. I'll also insert magnets for holding the needles. I created the design in SketchUp. Feedback welcome... Has anyone made a clamping mechanism that uses magnets to hold your work?
-
I bought this yesterday from Facebook marketplace. Love it! The stitching arms are detachable from the seat and just long enough to use when sitting on a chair. So very easy to use, on or off its seat. There is a wooden lever to control the arms and hold the leather in place. I am loathe to do anything to it but I need to attach some leather to the insides of the arms to protect the leather being stitched. I plan to do so with some water soluble glue because I do not want it to be permanent. In case anyone wants to buy one, there are at least 3 other sellers offering similar items on Facebook marketplace as of yesterday. I was lucky that this was being offered close to where I stay else shipping might be a bit of an expense.


-
Hi All - Up for sale are several stitching clams I recently constructed. These clams were handmade from a variety of hardwoods. Each has been signed, numbered, and dated. Due to the steam bending / lamination process and the use of different hardwood species, each clam is slightly different in its construction. Unless otherwise noted, each clam features the following: Profiled jaws, padded with whiskey Buttero leather Retaining strap for storage Contrasting wedged dowel reinforcements at joints Hidden needle magnets Mortised brass hinges Clam #2 (Ash / Sapele construction) - $500 (Sale Pending) Clam #4 (Walnut / Sapele construction) - $525 Clam #5 (Sapele / Walnut construction) - $525 Prices include domestic shipping. If you are looking to ship internationally, please message me for details on the additional shipping cost. Additional details (along with additional pictures) for each individual piece can be found in my etsy listing here: https://www.etsy.com/listing/784930167/leather-stitching-clam-saddlers-clam
-
Hi all - I’m sure many on here have seen (and like me, drooled over) the Fred Moreau clams that a few lucky souls were able to get their hands on. For my part, I’m still working with a very inadequate Tandy stitching pony, while continuously promising myself that I’d one day get around to building something bigger and better. That day finally came when I visited home for the Christmas holidays and I convinced my dad to donate his skills and equipment as a woodworker to help me in my endeavor. My goal was simple – create something as close to the Moreau clam as possible. Anything else just seemed inferior. For the wood I used zebrawood for the jaws (each jaw is a laminate of 4 pieces at about 1/8” thickness each, bent into shape with a custom form), walnut for the base, maple for the “lips”, and a combination of walnut / ash for the wedged dowels. Overall, the piece is 100 cm from tip to base, and has a little over 20 inches of space to work with on larger format projects. The one improvement for next time (if there is one), is to add some sort of internal “guide rails” on the jaws to keep things aligned well. The hinge has a little bit of play, so there’s some lateral movement that I’d like to get rid of. I’ve tried to chronicle the build process in the imgur album blelow (I’ll apologize in advance for my pictures – I’m slowly being convinced to spend money on a nice camera). This hasn’t been put into action just yet, but am looking forward to tossing the old tandy stitching pony, and actually being able to stitch bigger things like bags without holding them in my legs BUILD ALBUM: https://imgur.com/gallery/7C6NI1t
-
Hi guy, I'm fairly new to this. Got my first stcjing pony today. I'm so excited to start making some quality stuff. My pony came with some padding, some stretchy, shiny stuff. I guess my first question is, should I use the pieces given or just use veg tan scraps or chrome tan scraps? My second is how do I attach it. I was thinking using some glue that I have, but if I'm being honest I don't know if it's contact cement or what. I thought that it wouldn't be a good idea to use too strong of a glue either, for replacement purposes. Thanks in advance.
-
Hi all, My name is Spyro, I do some woodworking just for the pleasure of it, and trying to get into leatherworking for pretty much the same reason I thought I'd share my first steps here before I start bombarding people with questions about leather First thing I tried to do was complete a set of basic hand tools (buy or make) and then make some sort of tool box to put them in. I started by making a stitching pony, because I saw some really nice designs on etsy I think, and it looked nice and very important for some reason LOL Then I made a few awls and an HDPE maul. I know I'm really fussy about hammers and mallets, so I ended up drilling a bigger and bigger hole in it and kept adding metal washers until it had exactly the weight and balance that suited my hand turned out ok in the end, but most importantly it hits well. I made some other little things from wood and brass, some burnishing tools, a little brass hammer and roller etc. I'm not much of a metal worker, probably for the best or I'd still be making tools LOL Then came the tool box. I'm planning to keep leatherworking out of the shed because it's really dusty in there, so I had to make something kinda presentable for in the house, and this is what I came up with (that little knob thing is just some buttons cast in epoxy and turned on the lathe. I'm still deciding on drawer handles) So yeah, so far I'm having a lot of fun with this leatherworking thing without even doing any actual leatherworking LOL But I have started making a tote, and I'll post it here soon for you guys to laugh at in the meantime if anyone wants to make any of that stuff in the photos and is wondering how, please feel free to ask! All the best, Spyro
-
Little King Goods posted this stitching pony on his IG and had to order one. It came from Korea in about 2 weeks a little pricey for what it is, it is very nice and very portable. I am going to put some leather on the jaws love this design I think I might have to reverse engineer this in walnut or oak.
-
 So I have a bunch of wood. I just made a stitching clam (Pics below, not great but it will work) I already have wood cut for another and enough to make at least 4 more kike it. I also want to make 4 (1 for me) stand up clams also. Literally standing on the floor 4ft tall out of 2x6x8 cedar boards. Free wood, a saw, a drill, and router to you... Help for me. I even have a few hinges if you are not particular. Win Win I am tired of drilling an screwing everything to my table to hold it still. Anyone up for a Pony Party? You bring the bolts & HW, I used a 5 and 6 inch in these pics. Here is a thread with ideas I had, and here is what I made. PM me or respond here. No staining involved this way we are done in 1 day. http://leatherworker.net/forum/topic/78885-time-to-replace-the-shetland-ponyfoal/
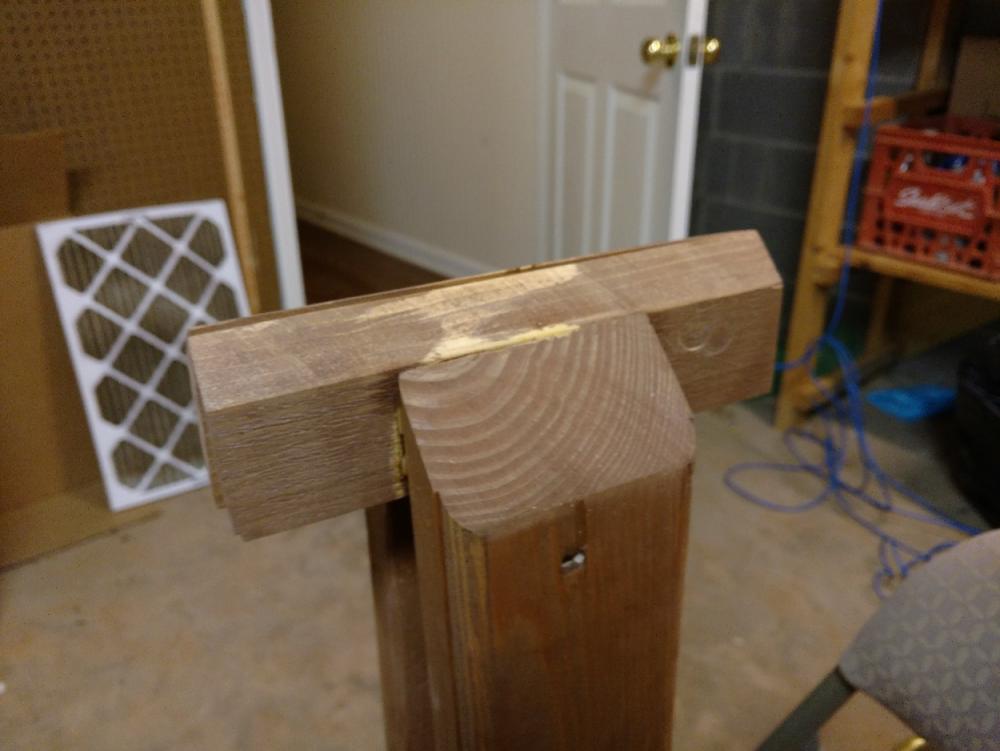
-
I needed a new stitching pony and a box sewing jig and a 45 guide to cut my miters, so I used some wood I had hanging around my brothers shop.

-
 Hello! I'm looking for one of these clamps that has built in holes or grooves to help sew thin leather evenly. 30 seconds in the video: Anyone knows where I can find something like this?
 -
See here a sit down style, pedal actuated stitching pony in near new shape! 50$ plus shipping from Colorado 970-379-4959 jacobkoski@gmail.com


-

-

From the album: Angie´s
-
I have a large stitching horse, so for sale: Fairly new Tandy Stitching Pony. $15 plus shipping. Paypal. YinTx
-
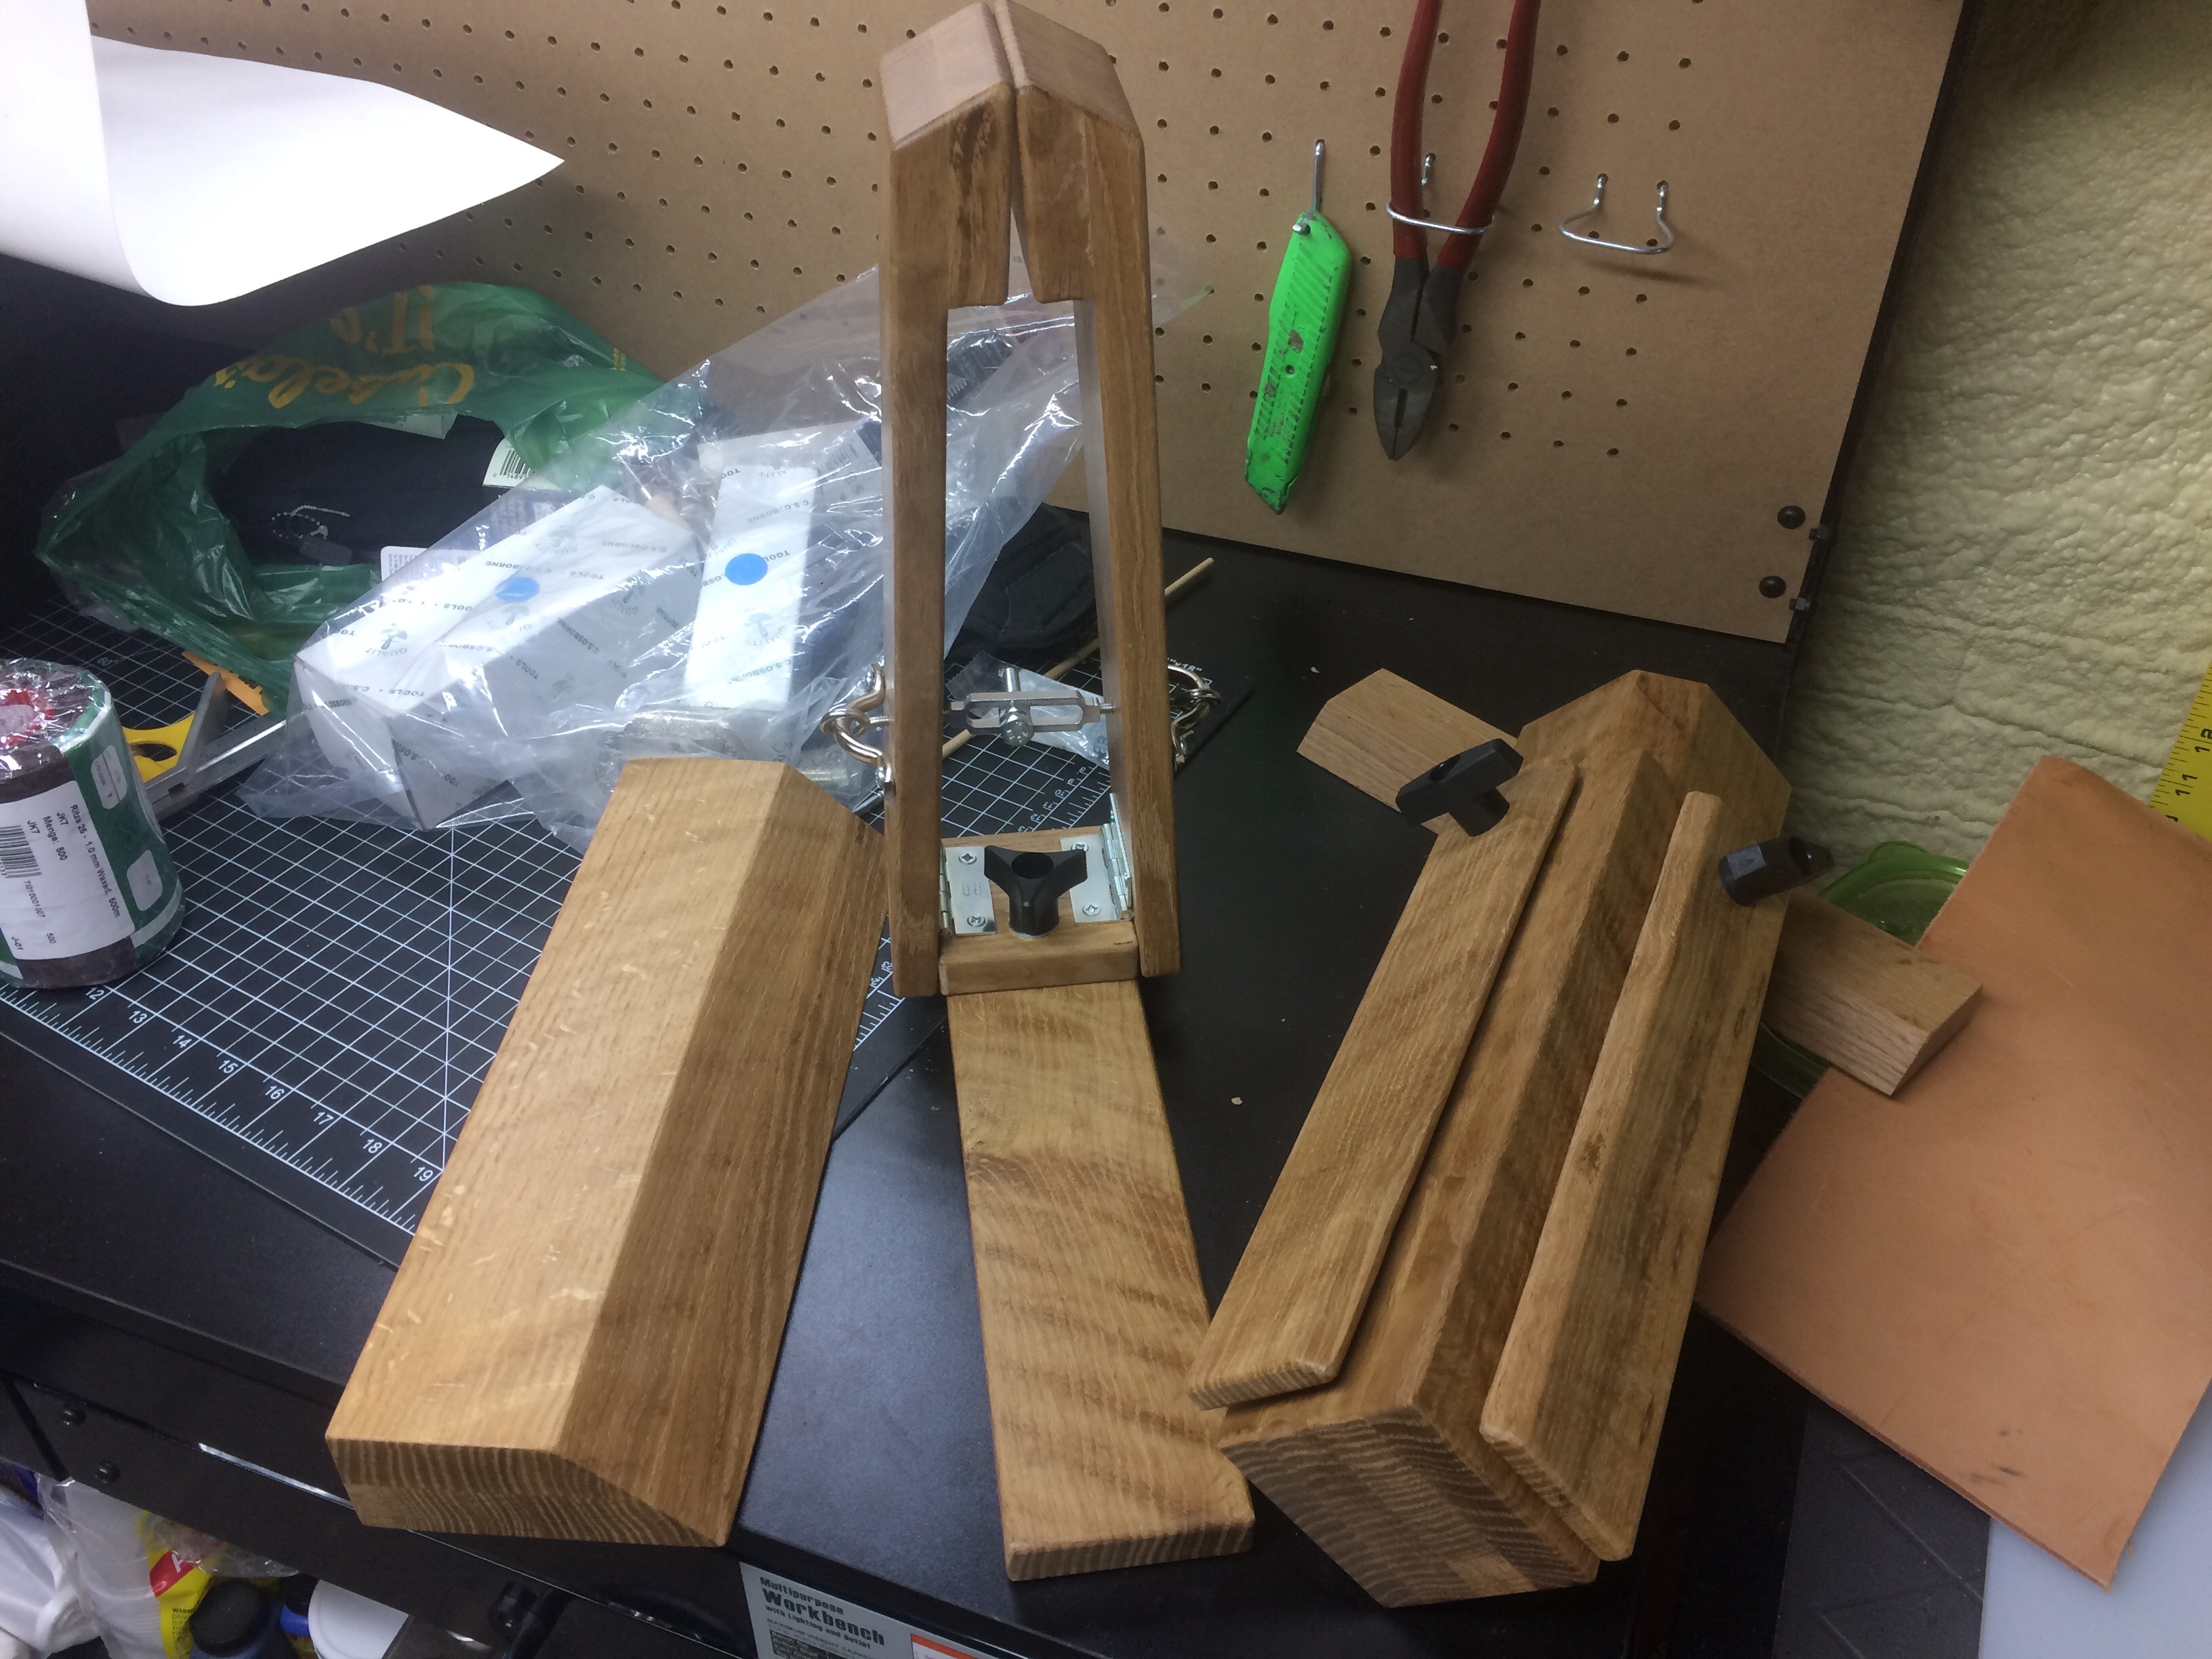
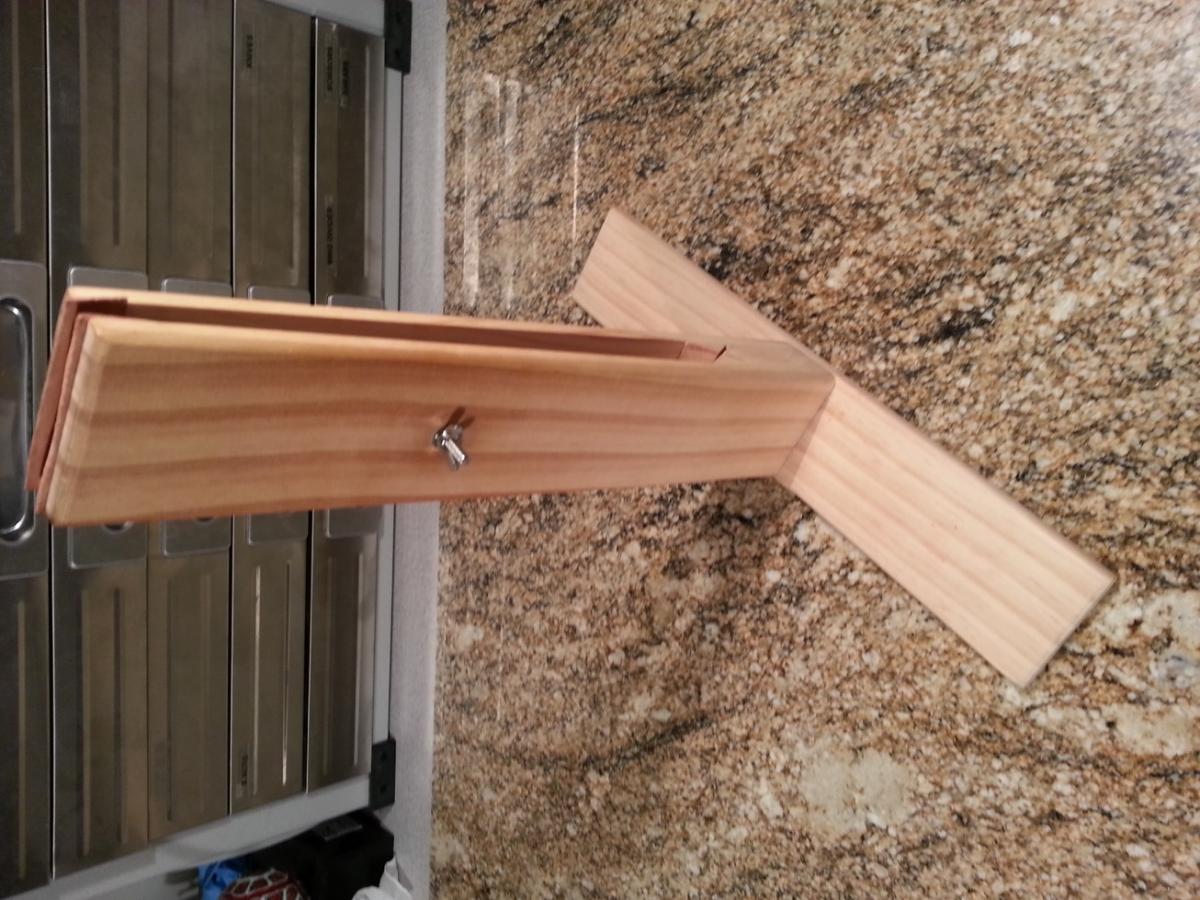
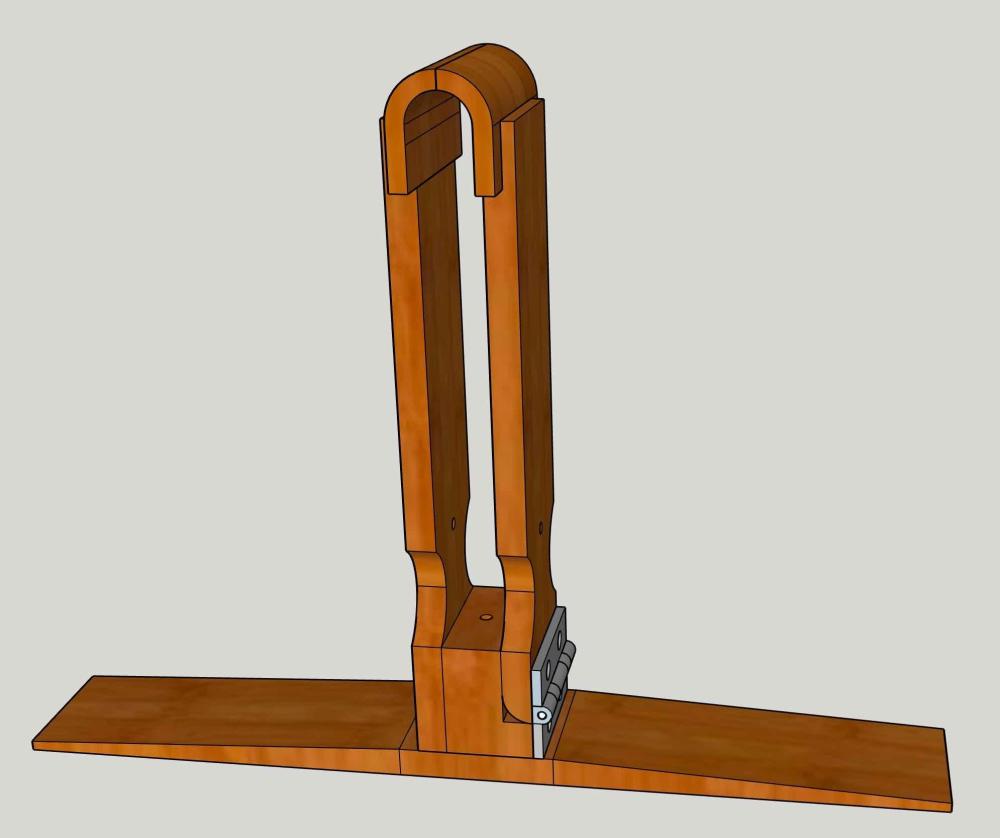
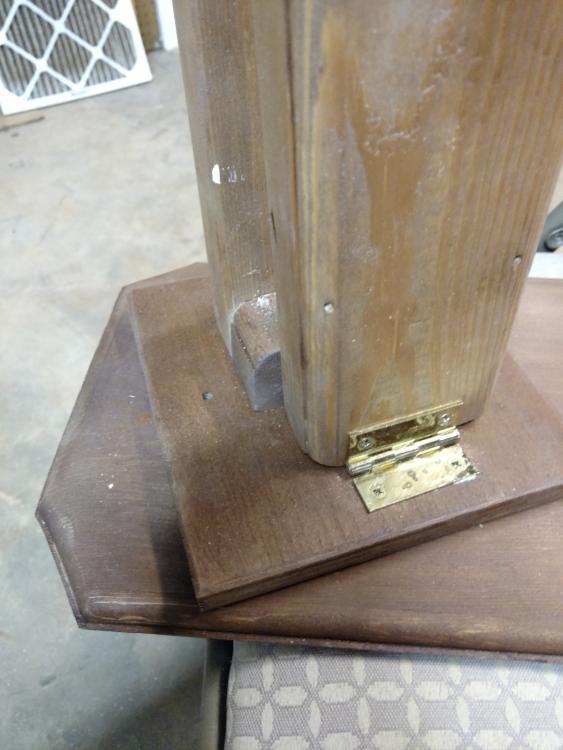
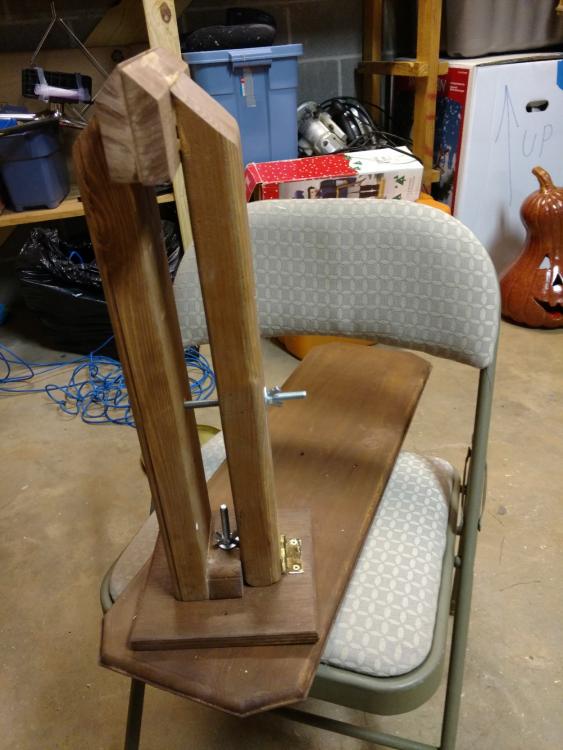
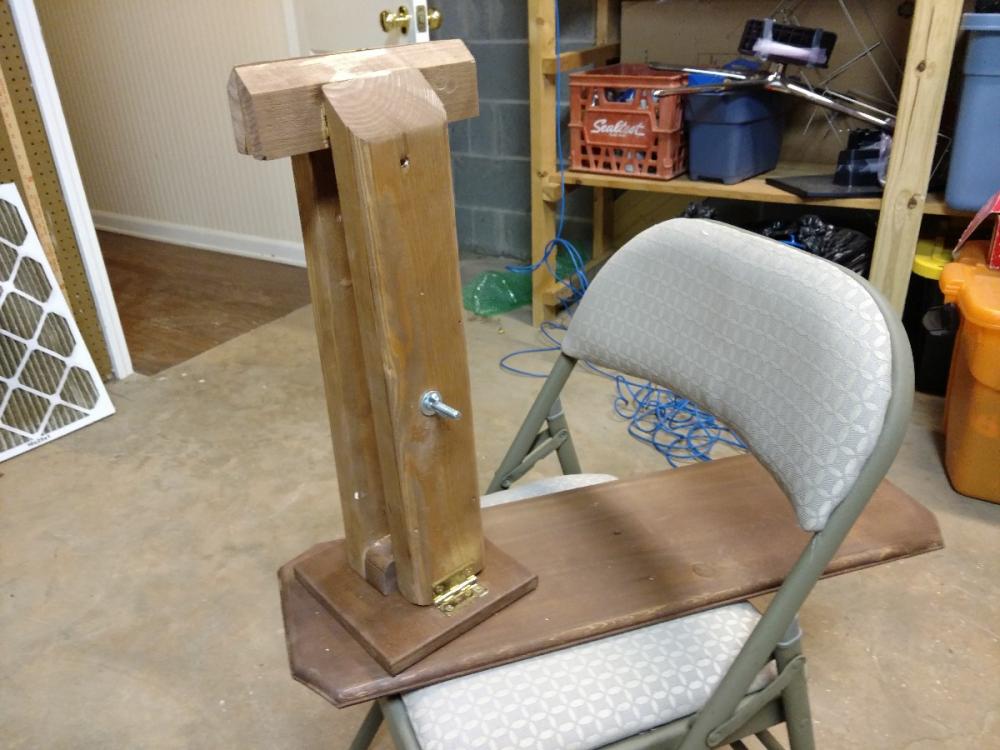
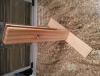
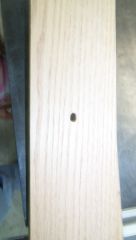
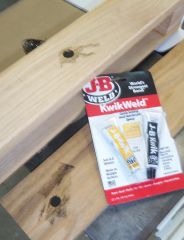
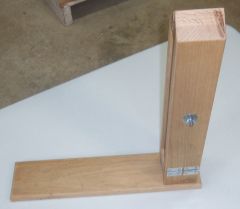
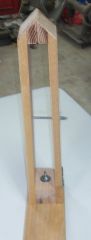
 This is my first post on here as well as my first foray into leatherworking. A couple of weekends ago my daughter talked the wife and I into going to the Maryland Renaissance Faire with her. She likes to get dress in either period or fantasy costume on these expeditions and was resplendent as a "Tavern Wench" except that she had nowhere to hide/stash her modern necessities; cash, ID, smartphone, etc. Her mother ended up play the part of "pack mule" for the day. We had intended to pick up a small leather belt pouch or a possibles bag but were shocked at the prices being demanded. Being what I consider to be a fairly handy gent and loving father, I decided that I would make her a belt pouch before she headed out on her next grand adventure. With these thoughts in mind, I dug out the very small and basic (5 stamps & a wooden mallet) leather tools set that I've had floating around the shop for years and then proceeded to scour the inter-webs for ideas, tutorials, patterns, and plans! I found a boat-load of stuff! Besides realizing that I would eventually need a lot more in the way of tools, I found out that nearly everything is laced, stitched, or sewn and unless I was willing to plop a ton of cash down on the barrelhead up front for a machine, I'd be doing a lot of hand sewing. I looked at purchasing a stitching pony, but found that for nearly $100 + S/H, I could probably build one from the extensive scrap pile in the garage. So with an image plucked from the inter-webs... I headed out into the shop to see how high I could successfully stack sawdust! Digging through the scrap heap, I found I had all of the bits (in white oak) necessary to create my very own stitching clamp. Nearly all of the pieces were already sized too. The first piece I found was perfect for the seat board; 3/4" x 6" x 20". I drilled a 1/4" through hole with a 5/8" diameter x 3/8" deep counter bore to accept a 1/4-20 x 4" carriage bolt that the swivel block would ride on. The edges were eased with a 1/4" radius bit in a palm router. I thought about tapering the seating area but decided against it when I realized I need to get a new resaw blade for my bandsaw. I then went back to the scrap heap and found two pieces that were 3/4" x 3 1/2" wide. One piece was 18 1/2" and the other was 19". I glued a 2" x 3 1/2" piece to one end of each leg to build up the jaws of the clamp. Once the glue had dried, I cut the jaws at a 45° angle. I then formed up the swivel block by laminating three pieces of 3/4" x 2 1/4" x 3 1/2", gluing and pinning them together. When the glue dried, I sanded everything square and then glued and pinned the base of the hinged leg to the swivel block. I mitered the outside top edge of the leg base to accommodate the hinge barrels. Everything is held in place by the swivel block carriage bolt, a 1 1/4" fender washer, and a 1/4-20 wing nut. I attached both legs of the clamp to the swivel block. I glued and pinned the stationary leg to the block and then attached the hinged leg using two 3/4" x 1" hinges. I cut the end of the hinged leg at 3° to allow additional pressure to be applied at the jaws then mitered the lower outside edge of the leg at 45° to allow for the hinge barrels. Since I forgot to drill the tension bolt holes before I attached the clamp legs, I drilled a 1/4" through hole in the hinged leg then uses a transfer punch to mark where the hole would be on the stationary leg. I drilled a 1/16" pilot hole through the stationary leg to align the counter bore that accepts the 1/4-20 x 4" carriage bolt used to apply tension to the jaws. I then went back and elongated the hinged leg hole to make fully opening the hinge side easier. To ensure that the bolts don't end up spinning in their respective holes while trying to tighten things up, I epoxied the bolt heads into their counter bores with a little JB Weld. This is how things stood before I added a layer of leather (5/6 oz I think) to the jaw faces, to protect my future work pieces. If you've read this far down, I thank you for your diligence and patience. Please let me know what you think and suggest an improvements your experience tells you I should make. Thanks. R/Derby (Topsnipe)
 -
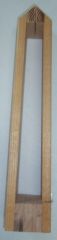
From the album: Stitching Pony
Inspiration! -
From the album: Stitching Pony
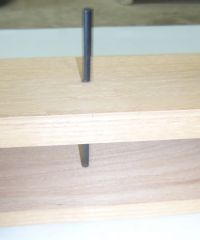
I elongated the bolthole in the hinged leg for the tension bolt -
From the album: Stitching Pony
Keeps the carriage bolts from rotating while tightening -
From the album: Stitching Pony
-
From the album: Stitching Pony
A 1/4-20 x 4" carriage bolt was used with a 1/4" x 1 1/4" fender washer and 1/4-20 wing nut to tighten the jaws of the clamp -
From the album: Stitching Pony
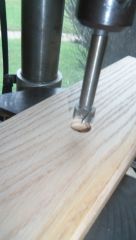
A counterbore was made in the outside of the stationary clamp leg to allow the carriage bolt to be epoxied in place. -
From the album: Stitching Pony
Since I forgot to drill the se bolthole before I attached the legs to the swivel block, I had to come up with a way to ensure the boltholes were aligned. I used a transfer punch the same diameter as the hole to dipple the inside of the stationary leg before drilling and counterboring. -

From the album: Stitching Pony
-

From the album: Stitching Pony
-
From the album: Stitching Pony
3/4" x 3 1/2" White Oak legs. A 3/4" x 3 1/2" x 2" block was glued to the inside top of each leg to provide additional material to form the clamp jaws. Once the glue dried, the jaws were cut to 45° angles.