All Activity
- Past hour
-

dyeing larger leather item
stampingdelight replied to stampingdelight's topic in Leatherwork Conversation
@fredk k worth trying if need more help will ask encase did something wrong or could of done better. last time I dyed I started on the edges, so starting in center might be better will give it a try. -
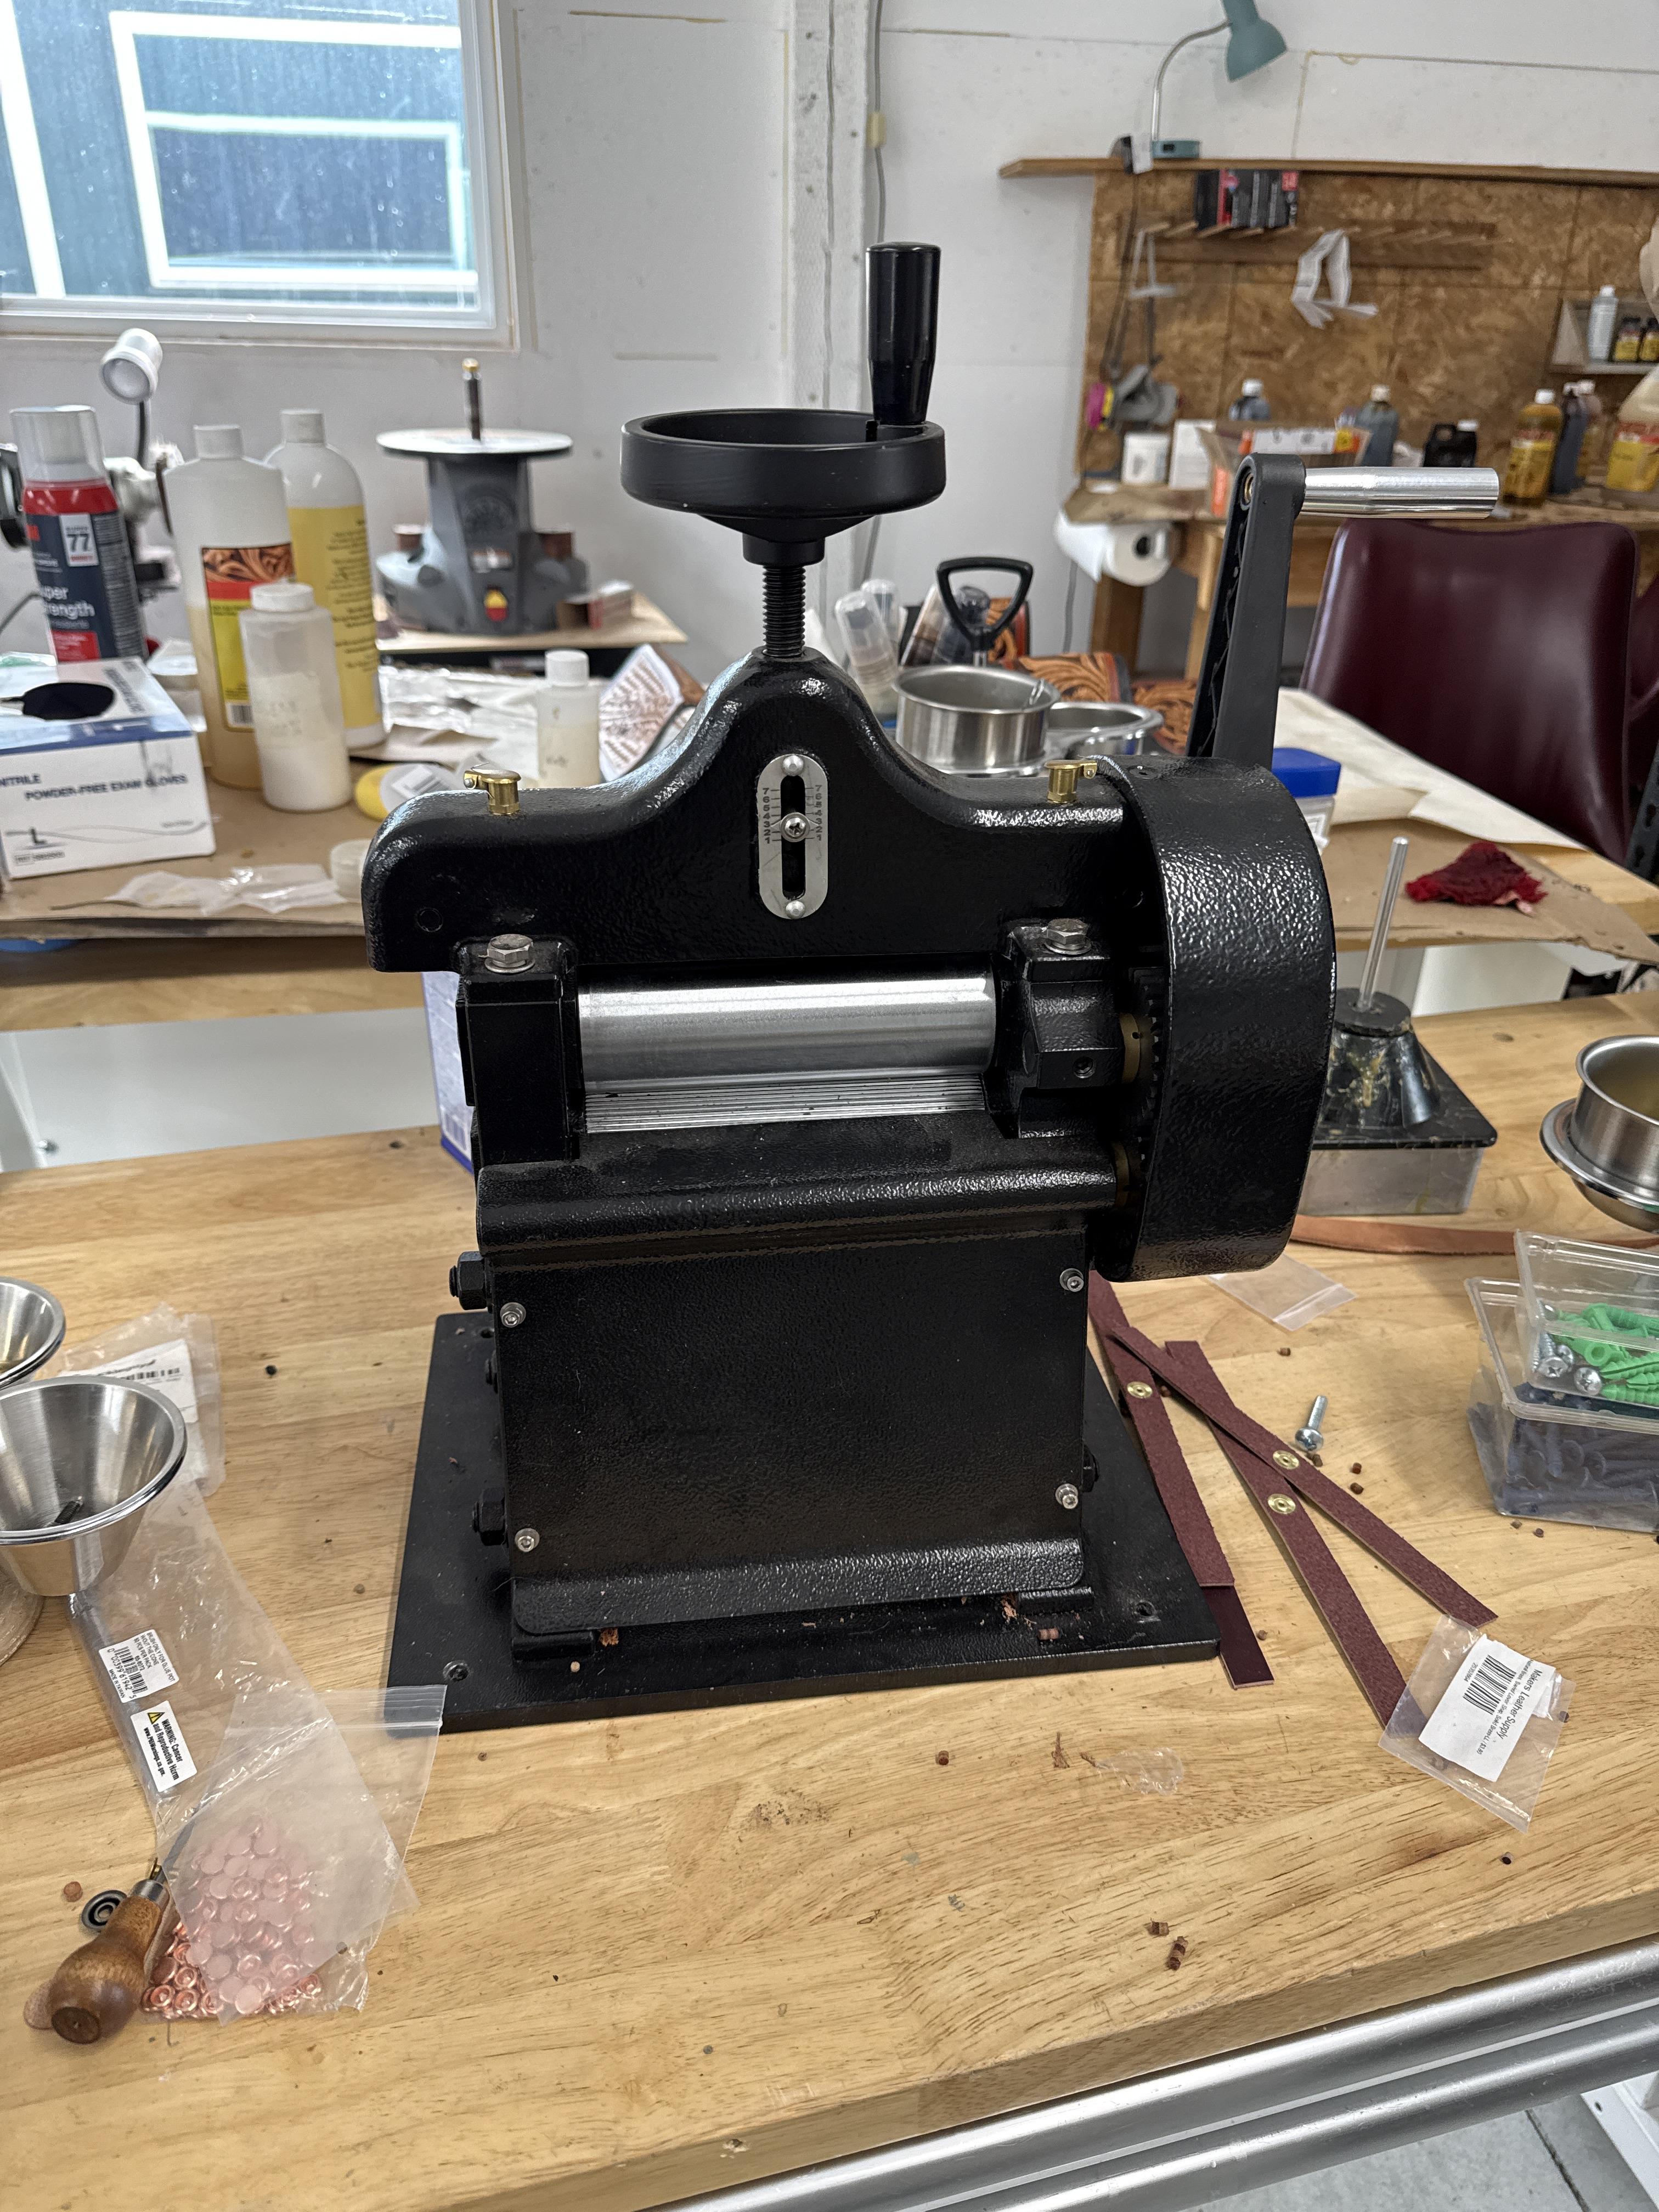
Like the title says this is a Buckleguy splitter in excellent, like new condition. A clone of the Landis 30. I bought this and then I got the Cobra splitter. located in Mountain Home, Idaho no shipping $1,500
-
dyeing larger leather item
stampingdelight replied to stampingdelight's topic in Leatherwork Conversation
what kind of airbrush - Today
-
.thumb.jpg.be873fe3cafed424774b187cfb1a470f.jpg)
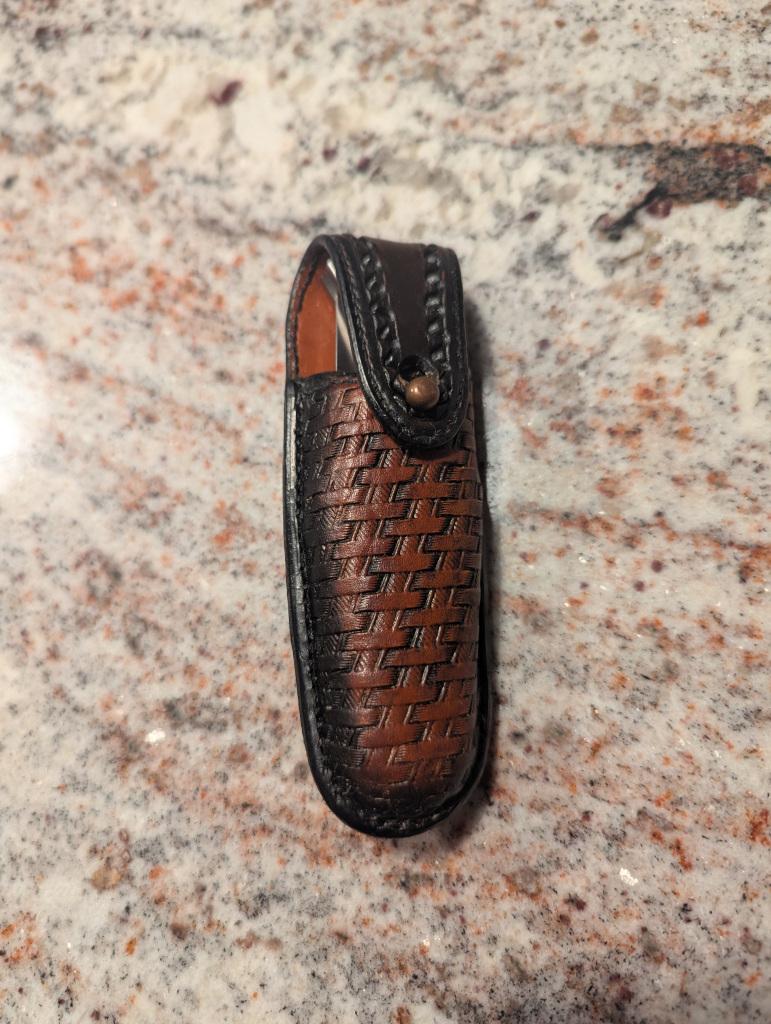
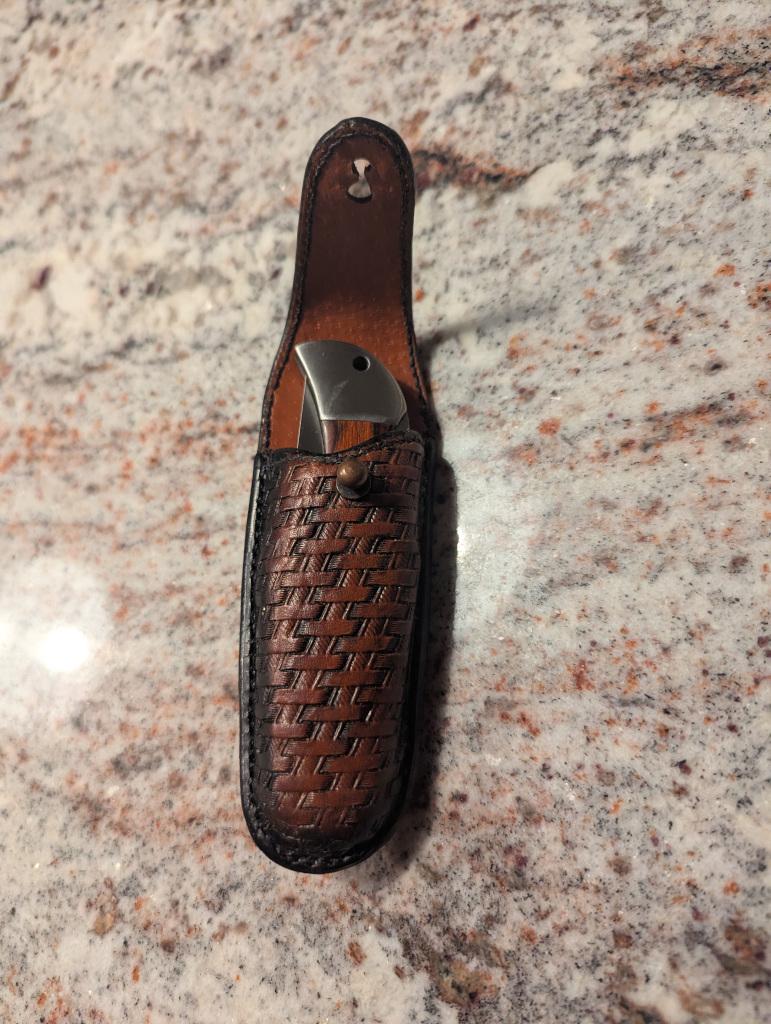
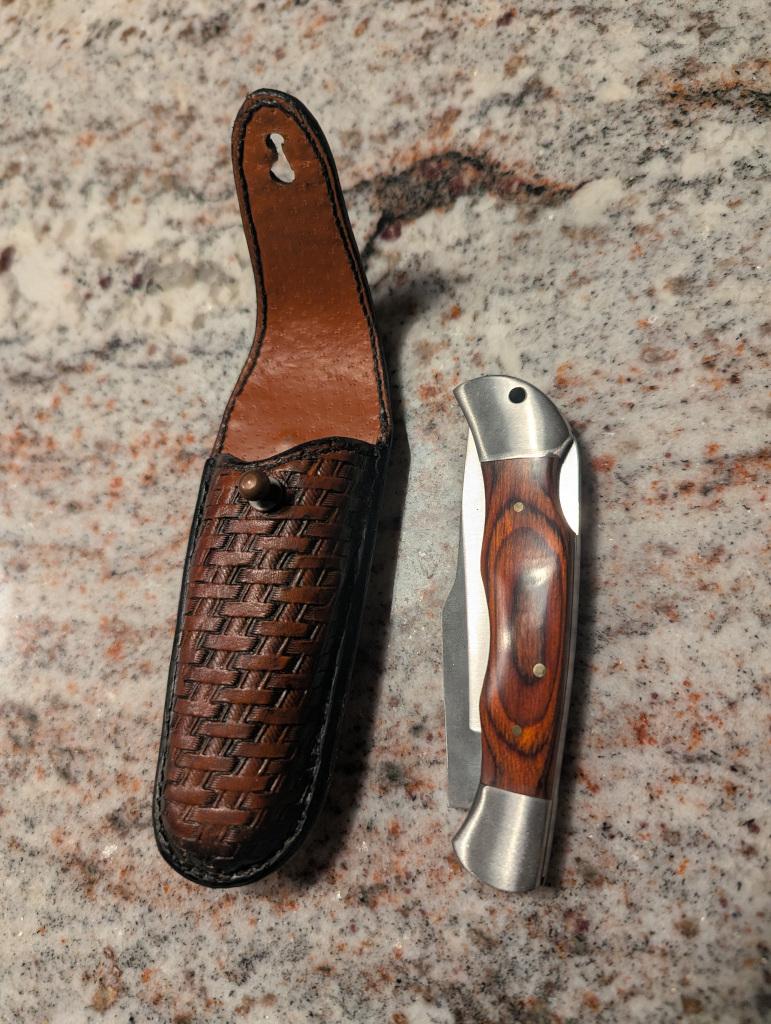
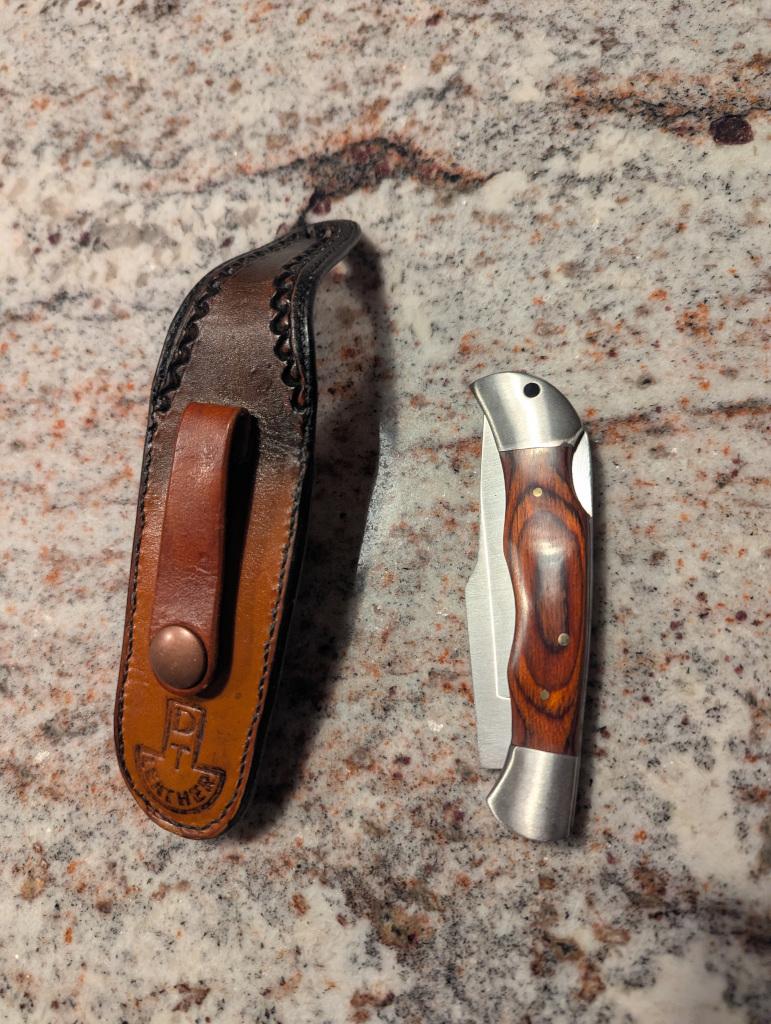
Been out a while. Knife sheath to get warmed up again.
Bert03241 replied to DwightT's topic in Show Off!!
Very Nice Dwight I too haven't done anything in a long while,combination of a lot of things. Health and other things. Maybe I should try a sheath or holster. Laser is down so will have to be hand cut which I'm not to good at LOL. I need motivation . -

Singer 211G156 vs Seiko STW-8B (Consew 226R) for heavier thread.
beefy replied to beefy's topic in Leather Sewing Machines
Thanks very much guys. Really appreciate the detailed responses. I don't yet have a maximum thickness I expect to sew of anything. It's more a case of I've acquired an extra machine so just wondered if one could be set up for heavier work, rather than having 2 machines that can only do the same work. I'm really still at the beginning of this industrial sewing machine game. It started with my wanting to make a bimini and side covers for my boat but I'm finding I'm falling in love with these industrial machines, especially the walking foot ones, and I find I'm looking for extra things to make LOL. I think it's just a matter of time before I start playing with leather too. Based on what you have explained to me it seems I'd be pushing the machine beyond it's design limitations. I may be better off getting one of the extra machines in a nice working condition with a servo, speed reducer, and needle positioner, and selling it at a profit and putting the money away for a more appropriate machine for leather. I've been absolutely kicking myself for a while now. Seen a Singer 132K6 going for a steal not far from me, but shrugged my shoulders because it didn't have a reverse. Never realised the value of these machines at the time. Needless to say it went very quickly and 2 days later I see the same model machine advertised for A$1000 more. I bet it was that one. I wouldn't have sold it though. Regarding the bobbin conversion I've read/viewed every resource I can on the conversion and understand what's involved. I don't expect this will increase the thread size capability, just want the extra bobbin size. The existing bobbin case seems to wobble a lot so I thought it might be worn out and instead of just doing a direct replacement I decided to jump in the deep end and do the modification. I'm a mechanical fitter and have a lathe and milling machine, as well as access to a CNC mill, so I'm lucky enough in that regard. Regarding the extra torque with a pulley reduction system I've retrofitted my machines with 4 pulley reduction systems and servos, and wow, the torque will smash things. Before I got my Seiko STW-8B I was using my basic lightweight Mitsubishi DB-189 with V138 thread (that's not a typo LOL) and got some needle deflection with the thick stuff I was sewing, and the needle hit the plate. Wow, what a solid crunch as the needle buckled and snapped, I was sure something must have broken or at least went out of adjustment. Nope, just continued sewing OK. That's when I started looking harder for a triple feed walking foot machine. -
Yup. Also another point is how the ink will react with leather that has been oiled etc and the longevity of the ink. The old inks could last twenty plus years with detail and colors still there. Today I see a lot of tattooing that needs to be refreshed after 3 or 4 years. kgg
-

Singer 211G156 vs Seiko STW-8B (Consew 226R) for heavier thread.
kgg replied to beefy's topic in Leather Sewing Machines
My two cents worth in addition to @Wizcrafts comments: Neither. They are upholstery class machines with a rated thread size max of V138 as a top and in the bobbin and typically a max sewing thickness of 3/8". That said depending on how thick you are planning on sewing sometimes you can use v207 in both the bobbin and as a top thread with thinner /softer leather more times you will be able to use v207 as a top thread and v138 in the bobbin. The drawback with using different thread sizes, top vs bobbin, is the strength of the seam will be only as good as the smallest thread size. As a note the brand name machines rated their machines on the thread size it could sew in the max thickness not what size of thread you could stuff through the eye of the needle. All the machines you have listed are rated for a #24 needle which is good for V207 in thinner stuff and V138 in thicker. Doing the conversion to the larger "U" size bobbin is not a simple pop-off and drop-in process which will in reality only get you more bobbin thread. The conversion is not going to get above V207 (limited by needle size) and depending on how thick / tough the leather is you still maybe limited to V138 as the top thread as well as in the bobbin. Is it worth the effort?? I don't know. If you need to sew V207 and above in thick or tough leather consistently these machines are the probably the wrong class of machine. You maybe able to trick the machine by increasing the torque using a speed reducer but chances are over the long haul you are going to damage the internals components of the machine. The term you used "extremely heavy" for thread is a relative thing. Domestic sewers consider V69 to be heavy duty while upholstery class machine users consider V207 to be heavy duty while those using saddle/ holster capable machines consider V415 as heavy duty and then you get into threads that hand sewers use which would be above V415. What is the thickness of leather you want to sew????? kgg -
 Neither of these machines was built to handle or tension #207/T210 bonded thread. Do so at your own risk. Sewing with #207 thread on the top and bottom calls for a #24 needle. You might need to find a heavy duty beehive tension spring to get enough top tension to pull the knots up into the leather. The bobbin tension would have to be very light, which can lead to other problems. Also, the hook will probably need to be moved farther away from the larger needle and the deflector tab may need to be bent out a little more (or not). Moving the hook sideways changes the timing. If you do manage to get one of these machines to sew properly with #207 thread, which has a 33 pound breaking strength, be prepared to replace the take-up lever and the connecting rods and crank shafts inside the head. These parts will wear out much faster than if the thread maxed out at 22 pound test #138. You might be able to soften the forces acting on the moving parts by reducing the bobbin tension to almost zero, while installing an anti-backlash spring under the bobbin, then balance the knots with the top tensioner. Last, set the check spring position for the maximum amount of slack in the top thread. On disk shaped check assemblies there is a screw inside a curved slot to control the slack. Loosen the little screw, rotate the assembly fully counterclockwise so the screw is at the right end of the slot, then tighten down the screw. Next, you may need to change both the check spring tension and bottom stopper position to hold onto the top thread as the take-up lever descends until the needle completely penetrates the bottom layer, and possibly longer. You'll need to get a substantial loop in the needle's scarf for the hook to pick it off at the distance it will have to be away from that thick needle. The hook timing may also need to be advanced to reduce the snapping as the top thread tries to go around the shuttle.
 -

Been out a while. Knife sheath to get warmed up again.
wizard of tragacanth replied to DwightT's topic in Show Off!!
Really very, very "knife" work! See what I did there? Nick -
Hello all. I've been gone for a while with traveling and moving houses. Moved two kids from Boise to Big Fork, Montana, then my wife got the bug to move too. Fortunately we didn't have to move all the way to Big Fork, just a better home in Boise. I finally got my new workshop set up, and a friend asked for a knife sheath to go with the knife that she received for Christmas. Gave me a chance to warm up the tools again.
-
I've been looking for period images of these saddles, and often finding Navajo riding western saddles or the saddle being covered with blankets and clothing, but did find this one that appears to be a Navajo saddle, circa 1900. source link
(1).jpg.6444cdf123ec7b63480925eccc9ddaf9.jpg)
-
Thanks! I really appreciate the kind words. Next is the LOTR trilogy. The books will be in the same style but the box will be a bit different. It'll be a clamshell/slip cover hybrid so I have to invent it lol. I want to make it so the front opens like a pair of doors with the doors of Durin on the front.
-
I guess the difference is between working on live skin and dead skin. 😄
-

Inadequate knife sharpness, or too much moisture. Ugly "drag line"
DwightT replied to LakeOtter's topic in How Do I Do That?
FWIW: If I have to take a long break during tooling, I will spray the project and my stone work surface with a misting sprayer (light mist), then cover the project with plastic wrap. The wrap will seal to the wet stone and hold the moisture in the project for at least a day. -

Fender repair...
Brokenolmarine replied to Brokenolmarine's topic in Saddle Identification, Restoration & Repair
Still waiting for materials. I'm chomping at the bit to get started. -
lol i asked my daughter about this, she is a tattoo artist. She laughed and said, can I make 200 bucks an hour doing it? She wasnt very impressed but did say it would be good practice for the real thing. I think if you're already an artist and have some skill in painting and such, it could be worth trying.
-
I think that this tool can be used along with hand tooling for best results. Used by itself, looking at the results on the listing in Weaver, the results look rather flat. Reminds me of the tooling on the leathers sold to tourists in some South American countries and elsewhere. Of course, I am only looking at photographs which is why I asked the question that I did, above.
-
 I will add that firearms have to be protected from their environment. Here in the high plains desert of Wyoming, the culprit is dust more so than humidity; we basically have no humidity to speak of, so oiling my weapons is diferent and much less than in more humid environments like down south. If I oiled up my gun and inside the holster i would come home with a gun and holster full of dust and dirt.
 -
Yeah, you're the man!! those are the coolest books I've ever seen. Your work is master-level for sure. I can't stop looking at them lol.
-
VERY nice!!
-
Something I've only heard mentioned once is the use of a VFD (variable frequency drive) for a 3 phase synchronous motor. The guy claimed the control with this setup totally outshines any servo motor. You can get these drives with single phase input and variable frequency 3 phase output, so you don't need a 3 phase supply to run a 3 phase motor. These drives are often used in industry and have many adjustable settings. Some that may be of interest are: Current limit - this will limit the torque of the motor and could be used as an electronic safety clutch. No need for a mechanical clutch. Max speed - these drives go from 0 hz to a frequency you would not want to run your machine at LOL. However, the max frequency can be set. External braking resistor option to reduce stopping time. This is a guess but I bet they also have a ramp up option which will be adjustable. Likewise my guess is they will have a ramp down option although this may not be wanted/needed. Probably some other settings that would be useful. Google and find a user manual and you'll get an idea. Something I should add is that I've heard running at very low rpm can cause motor heating as the internal fan of the motor is not doing anything useful. I'll leave anyone interested to do further research on that one. However, if the current limit is turned down and thus the current is low relative to the normal operating current of the motor, perhaps this heating effect will not be of any concern.
-
I can't believe I've now got two medium/heavy walking foot sewing machines. Came across a good price on the Singer so just grabbed it. Would anyone say one machine would be better suited than the other to thread heavier than V138. I'm waiting for parts to convert the Seiko to a large U size hook (the one used in the Juki LU-563), but I also realise that Juki lists an optional U sized hook for "extremely heavy" thread. So I'm toying with the idea of having one machine set up for V138 thread, and the other one for larger thread >>IF<< it would be OK to do that. Just don't know if one machine is better suited to the heavier thread than the other.
-
add; and my wee engraving pen, which I've never used. That cost me £6.50 ($7?) But I need to find them in my storage unit!
-
 You could do that and earn your money back by offering the heads to other leather workers eg, on here. Do it the 'Airfix' way; make the parts and let the buyer assemble them and paint it (if they want to)
 -
I have one of those Burgess wood carvers. You might have a good idea. Anyway, it warrants some thought.