All Activity
- Past hour
-
WOW! The craftsmanship is phenomenal! The level of detail on the spacing of all those dots, unreal! I am sure your son was pleased.
-
Hello all. I've recently purchased an old singer 111 that needs some TLC and I've run into a question. When i removed the oil packing screw for the arm shaft there was some old crusty wool-ish looking stuff in there, I'm assuming to act as a wick. I'm not sure what I should replace this with, I don't see any specific reference to it in any of the manuals or parts lists I've gone over. Any advice is appreciated. By the way, I'm really happy to have found this site. I don't do leather work but the information on vintage machines in here is fantastic. Thanks

-
I have increased the foot pressure and switched to white thread. This seems to have fixed the problem with skipping stitches. I ordered thread lube and a pot, and hope to switch back to stiffer black thread with lubrication. I am figuring out how to feed Biothane while sewing close to hardware. For leather halters I typically add a wedge/welt to ease the transition in thickness and sew tight to the hardware. Biothane is stiff and springy when folded around hardware so it's a new experience negotiating the ends of the straps. The feet want to slip back down the slope as the material compresses while sewing on a slope. Beta biothane is a matt finish and relatively grippy compared to bridle leather, but the flattening of the loops as they are sewn is a new dynamic for me. Thanks for the reminder, Tim. I will check the needle/hook distance. I am settling on a size 24/25 needle, which is what I've been using for leather (cutting point, not round point) on this machine without any issues.
- Today
-
I'm assuming this is a loop between the shoulders to hang the jacket on a hook With that in mind . . . the "loop" leather would be popped thru that sort of oval piece . . . and then thru probably 8 oz little circles. It would then be splayed into 4 pieces . . . each would be glued and then cemented to the little circle Then you super wet the whole thing and form that semi oval using regular tools and let it dry . . . when it was originally cut . . . I would have cut it probably 1/2 inch wide all around it . . . and once dry . . . trim to the exact size you would want. Glue and stitch . . . re-dampen the oval . . . touch up the molding . . . done It is actually a novel piece of work . . . would add a bit of bling to the garment . . . I would never use it . . . but it is a cool touch May God bless, Dwight
-
No but you can adjust the needle bar distance/needle from the hook. When I was working on my 441 I thought you would need to adjust this when going from a #19 needle to a #27. I think maybe you commented on this issue. Cowboy Bob sent the directions on how to do it.
-
I used to homebrew beer using the same sort of carboy. To make handling it easier, I bought a commercial handle that clamps to the neck. They cost about $5 at the time, probably more now. I also made a carrier harness using nylon straps. Not at all hard if you've got a sewing machine, but it would be a pain to sew by hand. Another type that I made had a double-purpose. I used some old terry-cloth bath towels to sew a bag that covered the whole carboy, sewed on some handles at the top, and closed by a draw string around the top. Beer is light-sensitive, so the cloth helped with that and additionally, put the whole thing in a big tub of water. Water wicks up the towel and evaporates to keep the temperature several degrees below ambient. As for the wicker basket, it's very cool looking! If you have materials and skills it would be great to keep or replicate, but that is certainly beyond my skillset!! - Bill
-
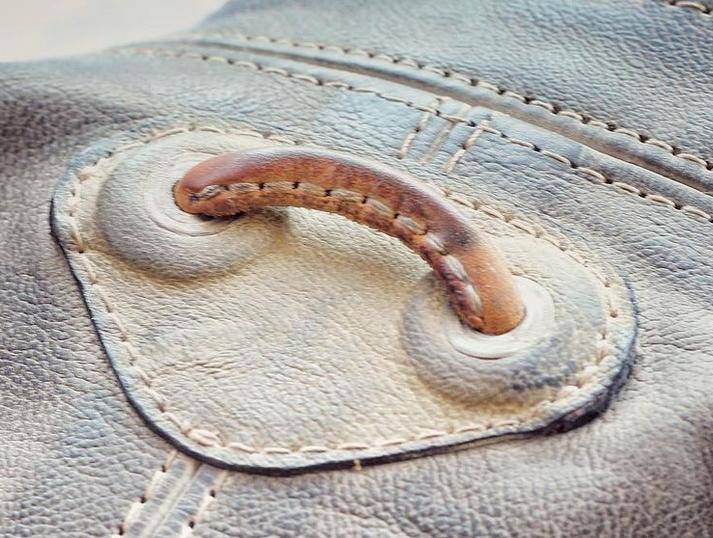
Hello all, Can someone give me a step-by-step guide on how to create this small detail? You might overlook it at first, but when you look closer you can see how beautifully the leather has been worked. The passage is slightly raised, creating a nice protrusion. I would like to know how to achieve this effect, and also how the leather loop is securely fastened on the inside. Edit Now that is look closer the loop is stitched between the patch and the jacket. Still the other question remains: how do I create those nice bulges 😉 Thanks in advance, Bert
-
Noseband With a Bad Reputation?
Tove09Tilda replied to TomE's topic in Saddle and Tack Accessory Items
Really great and inspiring work! As someone who rode in such a bridle for years (they are very common here in Germany!), I can say that I made no bad experiences with them, maybe as I was amongst the last generation of riding school kids, who were taught the two finger rule. Mine was never too big nor too tight. If you follow the rule of putting two fingers upright underneath the noseband when tightening you can't do anything wrong! That btw applies to all nosebands, as I was taught. So it's a lot of fuzz about nothing and a lot of wrong information, in my opinion. But look around on social media and pay attention to how tight the nosebands really are. Most are too tight. My instructor always said: "If you need to tighten anything so much, that your animal can't comfortably breathe anymore, the answer is easy. You are the problem, and maybe you should take a step back". The bad rep comes from people using this type of bridle as its very easy to "over-tighten" due to the "pulley-effect". As with most things in equestrian sports, if used as intended/correctly there is nothing grim about it! This type of bridle is often misused in dressage to make the horse more "controllable" in my experience. And I love that you don't have a snaffel strap and how comfortable you have designed it. I only know it, that the padding is a bit thicker and "overhanging" where Dee rings are build in, but I actually like your design more, as sometimes, especially after the leather got softer the padding was becoming a bit fiddly to place correctly within the pull area (especially with cheap bridles, like most riding schools used). -
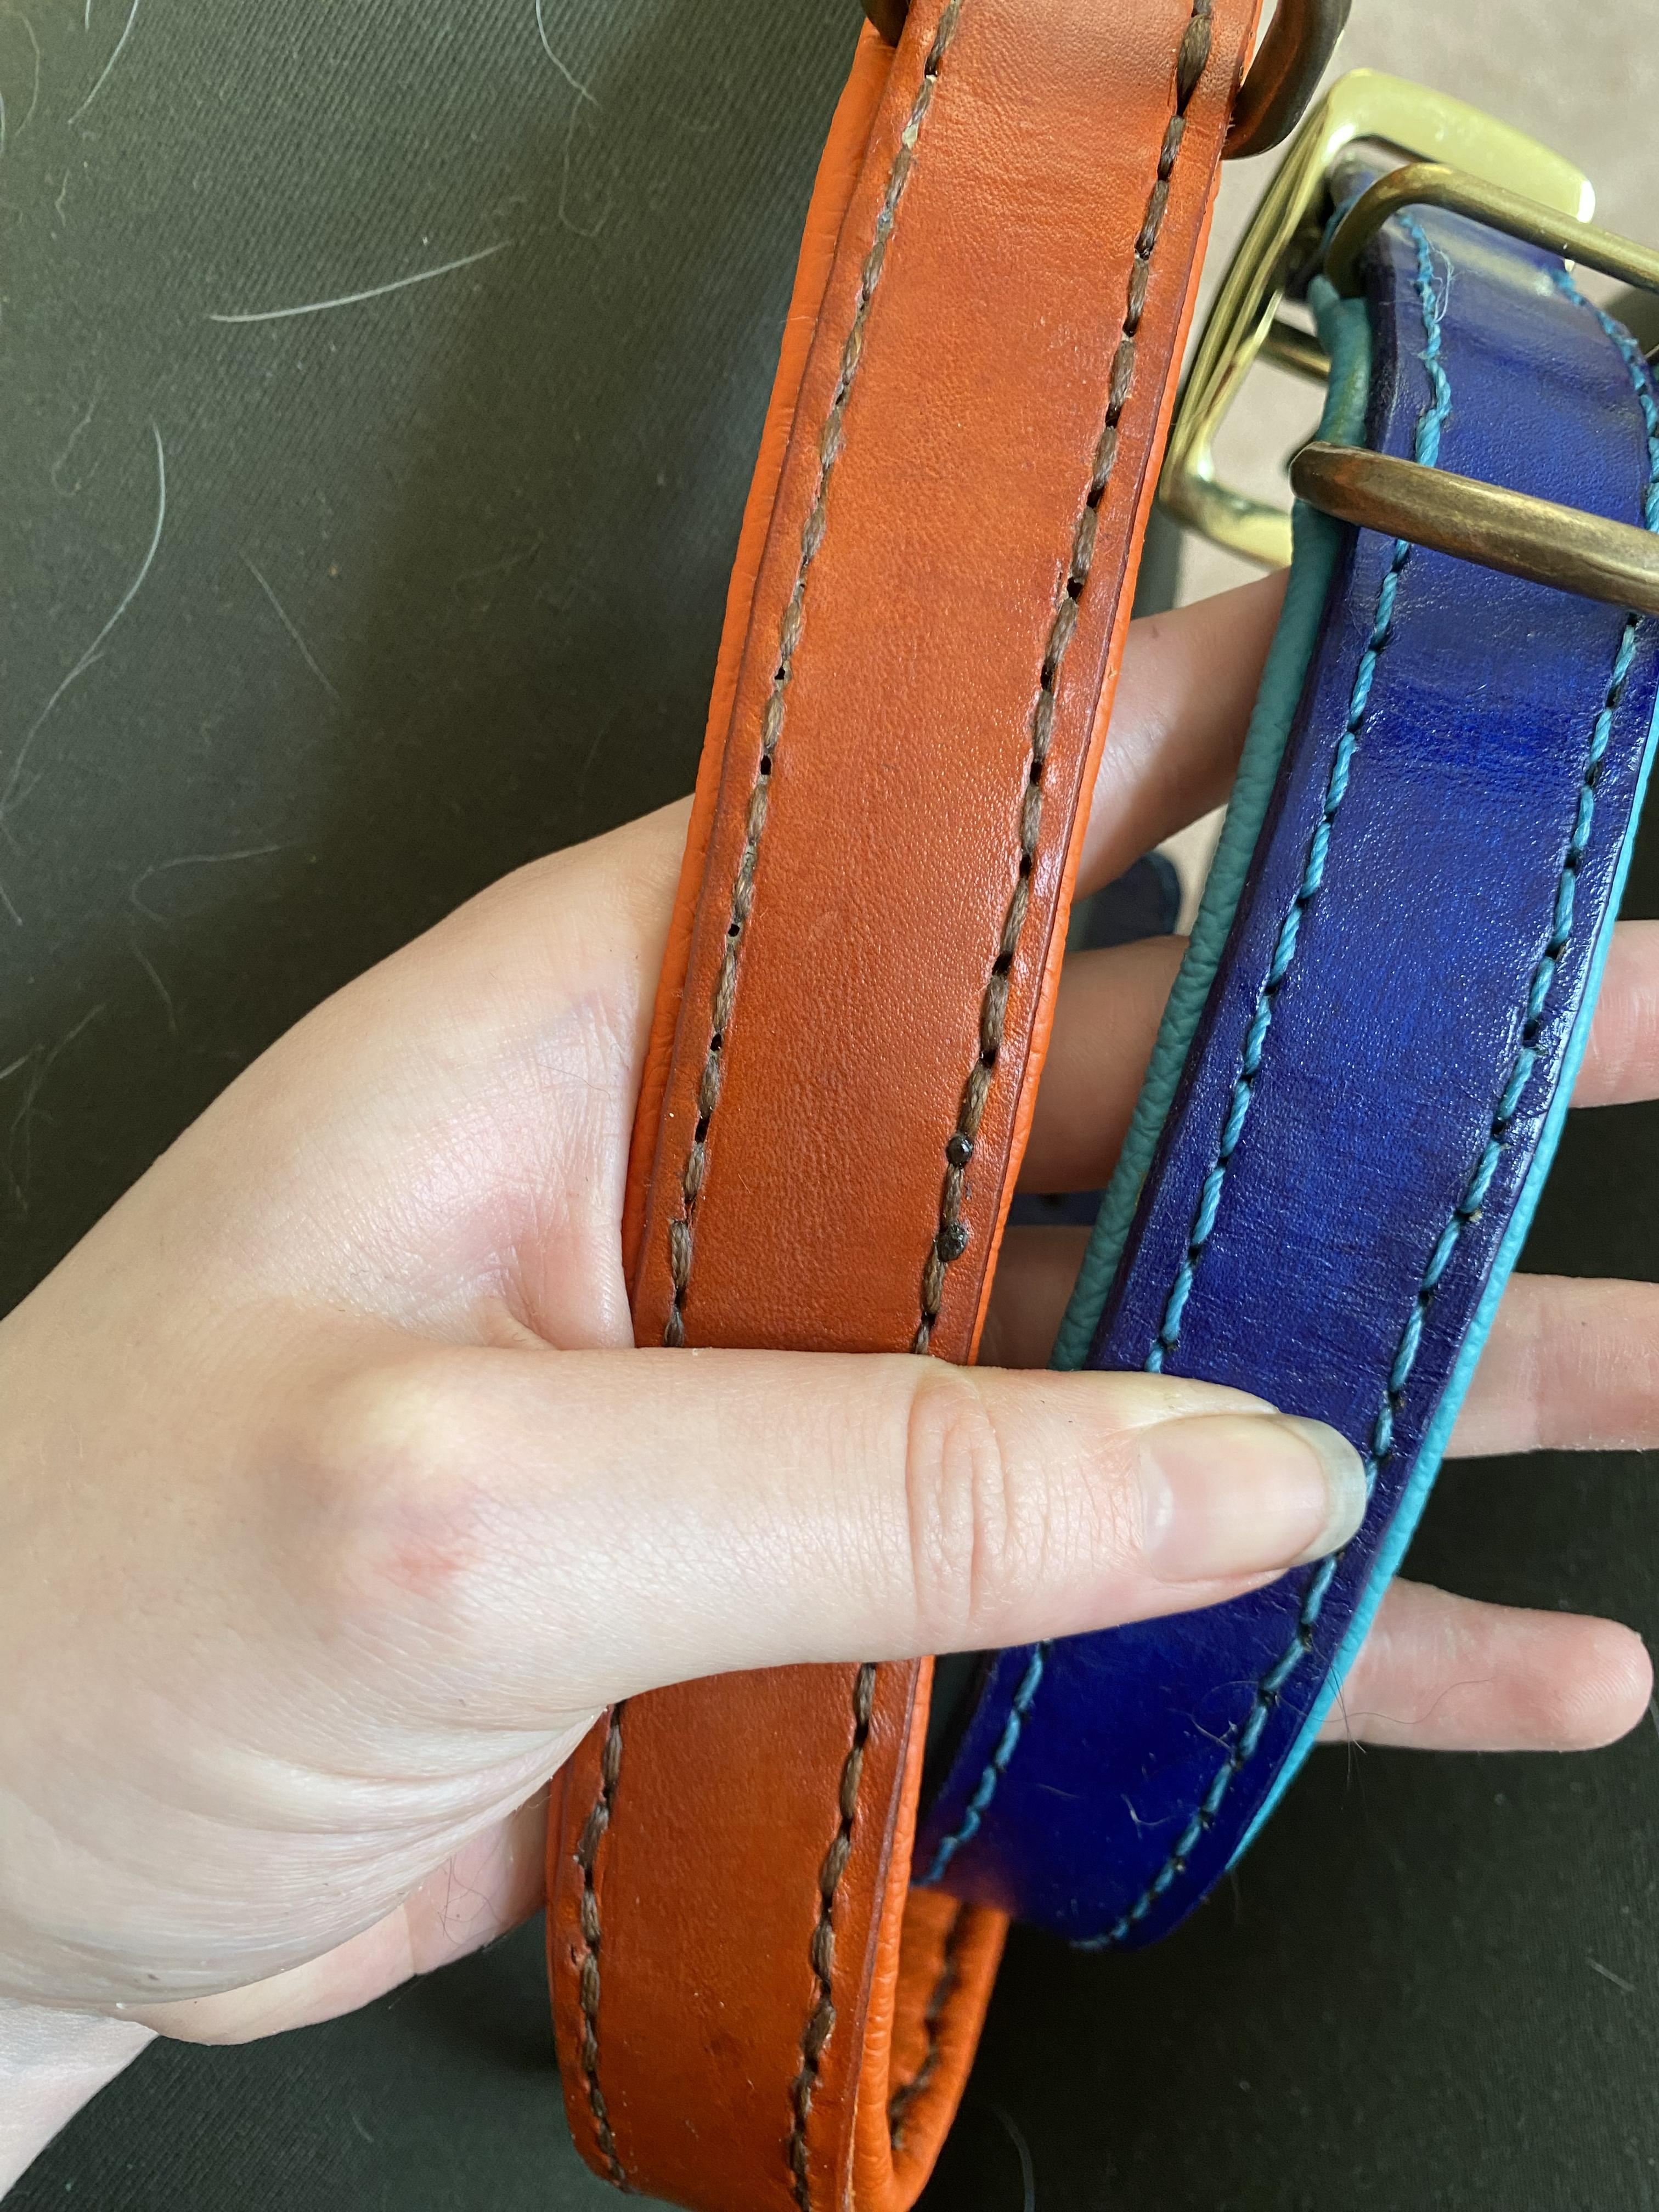
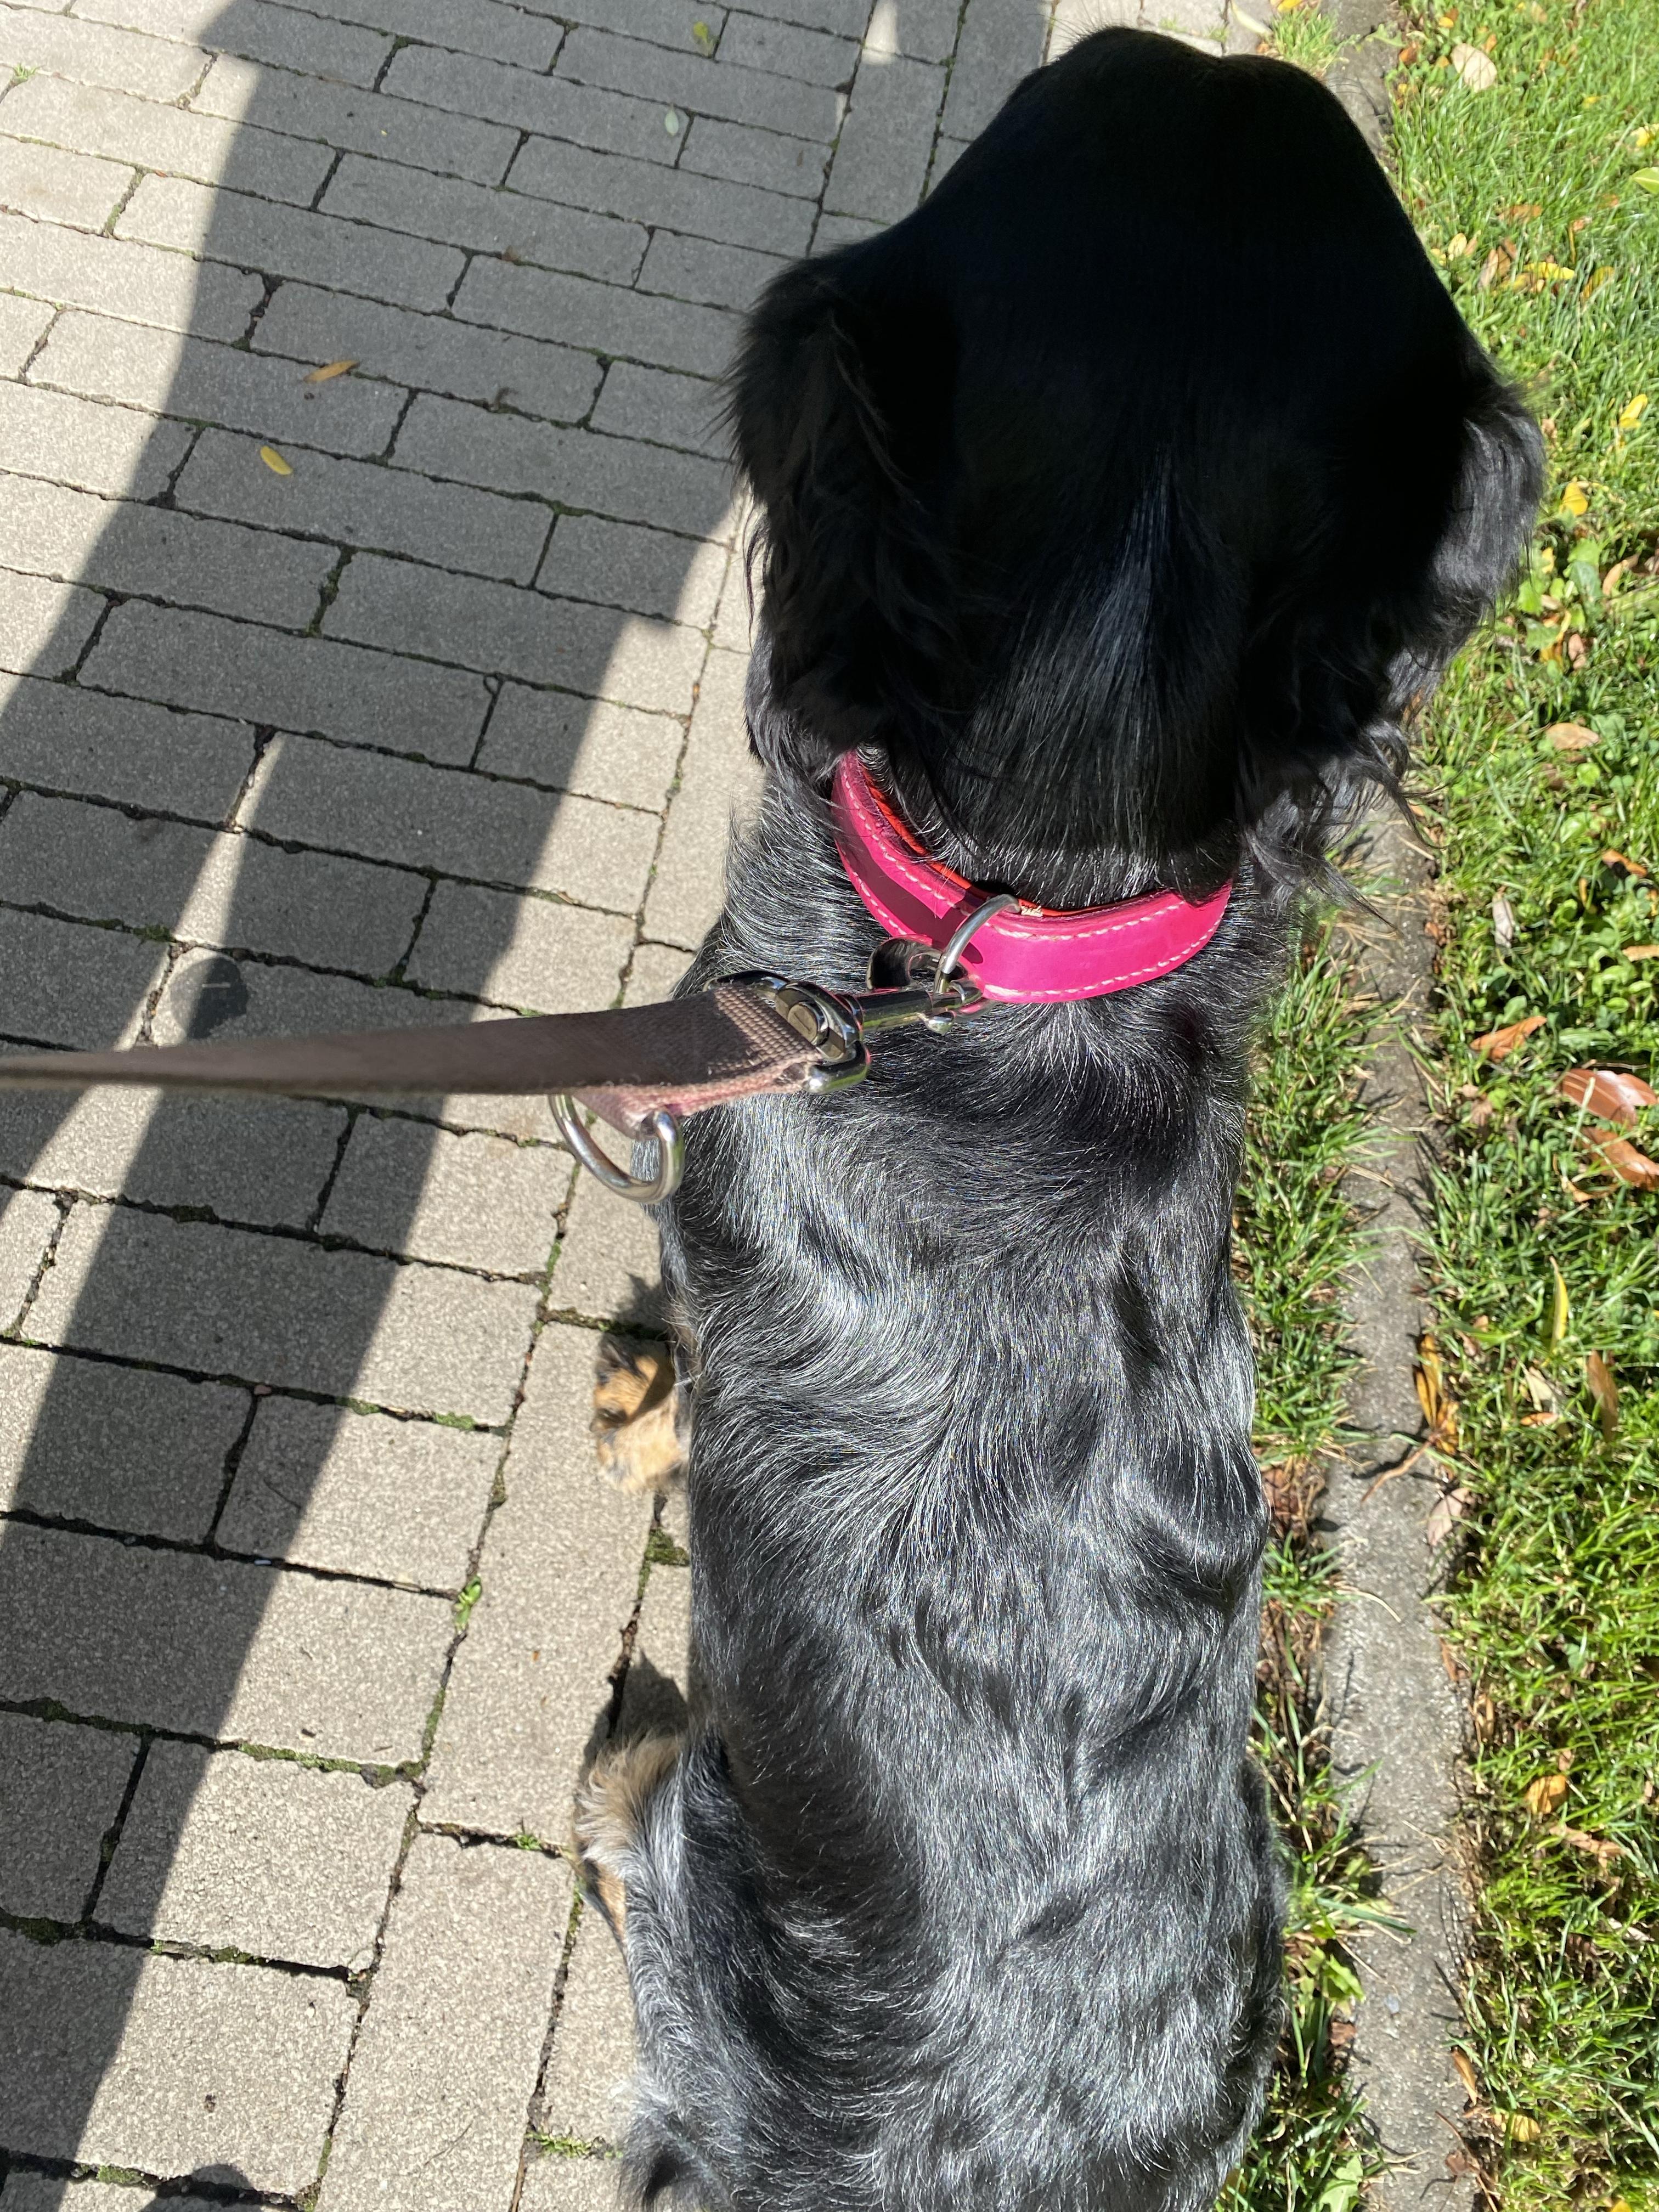
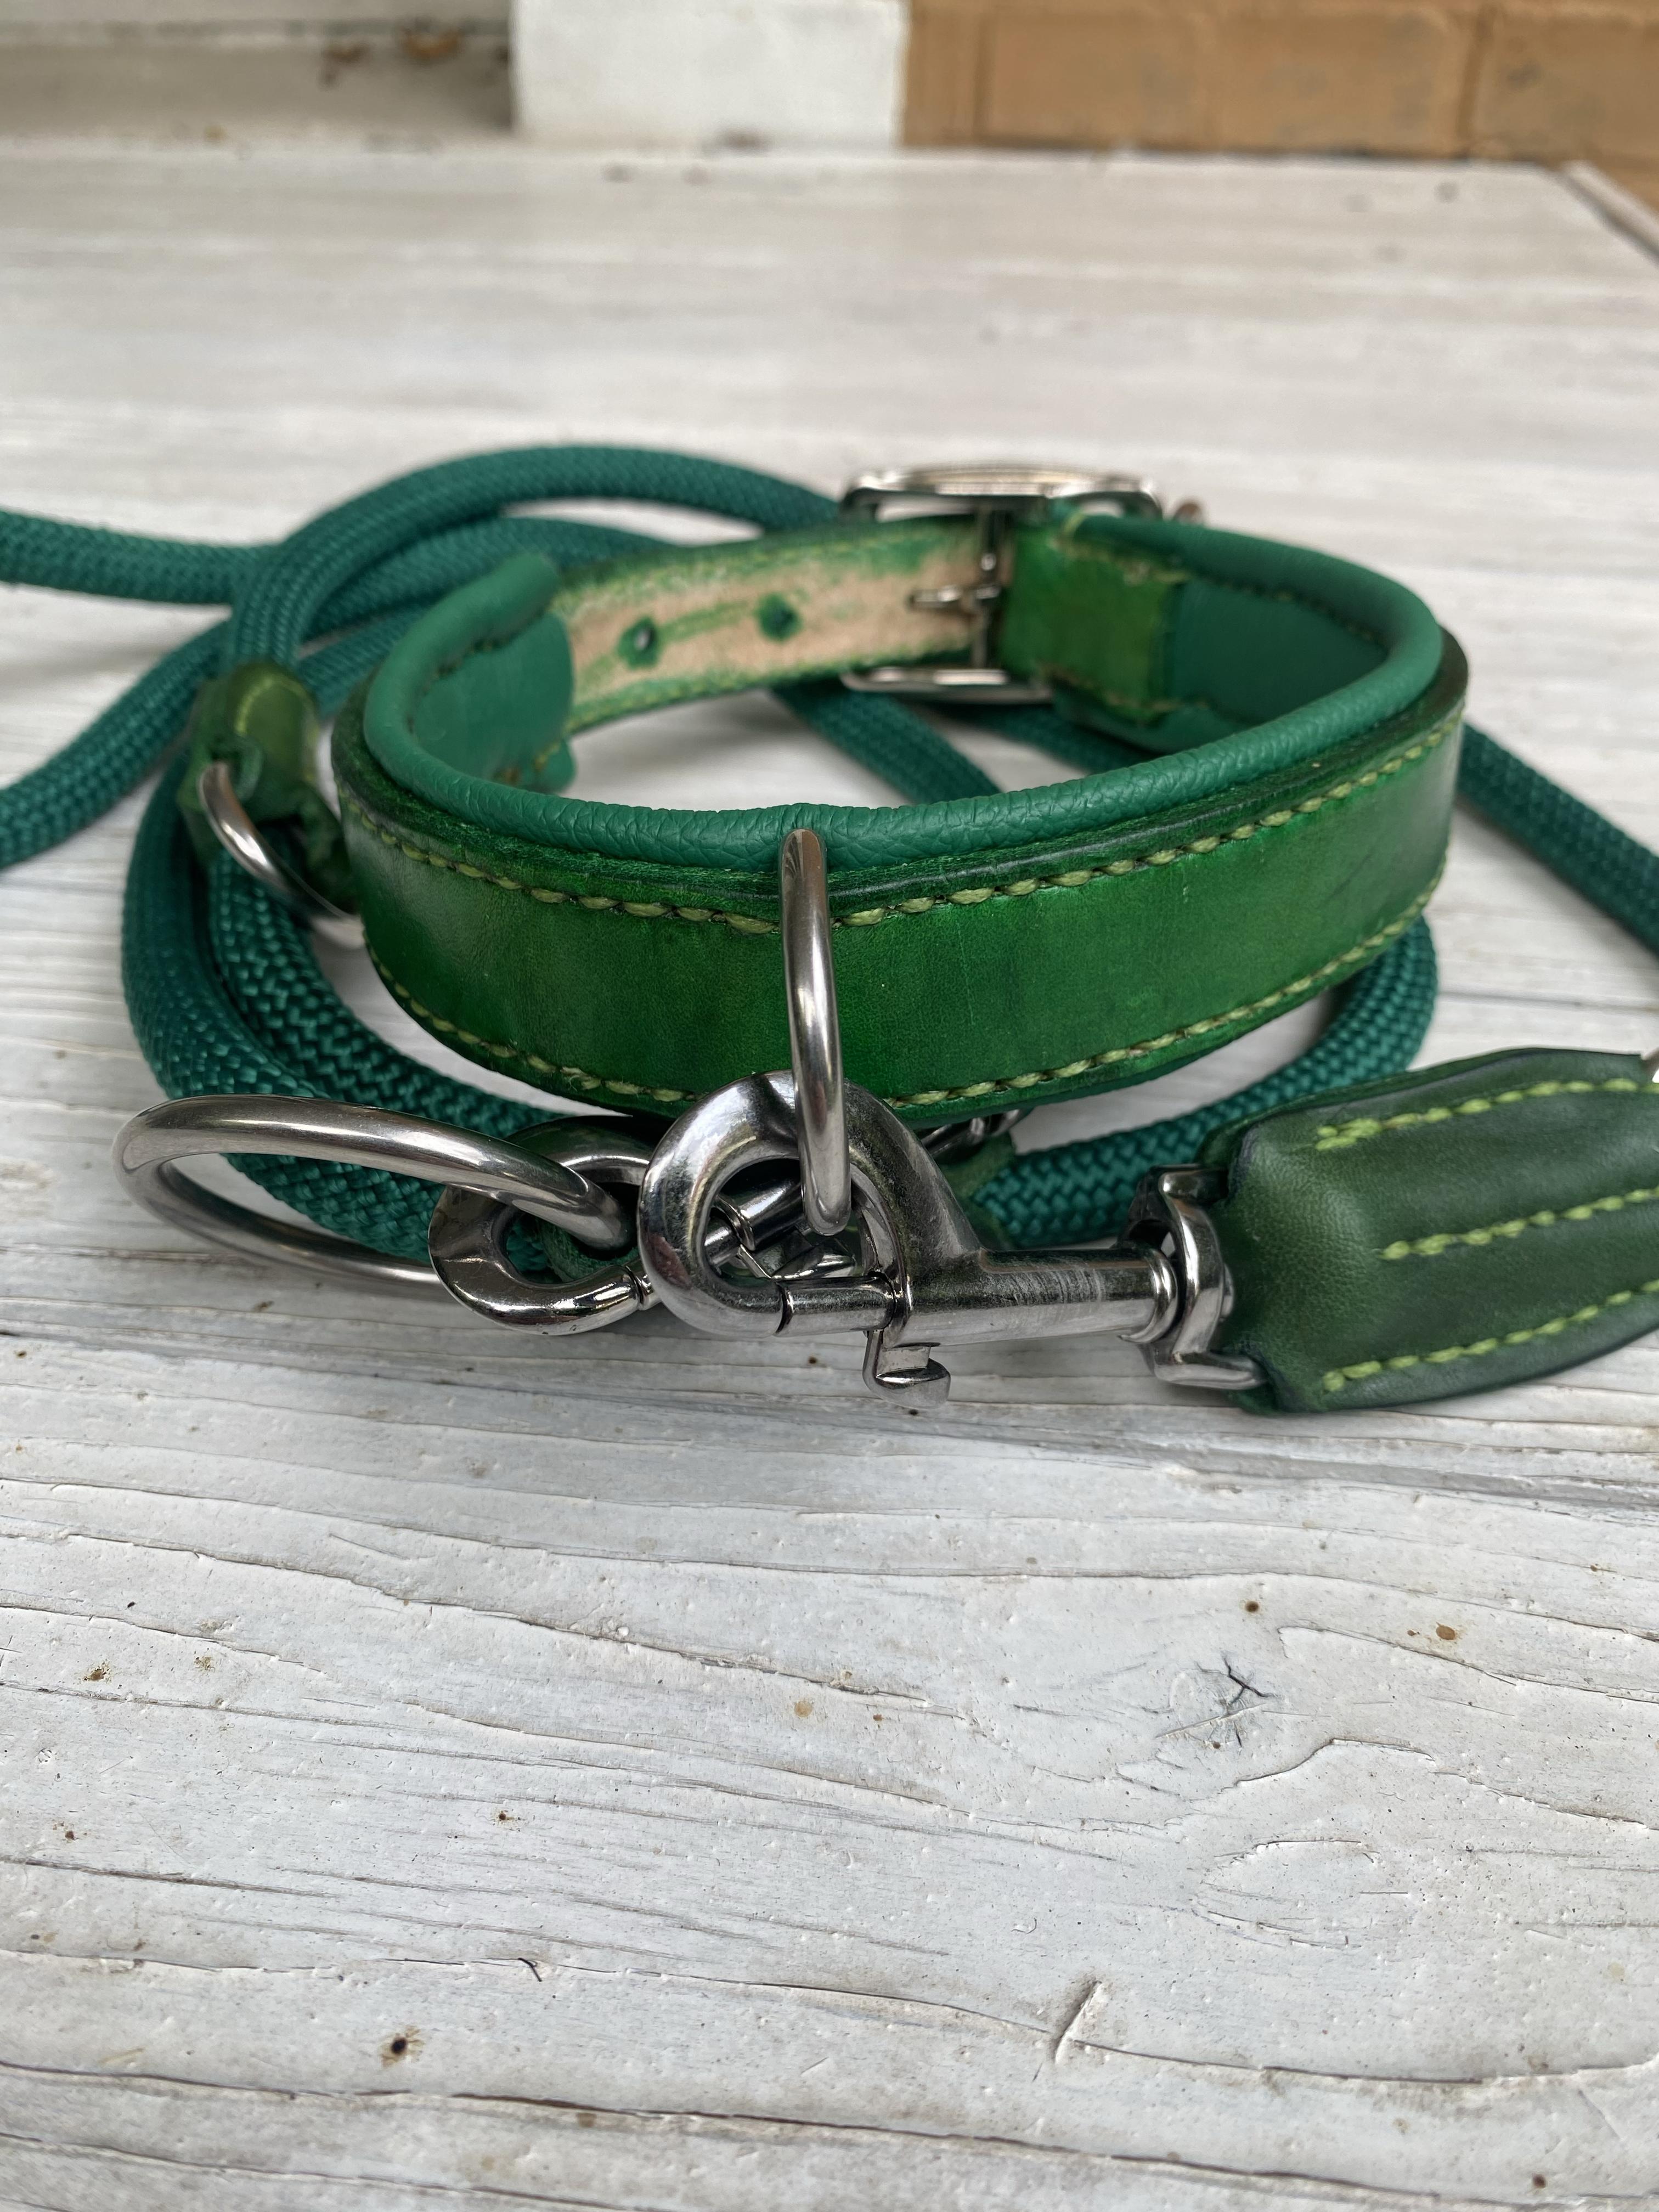
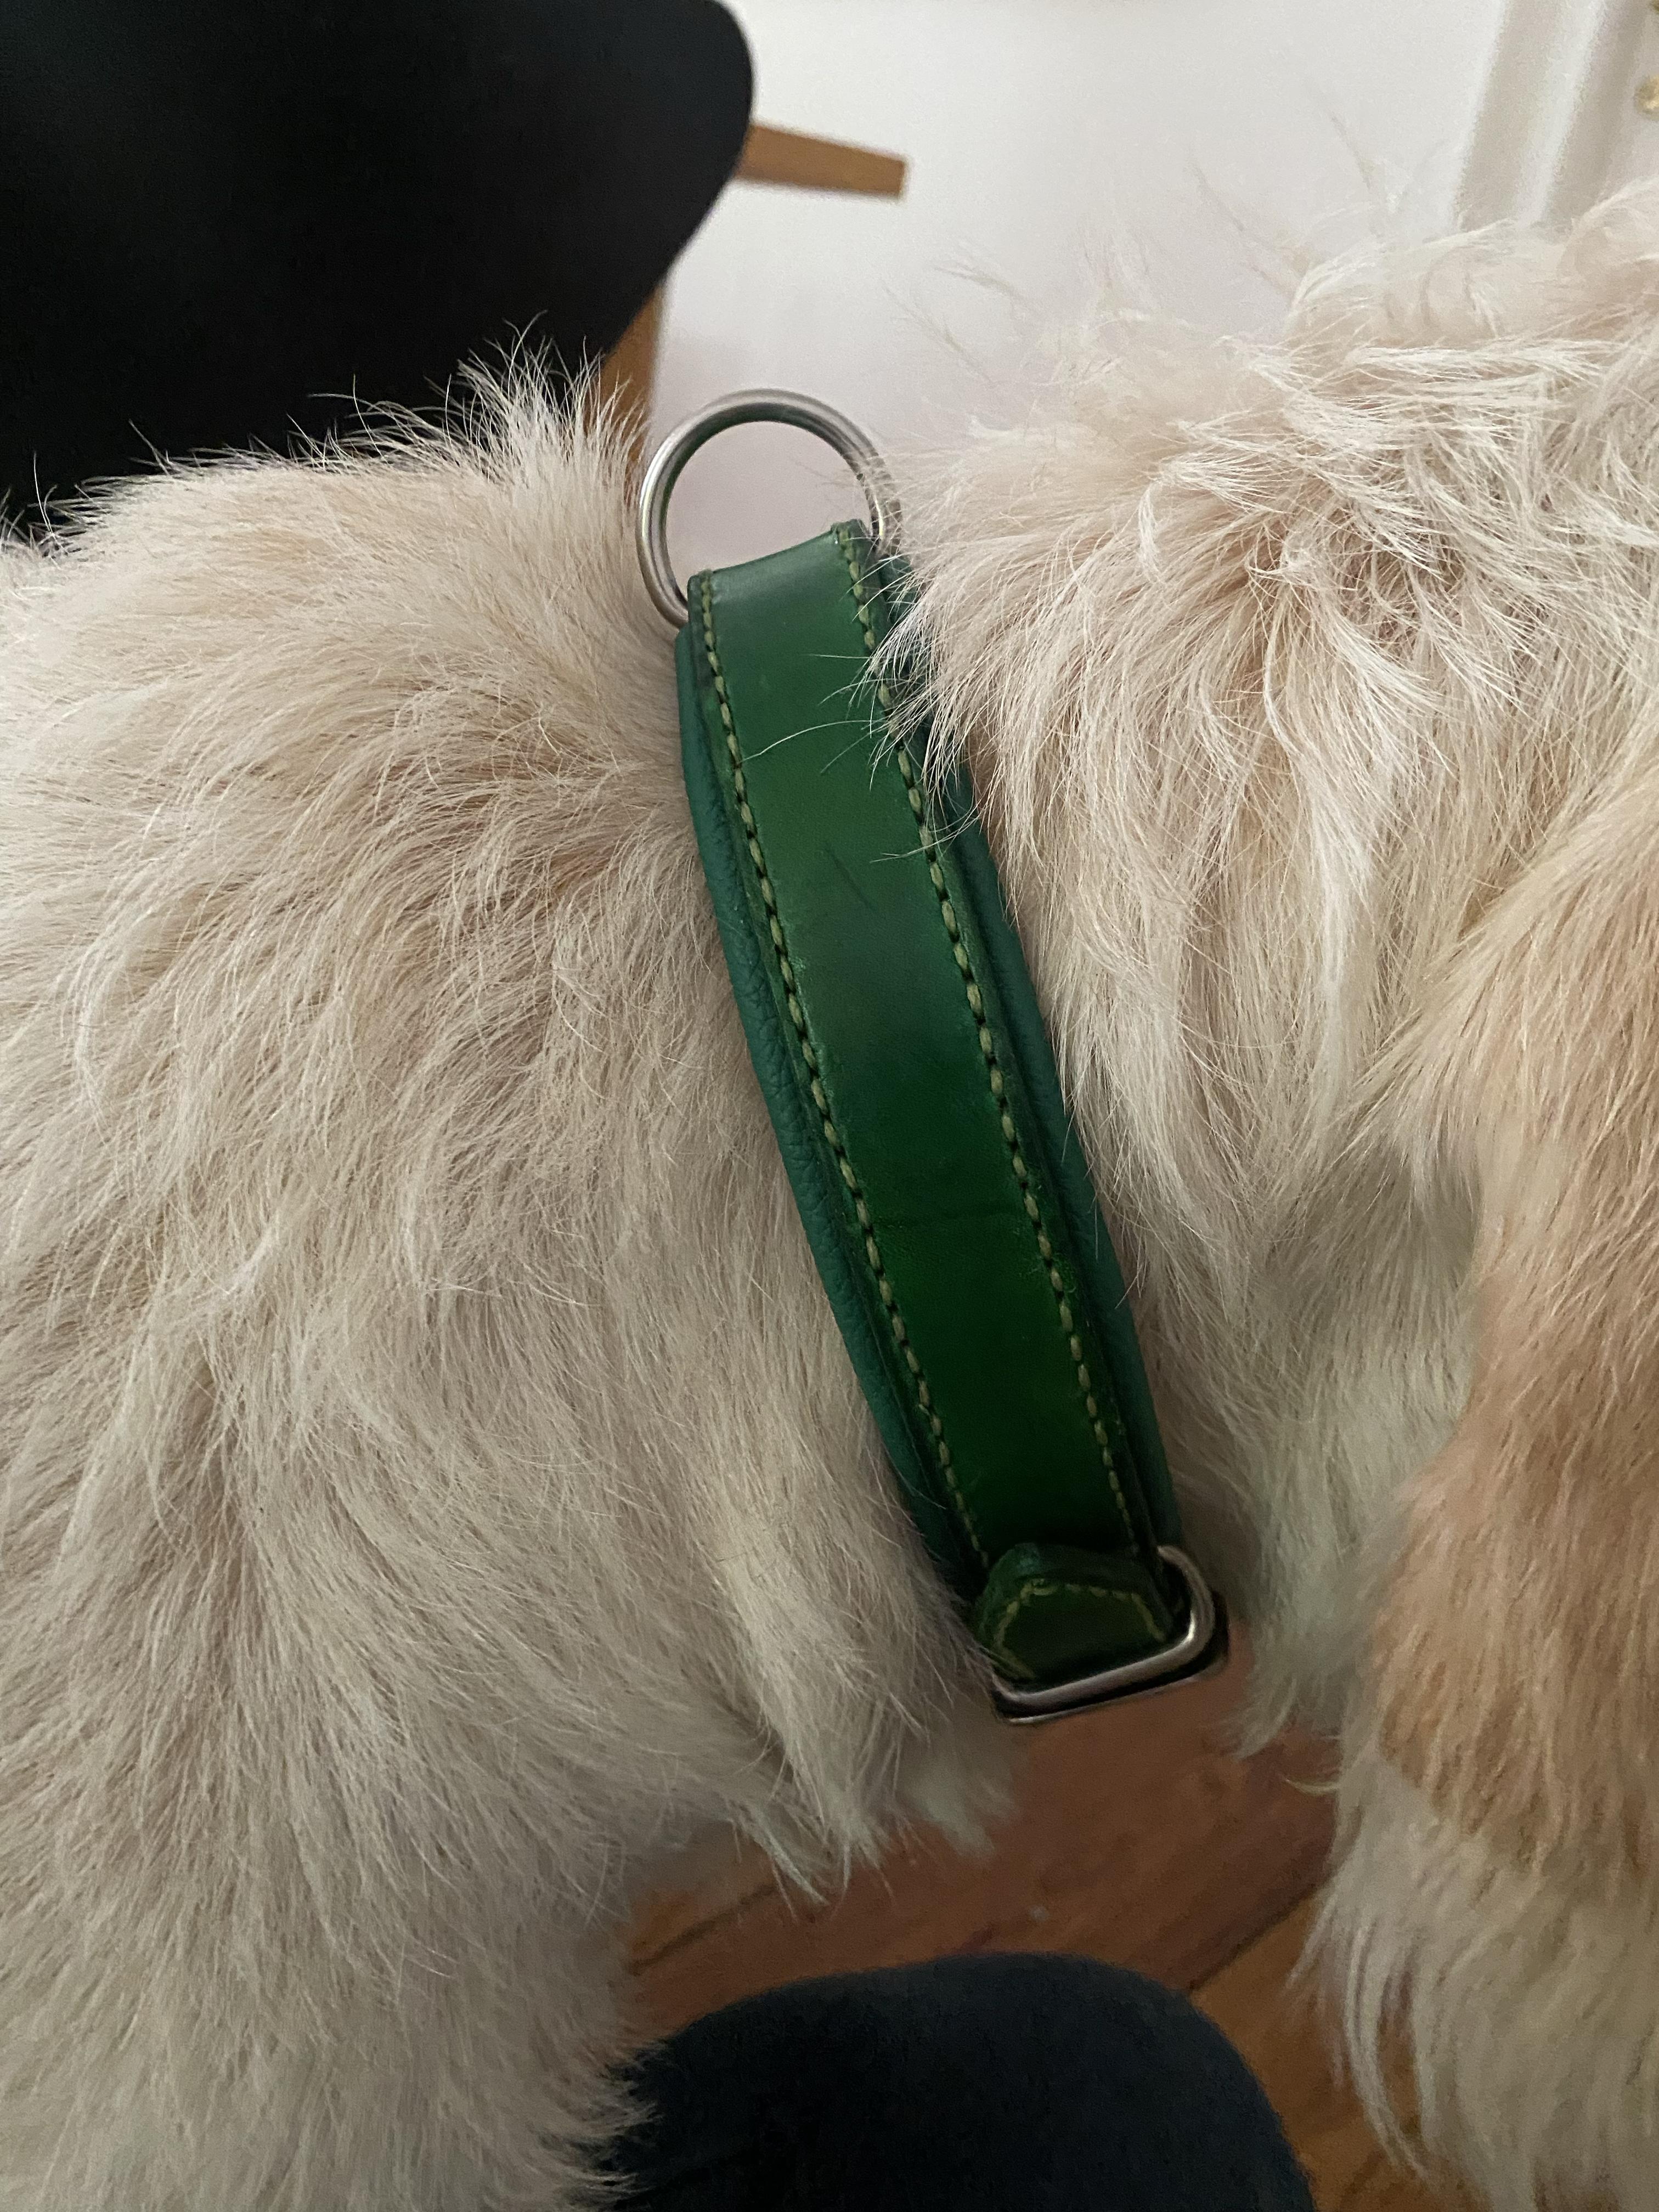
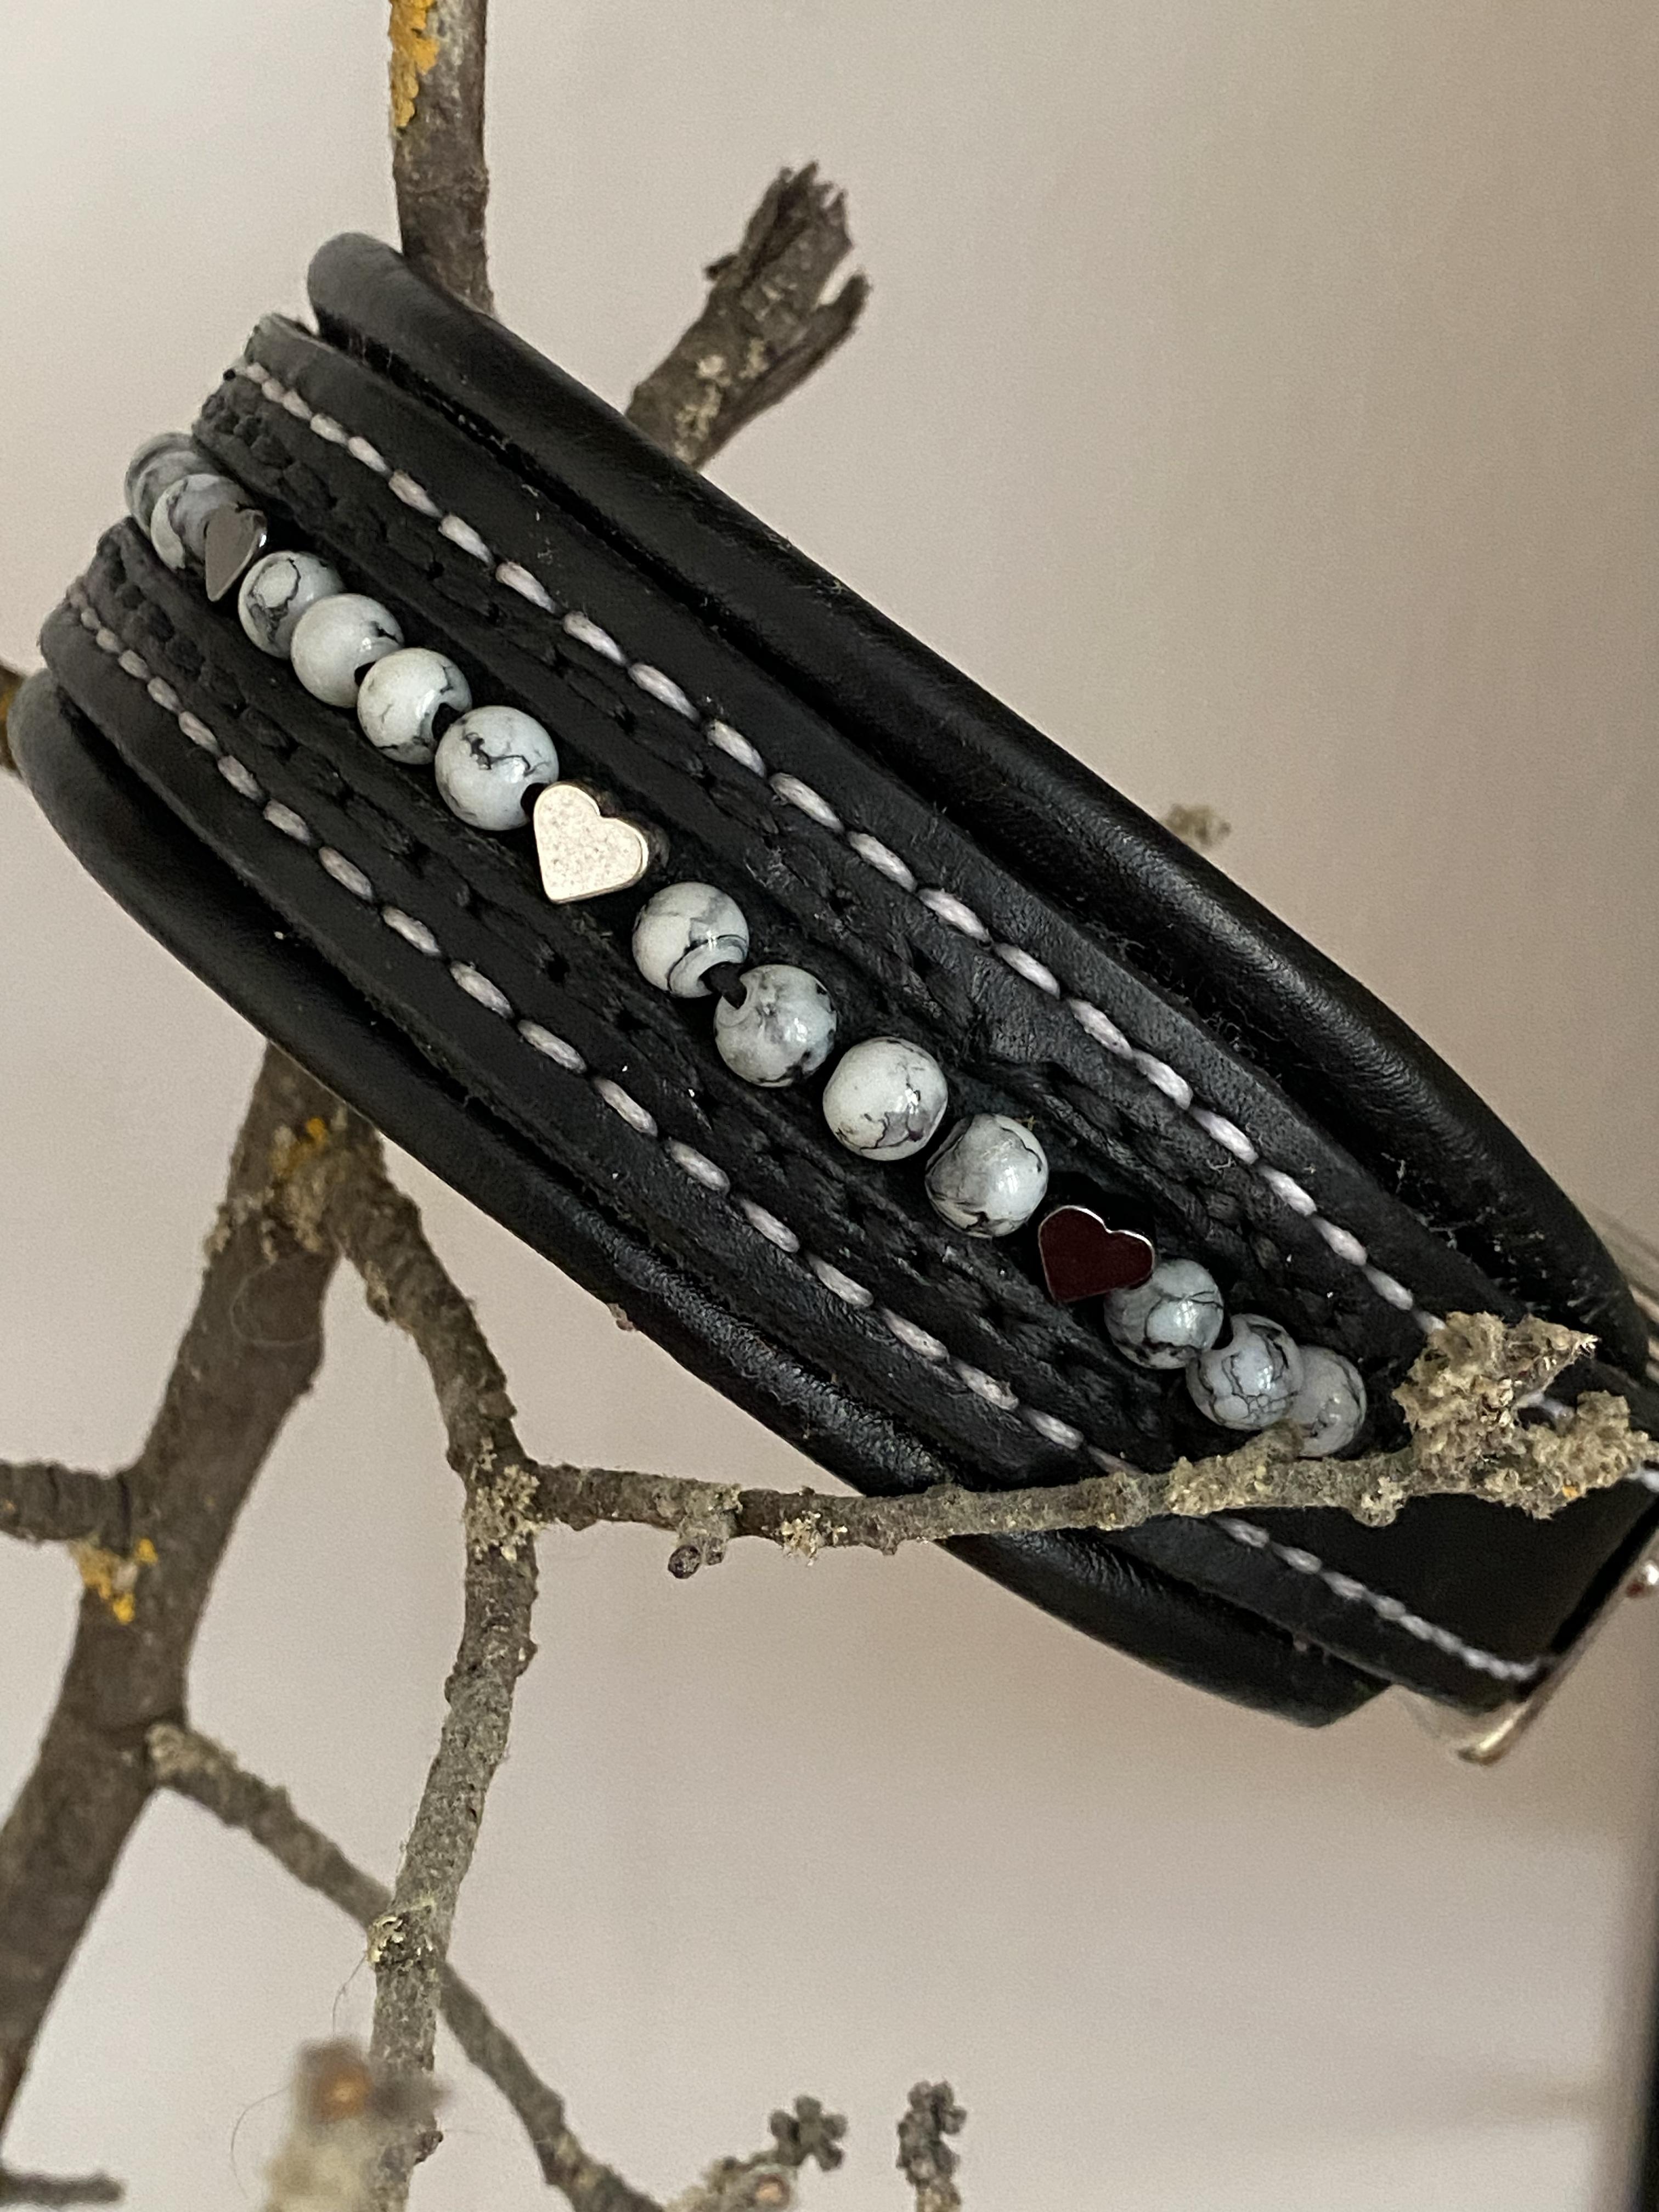
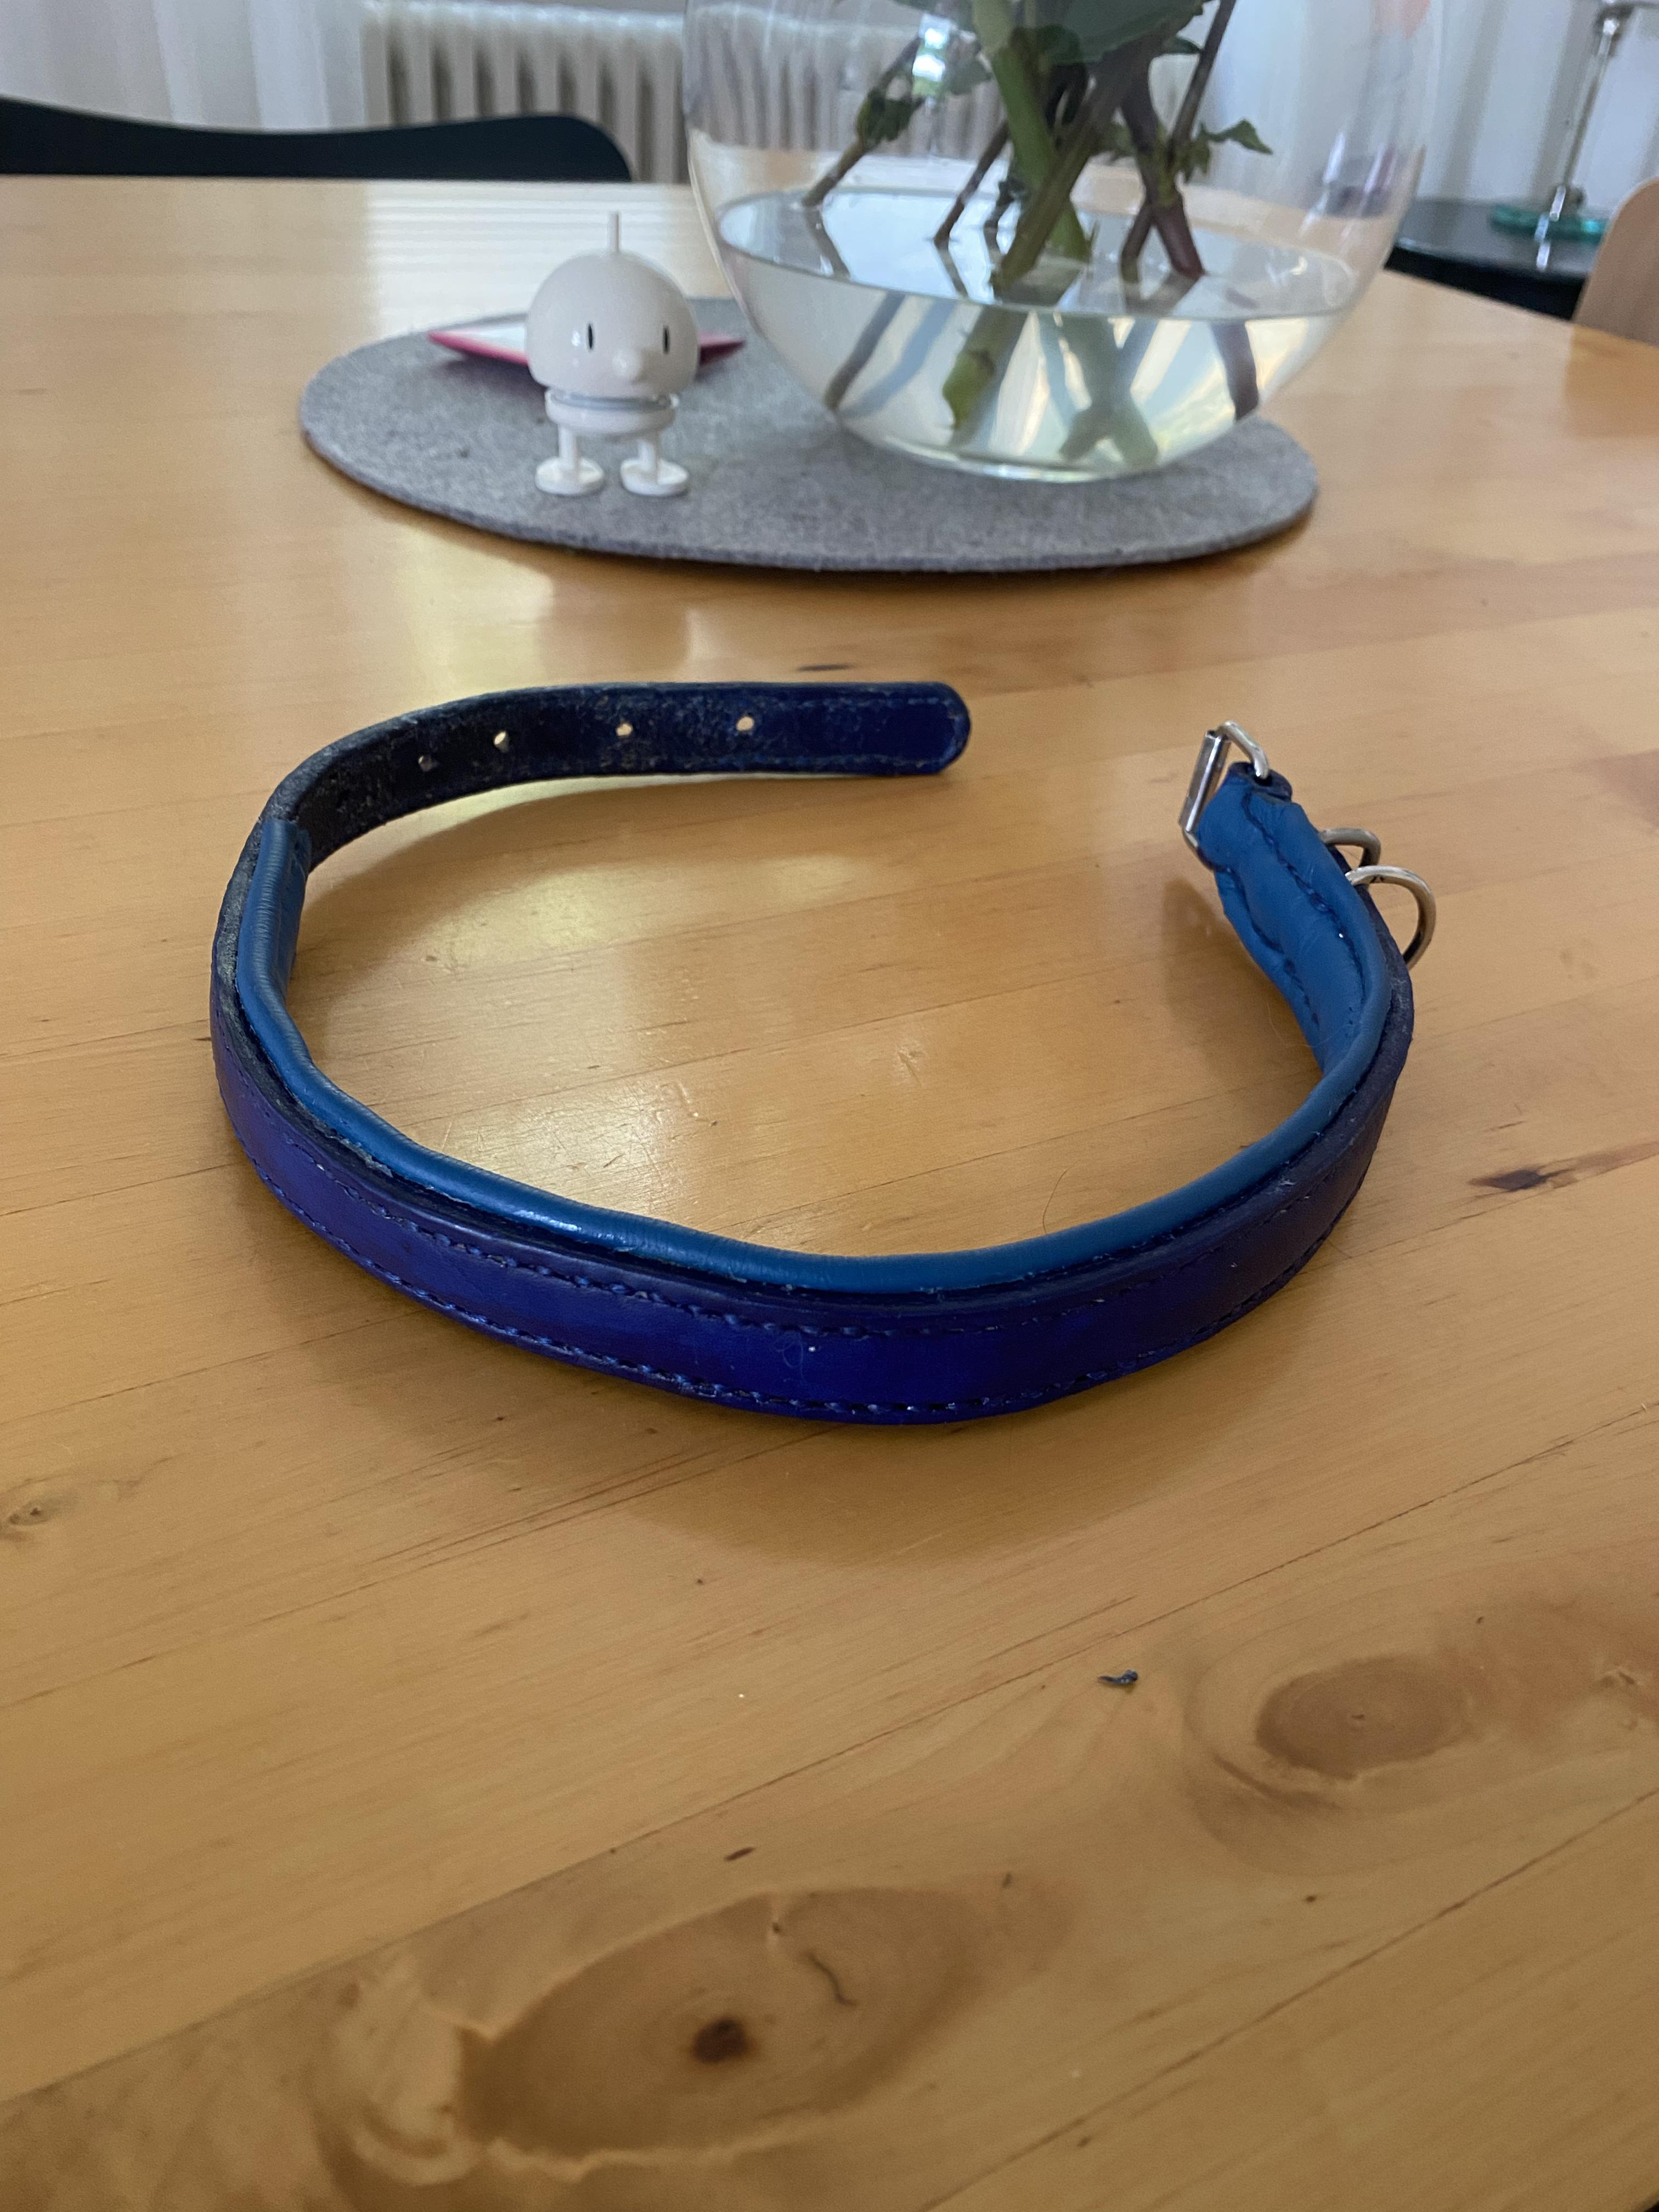
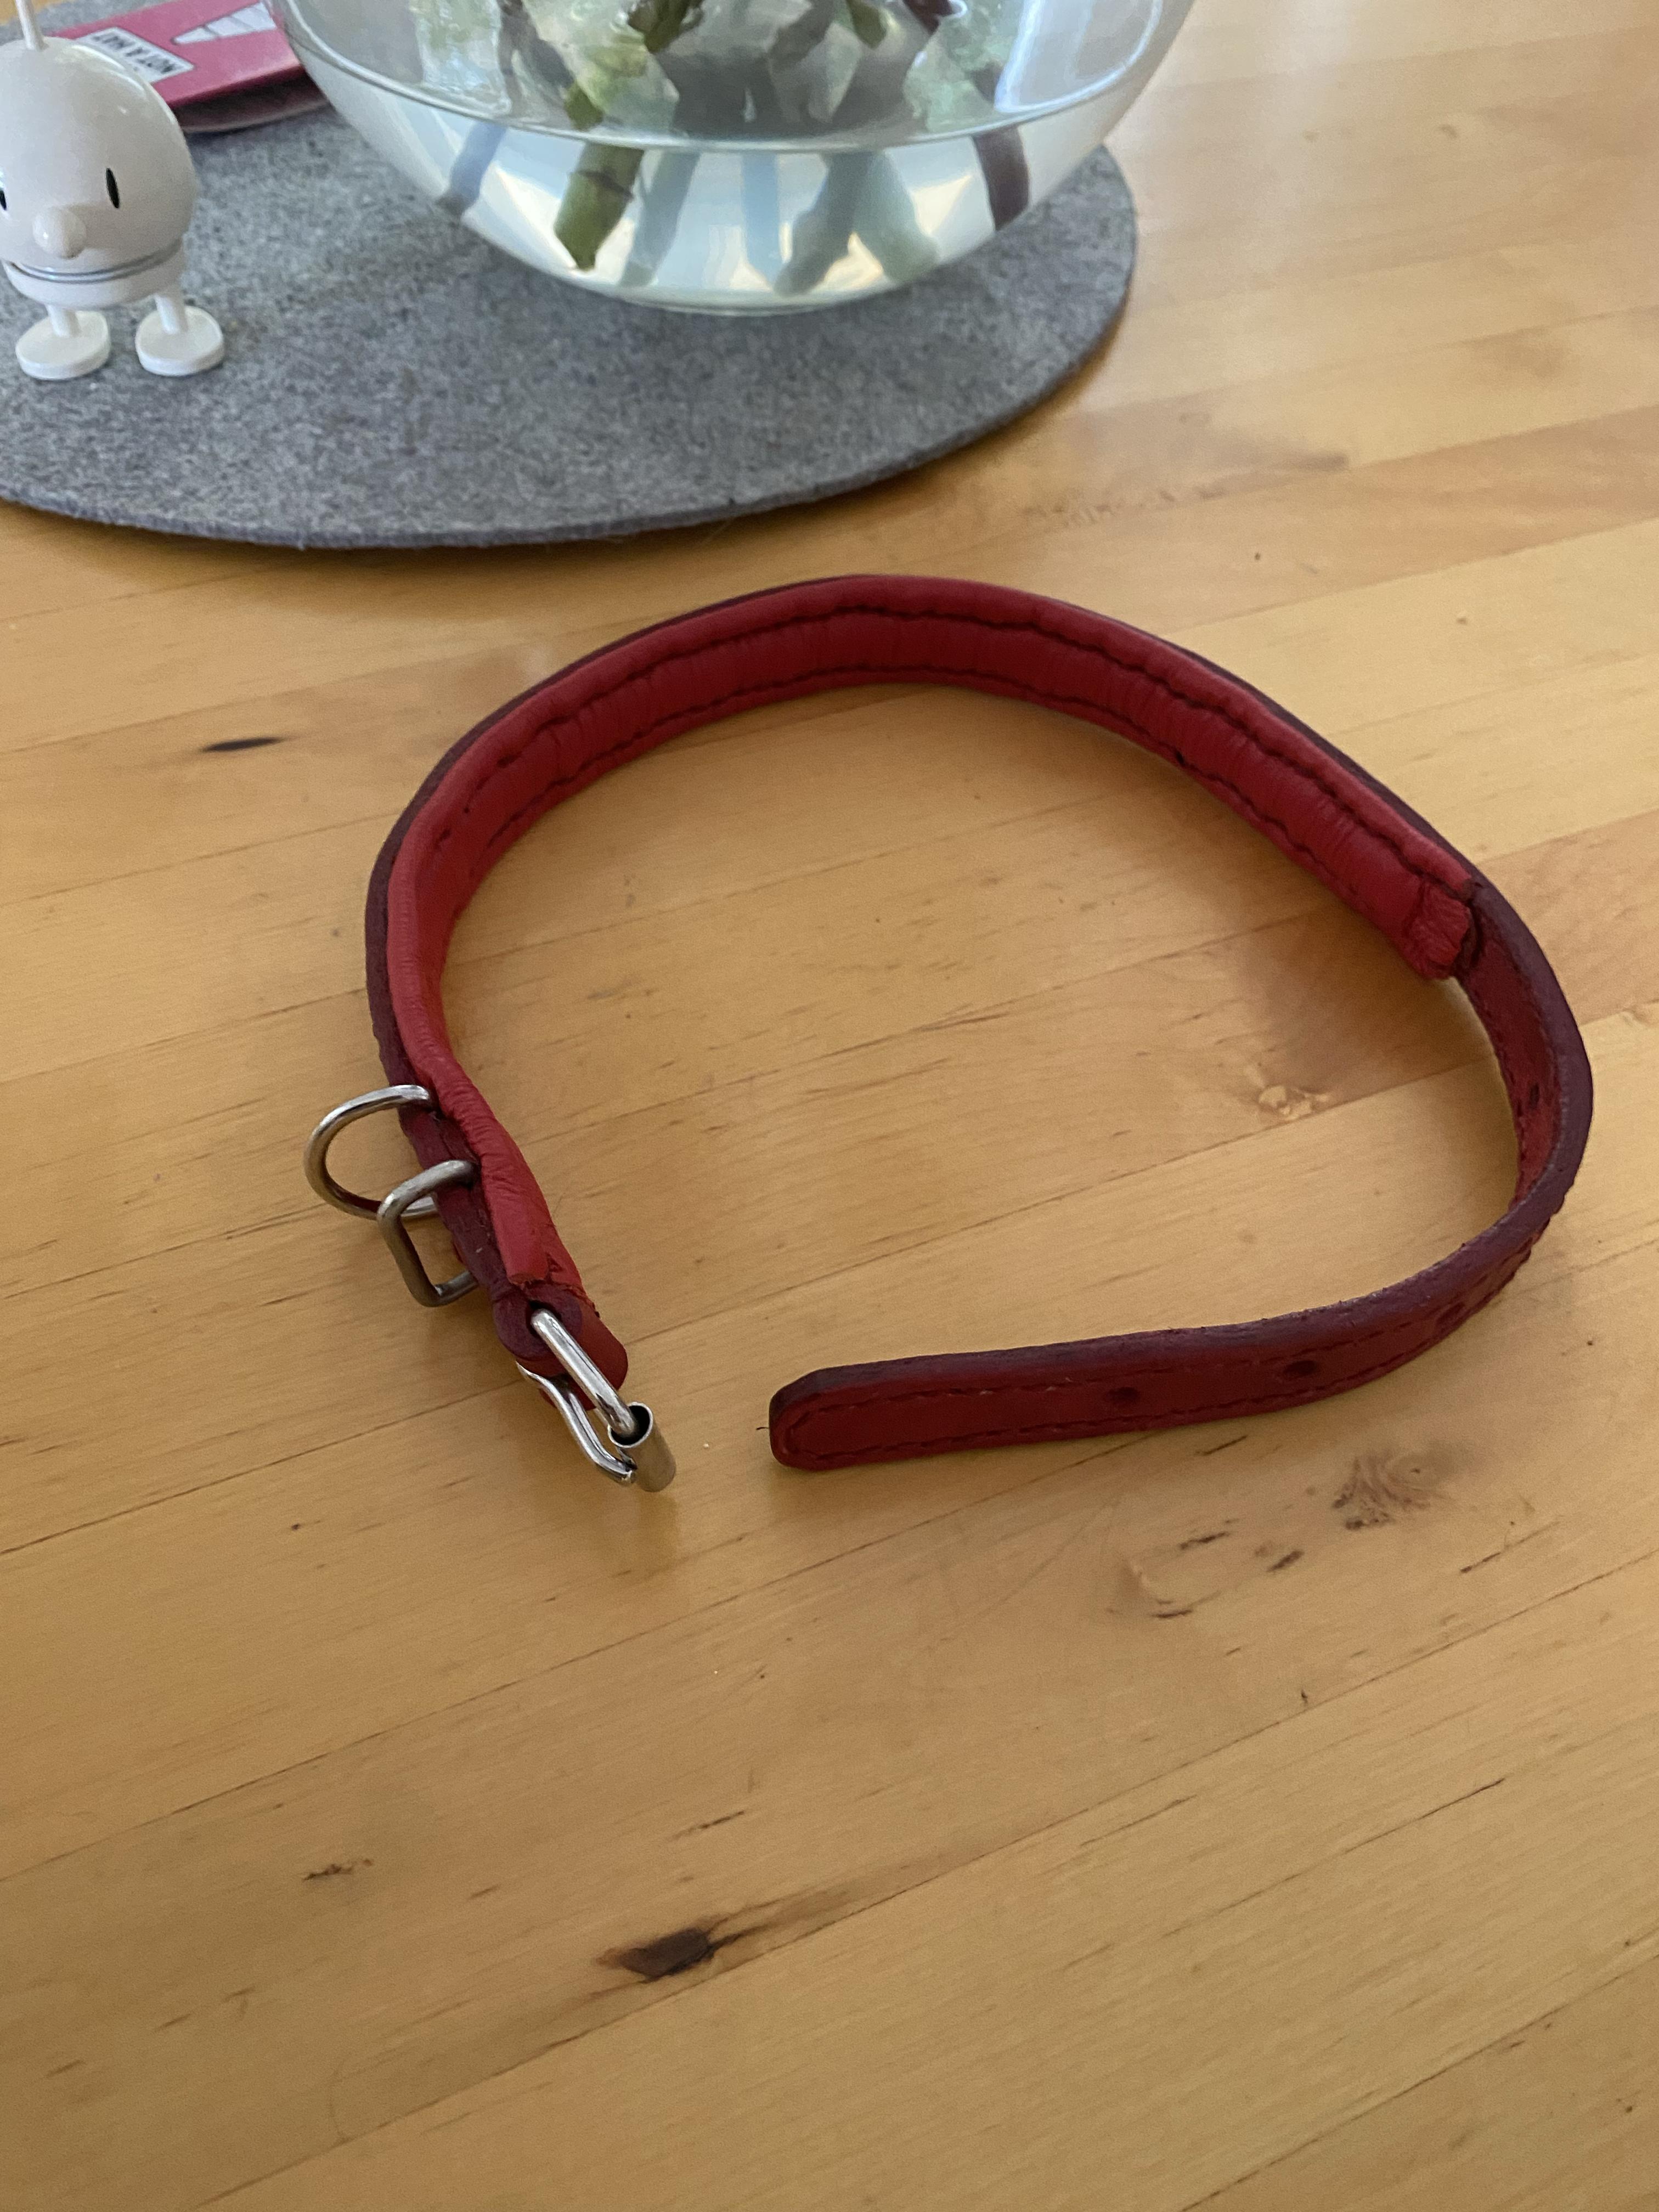
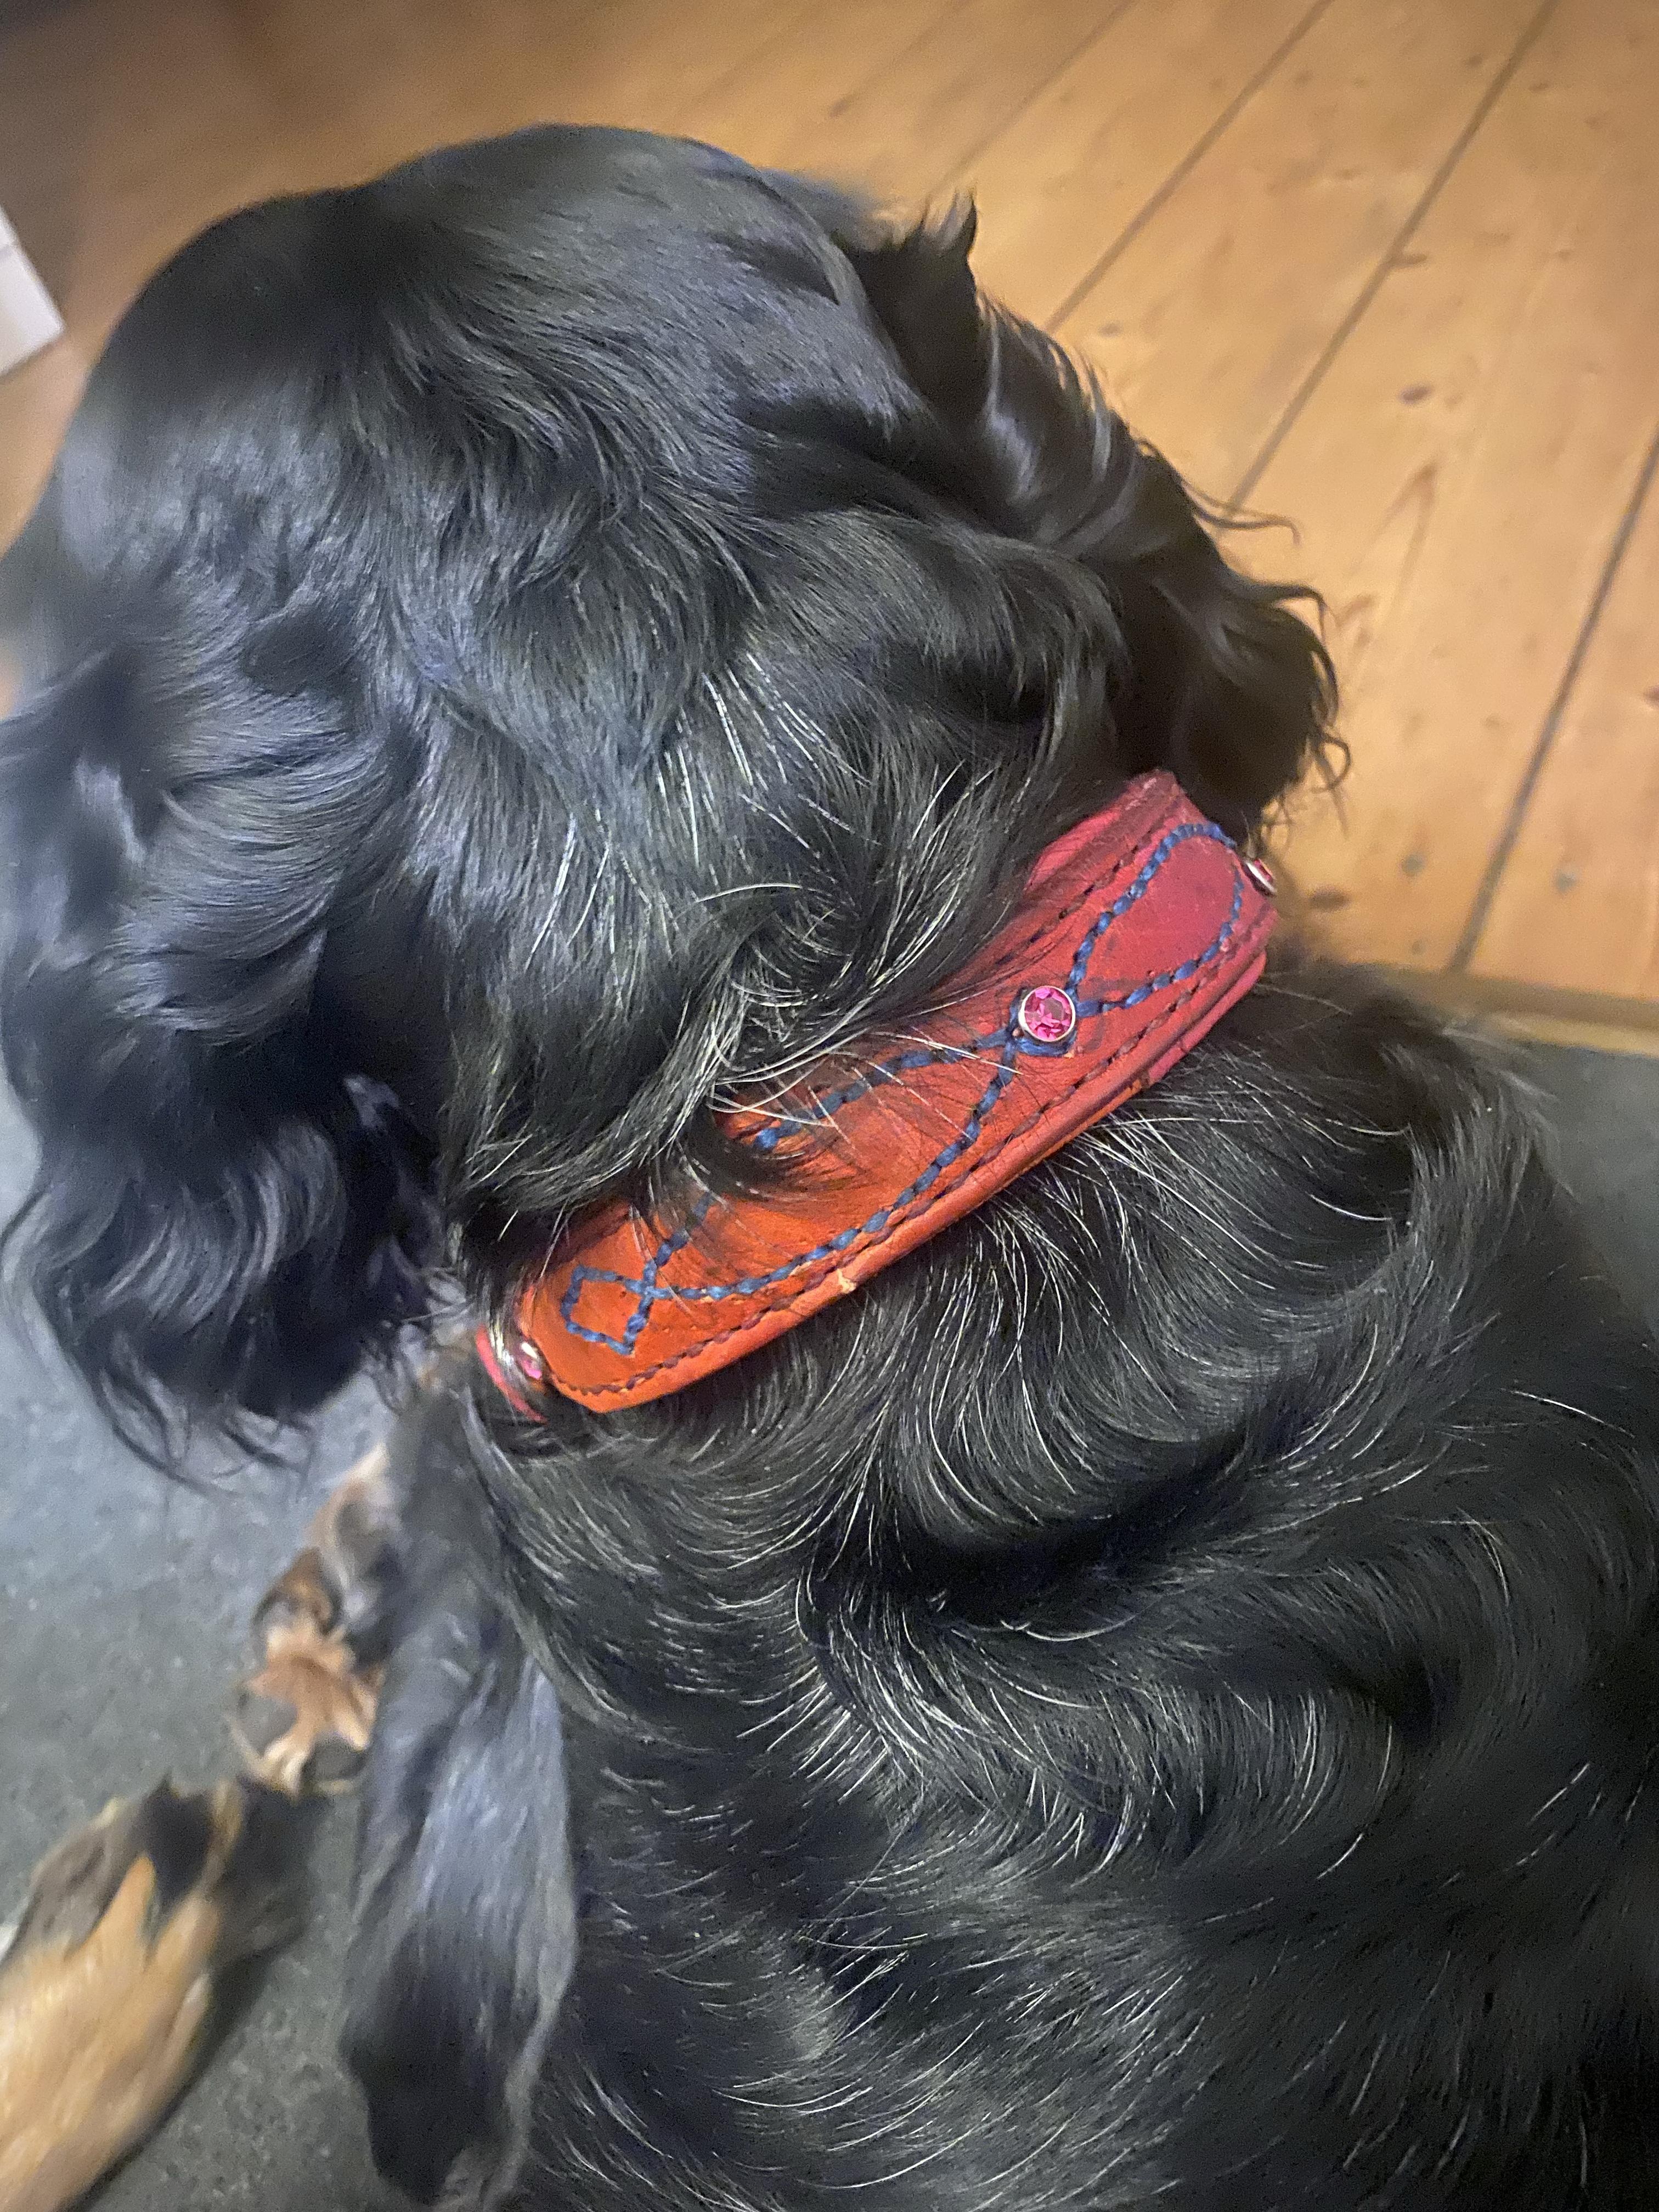
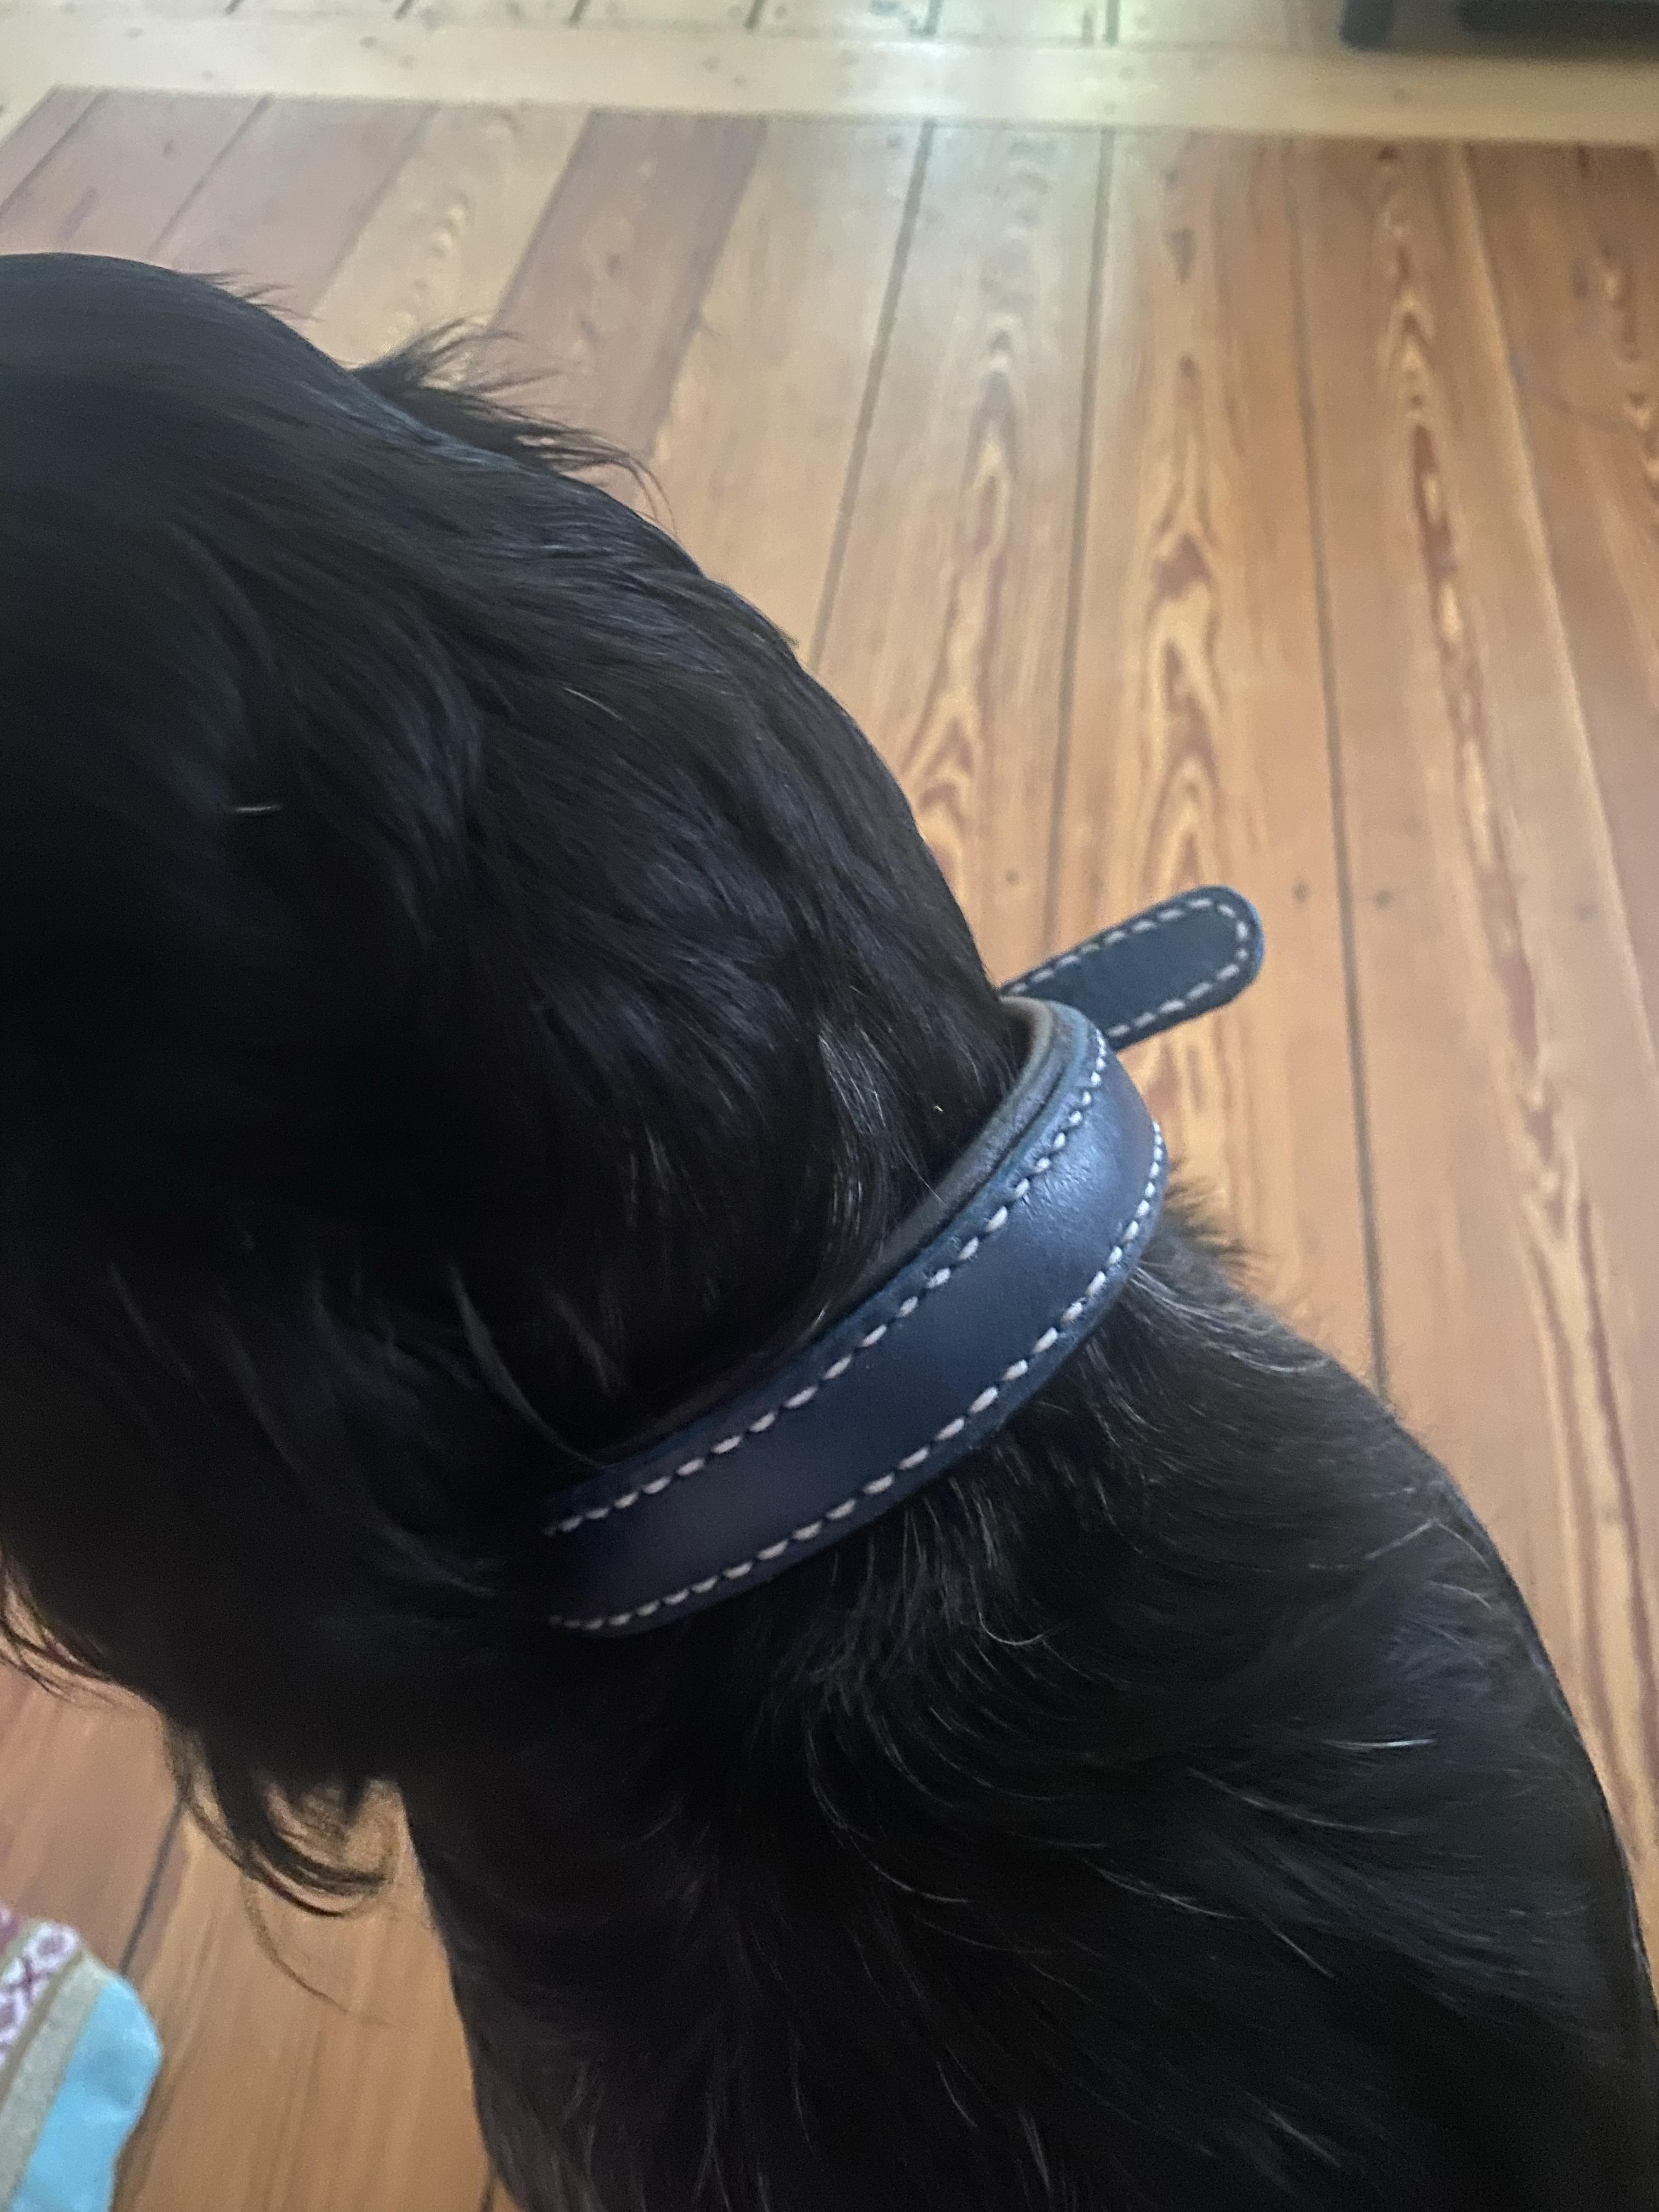
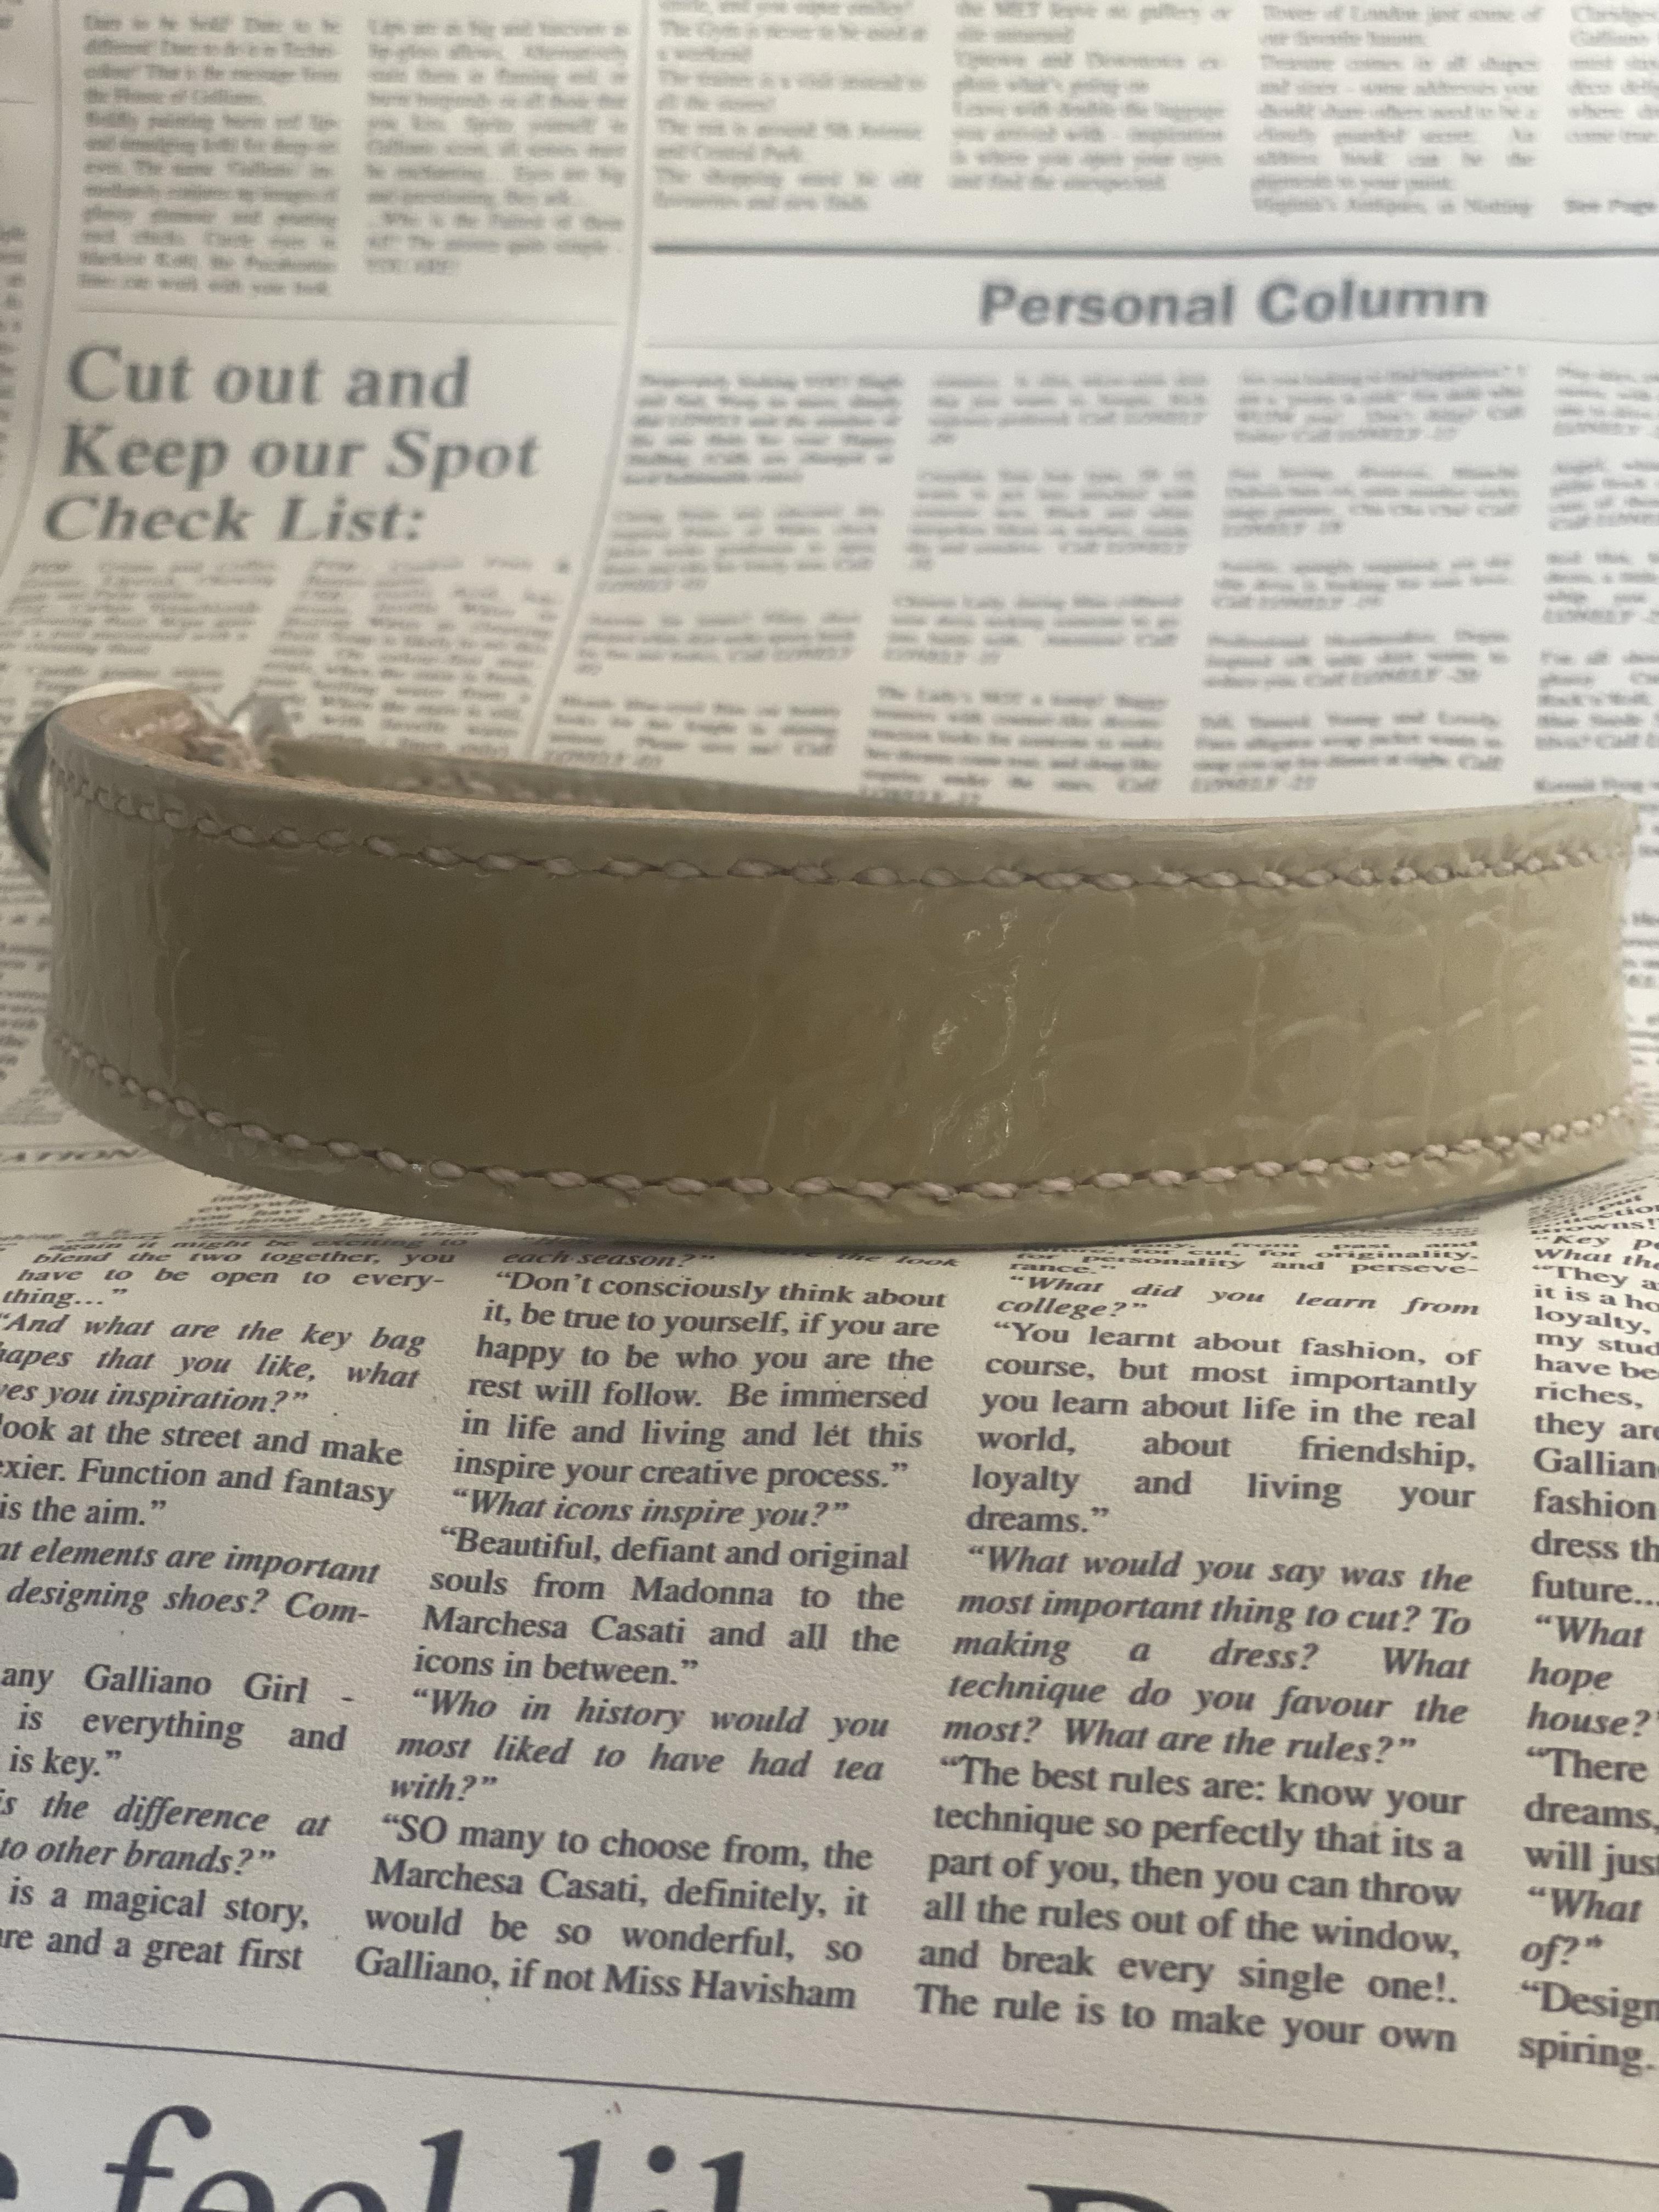
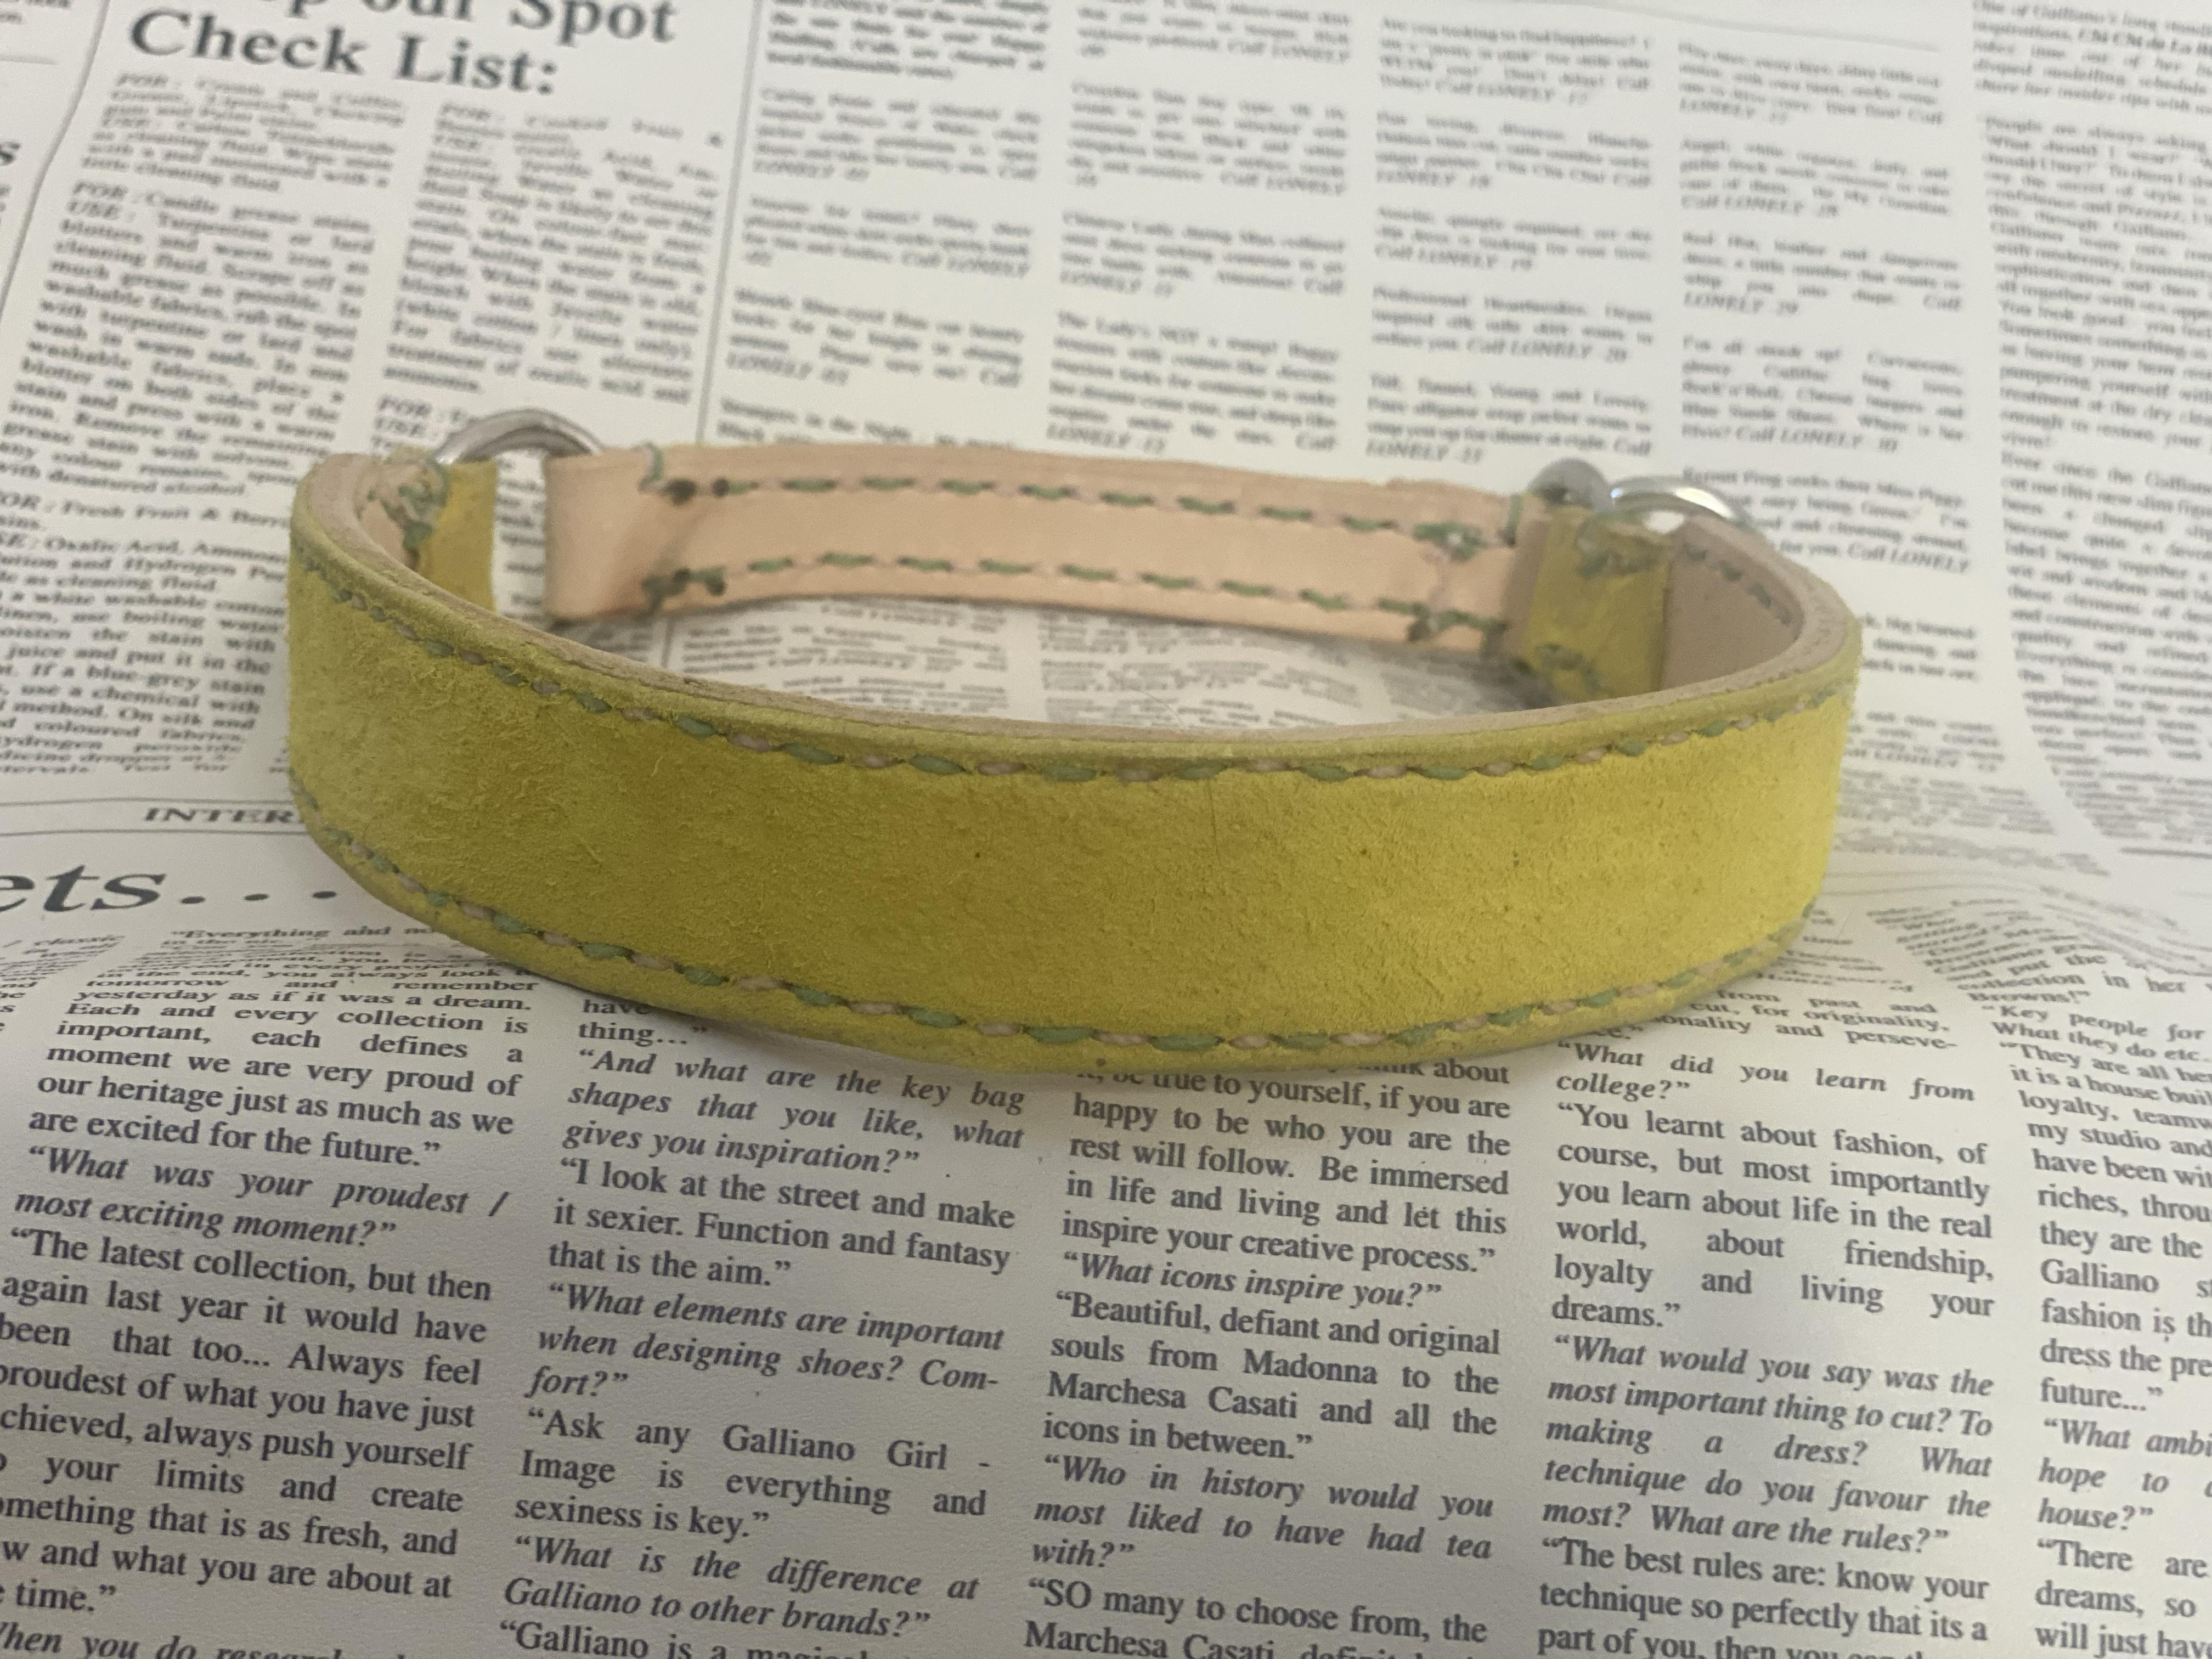
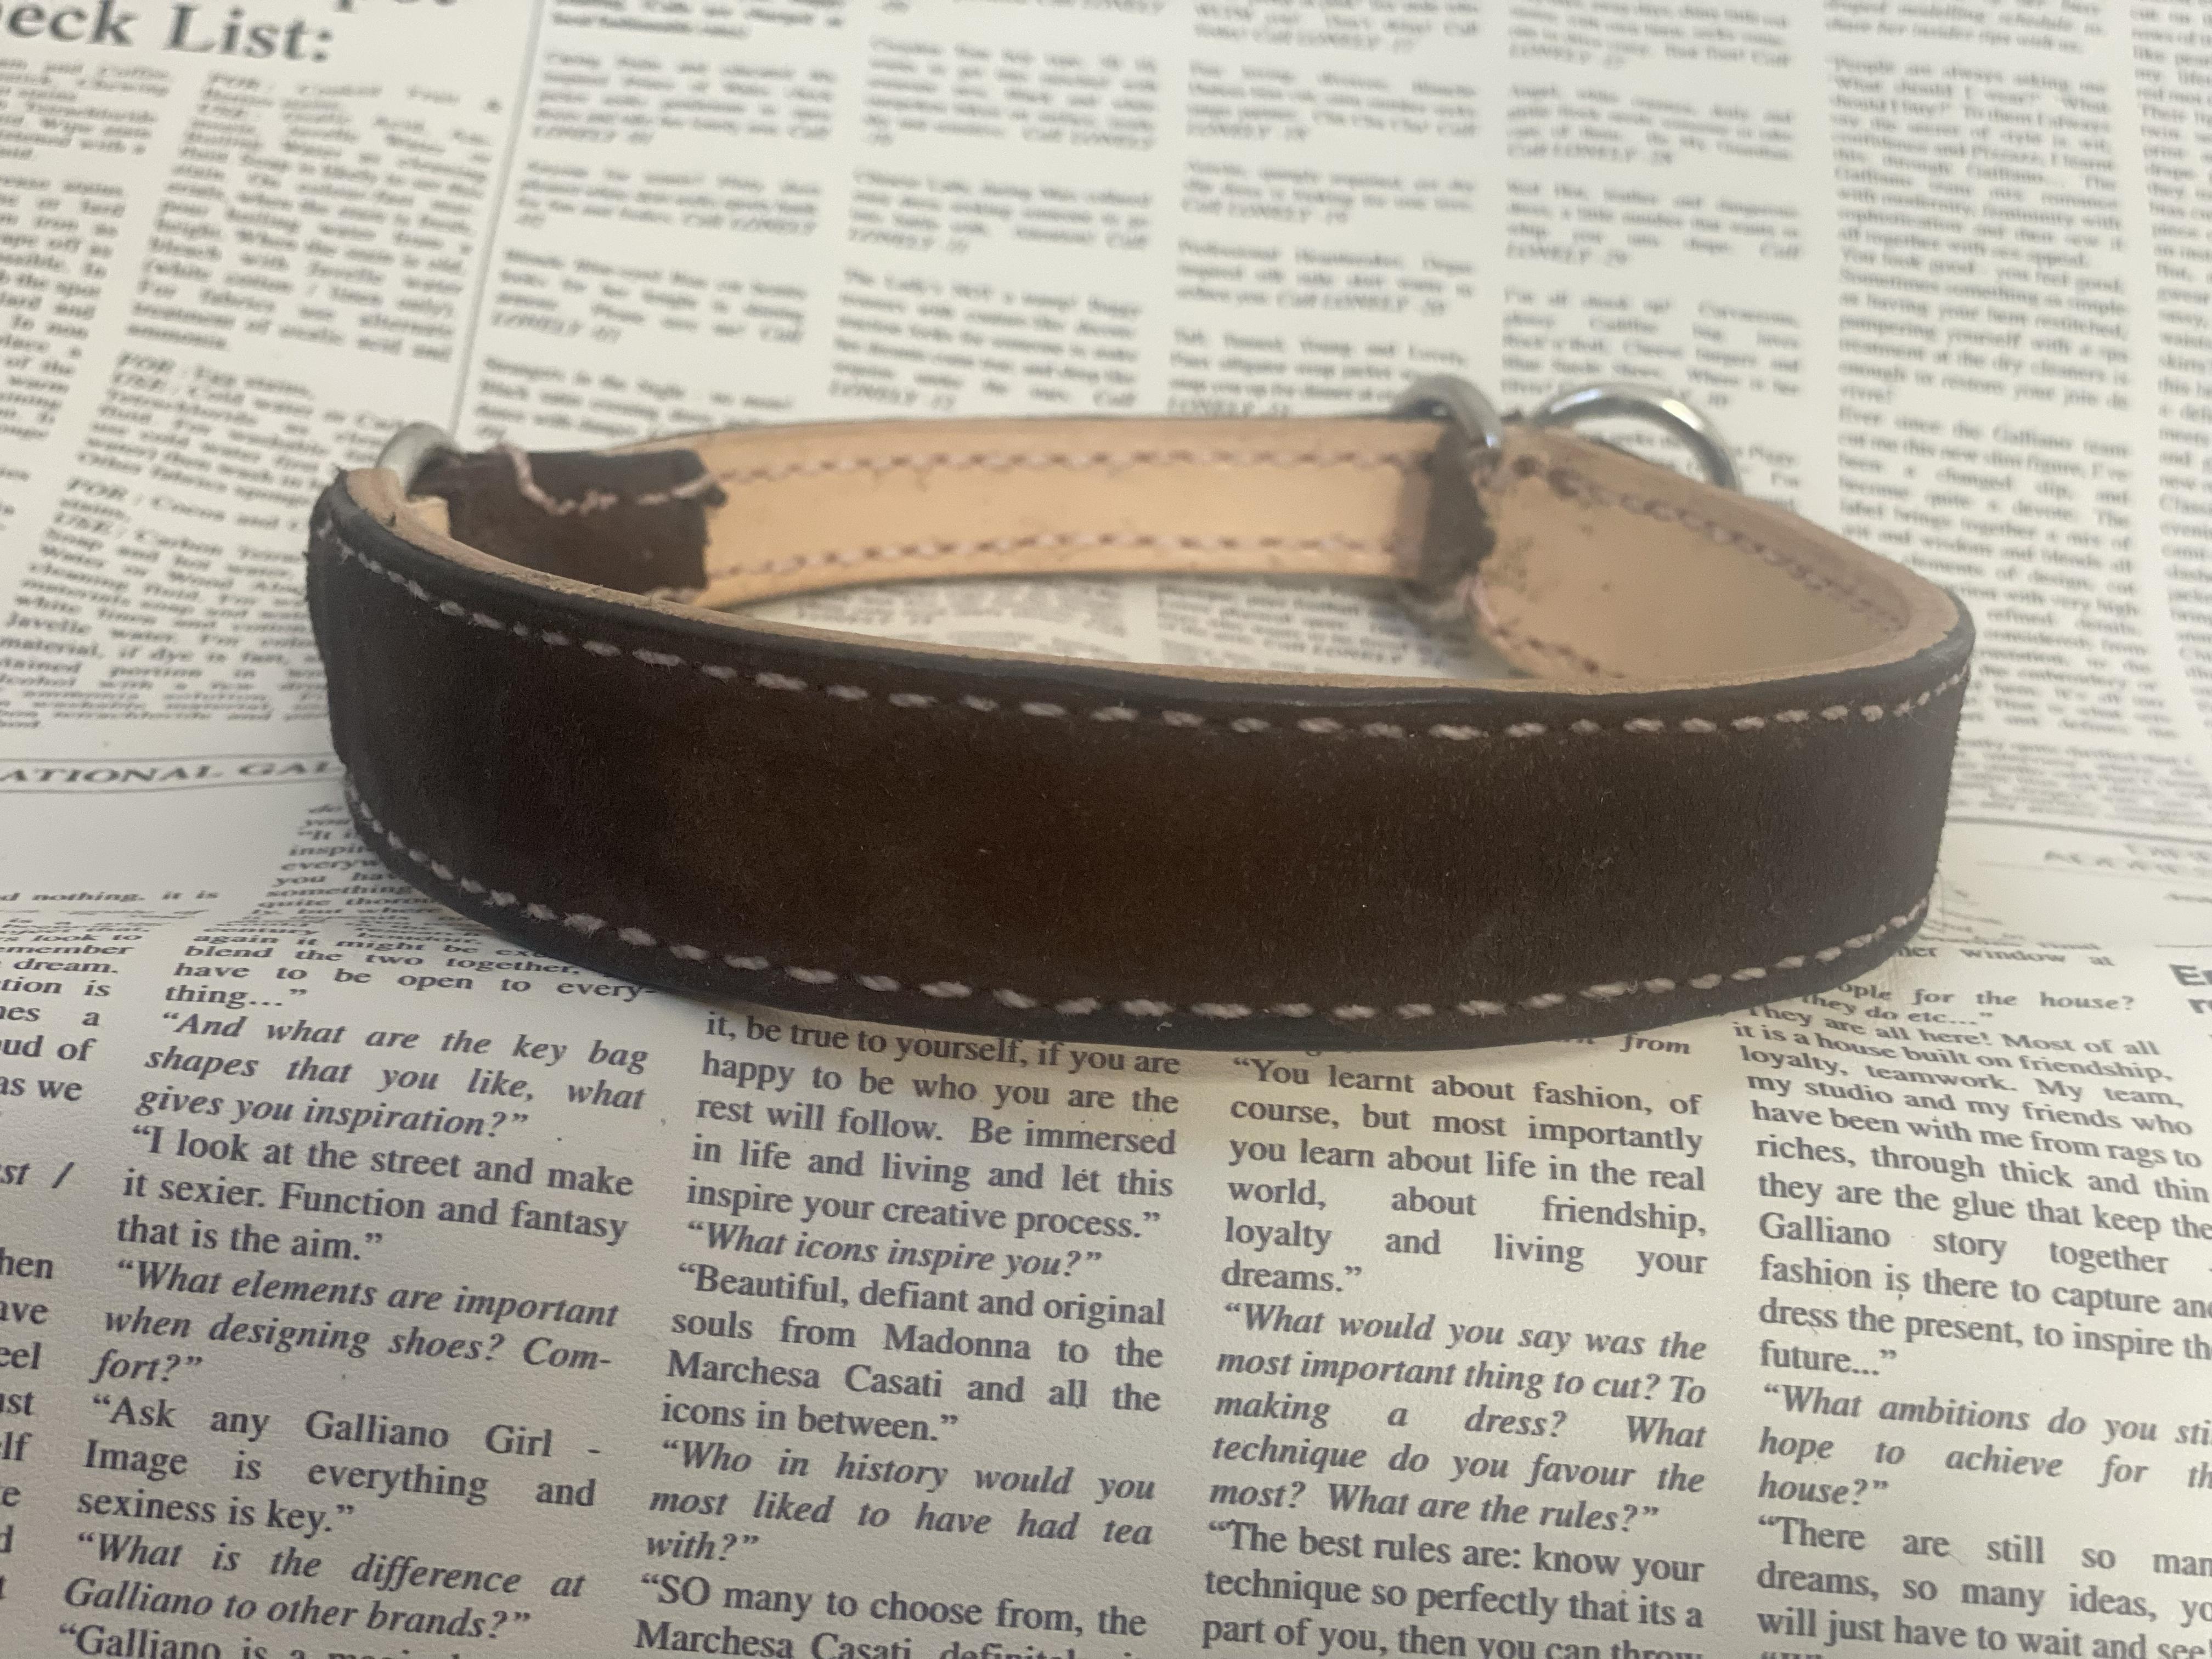
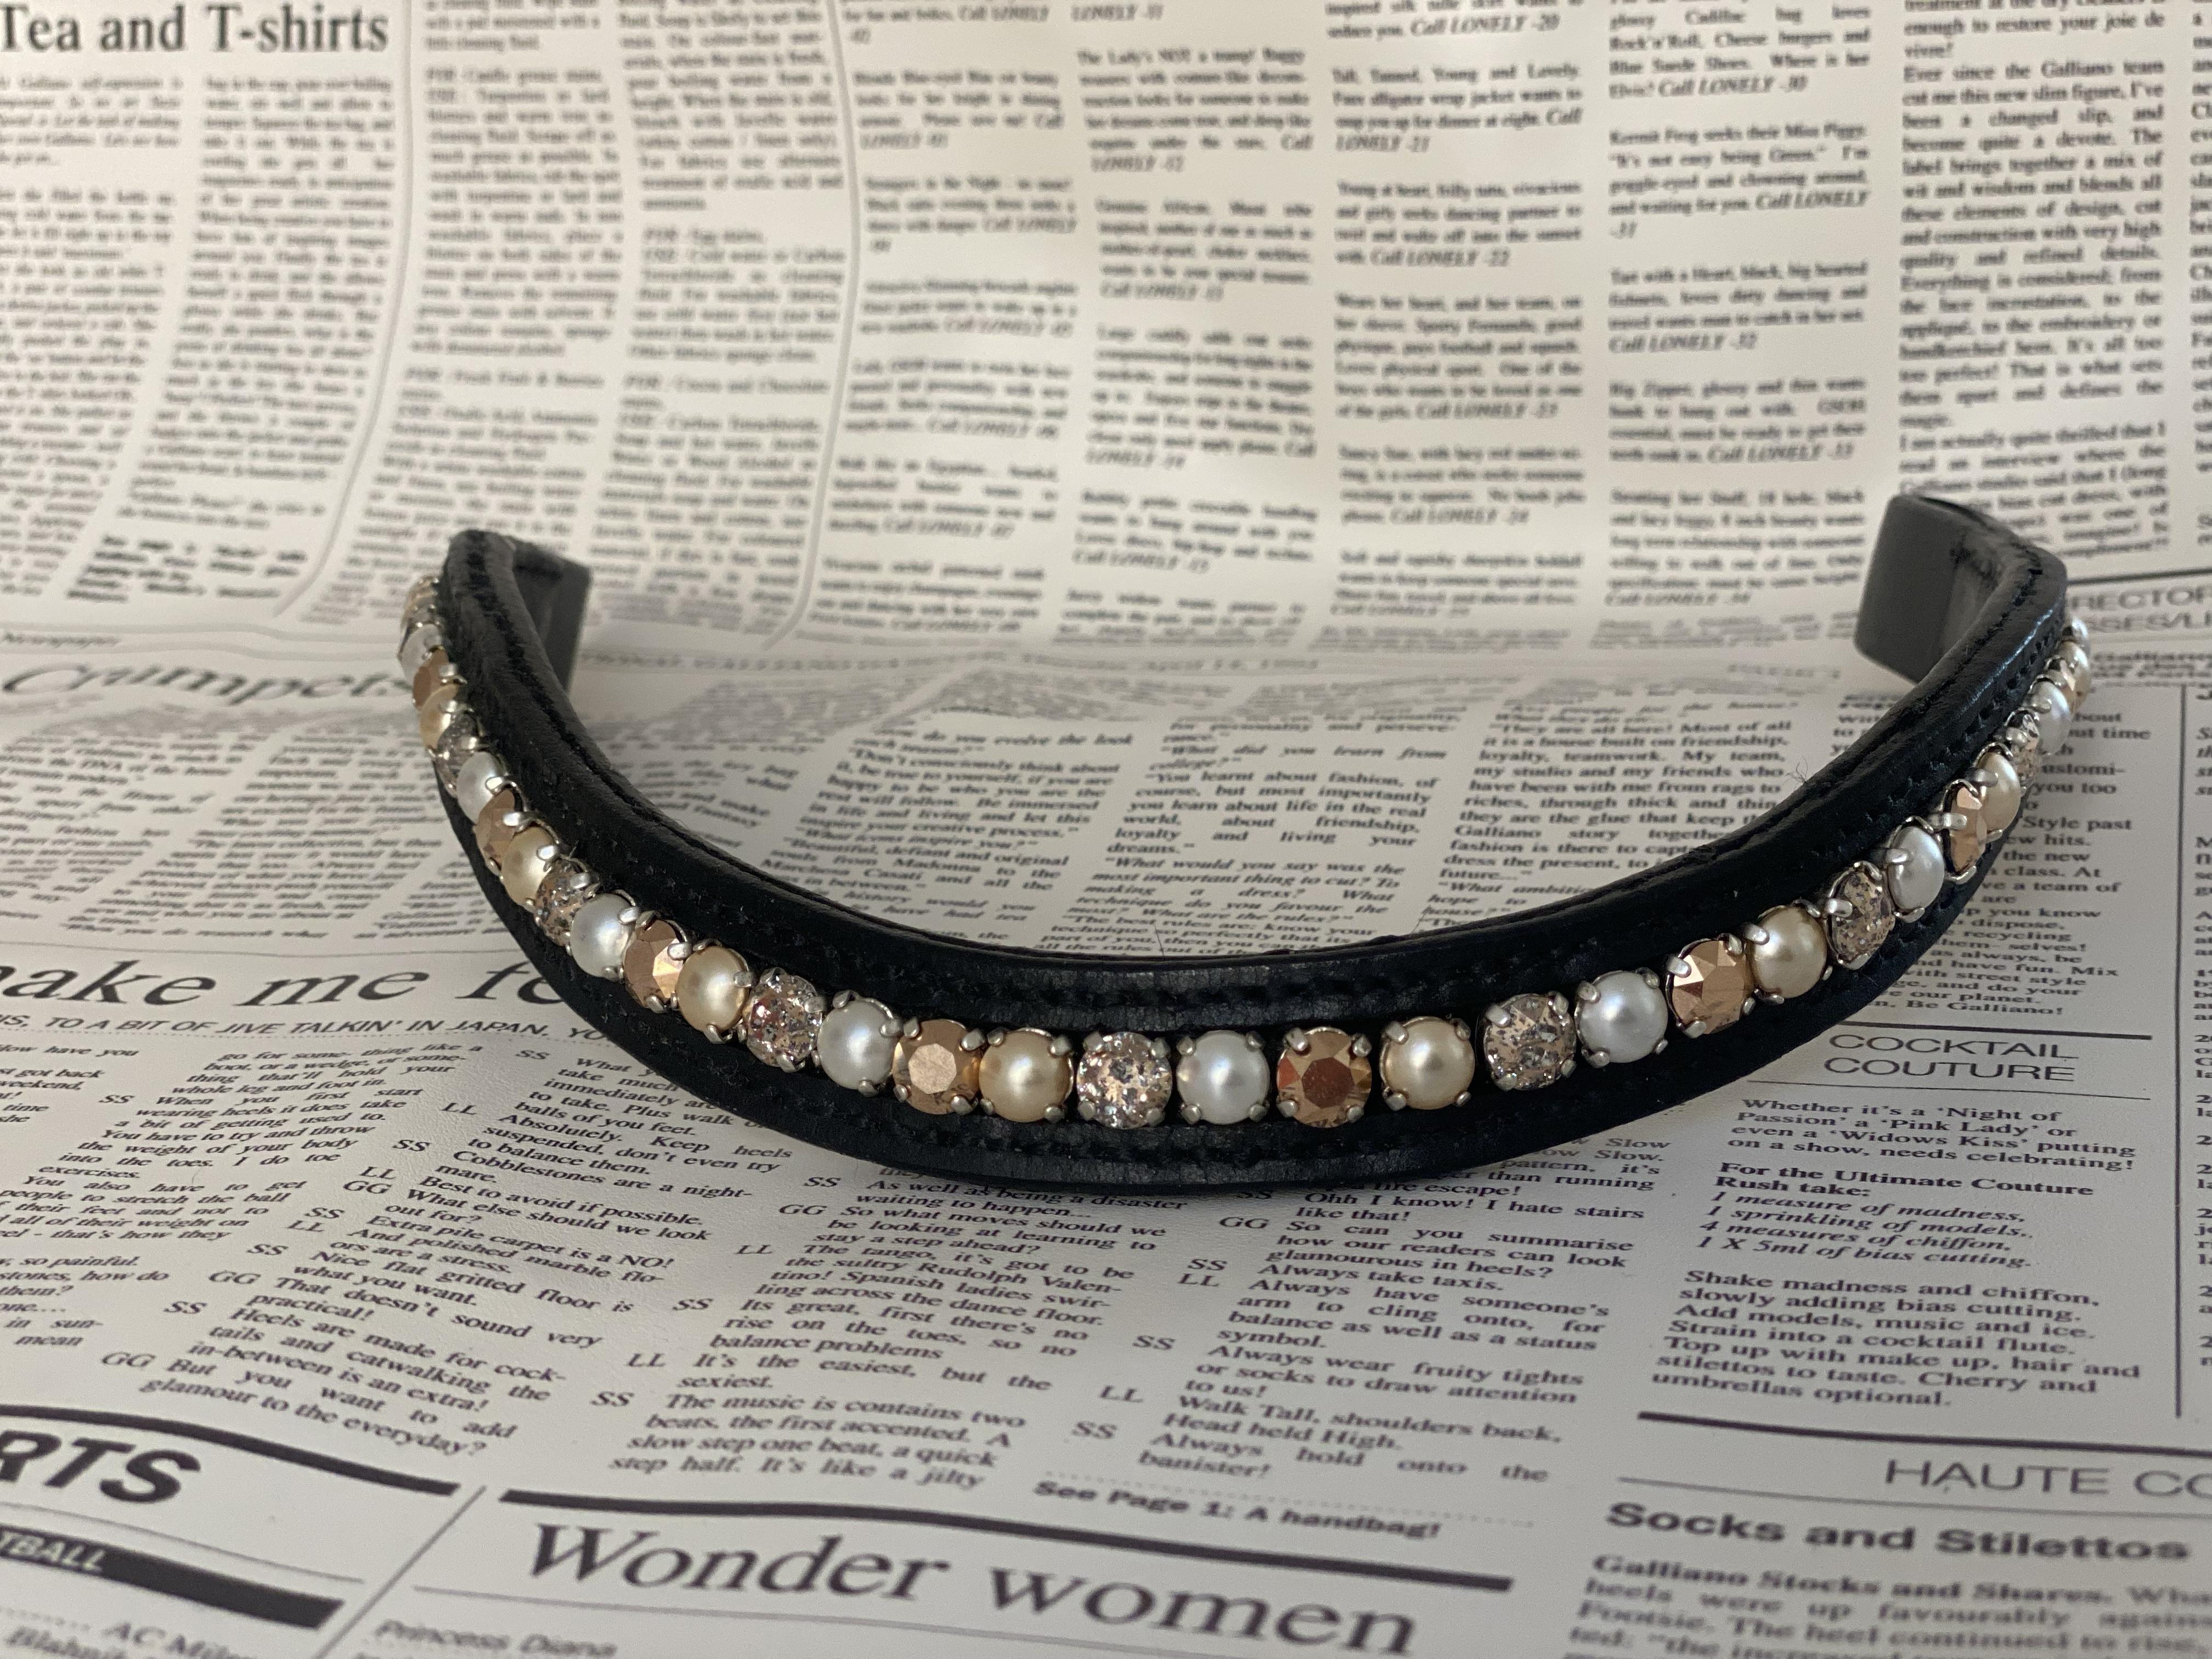
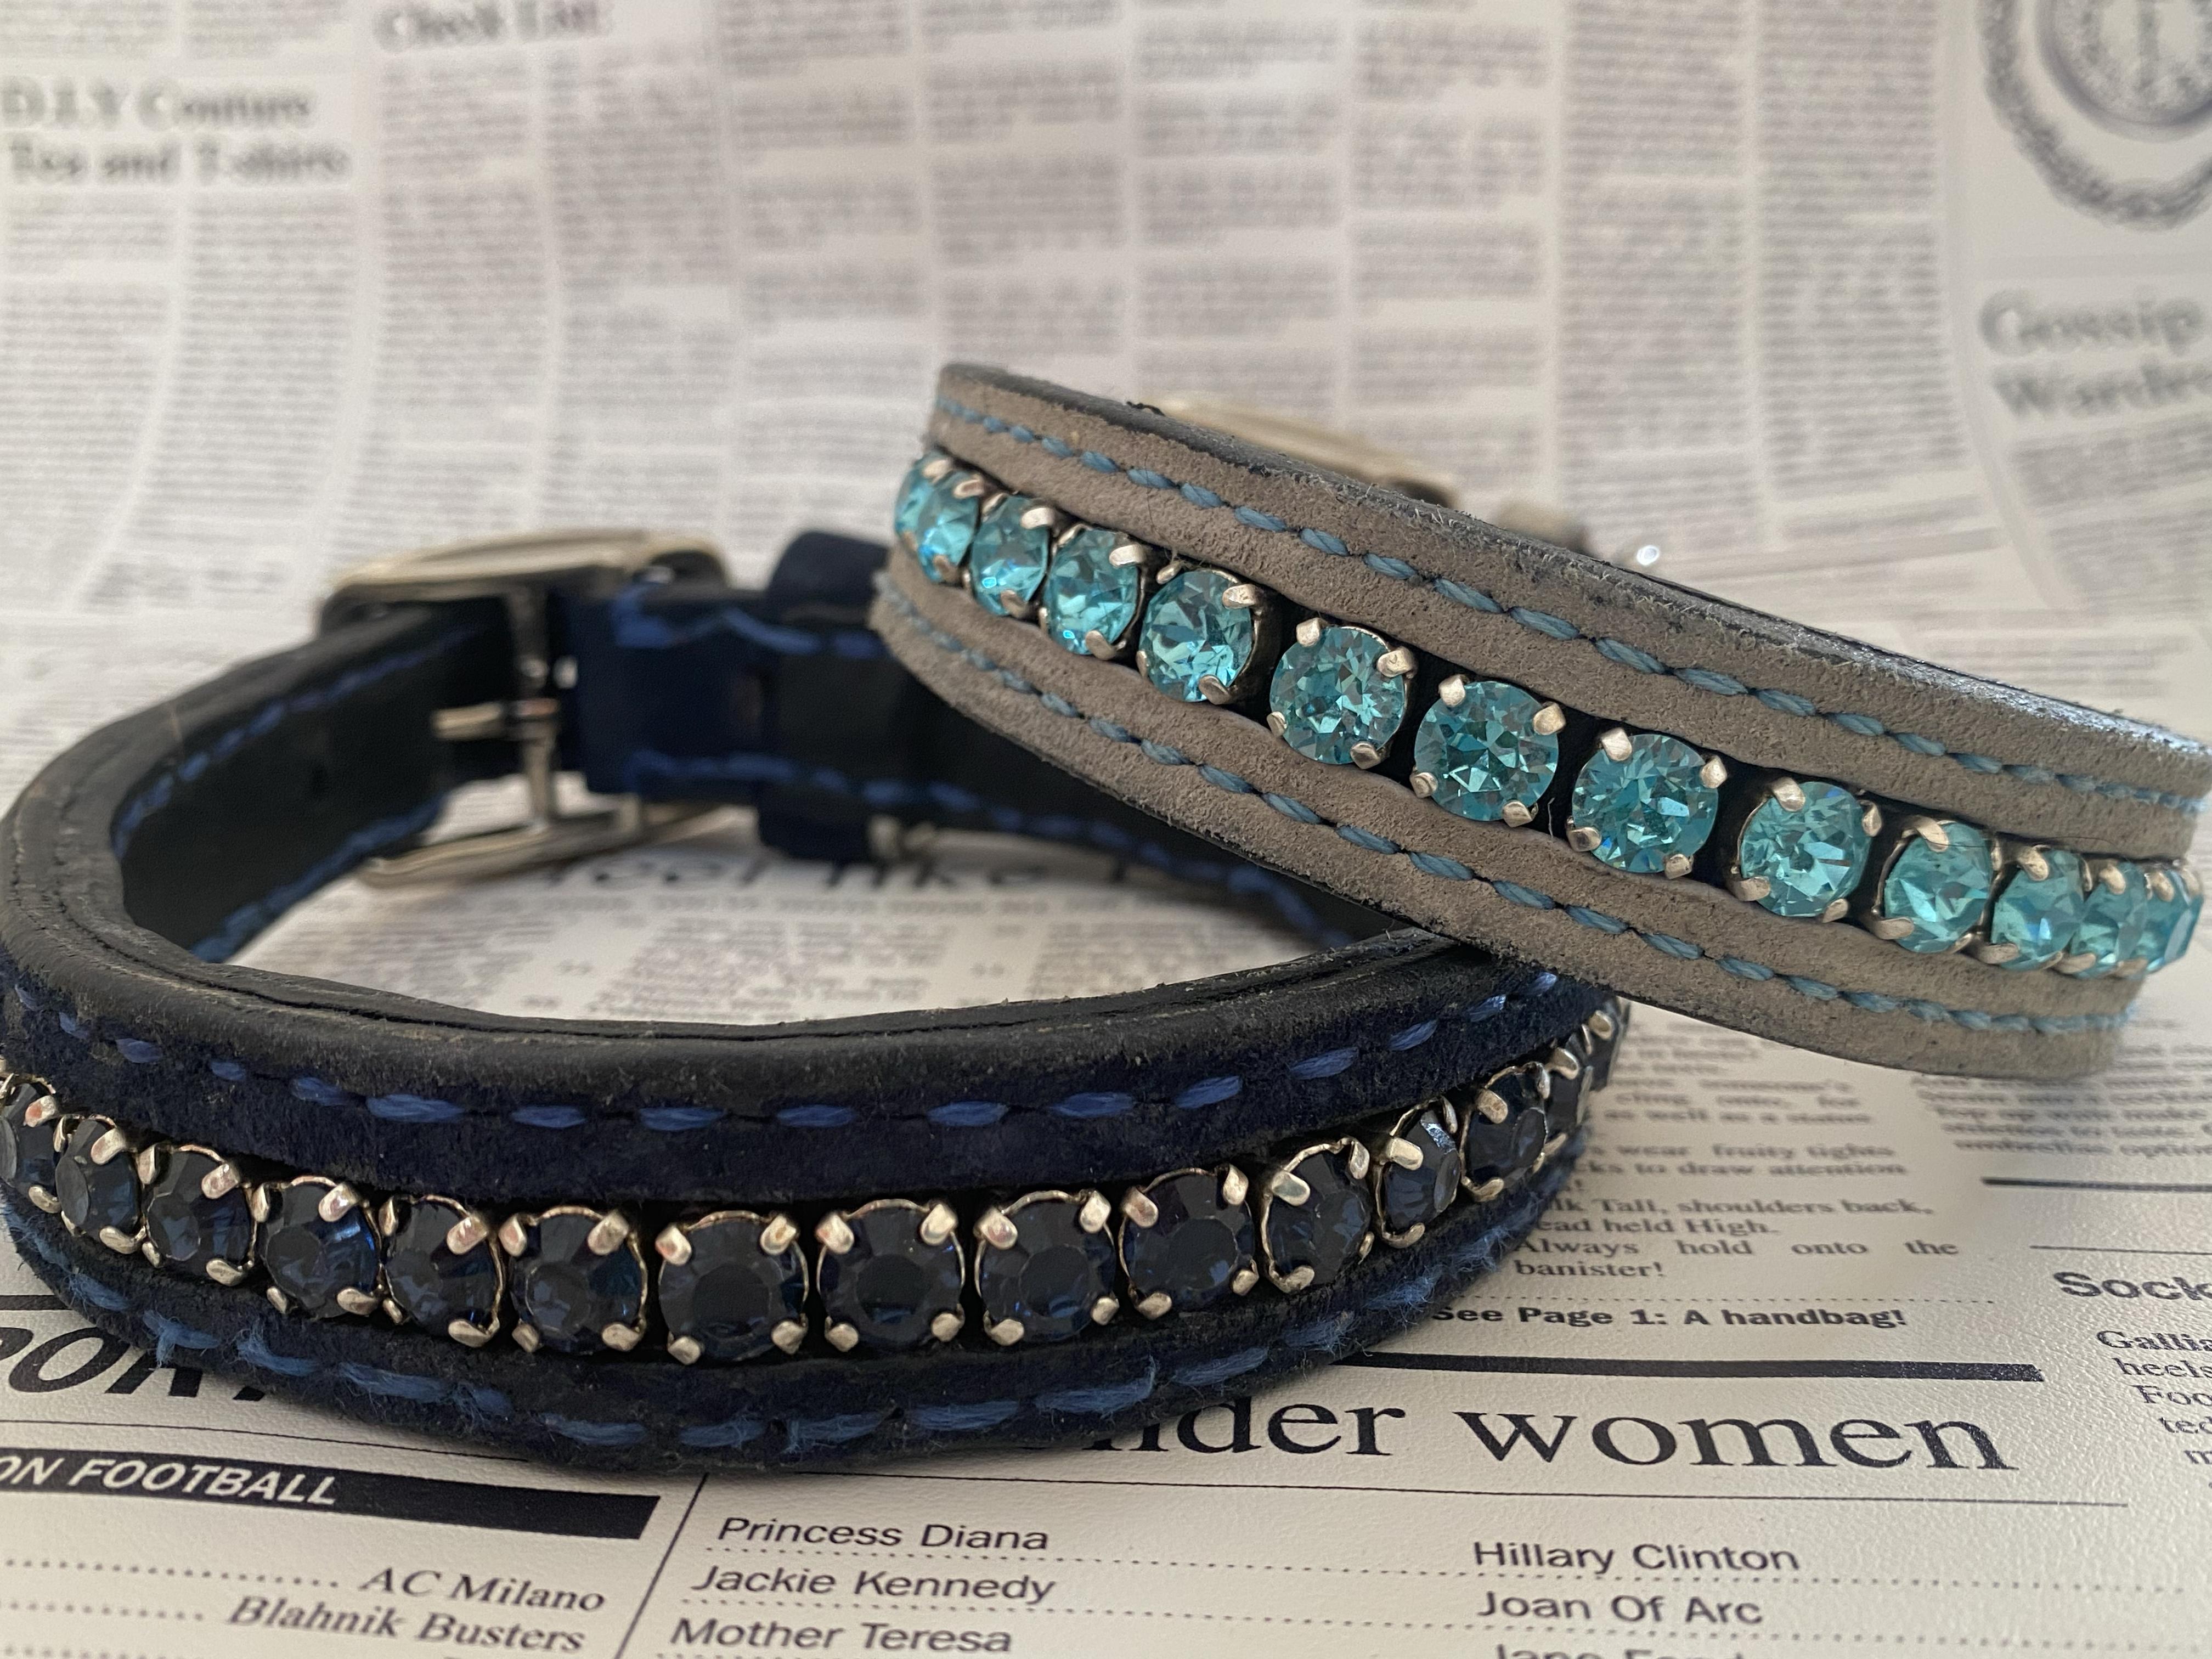
Hi, after seeing all of your amazing work, I feel a bit insecure about showing my work, but maybe I learn a thing or two and might also encourage others to put themselves out there. So here are all the collars I made so far (not many): 1st (mid 2024 after a break in leather work for a few years): Then I continued to pad collars: First collars for a friend: A little colour experiment - we still take out sometimes: Several collars I made just for fun and to use up some scraps: Here I only did the rhinestone work: Another collar: Our everyday collar made from Goat and Buttero leather: Fancy collars I made some time ago. The blue one was the first one and the grey one was the already "developed" one: First set I ever made (for my mums dog): And the mist recent collar: So that's basically also my whole development within one year of being back into leatherwork.


-
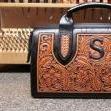
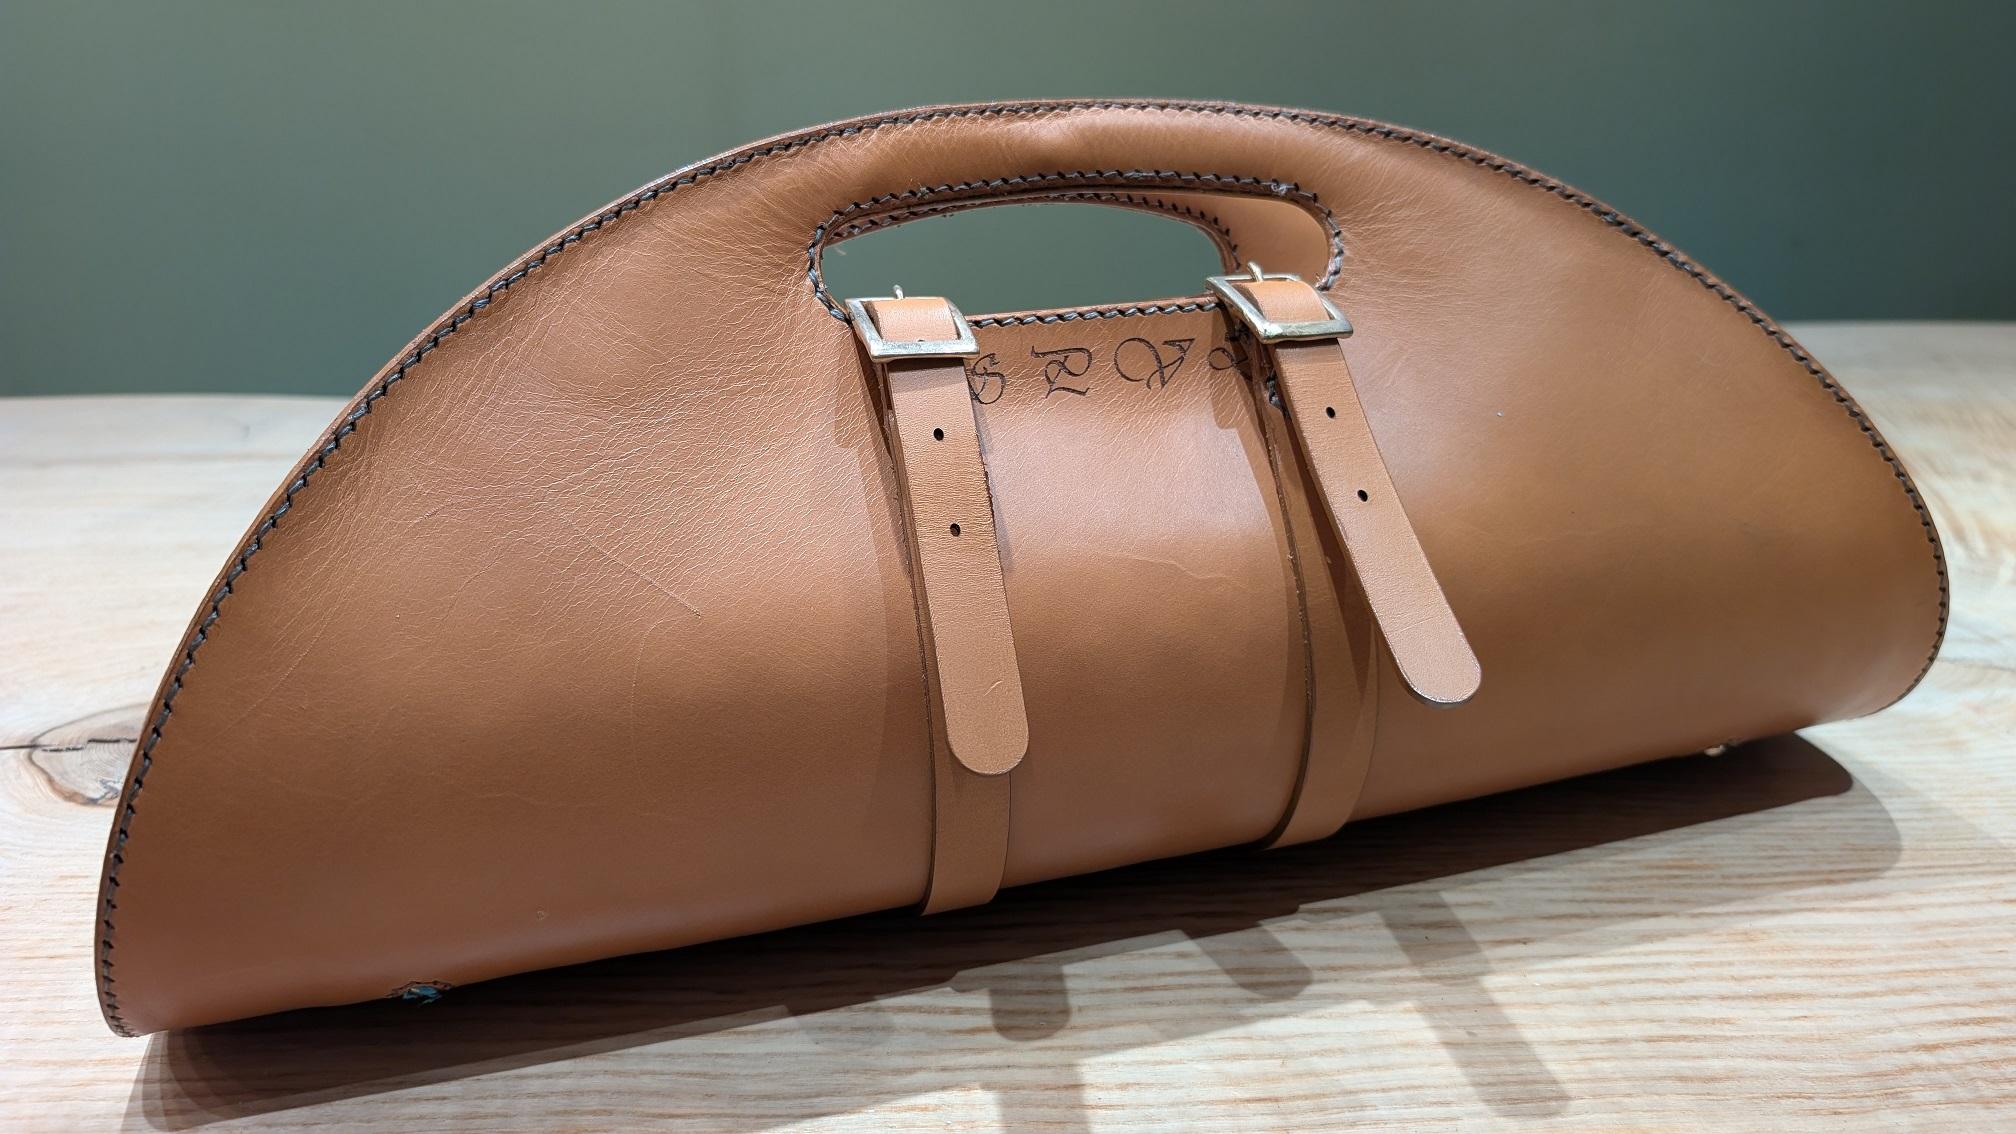
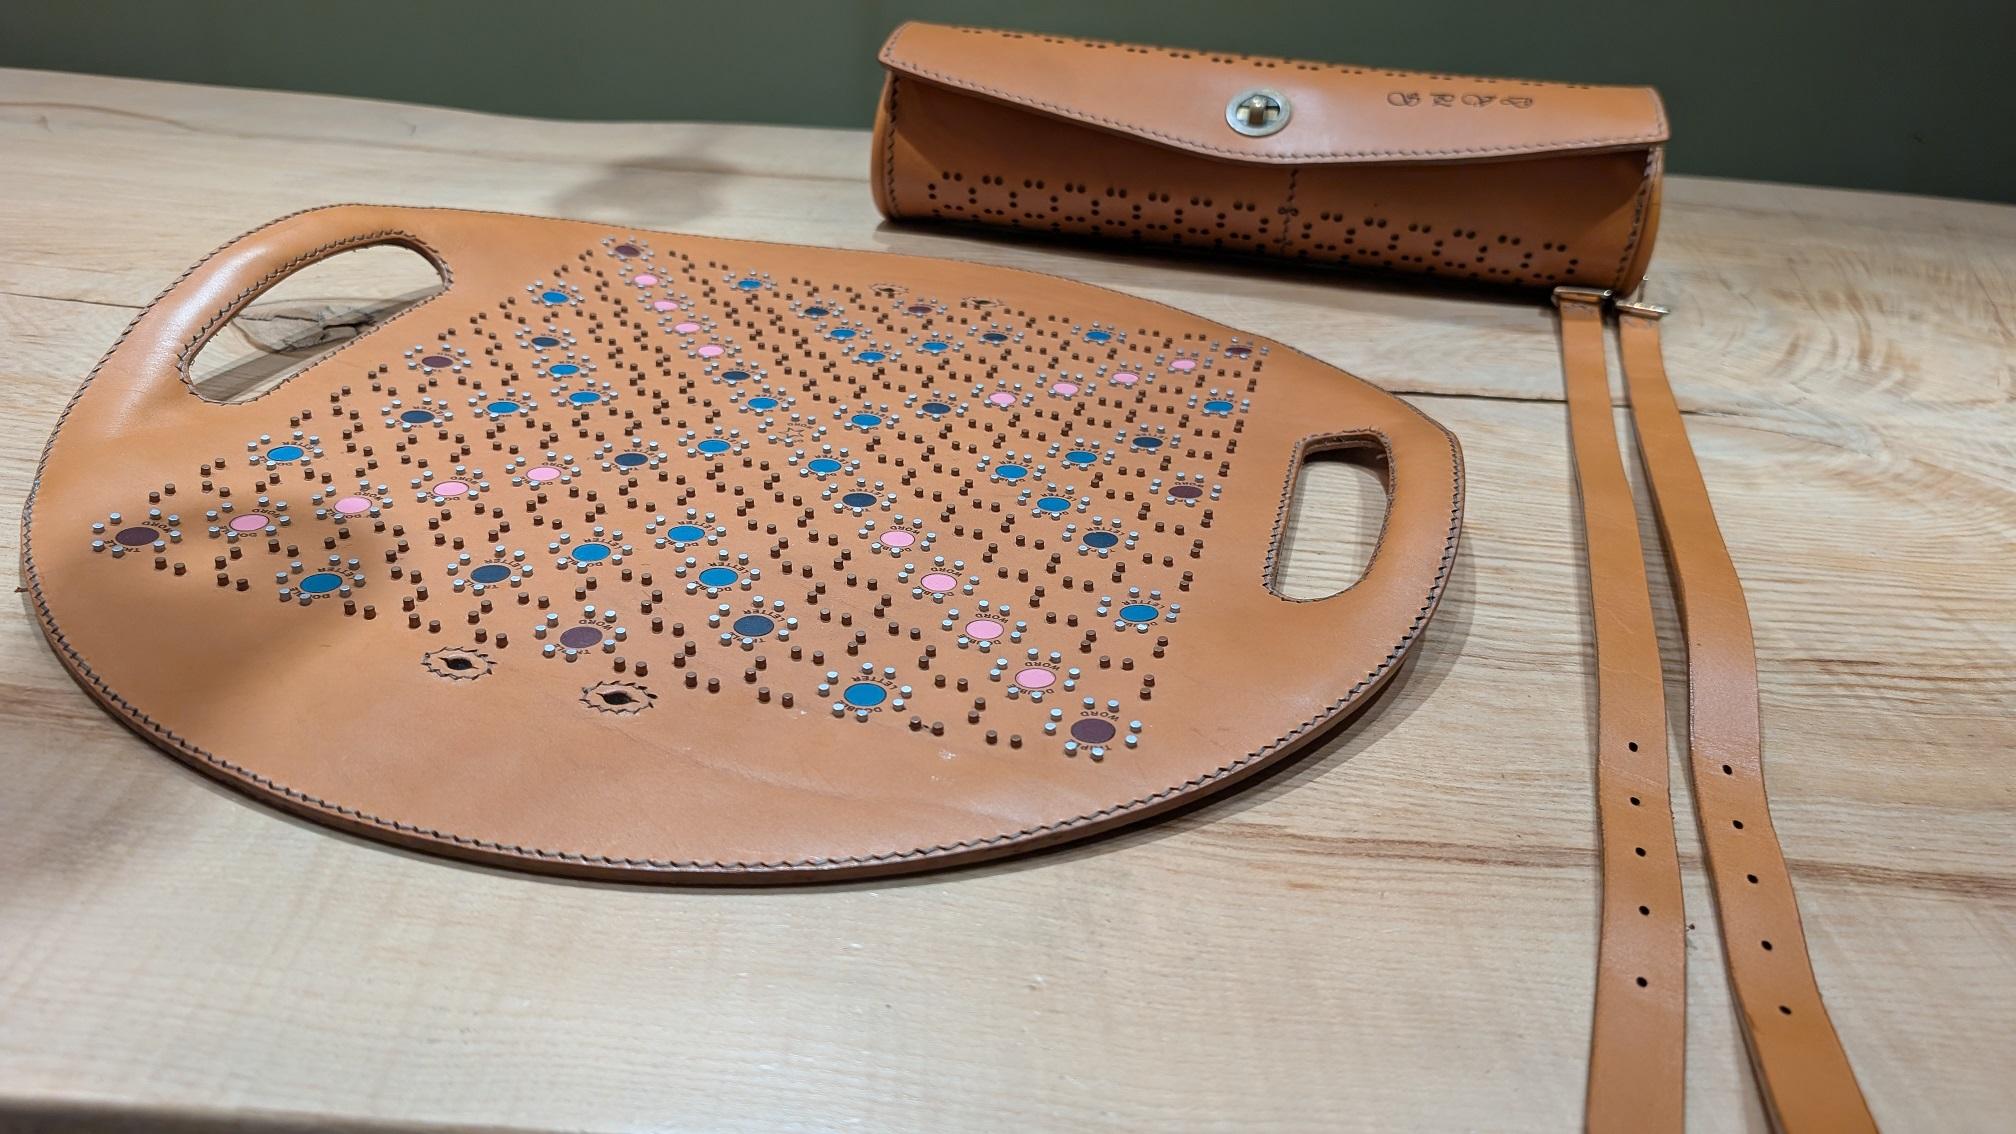
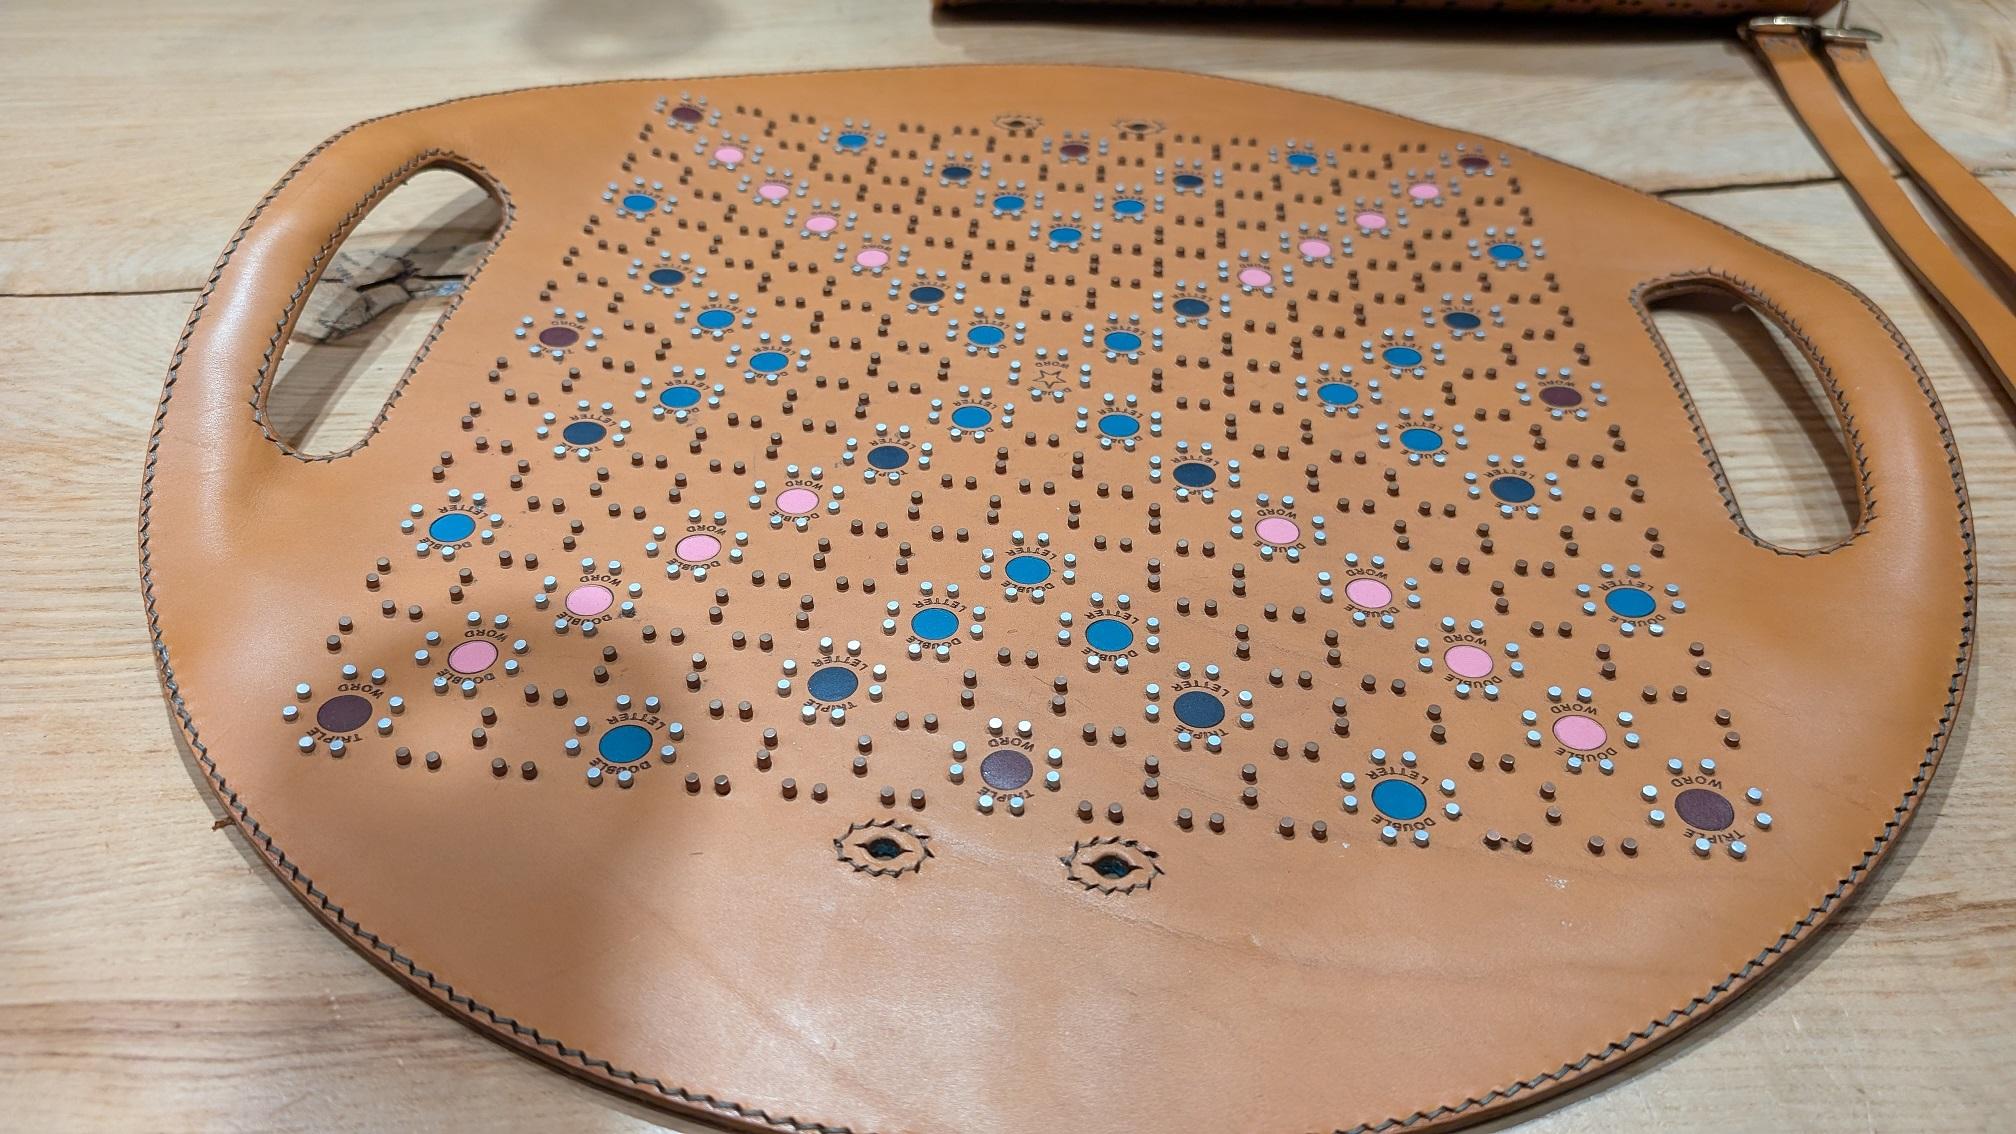
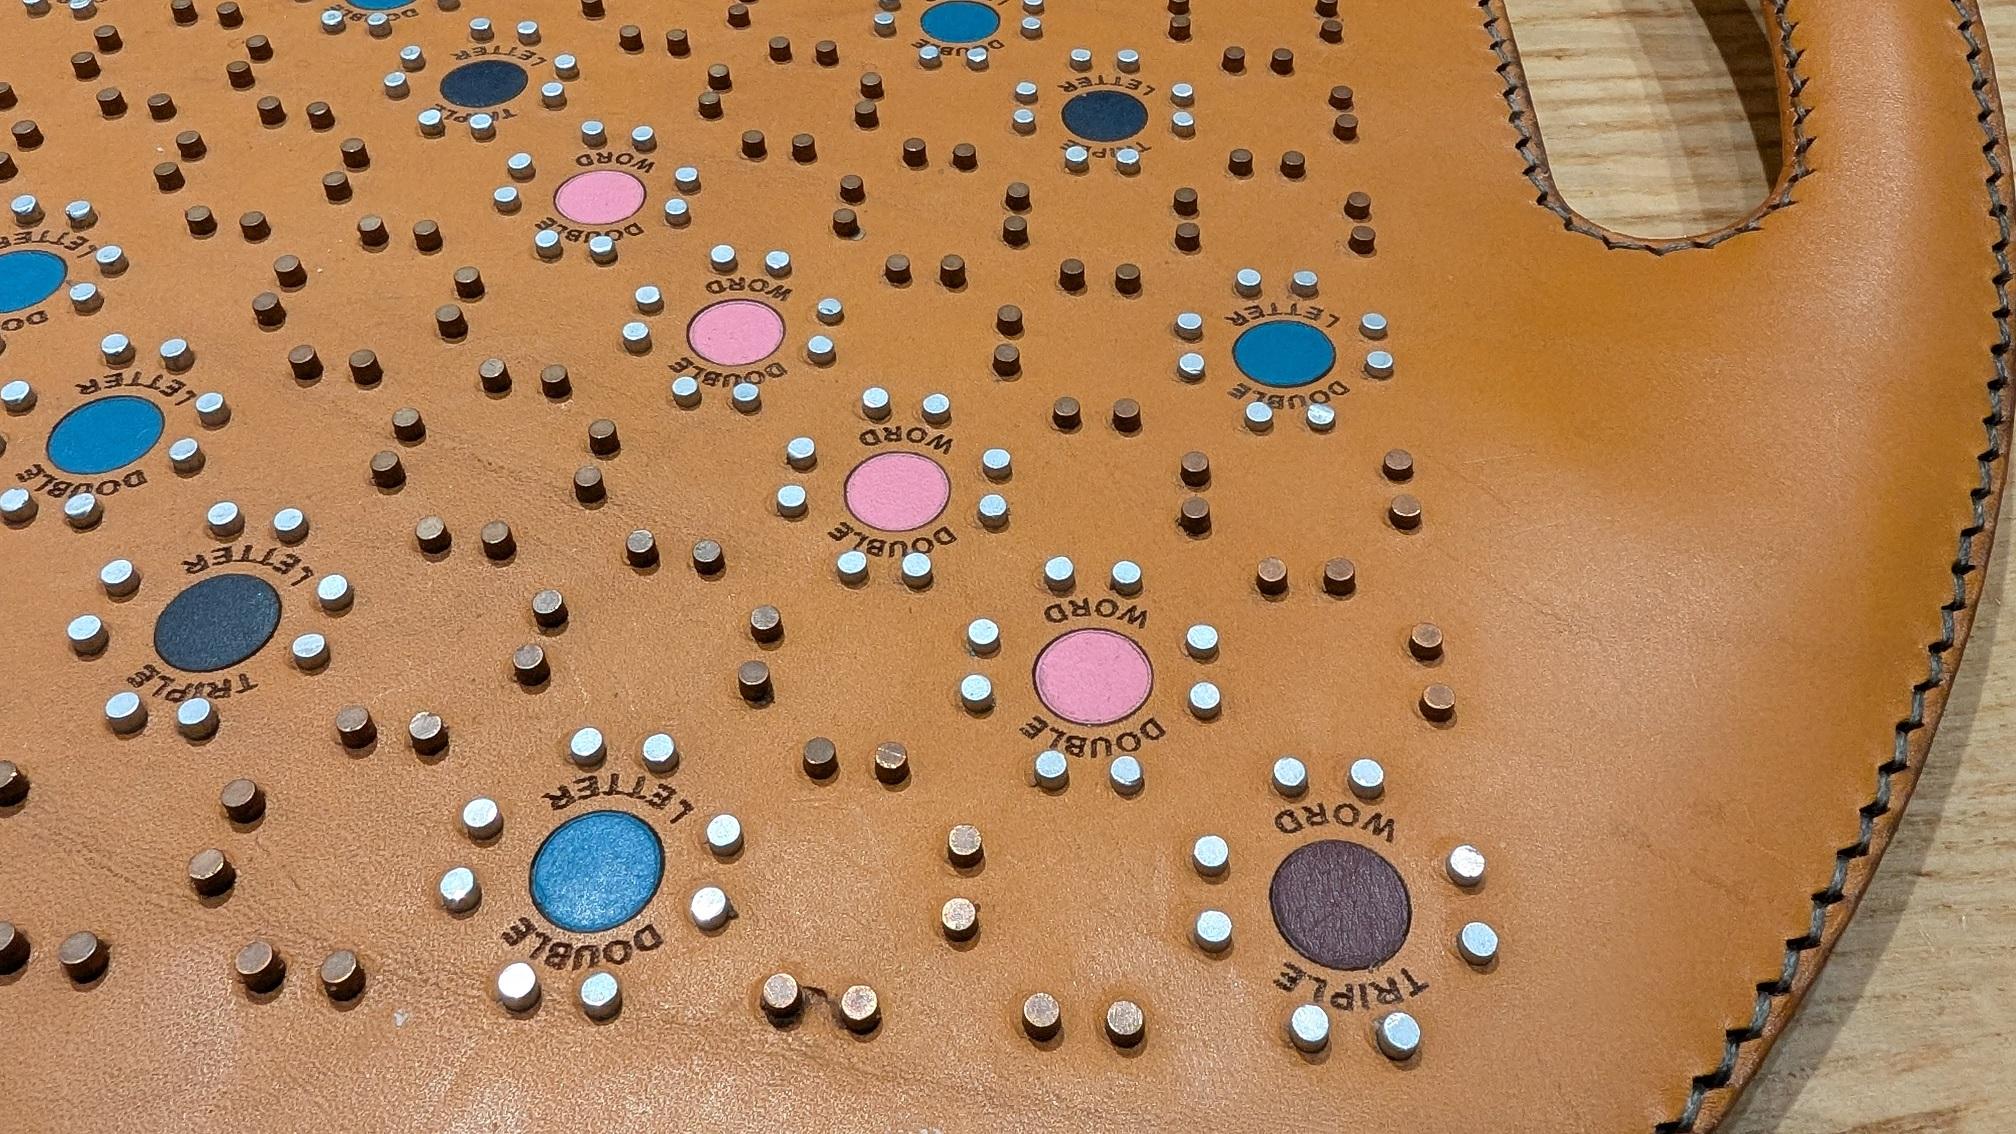
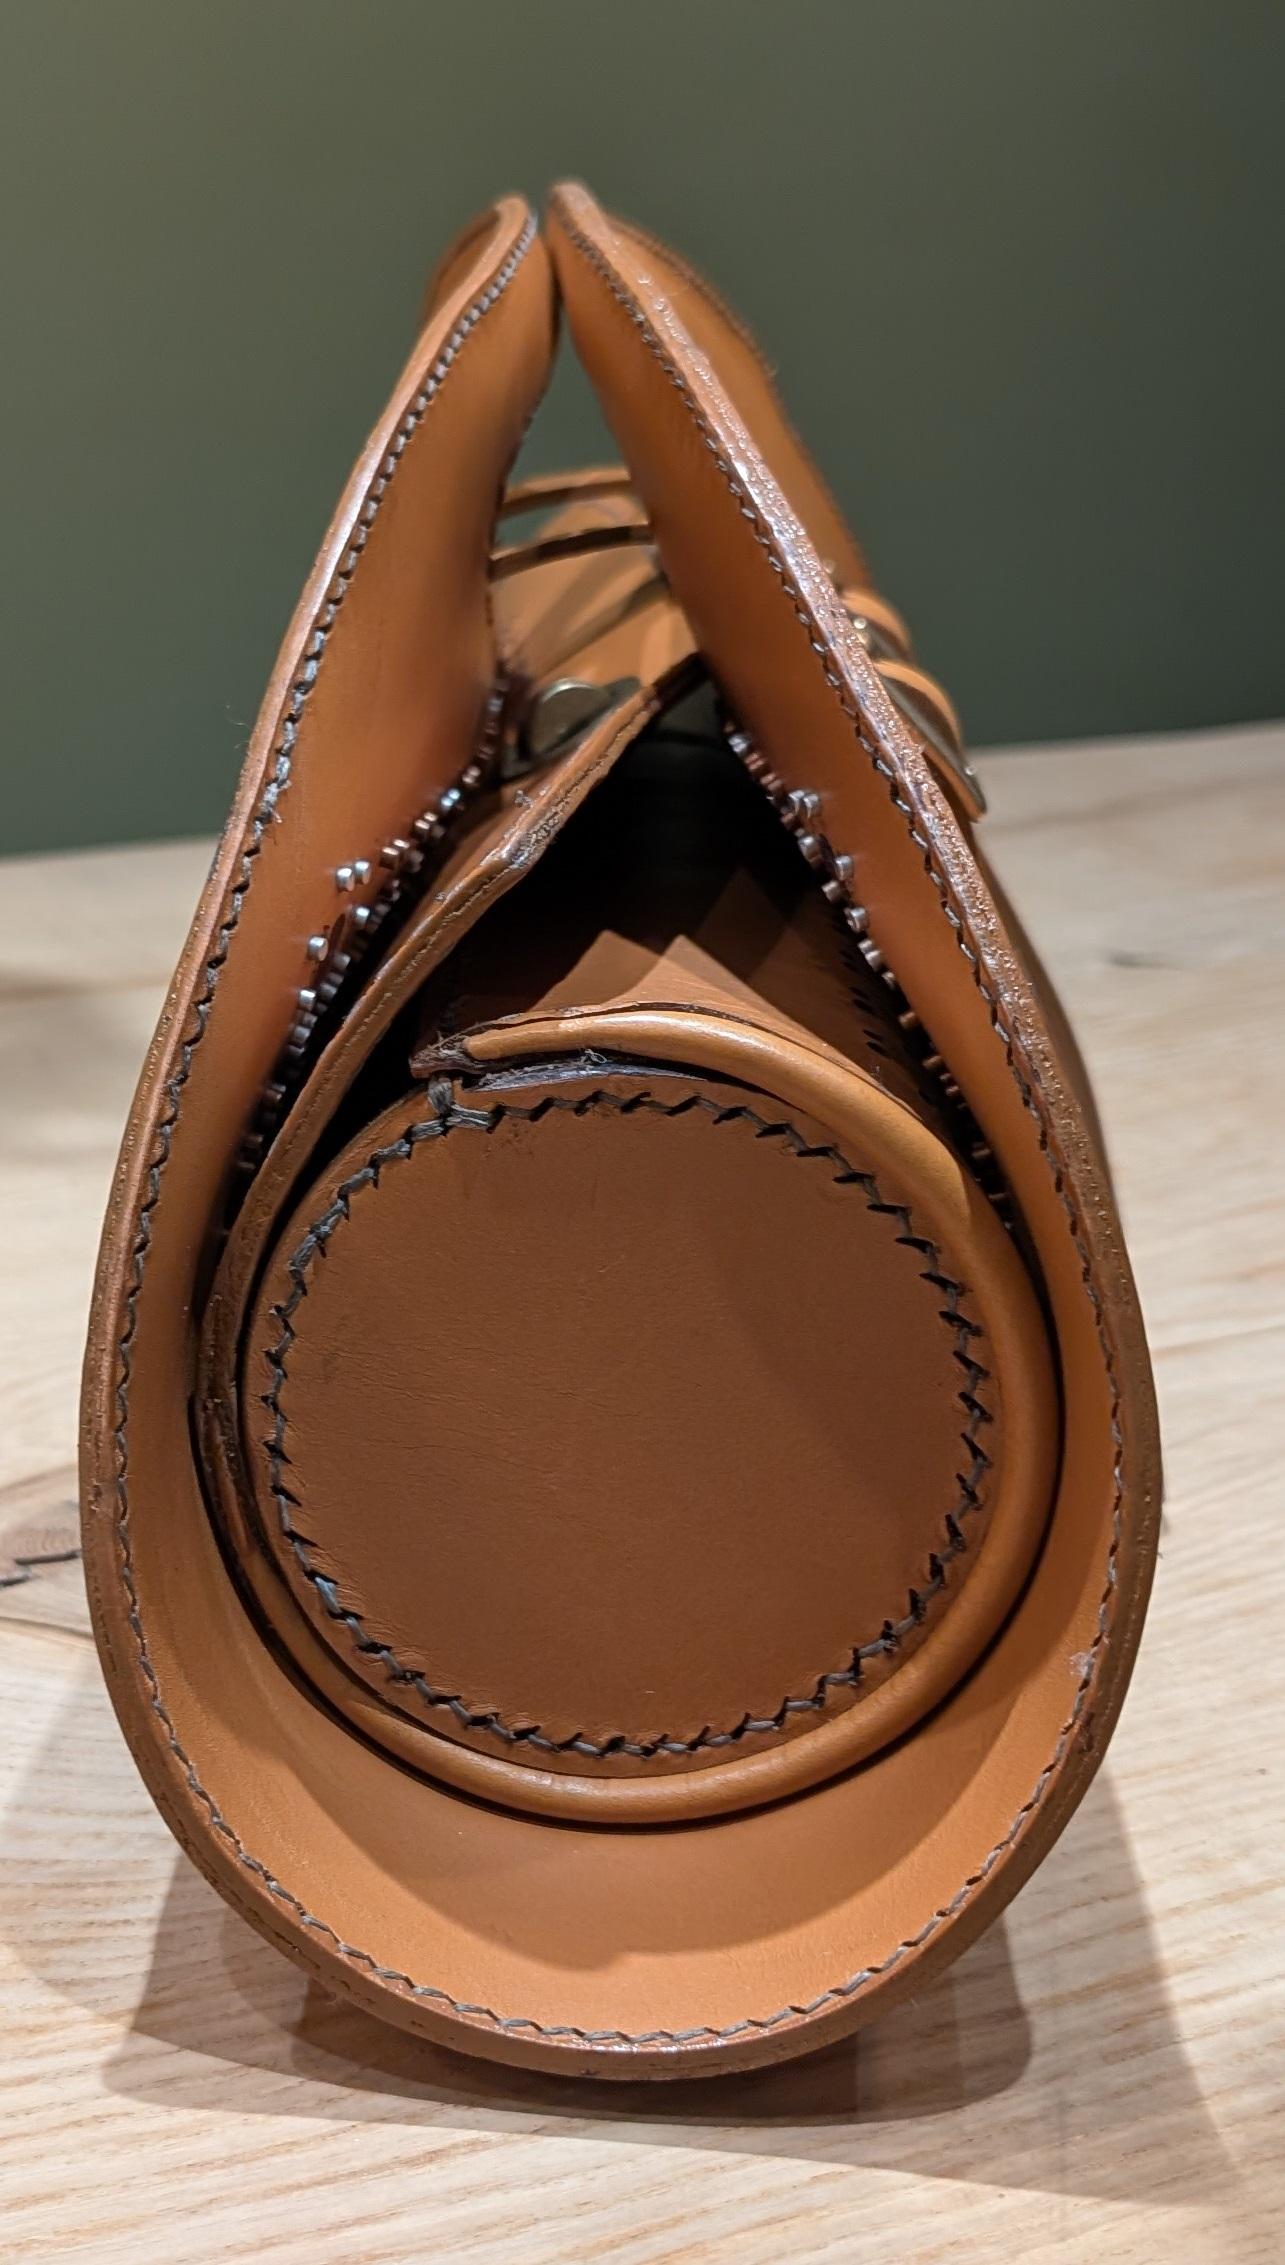
We're a family of Scrabble nuts and I've just finished making this Scrabble bag as a 30th birthday present for my son. The board itself is a leather circle with metal pins to hold the letters in place (aluminium for "power squares", eg, double letter, copper for the rest). The board is folded round a 4" cylinder (made with box-stitched and piped ends) and attached to it with studs, the cylinder holds letters, racks, etc., plus anything else you might want to carry! All stitching is either saddle stitch or box stitch. Having done a bit of woodwork over the years I'm new to leatherwork, and struggling a bit to get used to it: I'm using a block plane and fat (2") japanese steel chisel for skiving, cutting with a laser cutter (CNC machine with blue LED laser), I find the plane and chisel easier to handle and to sharpen than leather work tools such as French skiver (Also struggling a bit with health to be honest: aged 62, 12y Parkinsons Disease, major back surgery 2y ago). Anyway, my assessment is that round board is OK-ish, but edge finishing not great; cylinder looks not so great, box stitch is pretty hard ...
-
Hi fellow leather workers, I'm Tove09Tilda, 25 years old and from Germany. I started leather work when I was 15 by bedazzling Dog collars and horse wear, but ditched it for some time until I was about to finish my master degree in 2024. That's actually when the real journey started. I was traveling back to Sweden to get my degree (I studied in Sweden) and have a nice dinner with my fellow classmates and, well, with my dog. I knew that this was not a usual evening and of cause, when I was wearing something special, she also had to. So I started checking the pet stores in my area including an outlet of a big german brand, with sort of good reputation. In the end I found nothing that felt like "us" or was up to the quality that I was searching for. Following, I contacted a former supplier, who offered custom dog collars. That's when I learned that she produced in India and the collar would take weeks, if not even month, as it would have been included in a bulk order. And as I wrote my master thesis in cooperation with a very nice woman from Pakistan, with friends in the leather Industry … Let's phrase it that way: Production in India felt wrong! Especially for the price that was quoted (40€ including shipping (within Germany between 6 and 7€). Let's be real here - you don't need to be an economist to know that this price is unrealistic, when you expect fair wages. Unsatisfied, I started to remember that I had all the tools, that I knew how to saddle stitch and that there was literally no excuse to not try it for myself. That's basically when I got hooked again. I made a simple, plain dog collar, dyed it blue with angelus acrylic leather dye and called it a day, just to then teach myself how to make padded collars, make running loops, and of cause, making dog collars until my hands were full of blisters, but my stitches became more and more neat. Last year I also made my first handbag ( a little bit of a challenge at first! Due to all the backing needed!). That was the point where people in my surroundings started to suggest that I should try to become a saddler. When I couldn't find a job after my MBA, the original idea was indeed to try to become a saddle maker. My education wouldn't go to waste and I could follow my plan B. The economy made a big cross through the plan - unfortunately. Most saddles don't take apprentices at the moment or I got told I was better off with my MBA. Still without a job offer on the horizon, I at least find some peace in making collars and some occasional bags and belts. By now I make all the collars for our dogs, as well as leashes and also do some collars for friends, if asked to. My next projects are a dog harness for my little dog, two new collars for our dogs (finally matching for once!), and a martingale/ half-checker collar for my dog. Thanks for reading! And I hope to learn more by reading and observing the work of others in this forum! Best Tove
-
As somebody mentioned already, try tightening your foot pressure tighter. Want Lil tiny bit i have sewn woven strap material, it seems the foot slips some on the material & misses a stitch. You could be pushing or feeding the project thru instead of letting the machine doing it.. That could have been my problem as well. I think by increasing foot pressure it minimizes the problem.
-
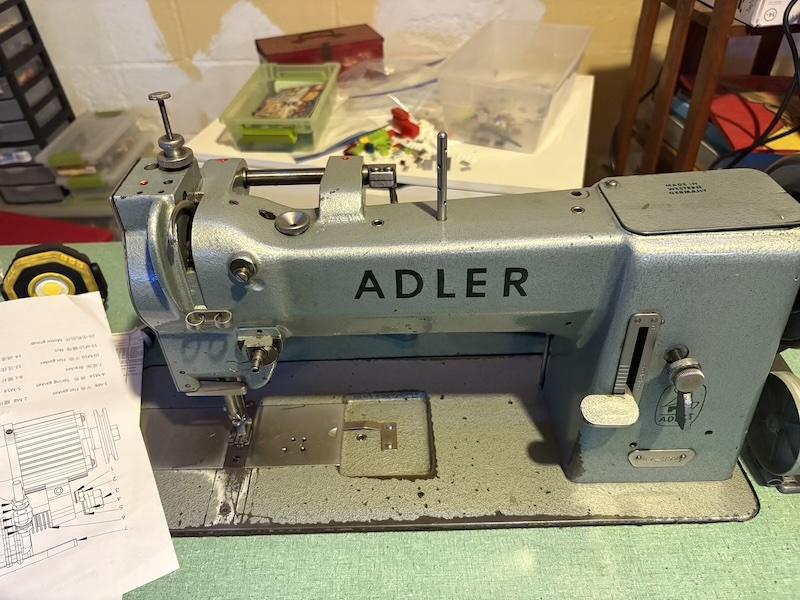
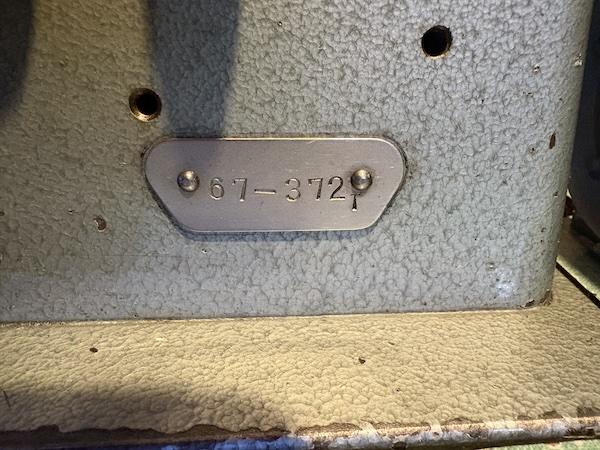
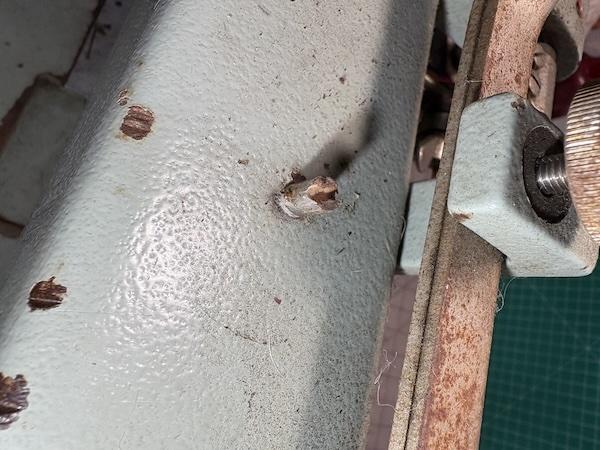
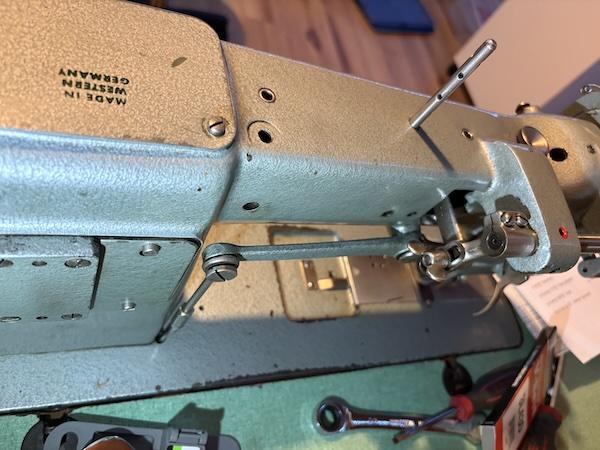
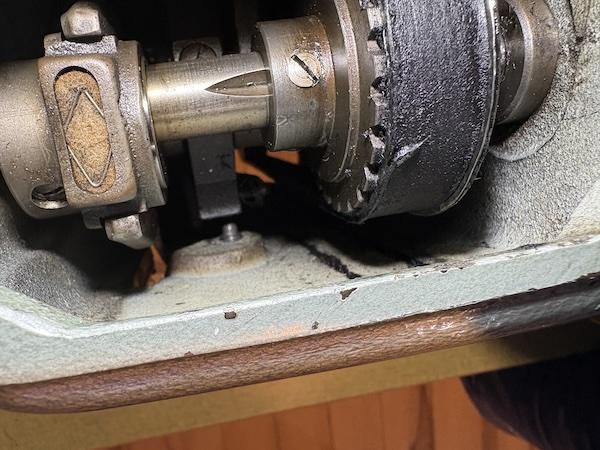
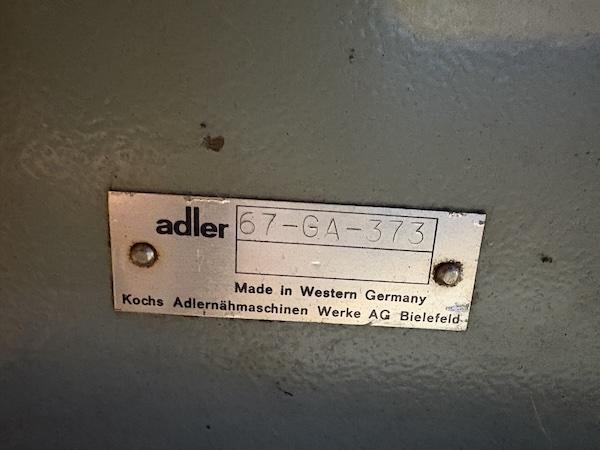
Hi all - I found an Adler 67-372T at the Goodwill Bins and an Adler 67-GA-373 all rusted out in a shipping container. I'm trying to figure out which is the better machine to restore since I think I have to salvage parts from one for the other, but that's really the question. The manuals cover both the 67 and 167 so I'm not 100% sure if one of these is actually missing parts or not. Trying to fix up these machines is the hobby! I intend to sell these machines once they're in good working order. I don't actually sew myself. I just love machines. Here's what I have: 67-372T - this one has already been scrubbed so looks better than the second. Front (Is it missing the bars at the top)? The tension unit has a few broken pieces, but I know I can find new ones to purchase. This picture shows what I think is a missing collar behind the stitch length locking lever (I can see this in the diagrams of the manuals, so this one just may be missing, but I'm not 100% sure). The other 67 has this part so I was considering poaching it from that one, or I can find one online for ~$USD 35 This is the back of the machine - it looks like it has the mounts for a top presser bar, but I really don't know if it is required This is the unit model 67-GA-373 You can see a fair bit of rust. The feed dog is missing since I stole a screw for the other machine, but I have it. This thread guide is broken and seemingly stuck in the machine Thanks for your advice! I can probably get my hands on missing parts or pieces but don't really want to get too much money into replacing parts. Also - I only have 1 table, so I'd be selling one of these as just the head, and I'm not 100% folks wanna buy machines that way, so that would be another expense to purchase a table.

-

Finishing Coat
Dwight replied to Cactusman's topic in Dyes, Antiques, Stains, Glues, Waxes, Finishes and Conditioners.
If you were in the military . . . Resolene and dress shoes would be a gift from heaven. Super polish them guys . . . about 6 or 8 coats or resolene . . . you have a pair of inspection shoes that need only to be put back in their protective white socks . . . to await the next inspection. Didn't have it when I was in the Navy . . . had to do it the hard way. And I would probably bring the holster back to you within about a week. Neutral or any other shoe polish has no ability at all to protect the leather item. Rubbing up against a wall . . . gate . . . laying on the ground . . . the leather will look like it was found on the beach at Normandy. May God bless, Dwight -
neatsfoot oil - how much is too much?
Dwight replied to el_pipou's topic in Leatherwork Conversation
Neatsfoot oil is meant to replace the oil that was latent in the original hide. It is very easy to get too much in there . . . kids usually do that with their baseball gloves . . . thinking sloppy and floppy will catch a ball better It don't. My oiling is done with a cheap 1 inch pig hair paint brush from Harbor freight. I put it on quickly . . . just enough to see it is wet . . . and quit. The "wet" stage disappears very quickly . . . My item will be just barely noticeably darker the next day. Usually only determined by putting a piece of the original leather up to the oiled one . . . squinting a bit . . . to find a difference . May God bless, Dwight -
This guy says subtract an inch from your measurement for gusset length. Some day I'll test this using my heap of leftovers from bridle sides but I currently have no experience with bag making.
-
Do it however you want . . . but if my project requires a gusset . . . I lay down the item . . . trace the outside for the length of the gusset I want . . . then cut the outside of the gusset piece out of a hunk of leather. I then decide how wide a gusset I want . . . use a pair of dividers and mark that all around the inside of the piece I cut out I then cut out the gussett . . . glue it in place . . . sew / lace / stitch / as necessary. May God bless, Dwight
-
Your video showed as much, but you beat me to it 🏅
-
Ok - fixed it. I also just farted around with it and found that I had forgotten to tighten the screws behind the connecting rod. Seems to have fixed it 😳
-
Link is not loading for me..
-
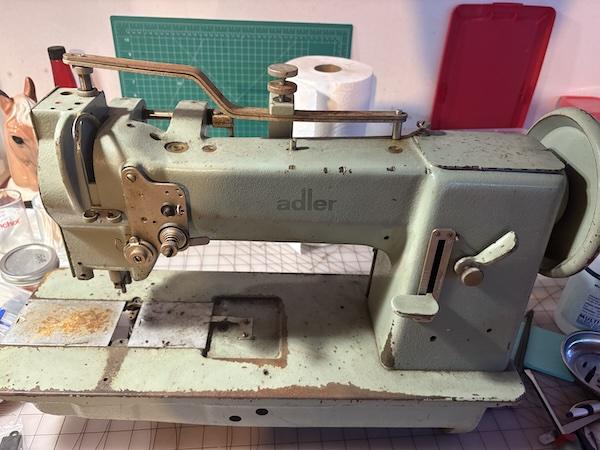
Hi all - found this Adler 67 at the goodwill bins and thought I’d try to save her! Am I mistaken that this is a walking foot machine? If it is - can anyone see why these feet aren’t moving up and down? I’m sure I broke something but don’t know where to start. Thanks!
-
I'll try those out. Needle is a 20....t90 thread. NOW...I was taking a video of the bobbin, sewing slow and then by hand....no problems. Then I started sewing regularly and now it's sewing fine....for now. When it starts acting up again, I'll take another video. Thanks for the tips.
-
Trying here too… I posted this question in How To but no one’s stepping up. I’m making a bag 9”x5-3/4” of 2mm thickness leather. I’m stitching by hand and have layed out and punched the holes about 3/16” from the edge. The 4 corners have 1” radius. My search here came up blank so I’m asking…do I add all sides together and subtract the circumference of the 2” diameter or work from the dimensions of the sewing line? I tried the old string around the outside all the way around and the string layer over the sewing line. Outside strings 1-1/8” longer. I’d like to learn how to get it right the first time and not trim it to fit or piece it together. Thanks! Dano PS I’m laying the outside panel on top of the gusset.
-
Its very hard to judge the right amount That is definitely too much. Too much can surely ruin a pair of boots To limit how much NFO I'm putting on I have a NFO/bees wax/carnauba wax mix that I apply all over. I let that sit a while then I buff the waxes to a semi-glossy shine. I've never had anything so dry that it needs more than one NFO/wax application. Perhaps in your case, another coating in a weeks time, then another after another week should see it getting enough feed
-
Have you complained to the seller / vendor as they may not be aware of the rancid problem??? kgg