All Activity
- Past hour
-

showoff Sharing one of our favorite recent projects.
BlackDragon replied to Teddy Patches's topic in Show Off!!
I going to throw out a guess and say there is a backing, like what you see on the inside of a ball cap after it's been embroidered, and since this is just a patch it's not really going to have much strain put on it. It look pretty cool I would like to see it in white against the black leather. It would really pop and give it a heavy metal vibe. -

showoff Sharing one of our favorite recent projects.
Digit replied to Teddy Patches's topic in Show Off!!
How do you do precision embroidery? Leather is not like woven textile where embroidery thread goes through the natural spaces between weft and warp. With leather you actually pierce and weaken the material with each hole you make, so if you make your embrodery stitches too close together you're essentially making perforation lines where the leather can rip apart. -
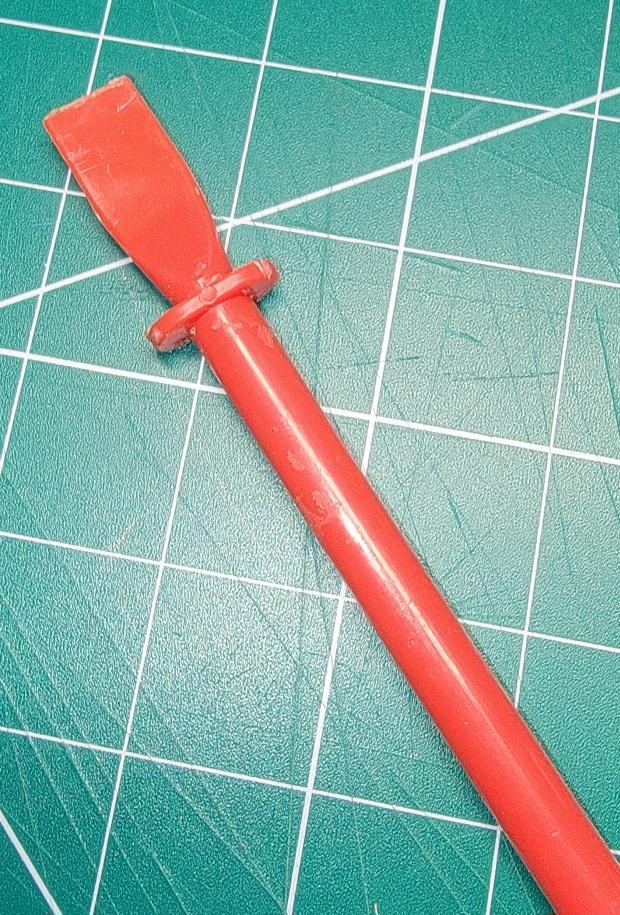
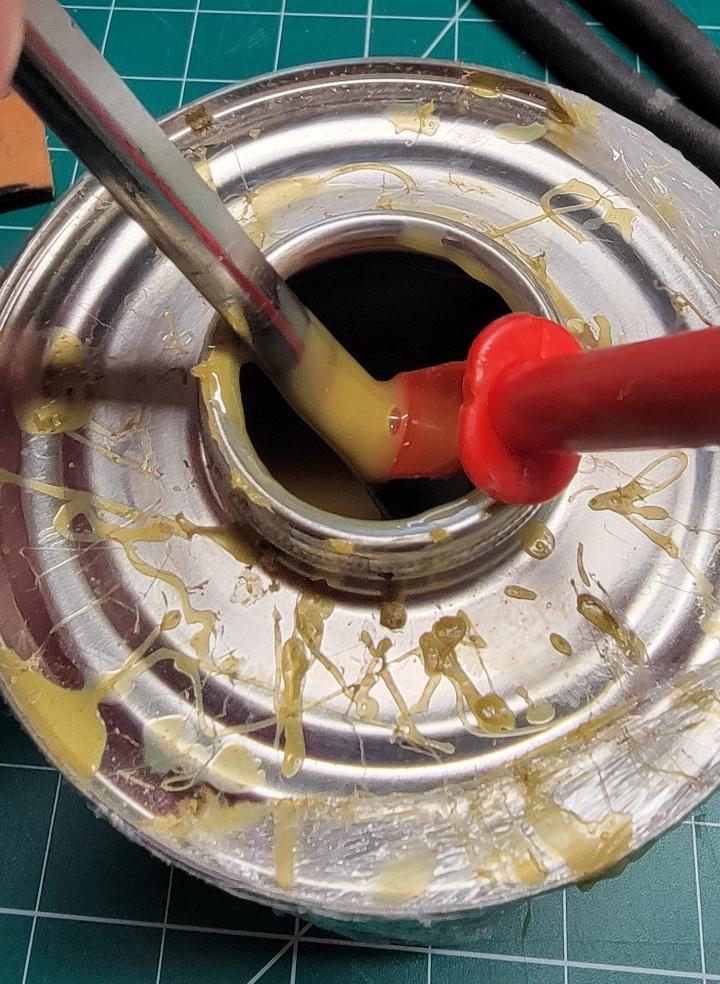
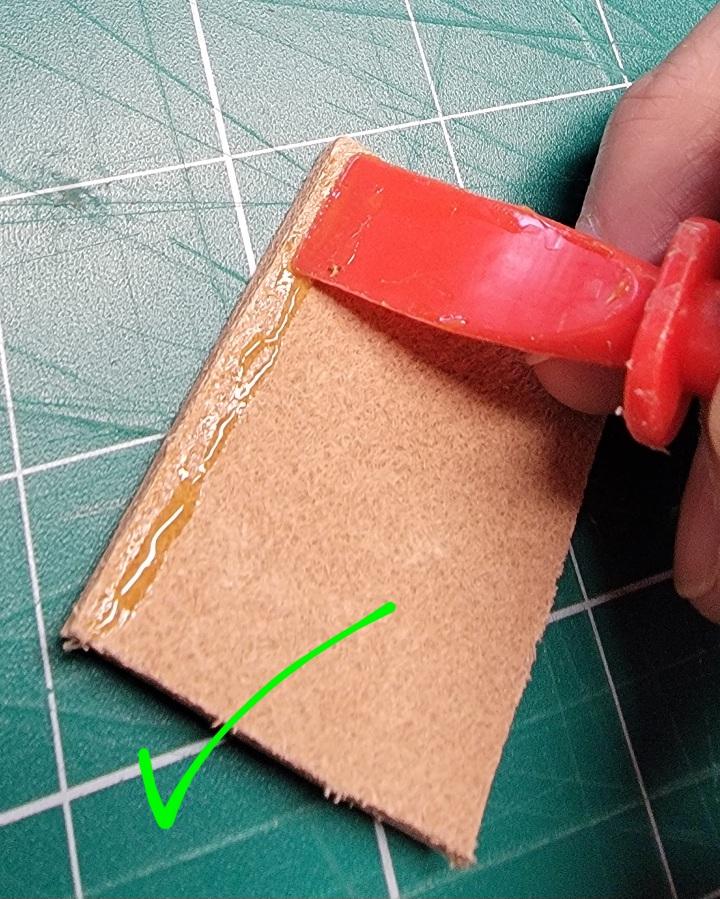
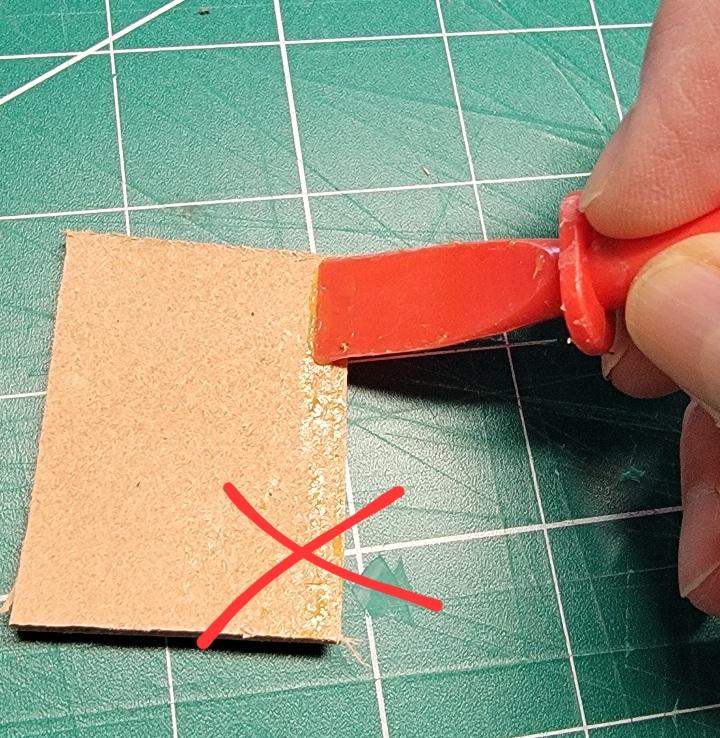
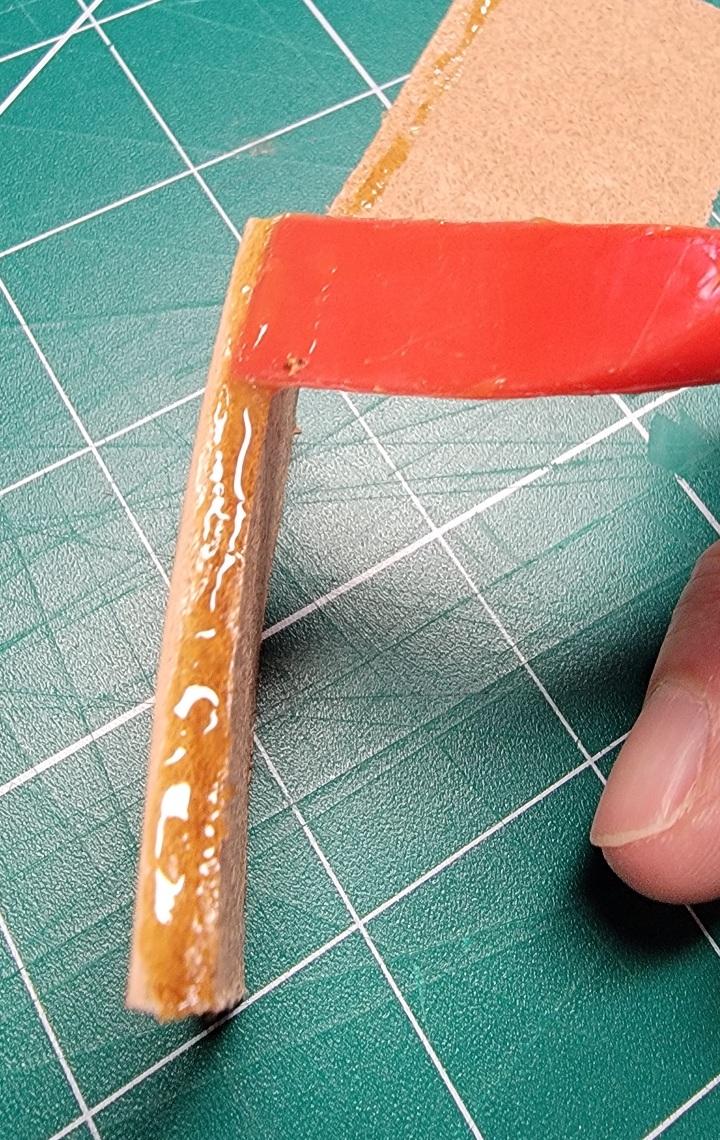
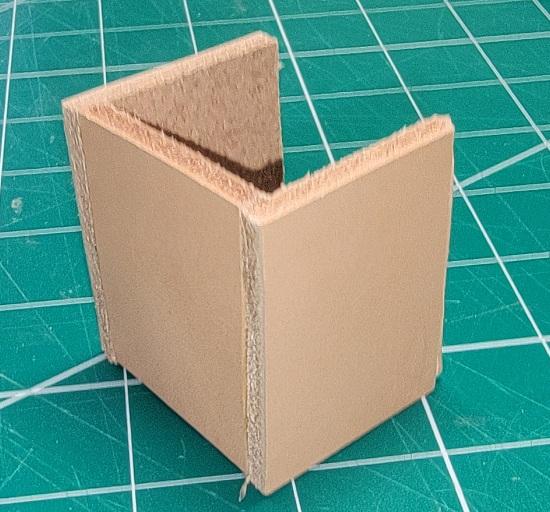
I use Barge cement and I don't use the cement as a fastening agent. It's more to hold in place until I stitch it together type of thing. When I glue up larger projects I use the can brush. When I want to do more refined work on small projects I use a plastic spreader. They're made of plastic and easy to clean. Even if the contact cement has been on there a few days I can use a rubber eraser and it comes right off. When gluing I pull the brush from the can and use the spreader to pick up some glue. I then spread the glue by pulling towards the inside, away from the visible edge. If you pull towards the visible edge there's a good chance it'll be seen when finished. When starting out you can draw a line where to stop pulling your glue. After a while you'll get the hang of it. Let it set until it's tacky (about 10min) then put the two together. This is kind of a one shot deal. Once the two pieces touch it's going to be tough to get them apart cleanly. After putting them together I let the cement finish setting. How long it actually takes I'm not sure. I go to another project and work on that then come back. So maybe a couple hours. This would be a box stitch and if I was actually doing this I would have punched my holes and finished the visible edge before gluing.
- Today
-
Just to add to Dwight's excellent advice: I use Weldwood "Red Can" Original contact cement because it's widely available at nearly every BIG BOX store, hardware or paint supply in my neck-of-the-woods. It's been my go-to adhesive for cabinetry, countertops, etc for 30yrs now...and following the directions on the can (purt'near identical to what Dwight described above), you will get excellent results. Just get it where you want it the FIRST TIME...because there is very limited adjustment once those two surfaces are joined together. That's really what contact cement is for: bonding things you want JOINED...as in, "let no man tear asunder," if correct procedure is followed. I use the very same metal handle "acid" brushes from Harbor Freight...with a 36pk only costing $3, I just use 'em & toss 'em...trying to clean cement outta one usually isn't worth the trouble. The bristles are stiff enough to allow control over where the cement is placed on your leather pieces. Chip brushes are also an option for larger areas that need gluing...HF's in my area also has those in bulk 36pack. Don Gonzales even did a video on the stuff a few weeks back, comparing it with other options...he uses GALLONS of it every year in his TX saddlery shop. Good luck...and I even like burnt bacon!
-
Thank you AIZilla.
-
I have a Pfaff 60 that I use for thin leather, wallets etc. It was my late mother's machine that she made or repaired our clothes on. But some more info would be good 👍 HS
-
When I need to apply contact adhesive with precision, I use cotton ear buds, ( or Q tips) single use, and you might use a few, but are cheap as . It might be a bit fiddly but it saves cleaning up after. Hope that helps. HS
-
 Augustthe3rd joined the community
 -
 marzi joined the community
 -

spring flowers and good food
Darren8306 replied to chuck123wapati's topic in All About Us and Off Topic
I approached a few local galleries, shopping my wallets around. Got good and useful feedback, and had one place take a dozen on consignment. All said my pricing was reasonable, quality adequate, and that from the retailer perspective. So it felt like a few compliments. I think I'll stitch a few while I think about it. -

showoff Sharing one of our favorite recent projects.
bruce johnson replied to Teddy Patches's topic in Show Off!!
Interesting idea and concept! Is there a picture of the finished bag anywhere? -
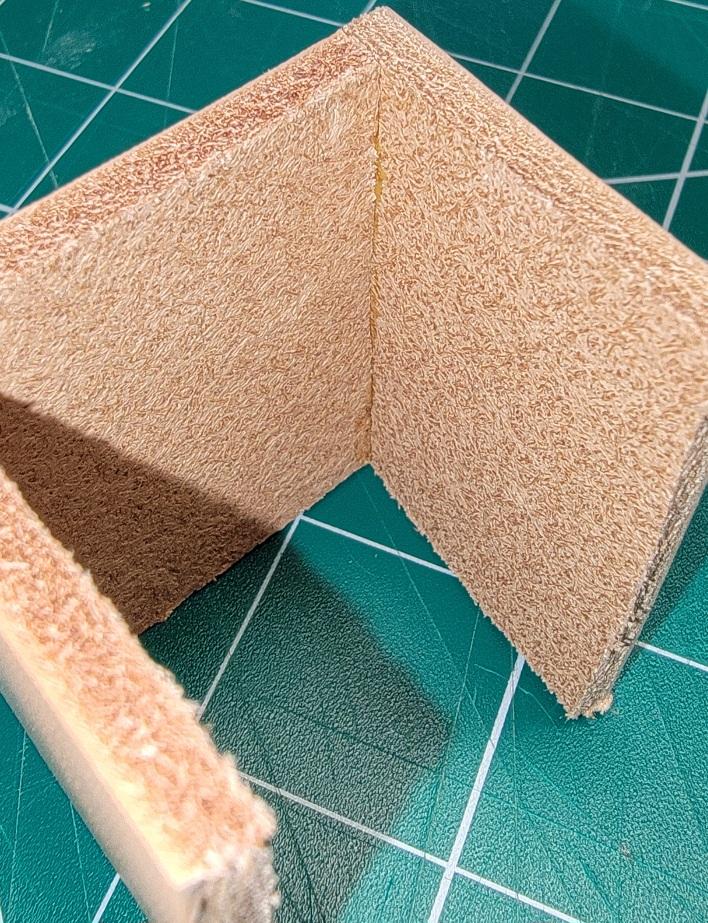
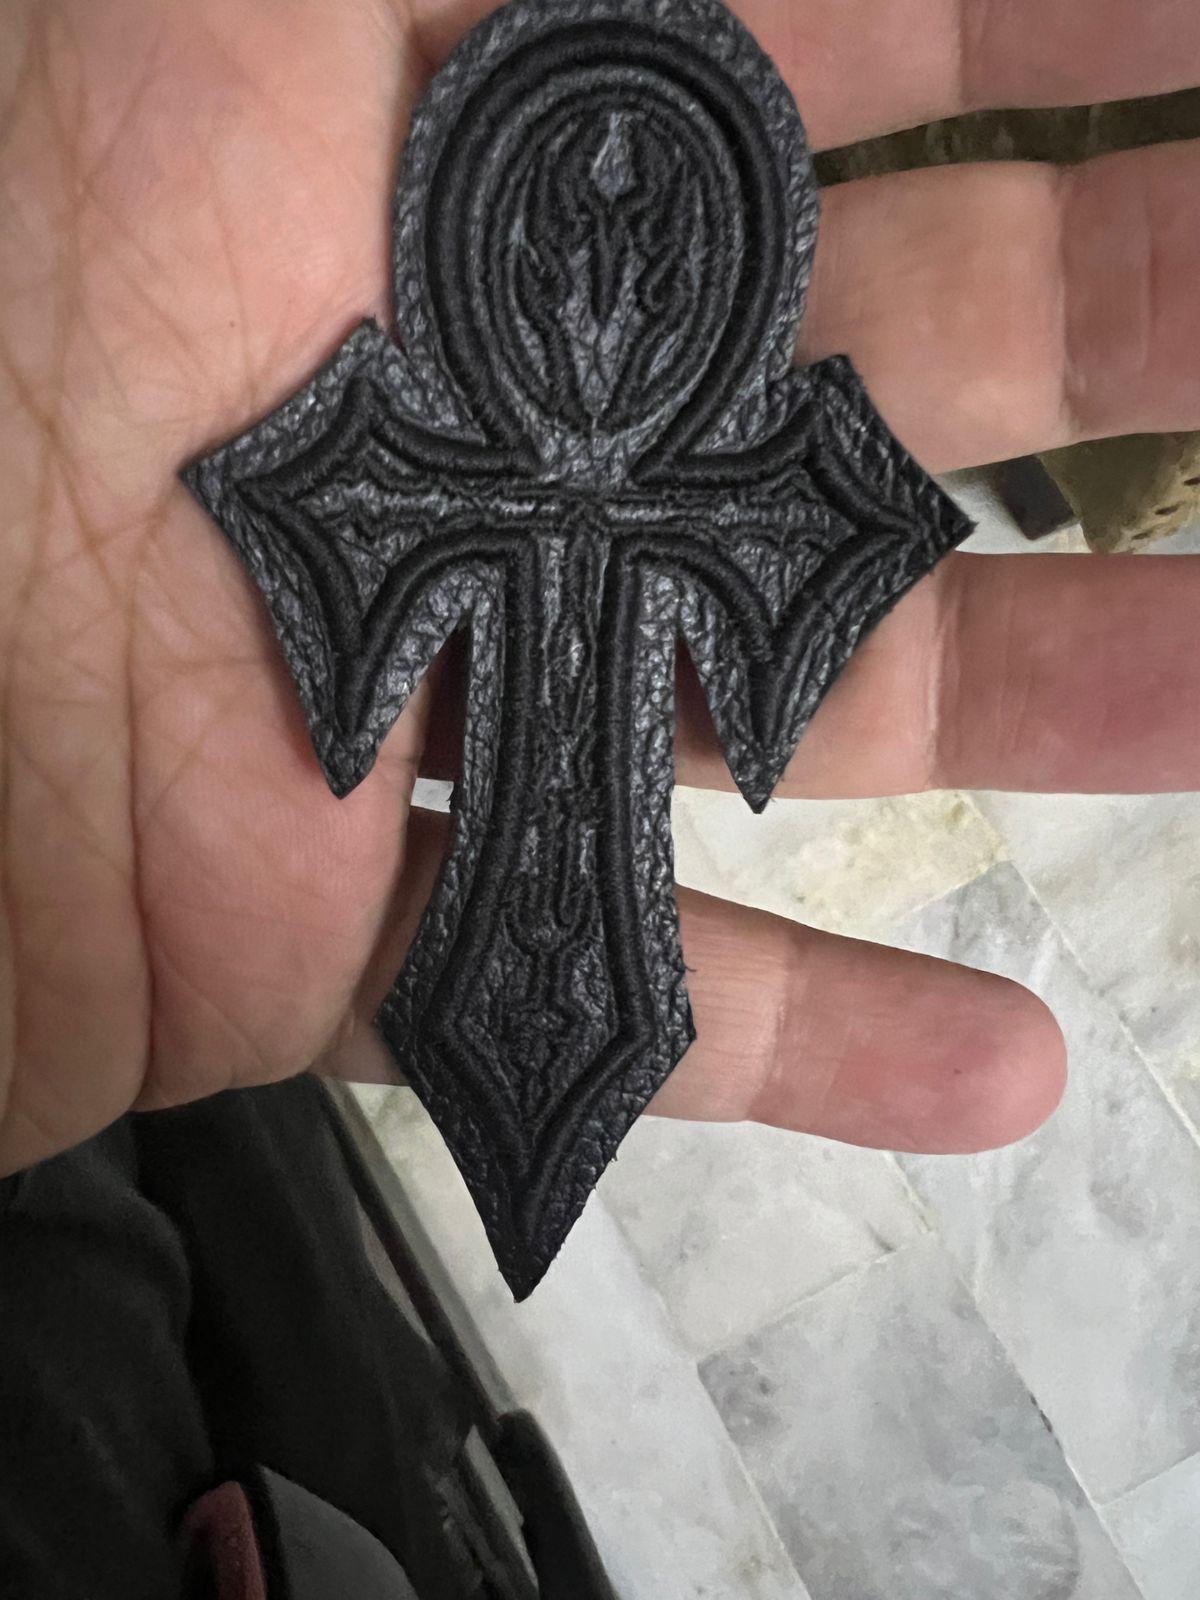
A celebrity designer reached out to us with a special request: create a full set of custom leather patches to cover an entire duffle bag. This piece is one of the 130+ embossed-and-embroidered leather patches we produced for the project. Each patch is made on genuine textured leather with precision embroidery to give it a raised, sculpted look. The details stay sharp, the edges stay clean, and the finish gives the bag a premium, handcrafted feel. It was a challenging build, but seeing all the patches come together across every side of the duffle bag made the effort worth it.
-
The knife has my utmost respect. Feeling a little better and wanted to tool a bit. Making a 1 inch hatband for a special hat. Not sure how it will be finished, painted or just antiqued. Waiting till 100% to get back on the wallet, hate to mess it up.

-
A gum eraser or "plastic" eraser does a pretty good job of removing excess contact cement. I apply cement sparingly, let dry for 5-10 min then warm it with a heat gun to "activate" the adhesive before assembly. Heating produces a strong bond with less cement.
-
Welcome to the forum! You need only post the details of what's happening or not happening, relevant details like thread and needle size, thickness of leather you're trying to sew. Any pictures will help. Do that and our global network of leather sewing consultants will offer the best advice anywhere.
-
I have a Pfaff 60 sewing machine it's in great working order and no issues. It has been a few months since I used it and now for some reason I can't get it to sew leather. Anyone who has this mechine and would be willing to assist me in troubleshooting I would greatly appreciate it.
-
There are a number of different center console designs. Probably need more information for a particular console. I made one that slips over the console lid and secures with elastic and velcro under the lid. Mine was for a bench seat with a fold down center console so the lid was pretty simple to cover.
- Yesterday
-
1: don't use glue . . . use contact cement . . . put it on with a plumber's brush . . . (cheap metal handled / size of a pencil / buy at Harbor Freight in a bag) 2: it goes on both surfaces that are to be put together . . . let it get 95% dry . . . then put them together. 3: a minimum amount of care will keep it off where you don't want it. May God bless, Dwight
-
 Welcome to the forum. Not knowing the history of that piece makes it tough It might be that it had something applied or spilled in those spots that prevents the conditioner from soaking in. It might evaporate with time. Maybe some time sitting out in the sun? How about a picture? Smarter people that I will certainly weigh in presently. Don't be in a rush.
 -
One of the biggest temptations is to jump right in and start making more complicated pieces, before we have the knowledge and experience. It's a very common thing for beginner leatherworkers -- most of us have done it! One thing that will help you learn is good leather, especially if you want to learn tooling. Cheap leather will be frustrating, but you don't want to spend a lot of money on beautiful expensive leather yet (until you know what you are doing). So there should be a mid-range that will let you buy leather that you won't mind throwing away on practice pieces. Is there a leather supply store near you?
-
It is. Been posted before. Still fun to post.
-
Great cats. Cute, for sure. Consistent quality from one to another. Nice shading on the backgrounds, too.
-
Thanks I'll give one of them a try and for sure I'll post the goal.one day will be making batman mask I saw once at a ren fair .
-
Hey, if you ain't bleedin', you ain't tryin'. Nice work.
-
 The Odd Platypus joined the community
 -
 BerlinAir joined the community
 -
Hello, I got a used leather purse; soft leather, pink in colour. I used the honey leather cleaner and then next day used the honey leather conditioner. I accidentally got some large spots (size of palm) with too much conditioner and its been 2 days. The spot is very noticeable. Looks greasy/wet. Not sure if I should used the cleaner on the spot that it not absorbing the conditioner and start again. Thanks
-
Hey all, So I’m making a padded belt, but I’m wary of getting cement on the face/grain of the strap. Is there a way to protect/prevent it? I had the thought of just masking it off with tape, but in the past, tape has seemed to deglaze the grain. Thoughts? Thanks, and may you never burn your bacon. — AZR
-
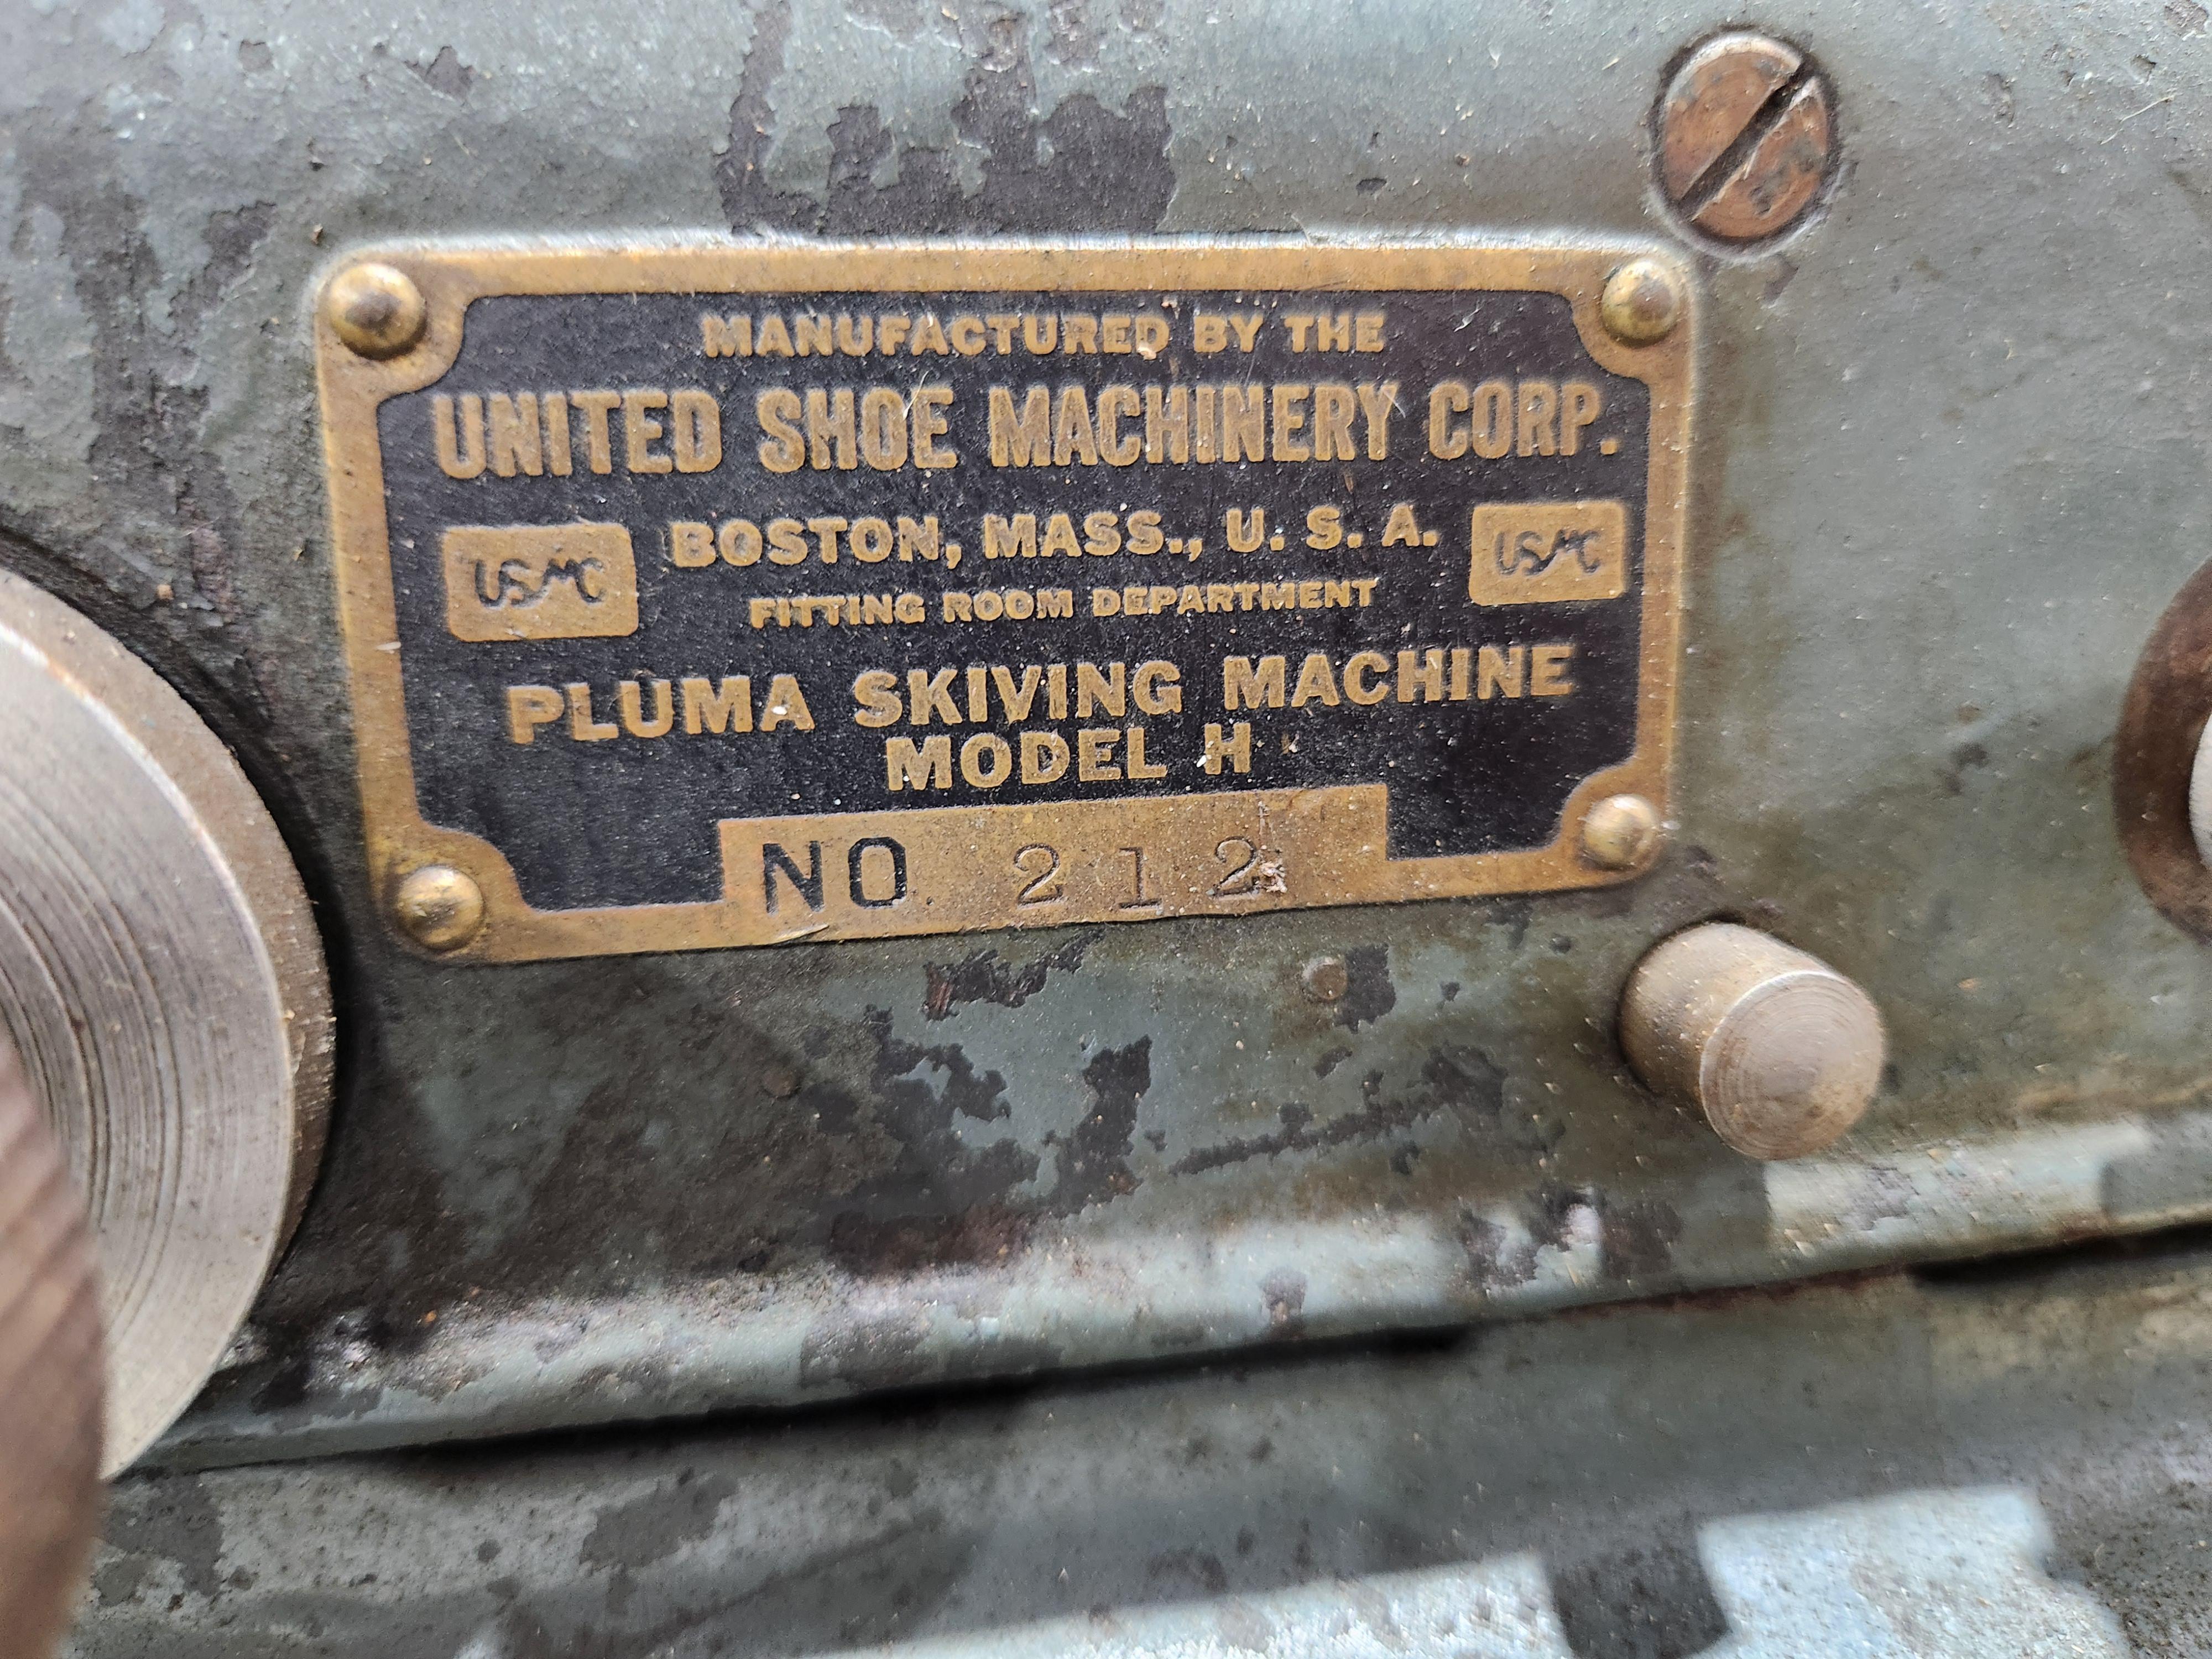
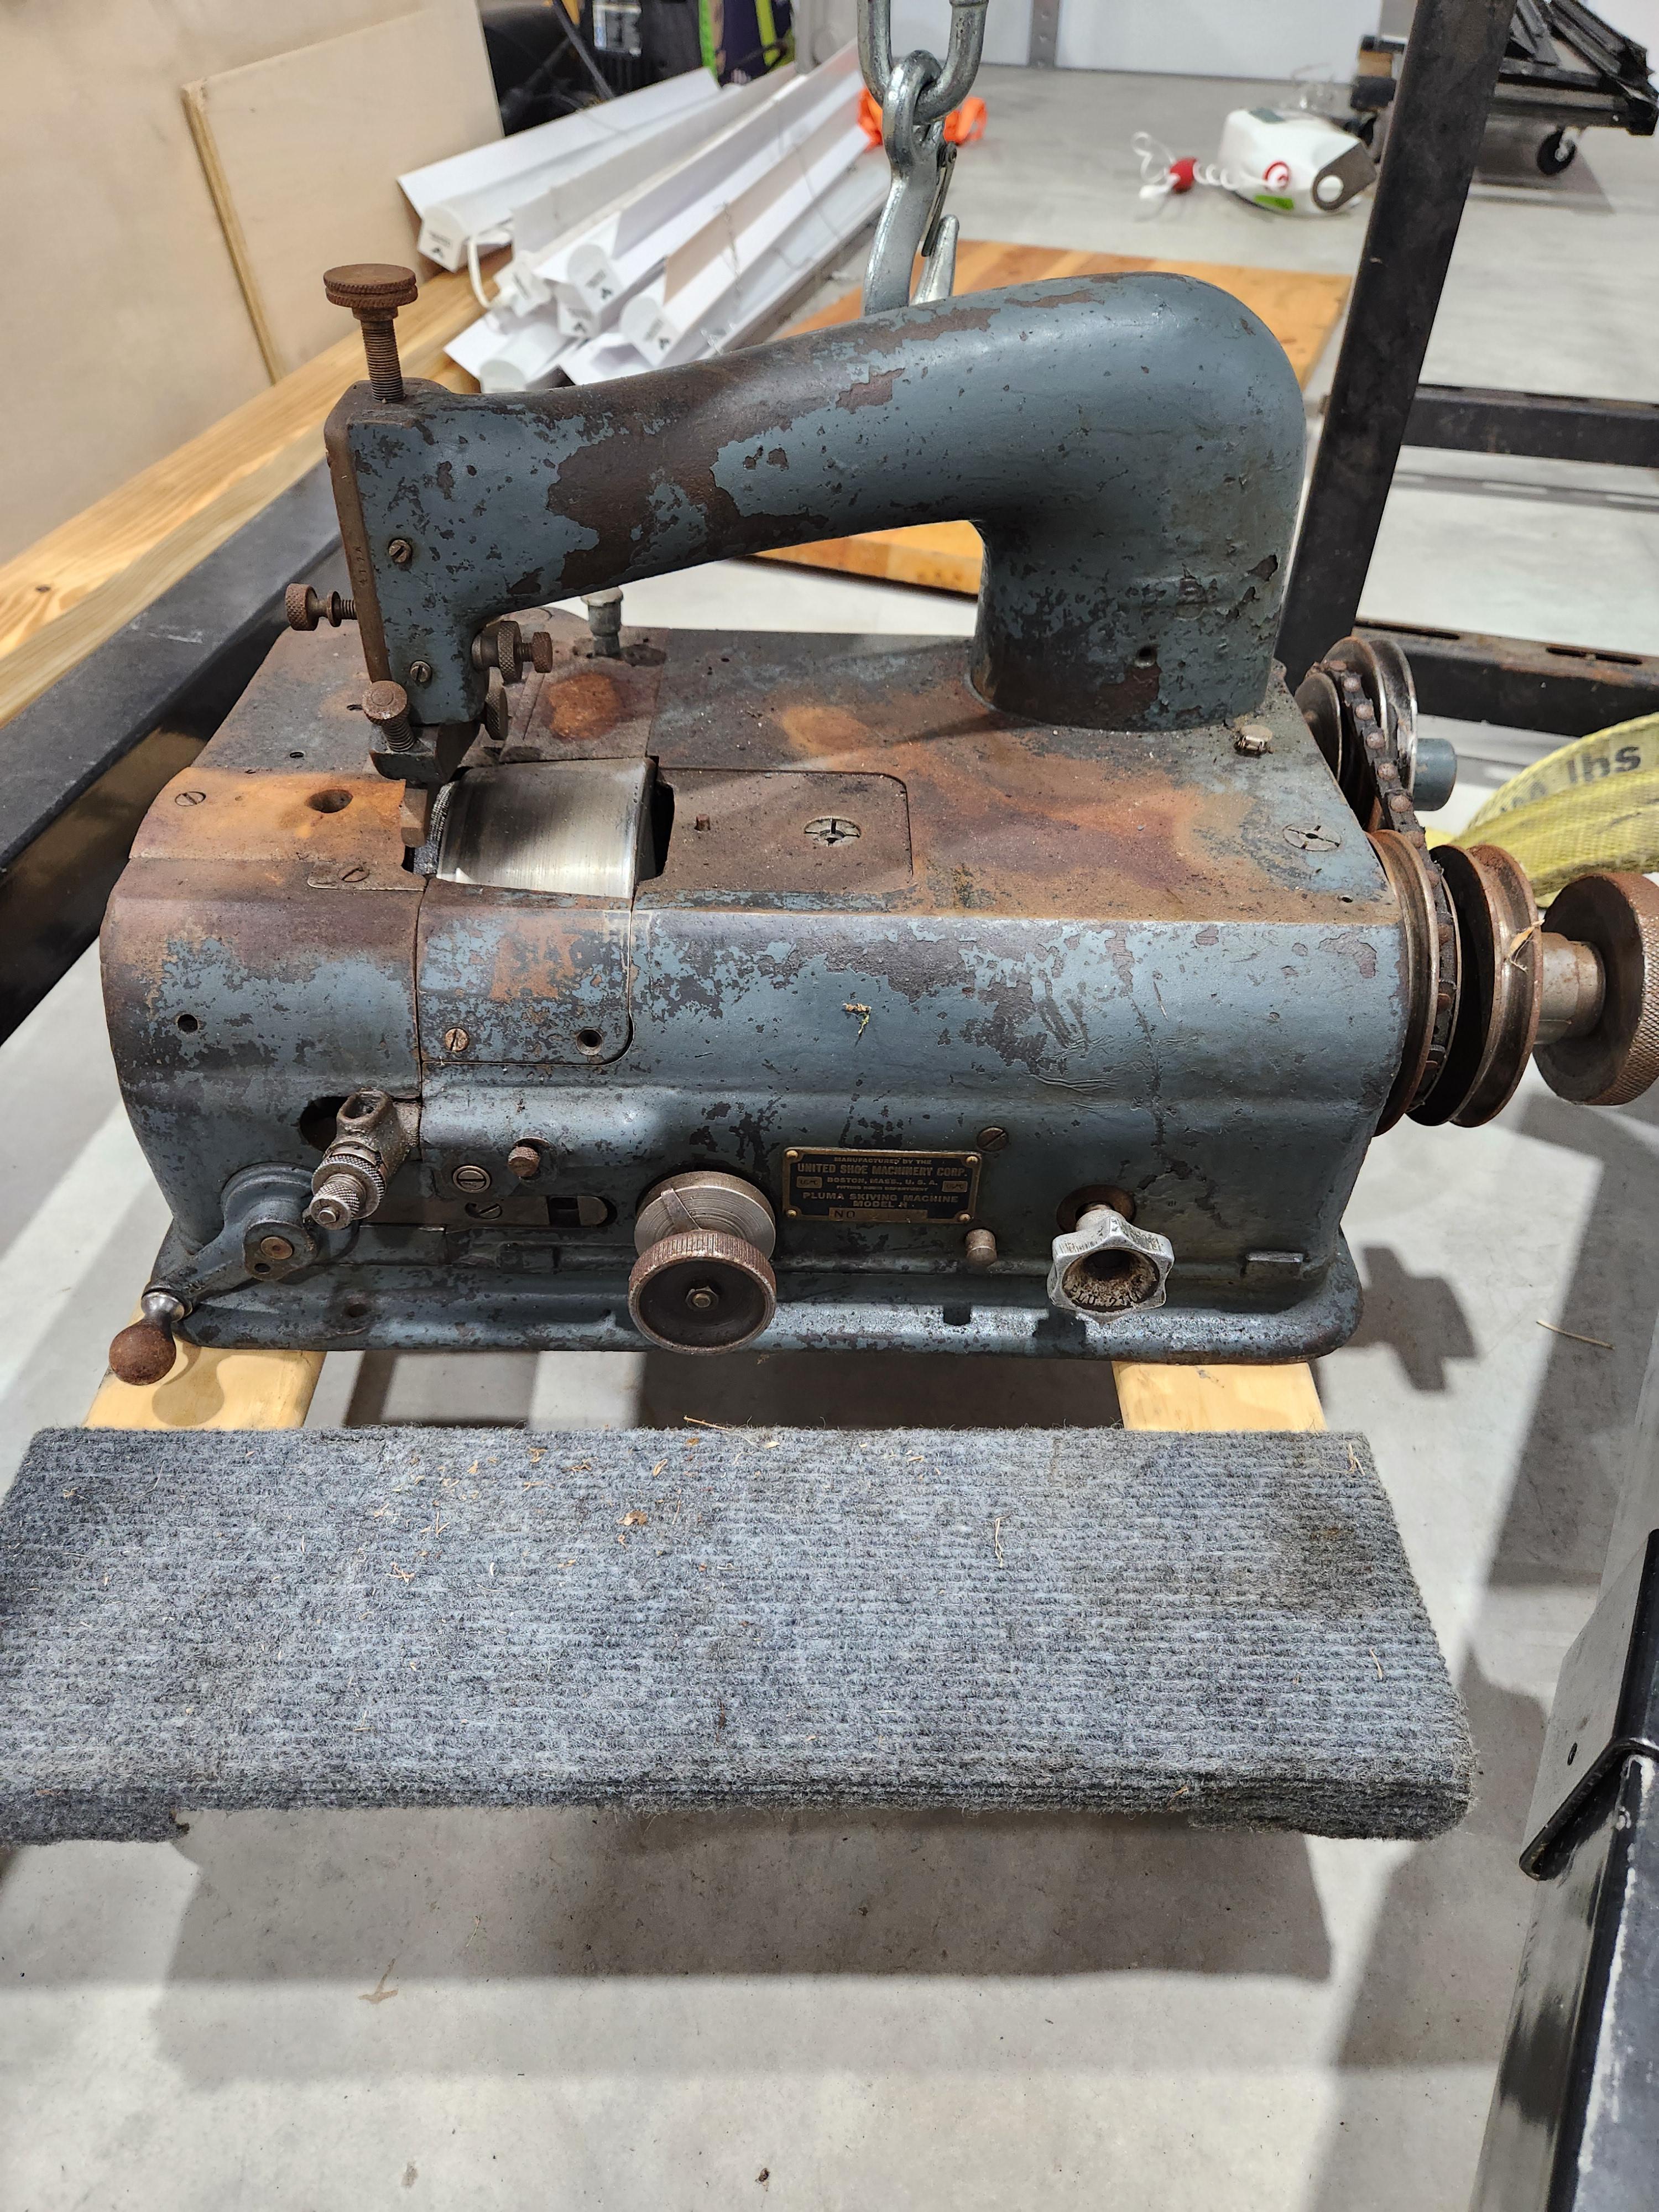
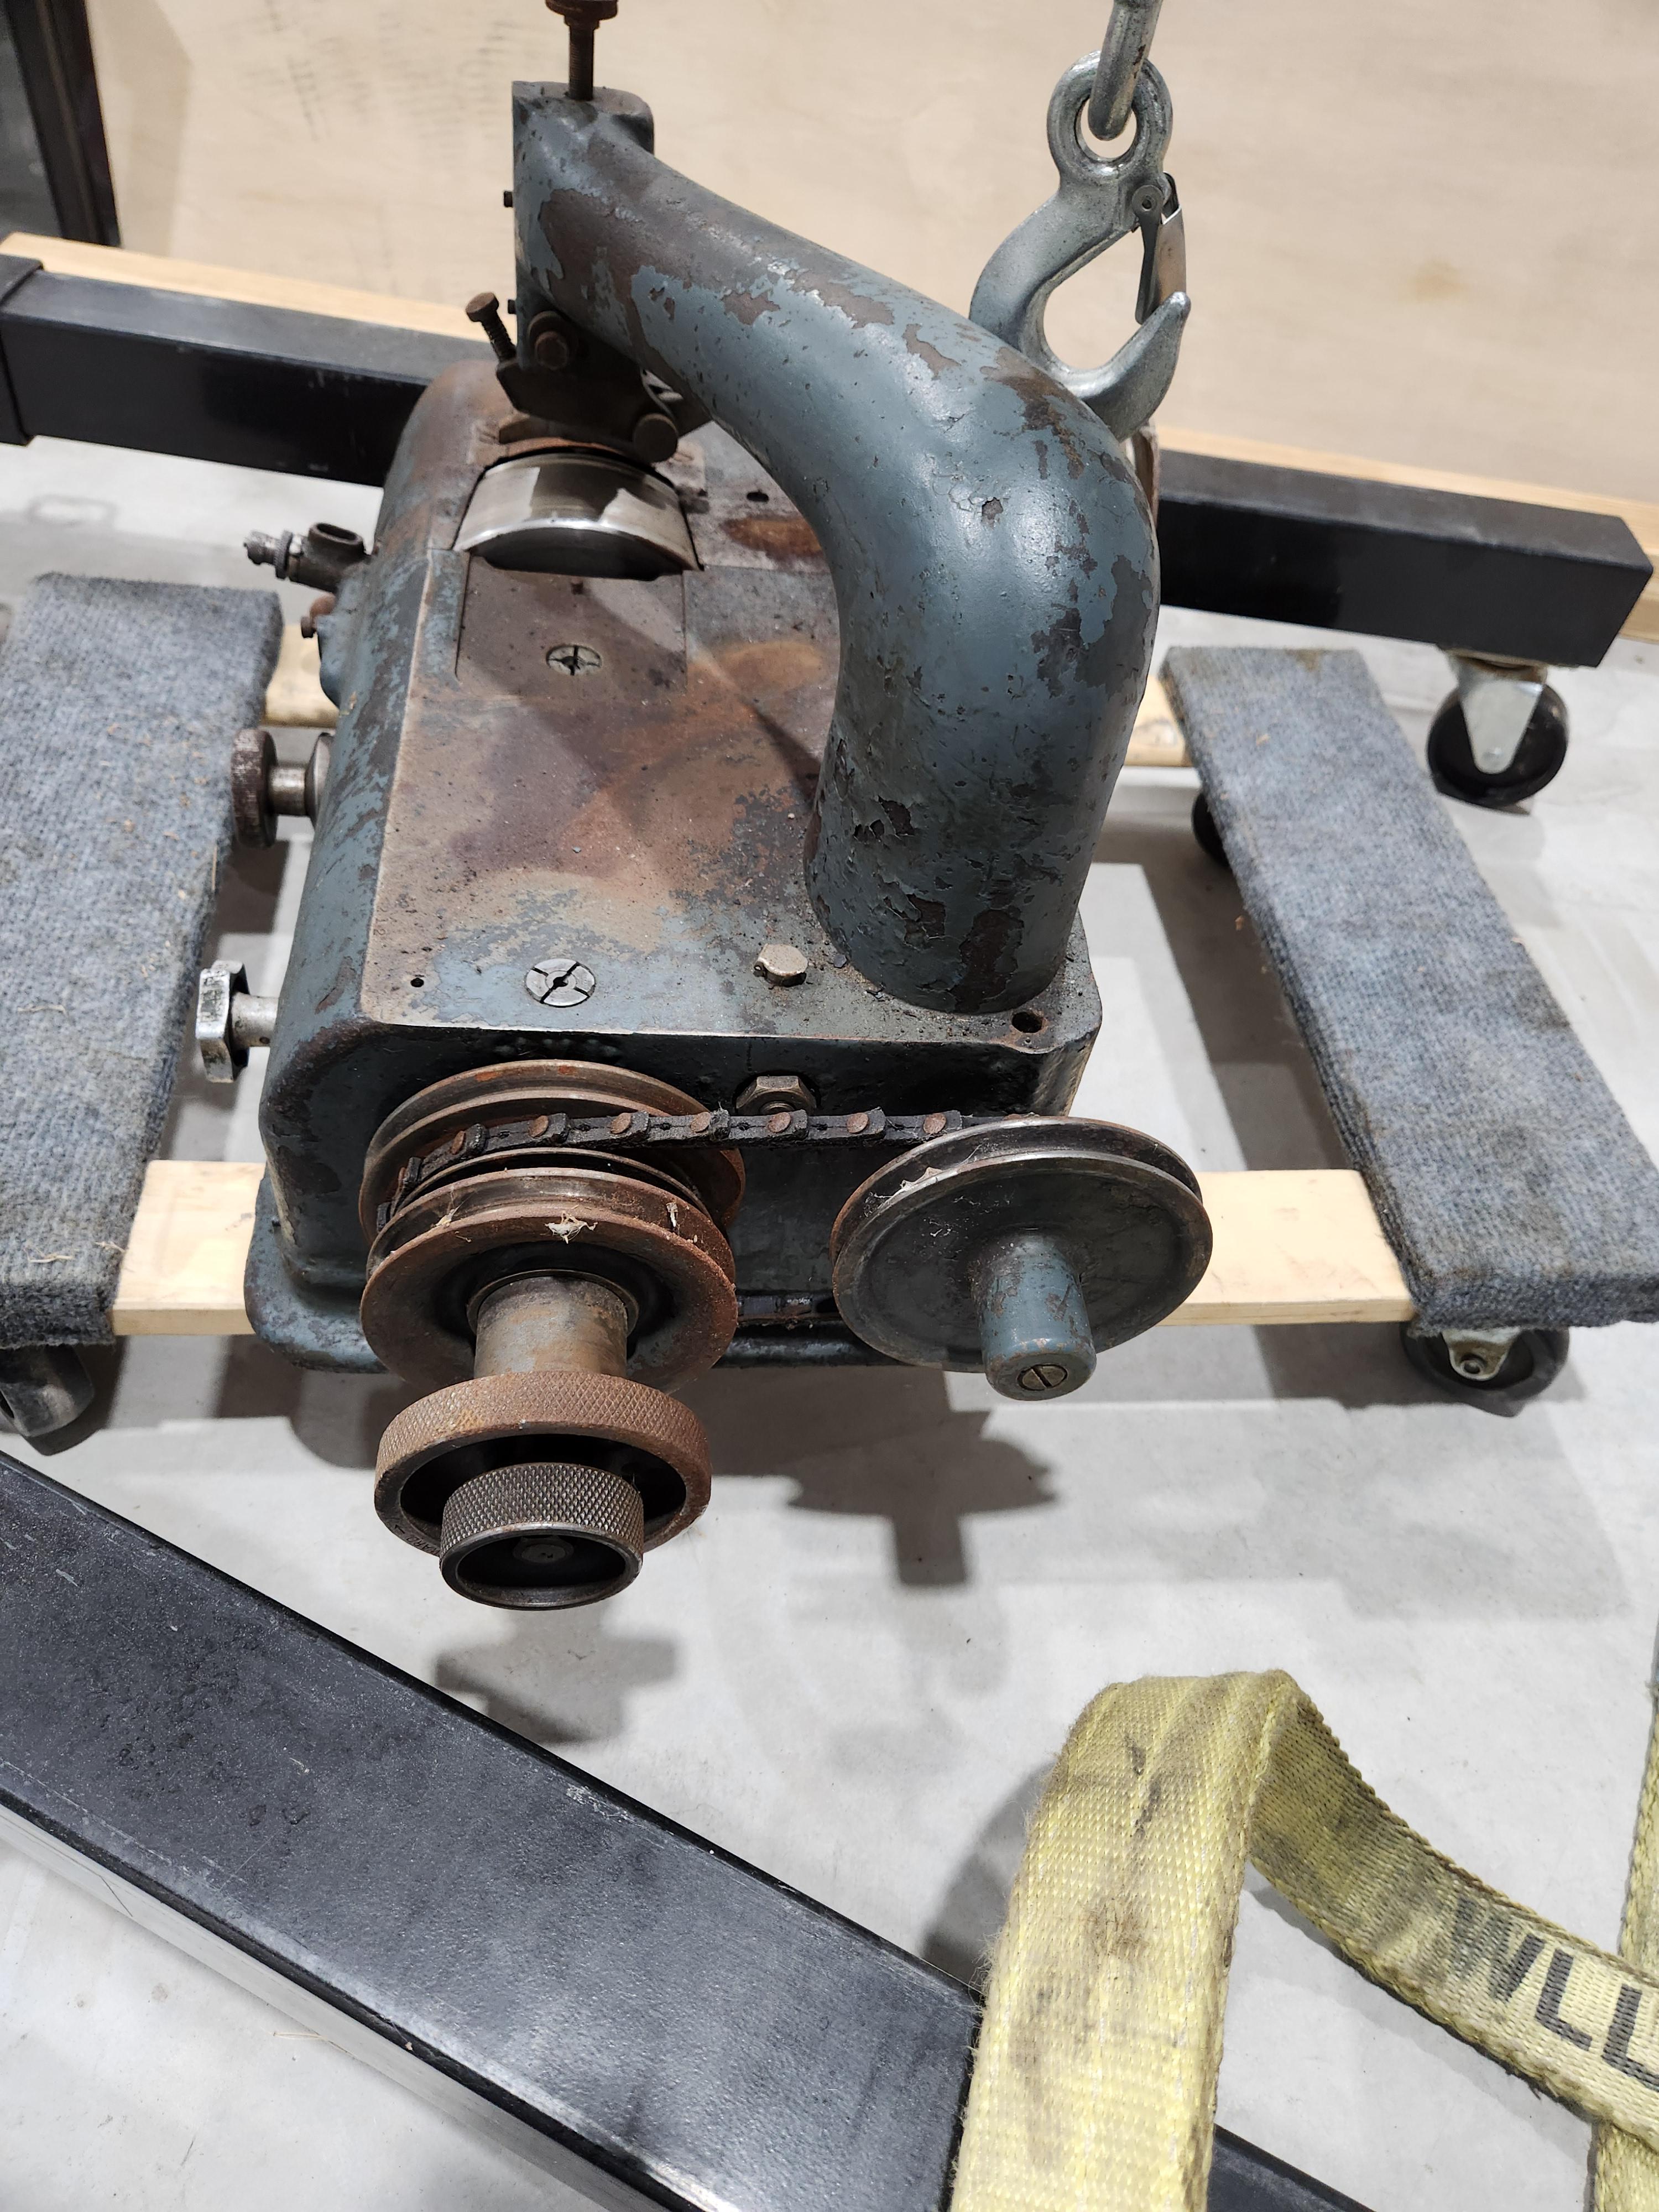
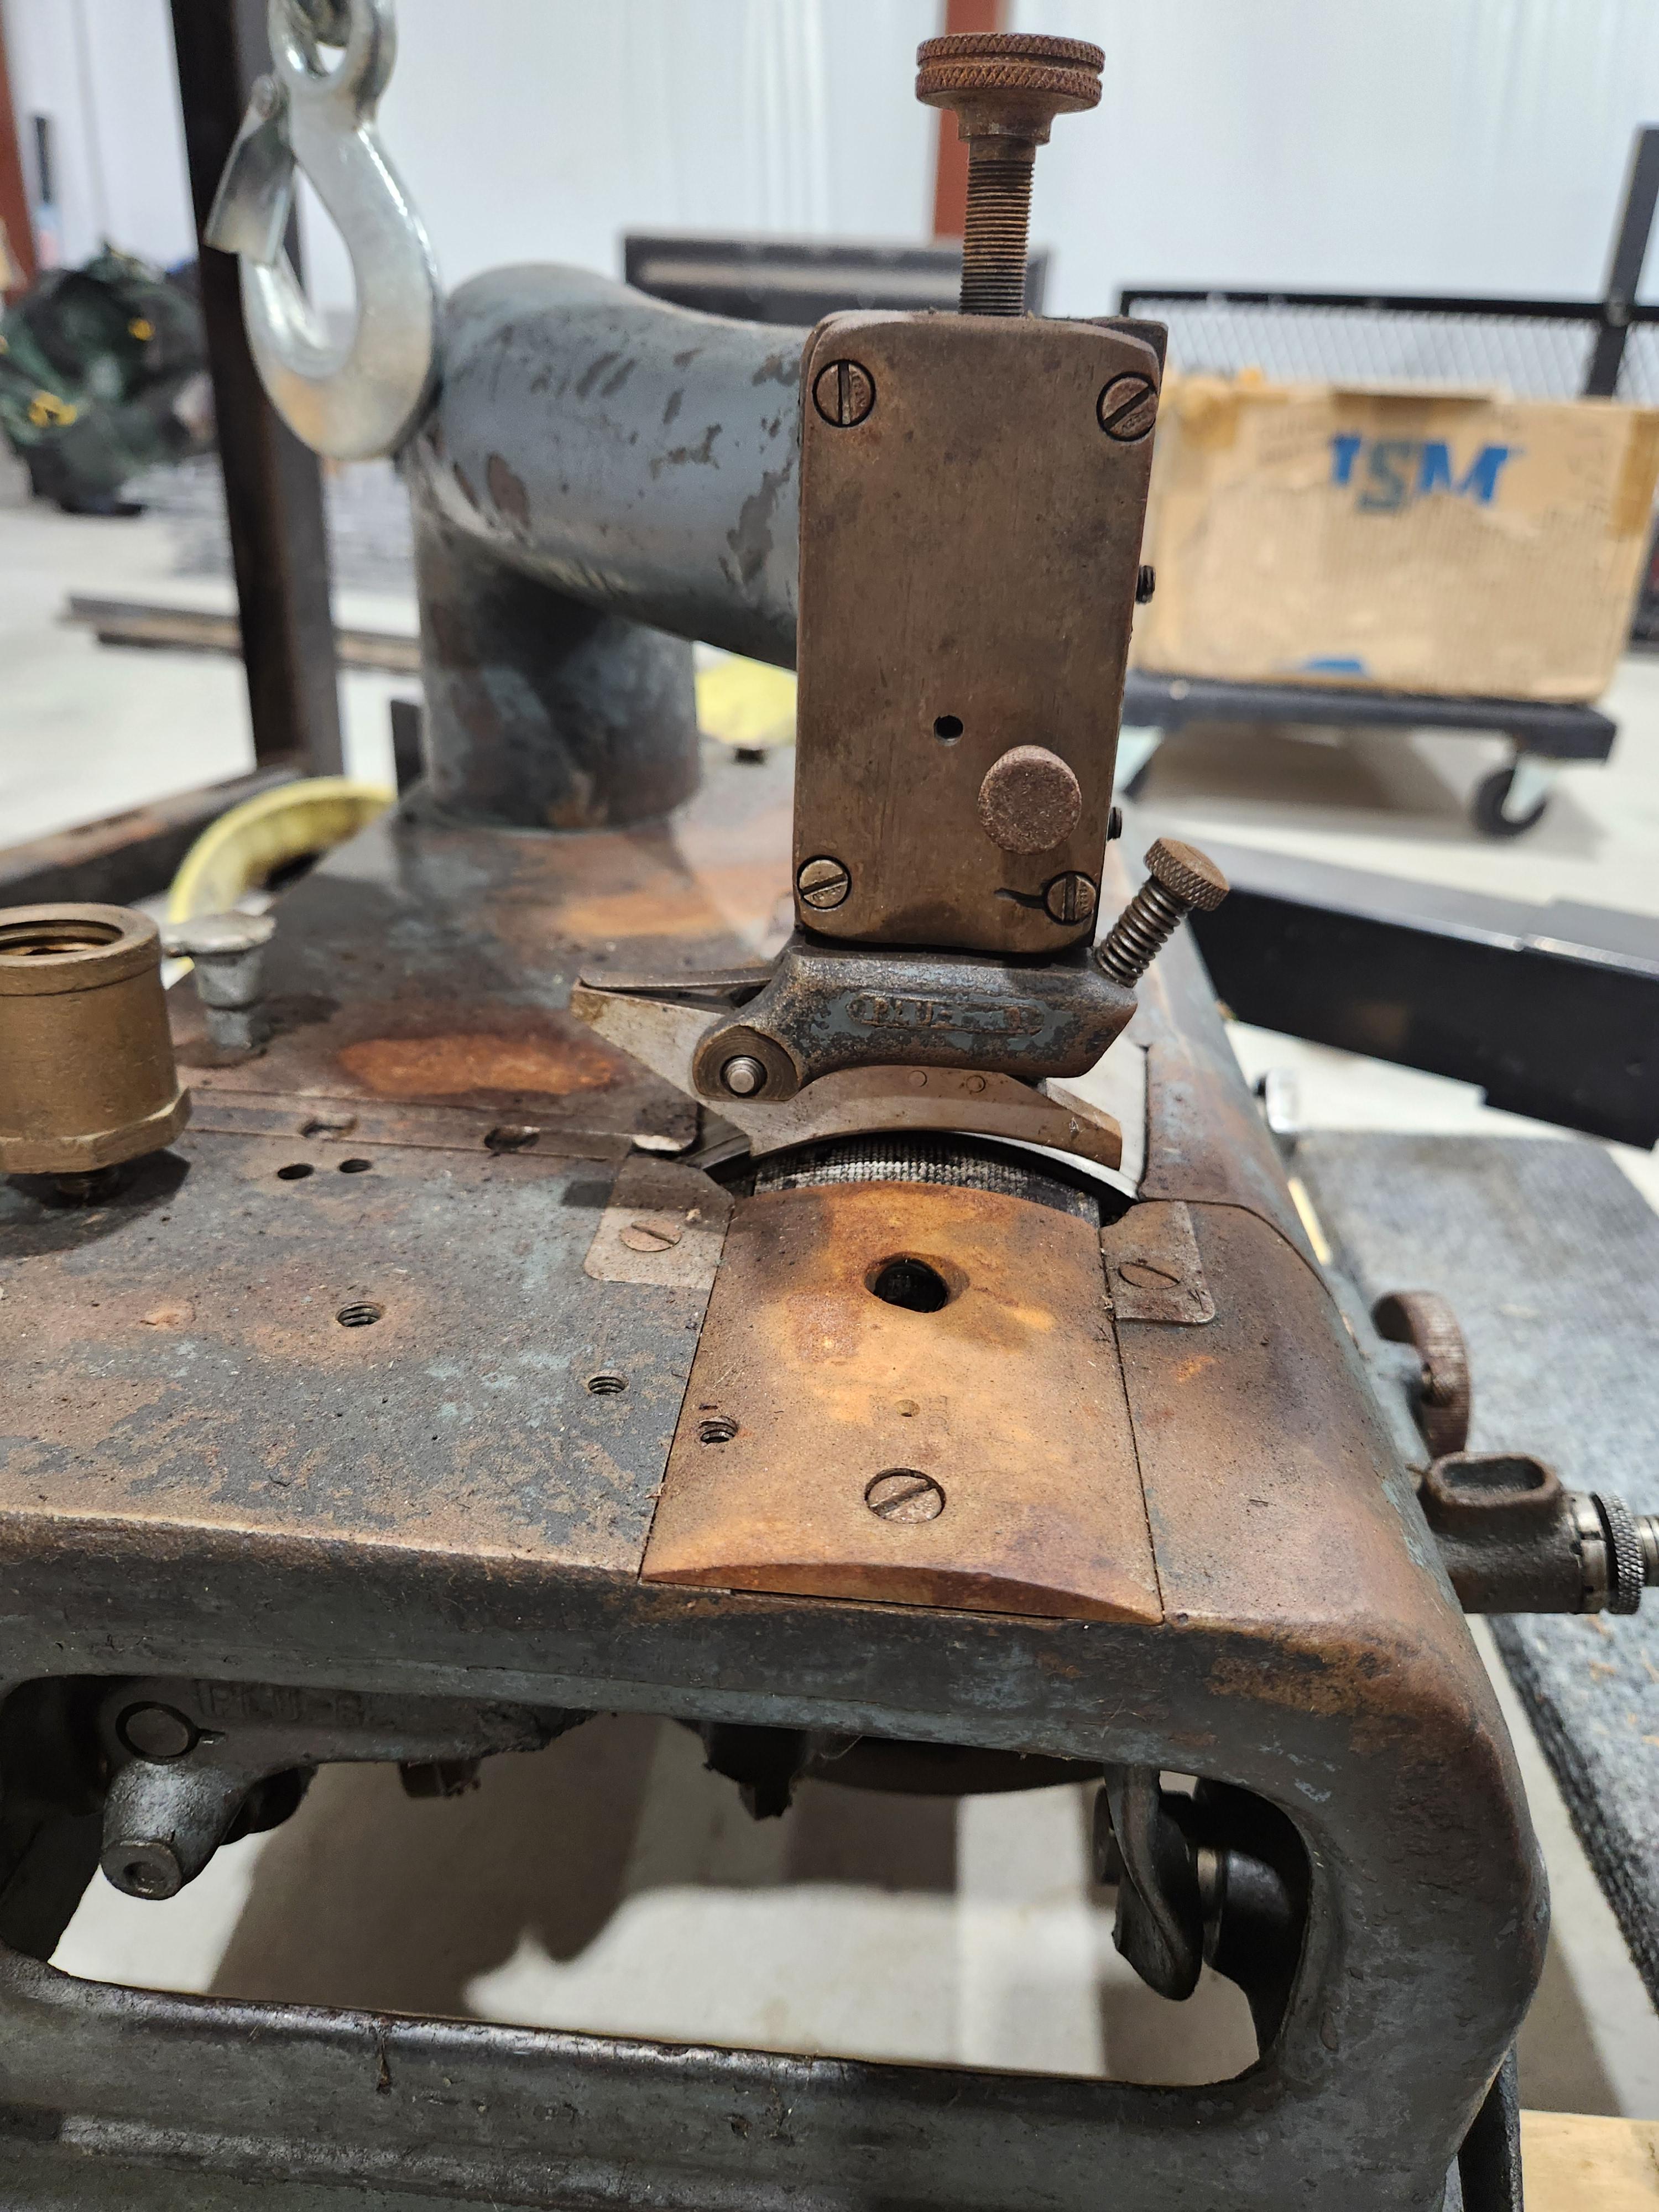
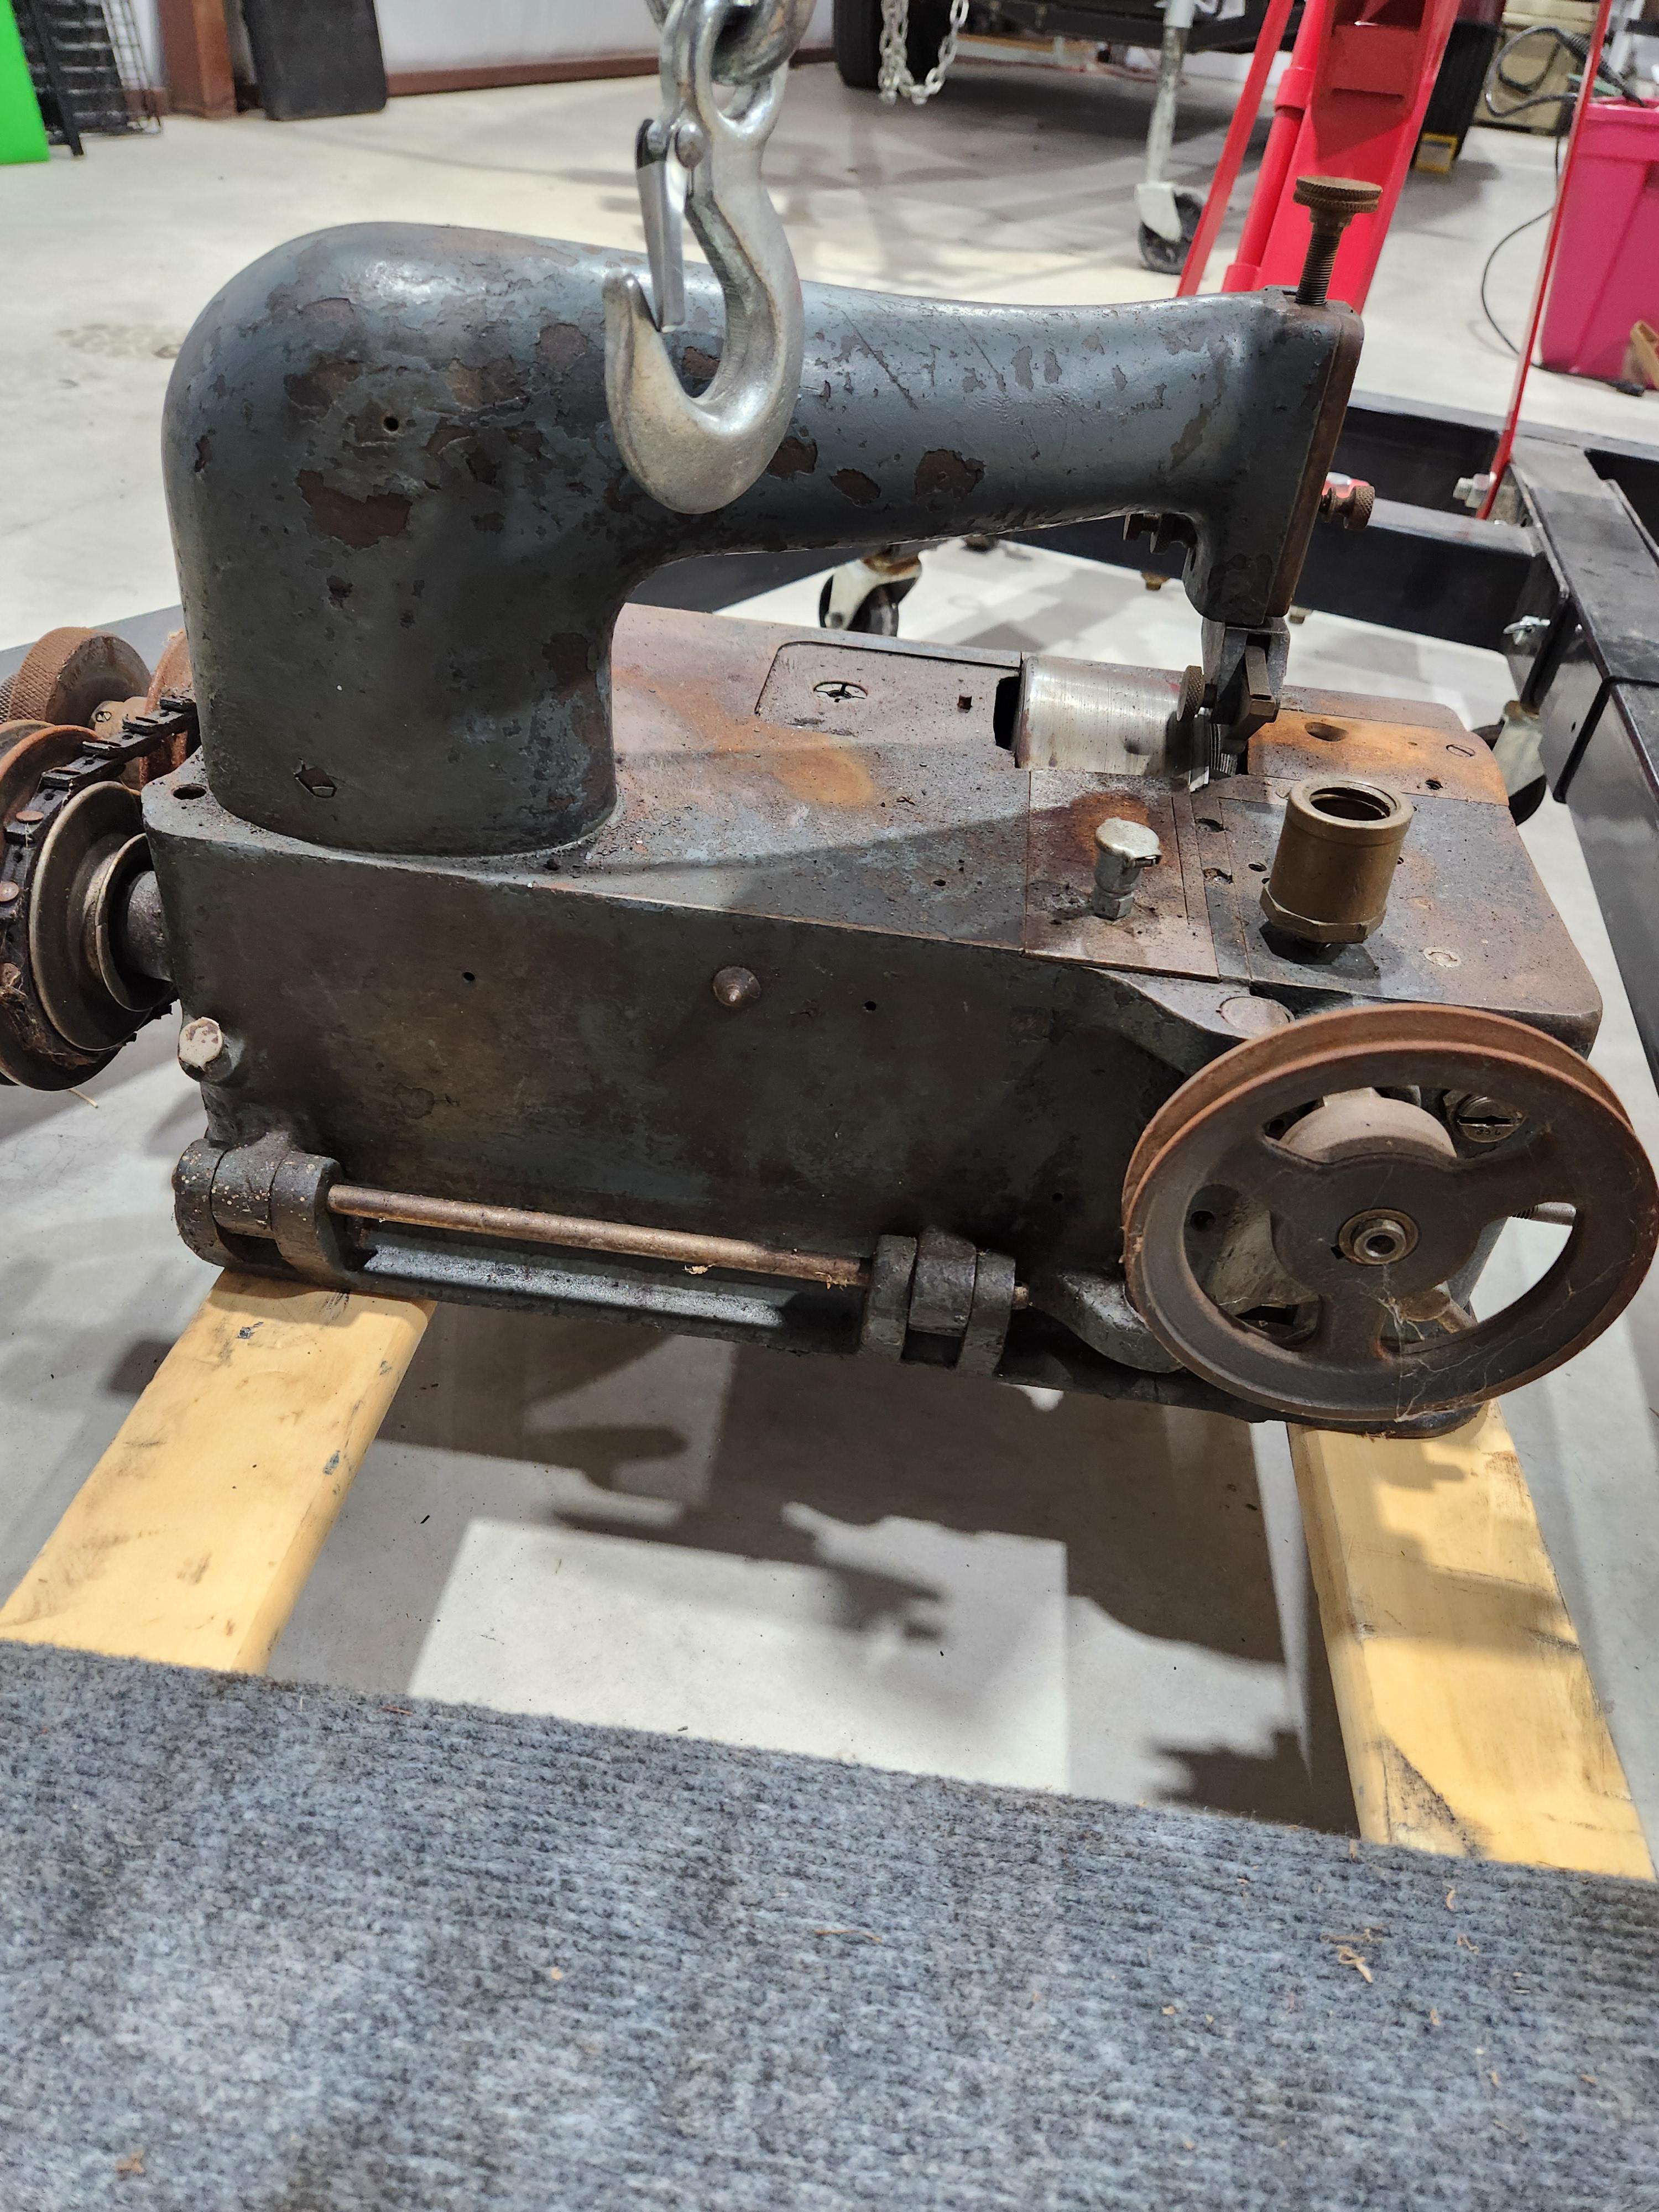
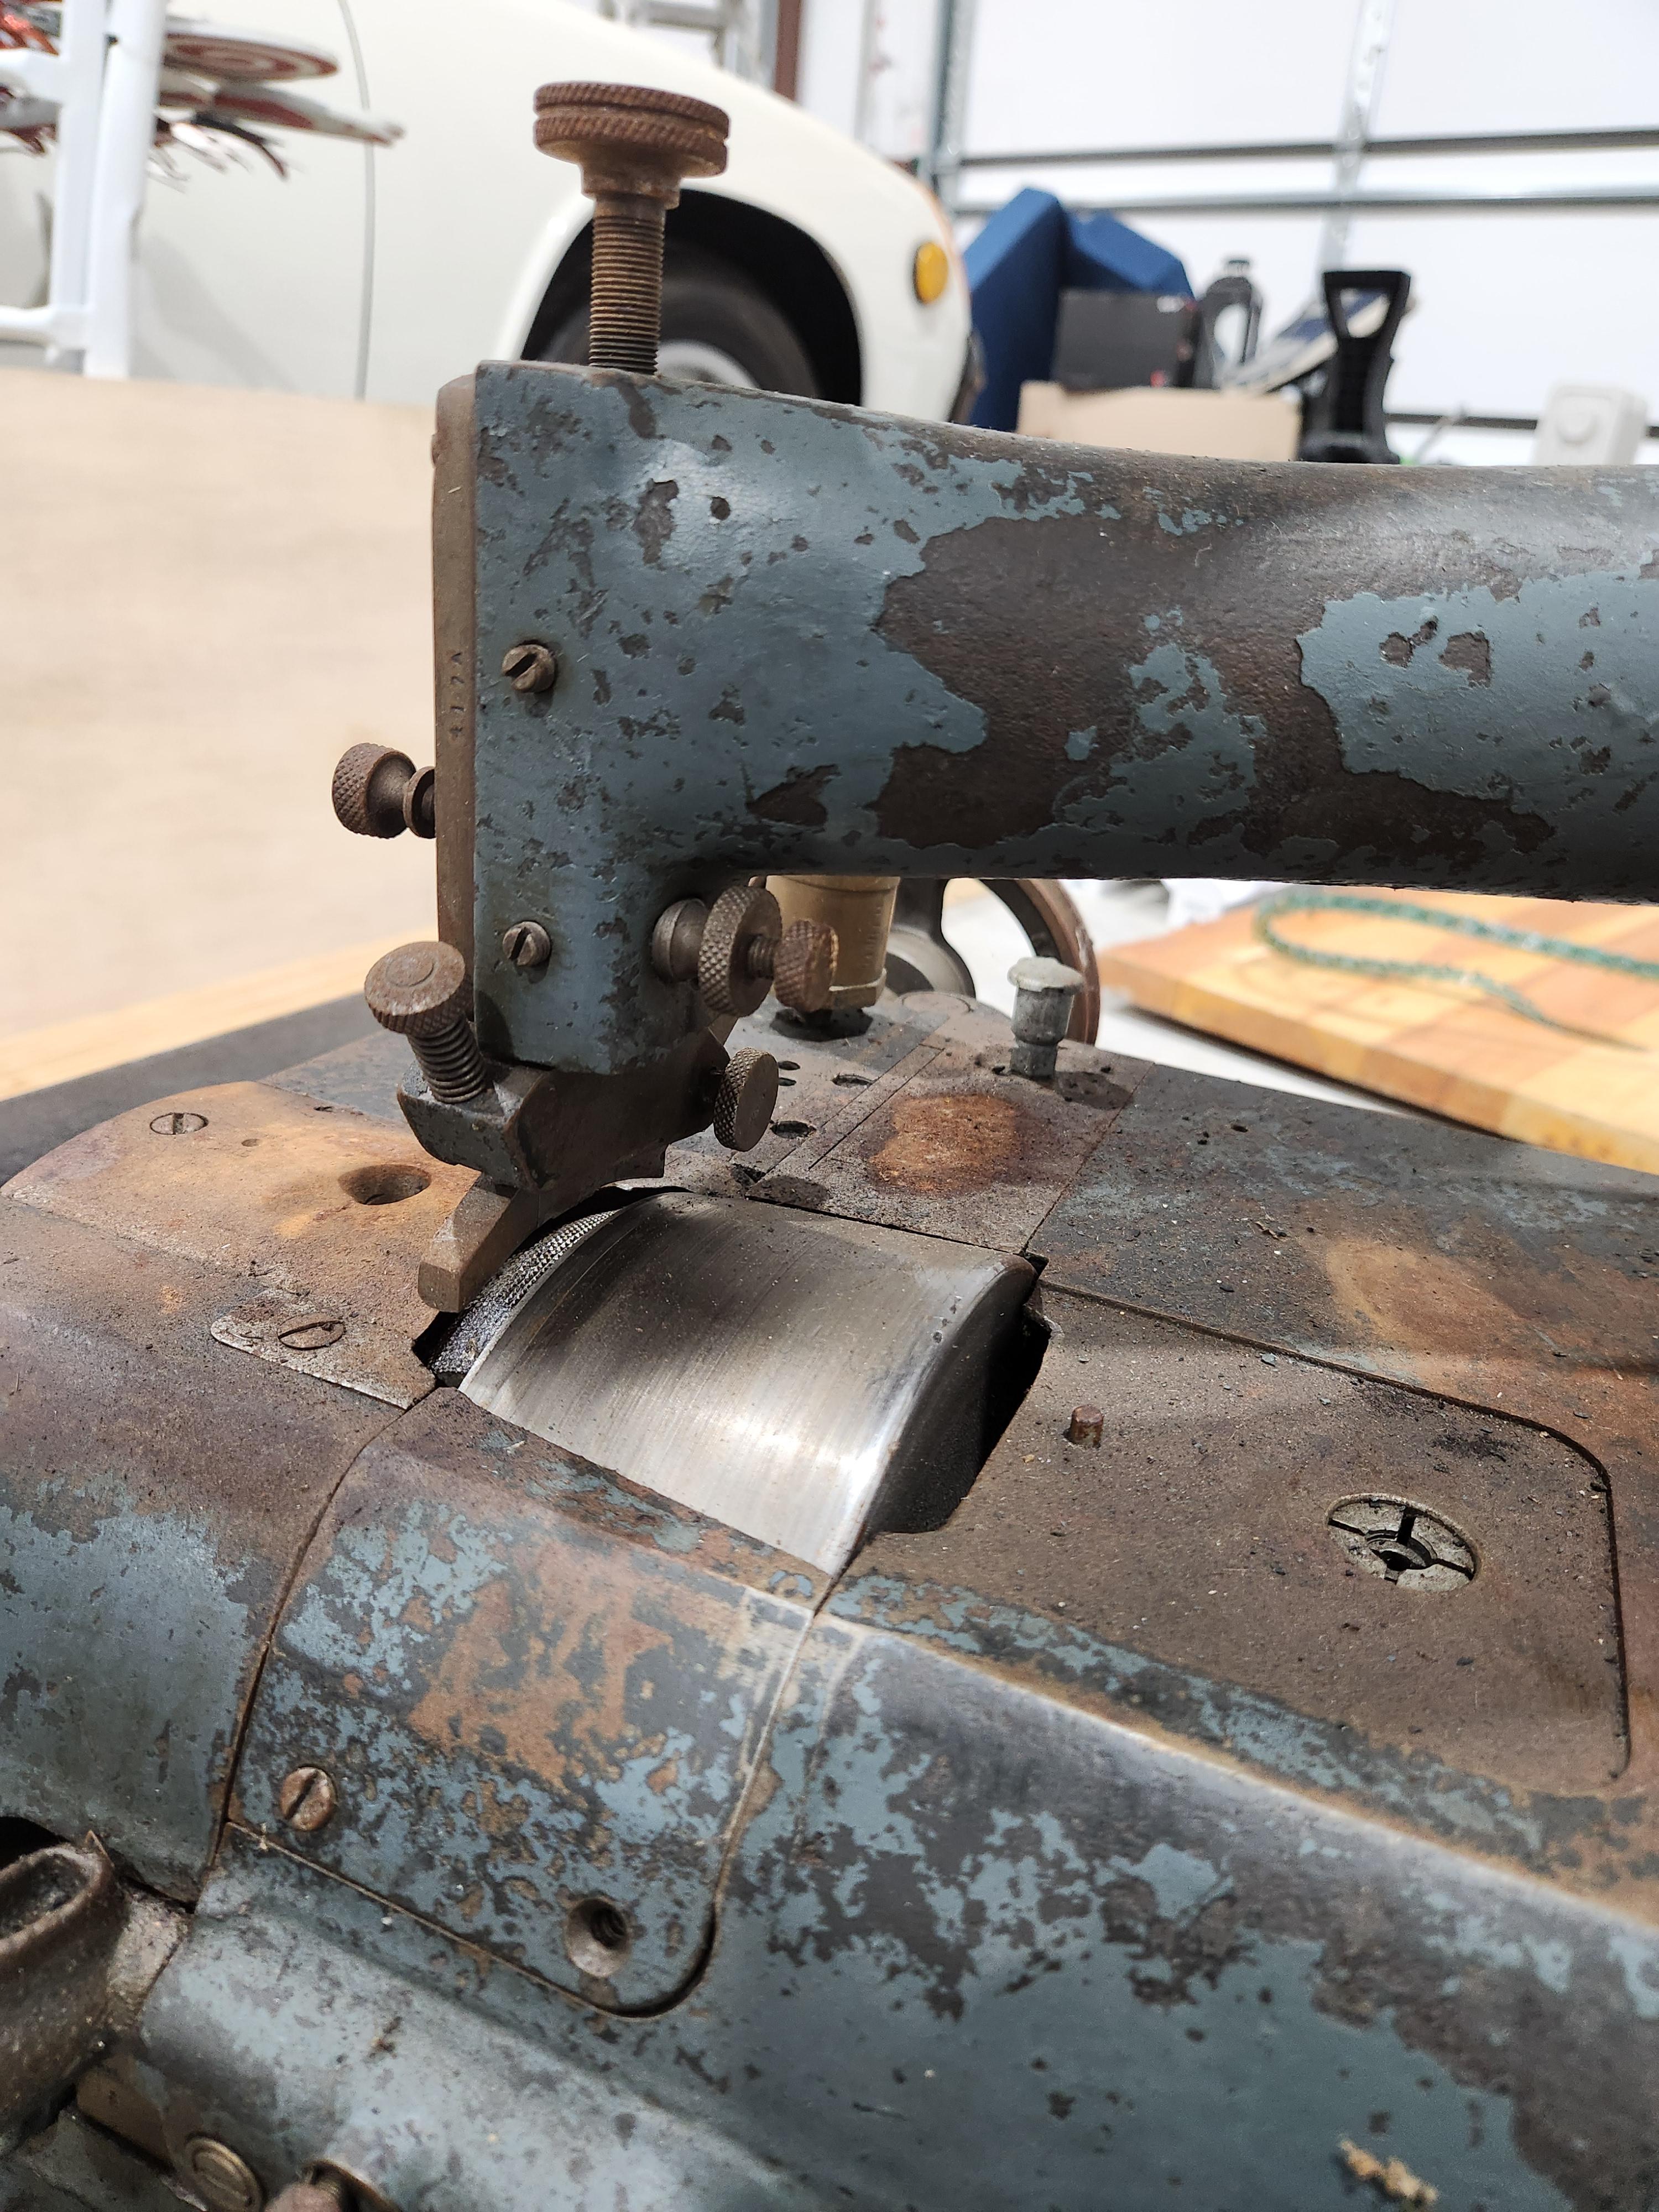
I purchased this skiver 20 years ago and am now just putting it into use in my shop. I found the Catalogue and Price List of Parts but am looking to see if there is an operating manual available or has any knowledge of this machine. Obviously needs to be cleaned up which I plan to do. All parts are moving freely despite any obvious corrosion. Bell knife has section of surface rilusrlt on the portion that was facing the presser foot while in storage and hopefully I can just clean that up. Blade edge looks fine. Any help or hints greatly appreciated.