bruce johnson
-
Posts
4,401 -
Joined
-
Last visited
Content Type
Profiles
Forums
Events
Blogs
Gallery
Store
Everything posted by bruce johnson
-
Art, MS Collins may have some more info on these. I think his great uncle made the Newell saddles. I expect they might be a little hard to drill the rigging screws into.
-
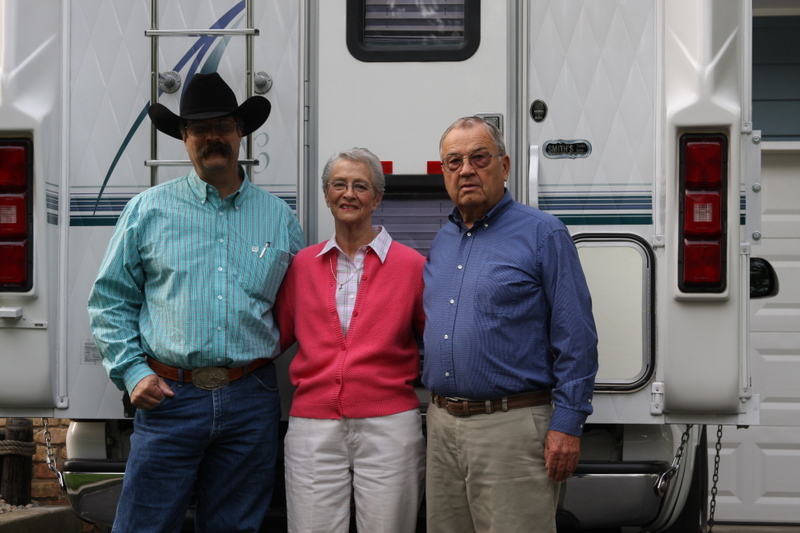
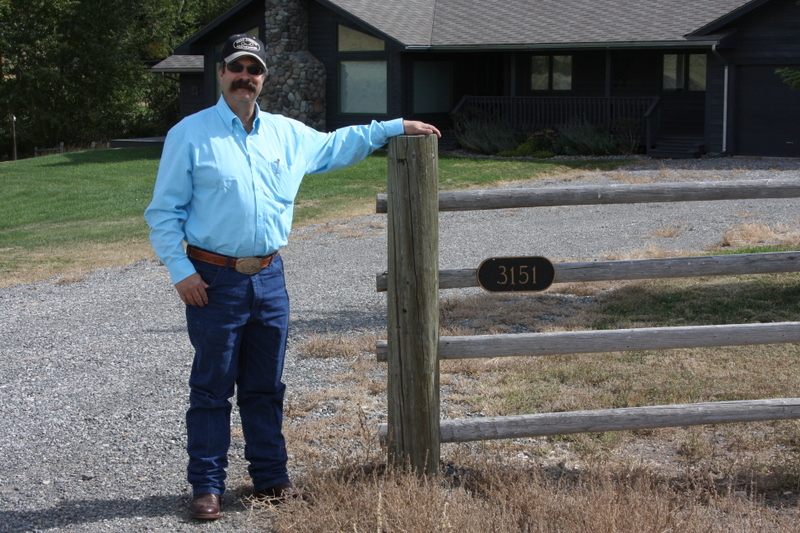
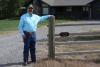
Art, I finally got the time to go through this thread. I've got a few to add. The first is Rundi and I at one of the horse sales my son was auctioneering. The next is my son Travis selling at a western art sale he put on. His first sale for his company, not contracted out to sell for someone else. Finally a few recent pics. Rundi and I flew back to Indiana to visit my parents in Indiana. My mom is dealing with cancer and their camping days are done. They gave Rundi and I their pickup and camper. We are selling the Capri rodeo camper that has been the home on wheels the last few years and movin' up. The final pic is me standing in the driveway of Harvey Lutske's place in Wapiti WY on the trip back. Harvey was in LA , but I got to see the summer estate anyway.


-
Russ, I have a B-100 and was in the same boat a while back. I couldn't find anything locally. Ironically, the worst selections of staples I found was at... Staples. I ended up and got a box at an antique store. I am getting low on them and looking again. One guy I talked to said that some of the Arrow staples will work, but I haven't got around to trying them yet. Anything on Google searches leads to places with pretty big minimums that I found.
-

Shell Cordovan Belts
bruce johnson replied to antipaladin's topic in Purses, Wallets, Belts and Miscellaneous Pocket Items
I'd like to see some cordovan sometime. I was thinking that shell cordovan was a thinner leather. The "horse butts" are left over after the shell is removed, and it is horse butts used for holsters? The one horse butt I had was about 8/9 oz. The hard roll vs. soft roll horse butts has to do with the amount of pressure they apply to them to compress. Ringing a bell with anyone? I talked to an old guy a while back that likes the hard roll horse butts for lining monel and brass bound stirrups. -
Looks like just the footwear I need to wear to the upcoming season of lutefisk/meatball supper/pickled herring feasts. Tak skal du have.
-
I have been taught two ways to skin the handhole. Originally I was taught on the swell forks to make the hand hole cuts in my ground seat buildups as I went. The first few slickforks I did it that way too. I then went to cutting the handhole last on them, and like that smooth transition behind the horn better. Curious how everybody else does this, and any tips and tricks are always appreciated.
-
Jon, Good looking saddle. I especially like how you made the back string button the center of that swirl in the tooling. It makes it look like that button just belongs there. Bruce
-
A couple of newby questions from the mom
bruce johnson replied to hvl's topic in Leather Sewing Machines
hvl, There are lot of loyalties among leatherworkers for sewing machines and suppliers. You'll no doubt get a lot of advice. I am keying in on your description of "reasonably priced". Also since you are doing tack work, cylinder arm machine first. You can always make a flat bed for it. If you find more need for a dedicated flat bed machine, those are more available. If there is any way you could get to a trade show, or spend some time in a shop with a few different machines, it would really speed your learning curve along. I've had both of the machines you mentioned. I bought a Boss when they were the only thing that could sew what they did for any kind of lower price. Even early on they were about $1600. I had very little problems mechanically with mine, and they were taken care of PDQ. It would sew chaps, skirts, or tooled corners on felt pads with ease. Actually ease on the machine, a little tiring and boring for the guy cranking the handle. Once I got the tensions set the way I liked them, the only adjustment I ever had to do was the stitch length. The Boss machine tends to keep a decent resale value. Tippmann will rebuild them and warranty a used machine like new. The throat is only about 6" though. When it was time to move to a powered machine, the Ferdco 440 was again the only thing available in that price range. The biggest problem I had with it was the feed system. It is a needle feed, and the throat plate has dogs (teeth slanted back) to keep the leather moving through with the needle pushing it, and not back up. Those teeth made a heck of a mess on the backside, and especially going around corners. I know guys who have these same type machines (sold under several names by different sellers) and some like them for what they have them dedicated for. I don't have that luxury. I called Ron and told him this wasn't going to be the machine for me. For not a whole lot more money, he sent me an Adler 205-64 head, and I sent the 440 head back. I was green as a gourd about machines. I didn't ask the right questions, and didn't understand and communicate very well when I ordered the 440. I have since traded up in machines, and sold the Adler for more than I had in it. Those machines are probably past the "reasonbably priced" entry machine. Now there are more choices. There are at least 4 or 5 sellers that have the short arm Juki clone machines. Looks like everyone has had a recent price increase, so they pretty much are $2100 or better. A much more versatile machine than the Ferdco 440. Most everyone is happy with the machines. Soooo, what would I do if I was buying right now? If the budget was $1500 or less, I'd get a Boss - new or used (less) and let Tippmann rebuild it - used to be a flat $100 fee. If I could go up to $2500 or so, I'd look at one of the short arms if I had to have a new machine. Figure you are going to pay shipping and need attachments too. Negotiate for some attachments when you buy it. They are not inexpensive usually, and will cost more later. For the same $2500, I'd also think about calling around to the dealers for a bigger used machine. The Adler I had was a great machine, in the end I used it for 4-5 years and sold it for $200 more than I paid for the table, motor and the head. I used it for better than free. There are other good machines sitting. Ron at Ferdco usually has some or knows of them, there are some other dealers who pop up on the forum. A lot of guys use a screen name, so I don't know all the players. ShopTalk has ads from most of them. Tell these guys what you want a machine to do, your level of experience, and most of them will bend over backwards to get you the right machine or refer to someone who has it. They know it won't be the last machine you buy. Final thing since you probably have not dealt a lot with these big machines - service. Most all of the guys selling machines can service them, and talk you through problems. You normally don't pack them up and take them to the VacNSew guy at the strip mall. Artisan has an exlempary reputation for service, as does Ryan Neel. I have bought 4 machines from Ferdco, because of their service and the way they treated me on the 440. I had a part break on the Adler, and knew zip about it. The tech talked me through the diagnostics until we found problem - over an hour on the phone and quick shipped the part. I work early mornings in the shop. He offered to call me at 4:00 or 5:00 am his time to talk me through installing it, so we could do it before I had to leave for work. I'm pretty happy with them, yep. -
What are you drinking right now?
bruce johnson replied to JustWakinUp's topic in Leatherwork Conversation
Saturday night here - Pendleton or another gin and tonic - The first G/T has been very enjoyable. I haven't had one for a good long while and it is reminding me with its smooth taste and drinkability just why I gave them up years ago. Probably go with the Pendleton to do a comparison. Home for the night, so I can do that I guess. -
Tom, An area of the forum that probably doesn't get utilized enough. It sure would be doable. We had a little deal a month or two ago with saddles. Denise kind of organized it by setting up a time and making an announcement that on (insert day here) at (insert time here) anyone interested in discussing saddles can meet in the chatroom. It was pretty good, and several people checked in. We really didn't know what to expect as far as how many. We didn't have an "agenda" so it was kind of free for all - talk about this or that, and introduce yourself to others in a less formal setting than a board post. Some people who don't "do chat" didn't quite know what to expect, but it ended up pretty good. We have recently discussed doing it again with a set topic of interest. Kind of have it a more or less regular thing, with a different main topic, and then anything goes discussion afterwards. I think that could apply for any area of interest - sheath making, holsters, motorcycle seats, etc. Set a time up and go for it. Some thing that has been kicked around was when we got a little flush, new features could be added to the board. One thought was video capability. Either real-time or recorded demos. With the prerecorded demos, the auther could have a chatroom time for Q&A. Not sure if we could do real time and have Q&A right there or not. Something to think about and kick around.
-
saddle fit question
bruce johnson replied to STPENNER's topic in Choosing the Right Saddle for the horse(s)
One of those things that could be caused by one or several inter-related factors. Anything that concentrates force in one area can be causing this. It can be too much crown to be sure. Also could be bars too narrow and pinching, bars too wide and sitting on the top edge of the front pads, bar angles too narrow and riding high, bar angles too wide and again riding on the top edge. The actual bars themselves may have small barpads and not be enough surface area even if they do fit OK. Too much flare and rounded pads = less area, even if the spread and angles are close. Could be a bridging problem with the bars too flat and the ends digging in. Not enough relief at the edges of the bars. Skirt blocking issues? Might be a rigging issue. The position they place the saddle and cinch it up and then hold it with a breast collar can do all of this. That is not as uncommon as you might suspect. In that case, it may not be the saddle fit at all. Too much or too little padding? Horse's conformation is a factor, along with degree of condition(ing), what the horse is doing for a job, and how the rider sits. A lot of things can go into making this problem. Dry spots may not always be associated with a recognised soring issue. In this case the horse is getting sore in the area related to them, so it is a problem. The "fitters' concentrate on the first part. The "non-fitters" concentrate on the second part. The answer is that addressing both of them gets us closer to being right. Not too sound like a broken record, but to back up, Dennis Lane's system is a work in progress, but accounts for some of these things. The "S" vs. the "D" card profiles account for bars with more crown for the S's and flatter for the D's. The rock cards help determine the bridging/not bridging when ordering a tree. The cards used to measure the three positions down the back help define the bar spreads and angles. It will get you closer than anything as practical we have had so far. Different tree makers will use the system differently, but it is at least a benchmark to simplify communication between treemakers and customers. The hard part of any of this is looking at the the saddle they are using and figuring out what the issue is without stripping it down to the bare tree bottom. Some guys can look and feel, others check reverse templates, wear patterns on the woolskin, some stick a hankerchief under the cinched saddle in the middle of the bars - if it pulls out easily, the tree bridges. Look at the hair patterns. Well, there's a lot to think about and no easy answers. -
Steve, Another source for steel stamps besides Infinity is Harper Mfg. They have been doing them for quite a while. Here's a link - Harper Manufacturing.
-
Jarl, If it is very small, it would be hard to tool consistantly, especially if he wants a lot of them on the piece. Too big, and it would be pretty time consuming. I would contact one of the tool makers and get one made. Even on one large project, the time savings and consistancy will pay for that stamp probably, and you'll have it later for other projects to start paying you back. For small sizes a delrin rod stamp may be the way to go. If it needs to be as larger size you could have a press plate made. I hate to quote someone else's prices, but you could muddle around freehanding for a few hours, and not be as consistant as a maybe $60-80 stamp or plate. Here is a link to Jeff Mosby at Grey Ghost - Jeff Mosby. I have two makers stamps from him, and have seen a recent custom design silhouette stamp he did that was good. As also was mentioned, there are a couple guys on the forum here on the forum doing these as well. Chime in guys - a chance to sell.
-
Kevin, This is the slickest format for organizing and finding info of most everything I am on also. It sure helps breaking it up into sections for sure. The biggest help is that everyone is not afraid to go back and add to an old thread, or start a new topic when a current thread starts to drift. This makes it much easier to look up things later, or for new members to join to find past posts. Sometimes there is some housekeeping to do - moving posts and that sort of thing. For the sheer volume we have though, it doesn't seem like much. My thanks to everyone who posts and keeps it organized, and the other moderaters more computer savvy than me who can clean up things better. I am pretty happy that a retiring leatherguy left some seed money with a pizza makin' mama from Ohio with vague instructions to start something beneficial for leatherworkers. This forum has evolved into something that nobody early on could have envisioned. A big thanks to everyone who contributes posts, questions, and funds to keep it going and vibrant. Special thanks to Clay B for donating his leather art for the last fundraiser. Thanks, amigo.
-
Art, I had the same problem with the SS strapping on the dee and straps I use on my saddles for breast collar dees. I use 2 holes and rivets to make them more secure and keep them from torquing. The titanium coated bits would maybe be good for one or two straps, even with oils/water/slow speed. Get them hot and just watch the drill bits melt and puddle on the strapping like the wicked witch of the west. The heavier strapping from my preferred source was a 2 bitter sometimes. I took to punching the holes and pounding the "splash" flat. Then enter my good pal Littlejohn from Detroit. A metal workin' man who solved my problem. (side note - Anyone heard from him lately??) As some stainless heats up it gets harder. He advised me to get the cobalt bits. They cost me about $5-6 bucks each. I bought a few and still am using the first one. They do a good job on the stainless. They eat old copper rivets like marshmallows. The real deal.
-
Pete, I heard about all the problems sewing stingray too, and was reluctant to use it for a few years. I also heard the little beads on the stingray would turn to dust if a needle shattered them and might as well be pouring sand into your machine. Probably happened to someone I guess. I am knocking on wood here. I have yet to break a needle or have any problems sewing the stingray. I mostly use the L/R point needles. I like the look a little better. On the 1245, I sew it with a 140 needle for the #138 thread or a 160 needle for #207. On the 2000, I usually am sewing #277 on top and use a 200 needle. I am sandwiching it between two layers of vegtan which might help stabilize the needle path. Still I have yet to break a needle or even burr one up. Sewing it on a home machine with skinny needles and lighter thread probably brings a whole different set of factors though with sewing. Biggest problem I had when it was topsewn was edging it. Those cut beads are sharp enough to slice you pretty good, although blood washes off the stingray easy enough. I used a dremel and sanding drums and got the best results. I think that is what Jerry VanAmburg was doing with his exposed edge stingray too.
-
Charlene, My linings are the same thickness as the top more or less. I don't have a large enough splitter to level big pieces as of yet. Regarding the space at the back of the dee ring. Like Greg pointed out, you need some room for a stitchline. I probably have a little more than that. It also depends on how low you hang the rear dees. Actually on mine, that area is pretty much covered by the rear jockey. I try to gauge my rear jockeys and back riggings so the top 1" or so of the ring is covered by the jockey.
-
Charlene, On the corner behind the back rigging plate - round it off. I don't like 90 degree points in most places. They tend to curl or catch things. In hindsight. Cut linings oversized to allow for little stretching things that happen with tooling and forming to the tree. Trim to fit after they are glued together. I skive my plate riggings on the top piece, I my linings are not a 100% lining of the top piece. The liner sits down a little from the top edge and is likewise preskived to make a smooth transition. I guess it all depends on what patterns you use. Regarding a gap at the edges of rigging hardware. If you case and mold it over the rigging harware, it eliminates a lot of that. Some guys will put little wedge shaped plug in there to make a smooth transition and fill that gap too. Seems like a good spot for a plate rigging question here. I usually glue mine flesh to flesh. If I need to do any extra skiving on the grain side of the lining piece, it is above where the screws are, so I am not thinking I am losing much of the strength of the grain side. A guy I talked with a while back does his linings flesh side down. His thoughts that as they wear, the grain side is intact and it is wearing down the flesh side. I am not sure there is should be much exposure to wear, but that was his reasoning. I also suspect it would make skiving easier if you don't skive before glueing them together? Any thoughts either way from anyone?
-
Superior Stirrup Leather Buckles
bruce johnson replied to bruce johnson's topic in Saddle Supplies, Tools & Trees
Timbo, In a nutshell. The piece with the posts rivets onto the fenderleg/lower leather. The posts extend through the holes in the billet end of the leathers. Tho top post on the securing plate is oblong. The securing plate will only go over it at a 90 degree angle from the leather. Slip the plate over and twist is parallel to the leather. Set the bottom hole in the plate over the bottom post, and pull it down to secure it. As far as how they work, some customers like them. Kind of like everything else there are fans of all of the different buckles. I have some barrel racing customers who really like the Veach fast buckles. Some people like one Blevins style or another. Some guys prefer lacing. I am sure there is someone who likes the Al-Ray buckles, but I haven't met them yet. -
Hot off the bench
bruce johnson replied to Elton Joorisity's topic in Clothing, Jackets, Vests and Chaps
Elton, Good ones again. I like the overlay too. Got a pic of that edge guide for the foot? -
MM, Bob isn't a forum member, but his daughter Vandy is. Bob lives in Sheridan WY. Vandy has Sheridan Leather Outfitters and sells her dad's tools also. That said, you can call Bob at the number JW listed or Vandy at SLO and get probably the best awl you'll drop into leather. It will come ready to use, with no further stropping needed before you take it to leather. He has regular and slim blade styles for finer stitching. When I talk to Bob, I always end up a little smarter than I was before. When you need some old hand tools, he's one of the first guys to call. He also has some hand tools he makes, but sounds like they are selling out and Bob is slowing down. One of the good guys in the business.
-
Penske, I don't think there is any one set seat profile for a reiner. Different guys prefer different seats. When I was growing up, the wolves were mostly riding Price McClauchlin saddles. Fairly good pocket and moderate rise. There were a few guys trying the "new" flat seat cutter seats, and other guys riding the California equitation seat too. Depended on what a person likes. Now it seems like Bob's Custom Saddles has a reiner model named for about every reiner out there. Here's a link to their siteBob's Custom Saddles. Don Leson has a high reputation among reiners, and his link is here - Don Leson saddles. Study those profiles and that should get you a start. The question of how many pieces to use depends on a lot of factors. How thick they are how, much you are taking off, strainer vs. all-leather seat, how much rise, how much pinch to the front. Find out what he doesn't like about the seat, and work at it from there.
-
Taking apart a "junker"
bruce johnson replied to bruce johnson's topic in Saddle Identification, Restoration & Repair
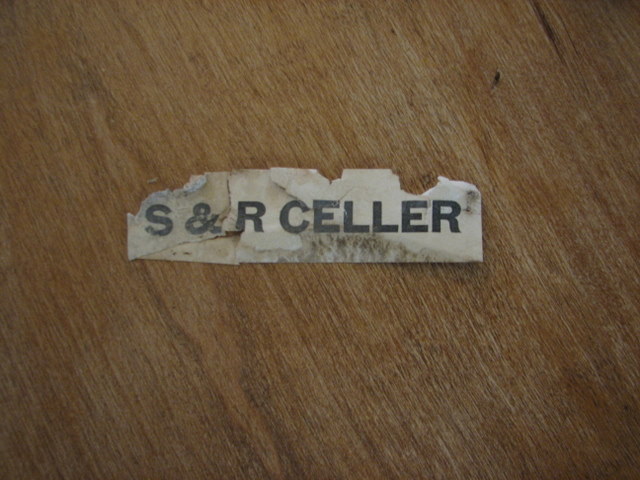
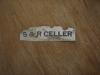
Thanks Jon, I have an edition of that book, I think from about 5 years ago. I couldn't find anything in there on "Celler". Google searches came up with the name (not related to saddle), but mostly misspellings of the word - cellar. There is a makers mark maybe on the seat front. A circular design with a 4 petal flower possibly, but that is as close as it gets, and I can't even be sure of that. You and I must have played in the same barns. Usually a section of that fringey looking strap stuff to keep the flies off the mules hanging there too. An old banty with a nest in the manger in one of the tie stalls. Knob and tube wiring that still worked, chewing pilfered Copenahgen and finding an old stashed bottle of Cabin Still. I restored my great grandfather's last saddle a while back. Sound as a dollar and lacing is still tight to the tree. It still has the original latigo carrier with the tree style number stamped on it. One of my treasured possessions. -
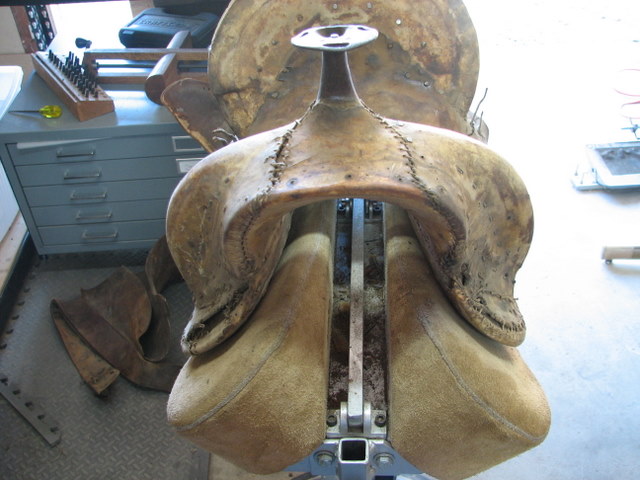
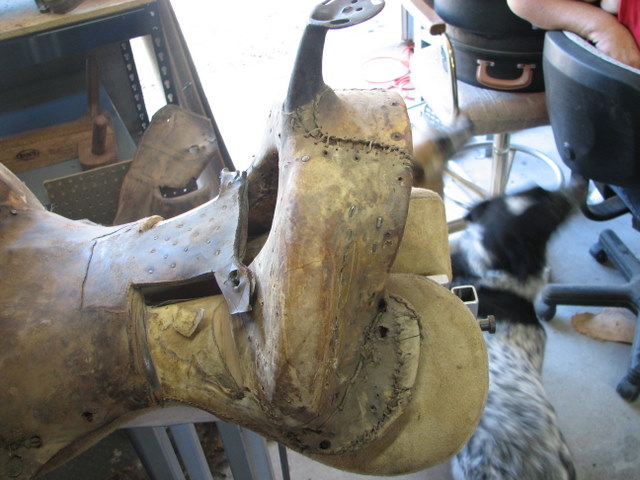
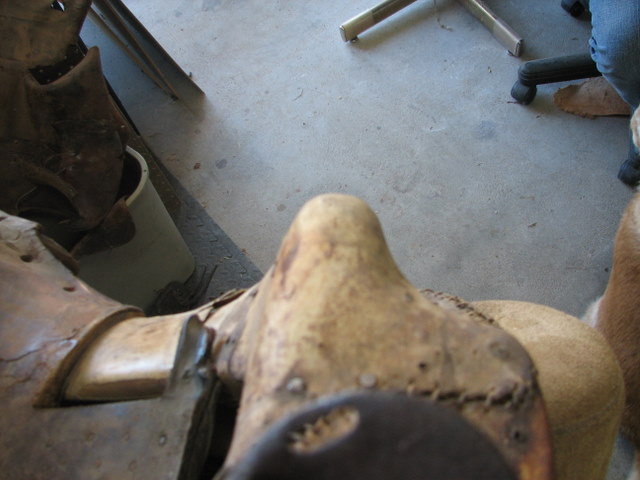
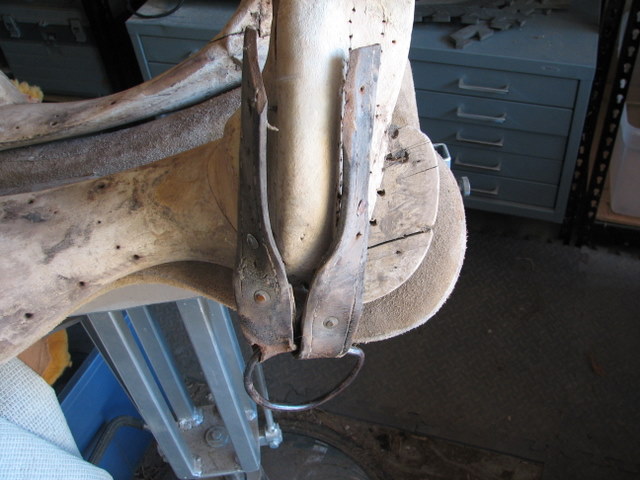
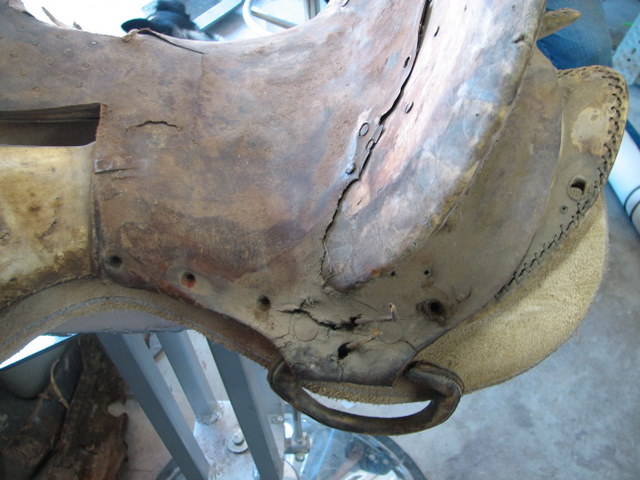
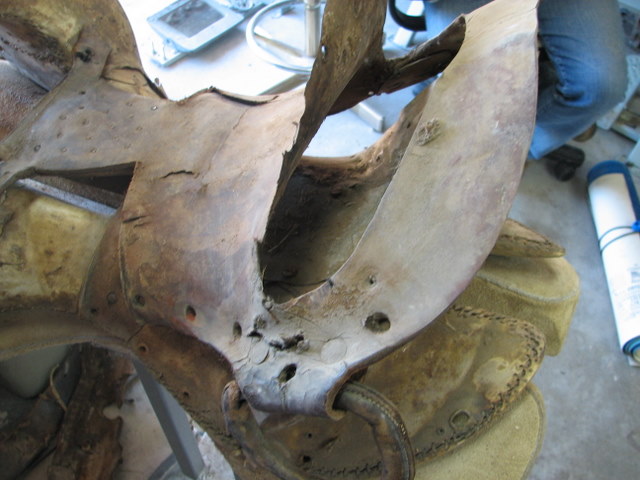
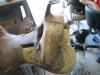
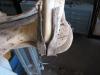
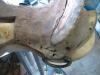
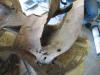
I bought this saddle a while back in an antique store. It had a pretty good old example of a fishcord cinch on it. The stirrups were brassbounds, with an iron strapping over that. Had about half the leather left. The metal horn is a repair horn, the broken stump is evident. No identifiable maker's mark on the leather. The guy wouldn't sell me the stirrups or cinch separately. In the past I have cut the forks off some old junkers and screwed them down to a board with the horn facing up to make hat or coat hooks. That was plan "B" for this one. Yesterday I got around to scrapping this one. A few items of interest as I took it apart. First off the swells are pretty narrowed and concave front and back of the swells. There is very little bar below the fork attachment. The front riggings were made up of two straps going down to the dee. The straps laid into those concave areas and were screwed and nailed into the fork. Kind of a Samstag rigging effect with it buried and not going around the horn. I thought that was sort of neat. On the back rigging, another WTH? The back rigging was one piece and also part of the groundseat. A slit was cut for the cantle, and it was laid over that. The rigging bridged the back of the bars, dropped down on each side with a tab to hold the rear dee, and then was the top layer of groundwork in front of the cantle. All one piece. It was set in grain side up. I thought both of these were pretty cool. I could feel the cantle was broken and was just going to lop off the fork. The rawhide was missing in spots (worn through, this was a user), lacing had let go, and the tree is pretty mushy. Rundi wanted to see what it would look like in the wood, she was thinking bookrack. I stripped the rawhide, and got a little surprise. In the front of the cantle under the rawhide was this little piece of paper that read "S & R Celler". I have seen other old trees identified like this, but am coming up empty on finding out anything on the name Celler as saddle or treemakers. Any insight is appreciated. I think it is kind of fun to take some of these oldies apart. It is a history lesson sometimes, and gives a guy an appreciation for where we've come from. Tip of the glass to the unkown makers......


-
I wouldn't do that deal. He is asking you to be his warehouse. If it doesn't sell, he isn't out anything - you are. How come the other guy isn't doing more for him if it is such a good deal? What kind of percentage is he charging? If he is setting the price, it is not consignment. He is wholesaling off your back. If he hasn't been "terribly communicative" in the past, expect him to pay you in the same manner. I got the "be careful on consignment" speech from my small business adviser at the start. Retailers generally don't make the percentage on consignment items as the keystone wholesale stuff they sell. Whose stuff are they going to push? Who is responsible when a piece is spilled on, stolen, or gets shop-worn? What do you do when one of their customers comes to you, and wants to buy directly? Do you cut out the middleman, and some would say steal the customer they got? The only consignment I have done was with two established wholesale customers I could trust. It was pretty specific. They both set up at the NFR trade shows in early December. Items were something they didn't carry in any other lines. Neither of them got anything similar so they weren't competing against each other. I knew I could trust them to either have it sold and a check at the end of 10 days, or I'd have it back for last minute Christmas customers. I only got a couple things back. It worked out well for all of us. They made some booth money they wouldn't have, I made money off it, and it was all stamped with my name, not theirs. Some of these generated custom orders that at least for the one still in business, continue now.