lightingale
-
Posts
256 -
Joined
-
Last visited
Content Type
Profiles
Forums
Events
Blogs
Gallery
Store
Everything posted by lightingale
-

What Is The Cut Of Leather To Make A Belt
lightingale replied to Sturme's topic in All About Leather
TXAG is spot on. To add to his answer, the back is often called the "bend" when you're buying leather. It's the back piece with the shoulder and belly cut off to make a mostly rectangular cut of hide (and the most expensive part). -
JLS has given you some nice advice. Boil everything down, it comes to "it's worth what someone is willing to pay for it". The customer doesn't care if you're a fast or a slow worker or any of the other things you've put into the production of the item, most only care about the final product. It will take some trial and error to find the right price point for you. Your input is so much more than your materials cost and your crafting time. It's the time and mental effort you spent on the customer making the sale, it's the time you spent learning and improving on your techniques. it's the time you spent marketing. It's the money you spent on learning materials. It's the time and money wasted on projects that you find fault with that you have to scrap. It's the time (and sometimes money) you spent on customer service trying to help someone who gave you the wrong measurements and their new item doesn't fit (despite your best efforts at idiot-proofing prior to the sale). It's the time you spent photographing your items, promoting them, designing logos, new products, business cards, and other paraphernalia, keeping up a blog, etc. etc. Gee, I realize I'm starting to go on a tangent. There's really no good formula for prices. Ultimately, I think you must have a passion for the craft (and another source of income), to make this work. Do your research. See what other people are selling. Guess their material and time costs. Align your prices with others offering similar items and quality. Build up from there as you find your niche.
-
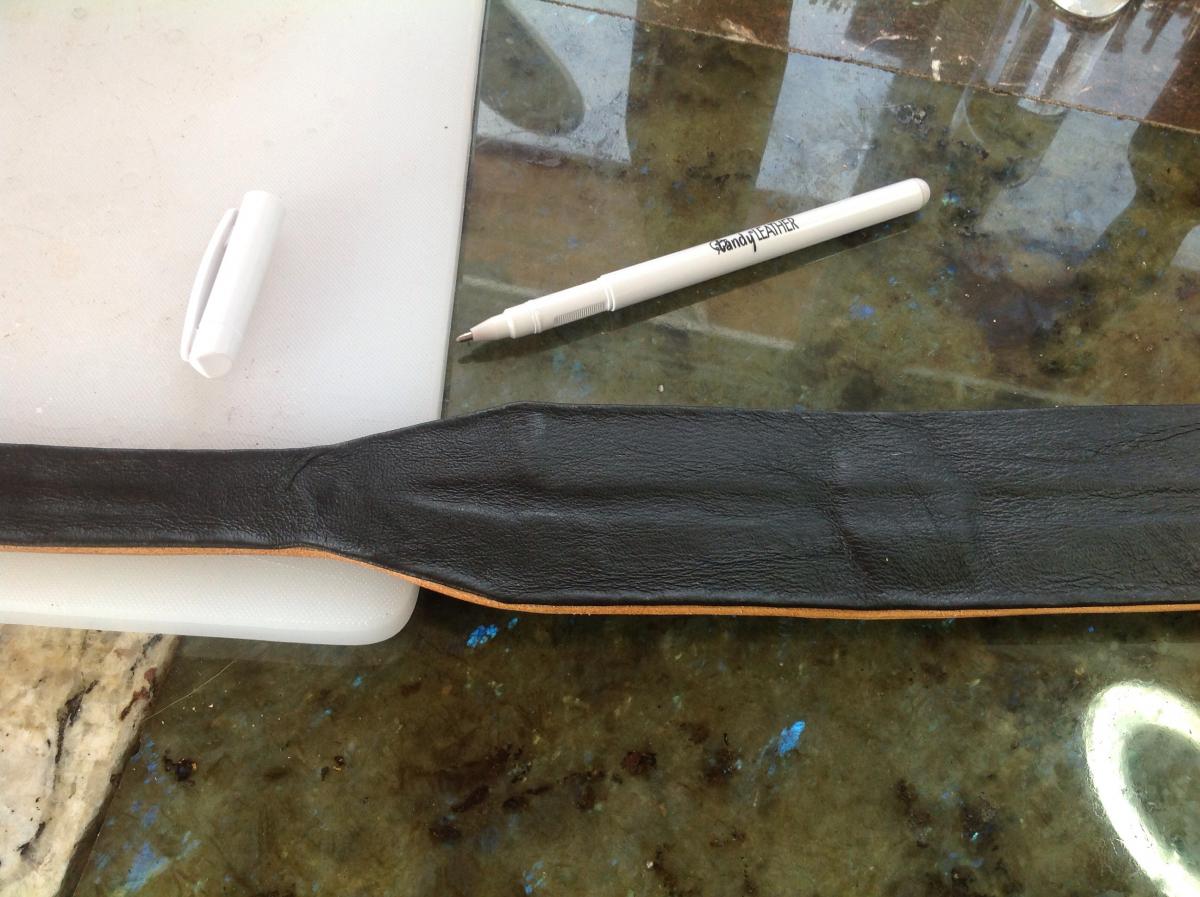
Just an update... The pen marks do rub off with finger pressure after it has dried, but take a bit of pressure. This is great, because you don't want to lose your markings by just handling the leather. I've attached a photo of today's project (it's a tapered dog collar with a pigskin folded edge lining that I've just glued to prepare for stitching), and you don't see a trace of the markings. Previously, I had tried tailors chalk (didn't rub on well enough to be visible) and resorted to using diluted iridescent paints, which were hard to remove from the finished project. The new Tandy marking pen comes highly recommended if you need something of this function.

-
I just picked one up yesterday. I needed it to trace my tapered collars on pigskin, so I would know where to fold the edges for lining. It looks more silvery than white, but did not rub off easily with my finger. I haven't really tested it yet, maybe it will need a damp cloth or some such to rub off.
-
If you do get a hide from Tandy, the "European Single Bends" are pretty good, and are on sale this month. Most people will say to stay away from shoulders for belts, as they can sometimes get a little stretchy.
-
Shipping costs and duties to Canada make it difficult to obtain some of the nice leathers directly from the tannery. I do, actually get most of my veg-tan leather from Tandy. They have one line of leather "European Tooling" bends that are of acceptable quality. The grain is nice, the flesh side is tight, and most hides don't have major faults to work around. The elite discount helps. To any Canadians that have ordered leather from outside of Canada.. I would love to hear about your experience.
-
How Do I.... Inlay Turquoise Etc. Into My Leather?
lightingale replied to AZ09's topic in How Do I Do That?
I've started doing this for a lot of my dog collars. I've attached a photo of one I made using such a technique. It's basically as electrathon said, but I'd like to add that you'll want to bevel the inside of the hole where the stone will fit, and super glue gel (often used for jewelry making and readily available in craft stores) will work better than contact cement. Your first attempt will not look good, but with practice, it will start to look more polished. Let me know if you have any specific questions on the process, as I've done it quite a few times now. -
Since our house burned down, my studio "space" and equipment has been a bit limited. I don't have any ventilation right now (and I have the headaches to verify that), but I spray on my workbench on a piece of cardstock or cardboard that I switch out when it gets too much dye on it. You'll want something slightly absorbent to put your project on (particularly if you're airbrushing along the edges), so if your project slides, you don't get streaks of dye rubbing onto it. We might have the opportunity to rebuild at some point, and I would put together something like a chemist's fumehood for airbrush work and other potentially toxic endeavors (like soldering lead for stained glass). Very basically, it's like your stove's vent in a box (with a light, an electrical plug, and a clear vertical sliding door that you can lower so just your arms fit into it). You mentioned in your other thread that your airbrush is hard to use because it got gunky. You should get comfortable with taking it apart to clean (and take pictures so you remember how to put it back together). You can get solutions to dissolve the crap on it, and afterwards, assuming the needle isn't damaged, it should work as good as new. Since I'm cheap, I just use Fiebing's dye reducer to clean it (I got a huge jug of the stuff for diluting dyes and cleaning brushes), and it seems to work as well as the expensive airbrush-specific cleaner (I only use solvent-based dyes in it, which might help in the cleaning department).
-
I used to do it the same way Cyberthrasher just explained. It works, but takes some practice. Don't get discouraged if your first attempt isn't what you were looking for, and test it on scrap first. Your best bet would still be to get an airbrush. You don't need an expensive brush or compressor for fading edges. It's currently one of my favourite tools to use!
-
I thought orders were supposed to slow down after Christmas?!... Hah!
- Show previous comments 2 more
-

That's what I was thinking. It's a great problem to have :-)
-

I'm in the same boat, and no way is that a complaint.
-
Not complaining! It's keeping me busy, entertained, and enabling my leather tool addiction! I budgeted time for a New Year's party, so it's all good!
-
Based on the (Japanese?) text on some of the products, I would guess these are from Goodsjapan.
-
For the record, I think the double beveler tool is crap. I have one, and it's bulky and leaves footprints from every angle. Maybe I'm using it incorrectly... You're better off just doing what Pete said.
-
Major Cracks...
lightingale replied to PirateWolf's topic in Dyes, Antiques, Stains, Glues, Waxes, Finishes and Conditioners.
With dog collars, I bend them over the buckle area right after tooling, while the leather is still cased. If it's not cased, I wet it with a sponge. I also dye and finish it while it's already bent into the shape I want. -
How To Keep Things Clean When Dyeing Leather?
lightingale replied to HC009's topic in How Do I Do That?
I've used a turkey baster (it's like an enormous eye dropper, and you can find them in dollar stores) to transfer dye from one bottle to another. I tried pouring directly from bottle to bottle, and it was too messy to bother with again (even though I did it over a sink). -
Why airbrush the oil? It's fairly easy to apply a thin layer of oil with some sheepskin. It soaks in, so it doesn't streak or anything. Personally, I would not put it in my airbrush because it would be a pain to clean. I also don't know how well it would spray.
-
I order mine from pethardware.com Their prices are phenomenal (offset by duties and shipping costs, the price is about on par with what you'll find locally), and the quality is good. However, they have a minimum order of $100, and they ship from overseas via UPS, so you'll get nailed by duties and a hefty shipping fee.
-
Metal Buckle Discoloured The Leather.. How To Prevent?
lightingale replied to lightingale's topic in How Do I Do That?
Thanks for the tip! I picked up a can of metal lacquer from the hardware store to spray on the buckle. I did use a sealant on the leather (zelikovitz professional topcoat satin finish) but next time I'll layer on a few coats of 50/50 acrylic resolene and water. I also have a can of saddle lac that I've never used... Do you think this might work better? -
Metal Buckle Discoloured The Leather.. How To Prevent?
lightingale replied to lightingale's topic in How Do I Do That?
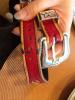
Whoops, edited the original post to attach the photo. Is there any way to keep using these buckles? I picked up a few of them and don't want them to go to waste if there is a way to mitigate the issue. -
I've been using some of the fancy buckles from Tandy on some of my dog collars. It doesn't say what metal it's made of, but it's a silvery colour, so maybe nickel plated? I've noticed that the buckle leaves an ugly black stain where it touches the leather (see attached photo). How can this be prevented? Can the black be washed off? Is there a coating or something that can be sprayed in the buckle to prevent this? I've only used one of them for a collar I made for a family member, and this is the result. I'm concerned about using the same kind of buckle for customer orders.
-
Commercial conchos tend to be limited in their designs and styles, and I've often wished I could turn a metal pin, badge, or brooch into something that I can attach to a belt or dog collar. I have a Star Trek fan to make a Christmas gift for, and I'd love to attach a metal communicator icon to a belt I'm making. I can get metal communicator pins for about $5. Yes, I could just tool it, but it would be so much better if I could attach the pin itself. How would you go about doing this? What tools would be required?
-
It looks like the background was painted in with a brush, the lighter areas were resisted with something like super sheen or other finish, and the entire project was antiqued with a highlight stain or antique gel.
-
I've used these on leather. They work, and come in smaller sizes than the standard Tandy sets. The only thing to note is that the letters can be quite shallow, so you only need a light tap. It takes some practice to get just the letter and not the entire tool face impression.
-
I guess for me it was easy.. I started tooling dog collars, and they sold well from week 1. In the beginning, my niche was customized, handmade dog collars that stood out from the collars you normally find at a pet store. Dog collars were the reason I got into leatherworking, because I wanted to use a design of my own to make something awesome for my own dogs. Now, my niche is more my own art style. I have people messaging me looking for belts, guitar straps, archery bracers, etc. with a design they see on a dog collar I designed and tooled myself. While dog collars are still my priority and my largest profit-earner, I'm slowly branching off into other things. Here's my interpretation, given my experiences selling for the last 2 years: What you want to sell is your "style", that which makes your work unique from everyone else's. It's much simpler and easier to start off with one kind of product.. something that is frequently in demand, (in my case, dog collars, which works out well because it's a hot item on Etsy and is relatively generic), and build a reputation on that. Become very proficient at making this one thing (or couple of things). One reason for this is SEO (search engine optimization). If someone's looking for a custom dog collar, they'll find me because those keywords are prominent in pretty much every leatherworking project I've put out there on the Internet. Another reason is the impression you make on your customer. If they search for this custom item, and see that you make a lot of this item (and can see many photos of examples), they might see you as more of an expert on this type of item. Once you've started building up a bit, you dabble in other things. Use your designs and techniques to make a different product with your style, and you can use your prior success to boost your new niche branch. You might need to adjust how you market your new item though. A new item I'd like to start marketing soon is archery armguards. My husband and I recently got into the target shooting hobby, and enjoy testing out new leather bracer prototypes. It's a short stretch to add some tooling and market those, however, this means I'll have to make rounds of some hunting shops in the area to get the word out, as armguards aren't in the same demand as dog collars and probably aren't searched for nearly as often on Etsy. Marketing really is everything. I've been very lucky that the first niche I gravitated towards is popular on Etsy. Many other types of projects would require a lot more effort to promote. With your horse eye pendants, I think you would have more luck marketing to the equestrian folks. Perhaps you could offer to take custom orders using a photo of their horse's eye to give them something to remember their favourite equine by. Just my take.. hope this helps! Edit: I also wanted to add that custom work seems to be key to sales in the leatherworking world. One can buy a generic leather item pretty much everywhere (at various price and quality points), but not everyone sells a custom made leather item to the customers' specifications. Some leatherworkers might have success making generic things, but every last one of my sales has been for something custom.
-
How To Make Large Dog Collar Sturdy Enough For A St Bernard
lightingale replied to OdinUK's topic in How Do I Do That?
I've made big dog collars with buckles as large as 1.5". The center part of the collar can be even wider, with the straps tapering down to 1.5" to reduce bulk. Here are some ways I reinforce a collar (at the customer's request) for a strong dog. 1. Use a thick leather. At least 8-9oz 2. Hand stitch a lining all the way around the collar. The thread and the lining help prevent stretching and disfigurement of the leather. 3. If you're REALLY concerned about the pulling power of this particular dog, you can sandwich fibreglass tape between the collar and the lining. 4. Definitely hand sew the hardware. You could add rivets too, for good measure. If you do all of this, I think that collar could restrain even Godzilla. -
Thanks for your suggestions! I went out and bought dry graphite lubricant, and it made a significant difference. It's not perfect, but it's usable now. If it starts catching again, I'll try King's suggestion of CLR. The knife is older than I am, so it would not surprise me if there's some rust inside.