
Constabulary
-
Posts
5,801 -
Joined
-
Last visited
Content Type
Profiles
Forums
Events
Blogs
Gallery
Store
Everything posted by Constabulary
-

Cowboy Analog Servo Motor Modifications?
Constabulary replied to BDAZ's topic in Leather Sewing Machines
I will keep that in mind - but I will try a servo motor + speed reducer first as I don´t like the idea of a permanently running clutch motor. But always good to see how others have solved their motor problems. Thumbs up! -
Would Like To Restore An Older Sewing Machine
Constabulary replied to Evo160K's topic in Leather Sewing Machines
You are welcome. Historical value is a totally different thing. I like the story - really! Keeping a part of history from a long gone company is always a nice idea. Especially when you personally have worked for that company. I like vintage Singer machines very much. They of course do not have a story like your machine (not that I know of) but for me they have that certain something. And I like to keep hem alive or bring them to live again. -
What Edge Guide For A Singer 111W155
Constabulary replied to TomG's topic in Leather Sewing Machines
awesome - I like it! Do you have only the roller guide or a straight guide as well? -
Would Like To Restore An Older Sewing Machine
Constabulary replied to Evo160K's topic in Leather Sewing Machines
THIS machine in particular may have a special value for you due to its history but I think no one will pay extra for just the story. You know what I mean? Don´t get me wrong, I absolutely understand you. But there are many of them out there, probably not CLAES but Singer 29K and Adler 30 are wide spread. As I said before they are all the same type of machine. I personally would not pay more tan 100 - 300 (maybe a more when it comes from a dealer and it has a warranty). But it depends on the condition and features that the machine probably has, such as higher foot lift (like the Adler 30-7). The problem is getting parts for the CLAES machine as it is no longer in production. Importing parts from Germany - if available at all - may cost an arm and leg. But MAYBE some Singer 29K and Adler 30-1 parts will fit but you have to find out in a trial and error or someone else can tell you for sure. Maybe you can ask PILGRIM if this machine can use Adler or Singer parts. They should know it. Regarding the paint - not matter if you like the color or not - as long as it is the original color and has just some chips here an there and is not rusted or so I would leave it as it is. Just my 2 cents -
Cowboy Analog Servo Motor Modifications?
Constabulary replied to BDAZ's topic in Leather Sewing Machines
I have no clue what the frequeze converter does and how it works with a clutch motor... Does it slow fown the speed and how can you control it? Can someone explain it to me in plain english? Trox - can you post pictures of your setup? -
What Edge Guide For A Singer 111W155
Constabulary replied to TomG's topic in Leather Sewing Machines
I haven´t seen either one personally but this one looks good to me http://www.ebay.de/itm/Kantenlineal-fur-alle-Dreifachtransport-Maschine-/221438341576?pt=Alte_Berufe&hash=item338ec0f1c8 The one form Kwokhing is $65 shipped (in case Kwokhing has not risen their prices.) and you probably have to pay taxes + 19% UST when it stops at the customs so it would cost about 55-58€ The one in Germany is 79€ and you don´t have to drive to the customs offcie and pick it up (just in case) + you have a 2 years warranty. And if you are a running a business you can discount the 19% taxes so it would cost 64€ w/o taxes. No matter what - for just 20€ I don´t take the pain to order in China. Just my 2 cents -
Cowboy Analog Servo Motor Modifications?
Constabulary replied to BDAZ's topic in Leather Sewing Machines
Very interesting thread! So no matter which servo motor you have it seems a speed reducer in addition is always your friend. -
Would Like To Restore An Older Sewing Machine
Constabulary replied to Evo160K's topic in Leather Sewing Machines
CLAES is an no longer existing Company. They were located in the former GDR (East Germany). But maybe the Company CL Maschinenbau can help you as they use the brand name CLAES and are still manufacturing this type of sewing machines: http://www.cl-maschinenbau.com/produkte/kl8346.php?&lan=eng&img=4 BTW Google translational is nice but remember that the grammar may not be correct and in some cases a translated sentence does nor make sense. English and German grammar is different! Well from the first view the machine looks still very nice do you really want to restore / repaint it? I would leave it the way it is. Most of operator manual for Singer 29K or Adler 30 should help you. The machines are all the same type but may have some technical differences but basically they are quite the same. -
Both are no beauties but I think you don´t care and you just need "something to sew with". I´d go for the gray singer 211 as it is set up with table and motor - so just plug an play (as it seems). But maybe it needs some adjustment. If the seller lives close to you visit him and test the machine. The Singer 111 does not have a motor and table as it seem and the presser foot is missing (as I can tell from the pictures) and needs a lot of work in advance. This is a restoration object I´d say.
-
Which machine do you have? How thick is the thread (size)? What needle size have you tried? Do you sew 1 layer, 2 layers 3 layers... Here is a chart from Tandy Leather http://d31snyb1jsf9xb.cloudfront.net/services/image.aspx/media/images-misc/ThicknessConversion.png-600x
-
take some pictures and post them, maybe one can help when he sees what is going on.
-
What Edge Guide For A Singer 111W155
Constabulary replied to TomG's topic in Leather Sewing Machines
Hey Floppy, I´m grom Germany too. You can find them here: http://www.rimgm.de/shop/PFAFF/PFAFF-145-245-335-545-1245/Kantenlineal-hochschwenkbar.html?listtype=search&searchparam=kantenlineal or even on Ebay http://www.ebay.de/itm/Kantenlineal-fur-alle-Leder-Sattlermaschinen-/221433119437?pt=Alte_Berufe&hash=item338e7142cd http://www.ebay.de/itm/Kantenlineal-fur-alle-Dreifachtransport-Maschine-/221438341576?pt=Alte_Berufe&hash=item338ec0f1c8 -
Pfaff 335-17B S Journey To The Unknown!
Constabulary replied to jimi's topic in Leather Sewing Machines
ha ha - you got it!! I saw it on ebay but forgot to bid! Good luck with it! :-) -
The Ferdinand 900B is a "kind of" Juki 441 clone, right? There is a pinned thread with hints for this type of machine type: http://leatherworker.net/forum/index.php?showtopic=49622 maybe this helps
-
Have you tried to adjust the hook / needle timing? In the upward stroke the hook should meet the needle scarf about 3.2mm / 1/8" above the needle eye.
-
Which Machines Need A Sytem 1001 Needle?
Constabulary replied to Constabulary's topic in Leather Sewing Machines
Hi CampbellRandall! That really helps - thanks a lot. Shank on my needles are 2.3mm. So it "seems" my needles would probably work for the 331 system. What do you think? But what exactly is the Singer 8 Needle? -
Which Machines Need A Sytem 1001 Needle?
Constabulary replied to Constabulary's topic in Leather Sewing Machines
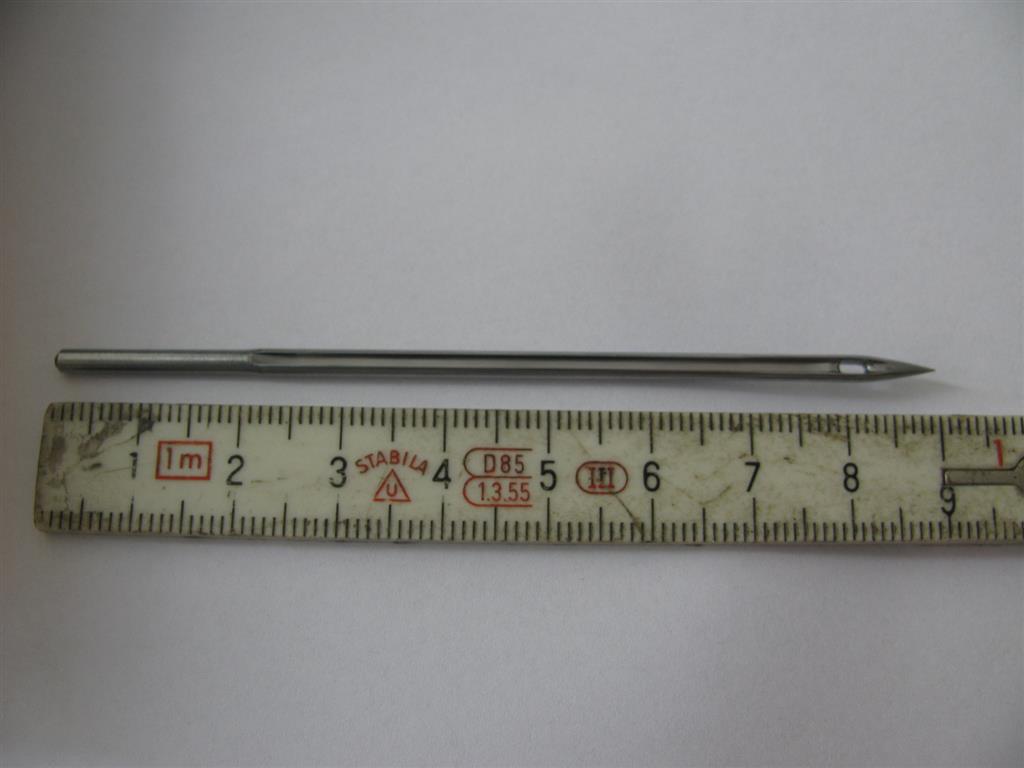
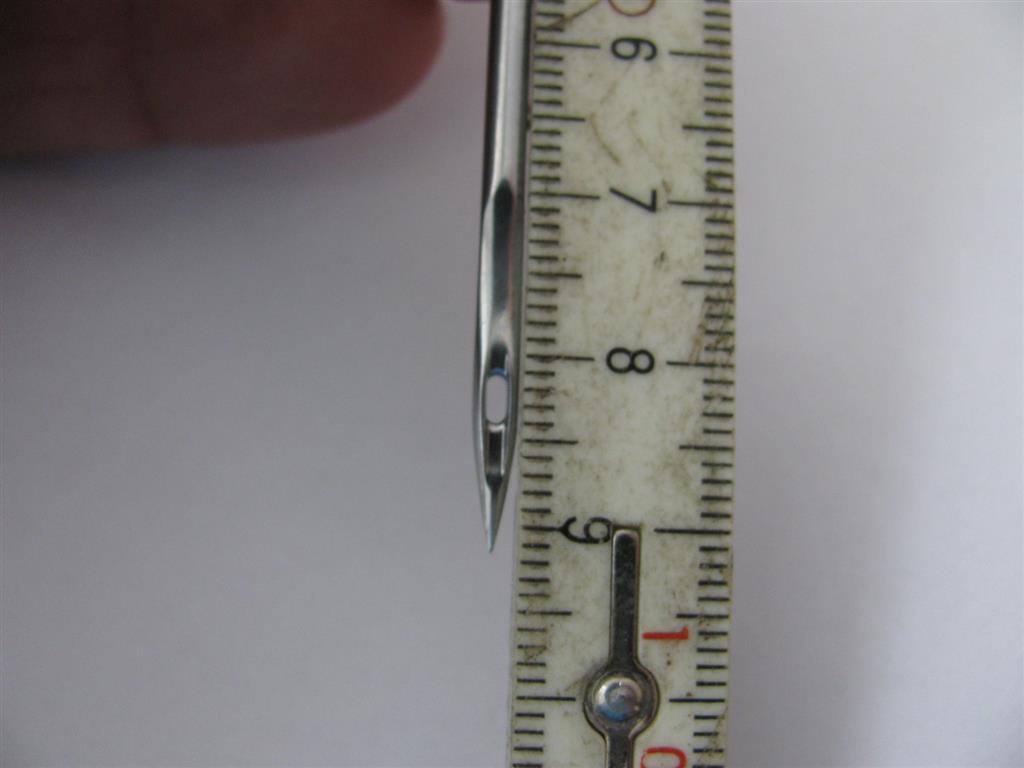
I´m referring to your last post #4 of course. The MY_1001 / UY_121 / DVX1 is a shorter needle which also fits into the Juki MF860 for instance. As mentioned before my needle is a 9.1cm long 280NM monster needle. So it can´t be the same needle - look at my pictures and the measures. How does a Singer 8 needle look like and what are their measures? -
Which Machines Need A Sytem 1001 Needle?
Constabulary replied to Constabulary's topic in Leather Sewing Machines
Are you sure they are the same? Mine are 9cm long - even longer than the 328 and 794 needles -
Which Machines Need A Sytem 1001 Needle?
Constabulary replied to Constabulary's topic in Leather Sewing Machines
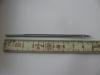
They have a regular tip. Total length: 9.1cm From top to top of eye 8 - 8.1cm From top to middle of scarf 7.5cm Some pictures: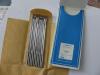

-
Adler Class Iii - Early 1900 Leather Sewing Machine
Constabulary replied to Constabulary's topic in Leather Sewing Machines
I just got it back to live this morning and figured that 794 needles work fine in this machine. I will post some picture and maybe a video in the days to come or later today. What an awesome machine!!! But I´m still not sure If I will keep it. -
I just can across a bunch of new SCHMETZ System 1001 needles in size 280 (metric) and wonder which machines could use these monster needles.
-
Thread Getting Wrapped Around Hook And Jamming
Constabulary replied to ponypome's topic in Leather Sewing Machines
1st of all you have to remove the bobbin case (maybe the complete hook but 1st remove the bobbin basket) an pull out all the thread (dirt + dust) and replace the bobbin case opener hook (#1) due to its damage. If you can move the bobbin case freely then probably the nose of the hook which sits in the small gap of the needle plate is worn or the needle plate is worn where the nose sits in. Remove the needle plate and check if one of the small bumps is worn (most likely the top one). if so it cannot hold the nose of the bobbin case and then it moves freely. Thats what I´d try at first. When you put the hook back in you probably have to time the machine again. If you have a service manual look into it for how to do. If you don´t have one I´m sure one can help you. -
I Need Your Help Again With Needles...sorry
Constabulary replied to IslandMoose's topic in Leather Sewing Machines
Nice + Slow - I like it! By the way - the thread guide on your needle bar is missing! -
I´m pretty sure it uses the same bobbin winder like the most of the industrial type sewing machines. Like this one: www.ebay.com/itm/321197399457 Needle system is 16x100 Here is a direct link to the manual (it will download immediately) from the Singer website. It will answer most of your questions I think. parts.singerco.com/IPinstManuals/78-1_2_3.pdf
-
I Need Your Help Again With Needles...sorry
Constabulary replied to IslandMoose's topic in Leather Sewing Machines
But you have not tried without the sensor, right? Your motor also has 550 Watts? I just contacted the Ebay seller and he replied within 30 minutes and sent the the manual of the motor and told me it is a new model which works with and even without the positioning sensor! I will red it later and see if something is mentioned in there.