bland
-
Posts
270 -
Joined
-
Last visited
Content Type
Profiles
Forums
Events
Blogs
Gallery
Store
Everything posted by bland
-
 I need some help with some design ideas for this gun. It is a modified Glock 19.
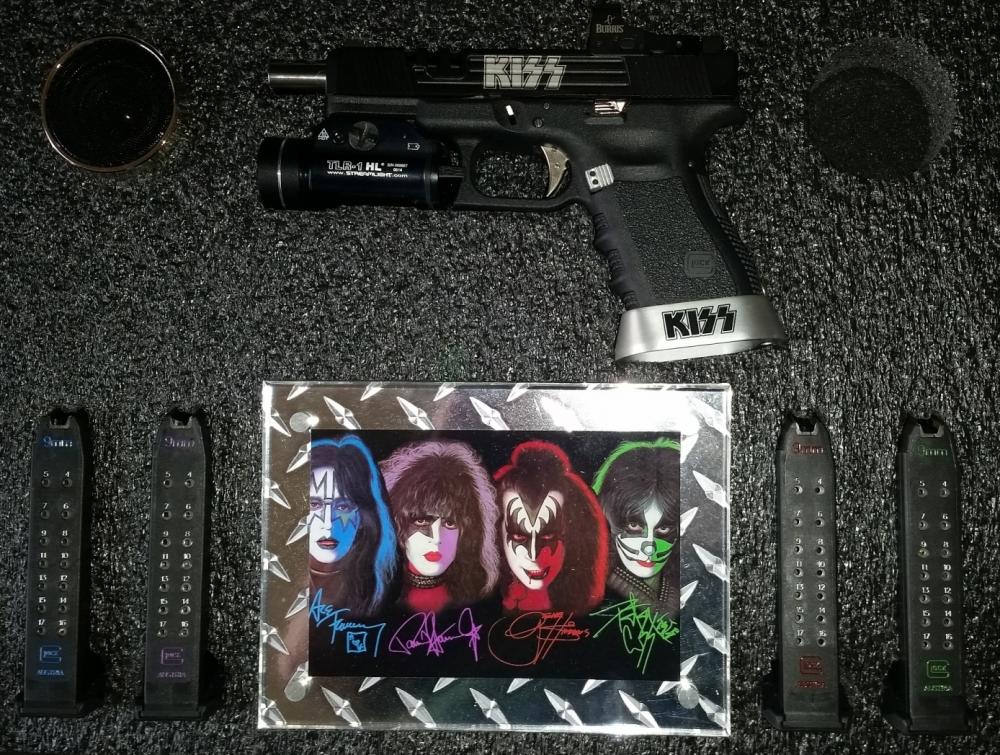
-
Laser-cut Birkin Bag
bland replied to LatigoAmigo's topic in Purses, Wallets, Belts and Miscellaneous Pocket Items
Very nice!! -
So these are the guns left? Not too interested in all the mags but for the right price I would take them. What is your best lot price? 1- S&W Shield 1- S&W M&P Compact 1 - Glock 19 1- Glock 26 1- Springfield XD Compact 1- Sig 238 1- Ruger LCP 1- S&W J Frame 2- Glock19 Mags 2- Glock 26 Mags 2- S&W Shield Mags 1 Ruger LCP Mag
-
Looks quite similar but is a cylinder machine. Another one to think about. Thanks for your input.
-
I am looking at getting another machine. I have a heavy stitching machine Cobra Class 4. Now I am looking for one that is more versatile I have used a Cobra Class 20 and really liked it but am also looking at a Juki 1508H I can buy local. I have heard the Juki is a little more versatile. Thoughts?
-
I did this late last night before I saw Bob's comment. Anyway this is 2 x 8 oz (16 oz) leather with 277 on top and bottom.

-
Here are more results from this evening. I adjusted the bottom tension a couple of times but when I tried to tighten the top a half turn bigger bubbles showed up again. The test leather started to drop off a little in weight. With the smaller thread the tension is pulling the knot out the top still a little. It is much better than when I started.
.thumb.jpg.0f1772078e8aead96f39592d89899113.jpg)
-
Everything seems to be coming off smooth without hang ups. I checked and I am threading correctly based on a couple different sources. I am sure it is pilot error. I tried to call Steve on Friday but no one was in the shop when I called and it is usually after hours when I get off my regular job. I have been sending him photos as well. Early on I ran it for a while with only one wrap around the primary instead of the recommended two. It worked okay but is not as consistent. I am reducing both tensions. Running the larger thread on the bottom leaves the back raised a little, it doesn't look as good as it should. I will check the bobbin screw again and see if there is any adjustment left. Wiz, Paul, Wild Harry and Floyd thanks for your responses and ideas on what to check. I think I''m getting closer to getting things adjusted. Hopefully there is still a little adjustment in the bobbin and it will all look good. I'll check a few more things and test it again. Thanks again to all!!
-
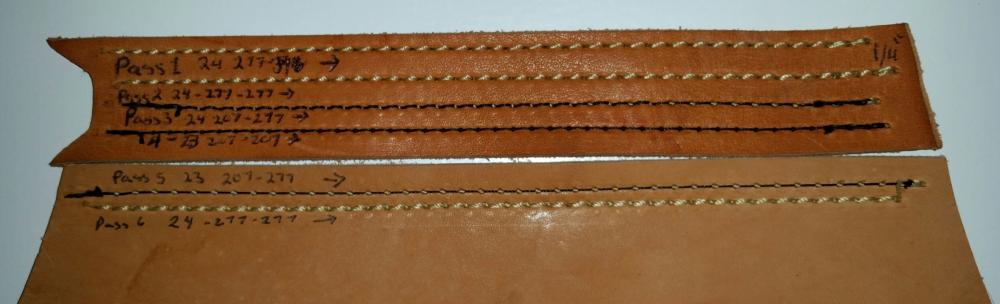
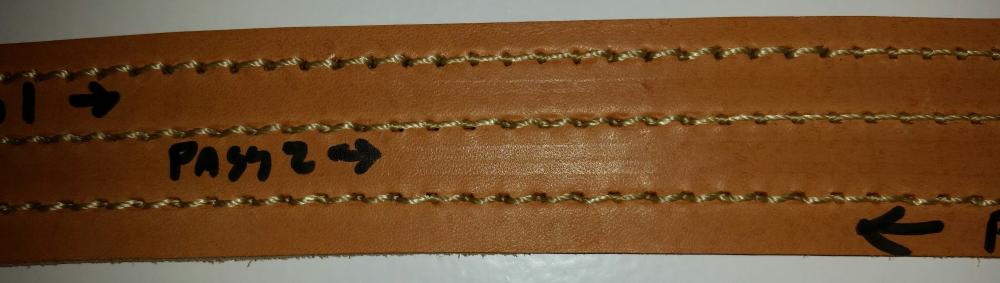
Okay, I tried a few things. 1. Bobbin was good. Cleaned to bobbin case and checked for foreign matter. 2. Adjusted holder moved cones up higher and made sure it was coming straight off the top. 3. Used different thread and needle sizes. 4. Loosened the presser foot chain. I noticed it was pulling a little when machine was running. Passes 1-4 on 14-16 oz saddle skirting. Pass 1 is size 24 needle with 277 nylon thread for top with 346 nylon thread in bobbin. Pretty pleased with top. Pass 2 24, 277, 277. Pretty pleased stitches are a lot more uniform. Pass 3 size 24 needle 207 polyester top and 277 bobbin. Fairly consistent but bubbles pulling up from bottom. Pass 4 size 23 needle 207 poly top and bottom. Consistent but bubbles showing up on top Pass 5 and 6 on 10 oz saddle skirting. Pass 5 size 23 needle 207 poly top and 277 nylon bottom. Consistent bubbles on top. Pass 6 size 24 needle 277 nylon top and bottom. With bubbles on top. The upper tension is as loose as I can make it. Still skips some stitches on reverse. I''m sure all is just operator error. Any suggestions are appreciated.
-
Need Tactical Shoulder Holster Glock, Clip, Cuff holder
bland replied to whitakermk's topic in Patterns and Templates
No problem. -
Nice!
-
Need Tactical Shoulder Holster Glock, Clip, Cuff holder
bland replied to whitakermk's topic in Patterns and Templates
I like shoulder holsters. They are great, convenient for semi concealed carry while wearing a jacket or other day to day use. Personally I would not want to add miscellaneous cases to a shoulder holster. A medium to large framed pistol and two mag pouches are quite sufficient on a shoulder rig. They were never intended to be a tactical carry platforms. Having carried tactically in the past, I have some real concerns about this carry method for tactical use. If, that is the intended use of these holsters I would ask some serious questions of my son and detective friend. Just food for thought. If you would like to discuss this more let me know. Here is the link for SLC shoulder holster pattern for sale. http://springfieldleather.com/Pattern-Shoulder-Holster -
I recently (one month ago) got a Cobra Class 4 machine and I haven't been able to get it adjusted correctly yet. Is there a troubleshooting guide out there that shows pictures that say if your machine is doing this then try this? I did 3 passes the first two left to right and the 3rd right to left. I changed the needle between the first and second pass. Thread size 277 needle size 25 (passes 2 and 3 with S point)on a single layer of 12oz saddle skirting. The back side looks pretty good but the front looks awful.
-
Booties for Miss Rodeo OK
bland replied to MendellLeatherOK's topic in Shoes, Boots, Sandals and Moccassins
Very Nice! -
cell phone wallet
bland replied to bland's topic in Purses, Wallets, Belts and Miscellaneous Pocket Items
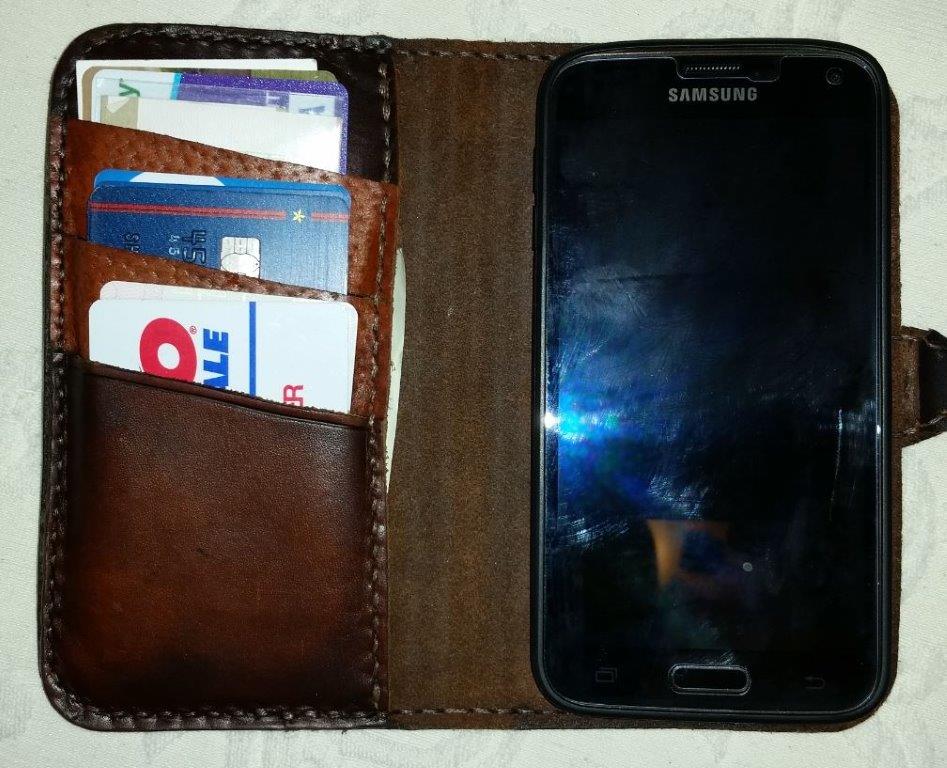
It is secured in a silicone type phone case that is stitched down the center of the back and at the closure strap. Theoretically you could use it as a stand to watch videos on the airplane or whatever. I never got to finish the edges as it was put into use prior to completion. -
cell phone wallet
bland replied to bland's topic in Purses, Wallets, Belts and Miscellaneous Pocket Items
I have done an ID window but quit doing it in favor of just card slots. In order to keep the weight and bulkiness down I opted for glazed pig for 2 slots.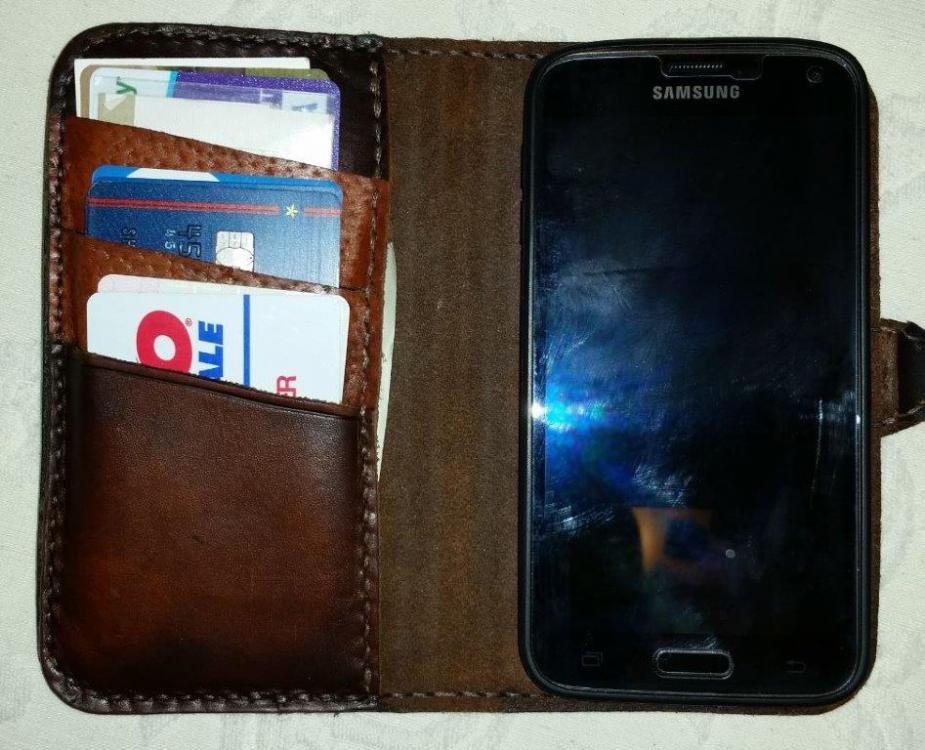
-
Haven't posted any projects for a while. Made a new phone case for wife. 4/5 weight.leather with magnetic clasp. 3 card slots ( full with 9 cards). Saddle stitched six stitches per inch.


-
Are you covering a can or are you making a can/bag all out of leather?
-
You might try cleaning the edges with saddle soap and re dying. I use glycerin saddle soap for my initial burnishing and have never had it resist the dye.
-
Vidro Backpack
bland replied to Oaksonauthentic's topic in Purses, Wallets, Belts and Miscellaneous Pocket Items
I like it. Nice design, looks rugged. People here are interested in the whole process and a few details. What leathers did you use I see three different types? What kind of hardware? What machine did you sew it on (because it only took you 10 hours)? More pictures? -
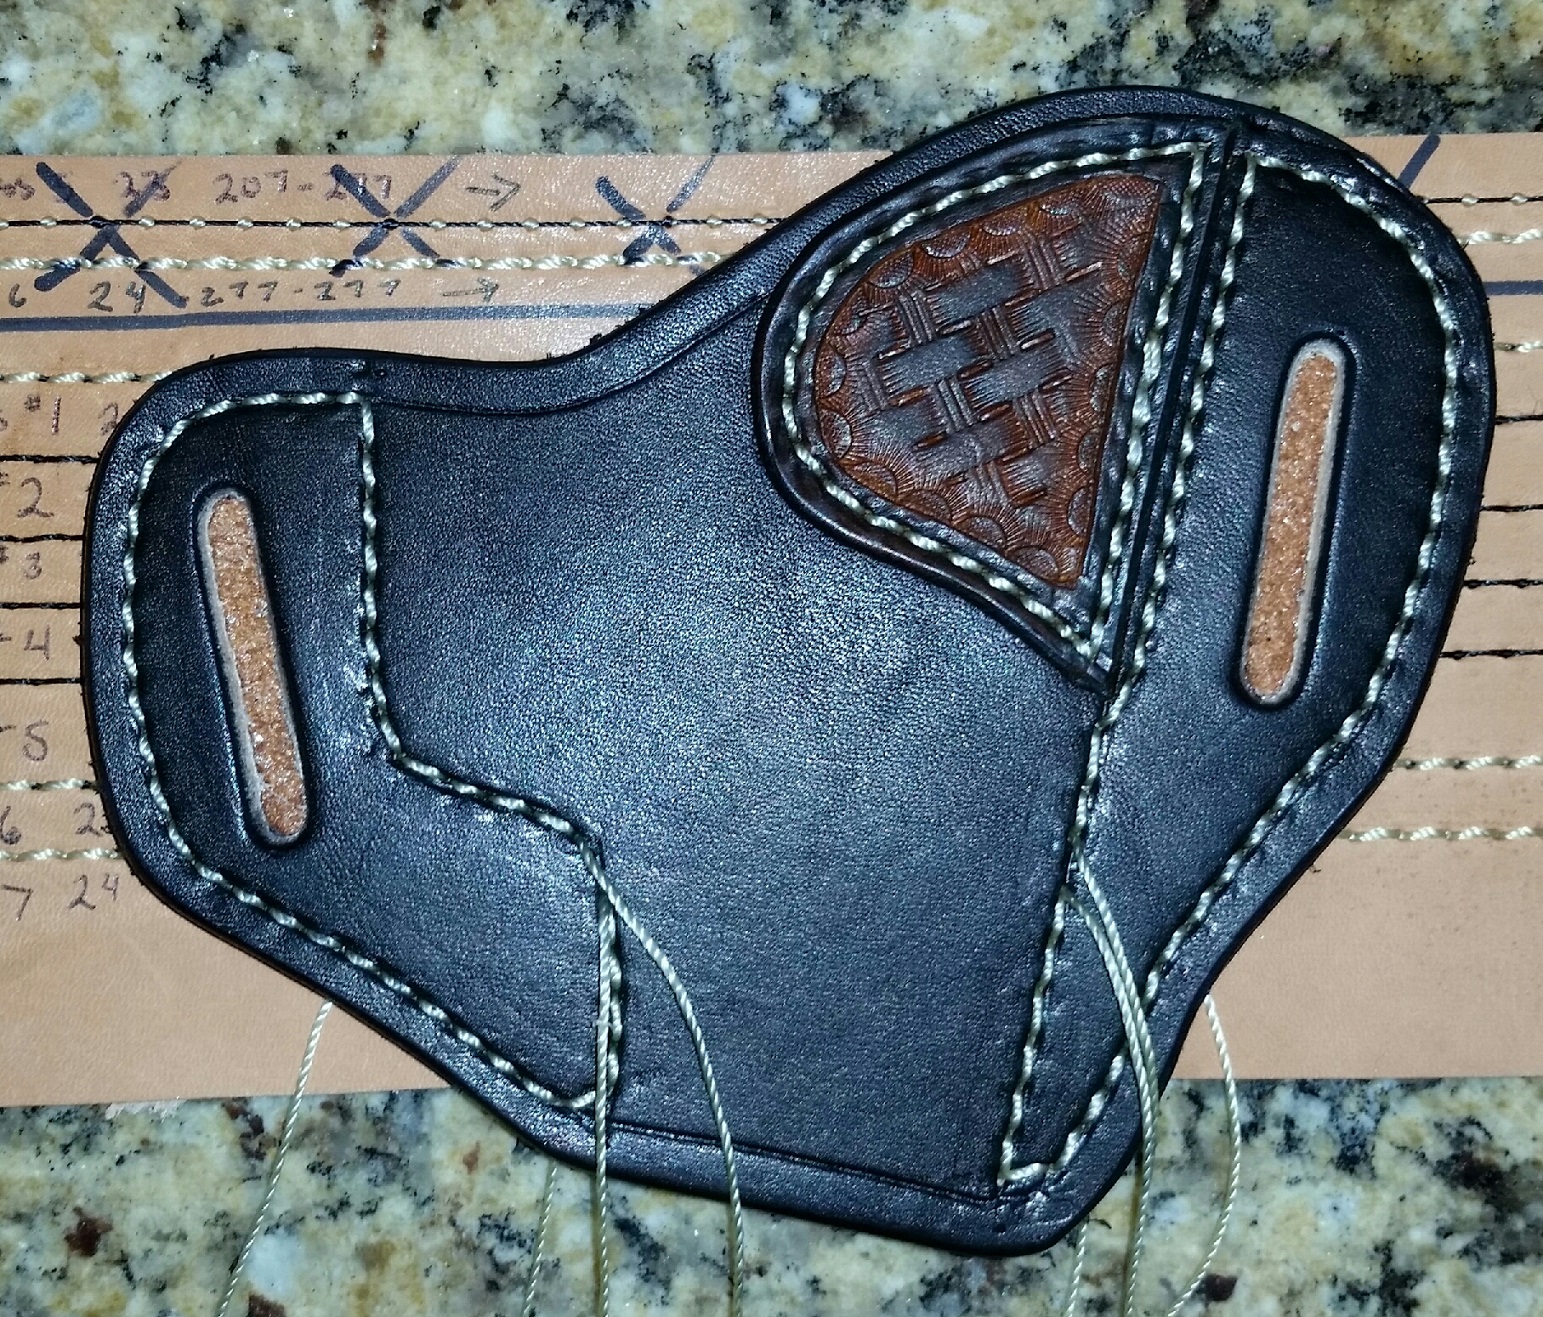
What kind of holster are you wanting to make? I have made several pancake style holsters and one avenger style holster for my and my son's PPK style handguns. I usually just make my own pattern with a tracing from the gun. My personal favorite to carry is the pancake style for cc. I can scan and send you one of my patterns or you can look at a couple other places. I'm sure there may be others out there. JLS Leather has some holster downloads on the website but not for the PPK. You could probably adjust the stitch lines on some of the smaller patterns or he has some tutorials on holster making. Most or all of the patterns there are free downloads. There a lot of folks on leatherworker.net that use his patterns including himself. http://www.jlsleather.com/diy/pattern-making/gun-holster-patterns/ Adams leather is also a site that has patterns for download. I believe there is a pattern on there for a Walther PPS on the list. https://www.adamsleatherworks.com/product-category/patterns/
-
Old overshoes use to have a buckle similar to that.
-
There are a couple of places on a belly that will stretch and become deformed on a project. It is fine for many projects and doesn't break the bank to start out. If you are not tooling the leather it opens up a lot of possibilities on what leather for you to use. The sky is the limit on what to use. Find the weight and temper you want and go to work.

.jpg.a662fa56f3c919dda14919098407b8cf.jpg)