klaykrusher
-
Posts
85 -
Joined
-
Last visited
Content Type
Profiles
Forums
Events
Blogs
Gallery
Store
Everything posted by klaykrusher
-
Cobra Class4 Premium LN (Cleveland, OH) $2400
klaykrusher replied to klaykrusher's topic in Old/Sold
Machine is sold.... -
Recent Builds
klaykrusher replied to IngleGunLeather's topic in Gun Holsters, Rifle Slings and Knife Sheathes
Those are really nice, very clean and great attention to detail. You may have mentioned in other threads, but I was wondering what finish products you use? They have a nice satin sheen, so I was thinking resolene? -
Cobra Class4 Premium LN (Cleveland, OH) $2400
klaykrusher replied to klaykrusher's topic in Old/Sold
Yes it is, PM sent. thanks. -
COBRA Class 4-P Premium Package....Excellent Like New Condition. Under 40 hours of Non-Commercial use. Always stored indoors. Our time is taken up by other responsibilities so we will not be using this in the foreseeable future. $2400. Must pick up (Cleveland, OH), cannot deliver. I am available if you want your shipper to come and crate/ship it. i have original box. All accessories shown, 6 roles of thread (207 & 277), work table still in box, never opened. From manufacturer: The COBRA Class 4 will sew from 6 oz. to 7/8″ leather for sewing skirting, all types of tack, bullet loops, chap leather and everything in between with ease. The COBRA Class 4 comes with many features including our heavy-duty multi-purpose presser feet. They are strong and compact, allowing you to sew in small areas easier than ever before. The COBRA Class 4 comes with a heavy-duty pedestal style stand with locking caster wheels, a variable speed digital DC servo motor, model SR2 heavy-duty ball-bearing speed reducer, thread stand, ten extra needles, four bobbins, tools, and oil. An Instructional DVD and parts manuals are also included. You will NOT need to modify the COBRA presser feet, like other companies require you to do. These presser feet have been approved by some of the most respected saddle makers, and holster makers in the business. The COBRA presser feet will not bend or break under normal sewing conditions. Premium Accessory Package Includes: Left Toe Presser Foot $75* Open Toe Center Foot $65* Double Toe Presser Foot $80* Right Toe Presser Foot $75* Work Platform $95* Leather Point Needles $10* Four Spools of Thread $10* Holster Plate $156* Stirrup Plate $156* Slotted Plate $85* Blanket Set (Inside & Outside Feet w/ Feed Dog) $150* Heavy Duty Roller Edge Guide $95* LDA-1 Magnetic LED Light $20* Oil and tool package Four bobbins Owner and parts manual
-
For me, I'd like to find one or two vids that really go into detail about the pattern making process. I have to admit that I haven't hunker'd down and spent a lot of time studying it and practicing making them. But things like, on a pancake or saddle holster as Andrews calls it, if I want the front (outside) piece to be longer so the gun sits say 60/40 or 70/30 verses 50/50, what determines how much longer the outside piece should be cut. Hope that makes sense. I have played around with the patterns, but seems to be more of a guessing game until one finally works. most vids attempting to show the process usually have someone saying "and just add a hair" to the stitch line or "I usually add an 1/8th or 1/4 inch to the measurement", etc. It also just may be my OCD for specific details. For cooking recipes, I have no idea what "a pinch" or "a dash" equals.
-
I'll take the dummy guns!
-
Belt - Double Stitch Spacing
klaykrusher replied to klaykrusher's topic in Gun Holsters, Rifle Slings and Knife Sheathes
Thank you, will run a few test pieces to check out the differences. -
I guessing this is most probably personal preference, but just wondering what thread spacing folks are using for a double stitched belt. I was looking to run the outer stitch at 3/16 from the edge and the inner stitch 3/8 from the edge.
-
G21 and G43 Holsters
klaykrusher replied to Josh Ashman's topic in Gun Holsters, Rifle Slings and Knife Sheathes
Very nice Josh! Wondering what type of finish you are using? -
Like you said, that's that wonderful Fiebing's oil dye color that keeps on giving....even when you pray it will stop. bagzy, the Pro Oil Dye is specially formulated by Fiebing's to work better with Veg Tan leather. As Dwight said, once dried, you have to buff it to make sure you remove as much of the dye that did not penetrate the hide as you can. A white t-shirt will let you know when you got most of it. I have tried Bag-Kote, and was not too happy with the results, but that is probably because of me, not the product. I also use resolene, diluted 50/50 with water or mop-n-glo, 50/50 as the finish coat. I usually apply 3 coats, letting it dry for an hour between coats. This has worked well, and has not left stain marks.
-
Tell me about your "Hot Box"
klaykrusher replied to Dwight's topic in Gun Holsters, Rifle Slings and Knife Sheathes
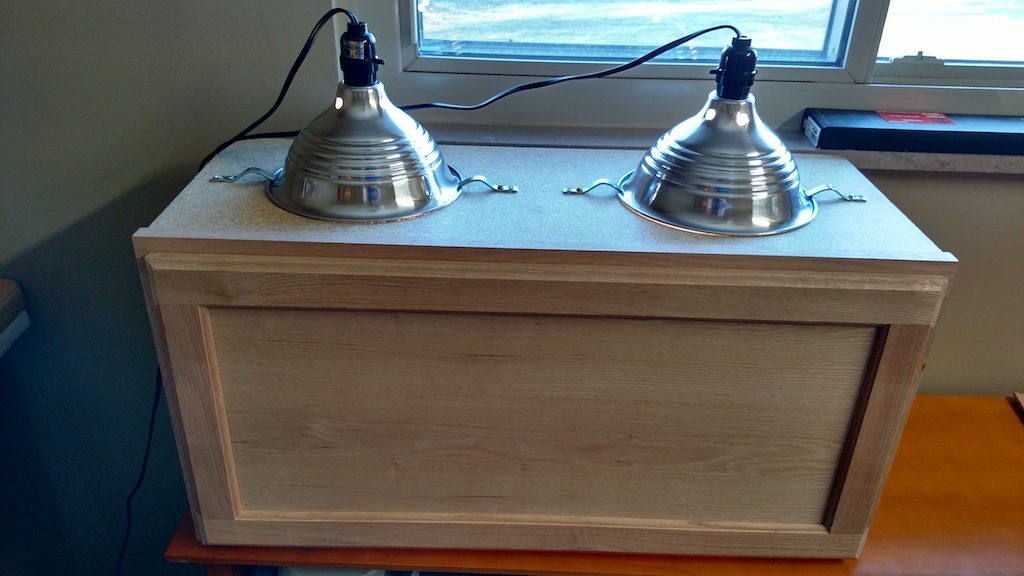
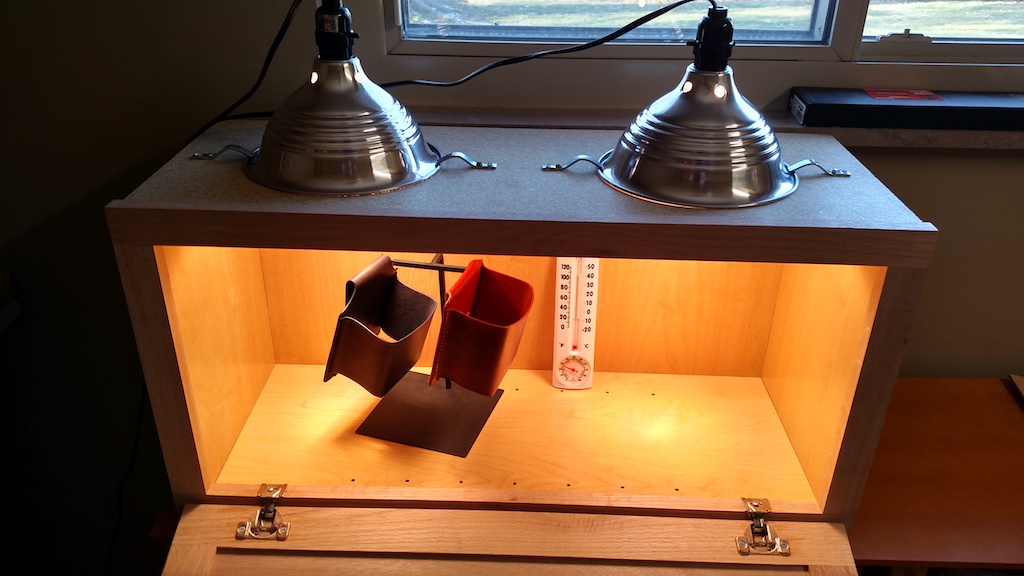
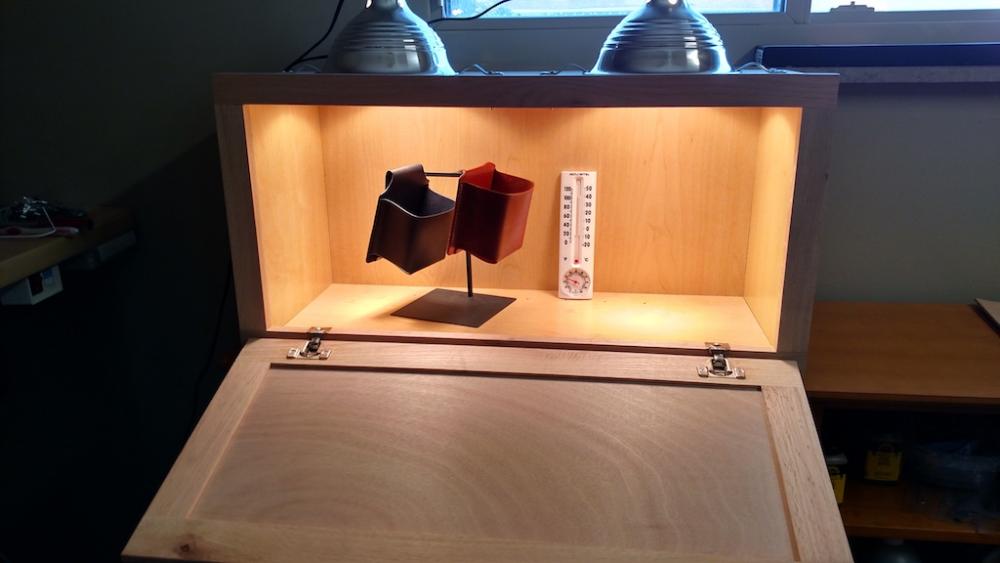
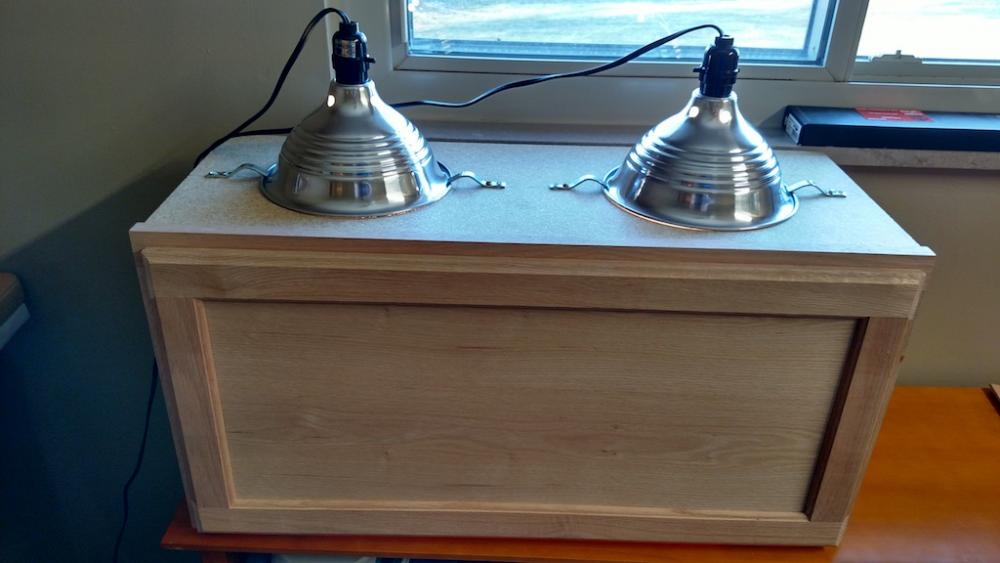
Well, finally had some time to tinker with this. I just wanted to keep it real simple. Picked up a 30x15x12" unfinished cabinet at Hone Depot and a couple 150w max utility lights and 2 100 watt bulbs. Figured I would just start with the basics and see how it plays out. I decided to keep the cabinet on it's side to match my needs. I cut a couple holes for the light fixtures and then used the spring clamp metal clips to hold the fixtures to the cabinet. With my room at about 70 degrees it took the 2 bulbs about 35 minutes to bring the interior up to 104 degrees. That seems to be about the max temp. I let it cool back down to 70, then used a heat gun to bring it back up to about 100. That took a couple minutes, then the lights just maintained at 104 again. Right now I'm good with the lights on top, but it will be easy to mount the cabinet on a wall and have them on the bottom, I can just switch the hinges for the door if it becomes a hassle. Appreciate all the guidance in this thread and Lobo's HotBox thread.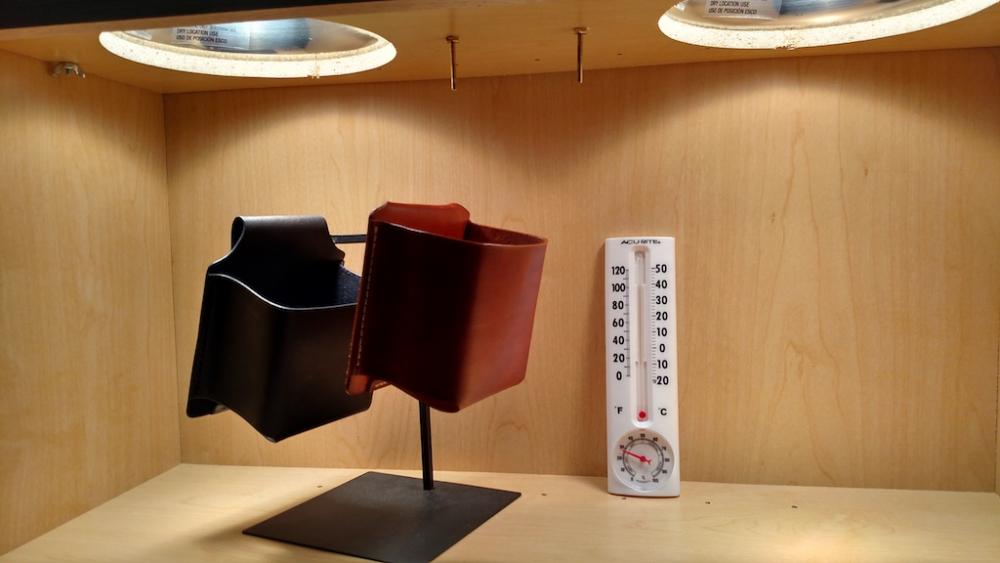

-
okay, makes sense. I'm gonna give ALD another try and this time I'll be more specific with what I'm looking for and what I expect.
-
So what determines whether the flesh side is processed smooth like HO or a little rough or spongey? Is that the grade? So SLC has HO 'B' grade which has a really smooth flesh side for the few backs I've purchased from them. The couple of shoulders i got from ALD the flesh side was not so smooth, pretty rough. My mistake was not specifying a grade at the time, I believe. grain side is pretty nice for these though.
-
I bring my liner right up to the buckle tongue slot and then fold the outer layer over that. Only adds an 1/8" and once broken in, don't even notice it.
-
Currently I just use those black foam brushes. Very rare that I get any bubbles like I was getting with resolene. I put on 3 coats. It's not that the shine is bad, I personally just prefer a matte or satin finish. I'm gonna have to try Chief's method above of rubbing it in and see how that goes.
-
I've been using both resoline and mop-n-glo on my belts and IWB holsters. Not crazy about the shiny finish, but so far, sweat and water have been a non-issue. I do like the crock pot idea for melting waxes, gonna have to try that, been using a double boiler and kind of a pain. Also gonna give the sno-seal a try. Like others, used it years ago and worked great on boots. Might have to go to a 25/75 dye/alcohol mix if the sno-seal ends up darkening the end product too much.
-
I'm very confused by this video...I need (expect) at least 35 minutes of explanation of what you are going to do before actually doing it....then another 35 minutes to explain what you just did....lol... Even though flawed...I am a new subscriber....
-
Tell me about your "Hot Box"
klaykrusher replied to Dwight's topic in Gun Holsters, Rifle Slings and Knife Sheathes
Check out this video. At the 9:50 mark you can see his drying cabinet. Just a microwave or refridge cabinet with a few holes cut out for a couple clamp lights and a fan from the side. Here is another, start at the 3:44 mark. Not much detail, but another perspective I guess... https://www.youtube.com/watch?v=3DTST319cFw -
Same here, I use barge and their directions include hammering the pieces together. That's all I do. I let it sit for 8 to 12 hours to cure. No issues whatsoever with separation.
-
Belt Leather Cracking At Buckle Fold - How To Eliminate It?
klaykrusher replied to CustomDoug's topic in How Do I Do That?
Dwight are you really running the resolene finished edges against the burnisher? For what purpose? On mine all burnishing is done, then resolene or MnG, and I'm done. Just wondering if something I may want to do also. As for the buckle end, after I glue the liner, I wet the fold inside and out, and test fit the buckle. Make any adjustments and then go through the remaining steps. When applying the resolene, I gently fold over same as Dwight described. No cracking so far with HO leather and some not so good cheapy leather. -
Too Critical or not critical enough?
klaykrusher replied to Boriqua's topic in Gun Holsters, Rifle Slings and Knife Sheathes
Alex, I would offer it as a blem with the discount you took off. I certainly would not pitch it....I think your wife said it right.... -
If this is for you, check on your other pants, shorts, etc. Different manufacturers place the loops at different spots. And if worse-comes-to-worse, just remove and reattach the pants loop. Enjoy the belt, it will be fine! Oh, and you are a brave person to fold and hand stitch a belt...hahahaha...
-
Heck, from the photos I'm not seeing any issues, looks good!
-
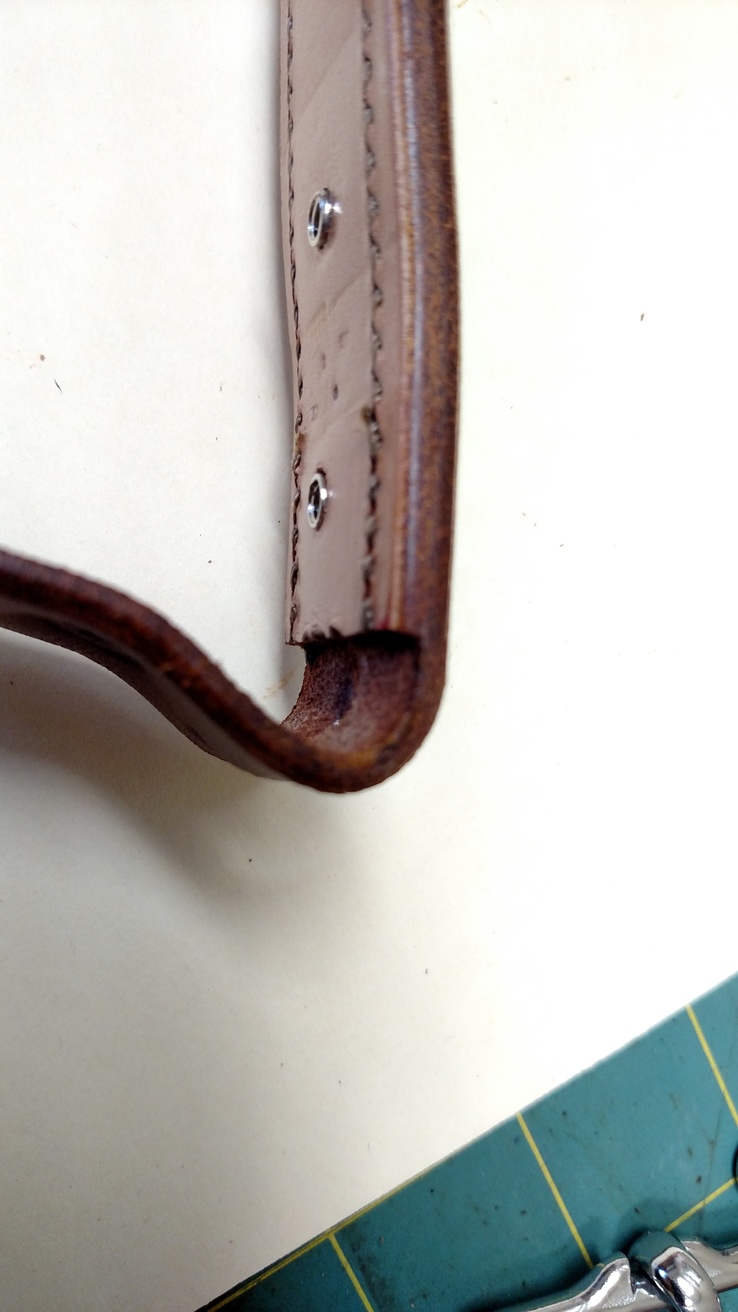
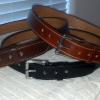
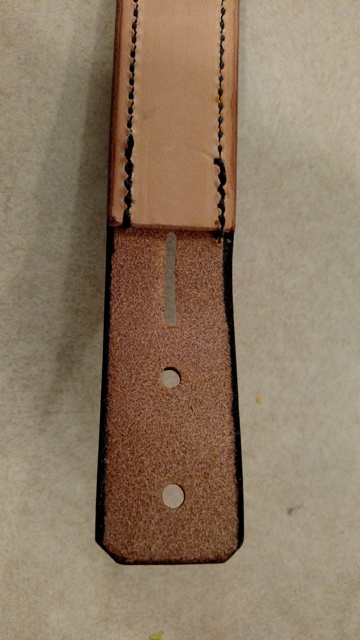
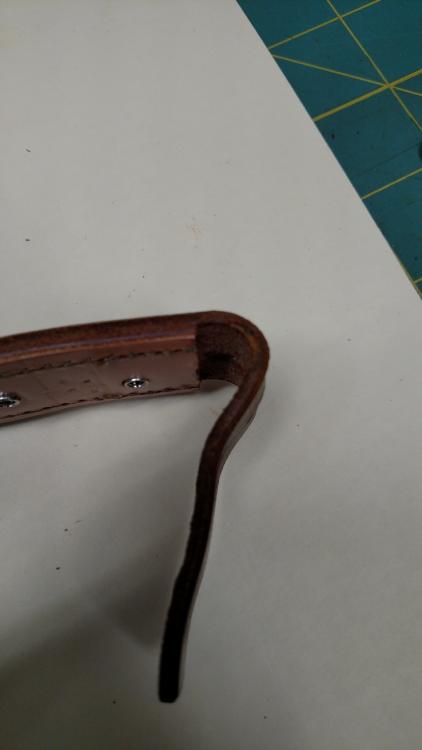
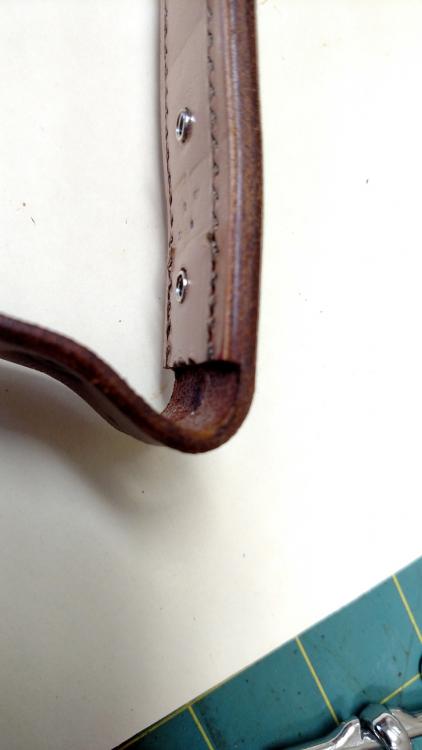
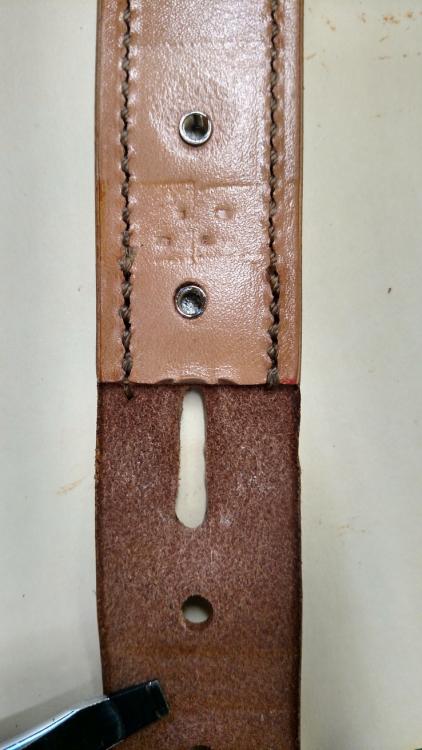
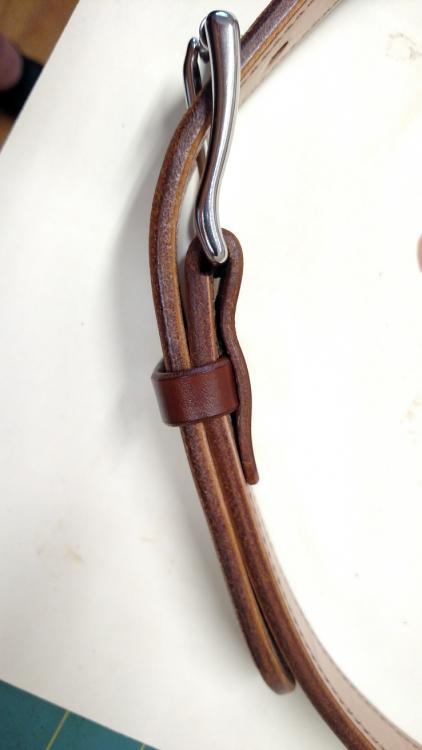
Hey Bryan, I follow Particles' method. Bring the liner to about an 1/8" before the buckle tong slot. Here are some pics: On this one you can see where I was a little too close to the slot and this particular buckle has indented into the liner, but it still works fine. I have not had an issue with the total thickness of the leather sticking out too far once everything is assembled so I don't see a need to skive at this point. Belt in pics is double 6/7oz Herman Oak back.
-
I hear ya, after much crying, pleading, begging and kicking the dog I finally got my C4's tension down to where it's purring like a disgruntled cat. So no hiccups with the #25 yet. I do hammer the stitching down after I'm done, so the holes seem to close up a bit. I found this link so will give them a try. They have both 24 and 25 available. Organ