GerryR
-
Posts
176 -
Joined
-
Last visited
Content Type
Profiles
Forums
Events
Blogs
Gallery
Store
Everything posted by GerryR
-
I have a 4:1 reducer on my machine, so "slow" is not a problem. (I also know that there is a mod to give more range on the speed control to enhance low speed operation. I would use a higher ratio speed reducer so that the motor can run at a higher speed and give you the lower speed that you require. This is better for the motor. Also, just for curiosity, I just finished checking to see how/if it would run on 120VAC, and it ran perfectly, full torque, full range of speed, etc. I assume the internal supply is universal and can handle all the way to 220VAC and that they change the label to suit the market. So, you can run it on 220 in the shop and have a small adapter cable to run it on 120 when in the field.
-
The Enduro drives work pretty well. The smaller unit, SM645B-2P is for sale on Ebay (https://www.ebay.com/itm/165684311695). I have used 2 0f these units, and except for the positioner control have been very satisfied. They make a larger unit, SM1050-2PF. The positioner control requires a simple modification to get it to operat properly. I don't know about th SM1050, but there are several people who have commented that the SM645 unit works just as well on 120VAC as it does on 220AC; I haven't tried it and run mine on 220 VAC. These might be other options and are very inexpensive.
-
Machine for alcantara and other textiles, no leather.
GerryR replied to DvidSnchez's topic in Leather Sewing Machines
The Pfaff 1200 series (1221, 1222, etc.) are domestic machines but are very rugged machines, and some of them have an upper walking foot (I believe it is called the "Matchmaker Foot") that can be engaged or disengaged. If you look on Youtube, there are videos of people using these machines for auto upholstery. I have no experience with Alcantara car upholstery so don't know if these machines are suitable for it, but it may give you another option. Brubaker's in Penn. (https://brubakerssewing.com/) would be someone to talk to as they are a Pfaff dealer. -
Very nicely done. I'll have to rethink my approach to maybe simplify it somewhat. Thanks for the pictures!
-
Could you post some pictures of your pedal and the attachment to the drive. No machining sounds great to me! Sometimes I can overly complicate things. Thank you.
-
You will probably want to drastically reduce the output by a speed reducer. Most of the servo's have good low speed torque, but you don't need the high speed, so by using a reducer, you gain more torque and have much better speed-range control via the foot pedal.
-
The Enduro Pro SM645B works great and some are still available on Ebay: https://www.ebay.com/itm/165684311695?_skw=Enduro+Pro+SM645b+Servo+Motor&epid=13016686151&itmmeta=01JGY3XPK9NY4B3Z35ZZCGZ4SS&hash=item26938df68f:g:dZIAAOSwqQxjKLg4&itmprp=enc%3AAQAJAAABAHoV3kP08IDx%2BKZ9MfhVJKnxM8bHb2nR%2BJ%2FSCjzhhIMTOULdd6EPTSJRQBXqH%2BsDVi4fG27BJC4xYoVBLOb5HtlrEtMOGz6qYegfF%2BJhqzFOMUOR6aQNw2N%2B5ZWhEOs4mcEw0nhh0gMRmlkhx4R6EDo2x6%2B%2BdaAgC5feSOQzJ0UKq9PyUKaowiDGRuL1zX0lHEp2tZR7iVv%2F79d84Ts1fY1WSmgP1t0eY49l5JbjoLukq3PILT%2FlRtGaSmog5rJrHP%2FWhkNIGmAurvrKBxHB8F%2Ba12JbKeI03LcqDnLOX%2B5DowXu0%2F7PvEADktc6W5uJL9CFiXsO7LPXKr8PONanCcU%3D|tkp%3ABk9SR9rp9sOHZQ I have motorized a couple of the Chinese Patchers and they work fine. Not trying to sell you anything, but if you want some ideas on how to set one up, look at my "for sale" ad here: This one runs on 220VAC, but I'm told they also work on 120VAC; I've never tried it as I have 220VAC readily available. The patchers readily go thru 20 oz. leather (5/16" thick), as you are probably well aware. Hope this helps.
-
I recently got scammed, the person saying they only had a "friends and family" PayPal account, and by using that, I could avoid a fee. Not knowing better I paid through "friends and family" for which PayPal does NOT protect the buyer. I have since learned that all accounts have the "goods and services" option for payment, which is protected by PayPal. So the moral of the story is that if a seller wants you to use only "friends and family" for payment through PayPal, it is most likely a scam!! Fortunately, in my case, they were just petty thieves that I dealt with and didn't lose much.
-
I have a Chinese patcher which has small bobbins. They hold ~ 20 feet of V92 thread (~16' of 138 and ~25' of 69). I just finished a belt, the continuous sewn length is 67 inches of leather laminated to diver's-belt webbing, total thickness 3/16." It used just about half the bobbin at 9 stitches per inch. The bobbins are .680" in diameter by .190" inside width. This might give you some idea of what your bobbins will hold. Just for your info, the Chinese patcher will sew 20 oz. leather with no problems (I motorized mine.). I looked at the dimensions of the 226r bobbins, and they are over twice the size of my bobbins and will hold over twice the thread.
-
Price lowered to $275.00 plus shipping to the lower 48 only.
-
I have had one of the inexpensive Chinese Patchers for years and I have built and sold a couple for others. I motorize them with a servo motor. The newer patchers have frames made from an alloy cast and are quite smooth, not like the older sand-cast iron machines that needed some clean-up prior to use. They sew fine and I have not found them to be "problematic." They sew up to 20 oz. leather. I've made duty belts, holster carriers for chest holsters, watch carriers for pocket watches and a variety of other small items. The bobbins hold approximately 25 ft. of #69 thread, 20 ft. of #92 thread and 16 ft. of #138 thread. I haven't tried anything bigger than #138 thread. I have a portable, clamp to a table or bench, unit for sale at present. It is servo driven, and is in your price range I believe. If interested, PM me and we can possibly talk a deal; price is negotiable. It is advertised on this forum here:
-
Add these to your scammers: Jasonbecker294 on this forum, autopartsdealer1@yahoo.com (who he refenced me to), and on PayPal, Brian Mutuma (is autopartsdealer1) and Joseph Oliver (oliverjoseph571@gmail.com) who is Brian's "friend." Scam was for purchase of a Chinese Patcher part.
-
@CdK Have you had the chance to get a quote on shipping yet. I really only want the handwheel-cam drive plate. Would you be willing just to sell that part? Thank you.
-
I wish I read this first. I believe I have been scammed, but not from overseas. I'm going to wait a couple more days to be sure, but the scenario is much like what Wiz stated but using PayPal "friends and family," which gives no recourse through PayPal. This is the first and last time I try to purchase something that is not on ebay or using PayPal "friends and family." You know the saying, "Catch me once, shame on you; catch me twice shame on me." At least it wasn't a significant amount of money.
-
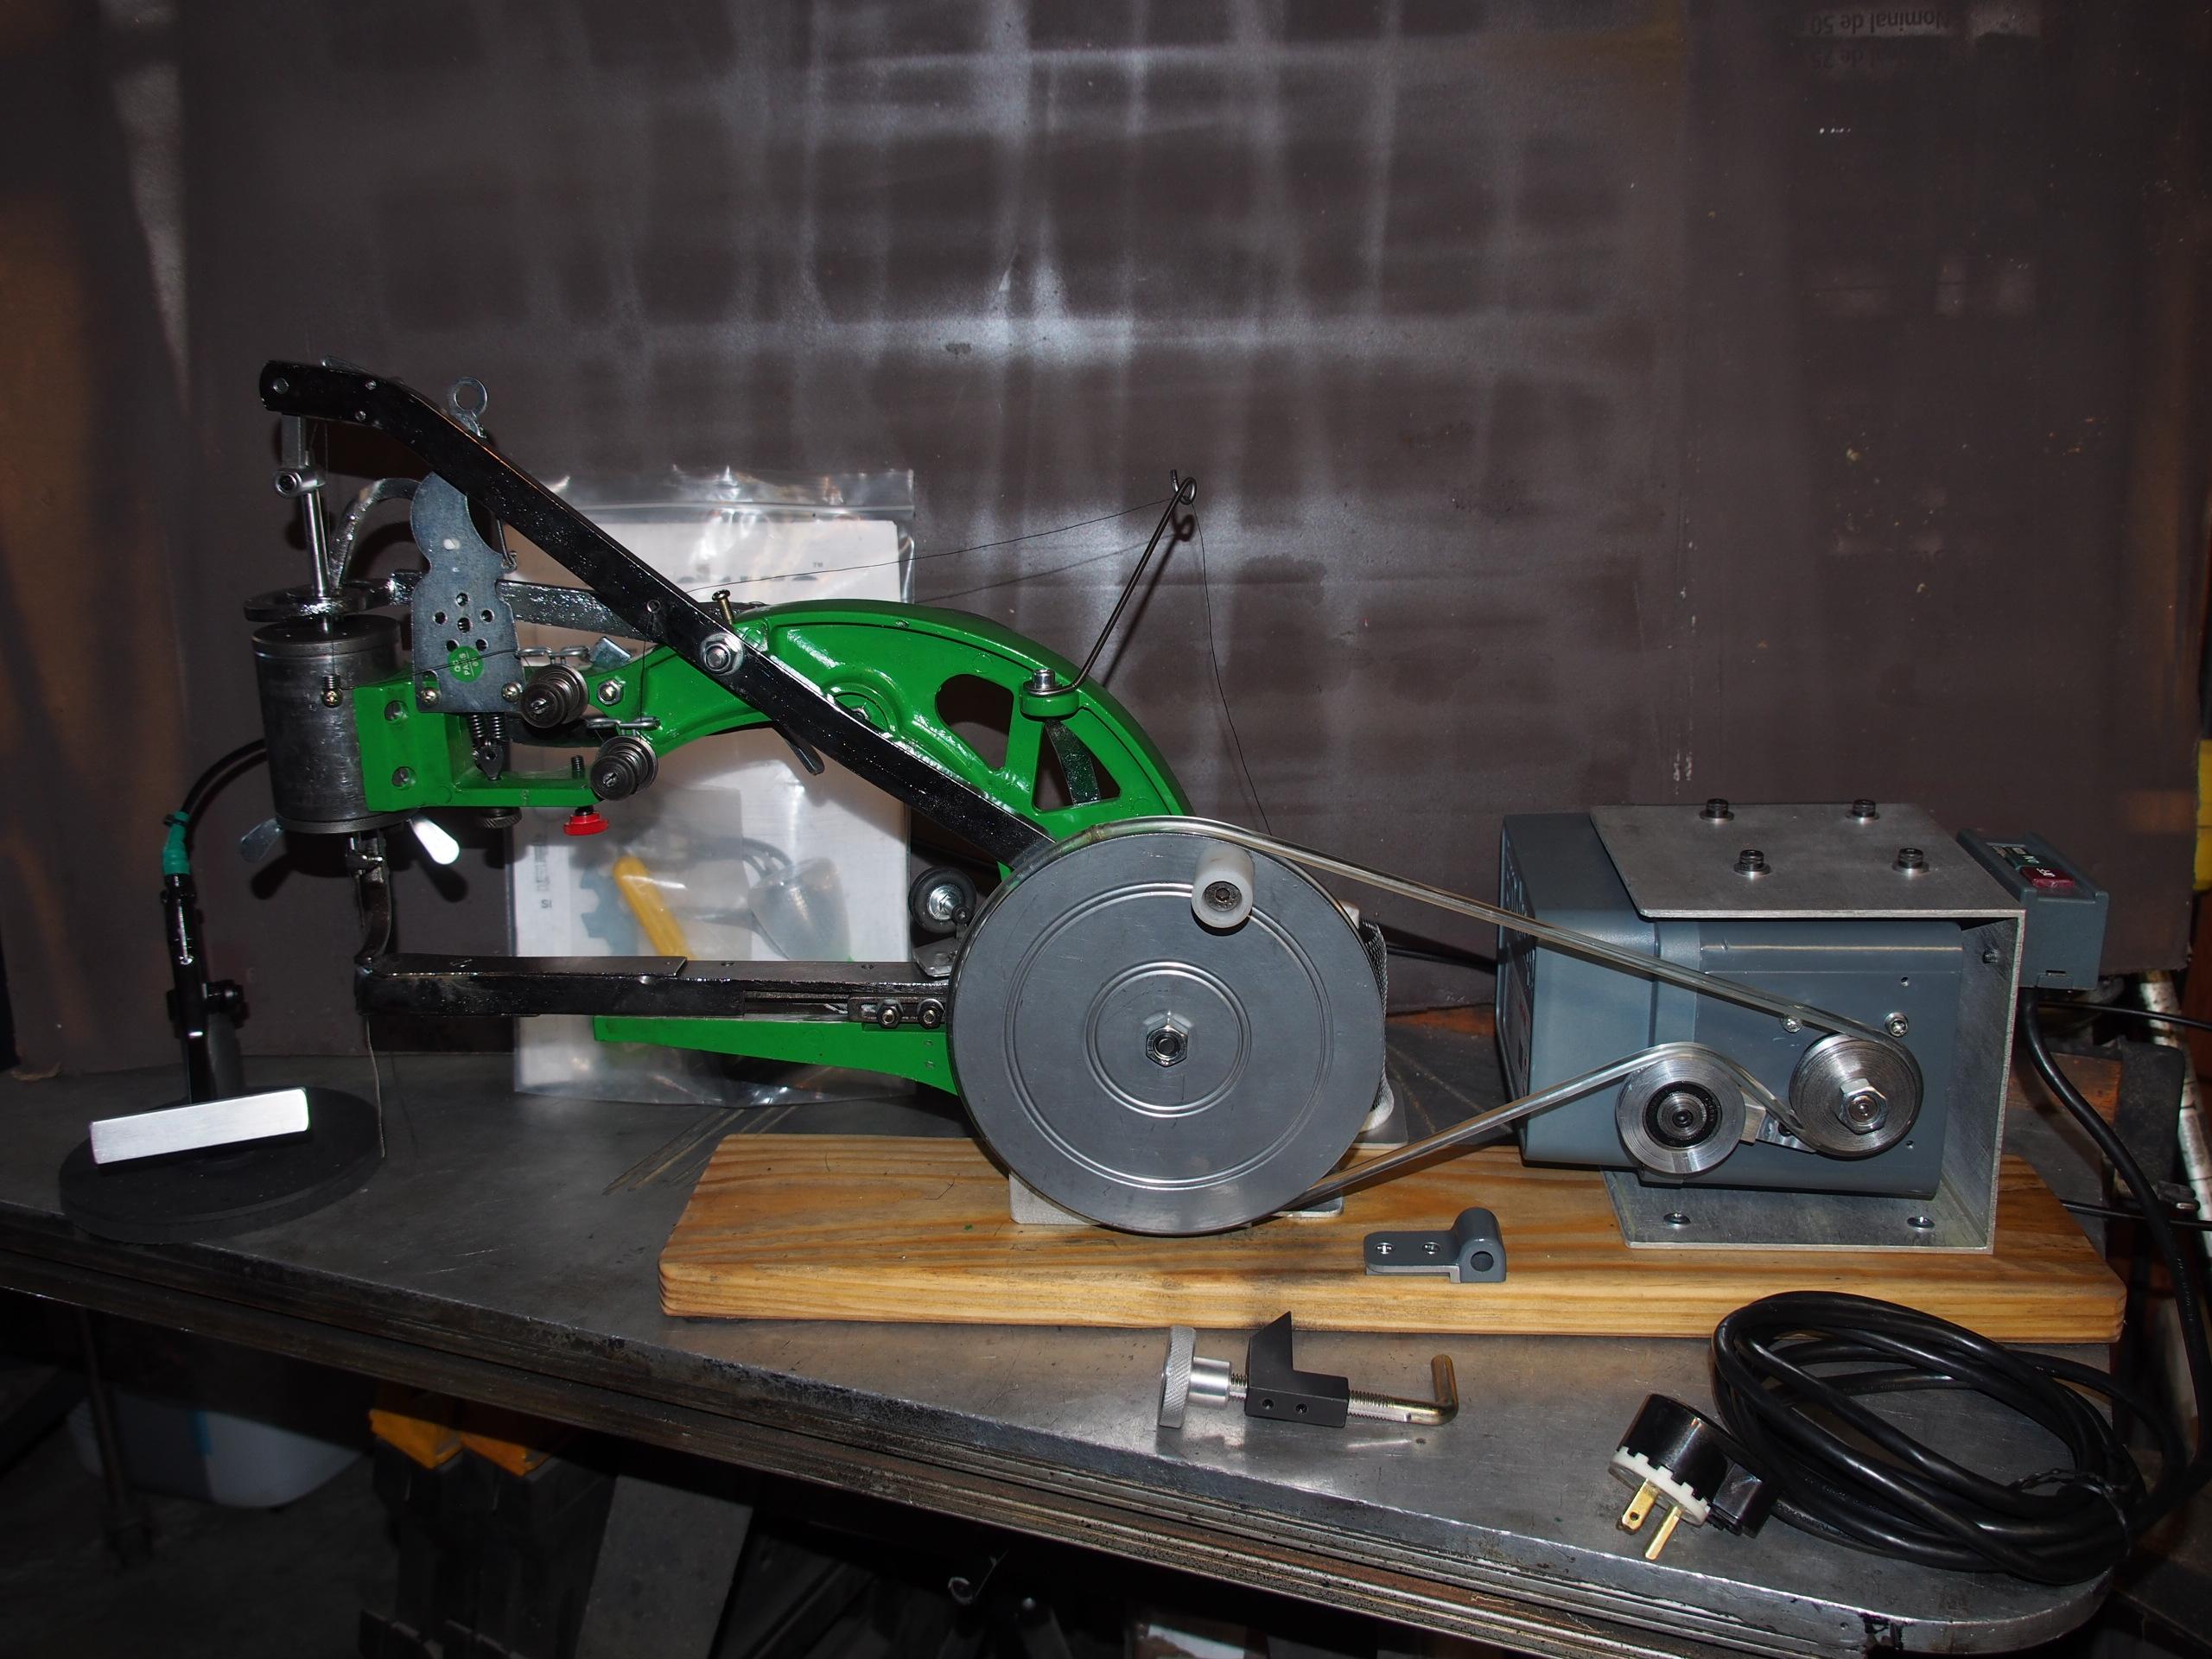
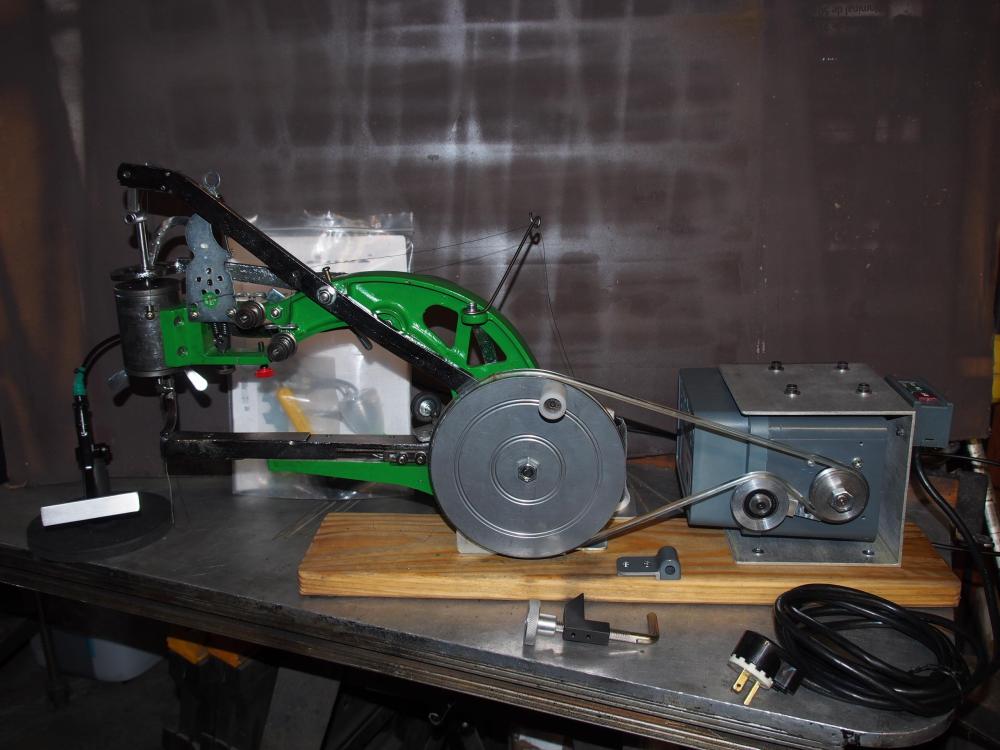
Customized Chinese "Patcher" Leather Sewing Machine: This is a Chinese Patcher that has been customized. The frame on this unit is an aluminum alloy and not the typical rough cast iron frame. It is precision cast and smooth. Though the control arms are not "perfect" in appearance, they came chrome plated, which should resist rusting for the long term. The presser foot tension control, the stitch length control and both thread tension controls now have custom made thumb nuts instead of the typical hex nuts, making adjustments a breeze. The patcher uses the standard HAx1 home-style sewing machine needles of which there is a variety available for sewing leather. The original bobbin winder was modified to run off the drive belt (see pictures). Also, a spool holder has been added so larger cones of thread can be used. I have added an Enduro speed control and motorized the patcher. This unit runs on 220Vac, 60hz, 1ph. (I was told that these units run fine on 120Vac, but at a slower speed. I haven't tried it and would caution others about trying it.) Everything is mounted to a base, which can be clamped to any bench or table (clamp provided), making it an extremely portable leather sewing machine. The foot pedal is custom made to accept a cable-type control (think bicycle hand brake control) to activate the control unit. Manual operation is still an option as there is a custom crank handle. This machine will sew up to 5/16" (20 oz.) veg-tan leather. I generally sew with size 92 thread on this type of machine. You can sew with heavier thread, but the small bobbins limit the amount you can sew in one pass. Size 138 is the max I have sewn with on a similar machine. Please see pictures for more details. Selling for $365.00, plus insured shipping, to the lower 48 states only. It will ship in a box 36" x 18" x 16" and is appxox. 40 lbs.
-
How much to ship to 23923 Virginia? Thank you for the offer. Is it the older cast iron machine or the newer alloy machine?
-
I completely understand!!
-
Small math error?? 10 pack @ $12.99=$1.30 10 pack @ $11.29=$1.13
-
If I had some 207 thread, I'd run it to tell for sure, but I think your close. I did run some other bobbins with 40 wt. thread. Class 15 holds 300 ft., and Pfaff bobbins (for 1221 machine) hold 240 ft. I have some others and will get to them sooner-or-later.
-
Really nothing special. I had a standard sewing machine motor with a 2:1 reducer that I had made for another project and didn't end up using. I had the spool stand and just purchased the tensioner (about $6.00). Also, I had the Rapala line counter. So, all I had to do was make the base (glued together pieces from some tomato stakes) and screw everything onto it. I had the footpedal from an old Juki blind hemmer and use it as a hand-operated speed control, also attached to the base. I was just curious about the amount of thread the bobbins held and had some extra time on my hands. I haven't tried it with other machine bobbins but will eventually. I did, however, wind 10 of the patcher bobbins with different weight threads in very little time. A good unit to have.
-
I was curious to know how much thread the bobbins from the Chinese Patcher sewing machine held and had some spare items and built a bobbin winder with a digital line counter on it. The line counter is a Rapala fishing line counter used for loading reels and for keeping track of line-out when depth fishing. Well, the bobbins hold about 25 ft. of #69 thread, 20 ft. of #92 thread, and 16 ft. of #138 thread. You probably could have gone all day without knowing that information.


-
Looking for the "Leading Plate" (main cam-drive plate with crank handle) for the inexpensive Chinese Leather Shoe Patcher. I have a complete machine except for this main part, so it is only good as a small boat anchor at this point.

-
Almost done with my Sanford & Son table
GerryR replied to Southerngunner's topic in Leather Sewing Machines
I personally like the natural wood and its contrasting with the rest of the machine. (I did mine like that.) That is some really nice work! Now its time to enjoy using it. -
Weird and frustrating obstacle Setting up shoe patcher
GerryR replied to Annikita's topic in Leather Sewing Machines
The bearing that is attached to the horizontal arm is what works the hook; it slides left and right. Slide it, in or out, to where it lines up with the inner groove of the handwheel when putting the handwheel on the shaft. Then line up the other bearing, the one on the arm going to the needle bar, with the outer groove, rotating the handwheel so the pin on the handwheel shaft goes into the notch of the handwheel. Also, there is a washer that goes between the handwheel and the shaft bearing to prevent the handwheel from rubbing the frame. If your unit is missing the washer, find one that fits over the shaft and remove the pin in the shaft and install it. If you can't get the pin out, file a notch in the washer to slip over the pin. The other option for a "washer" would be to take a solid piece of copper wire (12 or 14 AWG house wire) and make a single wrap, end-to-end, around the shaft behind the pin and then put the handwheel on. Hope this helps! -
Weird and frustrating obstacle Setting up shoe patcher
GerryR replied to Annikita's topic in Leather Sewing Machines
Much of the work done on these machines is for appearance sake, trying to make them look better. I have had a couple of these and they work "out-of-the-box." I can easily sew up to 20 oz. leather with these machines. Maybe I got the luck-of-the draw, but I think they get a bad rap because of their looks and price. What would you expect to get for ~$100. 00 these days? On the one I have presently, I did convert it to the 135x system for more needle options. Even that was very easy to accomplish. It still is the cheapest way to get into "machine" sewing of leather though not as elegant as other machines, unless someone just gives you a machine.