TomSwede
-
Posts
2,653 -
Joined
-
Last visited
Content Type
Profiles
Forums
Events
Blogs
Gallery
Store
Everything posted by TomSwede
-
Blood Clot Wallet
TomSwede replied to Spider's topic in Purses, Wallets, Belts and Miscellaneous Pocket Items
*BURP* sorry man, but I'm full now.... I think stuff like this is alot of thinking, 2mins of work, back to thinking etc and in the end it often comes together so fast that when it's done you wonder what just happened, a lovely feeling. This one definetly has that planned ahead look. Tom -
That is so true, I'm currently experiencing this, but hey, i think I will get a really cool colouring with this project. I think without buckles produces a cleaner look but mostly I'm concerned that they will scratch the guitar. Tom
-
white on black
TomSwede replied to Luke Hatley's topic in Dyes, Antiques, Stains, Glues, Waxes, Finishes and Conditioners.
Thanks for your help Luke! Didn't get any hits for it in Sweden so guess I'm stuck with cova for a while. Tom -
I love it RDB! The pattern is so beautyful and really well done! Without buckles is my melody!!! Tom
-
Blood Clot Wallet
TomSwede replied to Spider's topic in Purses, Wallets, Belts and Miscellaneous Pocket Items
You're the man bro!!!! Way to go, it looks professional. Nice and clean lacing, corners and all! Is that alligator skin or what? I just rescued a toad out of our terrace and all I could think of was how cool it would be to have toad skin, lol! Keep up the good work! Tom -
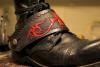
Embossing in the way we talk here is when you work from the fleshside with modelling spoons ot whatever comes in handy to push the entire or part of the tooling on the grainside (hairside) to pop out even more. Look up ClayB here to see what I mean. He's kinda extreme, lol. From your picture it looks like you are talking about depressing the leather that is surrounding your design. That is what we call backgrounding so I think you should look for backgrounder tools on the link Ken posted. This one:http://www.tandyleatherfactory.com/products.asp?number=6098-00 was used to depress the surrounding leather on my bootstrap. Takes some practice to get it even and is a really timekiller but I thinks this might be what you're looking for. Tom
-
white on black
TomSwede replied to Luke Hatley's topic in Dyes, Antiques, Stains, Glues, Waxes, Finishes and Conditioners.
Those look very proffesional Luke! Belt buckle is great looking! What is that white antique you used? I thought I'd make myself a new belt before heading to Scotland, black n white style with a buckle similar to that you've made and all I have is covacolour but never worked with that before. Tom -
C'mon girl, gimme a break!! This is ridicilous realistic!!!!!!! I'm stunned by theese! Did you find solution for the dragon edges and what tickness for the dragon?? Tom
-
Very nice Luke! You really nailed the old and worn look down I think and the red brings some life to it. Tom
-
Thank you Scouter! Back then I could very easily produce this look, but it's very hard now and I just thought it was the Tandy antiquing to blame for this but lately I have used some of the old leather that I have in a sealed box and they just take antiquing and colours in quite a nicer way so I'm starting to think there's something going on with the newer leathers I get from my dealer. I was going to reproduce a similar look n colour as with my stirrup flyreel bag but darn it, it is impossible to get that reddish look with newer leather. Tom
-
Well, that was about time! I was kinda wondering about his orientation after those girliemasks, lol! Congrats to the lovecouple! Tom
-
Welcome to the board! Your English seem to be allright and so does your work. The folding box was a nifty and unusual thing that I liked. La muerte (bookcover?) was nice and definetly my style but with a qute twist. Tom
-
Coofee and donuts served!! Hi and welcome to the board, Emily! I have no help for you on rivets other than that there is something called a chicago screw that might be someting for you. Not sure bout this but look it up, I guess Tandy's would have some. I read in posts here that gumtrag is not any good with other leathers than veg.tan and there's has been mentioning of something called plasti-dip in threads. Look in watch strap posts and also there has been some posts recently about edge treatment. You have come to the right place for your questions so I'm sure you'll get some advice soon. Tom
-
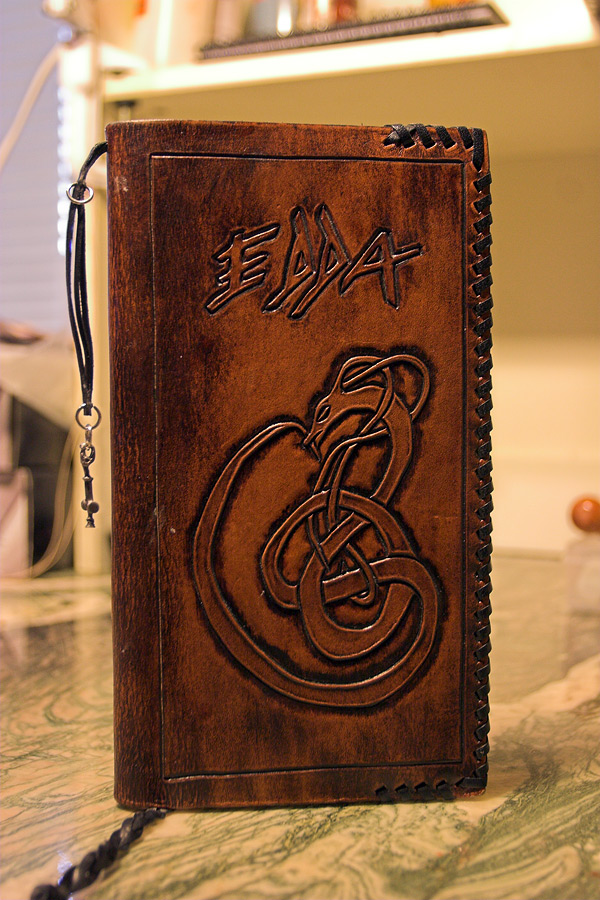
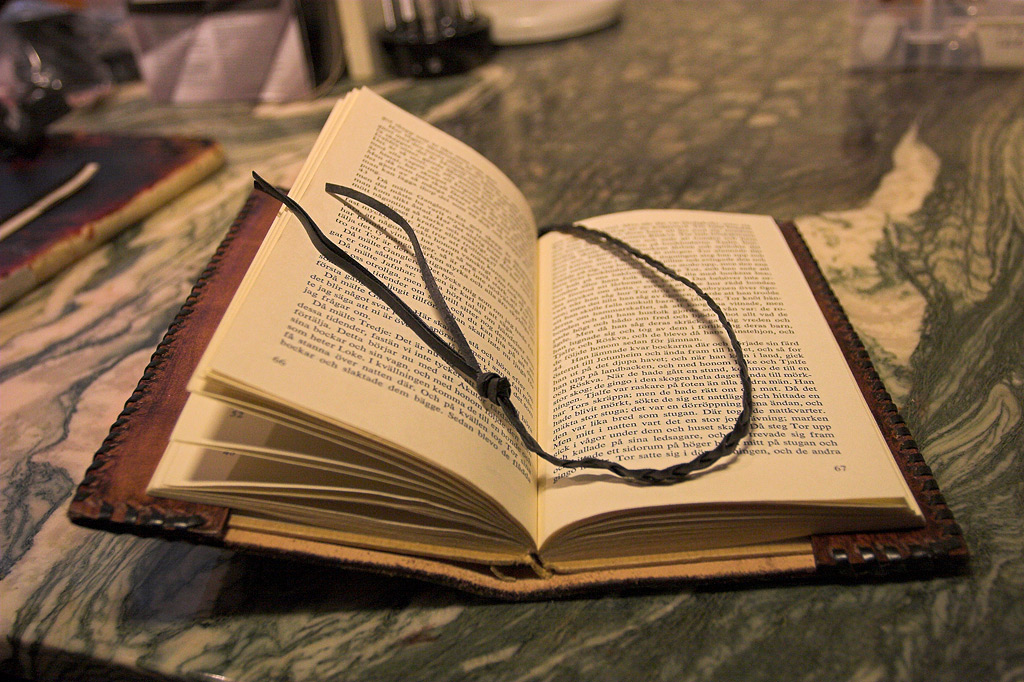
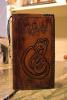
Hey you guys, alot of thanks!!! Zman, you just go ahead and get those lacing experience, a cover like this one is very easy and straight forward to make so you'll make one later with ease. Tooling is another matter, can be complex can be simple. Woodgrainish is now a word. Well to get the back woodlike was the most important thing for this book since the viking world belief system is dependent on a very special tree called yggdrasil and now you know why a decorated tree is common use at x-mas, originally a viking tradition. I bent the grainside backwards (when wet, I think) and got alot of cracking and then the antiquing did the rest. So simple. Leather thickness is 1/8" and the cover of the original is just inserted under those flaps. That' why they are kinda short otherwise it'd be to hard to tuck it in. Spider, your spot on as usual. I was after the broken in look. I didn't induce any buckles and scratches but paid no attention to try and keep avoiding them either. One thing not showing here is the ending of the bookmarker braid. I just tied it up so that the 3 strand points away from each other to get some similarity to a ravens claw. I often refer to viking myth (Asatru) as raven lore 'cuz ravens is very important in this belief. Spider might remember those magpies on the bootstrap, no accident I choose a crowbird for that design. Smilin Jim, I've done lots of viking stuff (celtic too) but it's sold. I'll check my personal stuff to see what's there, at least one giant bracer is here somewhere. Would you like a history briefing aswell?? The giant one is from a runestone and I can't rememder wich stone. Hard to look up, about 2500 runestones in Sweden. Tom
-
but I just add that the butterfly IS TO DIE FOR! Extrasuperslick job! Tom
-
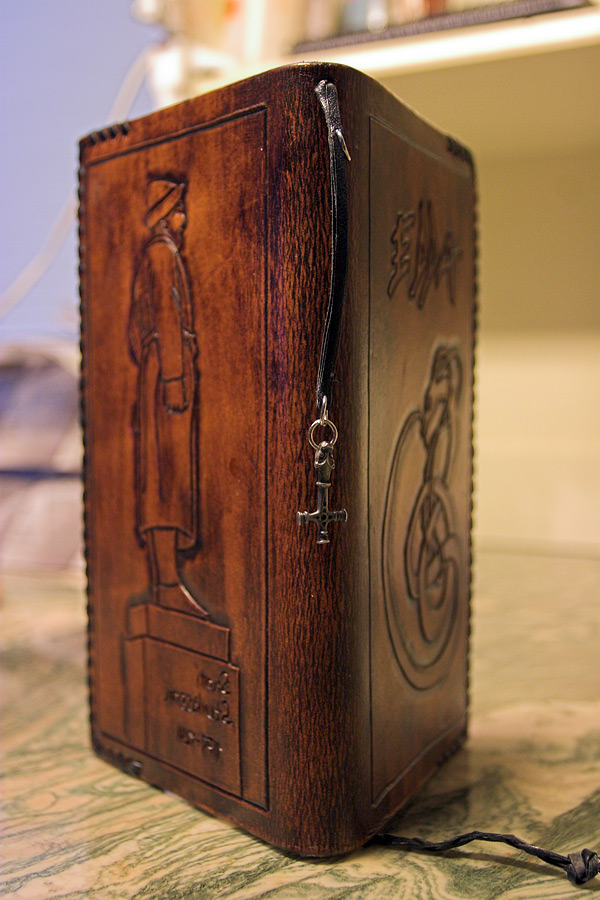
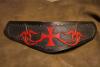
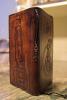
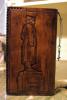
Not producing any finished items I have an itch to post something so I finally snapped some shots of this bookcover of mine. Did it 6-7 years ago. This is THE book to have if you're interested in Viking mythology. Björn Collinders translation (to Swedish) of Snorri Sturlassons book Edda. Written somewhere between 1200-1241 AD in Iceland. The cross is not an inverted cross. It's a cast from a relic found in Icelandic grave. Iceland was always mixed heathen/christian and proclaimed christian sovereign from the start but heathen traditions were allowed to practice at home but not socially. The cross is believed to symbolise the mix between the two cultures and on top theres a wolfs head causing the inverted apperance. The back piece of the cover is made from a picture of Snorris statue in Iceland and I kinda forgot to flip the transfer so the lettering got inverted. Didn't notice until after I started carving the letters,,,bummer..well I blame it for being possessed by pagan gods, lol. Someday I'm gonna re-do it. It's my most important book. Tom

-
Excellent stuff Leathercat. You seem to have the ability to paint well. I couldn't come up with that in a month! Tom
-
Ooooooaaahhhhh!!!!! Nice lacing and it looks so cool with the lacing going into the mainpiece like that. I find lacing I bit addictive and I like the roundhole style on this one. Bracers shure look the best on tattoed arms. Tom
-
When I apply antique to the main leatherpiece (toolingside) I just pass the sponge on the edges aswell, then some gumtrag and edgeslicking and finally top finish/sealer. If I'm dying mainpiece with spiritdye I often apply saddletan to edges with a brush. I turn the edge so it's facing up wards and gently apply with the side of the brush, little hard to explain but with this technique I avoid spilling over the edge and after that I apply gumtrag same way and so on. Tom
-
Wow David, that is a beautiful style! Seems like there's alot of nice seats popping up right now, summer's right around the corner and maybe it brings out the best in the seatmakingdepartment. That lacing is looking so good so thanks to Shirley for popping some nice stuff. I wonder if she has a name to it yet? I have done another variation of this lacing in an area where I could only pass the needle under on one side so if one has to do the original roundbraid and have one side of the lacing not showing it can be skipped there to save time. Wonderful stuff as usual with you David! Tom
-
Beautiful stool! My darling is Korean adoptee so better not show her this one...until I completed other stuff anyways. The themes is very nice and well done, I think and the colouring turned out really good too. Now I gotta go look at my old drumstool again, it begs for my attention everytime I pass by it, lol. Tom
-
I often use antique dye or saddle tan because, as Alex points out, they are faster to apply and it seems to me that the edge is easier to burnish with this but i do try to water down a bit and apply some gumtrag before slicking the edge. Tom
-
I agree with TimD about seeing the spots. I think it looks really great and on the last pic you posted it looks like the spot isn't that much of a prob anymore. Nice job with the colours schemes, it's definetly an eyecatcher. Tom
-
Oh dear, oh dear, oh dear...that is just a fantastic looking seat! I love the shape and the tooling layout to the form and the whole tooling designing in itself look just amazing. I made a mess dying yesterday so I get nervous when seeing this all natural and beautiful and still that step remaining. Cant wait to see it finished and happy braiding! Tom