JerseyFirefighter
Members-
Posts
421 -
Joined
-
Last visited
Content Type
Profiles
Forums
Events
Blogs
Gallery
Store
Everything posted by JerseyFirefighter
-
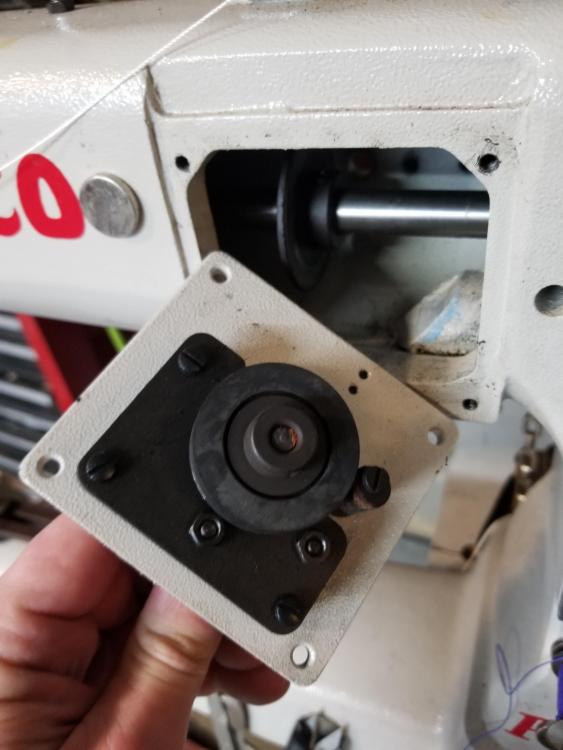
Indeed that is the part to the left. I was getting intermittent misses of the bobbin spin and then one morning the bobbin winder was DOA. after pulling it and cleaning it the issues haven't been as prevalent, but I suspect that it will give way soon enough. I see that after 2 years of wear I had a sizable amount of rubber collected at the bottom of the housing, so it should only be a matter of time. I've called it a Juki clone for a while, and always considered it nearly interchangeable with Cowboy or Cobra, given the two variations of parts manuals I would be wiser to just consider the machine it's own and refer to the diagrams included with the machine.
-
Had't realized it was positional via the set screws. Thank you for the tip! Unfortunately by the part number, both a web search and a ballpark from Keystone put the price at about $80. Could you tell me where you purchased it? Since I know this is a wearable part that eventually will be replaced I would gladly pre purchase it to have in the shop.
-
Any insight would be appreciated. Machine is a Ferdco Pro 2000 (Juki 441 clone). The bobbin started skipping while engaged. Removing the bobbin wind cover yielded what appeared to rubber shavings from the engaging wheel. I suspect this is a maintenance part and not a result of a larger issue, however id rather be sure before spending $80 on a replacement wheel and not fix an underlying issue if the case. Thank you!
-
I need an anvil with an elongated horn in the worst way. Never thought about cutting down a longer section of track to make it happen.
-
Alphabet stamping on a Firefighter Shield
JerseyFirefighter replied to chriscraft's topic in Stamping
Im guessing between 277 and 306. I use 277 for a good portion of my projects.. Even at 277 color choices are limited so some are 207 -
Right hand or Left hand
JerseyFirefighter replied to seabee's topic in Gun Holsters, Rifle Slings and Knife Sheathes
In my experience, etsy customers are more likely to not read the description, follow order instructions and be more demanding over my website (etsy amounts to about 10% of my business). I spend a fair amount of time emailing back and forth to address the missing information. Then again etsy really isnt geared to provide the number of options I tend to offer per item. I too agree with the mantra that things get fixed at no charge. I consider spending money on customer service an investment on your reputation. -
Handcutting vs Press Cutting
JerseyFirefighter replied to f1humlam's topic in Leatherwork Conversation
Texas Dies are a great company. I have a clicker and laser as well. I laser cut my gift cards, but the clicker is one of the workhorses of the shop. If you dont want to invest in a clicker or do not have the space, the idea of having them make it a mallet struck die is where I started. It shouldnt be hard to get through the leather with it considering the thickness of a watch strap. I was banging strap ends through 13-15oz bridle and it took a few hard shots. Clicker took those few hard shots and turned it into the pull of a handle. -
It was a while ago the last time I had bought from W&C, but I believe it costs $5 for each run through for staking.
-
Really depends on what you are using it for. The smaller anvil has just the right amount of horn to set rivets in tight spots for me.
-
Help! Too Many Machines, Too Many Opinions!
JerseyFirefighter replied to cutikatsam's topic in Leatherwork Conversation
I know budgets are a big PITA. Truth be told I blew mine out of the water and invested a good portion of personal finances toward my machine. That said it does return dividends in time and product. I went with the closest shop (philly) and despite not carrying cobra or cowboy, picked up a similar 441 clone. (ferdco) I went there to look at the highlead despite it being a bit more expensive. luckily they did not have any in stock. I can't stress how beneficial going to a good company locally could be like how others stressed to me. I was given a personal 3 hr crash course on the machine free of cost, and it help me beat any type of learning curve I would have to endure if a machine like this just arrived at my door step in a crate. Best of luck regardless on your decision. You will like only buy one (maybe two) of these in your lifetime.- 8 replies
-
- sewing machine
- cobra
-
(and 2 more)
Tagged with:
-
oil painting Hello, all. Oil painter from NJ **work attached**
JerseyFirefighter replied to Hernancito's topic in Member Gallery
Welcome also from Jersey. You seem to have a good head about yourself. If you find that your purse project is beating you up, take a step back, take up another project that can help you expand and hone your skills. You seem to have a fair grip of the basics... its only up from there. Best of luck!- 8 replies
-
- nj
- slingshots
-
(and 1 more)
Tagged with:
-
Hey Rob... Also Rob from NJ. I like the dragon carving. Keep up the great work!
-
The blue one? Old faithful for me right there.
-
Interesting enough. When I searched for clear lac I could not find anything save from a 32oz container. I may just do this once as a courtesy, but if it can in fact remove unwanted paint it could be a useful investment. I've been fortunate enough that my own work does not warrant the need to try to remove paint from a work in progress.
-
I have had a fellow Brother reach out to me because a leather piece he had purchased was likely to be incorrect. The problem was that the piece had a few painted (not stamped and painted) letters that he did not wish to have. I don't make these specific leather items, but since he is a friend of a friend, I offered to do a little digging. Are there any products that would remove a flexible acrylic without damaging the dyed product. If a stronger solvent can be used, are there any tips or tricks I may use to blend the existing finish to the new one? Im half curious given the nature of my business, but at the same time im not looking forward to tinkering with an already finished product. Thank you in advance for any help.
-
18 minute video on how well the knife cuts leather... not one piece of leather cut during video. I like the look of the knife though. Keeping things sharp are always a pain in the rear.
- 37 replies
-
- sharpening
- japanese knives
-
(and 1 more)
Tagged with:
-
I would think the steel would play a big part in the durability of the knife, however in my limited opinion, using any knife against a solid surface such as granite, glass, OR (as I caught my apprentice doing early on) on top of a piece of steel will create a much faster edge deterioration . I would not cut anything that isnt supported by either a self healing cutting mat, poly cutting board, or even as a quick cut on top of an oak workbench. I cannot speak to knife wear while cutting chrome tanned leather, but I believe that Japanese style blades are more finnicky and require a bit more preventative care, regular honing, and expectation that they will need to be sharpened/honed/stropped far more often than a more common blade found in the industry.
- 37 replies
-
- sharpening
- japanese knives
-
(and 1 more)
Tagged with:
-
If Japanese cutlery is anything like kitchen cutlery the blade has a different blade angle (15 degree if I recall) over a more common angle of say 25 degrees or therein abouts. This translates into a sharp edge, but can wear more quickly than a more tapered edge. It has been a while since I researched my own kitchen knives but I do recall that point in case with some japanese blade edge methods vs say a German or American made blade.
- 37 replies
-
- sharpening
- japanese knives
-
(and 1 more)
Tagged with:
-
New Radio Strap
JerseyFirefighter replied to Fire88's topic in Purses, Wallets, Belts and Miscellaneous Pocket Items
Looks good. Might be my own personal preference but using a strap end punch on the end of the strap gives it a nice finished look as opposed to square. I see a fair amount of people using both methods though. Dragon scales drive me nuts. -
Quick Release Buckle and Supplier Info?
JerseyFirefighter replied to Lclayton's topic in Hardware and Accessories
Today I learned. I've never seen a buckle like this before. I know it may not fit your design style, but cobra buckles are a bit cheaper than the buckle you had listed ($22usd). Quick release, high strength rated, and if you're doing a black belt the black buckles would blend into the belt and not stand out as much as the chrome or brass. -
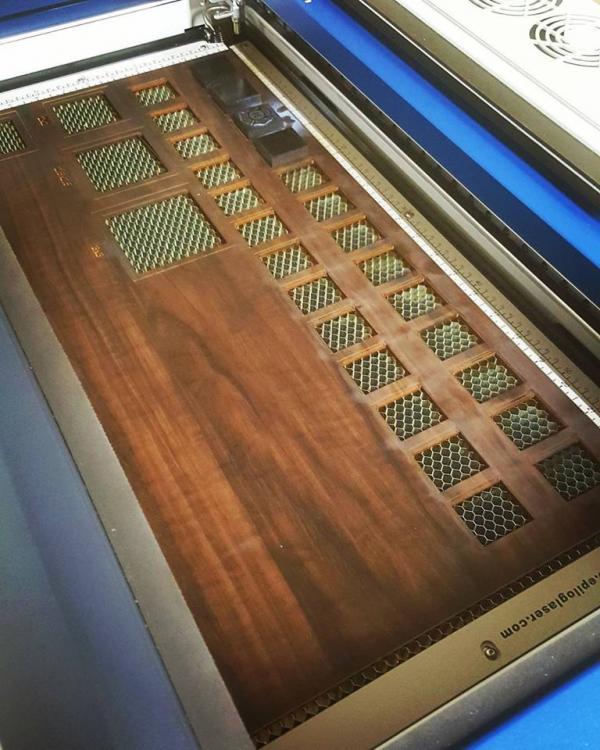
I haven't cut a bunch of stuff but I have been finding some decent ways to utilize the engraving portion of it. Ive made more $ selling drinkware for the time being but I really love the idea of cutting and engraving holster patterns. I went a little crazy and bought a USA made 50W. So far so good. The biggest headache by far is trial and error with the speed and power settings to get the desired effect you want on different media.
-
'How To' Question on Lining Collars
JerseyFirefighter replied to Sheilajeanne's topic in Collars, Cuffs, Leashes and Leads
Glue the non beveled leather down to the liner with contact cement such as Barge. Allow to dry. Trim the liner square with the leather. Stitch the liner and leather together. Sand flush if needed then edge bevel both the leather and liner side (a sharp stropped beveler works wonders on the liner side.) Finish by burnishing. -
leather fire bucket Leather Fire Bucket
JerseyFirefighter replied to enginecoleather's topic in How Do I Do That?
Hey Brother. Instructables has a good tutorial about a leather tankard that uses beeswax for sealing so it would hold true this should also work for making it waterproof. As for it's construction, there are a few sites out there that go into depth (at least describing) the construction of antique leather fire buckets. As far as what was "traditional" in water proofing it, some of these articles describe pitch tar as a sealing material. Both messy and not so easy on the nose. https://www.leather-dictionary.com/index.php/Leather_bucket This link goes into more specifics about construction materials http://yngfire.com/index.php?topic=3576.0 Best of luck!- 3 replies
-
- bucket
- fire department
-
(and 4 more)
Tagged with:


