MADMAX22
-
Posts
3,201 -
Joined
-
Last visited
Content Type
Profiles
Forums
Events
Blogs
Gallery
Store
Everything posted by MADMAX22
-
 That is very nice, I like. Not sure what I would do with it but a killer bag of some kind comes to mind. Looks a little 3d for holsters though. I would hold on to it until the right project raises its head.
 -
First mistake I made with backgrounding was not letting the leather get dry enough, I was trying to do it while it was way to wet and it would basically just squish around.
-
Belt Edging
MADMAX22 replied to ABC3's topic in Purses, Wallets, Belts and Miscellaneous Pocket Items
http://leatherworker.net/forum/index.php?showtopic=18101 There ya go. I still have to do mine by hand but use a similer method. First edge then dye follow up with glycerine saddle soap then I shape with my wood edger that I made, usually this gives me a smooth round edge then follow up with some bees wax, take the jeans fragment or whatever to this and rub it in nice and good Once your all done with that it should look pretty darn good, I usually follow up with whatever I am sealing the belt with as this will put a final sheen to it. -
Folder Sheath Custom Made
MADMAX22 replied to Rocky's topic in Gun Holsters, Rifle Slings and Knife Sheathes
Very nicely done Fritz. That stingray is really cool looking and love the edges you get. -
New Seat Almost Done , A Few Questions Though
MADMAX22 replied to billymac814's topic in Motorcycles and Biker Gear
Alot of poeple will have alot of different techniques and most work for them very well. Personally I would clean it up with some alcohol if you wish, this has helped my occasionally. Now some people will oil before dyeing, apply coat of oil and let sit till dry then dye. I personally usually dye it first then oil it but have been experimenting with both methods. I would use the pro oil dye as I like the pro oil dyes better then the regular version and that saddle tan is a very nice color. I like it alot for a mellow color or when antiquing. Once you finish with that then you will need to do some kind of resist for when you antique the project, either tan kote or atom wax should work pretty good. Once a coat or two is applied then apply the antique and do that how you see fit. The sealer will act as a resist for the high spots or the overall project but allow the antique to get into the crevices and such of the carvings. Once that is done apply your top coats of sealer with which ever you decide. Please practice this on something other then your project though, it takes a little while to get the hang of it and would be a shame to mess up on that seat, it is very nice. I like to use the sno seal as a good sealer that you reapply every once in a while. I have done projects with just that after dying and they turned out great. I have not played with it before doing antiquing so dont know how well that would work out. Also I do not have that much experience with seats, hopefully one of the seat gurus will chime in later today. -
Any Lizard Skin Experience
MADMAX22 replied to amadeusfort's topic in Exotics, Reptiles, Furs and others
Looks like some nice skins, I only use this type of leather for inlays myself. Lizard looks really good in inlays for various things. I am not entirely sure how it would hold up being sewn to each other as the primary leather for a handbag. You will need the advice of the handbag experts. -
Messenger Bag
MADMAX22 replied to AndyL1's topic in Purses, Wallets, Belts and Miscellaneous Pocket Items
Turned out really nice Andy. I agree with ya, the colors turned out great. -
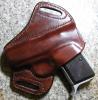
Thanks Rayban. yeah it should last a good long time. Well went ahead and tried a second attempt at it. Wanted to see if I could get the dye job a little better and do a little better at the stitching around the top of the slide area. I think I improved a bit. Here is the second one. Thanks for looking.
-
3 Ring Binder Daytimer
MADMAX22 replied to Double U Leather's topic in Books, Journals and Photo Albums
I agree with Doc, looks really good. I still have not taken on the challenge of zippers, one of these days maybe. -
Steel And Leather
MADMAX22 replied to RSFknives's topic in Gun Holsters, Rifle Slings and Knife Sheathes
Great looking sheaths and knives. Does that duracoat hold up half way decent, it does give a cool look to that knife IMO. -
Checkbook For A Friend
MADMAX22 replied to BearMan's topic in Purses, Wallets, Belts and Miscellaneous Pocket Items
Great work Ed, your carving always has alot of relief or definition (not sure of the right word) it always pops out at ya. Thats a good idea with the basketstamp also. -
 You do some amazing work, love the pendents also. Thanks for sharing Corey
 -
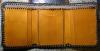
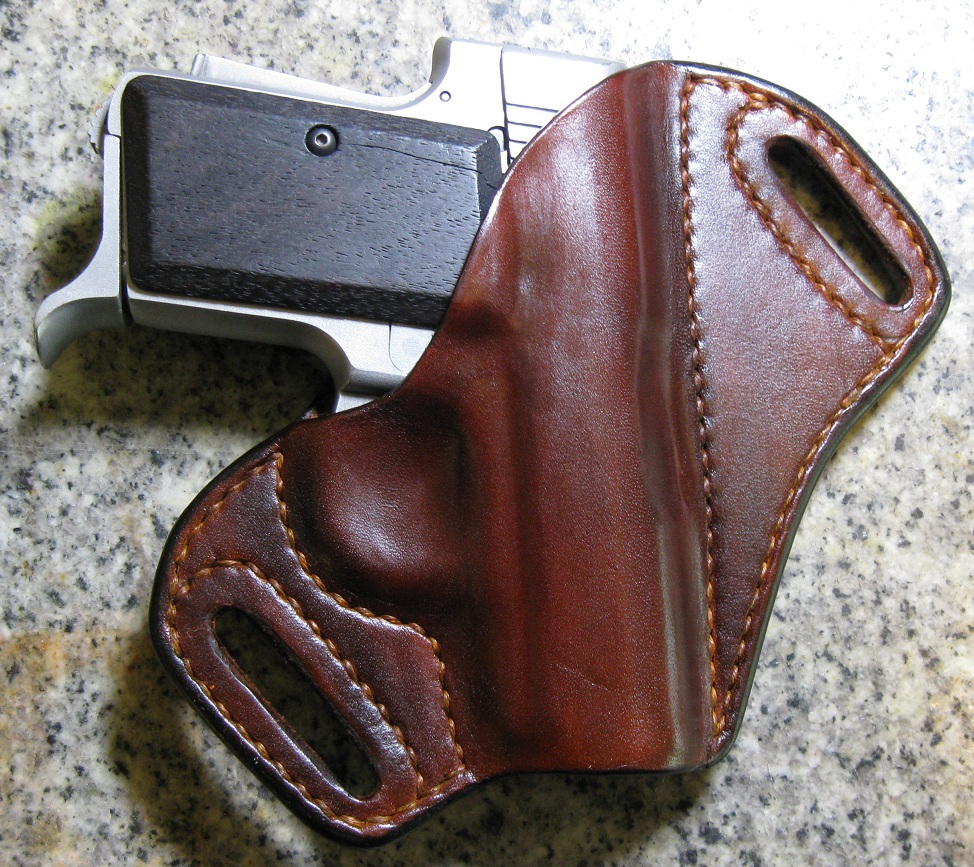
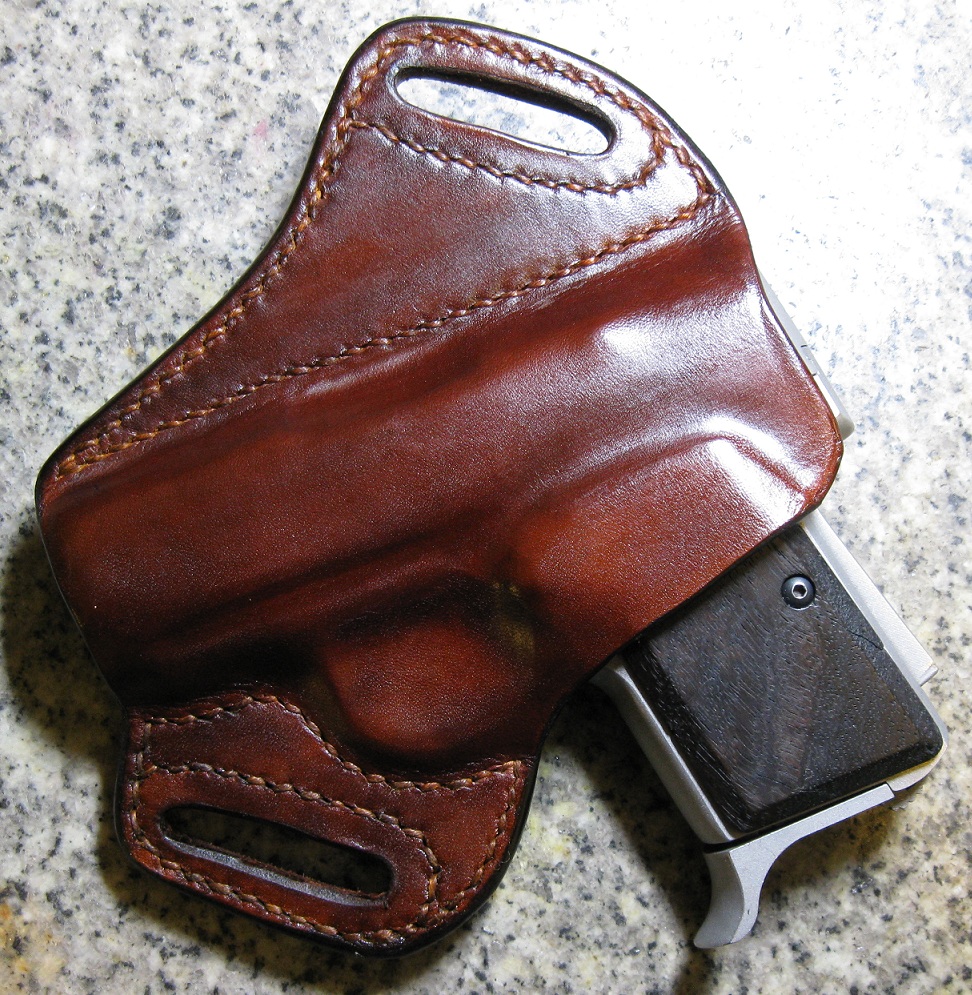
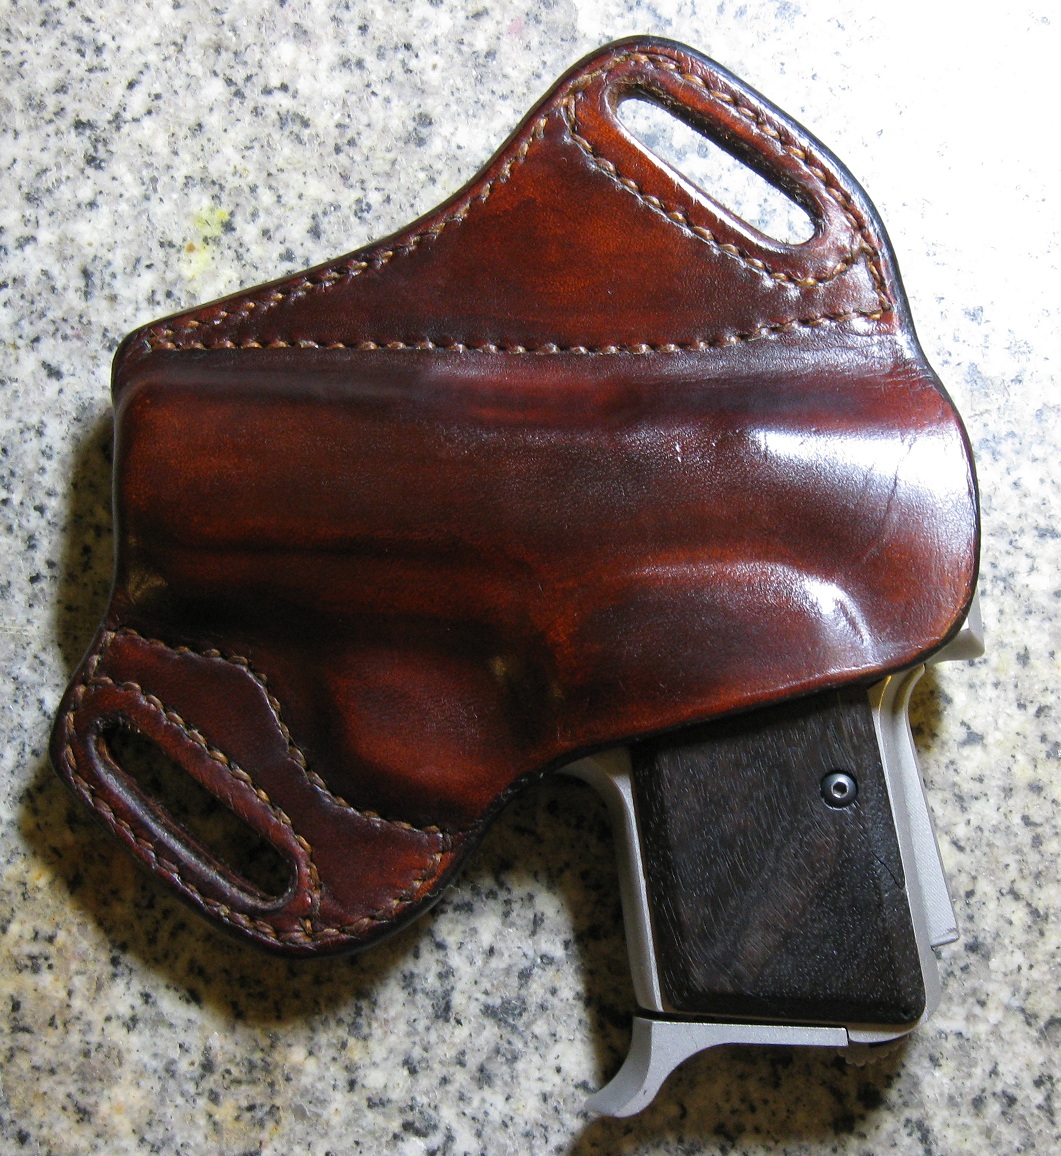
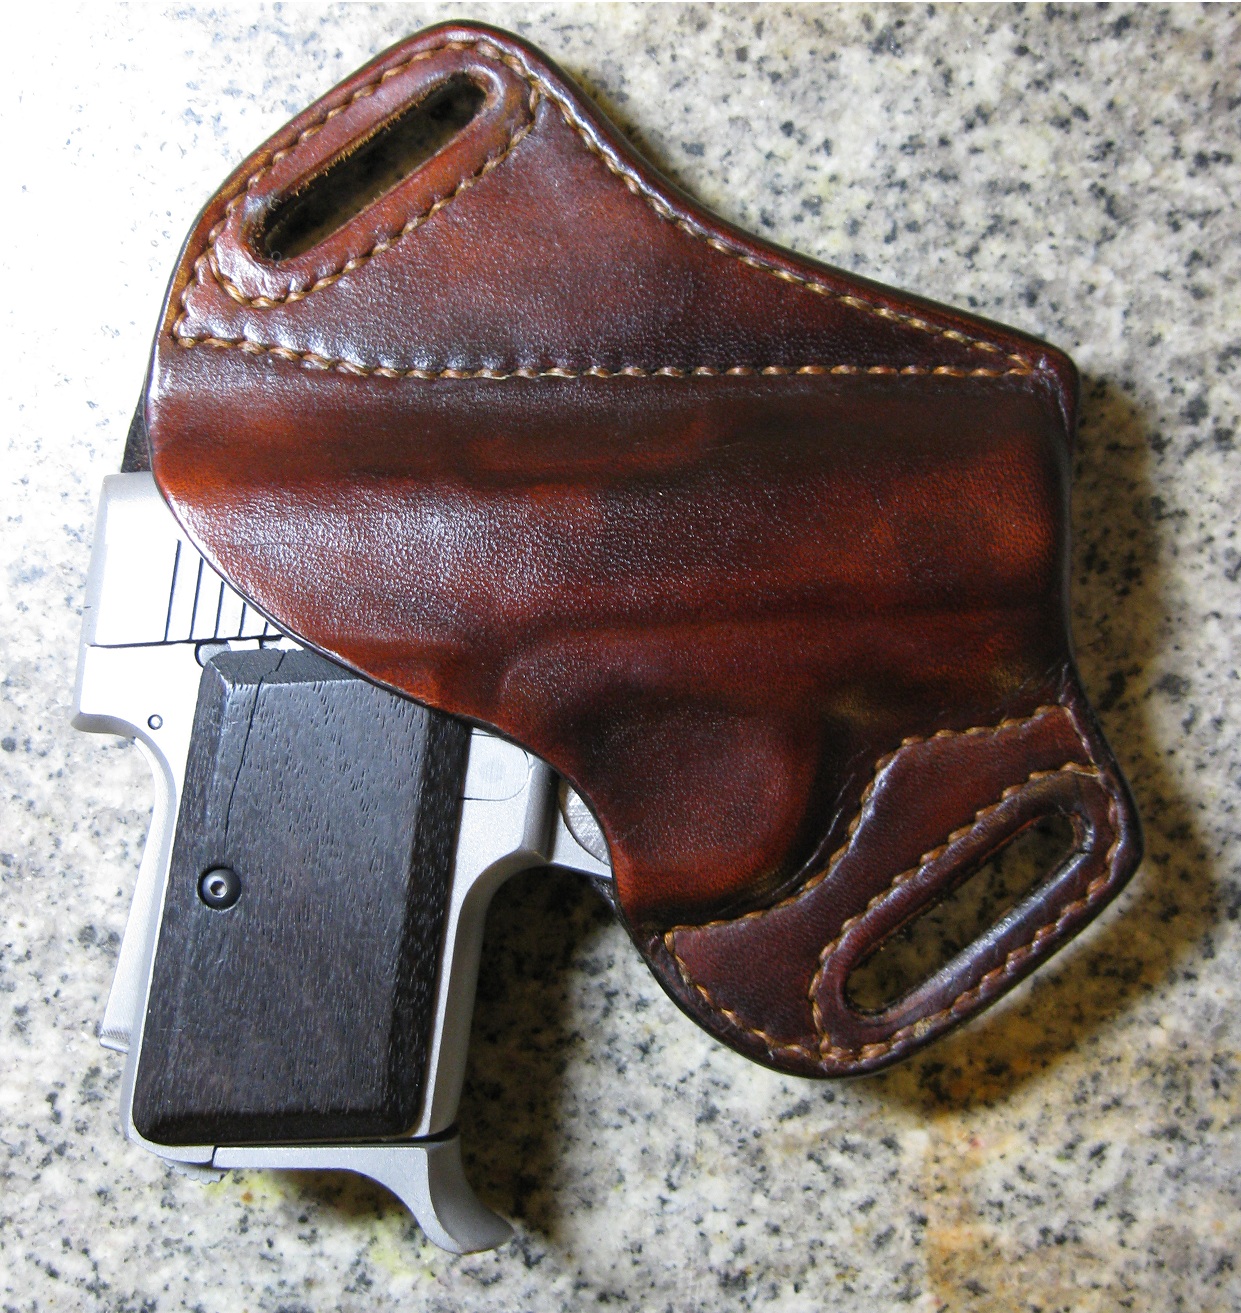
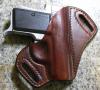
Buddy at work wanted me to make him a holster for his little backup. Its for in the small of the back carry which is a little odd to make a holster for with this gun. He found one picture on line somewhere so I kind of went off that (not sure who made it). Ive got one more coming thats almost done that will have that stitching line straightened out. I dont know why I curved it up, I think my template I made I carried thru onto the leather work. HO 7-8oz, linen 6cord, dyed dkbrown with a little bit of added black and cordovan. Was playing with colors a little bit and it still needs work, I think if I had a airbrush it would be just about right. What you guys think?


-
Ray about the only thing I use a dremel for right now is cleaning up edges before I start my edging process. I use the little drum sander that goes on them and will work it along the edges to sand then nice and flat. Then I go about doing the edge work. Helps to get a good smooth base to start working with.
-
That looks like alot of work. Great job and wonderful tooling as always.
-
I primarily use weld wood, get it at lowes or home depot. Not sure if it is available in CA or not. For thin stuff like pig lining I will use 3M 99.
-
Crazy Horse Belt
MADMAX22 replied to MADMAX22's topic in Purses, Wallets, Belts and Miscellaneous Pocket Items
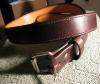
Thanks a bunch RDB, one question, what do you mean square up the keepers? You talking about forming the keeper a little so its not so roundish sticking out from the belt. If thats so I think in time it will do that on its own, its actually pretty tight once the belt is fed thru it and lays flat. I do need to make some of those bars that people use to form them though, that will be my next project once I move and setup shop. This leather doesnt wet form all that well though, I have only played with it a little. Its vegtan primarily but its also oiled and waxed so it repels water pretty good. Ive gotta try soaking a piece and then see what I can do with it. Not sure if it will hold a shape very well though but would be killer if it would. More experiments to do lol. -
Special Ladywallets
MADMAX22 replied to manfrommuc's topic in Purses, Wallets, Belts and Miscellaneous Pocket Items
So is that what happened to the rest of the litter...... lol Those look really nice, very well done. Ive gotta try those inserts one of these days. They always look really good. -
Crazy Horse Belt
MADMAX22 replied to MADMAX22's topic in Purses, Wallets, Belts and Miscellaneous Pocket Items
Thanks a bunch guys, Yeah this is some cool leather, something different to play with. ABN its funny but now these belts are the easier ones to stitch since they are just straight lines, took me about 3 episodes of legend of the seeker. -
 That turned out really really nice, way cool design. Now post some pics of the flame case, cant wait to see that one too.
 -
Taking The "slick" Out Of A Slick Seat Western Saddle
MADMAX22 replied to Go2Tex's topic in General Saddlery Discussion
I use to ride when I was younger from about age 5 to 20, that was about 13 yrs ago but I did alot of trail riding, some showing when I was younger but mostly trail. Also when I say trail I mean up some really rough stuff that you were hanging on for dear life. All of this was done on slick seat western style saddles or bare back (usually with a pad). I suffered the slick back saddle problem once and that was my first time on a well trained cutting horse, she was a very strong beast and I didnt understand leg pressure guiding a cutting horse and was use to trail riding, needless to say I squeezed one leg to much the horse went that direction and I stayed put. After picking myself up off the ground and my parents laughing there butts off I realized really quickly how to guide that horse lol. Never had a issue after that though. Guess what I am saying is I think the people that ride with that type saddle need to learn how to ride with it. If you are decent riding with them then you dont have a problem. If you cant then you need to request a different type of leather on the seat. Personally I couldnt imagine riding with any other type but thats just me. I tried the suede covered seats and didnt like them, I couldnt slide around when I wanted to very easily which wasnt a good thing when you were ducking trees and trying to hang on during various other issues. Oh and wanted to add, you make some amazing saddles. Would of loved to of had one of those when I was younger. Sorry if I didnt really answer your question but figured I would throw my little nugget of experience out there. -
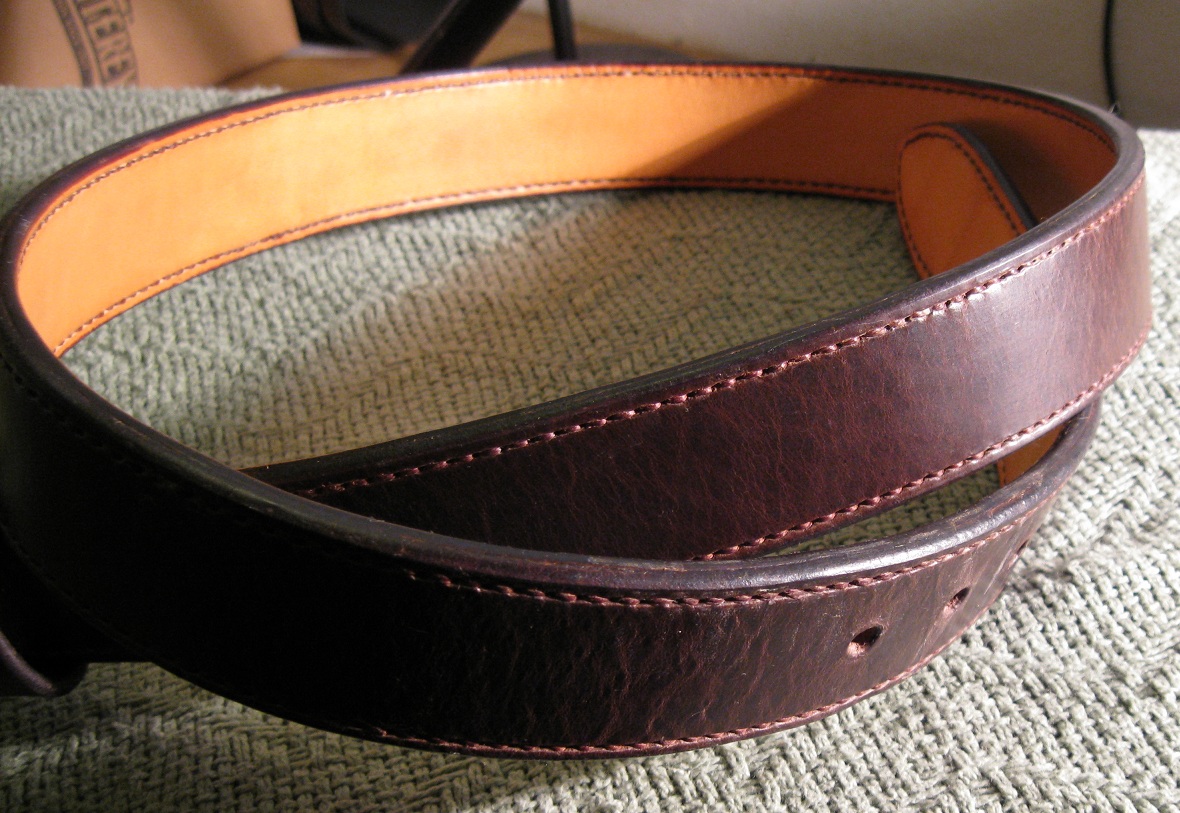
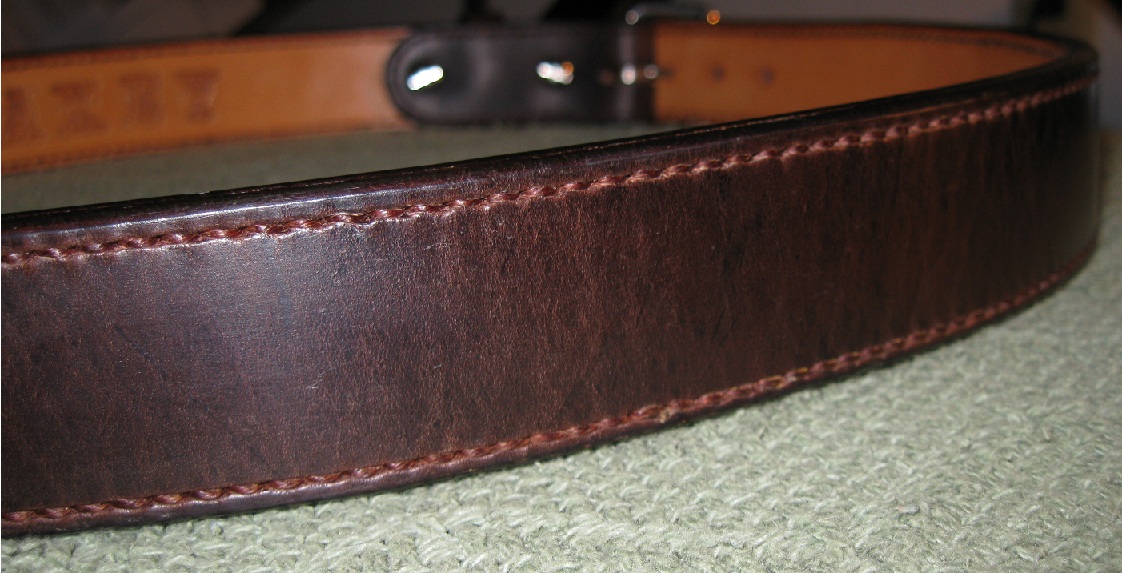
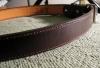
Made myself a new belt with that crazy horse leather that waterhouse has on sale. It sounded like some cool stuff so had to get one to play with. I really like it. It has a really nice slight pull-up effect but overall feels similar to vegtan (which it is primarily). I can see doing alot of different things with this stuff, some bags would look killer I think. Anyways this is about 8oz on top and lined with 7oz HO. Hand stitched, I dyed the thread with cordovan which comes out very close to the top leather color. Waxed and sealed the inside and edges. Not sure what to use to seal the outside with but it is naturally pretty water proof. I did add a little more wax and oil to it but not much. The edges arent the best, I didnt get them cut perfectly before doing the edging work and it shows. Dyed the edges with cordovan also. Also I dont have a light box or anything for photos so bear with me.


-
Vinegarooned Belt
MADMAX22 replied to NoahL's topic in Purses, Wallets, Belts and Miscellaneous Pocket Items
Very nice and simple. Gotta love vinegaroon. -
Well guys I must say if you can get one of these brown head mauls. I noticed right off the get go that this material was very very nice to pound with. Ive tried a few others, Ive got Ed's older style white maul and now a set of these and must say the brown is definitely where its at. It is a little hard to describe but this material doesnt want to bounce or ricochet, it is very easy to get nice smooth tooling (well barring my tooling ability lol). I also must say that the pictures barely do the set with the ivory inlays justice, they are amazing in person.
-
I dont have a pattern besides the physical one I made for my trifold but wanna say Kevin has a couple of good how tos. One is in the how do I do that section at the top, the other is in the wallet and pocket section at the top also. When you make the insert portion for a bi or tri wallet you have to make the insert roughly about half an inch smaller in length then the outer portion. Then when you stitch or braid it together you have to leave a small portion in the center (the two fold lines on trifold) with a small half circle or something cut into it and you dont sew or braid this portion. When you sew or braid you attach the inside portion to both edges of the outer material first then work your way in. This causes the outside to kind of pull in around the liner. When you open the wallet it will pull open the money compartment and will prevent the inside from bunching when you fold it in. Also when you first make it you gotta work it all into position and leave it tied up like that or preferably left under some weight for a while. It takes a little bit of time to break in. This allows you to have less material on the inside and it wont bunch up to badly. Here is a pic of one I made a little while back showing what I am talking about. Hope it helps.