rickybobby
-
Posts
722 -
Joined
-
Last visited
Content Type
Profiles
Forums
Events
Blogs
Gallery
Store
Everything posted by rickybobby
-
There is no excuse for that kind of wait time! Go to another supplier! Quickly! There are plenty of other places to buy leather. RJF Springfield even Tandy's Move on, stop waiting for product and start producing what you want to make! Just my .02
-

With Or Without Castors Sewing Table...
rickybobby replied to Yanni's topic in Leather Sewing Machines
Go with some kind of wheels! My machines are all over the shop depending on what is going on! Sometimes out to get out of the way, sometimes to be in the middle of production! Hope that helps, -
I think they are really nice! I like the "plain and simple" design. I am always trying to guess what tooling pattern will sell best, Floral? Basket? Edge border? I think I am going to make some nice and clean like yours!! Very nice job!! Thanks for posting!
-
Hi Curley, Welcome to the forum! Sorry about the new hobby!! $$$ lol!! You have only began to scratch the surface with tools! A very interesting and useful boarder is the "Meandering Line" It can be used with a"Beaded Boarder" and without. It is a simple tool that has a great impact when used correctly. There are several, Tandy has a few sizes of one style D443, D444, D445 and D447 is a different shape. Spacing from side to side as well as overlap need to be considered when running this type of tool. Also what type of boarder to use. The look can change a lot just from a boarder difference as well as spacing. There are several tutorials on how to use this type of tool and they give some "rules of thumb" to get you started. It can be a frustrating tool at first but if you are doing some serious boarders once learned it covers a lot of ground quickly and makes you look like a MASTER carver! I also like the D616, When bordered properly it gives a nice look to a plain leather (no additional tooling) item like a stirrup fender, wallet, purse. Reference; http://www.tandyleatherfactory.com/en-usd/home/department/Leather-Stamps/Border-Leather-Stamps/Border-Leather-Stamps.aspx
-
Rifle Scabbards
rickybobby replied to IngleGunLeather's topic in Gun Holsters, Rifle Slings and Knife Sheathes
I have made several, both lined and unlined. It seems customers that have bought a brand new gun want them lined. I have lined those with inexpensive "upholstery" hides from Tandy's (smooth side out) they are available in many colors and work well. Plan you stitching around openings well before closing and sewing up, the edges need to be stitched. When glueing lining, fold the skirting first and apply the lining in the folded position. This eliminates all the wrinkles and "gathering" in the fold area. BTW, Wills scabbard patterns are pretty narrow. Plan on adding a little is using thicker leather. -
Hi Floyd, You stated "When you say "pull up the toe area of the sole, and press the foot bed on", When adhering two pieces of thick materials on a flat surface if you bend them the inner material "bunches up". Example, a cell phone case with a flap, if you line the flap in a flat position and stitch it then try to fold it, the inner will bunch up. Those same materials when glued and and stitched in the folded position the liner will not bunch up. The same thing holds true with the sandals. The bend will stay and provide a more natural "rock" for walking. Is the bed cut smaller than the sole to maintain the "pulled-upness"? If so, what keeps the stiffer sole from pulling the stitches out of the bed when worn? The sole is larger then the footbed, trimmed after glued/stitched. A good way to trim is, after attaching trim the sole with a knife then sand on a belt of orbital sander. What keeps the leather sole from becoming slick and slippery when worn for a while? I don't know. Sole leather is pretty tough. On the sandals I have made I used soling crepe, no need to stitch, just glue well. You can stitch the toe, 6 or 7 stitches. Cut a slit in the soling to "bury" the stitch 1/2 thickness of the crepe. use super glue to close the cut. Space the stitches 1/4 inch apart.
-
AJ, If your leather is 1/8th it will stretch like crazy! If in fact it is 1/8th (about 8/9oz.) you should back it up with something like Latigo or Harness leather, these are better to resist sweat. Veg-tan will absorb moisture, latigo and harness leather have oils and waxes in them to resist it. Use a collar that he likes for your basic pattern and go from there. Just my thoughts,
-
Those are some inexpensive saps!! There is no way to compete price wise with that but, I don't try to compete with Walmart belts, wallets, or anything else they have in "leather". I look at it like customers that pick up one of my belts (at $50.00 with no tooling) and tell me they can get one from Walmart for $15.00, go ahead! Something is always cheaper somewhere else. I prefer people come to me because I have a good quality product. The customer and I are both much happier then. If someone wants a hand made piece they most likely know that quality is more expensive but will last longer. I have never seen one of those Saps in person but if they are production line made they are probably like the production line made belts and may not last. This gentleman has built quite a business from these. The prices are in line with a custom piece that is hand made. Check it out at... http://www.greenmanleather.ca/jack-saps.php He offers many styles, shapes, and weights. This is another site that has sold them for quite a while and seems to be getting a good price for a handmade piece... http://www.shottist.com/saps.htm I would like to learn more about them, and build a good product. If I find a customer base for the product I would like to offer them. But only if they are of good quality (construction and materials), and profitable. So my research and prototype continues.
-
O.K. you asked for thoughts... My first thought is to use your time learning to work with leather "( most certainly new to the leatherworking world! )" by this I mean how to cut, edge properly, skiving leather properly, construction techniques, types of leather to use, and then there is tooling, a whole other art to decorate your tack with. Hand sewing is a needed requirement as not everything is accessible for a machine. A sewing machine will not make you a leatherworker, the other skills will, the machine will just help your production times! I would put my money towards... a couple good knives (a round knife and a trim knife) better quality basic stamping tools (a very good set for not a lot of $ is from Hackbarth Tools. Lonnie is a great guy and his basic set of tools is about $145.00 it is about double Tandy tools but the quality is 10X's you will use them forever and have a clear impression every time making learning much easier. Use a Tandy store for beginner tooling classes they are free or $10.00 this will give you the basics Use this forum search function and post questions, there is a saddle and tack forum for equipment questions and several years worth of information available by searching your topic. Don't be afraid of searching other areas of the forum, many construction techniques are the same and you will learn more seeing it used in different areas of leather work. You can hand sew many projects, this provides a good foundation for you skills and if you must have something stitched you can take the project to a saddle shop, shoe repair, or an upholstery shop, for $10.00 or $20.00 they will sew most projects for you. (breast collar, chinks, chaps) My advice is to get some projects done, learn some construction techniques of what your main projects will be at first, hand sew as much as you can, then search for a machine. (For petes sakes, read as much as you can in this forum about sewing machines, forum member Wiz has several excellent post on machine types, styles, abilities to match your needs in the sewing machine section). Buy books!! There are several that are a must for everyone starting out... https://www.leatherc...l-stohlman.aspx This one will help you understand, use, care for, and sharpen many tools you will be using https://www.leatherc...-ja-wilson.aspx https://www.leathercraftlibrary.com/search.aspx?searchterm=hand+sewing These are just a start, many others can be found used on Ebay or here on leatherworker.net if you post wanting to buy some, many members have duplicates they may want to sell. Others may jump in with their opinions, this is just my thoughts on the content of your post. Good luck and keep reading! Welcome to the forum! Rick
-
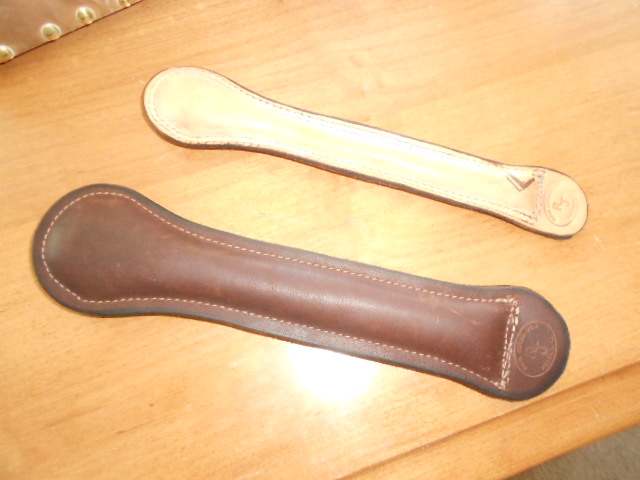
Hi All!! O.K. I am in! I think these are great! Some questions I need cleared up... I understand you are using lead shot (#9) What keeps it from coming out at your strap slot? Are you using a gusset piece for the shot to lay in? If so does the front rivet hold that together in the mid section where there is no stitching (to keep the shot in)? The spring steel piece, do the rivets go all the way through? Here is a photo of my attempt. One is oil tan chap and the other is 5oz veg tan, I sewed these on my chap machine w/92 thread, much to light. I think I would use my saddle stitcher with 207 (if using veg tan) I filled mine with shot then stitched. Any tips for construction? Also, there is a member here from Canada that started making these, he promoted them as "massage aids" I think to get around any laws, last time I was on his site he has changed it up to saying "they are for self defense" . I also saw one site that promoted them as "Book page holders" to keep a cook book open to both pages while on the counter! Thanks,

-
I have had no issues with W & C but the items they are short or out of always seems like what I need at that time. RJF is top notch, The website is very basic. Roger answers the phone and has no trouble giving you a price on what you need. The leather is consistently the same colors, quality, and texture/feel It is worth the call to Roger to try his product, I am glad I did.
-
Hi, Just my .02 cents I tried #92 thread in mine and it was to small. I could not get any bobbin tension. Maybe someone braver or more knowledgeable would bend that little bobbin tension-er but I did not have a spare and did not want to break it. I just bought another machine for lighter items.
-
There is no damage, but it looks terrible !! After washing as it starts to dry the leather looks "stripped" I guess it is but the dirt build up is gone. It all starts to come back after oiling it and putting the Tan Kote or Bag Kote on. No, The brush does not damage anything. There are some saddles that have very deep tooling and the dirt will get caught in the bottom, a toothpick will get it out. The tooling stands up fine, no deformation from cleaning. If it were to stay wet for a long period 6 or 8 hours that may be a problem but if a saddle is wet that long there has been a flood and you have other problems!!
-
Beautiful job! I know you didn't ask for critique but one word of advice may help for your next pair... When gluing the sole on to your footbed, (before stitching) pull up the toe area of the sole about 1/2 to 3/4 of an inch, and press the foot bed on . This allows the toe area of the sandal to have the natural "Roll" needed for walking. it won't look like much but it will help a bunch. When glued flat there is a greater chance of tripping because the toe does not have the roll needed to keep your stride. It is a mistake I made on my first pair and an experienced boot/shoe maker pointed this out to me. Others I made after that were easier to walk in. They are very nice and you should be proud!
-
I had the same trouble using Explorer, Open Firefox as a browser and it works every time.
-
Hi! I will offer up my method of cleaning most items that come to my shop for reconditioning. Most of my work is with heavier leather, saddles and other horse equipment. I do use the same products for lighter items I just don't get them as wet or scrub as vigorously. I am only posting this because it works for me, I know there are other products and methods that others use. I am open to all other suggestions, products and methods. Murphys Oil Soap (Available at most grocery stores, I get mine at Smart and Final $14.00 gal. and it lasts quite a while) Feibings Pure Neatsfoot Oil (I get mine from Southern Leather in Denver) about $24.00 gal + shipping Feibings Tan Kote ( Most leather suppliers carry this) For heavy weight leather, saddles and tack I mix 2 cups of Murphys Oil Soap in a bucket of water (about 2 gallons) I also mix a 12oz water bottle with 1/2 murphys and 1/2 water and put a nail hole in the top to use it as a squirt bottle. Using a sponge to wet the entire saddle (with the bucket mixture) I start scrubbing the leather with a scrub brush, this includes the seat (even if it is a padded seat) all of the tooling (floral and basket weave areas). While doing this I use the water bottle mixture of stronger mix to help with the sudsing action. Keeping it all pretty wet and rinsed washes the dirt out while scrubbing in a circular motion. Washing all areas under the skirts, jockeys, stirrup leathers and under the gullet hat most people never see on their saddles. After this is all done and washed and scrubbed I give it a quick rinse with clear water and the sponge. This helps wash some of the suds away. I don't worry if some is left. I then towel dry the saddle and begin using the Neatsfoot oil on the leather. I give a nice even cote of oil while the leather is still damp. I then let it sit for a day. If needed a second cote of oil. Let sit another day if needed. I then use the Tan Kote on the smooth leather (not on rough out of padded seat suede). On lighter weight leather pieces I use only the bubbles and suds for cleaning so the leather does not get so wet. The rest of the process is the same. I would welcome any others methods/ materials/cleaners ect. and info anyone else is using.
-
Stitching Around Belt Slots
rickybobby replied to SooperJake's topic in Gun Holsters, Rifle Slings and Knife Sheathes
I do some of mine for looks. The ones I have not stitched have never come apart. One pancake style I did 15 years ago with no stitching around the slots, is still with me and holding strong. -
Problems With The Avenger From Hell
rickybobby replied to George B's topic in Gun Holsters, Rifle Slings and Knife Sheathes
Nice work George! It looks great and the customer should be very pleased!! -
Its good when the planets line up, we make some money, customers smile, and everything in the shop goes smooth! Great canteens Luke!!
-
My reaction to that kind of micro management is "they need to build it themselves or let someone with a crystal ball help them" Send them down the road!
-
Kickstarter Campaign
rickybobby commented on CicadaLeatherDesigns's blog entry in CicadaLeatherCompany's Blog
Mia, Congrats on your Kickstarter funding. Good luck and post photos your pieces for the backers, I would love to see your work! Rick Jorgenson -
Jerry, If you are marking your stitch lines you should be able to make the turn. On your way to the point (on your second stitch) when you get a stitch or two away MAKE your last stitch end at the point you marked. If you are new to sewing machines here is a tip... Approaching the last couple stitches, eye the spacing, if you need to do a half stitch to make it drop in the point, lift you machine foot so you can "slide" the belt under so the last stitch for that line will drop right in the spot you need. Before you turn the belt from that last hole/stitch make sure your needle is moving up 1/4 inch or so, this keeps the stitch from skipping (Wiz can explain the mechanics better then I). You have now turned the belt and are ready to move down the side of the belt. If you are using an edge guide for the sides you just swing it out of the way to do the tip. Thats right you will be "freestyling" for the tip!! Hope this helps and not confuses you more! If I have missed something, anyone jump in and help explain!
-
Ken Griffin wrote a couple other books as well and was also involved in many of the doodle pages. His style is unique and you will recognize it after you get his book and see it someplace else. I like it as it is larger flowers and leaves then most other patterns in print. It is just a very cool look! Good luck with your new toys!
-
This is a good method and pretty much how I approach the situation, I worked in the autobody repair field for 20 years, people never look at their cars until they pick them up from YOU, then every rusted scratch or door ding happened at your shop. These "prior damage" items are pointed out while they are dropping the gun/car off and noted ends all of the questions when picked up. BTW when I rent a car I mark every panel on their check out sheet, I can find a chip, scratch, ding on every panel of a rental vehicle. The people at the rental places can't believe it so I show them a mark of some kind on every panel. They always say "Oh don't worry about that" but I got burned once by a rental co. (rhymes with Avis) and have done this ever since. No troubles since!! Big Gun Doc makes a good suggetion, a camera, as well as the Grump, some kind of documentation, the customers prior knowledge and your documentation wins the argument. I also always keep customers items in the gunsafe unless I am working with them!
-
I believe the Ken Griffin Scrap Book has been out of print for some time. My 35 year old copy started falling apart, I found one used in good condition a year or so ago and had to spend $55.00 to get it. If the tools are "pre letter" for identification they are a sharper image when stamped and do cost more when found for sale. Check the values of everything. Offer to sell the items you don't want for him and give him the money. Make the deal work for him too. Remember, it maybe you selling tools one day! Good luck, it looks like a great find.