Dwight
-
Posts
5,247 -
Joined
-
Last visited
Content Type
Profiles
Forums
Events
Blogs
Gallery
Store
Everything posted by Dwight
-
 I actually have two machines for leather, . . . my belt machine is a Tippmann Boss, . . . usually on Ebay, . . . can be picked up for $1000 or so usually. I prefer it for belts & holsters as I can absolutely put that stitch where I want it. . . . and it will allow me to sew through 3/4 inch of dry leather. I have also used up to 410 thread in the thing. My other machine is a Singer 111W155, . . . which I have a total of about $450 invested in it. It is probably older than me (70), . . . but it does a beautiful job sewing everything I put through it. The problem with it is that it does not handle the heavier thread and has a much smaller bobbin than the Boss, . . . I'm going to do a belt for myself on the Singer one of these days soon, . . . but maybe someone else will chime in with their experiences on this or a similar machine. I was told I actually overpaid the original $300 for the machine, . . . but then again, . . . I was happy with it, . . . I added an electronically monitored motor that controls the speed pretty well, . . . but then added a 3 to 1 reduction pulley to slow it down further, . . . you could almost take a nap watching it sew now on its slowest speed. If you are near Toledo, Ohio, . . . there is a sewing machine shop there that can fix you up with several different models, . . . he's one of the advertisers on here. Others don't always share my opinion, . . . but FWIW, . . . if I had to hand sew double layer belts, . . . I'd probably find another line of work. May God bless, Dwight
 -
BondoBob knows whereof he speaks, . . . at least in my opinion. I cannot afford a really high priced knife, . . . so I use a drywall knife. Looks like a box cutter in a way. First thing I do when I put a new razor blade in it, . . . put that blade on my strop and sharpen/hone it. Yeah, . . . scary sharp is a good definition, . . . and right now I've got a left index finger that wasn't fast enough a week or so ago. It happens. But even so, . . . I still like leather work enough to buy bandages and razor blades. And the drywall knife is my knife of choice. I have a number of other styles, . . . it is first and foremost, . . . my go-to knife for all my leatherwork. May God bless, Dwight
-
Cartridge Loop Spacing
Dwight replied to Modad2010's topic in Gun Holsters, Rifle Slings and Knife Sheathes
Awww, c'mon George B, . . . that's what needles and thread are for May God bless, Dwight -
If I may, . . . I adjusted your order, . . . highlighting one item: I learned this from my mother. She was a quilter, . . . one of the best I've ever known or seen. She would throw away a piece, . . . or a whole stack of pieces, . . . rather than try to "Attempt to still fit pieces together despite cruddy cutting job". The cutting will always make or break your project, . . . lousy cutting = lousy finished product, . . . good cutting = good finished product, . . . excellent, and carefully done cutting = excellent, and carefully done final product. Get that under your belt, . . . then you can worry about the rest, . . . which IMHO looked pretty good. But also, . . . the "order" will always be determined by the desired final piece. Order for a pair of boots is far different from a billfold. May God bless, Dwight
-
Personally, . . I would not worry too much about it. Remember, . . . the guy who made it, . . . did not make a show piece to go behind glass at the Smithsonian, . . . he made a tool to be used, appreciated, enjoyed, and one day, . . . some day, . . . some time, . . . it will no longer be useable. From what I can see, . . . it looks beautiful, . . . I have an old "Jumbo" saddle, . . . probably a lot older than my 70 years, . . . been repaired many times, . . . and I still love it. You and I both have a privilege of sitting on history when we ride these saddles, . . . embrace it, . . . enjoy it, . . . thank the Lord for it. May God bless, Dwight
-
Doubled 7/8, . . . I like my belts to come out more or less at the .200 to .220 mark on my caliper, . . . sometimes even a bit lighter, say for a slim ladies belt. But that is the area I shoot for if I know the guy is going to be packing iron on the belt I made. And if he is in the 50+ market area, . . . I'll make it a tad thicker, . . . lotsa real estate to cover with only one belt The one I have on right now (and have worn so long I don't remember how old it is), . . . measures at .250, . . . has some stains, . . . some scratches, . . . and a lot of character rubbed into it. May God bless, Dwight
-
I'm with Art, . . . my CCW belts go out of here as a doubled 7 or thereabouts. I cannot tell you the engineering or anything else as to why it does it, . . . but two pieces of 3/4 bonded together is one heck of a lot stronger than any single layer the same thickness or even thicker. May God bless, Dwight
-
I saw a pair of gloves once, . . . where the top of the hand, . . . the back of the glove was totally flat. All the bending and forming was done with the palm piece. It put all the stiches up on top of the hand (when the palm is laying flat down on a table). They were side by side where the fingers come together, . . . but did not go down into the valley between the fingers. They looked kinda funky, . . . but that pattern would work form most sewing machines, . . . that is why I even remembered it. That would be my first look, . . . I'd probably try it in a marine vinyl or something like that first to see how it would work for me. Good luck, . . . may God bless, Dwight
-
I thought about getting a rubber stamp for some of my needs, . . . but being a computer nerd to a certain extent, . . . and having 3 different printers available, . . . I decided to let the computer do my stamping. I have built logos, avatars, return address, customer addresses, . . . on envelopes, . . . labels, . . . cards, . . . handouts, . . . and I don't need even one ink pad. But that is my way, . . . and it has worked for me. May God bless, Dwight
-
AND, . . . if you tape the back, . . . you can use a strap cutter, . . . yessir, you can. You can also make a jig, . . . see the little drawing. May God bless, Dwight pig skin jig.bmp
-
Got a PM from him 1 March last year, . . . nothing since. We discussed Mop and Glo. Hope everything is good, . . . just don't know any other way to contact him. May God bless, Dwight
-
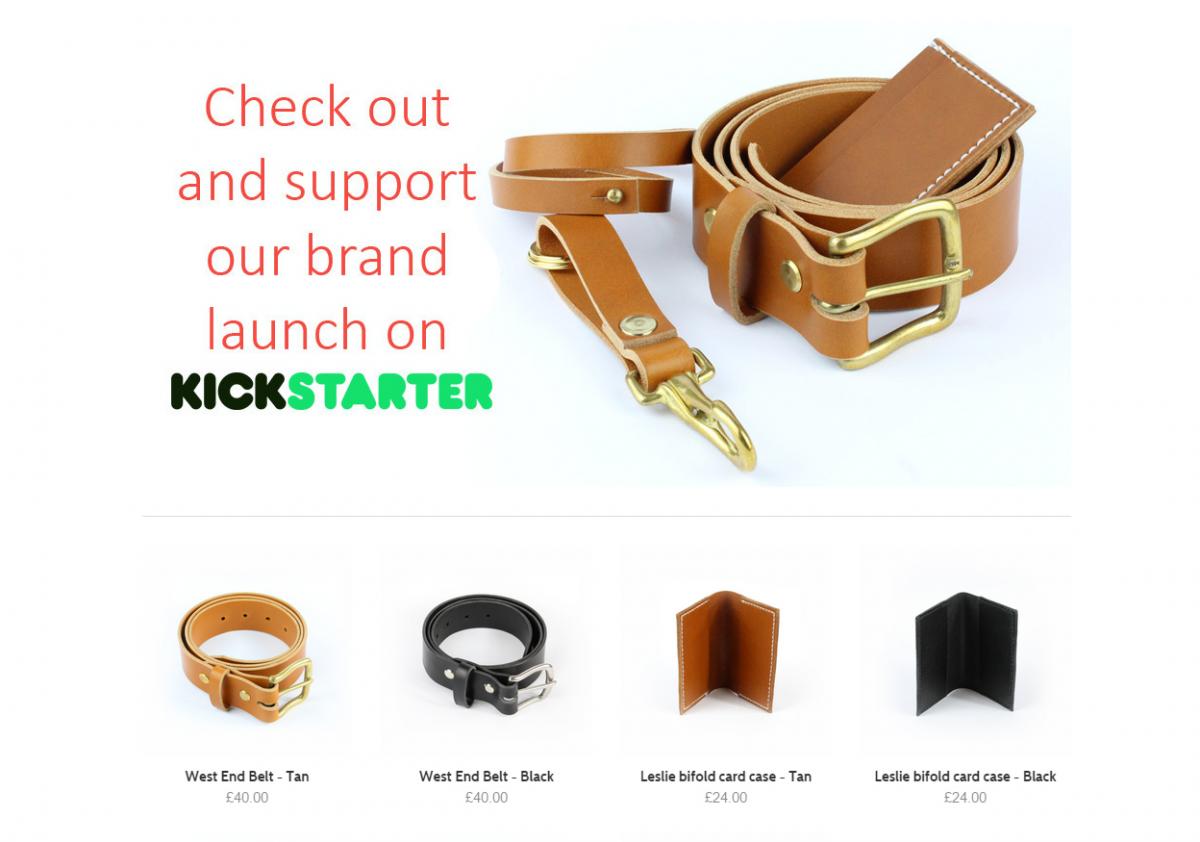
Hey, Shaunread, the screenshot below is a better one, . . . the first one I got looked like the one you posted. With the links to delivery, shipping, returns, etc just too prominently posted, . . . that was what I referred to as legal mumbo-jumbo. Your belts, key fob, the strap, even the wallets simply look like raw cut straps with a buckle or sewing. There is no design, no tooling, and worst of all, . . . the edges are simply raw leather. They need to be burnished, slicked, and professional looking, . . . which they are not at this point. The color you chose (tan) looks far too much like raw leather, . . . giving the idea that it isn't even dyed, . . . much less finished. I know you are trying to project yourself to the young, willing to spend, trendy crowd, . . . and perhaps a model, tastefully adorned with your products would do more than the simple pictures. Not to be bragging, . . . but take a look at my website: www.dwightsgunleather.com and you can see something of what I am talking about. The opening to the front page shows a product, . . . and how it is used, . . . with a model. The clothing was specifically chosen to appeal to the cowboy customer, to the male customer, and to the conservative customer. The model chosen is just a good average, . . . not pencil thin, . . . not fat, . . . and the shirt chosen is associated with working men, the blue chambray shirt. When you open the page, . . . your eyes naturally go to the pictures, . . . they tell a story, . . . and they attempt to create a "he's one of us" thought in the eyes of the beholder. Think in terms of your favorite commercials or ads on TV, . . . what did you see that peaked your interest? Product being used ! Competitive or "less expensive" ! A little humor ! Incorporate some of that, . . . it goes a long way in separating your product from the "rest of the world", . . . which is what you have to do to succeed commercially. In the US, . . . a number of years ago, . . . there was only one identifiable trait to the Avis car rental agency that thousands of dollars of research could pinpoint. They were 2nd in size to Hertz. They locked onto "We're only the 2nd biggest, . . . so we try harder" and their business $$$$ soared. Find your niche, . . . you'll succeed. You have the main things needed to be successful, . . . good ideas, . . . willingness to re-vamp, change, learn, . . . using quality materials. May God bless, Dwight
-
To be brutally honest, . . . looking at your website, . . . I would not bother past the first page. Simply stated, to me it is not attractive, . . . shows me no reason whatsoever to go to another page, . . . and shows me products that look unfinished to me. Your belt prices (in US dollars) are far and away too expensive for what "appears" in the picture. That same looking belt can be purchased at Walmart in the US for probably 10 to 15% of your price. Steps to improve: 1. Move all the legal mumbo-jumbo to the bottom of the page, . . . in smaller letters, . . . or, . . . just take it down. Most people will ask about what concerns them, . . . whether it be your shipping policy, . . . return policy, . . . etc. 2. Put products with some pizzazz on that front page, . . . let it be the first thing the customer sees. 3. Draw attention to YOU, . . . do that by mentioning your university, . . . age group, . . . where you live, . . . in so doing, you identify with certain groups that "may" pick up on the "birds of a feather flock together" syndrome, . . . making them feel more attracted to you, and therefore possibly your products. I may have hurt your feelings, . . . and that was not the intention, . . . because in today's world of advertising / attracting customers, . . . you ABSOLUTELY HAVE TO BE UNIQUE in something, . . . and your website simply does not do that. I certainly wish you the best, . . . you are to be commended for your effort so far, . . . just polish it up a bit, . . . don't get discouraged, . . . and you'll get there. May God bless, Dwight
-
Using Leather Sewing Machine To Poke The Holes In Thick Leather...
Dwight replied to thekid77's topic in How Do I Do That?
I may be one of them, glockanator, . . . as I do it sometimes. Most of the time it is because I have a very lazy streak in myself. It can be easier to poke the holes and hand sew it, . . . than to mess around adjusting the tension to get the stitches right on the thick stuff, . . . then have to mess around straightening it up again for the thinner stuff. That's my story and I'm stickin' to it. Oh, . . .and yes kid77, . . . when I do it, . . . it is definitely saddle stitching for that project part. I have also been known to use it to space the stitches correctly, . . . and make sure they are straight up and down, . . . something I have never perfected to my standards with an awl. May God bless, Dwight -
Small Of The Back Holster
Dwight replied to horseplay's topic in Gun Holsters, Rifle Slings and Knife Sheathes
You may also suggest that if he is ever shoved down by an antagonist, . . . lands on his back, . . . with the weapon between his spine and the concrete, . . . he may be paralyzed for life. I've had requests, . . . turned every one down on that simple thought alone. May God bless, Dwight -
If you contact Galco, . . . they will sell you the paddle, . . . it's plastic, . . . and by far the best material for for the paddle. Take a look at some of their paddle holsters, . . . I had one once, . . . went to an IWB, . . . it's more concealed. The down side to a paddle holster is they wiggle-waggle on your belt, . . . and you have to almost have a USNavy pea coat as a cover garment to not let it be seen. May God bless, Dwight
-
Gun Patterns Or Molds When Making Sass Type Holsters?
Dwight replied to bushpilotmexico's topic in How Do I Do That?
Or if you are handy with wood working, . . . I did one for a S&W model 29 a few years back. Still have the model, . . . customer still has the holster, . . . he was tickled pink with it. May God bless, Dwight -
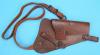
Simply put, . . . it is a wrap around holster with a shoulder strap, and a belt strap, . . . a suicide strap keeps the gun from falling out if he bends over to tie his shoe. Look at this example, . . . it's for a military pistol, . . . but shows the general idea. May God bless, Dwight
-
PM Sent
-
You'll have to be more specific, . . . 3 oz will work for some applications, . . . a double 8 oz might be needed in another. Is it for looks alone? Carrying a bunch of stuff on it? Woman? Man? Dress? Utility? May God bless. Dwight
-
Actually, . . . it can hurt. First off, . . . the belts won't wrinkle unless the maker does some radically wrong things, . . . and secondly, . . . the contact cement will not adhere to the filament tape as well as the leather, . . . it can come loose, . . . leaving only the stitching holding it together, . . . I prefer mine to stay "together" as long as it is a belt, . . . so I don't put any foreign object in my leather belts, . . . other than the metal and stitching. May God bless, Dwight
-
I make, sell, and wear a double belt. I usually make them of blanks cut from the same hide, . . . generally cut side by side. The better looking of the two becomes the outside, . . . which will wrap around and through the buckle, . . . come back and fasten to itself, . . . and lay flat next to the inside piece. I use good quality buckles, . . . and I Chicago screw them together. None of my belts has ever been returned as being worn out. Comfort is in the waistline of the wearer, . . . and while in the pulpit on Sunday morning extolling the virtues of Jesus Christ, . . . it sometimes is a bit more comfortable to have my thinner Ranger belt on, . . . but I also do not have my 1911, and two 8 round magazines hanging off it. Sometimes, I will use one thicker piece and a thinner piece as Chief said he does, . . . but usually mine come from a 7 oz piece of leather. It is (if right on the money) .109 thickness which will result in a .218 thickness belt. The one I currently wear is right at .240 and is a little stiff, . . . but I personally like it better that way. The ones I make and sell will generally start at .180 overall thickness for a slim, ladies belt, . . . to the .250 for Mr. Big Guy whose girth is substantial. And, . . . yes, . . . a few thousandths of an inch WILL make a substantial difference in the comfort level it gives. There is no "one size fits all" in this question, . . . I hope this helps you, . . . may God bless, Dwight
-
Avion, . . . where are you located? Reason I ask, . . . I've got a couple spare marble pieces, . . . if you're close, . . . I'm sure we could work out something. I wasn't thinking earlier, . . . Electrathon certainly has the other most likely component. May God bless, Dwight
-
Avion, . . . I am not the "best" person to answer this because I don't do a lot of stamping, . . . and there just isn't enough money left in Ft. Knox to get me to do a lot of basket weave, . . . it's just not worth the wear and tear on my very last nerve. But having said all that, . . . just about every time I have an issue with a stamp or my stamping, . . . I stop and take stock, . . . and I've usually either started before the leather was really ready, . . . or allowed it to get too dry. I usually give it a real good 5 to 8 second dunk, . . . then let it lay on a paper towel on my marble until it has turned almost a "dry" color, . . . before I do much stamping if I really am interested in the piece I'm working on. I use a 1 pound mallet, . . . and I've found that 4 or 5 or 6 "tap-tap" blows will usually equal one "whack" blow, . . . and most of the time will be done a lot more accurately. Whacking the stamp does not work out for me, . . . but again that is just me. Best wishes my friend, . . . wish I could help more. May God bless, Dwight
-
Wet Forming My Cowboy Fast Draw Holster
Dwight replied to bushpilotmexico's topic in How Do I Do That?
Mine is usually just a good "dunk", . . . doesn't last over 5 or 6 seconds. Then I give it a few minutes to allow the water level to even out. I have to do that because almost all my Western rigs are two layers bonded together, . . . need that time for the water to get down to the bottom fibers in the stack. I've never had a problem doing that. You also won't want to allow it to get all sloppy, soaking, wet, . . . as the stamping and stuff will lose it's crispness, . . . look more like something rolled out by a press in China, . . . rather than fine detailed hand stamping. May God bless, Dwight