Dwight
-
Posts
5,247 -
Joined
-
Last visited
Content Type
Profiles
Forums
Events
Blogs
Gallery
Store
Everything posted by Dwight
-

Words On A Belt? Best Way. Stamping, Carving?
Dwight replied to BarnDog's topic in How Do I Do That?
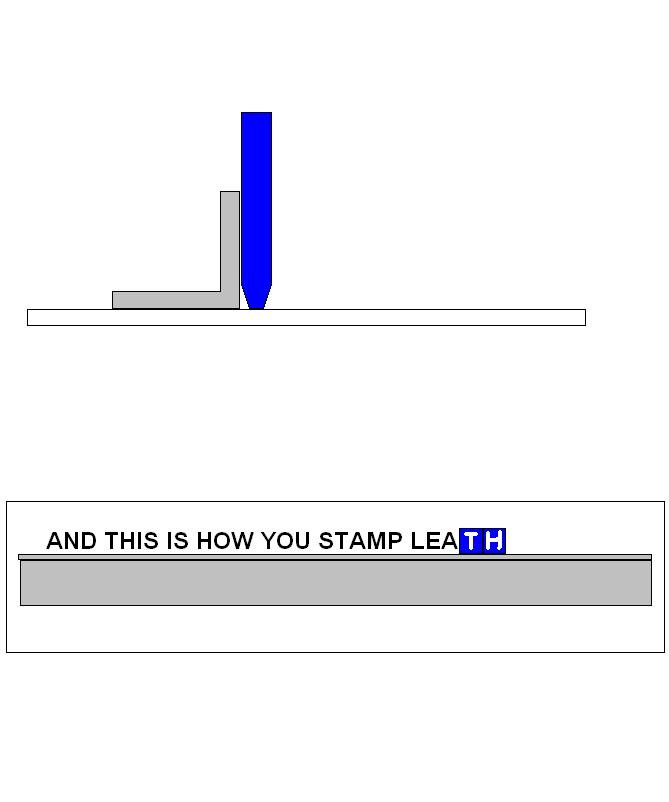
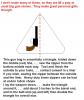
I do not do a lot of stamping, . . . only have one small set of dies, . . . but when I do, my "eye" is not good enough to get the job I want. For extended wording this is what I would do: affix a plastic piece of "angle iron" with tape or light clamps so that it makes the bottom of where you want the wording to be, . . . measure and figure out left-to-right how much space you need (size of stamp x number of letters), . . . to get your starting point. Stamp the first letter over on the left side just like you were printing it. Leave it in place, . . . line the second stamp up next to it, . . . stamp the second one, being careful not to hit the first letter again, . . . remove the first letter, . . . bring up the third letter next to the second, . . . strike the third, . . . and so on down the line. Turn over a stamp to use for spaces between letters. Check the little sketch, . . . it'll maybe be better understood than my wording. This works for me,........ May God bless, Dwight
-
 Thanks, may God bless, Dwight
 -
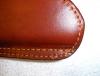
Tex, . . . a friend who reintroduced me to leather work some 20 years ago put me on to glueing it all together before sewing. In the interim, . . . I've probably done a half dozen things without the glue (I actually use Weldwood Contact Cement, . . . exclusively) but honestly, I cannot remember one right now. I coat each "side" where it is to be sewn with a small plumbers brush bought from Harbor Freight (whole bag of em is about 3 bucks) then use my heat gun to dry the contact cement, . . . line em up, . . . stick em together, . . . sew em and be done with that part. Anyone who has sewn in a zipper knows they are not "cake" but can be handled. My secret is making that bottom corner you have to go around (twice) a nice long sweeping turn, . . . makes it easier and looks better. May God bless, Dwight
-
Tex, This is the best I can do for a pattern. I actually make mine one at a time, then pitch them, for something like this. I use manila envelopes and masking tape (to add back stuff I cut out ). I use about 7 oz leather for mine, . . . but they can be anywhere from 4 to 9 depending on how big the gun is, . . . tooling, . . . lining, . . . etc. My son has the first one I ever made, . . . he might sell the gun, . . . but you can bet the bag will never go anywhere except his safe. Let me know if you have any other questions, . . . but really it is pretty straight forward. One caution, . . . on the corners, . . . make at least a 3 inch diameter curve, . . . otherwise the zipper is one super pain to sew. I sew mine from the middle out, . . . if you sew the other way, . . . Murphy's law comes into play, . . . and something won't be right. May God bless, Dwight
-
I back stitch (number varies somewhat) and cut as close as I can to the leather after cutting the threads about 3 or 4 inches long, . . . and doing the tug, pull, tug, pull thing to get that final knot seated in the middle. My sharp little pointed scissors goes down as close as I can, . . . SNIP, SNIP, . . . and I'm done. The dye and Resolene usually hide the little short ends well enough for me. May God bless, Dwight
-
 Those really look good, . . . you have a patience for tooling that I've never found yet. Would love to see how you treated the bottom portion of them. May God bless, Dwight
 -
What Do You Recommend For
Dwight replied to glockanator's topic in Gun Holsters, Rifle Slings and Knife Sheathes
Actually, . . . I don't specify, . . . I've used black, brown, etc, . . . with basically no problems. Never tried neutral, . . . everything I've ever polished, needed that added touch of color for, . . . uhhh, . . . restoration? My favorite is Kiwi scuff coat, . . . originally for kids shoes, . . . I like it. May God bless, Dwight -
It is a little late now for this process, . . . but the vinegaroon (use the search function, . . . lots of info out there on it) process gives you a pretty decent black color, . . . and from what I've been told, . . . zero rub off. For your belt you have right now, . . . lay it down flat on a hard, . . . not moveable surface, . . . grab an old tee shirt you no longer need, . . . and start buffing / rubbing it, . . . as though you are trying to rub off that top black color. You won't, . . . but try anyway. Keep turning the tee every few minutes, . . . and when you quit getting pigment rub off, . . . you are done. Final step, . . . and, honestly, . . . don't laugh. Apply Kiwi black scuff coat shoe polish. It comes in a little plastic squeeze bottle with a sponge applicator on top. Polish the front and the edges, . . . let it dry for an hour, . . . turn it over, . . . do the back and the edges again, . . . let it dry an hour, . . . turn it over and put a second coat on the front. If it all works out right, . . . it will look almost as good as the day you first bought it, . . . and your "rub off" days will be over. May God bless, Dwight
-
What Do You Recommend For
Dwight replied to glockanator's topic in Gun Holsters, Rifle Slings and Knife Sheathes
Mine mainly stresses 2 points: don't get it soaked, . . . if you do, no heat, no "microwave", no oven, . . . hang it in front of a fan to dry, . . . and, . . . shoe polish can be used to keep it spiffy looking. May God bless, Dwight -
Belt With Fancy Stitching
Dwight replied to steelhawk's topic in Purses, Wallets, Belts and Miscellaneous Pocket Items
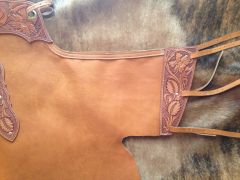
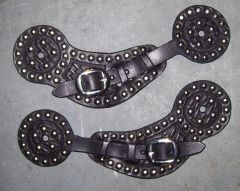
I don't do many of these, . . . and I hand lay out each one as the length of each segment will have to change with the overall length of each belt. The "pattern" simply is a part of the outside edge of a circle. The pictured belt has 2 patterns, the one around the belt holes, . . . and the other sorta looks like a fish with two tails. The fish is duplicated 7 times, . . . so go back a couple inches from the last hole in the belt, . . . measure around to the last rivet holding the buckle, . . . divide by 7 and you have the length of that outside edge of the circle needed. Sometimes I use a plate, . . . a pie pan, . . . roll of tape, . . . just what ever will give me the best looking (to me) arc for the belt. Lay it out on a piece of manila folder, . . . cut it, . . . trace it. Take a look at the little diagram. May God bless, Dwight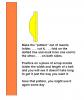
-
If your leather shop is so chaotic that you fear to have live ammunition around you, . . . probably ought to think about lessening the chaos. Also, . . . 9mm snap caps are $149.50 for a box of 50, . . . 9mm ball ammo is in the neighborhood of $12 for 50. I use THE size and style (when possible) of loaded ammo in my belts for all my customers, that they will use in their belt. After I weave the loops like katsass recommended, . . . I leave the cartridges in the loops until the loops are almost dry. Take em out too soon and the leather will shrink up, . . . making it very hard to get them in next time, . . . and you usually wind up wallering them into the loop and stretching the loop. The loaded ammo makes sure that THE proper diameter is imparted to the loop. Empty ammo has a sharp edge many times, . . . and you can seriously cut the end of your finger with empty cases. It won't happen every time, . . . but it only takes that once, . . . and you will not want to do it again. May God bless, Dwight
-
You make a two piece wooden form, . . . male and female. The male would be the back part, . . . and it would be the shape of the back and the empty void you desire in the piece. The female part would be the front, . . . hollowed out to accept the back piece. What you will probably have to do is make the back on a lathe as a round piece and saw it in half. The front will only be done by gouging, drilling, cutting, and sanding, . . . and will take some time to do. Be sure to fully, . . . completely, . . . throughly sand the front piece, as any imperfection will be transferred to the face of the leather. Leave the space between them for about 3 or 4 oz thicker leather than you plan to use. Wet the leather, . . . hand force them into the female part as much as possible, . . . then force the other piece into it, . . . leave it for about an hour with clamps on it to keep it from moving, . . . remove the clamps, . . . air dry. May God bless, Dwight
-
How Do You Handle People Wanting To Cancel Orders.
Dwight replied to billymac814's topic in Leatherwork Conversation
While most of my relationship with Paypal has been good, . . . several years ago I bought a computer off Ebay. I should have known better, . . . but the price and the lure was just too much, . . . so I bought it, . . . paid by Paypal. Long story short: the computer was junk, . . . software not installed right, . . . I'm not even sure he had licenses for the software. I contacted him and told him his computer was coming back. Took it to the Post Office, . . . sent it with tracking number and it had to be signed for by him. He got it, . . . signed for it, . . . refused to refund my money, . . . tried to slide by the time allotted by Paypal for disputes. They sided with him, . . . even though I had all the documents proving he got it back and HE signed for it. Fortunately, . . . Master Card stepped in and refunded my $350.00 or I would have lost out altogether. Moral of the story, . . . if you have a dispute, . . . act quickly, . . . positively, . . . and have all possible receipts & paperwork. The copy of his signed receipt was the ONLY thing that made the difference for me. May God bless, Dwight -
About Vacuum Forming
Dwight replied to Dwight's topic in Gun Holsters, Rifle Slings and Knife Sheathes
Yay, . . . hey, . . . hey, . . . good looking holster. May God bless, Dwight -
Tippman Boss....how Long Is Learning Curve
Dwight replied to icdux1's topic in Leather Sewing Machines
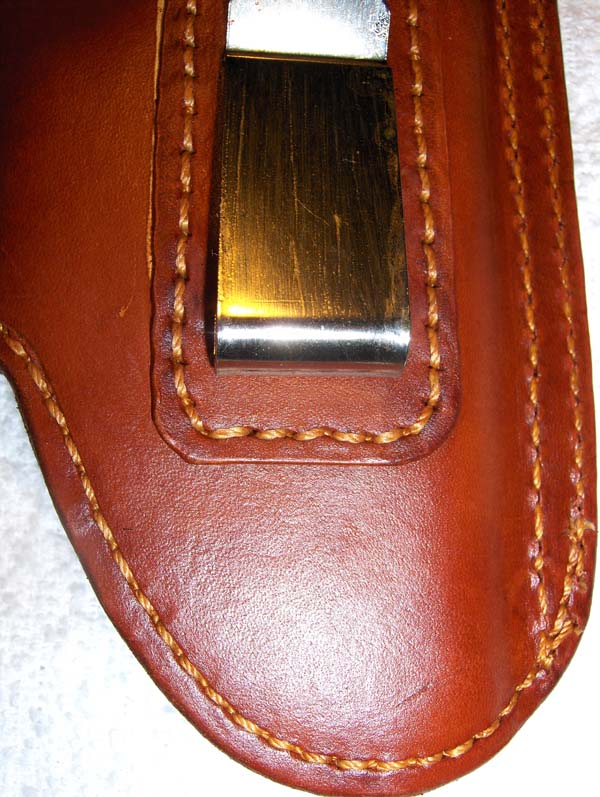
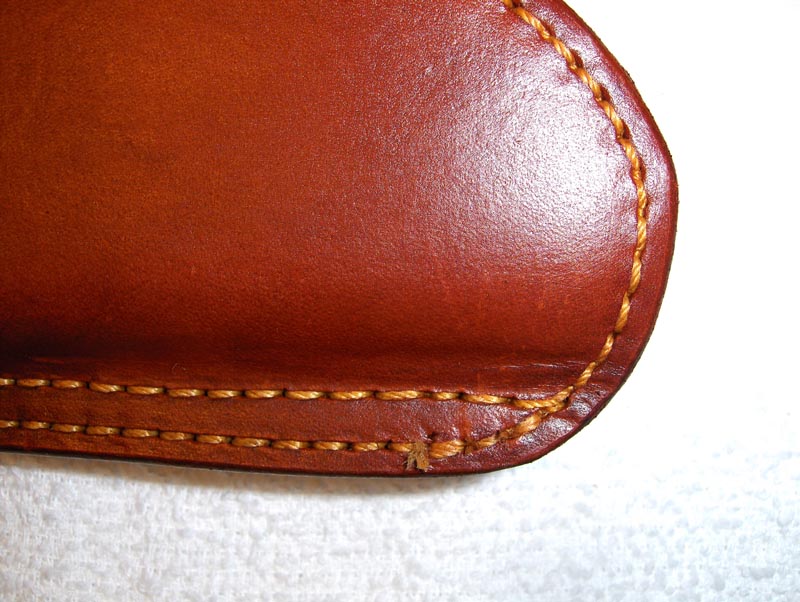
It sounds like you are on the right track. In your reply window, . . . bottom right hand corner, . . . push the button for more reply options. It will let you upload pictures. That is how these are on here. This is a small holster I did earlier today, . . . on my Boss, . . . double layer 4/5, . . . 346 thread. I'm not sure of the needle, . . . Does your stitching look like this? This is not a perfect example, . . . but a rather representative sample. May God bless, Dwight
-
Tippman Boss....how Long Is Learning Curve
Dwight replied to icdux1's topic in Leather Sewing Machines
1. Did you watch the DVD they sent with it? 2. Did you set the machine up like you were told? If you answered yes, . . . then post some pictures, . . . front and back of a typical sewing setup you would have. What thickness leather are you sewing? What size thread are you using? What size needle are you using? These are all part of the equation, . . . and you will have to take each into account. May God bless, Dwight -
How Do You Handle People Wanting To Cancel Orders.
Dwight replied to billymac814's topic in Leatherwork Conversation
My policy is simple, . . . I treat my customers like I want to be treated. They don't like what they ordered, . . . they get their money back. Sometimes something does not work out, . . . is not what they expected, . . . whatever. That's my policy. Yeah, . . . been burned, . . . will happen again, . . . but I sleep well at night knowing I did not rip anyone off, . . . and there should be no hard feelings by anyone. My last "return" was a very special custom belt that did not work out for him, I made him a new one, . . . added a brand new buclke to it also, . . . got two holster orders from him, . . . plus, I'm wearing the belt he didn't like. May God bless, Dwight -
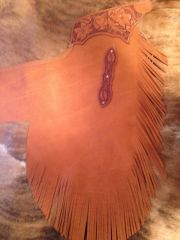
Mike, . . . I'm 3 pairs of chaps and one pair of chinks ahead of you in the "chap learning" curve. Cody, has given me some good ideas. Don't waste your money on either chap pack sold at Tandy's, . . . they look and fit like something out of a bad "B" movie. I bought a pattern pack from Bob Klenda, of Klenda saddlery, . . . (google him), . . . I liked his # 33 Arizona chaps best. $15 for the pack. I made a couple of adjustments to his pattern, . . . and I like the end product. Also, . . . go on line, . . . get the 40% off coupon from JoAnn Fabric, . . . get 2 yards of their $17 a yard naughahyde, . . . it'll make a full adult set of chaps in the legs, . . . and is a whole lot cheaper than leather. I made my first two pairs from it, . . . learned a lot, . . . and did not break the bank. I'm keeping both as "try on" pairs for hopefully, . . . future customers. You can also look on Ebay, . . . there were some kids chaps there that were really cheap, . . . might start there for a pattern. May God bless, Dwight
-
Leatherwork is no different from other business ventures, . . . in the truly "business" end of it. Find some part of it at which you are good, really good, or great: concentrate on that area. That is the way businesses have always survived. Example, . . . where would Ford be if they had continued making the Edsel, and had forsaken their other lines? In the ditch with Yugo, Studebaker, and Frazier. IF YOU HAVE TIME, every time you make a custom piece, . . . make 2 of them. One you sell, . . . the other is for craft shows, inventory, immediate sales, etc. Yes, you will wind up with some dusty old pieces in a cardboard box that no one wants, . . . but you will also get some quick sales. As a personal anecdote, . . . I took one of those boxes with me to a gun show with some friends, . . . borrowed a corner of one of their tables, . . . unloaded the whole box for $10, $15, and $20 a pop. Came home with a nice bunch of folding money, . . . and some better ideas of what my customer base wanted. The other day, . . . I made a serious mistake on an IWB holster, . . . after an accident in the drying room ruined another one, . . . between the two, I now have a new product line to offer, . . . higher end, . . . better prioduct. All because of a couple of accidents. I'm actually getting ready to put my sign out by the road, . . . holsters, belts, chaps, and saddle repair. I'm certain that as soon as it is visible to the public, . . . I'll be busier than ever before. But those are the areas of my interest, . . . I enjoy them, . . . makes all the difference in the world. May God bless, Dwight
-
I have a snap setter I bought at Walmart 5 or 6 years ago, . . . have used it for literally hundreds of snaps, . . . but the model I have is only good for line 24 snaps. Hobby Lobby carries the tool now, . . . it is $25, . . . you will find it in their sewing section, . . . it looks like a blue handled pair of pliers. The throat is short, . . . so you have to be careful where you place your snaps. I have heard people bad mouth the tool, . . . but when you listen to what they said, . . . they must be ham handed brutes who would break anvils with a rubber mallet. The tool is good, . . . functional, . . . and is far superior to the hammer tool sold by Tandy. Just remember, . . . squeeze it until you feel it come to a stop, . . . open it up and look, . . . you will be pleasantly surprized at the wonderful results. May God bless, Dwight
-
 If you set your leather onto a black "poundo" board from Tandy's, . . . you can retire your awl from spot setting. One firm punch, . . . the spot is in and on, . . . turn it over and bend the tabs to the middle, . . . soooooooooooo easy. May God bless, Dwight
 -
Very Basic All-Leather Mules Or Flip Flops?
Dwight replied to humperdingle's topic in Shoes, Boots, Sandals and Moccassins
The Roman soldiers of 2000 years ago wore flat leather sandals with cleats on the bottom side. They walked all the way from Rome to London (with a little help from their navy). This http://en.wikipedia.org/wiki/Caligae will show you some good stuff about them. They had an inner liner and an outer sole, . . . attached to the main body. It is the pattern I have attached. May God bless, Dwight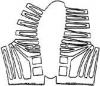
-
Reverse, . . . in a nutshell, . . . is a time saver, . . . almost extrordinaire ! Without it, . . . you turn the piece, . . . or hand stitch, . . . or force the machine to re-do them one at a time. With reverse, . . . it's done as quick as you can flip the lever and make the stitches. Also, . . . there are some "fancy" things reverse is especially well suited for: stitched decorations such as on belts, . . . sewing cartridge loops on gun belts, . . . doing applique work on chaps or chinks or purses, . . . I have survived without it for several years, . . . will probably continue to do so, . . . but I have found "Dwight" ways to do those things I need reverse for. May God bless, Dwight
-
Shoe Construction, Step By Step
Dwight replied to electrathon's topic in Shoes, Boots, Sandals and Moccassins
Far worse than mine, . . . that's for sure. Mine is just nasty, ugly, pain, . . . not crippling, . . . just aggravating pain. I keep getting a little closer each new insert I make or change (most of the time). I'm hoping when I get it right, . . . I can use that shape for the bottom of a pair of shoes that won't hurt my feet. On the one last, . . . it looks like you built it up a lot, . . . did I see that correctly? May God bless, Dwight -
Removable Loops For Iwb/owb Convertable
Dwight replied to Boriqua's topic in Gun Holsters, Rifle Slings and Knife Sheathes
It doesn't really matter if it does pivot (I use snaps, . . . no TEE nuts) and all of mine pivot, . . . but once the belt is laced into the two straps, . . . gun inserted, . . . belt pulled taught, . . . it ain't going anywhere. May God bless, Dwight