Dwight
-
Posts
5,247 -
Joined
-
Last visited
Content Type
Profiles
Forums
Events
Blogs
Gallery
Store
Everything posted by Dwight
-

Using A Press To Mold Holsters?
Dwight replied to hestes's topic in Gun Holsters, Rifle Slings and Knife Sheathes
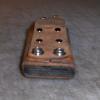
I quit using a press, . . . use a vacuum system now that I like better, . . . But here is my old press that worked fine. I quit using it because I'm getting so many of these plastic guns, . . . and I figured that some day I'd smash one, . . . takes a bite out of the old profit margin. The press is made of 2 x 4's bolted together, . . . and an 8 ton jack, . . . was way more than necessary for the job. The key is the two brown layers, . . . gum rubber, 1 inch thick, 40 durometer hardness, . . . cost me about a hundred bucks from McMaster-Carr (goggle em). All in all, . . . I had something like $130 in the first holster I pressed out with it. If you are only using steel guns or "blue" guns, it is OK, . . . but if you are doing Glocks or XD's or some of the other plastic fantastic shooters, . . . just be careful. May God bless, Dwight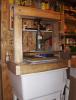
-
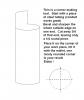
BSA, . . . I have never used the Balsam wax, . . . I'm one of these "if it ain't broke, don't fix it" type people, . . . I found out how to use Resolene, and it has served all the purposes I needed for my holster, knife sheath, belt, and mag holder business. It leaves something to be desired on others, . . . BUT, . . . you have to look at where you are, . . . you have a project that is worthless as it is, . . . putting on the resolene might just cure the problem. I would first take a cloth (not a paper towel) and put some feibings thinner on it and rub the pouch, . . . not too hard, . . . just go over it and see if it will take off the wax. Whether it does or doesn't, . . . mix up 50/50 resolene and water, . . . take a cheap pig bristle paint brush (it's the 50cent one at the hardware store probably), . . . and start brushing it on. It will lather up almost like a low grade shampoo, . . . and that is OK, . . . get that going all over the bag, . . . do it a second time, . . . but after the second application, . . . start brushing out the bubbles, . . . left / right / up / down / diagonal right / diagonal left / just keep brushing until there are no more bubbles. I usuall find a way to hold my piece by the inside so no fingerprints will show in the wet resolene. Set it somewhere to dry, . . . give it 24 hours plus unless you are having this nice 95 degree dryer temp out on your porch, . . . then it is only about 4 hours. Good luck, may God bless, Dwight
-
I use Feibings professional oil dye, . . . and have generally good success. I am in the process of evaluating Eco Flow Professional Waterstain, . . . black. My co-conspirator in this project is the local Tandy manager. He promised me I would never have any rub off, . . . under any circumstances, . . . ever. So far, his word has been true, . . . I'm getting ready to do the final test, . . . an "X-cross" shoulder holster using 1 inch wide shoulder straps. When I get it done, . . . I'll wear it a few days under my regular shirt, . . . with only a Tee shirt on. If it don't bleed there, or rub off, . . . it'll be good. You also need to seal that black dye you are using, . . . and while I am unfamiliar with the product you said you use, . . . i am familiar with Resolene, . . . and have had very little rub off problems with it. You apply it in a 50/50 mixture with water, . . . air brush / sponge / bristle brush, . . . you'll need to practice. But it WILL lock in the black dye. By the way, . . . if you think that dye has rub off problems, . . . try USMC black. It makes a beautiful project, . . . but it is really tough to get all the pigment off. May God bless, Dwight
-
Here is one idea, got it from an old chink maker. May God bless, Dwight
-
I do the same, . . . no different from many other tools we use in many other applications. If you want a good "set" on your copper rivets, . . . a small ball peen does a fantastic job (IMHO). May God bless, Dwight
-
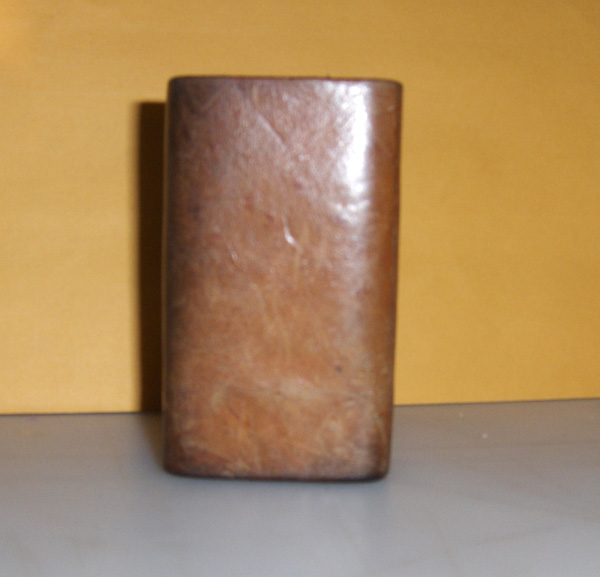
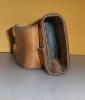
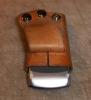
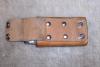
goldenstone, . . . best I can tell you, . . . never have had a problem with dye rub off using it. BUT, . . . most of the rigs that I use this on, . . . are cowboy rigs that most of the guys and gals have on once a month or twice a month for a couple hours at the most. The one piece of leather that I can attest to is my phone case, . . . had it in use about 5 years or so, . . . didn't dye it, . . . but also never have seen any oily residue or wax where it didn't belong. It's easy to make, . . . best to satisfy yourself with a little back yard testing. Use some scraps, . . . especially use some USMC black, . . . if THAT doesn't rub through, . . . nothing will I would imagine. May God bless, Dwight
-
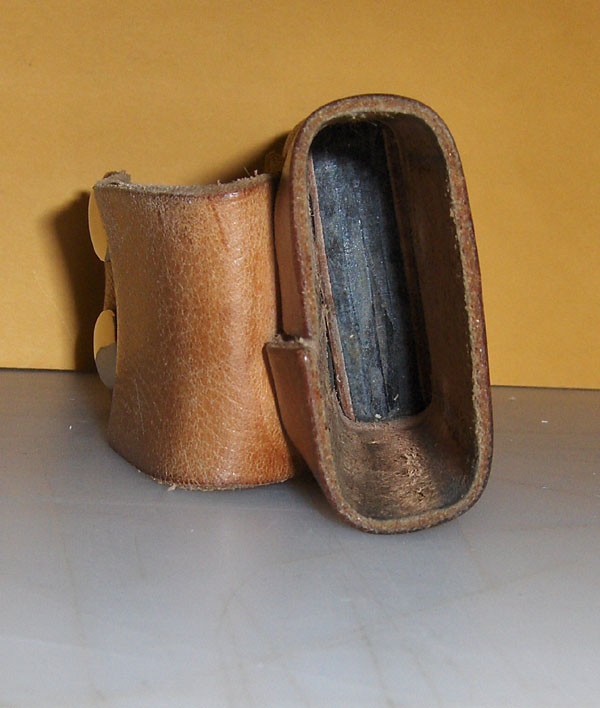
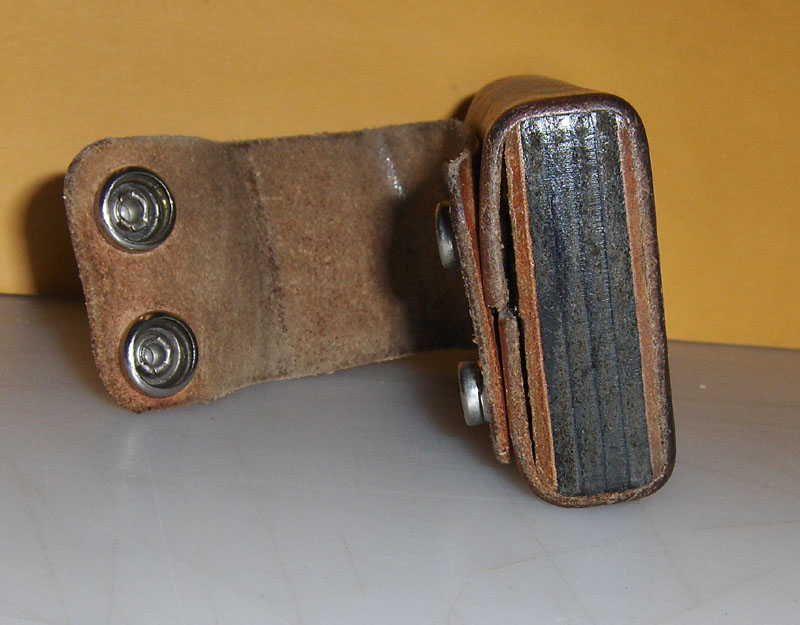
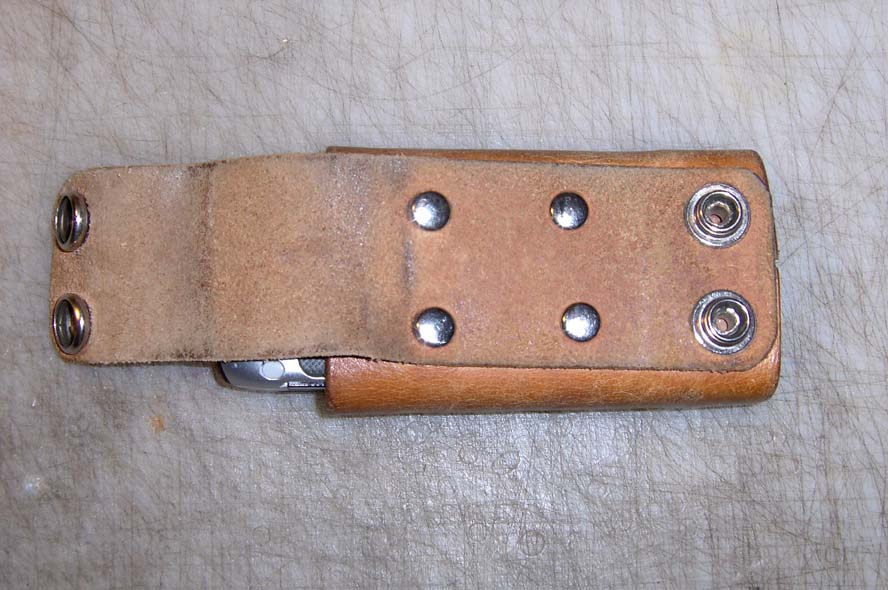
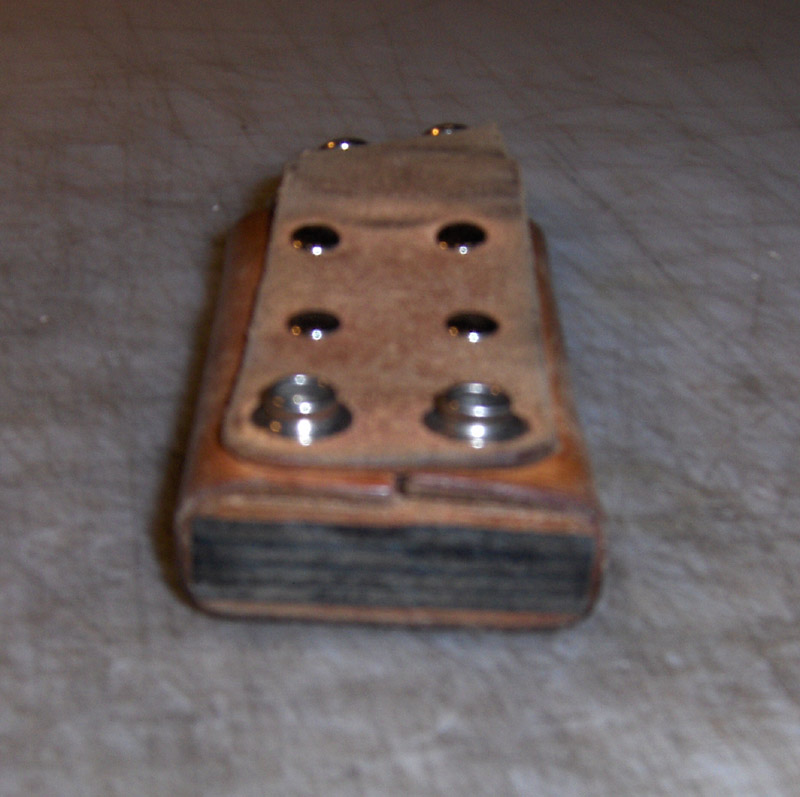
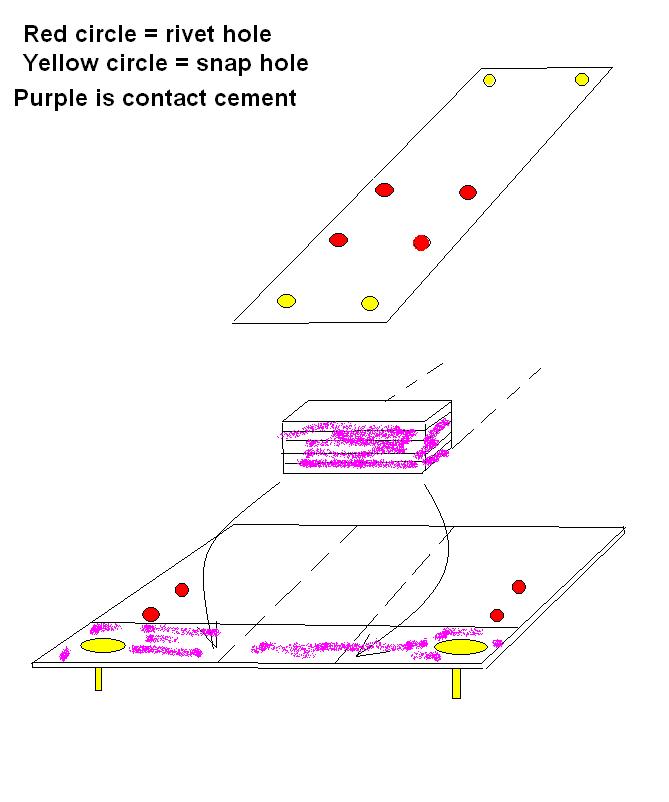
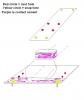
It's a simple case to make, . . . for my Motorola phone it took the following: 1 piece 5/6 leather, 4 x 6 inches, . . . the main body 1 piece 5/6 leather, 1 3/4 x 7 inches, the belt loop 5 pieces of scrap leather, 3/4 x about 2 inches, . . . forms the plug for the body of the case. First cement the scrap leather together to make a plug, . . . one piece on top of another, . . . stack em up, cement em together, . . . one solid plug, about 2 inches by 3/4 inch by 3/4 inch. Take it to a sander and even up your pieces, . . . round the corners a bit. Pop the holes in the bottom of the main body and the bottom of the belt strap for the snaps and glue the snap stud to the main body. Contact cement the main body to the plug, . . . with the snap studs pointing up. Contact cement the belt piece to the back of the main body, . . . aligning holes for the snap studs, . . . put the male pieces on the snaps and set the snaps. I used a center punch and an ice pick to slowly and gingerly get the snaps set, . . . it was the hardest part of the whole job. If you pull the main body tight around the plug, . . . (cutting it so it really fits good first is a really good idea too), . . . the plug will withstand the "tap-tap" beating you do to set the snaps. After that, . . . pop and set the four rivets, . . . then the female portion of the snaps, . . . finish, . . . VOILA, . . . you are done. I also made one using basically the same pattern for a Galaxy phone some time back for a customer. He all but danced out the door he was so happy. I have another case, leather, got it for 50cents at a yard sale, . . . it's my "Sunday go to meeting" case, . . . but I don't like it any where as much as I like this one. The only finish it has ever seen is a neatsfoot oil / beeswax mixture. May God bless, Dwight


-
I can't speak for your results using NFO / beeswax, . . . I assume it is probably a commercial product. I make my own using virgin beeswax, and neatsfoot oil, . . . 50/50 by weight, . . . heated together in a glass jar, . . . sitting in a crock pot with just enough water to make the larger jar float up off the bottom a bit. It gives a medium sheen, . . . and while not "waterproof", . . . it is seriously water resistant. I put it on rubbing the cake of material liberally on the leather, . . . go over it with a heat gun, . . . usually 3 or 4 coats, . . . come back in a couple of hours and buff it a bit. Back off a bit maybe 55/45, . . . more oil than wax, . . . you might really like the results. It is also easily restored when you fall down in a gravel pile and scratch up the surface finish. May God bless, Dwight
-
It would help if we had some idea of the project you have in mind, . . . also how thick is the leather you are using? May God bless, Dwight
-
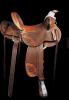
I have never built a saddle before, . . . this would be my first. It would be for a 15 hands high quarter horse gelding, . . . 5 years old. The horse may change, . . . but I'll keep the saddle, . . . probably passing it on to either a niece or nephew in a few years. I really like the look of the one Tippmann has on their website, and I copied that picture for here, . . . although there are some cosmetic changes I would make. Anyone here have an idea where I could get a reasonably priced tree like this? I'm particularly fond of the high, straighter upward swept back of the saddle seat. Thanks, may God bless, Dwight
-
Just in case you are haveing a bad day, . . . take heart, . . . it could be worse. Customer came in today, . . . we chatted, . . . he ordered, . . . left, . . . I started. I had 2 belts, 2 holsters, and one mag holder to make. I made the right hand holster for a lefty, . . . the left hand holster for a right hand, . . . the mag carrier should be for a lefty, . . . yep, reversed it too. I'm anxiously awaiting the belts, . . . Said to heck with it all, . . . got a piece of strawberry rhubarb cobbler, . . . cup of coffee, . . . kicked back, . . . tomorrow is another day. May God bless, Dwight
-
Make this little tool, . . . use it for your corners, . . . it will not only help your corners look better, . . . it will choke down some of the frustration. May God bless, Dwight
-
Yeah, . . . pictures would help, . . . don't quite understand what you are trying to accomplish. May God bless, Dwight
-
Chair Or Stool You Use With Your Stitcher?
Dwight replied to SooperJake's topic in Leather Sewing Machines
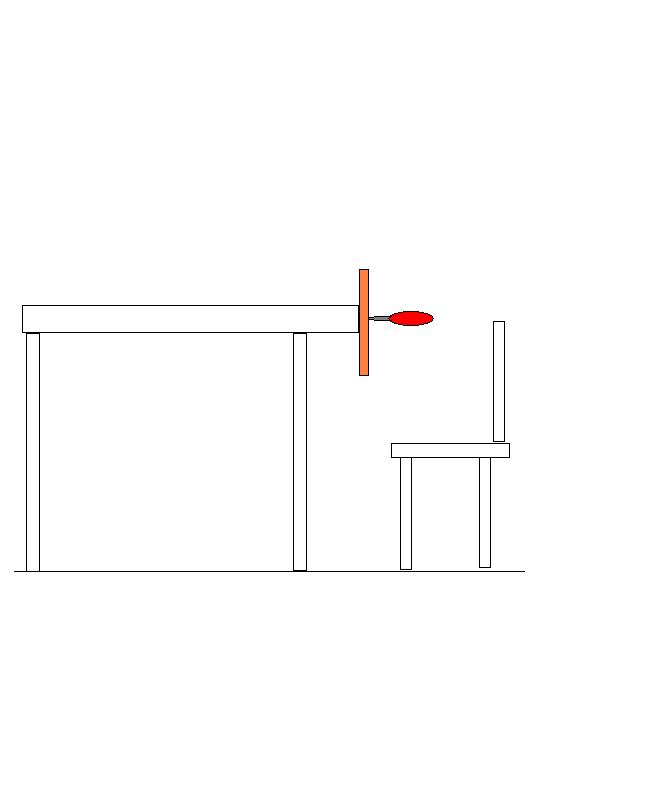
I am 6'1", . . . long legged, . . . and like Cascabel, . . . I use one of those nice swiveling, 5 roller, office chairs. It has a high back (I can kick back and take a snooze if I want to, . . . don't have to hit the couch). Unlike him, . . . I have both (2 similar chairs in my work space) all the way up as high as they will go. Easier on the old legs that way. One is well over 15 years old, . . . kinda rickety, . . . but very comfy, . . . the other is getting broke in as it is just over 10. May God bless, Dwight -
Some things I do differently, . . . but since most of my awl punching is done for small stuff, . . . I've gotten into the habit of using the edge of my work bench. I've got a couple of small holes punched in there, . . . and I can lay that small piece up against the bench edge, . . . punch straight through, . . . and it is always 90 degrees and right on the money. I actually don't do as good a job other ways, . . . this is my "preferred" position, . . . unless it is awful big. May God bless, Dwight

-
Your best friend is your computer, . . . with your customer, . . . and Ebay. Search for Fanny Pack, . . . go down the left side and select "Used", . . . then further narrow it down by price, . . . say $1 to $15. You will get hundreds of choices, . . . buy the one your customer likes for 10 bucks or so, . . . take it apart, . . . Voila, . . . May God bless, Dwight
-
It would help if we knew where you were, . . . one of us may be just down the road so to speak. May God bless, Dwight
-
If you can't afford a poundo board from Tandy's or something similar, . . . go to Walmarts and buy the smallest and cheapest white polyetheline cutting board they have back in the kitchen stuff. It is not the "very best" backup surface for punching holes, . . . but it is good. It stops the punch from going way too far (which can easily happen if you use another piece of leather under your punched piece), . . . and does not dull the punch cutting end. Next, . . . keep your punches sharp, . . . a dull punch is worse than dating your ugly step sister, . . . very little good ever comes of either idea. And don't forget to use the wax. i kinda "roll" the cutting edge in the wax about every 3rd or 5th hole, . . . makes it all soooooooooooo much easier. May God bless, Dwight
-
Good question, . . . maybe not so good an answer. A friend loaned me his 3 VHS tape set on how to make holsters featuring John Bianchi. It was all about making a western rig, . . . and John spcified in his teaching that the cartridge loops needed to be of calf skin. Why? I really don't know. I have had good results with both veggie tan and calf skin, . . . and since my personal supply of calf has dried up, . . . I am doing all of them in veggie tan now days. I do not sew mine in place, . . . I use only the "in and out" in the same hole process, . . . and really have never had an issue with it. May God bless, Dwight
-
Private Instruction
Dwight replied to particle's topic in Gun Holsters, Rifle Slings and Knife Sheathes
The classes I teach, . . . are really, really basic. The student winds up with a simple pancake holster after 5 1 hour sessions. I charged $40 per student, . . . usually working with 5 students, . . . which gave me a gross of about $40 an hour, . . . In addition, there was no charge for the dye and resolene finish, . . . and I allowed those who were "brave" enough, . . . to try their hand at using my Boss machine to sew their creations. I found, truthfully, . . . very few who would ever pursue it beyond their own personal use. They were looking to ramp up their own personal skill set, . . . and it was quite a lot of fun. Hope this helps, may God bless, Dwight -
First Attempt Of Sheridan Style Carving.
Dwight replied to jessebeckham's topic in Floral and Sheridan Carving
If you had not owned up to a mistake, . . . I would not have known it, . . . I would have thought that you did it that way for a reason. Good job, too, . . . and I'll echo some of the others, . . . it's far above my food chain permit. Sewing, cutting, sanding, molding, even designing, . . . I can do, . . . this, thankfully others like yourself are talented at. May God bless, Dwight -
I try to use calf skin when I can get it, . . . but otherwise, . . . our processes are the same. Once they are almost dry, . . . I slip out the cartridges, . . . VERY CAREFULLY, . . . and finish assembly of the belt. Once it is all assembled, . . . it gets dip dyed. 24+ hours later, . . . I'll begin to add the beeswax / neatsfoot oil paste, . . . using the cake itself, rubbing it on / in / over / above, etc, . . . interspersing light touches with a heat gun to help melt the wax into the belt and the loops. I usually allow it to dry for several hours after that, . . . then give it the "buffing". Sometimes I only buff it lightly it for a softer look, . . . sometimes I buff the heck out of it for a "polished" look. For my CCW customers, . . . I almost always do Resolene, . . . but for my old west gunslinger pards, . . . it's beeswax and neatsfoot oil only. May God bless, Dwight
-
I have used a scroll saw, . . . and quite honestly, . . . I did not like the results. The blade's up and down motion would put little grubby marks on the edge of the leather, . . . plus the edge was uneven, . . . just UGH ! HOWEVER, . . . I recently bought one of those $99, . . . table top, . . . 12 inch band saws. It is not the "cats meow", . . . but it is a ton faster for my everyday holster work than even thinking of doing it with a knife. It only has about a 1/4 inch wide blade on it, . . . and it IS FAST. Hope this helps, . . . may God bless, Dwight
-
You have a private message, . . . double click the red box in the upper right corner. May God bless, Dwight
-
New Belt Pattern
Dwight replied to Double U Leather's topic in Purses, Wallets, Belts and Miscellaneous Pocket Items
Looks really good, . . . I was thinking it was a shame to punch holes in that beautiful art work, . . . then I saw two of the holes. That was a neat moment, . . . as you blended them well. May God bless, Dwight