Dwight
-
Posts
5,233 -
Joined
-
Last visited
Content Type
Profiles
Forums
Events
Blogs
Gallery
Everything posted by Dwight
-
dkbutcher, . . . the first thing you want to do to "learn" the belt craft, . . . is go to Tandy and buy a belt blank. You obviously bought a "cheap" piece of leather, . . . and as mlapaglia said, . . . probably some neck or butt and some belly, . . . maybe was cut around the cow instead of the length. Start out with their blank belt straps, . . . punch your own holes, . . . don't use snaps (it's a bad habit to break), . . . put em together with Chicago screws, . . . buy good buckles, . . . measure it so the middle hole to the outside of the belt buckle is the dimension of your waist or your customer's waist. Also, . . . punch 7 holes for adjustment instead of 5 (like at Walmart), . . . Very few belts need neetsfoot oil to start with, . . . dye it and use one of the Tandy finishes, . . . I personally prefer Resolene, diluted to a 50/50 mix with water. Ask questions, . . . challenge yourself, . . . practice, . . . have fun. May God bless, Dwight
-
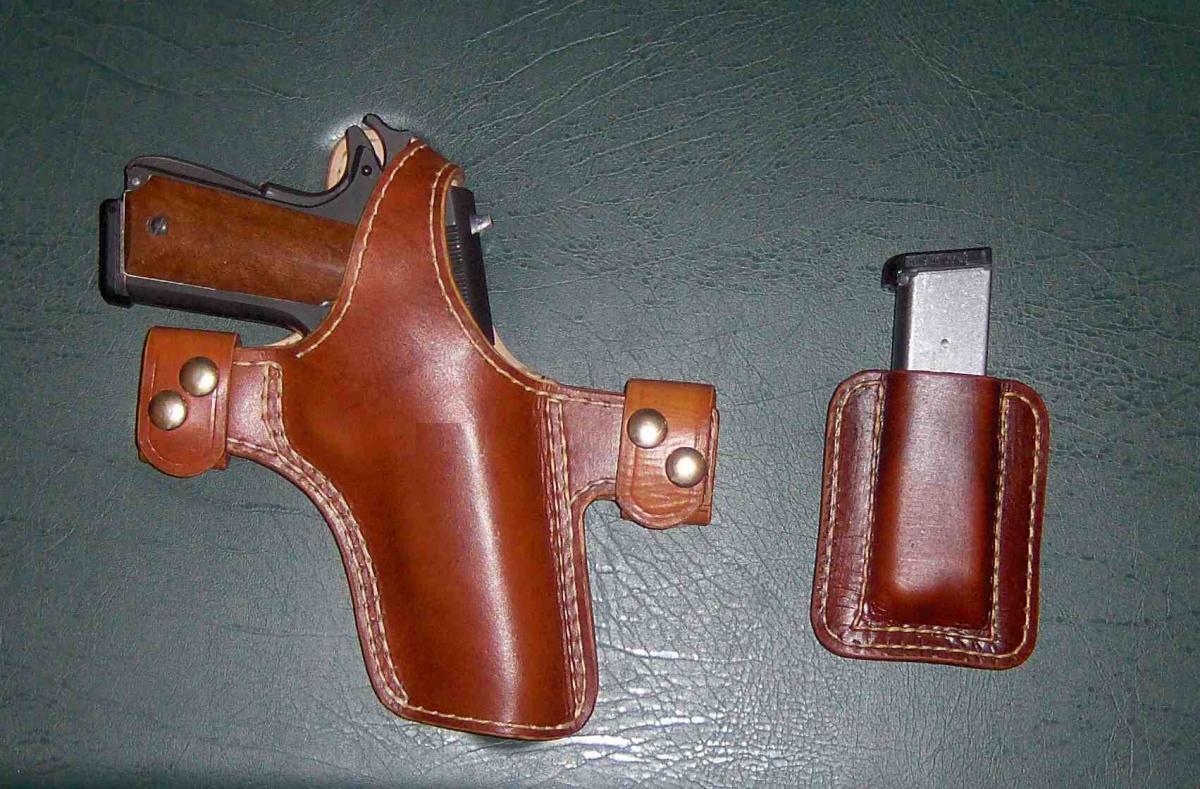
That is some neat gun leather there, camano ridge, . . . I'm always interested to see what other people do/did with their gunleather ideas. Mine are far more on the "plain Jane" scale, . . . Don't think I'd want to tangle with the wearer of the center rig Handstitched, . . . you didn't say whether your client gave you 2 3/4 or 3 inch shells, . . . might want to put a measuring stick on them. Also, . . . from personal experience, . . . when you make that shotgun rig, . . . go with 2 inch buckles and belt tongues. A waist full of shotgun shells is heavy, awkward, and unruly. The bigger buckle will give you a larger belt tongue to put through it. You may also want to use a two layer, stitched tongue, . . . they hold up longer, better, and are also more stable. I use them on all my big gun rigs, . . . have seen some where they used single layer, . . . the leather stretched, bent, got hard to use. May God bless, Dwight
-
Hadn't shared anything for a while, . . . These are heading for TX come tomorrow morning. Basic boonie gear on the 4 wheeler. May God bless, Dwight
-
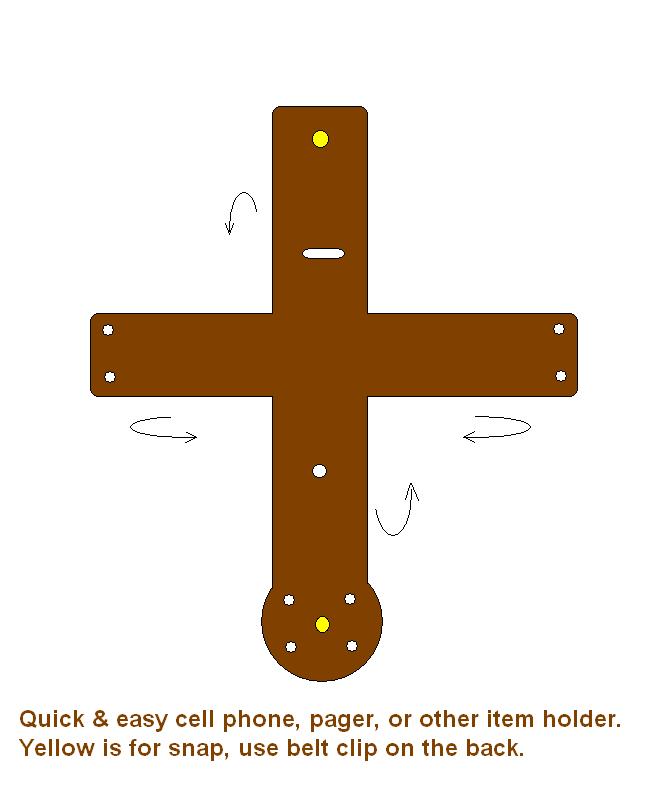
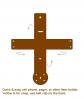
You can make a very quick and easy cell phone, ipod, pager, etc. case with this little diagram. It's held to the belt or waistband by a metal clip, . . . two side pieces are sewn or riveted to the round piece. The top strap holds it in the case, . . . with a snap. It's a "snap" to make. May God bless, Dwight
-
Handstitched, . . . thanks for the exercise, . . . guy needs a mental challenge early in the morning. On things like this, . . . somewhere along the line you have to make some kind of assumptions and hope they turn out correct. I took a set of calipers to your lone cartridge, . . . assuming it to be a .45 Long Colt (bottom base diameter is .505, cartridge itself is .470 and went from there. If my calculator and brain worked together like they should: The belt is 2 inches wide, . . . the buckle is an 1 1/4, . . . the "edge of one buckle to edge of the other" in the front picture is about 7 1/2 inches, . . . and the front piece is just short of 3 inches tall. Checking it against the other pieces we can see, . . . that should work out good, as it is a lined belt, . . . and seems to be made of 7/8 oz material. Personally, I've never seen one like this. Thanks for sharing. May God bless, Dwight
-

How Long Do You All Let Your Holsters Dry?
Dwight replied to hestes's topic in Gun Holsters, Rifle Slings and Knife Sheathes
When it comes to getting in a hurry, . . . trying to do multiple things, . . . katsass tells us never to try holding a cat and an operating dust buster at the same time, . . . let me also add never to try to "hurry" the project by putting a wet holster in a microwave oven. Ain't tried the cat thing, . . . but wayyyyyyyyyy back in my plebe days at leather U, . . . I did try the microwave, . . . nahhhhhh wasn't a good idea. May God bless, Dwight -
Need Help With A Project Please - Leather Cuff
Dwight replied to shagsj's topic in How Do I Do That?
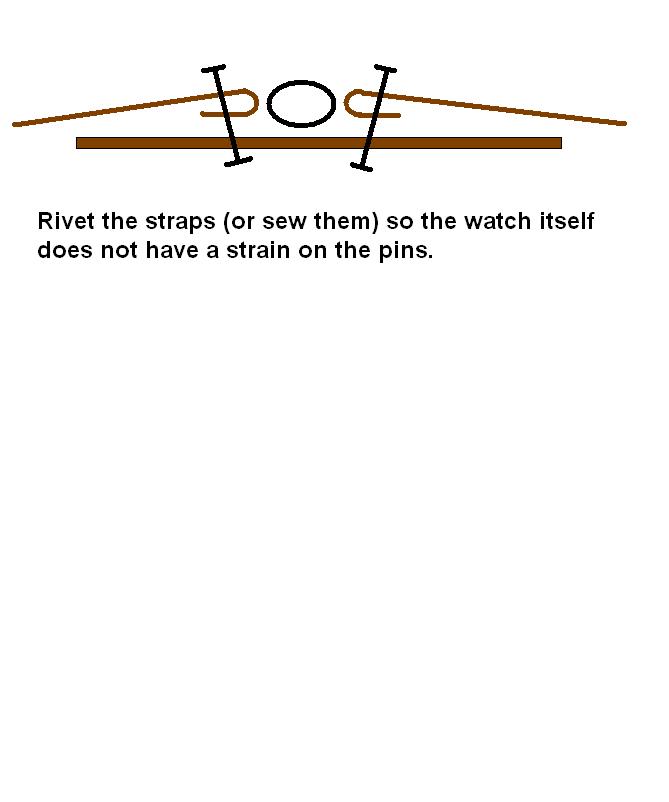
If you are using this just for a cuff, . . . punch the holes in the strap, . . . put it on your wrist, . . . mark the holes in the cuff through the strap, . . . set your rivets there, . . . and you should have no problem. If you are going to use this for a watch cuff, . . . your friend will probably be back in a couple of days with the pins broken that hold the strap to the watch. Those pins will almost never work this way. The pins for a watch cuff need their own loops. See the little diagram below for how to attatch straps for a watch cuff. May God bless, Dwight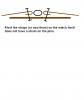
-
If you go down to the holster forum, . . . the third one down on the pinned list is an excellent pattern for an ankle holster. I have used it to make one for a friend, and it is a very good pattern / idea. As far as material is concerned, . . . Tandy Leather Shop will have all you need. May God bless, Dwight
-
Welcome, . . . or should we say welcome back? This is a fun site, . . . lots of good people, . . . most are willing to share. May God bless, Dwight
-
In practice, . . . it is a hand stitch. Go down through the front, . . . come back under the previous stitch, . . . back up through the hole you came down from. You do not want to run out of thread with that type of stitch. Figure on measuring the full length of stitching you have to do, . . . cut a piece of string about 5 times that length. Oh, . . . and good luck. Personally, . . . I'd machine stitch it, . . . or his price would be significantly more. There are machines that produce a very similar stitch on bags of feed used for horses, cattle, etc. May God bless, Dwight
-
What Size Thread Do You Use For Hand Stitching?
Dwight replied to leathervan's topic in How Do I Do That?
Admittedly, . . . I do very little hand sewing, . . . but when I do, . . . I take my 346 thread off my machine and use it. You can get it from a Tandy store, . . . it's really strong, . . . extremely versatile, . . . is coated with some kind of parrafin product which will keep the stitches tight. I use it for wallets, holsters, gun cases, belts, dog collars, . . . the whole 9 yards. May God bless, Dwight -
You will have to either make the band bigger or the leather thinner. Lay a piece of carpenter's twine inside the band before you sew, . . . and be careful not to sew the twine. Also, . . . make the band several inches longer than the finished product, . . . and taper the leather down on one end to almost a point. Punch a hole in the tapered end, . . . tie the carpenter's twine to the hole, . . . and gently but firmly pull it back through. Oh, . . . and good luck, . . . it's easier said than done, . . . but it can be done. May God bless, Dwight
-
Actually, . . . you don't. I have contact cemented holsters together in the past, . . . wet formed them, . . . let them dry, . . . dip dyed the rascals (touch up the forming and details while the dye is wet), . . . let it dry again, . . . sew it with that pretty "clean" white thread. I use only Weldwood contact cement, . . . it has never let me down yet. May God bless, Dwight
-
There is a product, . . . called Teslin, . . . I believe it was originated by PPG. It thicker versions, it resembles leather, . . . and can be dyed any color you want. You CANNOT tear it with your bare hands (as a joke, some guys get business cards made fromit, then dare you to tear them up). Anyway, . . . you could cut it with scissors, . . . sew it, . . . wash it, . . . the whole deal, . . . and a lot of folks would not know the difference. May God bless, Dwgiht
-
Black Turned White
Dwight replied to rundogdave's topic in Dyes, Antiques, Stains, Glues, Waxes, Finishes and Conditioners.
I don't know, . . . but I'm posting on this thread so I can get the answer too. I just invested in some of this product, . . . may have to re-consider it. May God bless, Dwight -
Looking forward to seeing the finished product. May God bless, Dwight
-
How Hard Would It Be To Make This
Dwight replied to Greenleaf's topic in Archery Quivers and Bow Cases
If you make a wooden form the shape of the inside of the quiver, . . . vegetable tanned leather can be wetted, stretched, and formed to the shape of that form. Vegetable tanned leather can be shaped into some unbelievable shapes, . . . decorated, . . . and used for all sorts of things: bags, boxes, purses, holders, etc. Actually making the leather part of the quiver is probably one of the easier parts of replicating that rig. May God bless, Dwight -
In picture 9130379, the one in the upper right hand corner, a billfold with flowers (top row, 2nd picture) Bottom row, right hand picture, the belt / key case. I would be interested in those two, . . . but not in the rest if you decide to break up the group. May God bless, Dwight
-
Using Permanent Markers To Color Tread Prior To Hand Stitching?
Dwight replied to Roger J's topic in How Do I Do That?
Electrathon is correct, . . . you will have color issues later on if there is any wear or flexing of the stitches. Belts for example, . . . will lose some of theirs, . . . but most holsters don't lose a lot of it. It depends on what you are using it for. May God bless, Dwight -
Ahh, . . . yes, . . . welcome back kind sir. Doctors can be good, . . . really good, . . . or bad, . . . or really bad. I've had all four, . . . and like you related to the old ticker. Don't take no for an answer from them, . . . I did and it could have turned out really bad. Anyway, though, . . . welcome back, . . . keep grumpin and hand stitchin, . . . May God bless, Dwight
-
I Want To Make An Electrician's Tool Bag
Dwight replied to Slow Learner's topic in How Do I Do That?
Having worked as an electrician for almost 50 years, . . . I can say with some experience that you need to get your friend involved. He will be the key to getting the right one done correctly. The reason I say that is that my tools, . . . another electrician's tools, . . . and your friend's tools will not be the same, . . . because of the type of electrical work each does. I was a maintenance electrician for the most part, . . . and carried upward of 20 pounds on my right hip in my prime days. That included at least 4 screwdrivers, lineman pliers, dikes, BX stripper, needle nose, wire stripper, screw starters (2), open / box end wrenches (1/4 through 5/8), roll of 3M black tape, roll of rubber tape, hammer, spike, wiggy, flashlight, and some few things I cannot think of right now. Generally, . . . the pouches I found at places like Walmart, Graingers, ABC Electric, were all designed by some jaybird accountant who worked in a leather company, . . . and was trying to sqeeze every bit of profit out of each pouch. Enclosed is a little sketch of my favorite pouch I ever had. Bought it at an air conditioning part supplier in about 1970 (?) and if I remember correctly, . . . paid $18 for it. That was expensive then, . . . as I was making just over $3 an hour, . . . about $2.40 take home pay. Anyway, . . . good luck, . . . have fun. May God bless, Dwight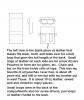
-
Your period perfect holster is found on page 31 of a Tandy Leather book about making holsters, . . . book # 40. The pattern is on page 31. Keep in mind that period perfect for 1912 would have been a revolver, . . . and it would have been carried with the muzzle pointing down. The Jackass rig carries the weapon with the muzzle pointing directly behind the carrier, . . . and is not really a "novice friendly" design. That design didn't make it's debut until 1970 or somewhere thereabouts. In fact, . . . shoulder holsters in general are not novice friendly. Getting one done and done right takes experience, but this particular pattern will be a real good one to learn on. Let me also suggest you use some of the heavy duty naugahyde from some one like JoAnn fabric (about 18 bucks a yard, . . . 45 inches wide, . . . 1/2 yard will give you plenty to play with) as it will simulate what you need, . . . you can make minor changes to match your model, . . . and you won't be butchering up a bunch of leather at $6 a sq foot. May God bless, Dwight
-
How Long Do You All Let Your Holsters Dry?
Dwight replied to hestes's topic in Gun Holsters, Rifle Slings and Knife Sheathes
Looks to me like you are doing it right. That is more or less my process, . . . 24 hours. You also mention an oven/dry box, . . . and there was a thread on here a few months back, . . . I glanced at it, . . . but didn't get involved because I don't use anything but a fan and the sun (wood stove in the winter). One of the things I hope you don't find out the hard way, . . . but dyeing a holster while there is still excess moisture is a recipe for spotty, . . . blanched, . . . ugly junk that goes into the "I should have known better" bin and the profit takes a serious hit. Same for the oil, has been my experience. May God bless, Dwight -
That is very similar to a Galco Jackass rig, . . . you can google the two words with shoulder holster, . . . should get you some pretty good pics. Most important thing needed, . . . what kind of weapon? And will this be a prop type holster for a costume, . . . or the real deal where someone's life might depend on it being done right??? All of this makes all the difference in the world for the pattern. May God bless, Dwight
-
I have to admit to having never seen that problem with my Tippmann Boss. But, . . . there is help for you. Get on line, go to the Tippmann website, get their phone number. When you get them on the line, explain to them you have a question for Ben. If anyone on the face of the earth can walk you through it, . . . he should be the guy. But, . . . first let me tell you how I backstitch with no problems: 1. First I make the stitch I am going to backstitch over, . . . and completely raise the needle up out of the leather to the top of the stroke. 2. Gently squeeze the handle, releasing the foot just enough to be able to pull my work back to me the length of the stitch. 3. When it is approximately in position, . . . ease the needle down into the stitch hole. 4. As the needle begins going through, . . . release the handle, . . . allowing the foot to go down flat. 5. Continue with the stroke completing the "backstitch". 6. I then will backstitch two more holes, . . . giving a total of 3 backstitched holes to prevent the thread from coming undone. Again, this is my proceedure and I do not have any problems with it. May God bless, Dwight