Dwight
-
Posts
5,235 -
Joined
-
Last visited
Content Type
Profiles
Forums
Events
Blogs
Gallery
Everything posted by Dwight
-

A Couple Of Recent Builds
Dwight replied to Ran's topic in Gun Holsters, Rifle Slings and Knife Sheathes
As always, . . . excellent work, . . . excellent execution. But from one who has "visited" your lovely state many times, . . . that weather you have could make someone truly want to develop an indoor hobby. Thanks for posting, . . . always a joy to see them. May God bless, Dwight -
Widget, . . . the thinner you want to use is acetone. There may be other things that work, . . . but I can for sure tell you this one does. I keep a can around for that last two or three ounces in the bottom of the can that always tries to thicken up, . . . a capfull of acetone thins it out and makes it work. May God bless, Dwight
-
Your logic is exactly why I switched over to vacuum forming. I'm in the process of rebuilding my leather shop, . . . when I get it all laid out, . . . I'll get some pics up of the vacuum system. Suffice to say, . . . it works really well. May God bless, Dwight
-
There is no "science" to my way of doing it, . . . but when I am putting something together with contact cement, . . . I very lightly lay them together at first. I then look real hard, . . . and very detail centered, . . . to be sure it is in the right place. I have had excellent results taking the pieces apart this way if I inadvertently didn't get it right. I then usually have some kind of rolling device, . . . rolling pin, . . . wallpaper seam roller, . . . palms of my hands, . . . that will smooth the two together. Like already said, though, . . . once smooshed together, . . . it's done. One caveat, . . . when gluing flesh side to hair side, . . . take a small brass or steel wire brush and scuff up the part on the hair side, . . . makes the bond ever so much better. Without the scuffing, . . . it can come apart. May God bless, Dwight
-
I seriously doubt there is anything on the open market that is better than regular Weldwood. If you are having a problem with it, . . . quite frankly the problem probably is you, . . . not the cement. I've used it since the late 60's, . . . or thereabouts, . . . and like Jackd, . . . I come from a woodworking background, . . . learned to use it doing kitchen cabinet tops, . . . the only other thing I will use is regular carpenter's glue, . . . but it takes so long to dry, . . . and does not bond as strongly. May God bless, Dwight
-
bydeniss, . . . I somehow got farther along in your picture album and saw some of your other work. You do really beautiful work, . . . keep it up, . . . a pleasure just to see that level of accomplishment. May God bless, Dwight
-
I follow Camano Ridge's idea, . . . but with a twist. I hate, detest, dislike, abhor, and in general don't want to do ANY hand stitching at all. Hands are for hamburgers, . . . machines are for stitching. BUT, . . . when I have to, . . . I pull off at least 4 feet too much thread just for this purpose, . . . if the thread is to be white. That way, . . . the first 24 inches of the thread on each needle, . . . picks up the wayward dye, oil, sweat, or whatever other contaminant there is to make my stitches "un-white". May God bless, Dwight
-
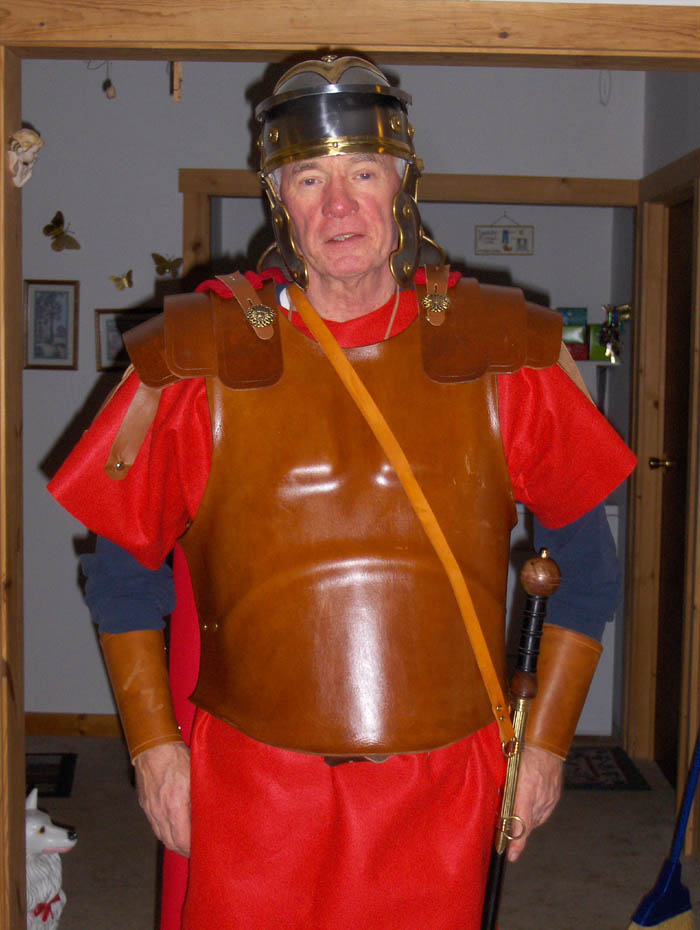
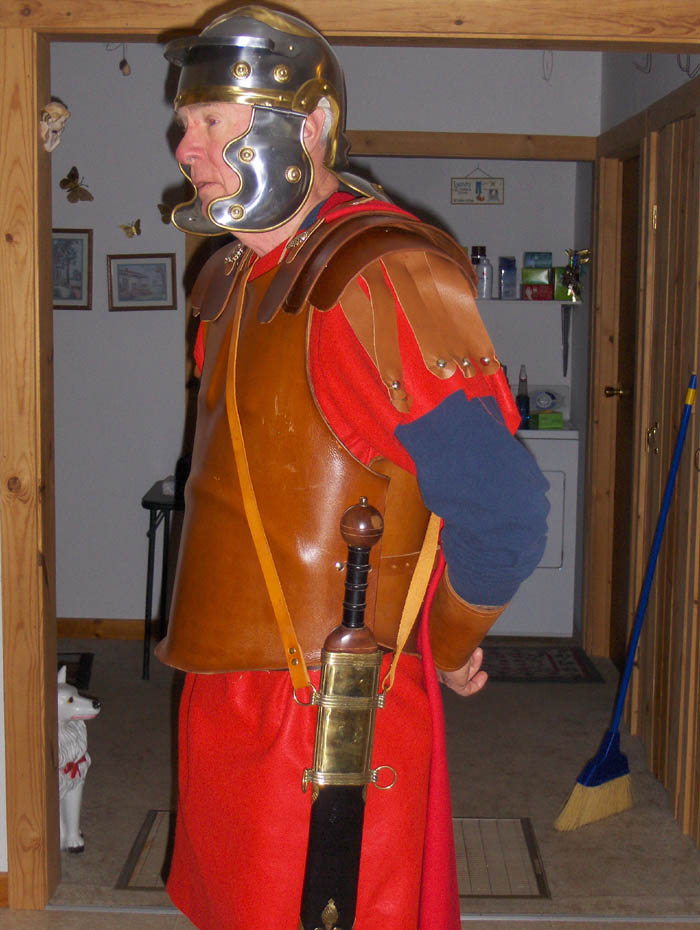
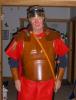
I used vegetable tanned leather for my armor, . . . made to look like the statue of Agustus Caesar (I believe it is in Rome???). It is about 4mm thick, . . . and I paid about seven dollars US per square foot for it. The wonderful thing about this type of leather, . . . it is easily worked, . . . cut, . . . sewn, . . . all that working stuff, . . . until you are ready to finish it. Then you dunk the whole thing in very warm water (around 130 deg F), . . . then mold it to the shape you want it, . . . let it dry, . . . and it will dry fairly hard. I made a mold of my upper body, . . . and did the above process, . . . and now I have my alter ego: Centurion Salvatorus Antonio, Centurion of Capernaum, of the Sixth Legion. May God bless, Dwight

-
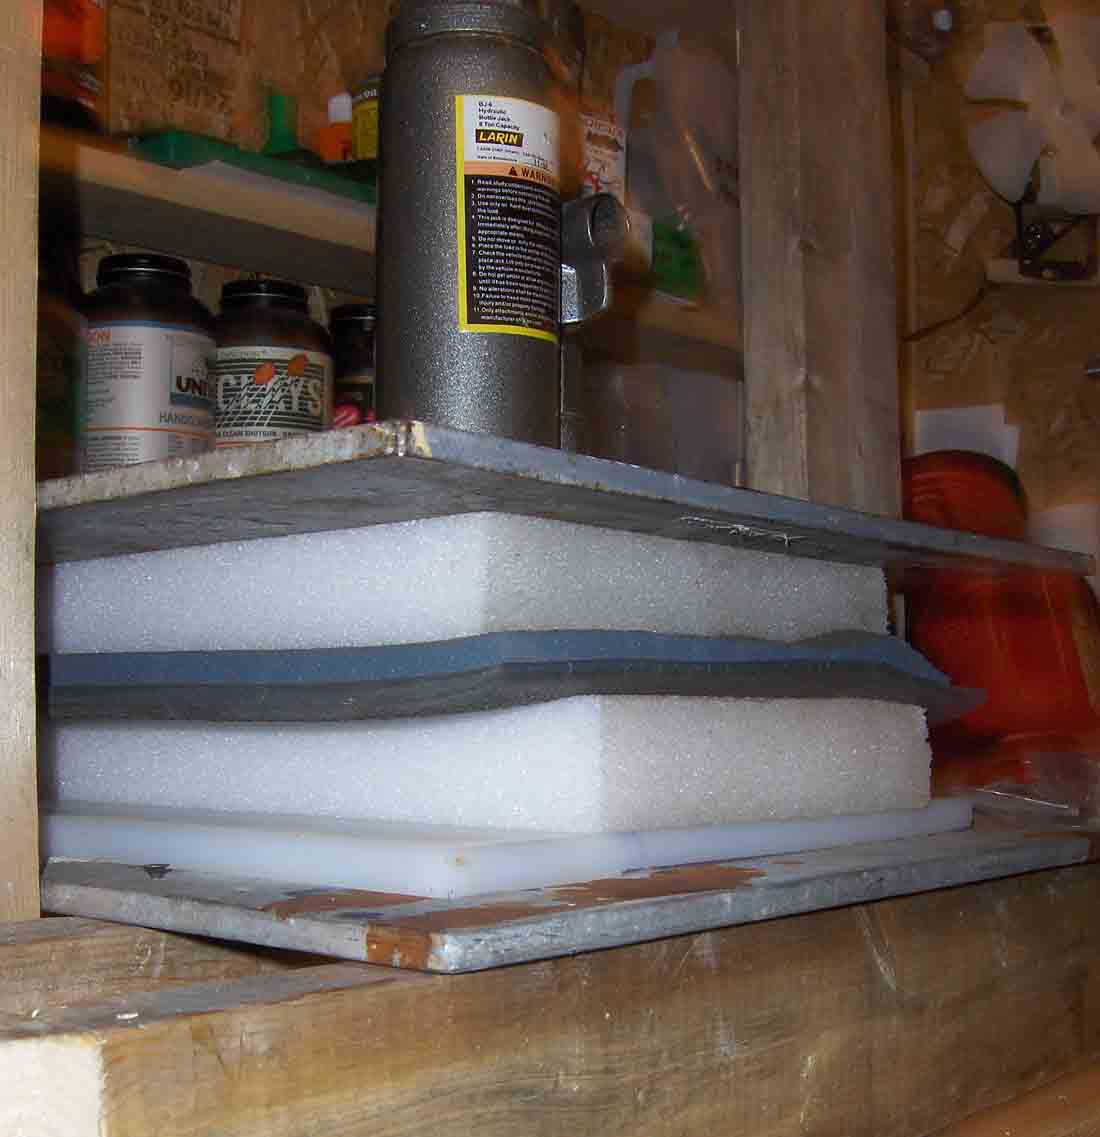
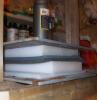
I have since switched to vacuum forming my holsters, . . . but for a while, . . . I did them on a press. This dude did the 8 ton jack magic, . . . never skipped a beat, . . . even though Rube Goldberg looks all dressed up compared to this. May God bless, Dwight

-
DJole, . . . thank you ! As a pastor, I hear all kinds of comments about the manger scene: for it, against it, not correct, too correct, yadda, yadda, yadda. The Lord Jesus is the same to every one, . . . but each person perceives Him differently. I really enjoyed your "rendition". May God bless, Dwight
-
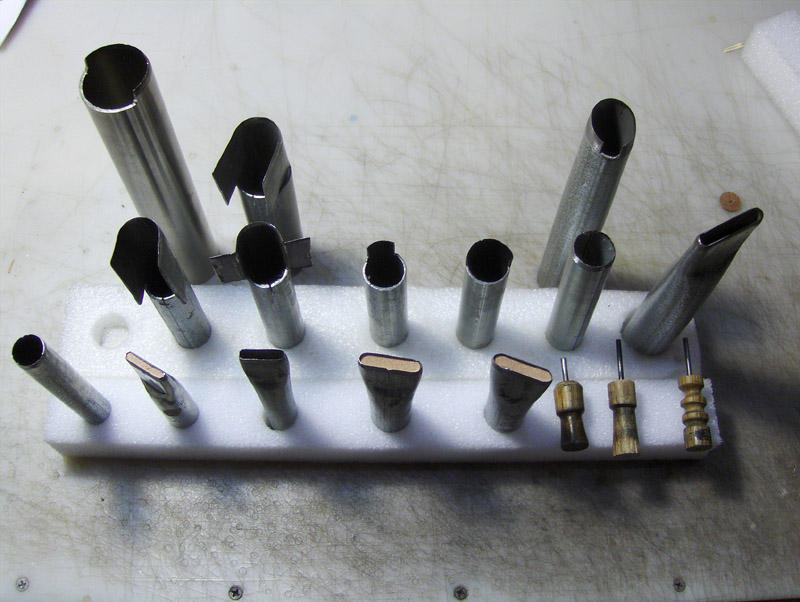
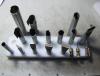
I don't mind sharing, . . . cause I'm basically a cheap old coot, . . . if I can make it, . . . I do it. Here's some of my "creations". All pretty much out of EMT (electrical conduit). Back Row, Left to right: 1 1/4 strap end rounder, 1 inch strap end rounder, specialty punch for making a strap end to hold the hammer down on a single action. Middle row: 3/4 inch strap end punch, special belt ending punch, corner rounder, 3/4 inch strap end punch, 3/4 inch round punch, 1 1/4 bag punch Front row: 1/2 inch round punch, 3/4 bag punch, 5/8 bag punch, couple of old dull bag punches, . . . dremel tools made from dowels with drill bits used as metal shaft. I probably have a total $$ investment of $5 in all you see there. May God bless, Dwight
-
Questions About An Elephant Project
Dwight replied to Eagle Crest's topic in Exotics, Reptiles, Furs and others
Every time I see an article on elephant hide, . . . I remember my elephant hide wallet I bought in Vietnam in '66 or '67. Brought it home, . . . used it till I got tired of it, . . . bought a leather one, . . . wore it out, . . . got out the elephant and used it again till I got tired of it, . . . bought another leather one, . . . wore it out, . . . This went on for almost 25 years, . . . and the elephant billfold is still somewhere in the upstairs, . . . still useable I would suspect. Eagle Crest, . . . I hope your customer has as good fortune as I had. I probably wouldn't use it now as it didn't have slots for credit cards, licenses, etc. . . . but I jusst may go see. May God bless, Dwight -
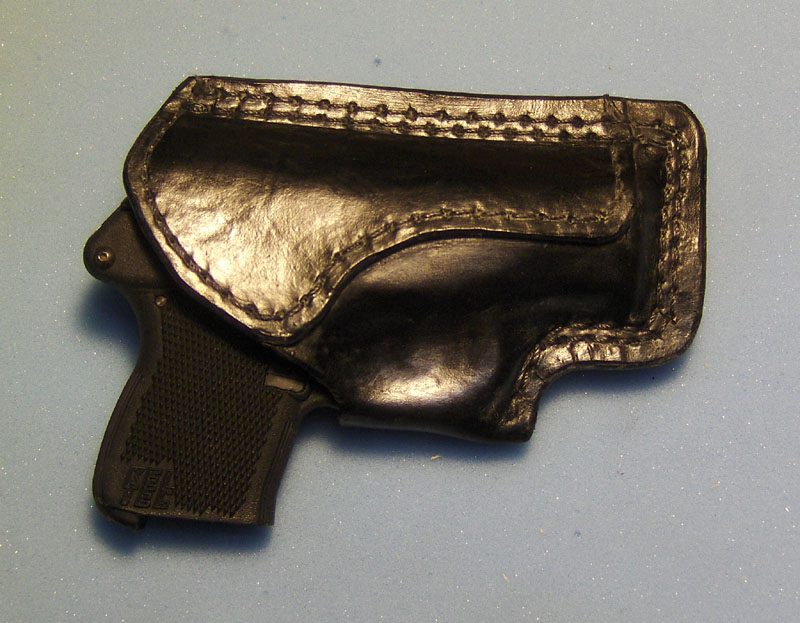
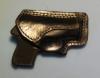
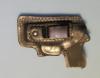
I've made several of these, . . . many smaller handguns lend themselves very well to this design. This is for a friend, . . . it's a Keltec .380. I enjoy knocking these out. May God bless, Dwight
-
You too, . . . have fun with the sheath. Do you have a machine, . . . awl, . . . plus the stuff to do this? May God bless, Dwight
-
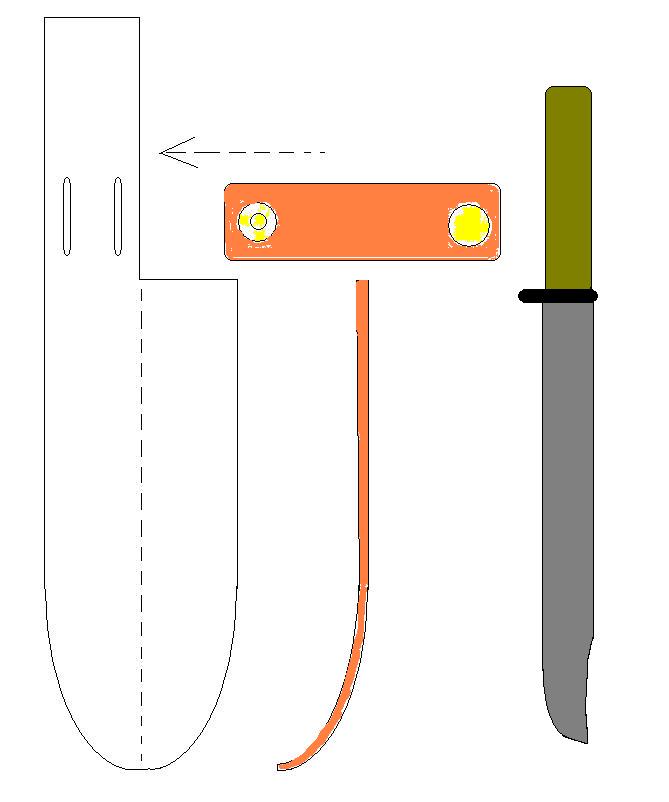
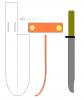
Mike, . . . This is just a basic sheath. Use 4/5 oz vegetable tanned leather, . . . cut it out kind of in the proportions you see in the drawing: knife vs leather. The top tang folds over at dotted arrow line, . . . rivets below the two slots and forms a belt loop. The piece with two yellow dots is the keeper, with a snap, holds the knife in place. The long kinda "J" curved piece goes along the sharp edge of the knife, . . . it's sewn in between the back and the front, . . . keeps you from cutting the sewing threads every time you pull out the kife. Cut it out, . . . fold over and rivet the belt loop, . . . fold over and sew the edge, . . . glue all parts together before you sew them, . . . I use weldwood contact cement. Take your time, . . . knife sheaths are fun to make. May God bless, Dwight
-
Keeping A Wild Bunch Holster In Place
Dwight replied to harley45's topic in Gun Holsters, Rifle Slings and Knife Sheathes
A "true to form" Wild Bunch rig will not be a buscadero, hanging below the belt, . . . but will rather be a holster that allows the belt to go through a large loop in it. If you form your loop very closely to the holster, . . . and not make it any wider than enough to get in on the belt, . . . you should not have a lot of holster movement once it is strapped on. But if you want to make it unmoveable, . . . a Chicago screw through the back portion of the loop and through the belt, . . . it really ain't gonna move. May God bless, Dwight -
I have done a few, . . . and personally, . . . I don't like it. The suede tends to be sticky when you try to put the belt through the loops, . . . grabby, . . . I do not have as good success on edging a veggie tan/suede edge as I do a veggie tan/veggie tan edge of two pieces of leather. Others will chime in, I'm sure with different ideas, . . . these are just my thoughts. I vastly prefer veggie tan liners. May God bless, Dwight
-
Made me tired just wandering through it. Think I'll take a nap. Good job, by the way. May God bless, Dwight
-
Just as long as you don't try to tag www.dwightsgunleather.com as the financial sponsor. May God bless, Dwight
-
A Couple Of Recent Commissions
Dwight replied to lightningad's topic in Purses, Wallets, Belts and Miscellaneous Pocket Items
My nemesis: "and involved a few unpicking sessions to get things right before stitching up again! " There are not words to describe how I hate that. I usually set and fume long enough that I could have been done with it, . . . before I get started. But, you did good. They should be happy with those. Merry Christmas and a Happy New Year to you too. May God bless, Dwight -
I use Resolene on just about everything I do, . . . have never had a customer complain about dye disappearing. I generally thin my dye somewhat (one is a 50/50 dye/thinner ) and for BLACK, blacks, . . . I use USMC black. You WILL have to rub it hard and long to get rid of the extra pigment, . . . but it is the best black dye I have ever used. The water base dyes just do not work for me, . . . I've had some biker friends over the years, . . . and most of them were of the bodily size that would wear the finish off a marble slab, . . . and then some would complain about it. I simply refuse to do work for those guys. Another angle you may look at: buy only pre-dyed leather. I have some drum dyed black leather I bought a couple years ago, . . . it is black, through and through. I've never cut a piece of it and found any of it where the dye did not fully penetrate. It's harder to work, . . . and I did not have any of it rub off on anything. May God bless, Dwight
-
They will for leatherwork purposes pull pretty much the same. This is a slightly technical answer: The maximum "inches of vacuum" would be roughly equal to the barometric pressure outside, around 29.92 inches for a typical day (1 atmosphere here on Earth). This would be, for example, how far the mercury would rise if you pull air out of the top of a tube whose lower end is in a pool of mercury. If you are in HVAC work, . . . the bigger one will be quicker to evacuate a larger system, . . . saving man hours, . . . yadda, yadda, yadda. For us, . . . sucking the air out of a bag and collapsing it on some ole dead cow hide, . . . either will do the job adequately, . . . the bigger one would probably work faster if you were making shoulder holsters for Ma Duces or Barret .50 cals. May God bless, Dwight
-
I hope you don't get a compressor, . . . but rather a vacuum pump. I bought their cheaper one (I'm kinda like that, y'know) and have been seriously happy with it. It's done all I have asked of it so far, . . . and I think it was $99 when I bought it a couple years back. Just be sure to go to a local auto parts store and get a quart of compressor oil (or an AC/Refrig supply store). A quart will last a long time, . . . but if you run her dry, . . . you may have to buy her sister to get back in business, . . . and it only takes once. May God bless, Dwight
-
How Do I Measure The Length Of The Thread When Stitching?
Dwight replied to leathervan's topic in How Do I Do That?
AND, . . . if you happen to get very close, most of the time I find that the last few stitches will be grubby, dirty, frayed, or otherwise "not good looking" and the reason is those first few inches get all the hard traffic and wear making the stitches. As he said, . . . thread is cheap, . . . compared to even the time it takes to rip out a too short piece and re-sew the right size. May God bless, Dwight -
Dirtclod's answer (cork backed s/s rulers) is about 60% of the answer to your problem. These rulers (I have an 18 and a 48) are worth their weight in gold for the leather worker. The other 40% is the knife. Personally, . . . the carpenter's utility knife is my favorite for anything above 4 oz leather, . . . a 50mm rotary cutter does the 4 and below stuff very nicely, . . . especially any fringe I want to cut. Every brand new blade right out of the package first goes to my strop before it ever touches leather. Then strop it every time before you use it. Leather demands either sharp tools or blood sacrifice on your part, . . . and it is your choice. Dull blades will get you the blood sacrifice. For absolutely square pieces, . . . you need a table with a flat & square edge, . . . and a triangular "rafter" square, . . . it looks like a 6 inch by 6 inch aluminum triangle with a lip on one side, . . . lay the leather along the edge of the desk, . . . put the square on it, . . . cut the perpindicular edge, . . . voila, . . . exact squares. Final tip, . . . you cannot cut leather well when you are sitting on your duff. Stand up, . . . look straight down on what you are cutting, . . . and give it your total concentration. And again, . . . I cannot emphatically urge you too much to make sure your blades are SHARP !!! May God bless, Dwight