


RockyAussie
-
Posts
3,265 -
Joined
-
Last visited
Content Type
Profiles
Forums
Events
Blogs
Gallery
Store
Everything posted by RockyAussie
-
Is that with the logo in it? I generally get away with 250m on the main colour and have gotten away with 100metres on other colours if in the same order. We have been dealing with them for a long time I suppose. If it makes any difference I have never had any frayed edges on any product that came back for a revamp. Having done repairs for years I can't say how many wallets I've seen the fabric pull away from the edges except to say that it is nearly all of them if they are more than a year or 2 old. I would hate EVER getting anything back that I might feel ashamed I made. If you want to buy a metre or so to try out PM me your details and we will sort something out if you want.The colours I have in stock at present are black, dark brown, tan, red, pink & orange.
-
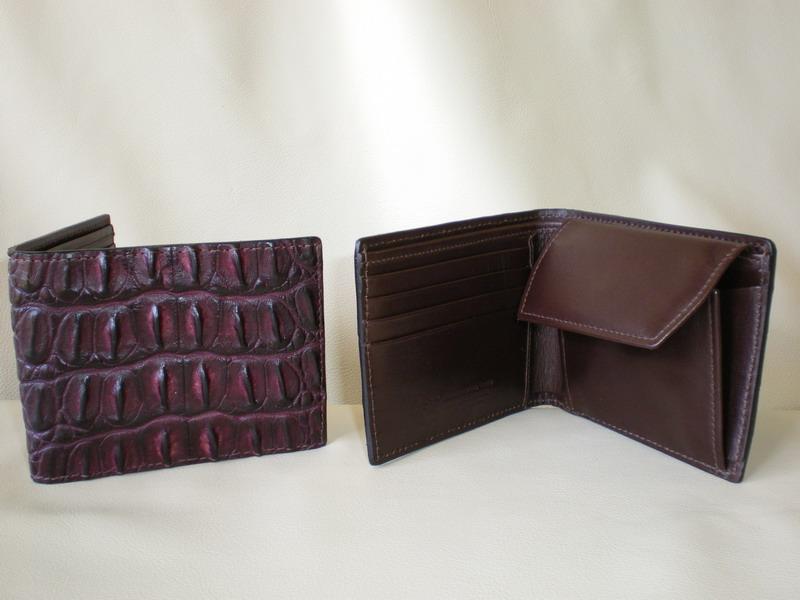
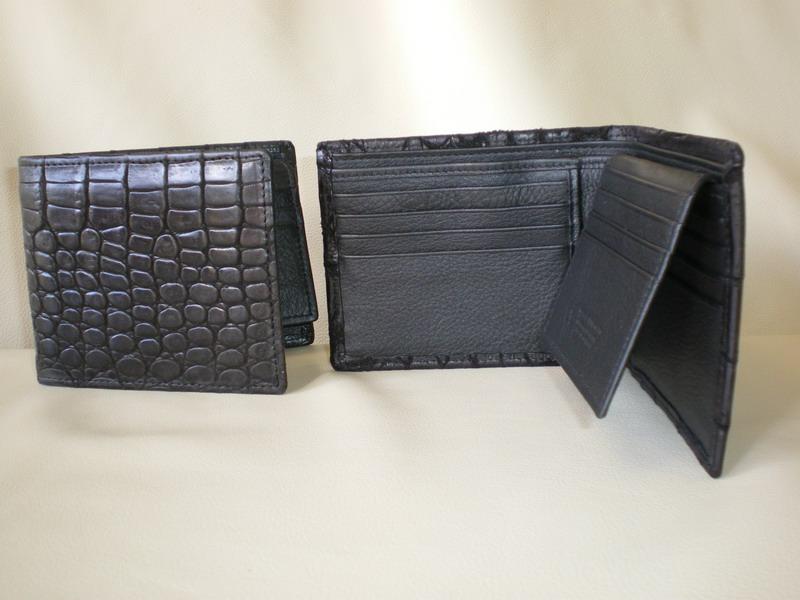
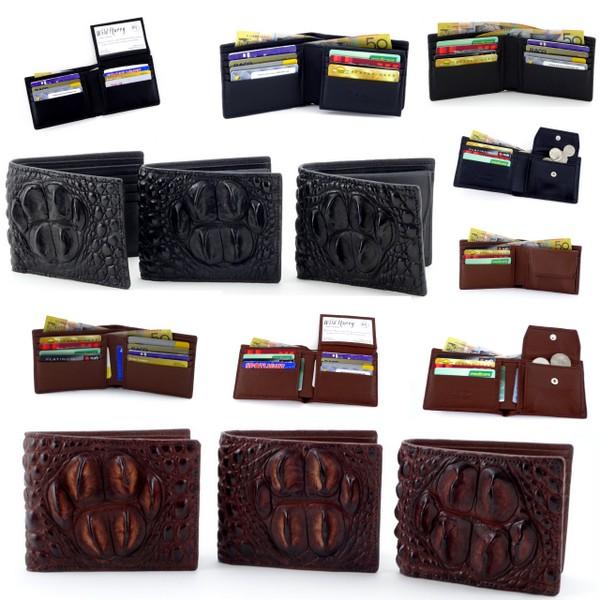
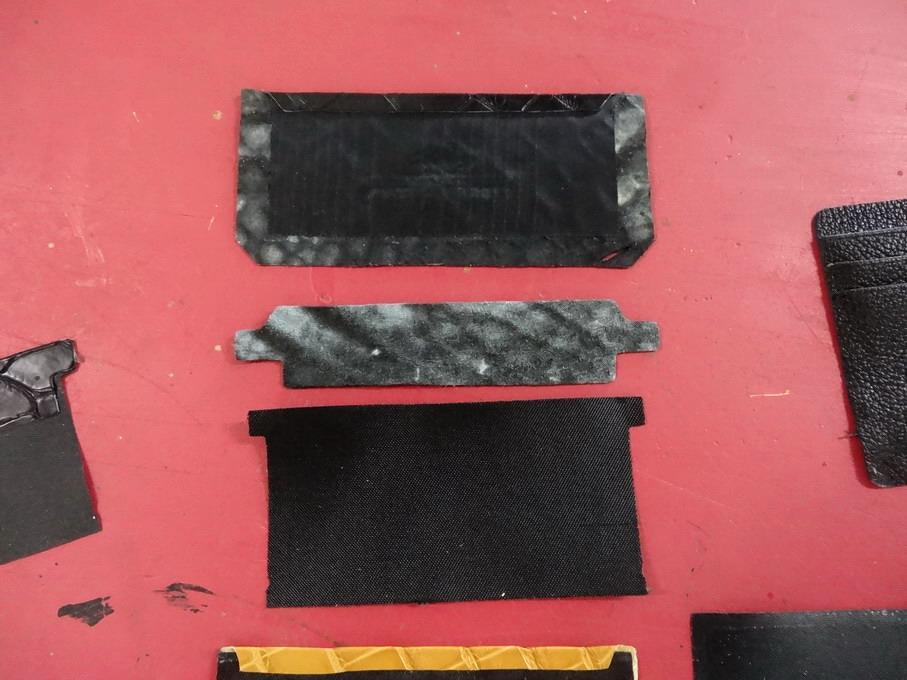
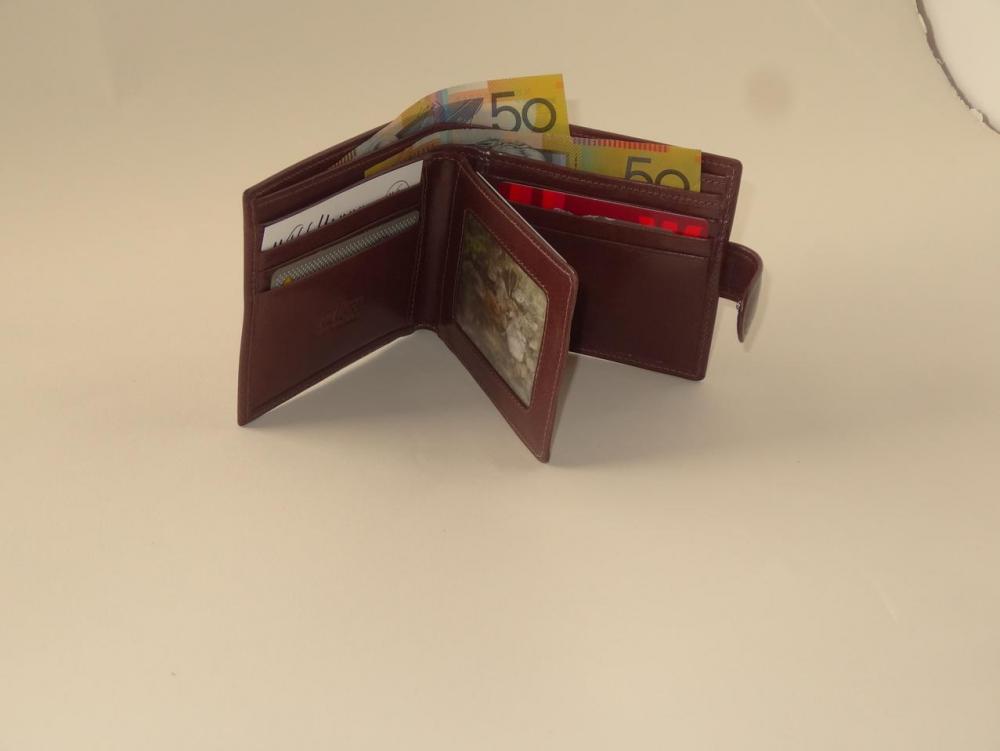
And I would say wrong as well. If I am designing a wallet I consider that the inside should not need to be trimmed shorter to fit the outside. As much as I have years of experience with cad drawing I also have learnt that some leathers are not always the right thickness perfectly and some leathers stretch way more than other leathers. The answer is best to leave room to trim the outside a little after it attaches to the inside. Putting the 2 pieces together flat will not allow it to fold together well and putting it so it is able to fold fully down does not then allow it to open fully very well. I go for a just past 90 degrees when attaching together depending on the thickness and leather stretch and trim up after it comes together. This is done whether it is a folded edge or raw edge finish. I should add that all the wallets I make are stitched fully around the outer edge. The first pic below shows a raw edge with edging applied and the second shows a folded edge. Last one is cause I reckon it looks good. Helps show how some outer skin leathers can vary in the thickness.
-
Mid last year it cost 5 Euro per metre before freight etc. The Tessuto Jacquard we only use for wallets and purses and bag pocket linings etc. For our bags we mostly use upholstery leathers for linings. The majority of the bags we make are crocodile though and the extra expense of the lining leather is warranted. Tabru does have an unbelievable range of fabrics and leathers to choose from it is just a shame that they do not have an English speaking friendly web page. The customer handling and the samples you get from them makes up for this though in my experience.
-
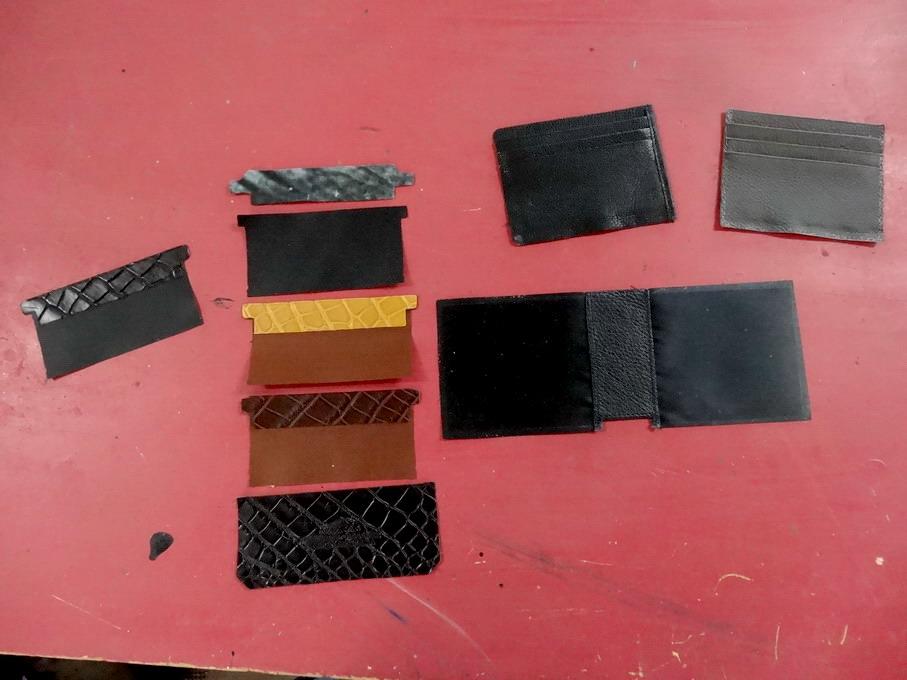
If you want world class fabric that does not fray when you cut it I get mine from Tabru in Italy. https://www.tabru.it/ Many of the larger brand names like Longchamp and Benetton use them as well. I have been using it for over 20 years now without any problems with it or them. There is a huge range but for wallet and purse linings I use Tessuto Jacquard 263122/657 and if I want plain black RAS05/8/03. I think the minimum buy is 100 metres but if you get something like I think 250 metres you can have your brand all through it like a lot of the brand names do now days. They may have a dealer in the states if you care to check. They have been happy to send me a lot of samples in the past. I have a few different colours so if you are happy to pay the postage I can send some small samples of my own. The fabric in the pics below are the Tessuto Jacquard 263122/657 as they cut on my clicker press.
-

Pfaff 335, Adler 69 type Cylinder arm caps.
RockyAussie replied to RockyAussie's topic in 3D Printers and Lasers
This one should do the job. -Adler Bobbin Cover.stl You may need to flip it over so the end is facing down onto the plate. The Adler 69 and the Pfaff 335 are much the same. -
Not sure what that stuff looks like any more. For any of you owners with these big sewing machines have a think about how you could make up a heavy leather harness strap attachment to go onto these large water extinguishers. Something that attaches onto the wall hanging thingy. They get pretty heavy when your trying to carry 2 at a time. Something that can go over the shoulder sort of thing would be nice . Still working on getting better at that yet. I really would like some way of filling the air up into the extinguishers from my car but at 90 to 100 psi I am not sure how hard that would be yet. Extra water in Gerry cans is easy though. Sorry I seemed to have somewhat hijacked the thread @dikman . If I can find a bit more time I will think of a way to start a new post on this subject.
-
That is all I was doing on Tuesday, running back and forth madly filling up 2 water fire extinguishes putting out a neighbours bush fire. At the end of the day when the owners relative showed up I was rewarded by being given another 3 water type extinguishers to keep. He was a fire fighter for 30+ years. Although around 20 acres went up we managed to stop it well short of their house.By the time the fire brigade got there one of my workers and I had most of it beat. I really have to say that the extra manoeuvring that these portable extinguishes give running through the bush should not be underestimated. Even after the fire fighters showed up I was able to get around and extinguish fires that their hoses were sitting in after they had dragged them out to their full lengths. If you live in a bush area I recommend having a few on hand and ready to go. Learn the refill procedure to minimise time lost at that stage as well. I will be buying a few more of them I think as the 100+ acres I have has 1/3 of it covered by an area that I can not clean up without notifying the government my intention to do so including having to supply GPS maps and pictures etc. BIG penalties if you do.
-
I think that if the feet lifted any higher the needle bar would bottom out on them at anything more than 20 or 22mm from memory. That could be a real disaster with a servo motor driving I think.
-
Adler 30-1 treadle long arm patcher purchase questions
RockyAussie replied to chiefjason's topic in Leather Sewing Machines
Thanks @ljk .....pure genius. Re the needle plate I am thinking it should be possible to just go with a full teflon or nylon perhaps. The grab screw could use a little lock nut and maybe an Allen head do you think? I love the concept and would really like to see it on video. If you took it a little further it should be possible to make the screw adjustable for stitch length adjustment as well. Move and lock. I think as is would be very useful to have all the same. -
Adler 30-1 treadle long arm patcher purchase questions
RockyAussie replied to chiefjason's topic in Leather Sewing Machines
I knew there was some reason I was following you. Is it possible you could share a pic of this mod? Thanks Brian -
@Carrie88 The price is not listed as far as I can see but at any rate I am not a fan of having a skiving machine without an aspirator ( a suction device that helps with the waste extraction). If you are only doing firmer veg stuff it may be alright but for the softer leathers it can be a lot of trouble. Peter Jackson at WMc Jackson is the Australian agent for Fortuna machines and may have something there - http://www.wmcjackson.com.au/www/home/ PM me if you want to phone me to discuss more.
-
Regarding the sealant put over the soot directly .....I tried several with no success. Any painting requires a good base to adhere to and soot just aint one of them. It just keeps soaking it up and up. What you could try is clean it out and use one of the antique lacquers to replace the dark area you want. Then go ahead with a sealer to finish it off.
-
Masking on leather - CerMark or TherMark?
RockyAussie replied to BulletAK's topic in All About Leather
For cutting the masking tape using a diode laser I have used the blue 3M painters tape. Here's a link showing it in use - -
The 3200 is still a fairly heavy weight machine and in my opinion I would not want to use it for anything under 5oz (2mm). The leather point needle range does not go very small is just one of the issues. Getting the thread knot to be hidden on thin leather is not possible with thin leather and thick thread. I cant say what problems the Juki 341 had that you looked at but it should of had no problem handling that stitch job. Check this machine at Solar out http://www.solar-leather.com/cowboy-cb341 There is a lot of videos out there that show this machine in action. ANYBODY with a 3200 thinks different to what I said above please say so.
-
Looks good to me and thanks for sharing.
-
3D printed strap cutting spacers
RockyAussie replied to RockyAussie's topic in 3D Printers and Lasers
That would be true as well as I keep in a small room with the door closed to keep the temp up. It helps it all connect together better I reckon. I never use any tape or hairspray or any other junk that I have to waste time cleaning up so for me the fastest way is what I do. A bigger platform would be great to get more on in the one print and Ultimaker bowden style that cuts out the need for any x + y base movement and ...and ... one day maybe -
3D printed strap cutting spacers
RockyAussie replied to RockyAussie's topic in 3D Printers and Lasers
For the PLA+ I use 65 degrees C and run the first layer a bit slower to get maximum adhesion and avoid any edge lifting. Aside from not wanting to get any rounding off of the edges when I take off the job or also don't want to upset my bed levelling by forcing it. -
3D printed strap cutting spacers
RockyAussie replied to RockyAussie's topic in 3D Printers and Lasers
Last time I checked was years ago and it was cheaper for me to make them from pipe and dress them up on my lathe. In Australia some things like this can fall into the "specialist" type thing with a Fspecialist price tag. May be different in the USA/Canada? Here you go buy a colour printer for less than the cost to fill it with ink next time. With the heated bed it can take 10 or 15 minutes to cool down enough to get the print job off of the plate so the fan speeds this up to about 1 minute. I just turn it on when the bell that lets me know its finished goes off. If I was truly a bit smarter I would set it up so that the fan switched on when the bell goes off. -
3D printed strap cutting spacers
RockyAussie replied to RockyAussie's topic in 3D Printers and Lasers
Still is I reckon but as the 38mm spacers cost $1.03c au to print including the electricity cost and the fact I can be working on something else as it does it comes into it as well. -
I can't say for sure as I have only ever used DXF and PLT - 2 dimensional drawings and images that get converted by the T2 Laser program to G code. The Z adjustment has only come into use for depth of cutting so far.
-
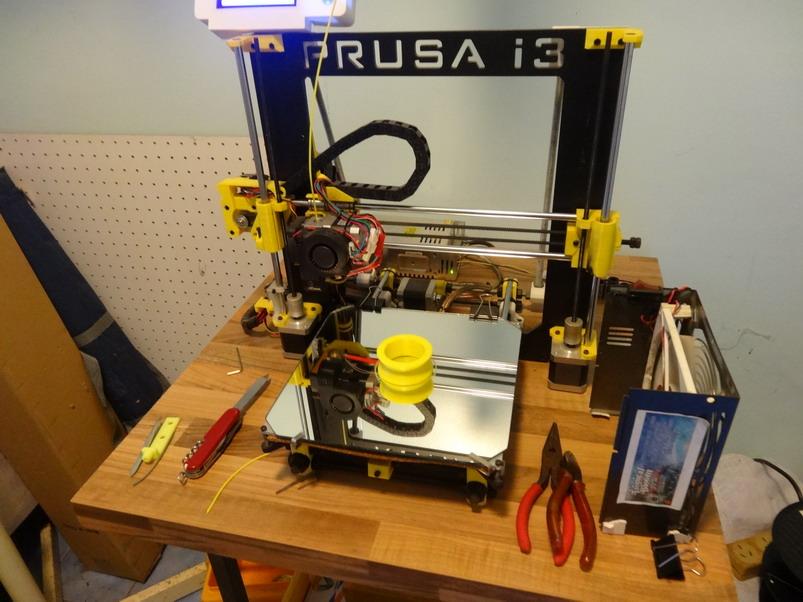
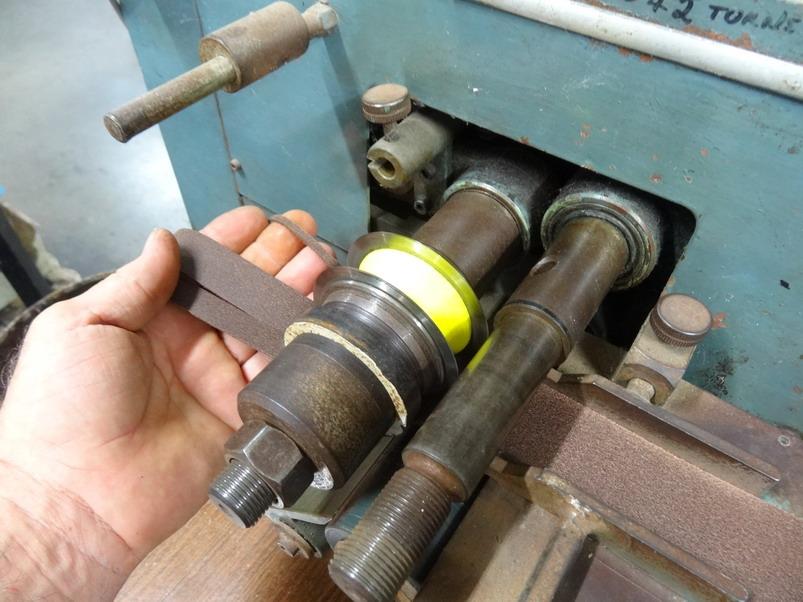
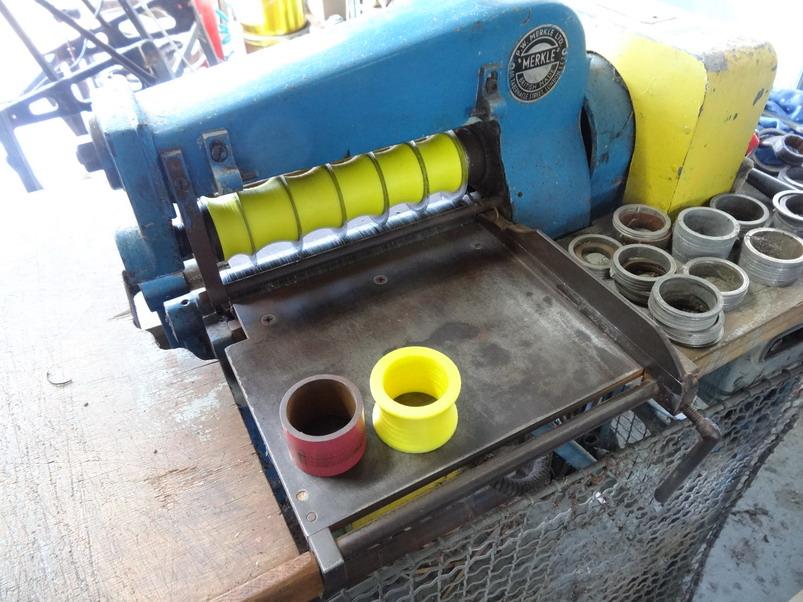
This is the latest 3D project I am working on that shows the advantage of being able to print spacers for strap cutting work to the exact size width and all the same. Recently I decided to make up a 22mm width spacer for some dress belt fillers in order to not have to muck about measuring up various width spacers every time I wanted to do it. As it worked so well I decided to do myself a heap of 38mm spacers for my strap cutter as well. Previously I have had to cut pipe to length and lathe the ends up and try and get them all the same width. The side wall thickness of the pipe was a little thinner than I would have liked and with the printed version that enabled me to give plenty of side wall thickness at the blade and still allow plenty of clearance in the middle. The pictures should tell the story better than me I think - This is the 22mm spacer as printed These 2 pics show it in use This picture shows all of the 38mm spacers in place and note the differance in the side wall thickness of the old as against the new one. I have an order to do around 1200 of the 38mm width straps to do at the moment so as soon as I get through them I will let you know if any problems develop. Merry Christmas to you all Brian

-
I believe that the 26 would be the best in this case. It can also go up to a 207 thread and 138 bobbin I believe. The smaller shaped in cylinder end will be a lot better for getting into the tight gusset areas and the shorter needle length will lead to a more consistent tidy stitch on anything under 1/4" 15oz.
-
Thank you for posting those pictures @RemingtonSteel. This can be very helpful when people run into problems like this.
-
I just found this video by @Uwe that I referred to earlier in this post - Thanks again Uwe.
-
It would be helpful I think if we could get a couple of other peoples pictures as well to help establish if there are any differences in the set up. It is one part of the machine that I think could have been set up better and as you say it seems there are no good diagrams/pictures that show much in this area. I also took some off of the length of the wedge that opens the tension discs as it opened the discs ridiculously apart and was near impossible to get even a fraction of foot lift without loosening the top thread tension. (Not good when you want to lift a little to get around a corner etc). Works good now but was just another head scratching thing I ran into. I hope I remember to show Jess and Mitchell this the next time they drop in.
