RockyAussie
-
Posts
3,265 -
Joined
-
Last visited
Content Type
Profiles
Forums
Events
Blogs
Gallery
Store
Everything posted by RockyAussie
-
Page 22 in this manual may help. https://www.manualslib.com/manual/1680001/Consew-227r-2.html?page=12#manual
-
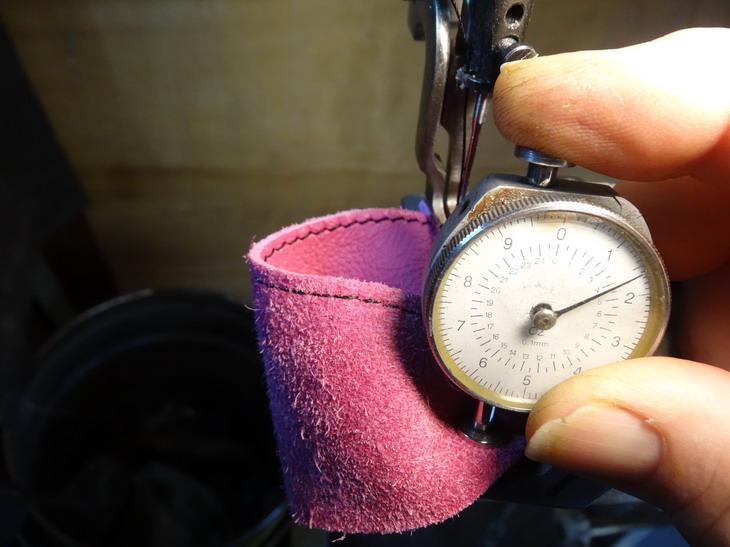
Yeah the ones we are working on should be about 1/2 that for the dog foot and needle plate set. I should have some samples and and pictures pretty soon now.
-
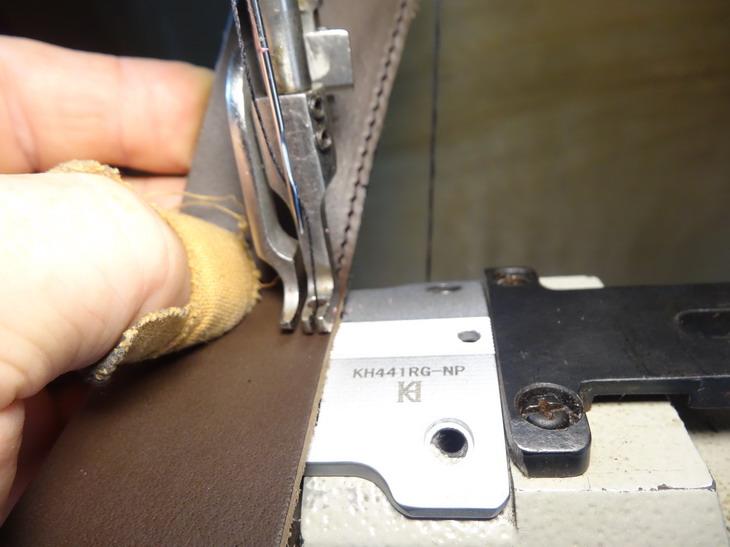
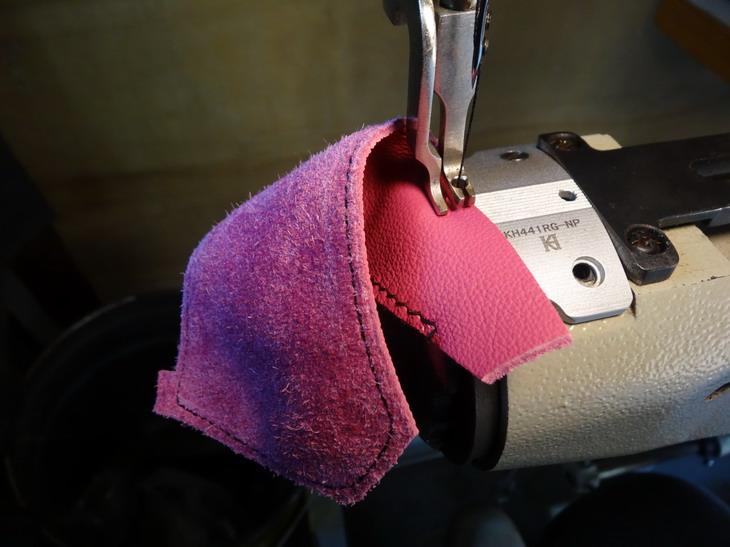
If you replace the roller and put in a bit of 3/4" angle bolted on you would have something similar to guide above. If you want to cut out the see-saw as you stitch you need to get a narrow throated needle plate and thinner feed dog to match as shown below. This makes freehand way way easier and predictable including the straighter better tension look on the underside. Soft leather also is then more real and note again I am using just a standard left foot.
-
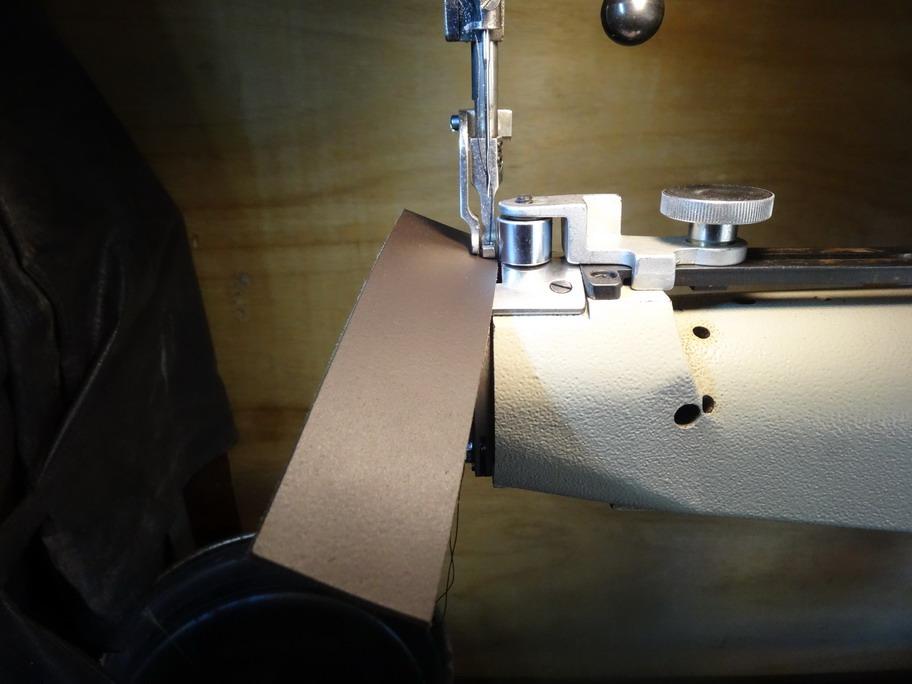
Different machine but this pic shows another flat edge guide I made that I can angle inward etc. This keeps a little inward pressure with a strap and it pretty much feeds itself through with minimal help.
-
The softness of that leather as you say makes it a little hard to keep straight. I have for soft leather edges a flat edge guide about an inch long that helps the leather edge not move in as it does on the standard roller style guides. If you decide to make one tilt the back end about 1 degree inward as this will make the long straps stay straight and almost not need to be held. Following a straight line on soft leather like this will often lead to some over stretching of the work and look wobbly when finished.The foot work combo is not the best in my opinion and I think you would be better with a left foot in use instead. This will make the job hold more stable and will not affect your visibility that much if at all. Where you have welded in the back of your needle plate means that you have reduced the possible length of your stitches and you could also easily cause damage if you mistakenly open the stitch length a little too far as you go. I would suggest the flat needle plate may be worth a try for now if you have one. You may be able to get a set of narrow dog feet and needle plate as I did in the post I mentioned above or if you want to wait for a few weeks I have a friend working on making a matching set for the Cowboy 4500 along the same line over here. I should have some to trial pretty soon and I will post the results here on LW when that is done. BTW the bag work looks promising and if your machine is set up right I would say the bag should easily be made in a day on a one off basis as long as you have all of your patterns sorted well. This could be half that time frame if you were doing 5 at a time with minimal variations. I don't see where any hand stitching would be needed except perhaps the handle and that can be designed to work for a machine as well.
-
Welcome @wizcam and may I thank you for so early going to the effort of sharing. Looks pretty good to me.
-
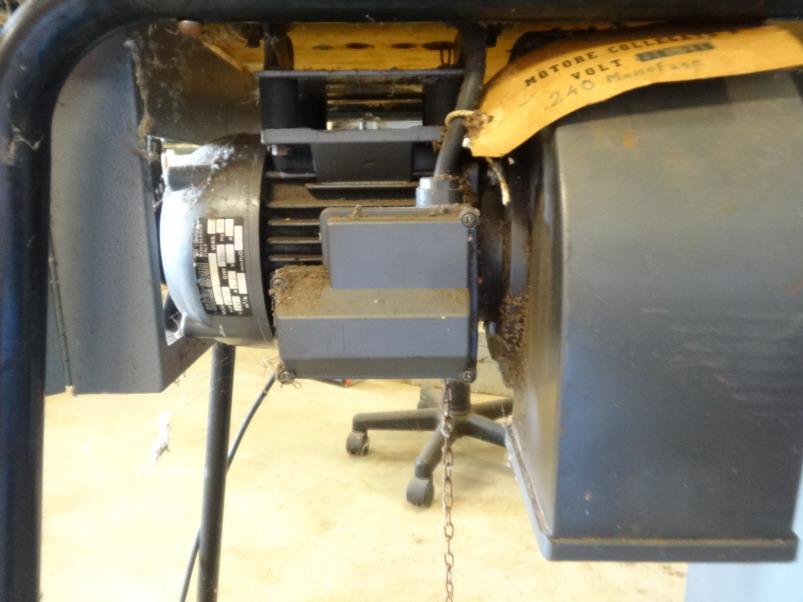
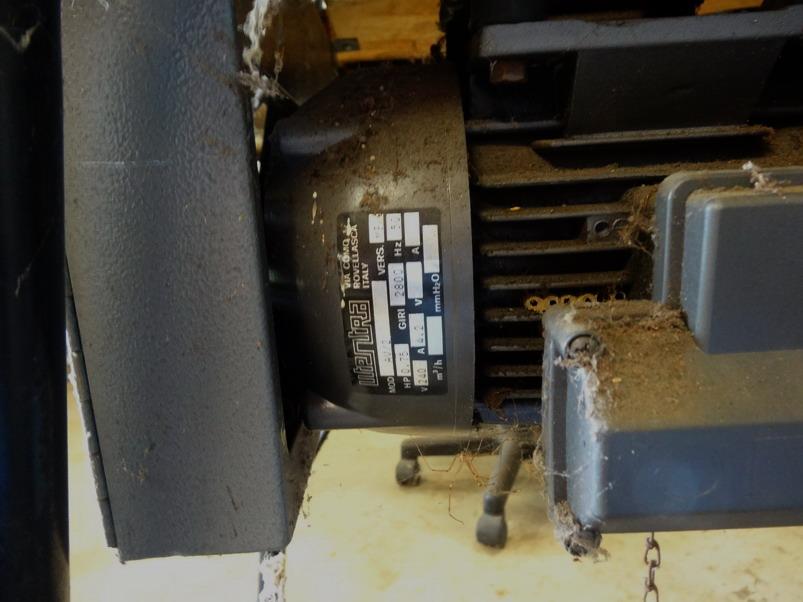
 I have had a look into the FAV AV2 range and found that they do have a model that has 2 motors on it. That model has a super suction on it. If you look at the bottom pictures on the second page in this pdf file you can see the one with the single motor and the double motors version. http://www.fratellialberti.com/lang2/files/Depliant--AV1-AV2.pdf I doubt there would be much issue in getting the aspirator to go with a single phase set up but you could probably get an answer by contacting the makers. Here below are a couple of pictures I took today of mine with the single motor set up From the back showing the drive pulley to the left and the vacuum extractor to the right. Close up on the motor Hope that helps some Brian
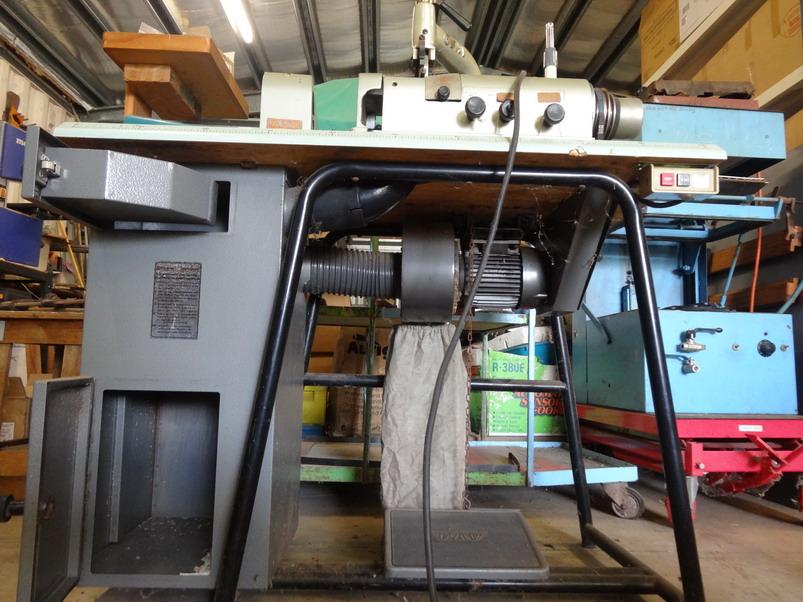
-
I think a picture of the job that you are trying to do would help get a more relevant answers. Are you trying to stitch close to the outer edge or close to a seam?
-
In the Campbell Randell video above at just past 20 minutes in you will see why an aspirator is a very desirable feature. When that waste comes up it often comes up 1/2 way through your work and tears it to pieces. The waste scrap pieces visible at the back of that machine show what you can expect without an aspirator. I There are some silly little scrapers on the non aspirated skivers these days and I have seen on here where they fail and where people I looking for better fixes. It would be wise to spend at the start and not have to try and fix later. As for the FAV AV2 of mine it has 1 motor single phase. The right side when you look under has a belt to drive the skiver and on the left side it has the extraction set up with a tube then running over to the collection box. The motor itself is not a clutch motor just a simple single phase motor. The clutch action happens up at the skiver head and that is the same on the Fortuna as well. You could easily change the motors on either of these machines to a single phase as long as the rpm is the similar. You may have to do a little adapting to a mounting plate but that is pretty easy. Motor cost over here I would guess at $120 au. The first bell knife skiver I had was an old Fortuna and had the disadvantage that when you fed the job through slow the bell also went slower and worse it had no aspirator. I wrecked a lot of work on my shoe uppers at the time. I felt guilty selling it to some poor bugga for $200. I should have given it to him with a sympathy card. I can do a few pictures under the FAV if you really want.
-
Some info in this post I did awhile back may help you. Some pictures of your work may help with suggestions.
-
I am not sure what they mean there. They have a feed stone that feeds the material through but that is on all bell skivers. I am guessing they may be refering to the black knob you see at the back right in the video above. When you turn that knob down you can make the speed of transport go a the speed you want it to go at which can be useful when doing long strips on a continuous basis. That is not a feature on the Fortuna but if you kick the heavy foot pedal forward on the floor you can pretty much achieve the same thing. With a servo motor you could set the speed but I am unsure if you could get the same slow crawl that you can with a good clutch set up. Dinners ready so I will check in tomorrow. Here is another video worth a look -
-
The FAV AV2 of mine is single phase 220 volt. The aspirator on it is quieter than my Fortuna but in an apartment building could be annoying for an extended period. Maybe a lot more pleasant than hip hop though. Skiving operations rarely need to go for any extended time frames keep in mind. A long stint may be 1/2 hour in one go. The Fav has a clutch motor with a very controllable clutch as well. The aspirator goes when the machine is turned on and I don't think is separable. I can find out tomorrow if you like.
-
Forget the old Fortuna. I always recommend having an aspirator (suction) installed on the machine and particularly if you want to do any of the thinner softer leathers. I have a Fortuna as can be seen in my you tube links along with some mods you may find interesting and as well an FAV AV2 skiver as well. I like the Fortuna slightly better due to it having a little more fine tune adjustment controls but I think for 900 Euro the FAV would be an excellent purchase. Parts for them are in my experience quite good as well. Here is a link I just found on the FAV - http://www.fratellialberti.com/lang2/skiving-machines-av2.html If you care to have a look into my profile section and over into the "about me" section you can also find some previous posts on the Fortuna in use. Best Wishes Brian
-
Just wondering does this video not show you that answer? https://www.youtube.com/watch?time_continue=20&v=Fsb-yUp1nMQ&feature=emb_logo
-
Or ( I will get in trouble for this I know) you can leave the little bent wrench in there are turn the machine backwards by hand. As it it sometimes easier to get more leverage this way as the wrench touches the table it will stop it from moving and then come loose.
-
And the thread is firm to pull through the discs and gets harder as you tighten the disks? @Uwe has a video on one of these I think and still may have one of these.
-
I would have thought so as well except some videos I have seen showing them in use were quite surprising. As for the base connection do you think if a larger steel base were attached or a large collar at the post base it would be better? I am looking at getting in one for a friend and I would like to be sure that the post part at least is quite solid. I already have to make up some better quick change stamping blocks for it so I would like to avoid it turning into a marathon. I have even considered whether to transplant the workings over onto a small drill press to gain working height and strength.
-
Same with mine and the threads on yours show the same.
-
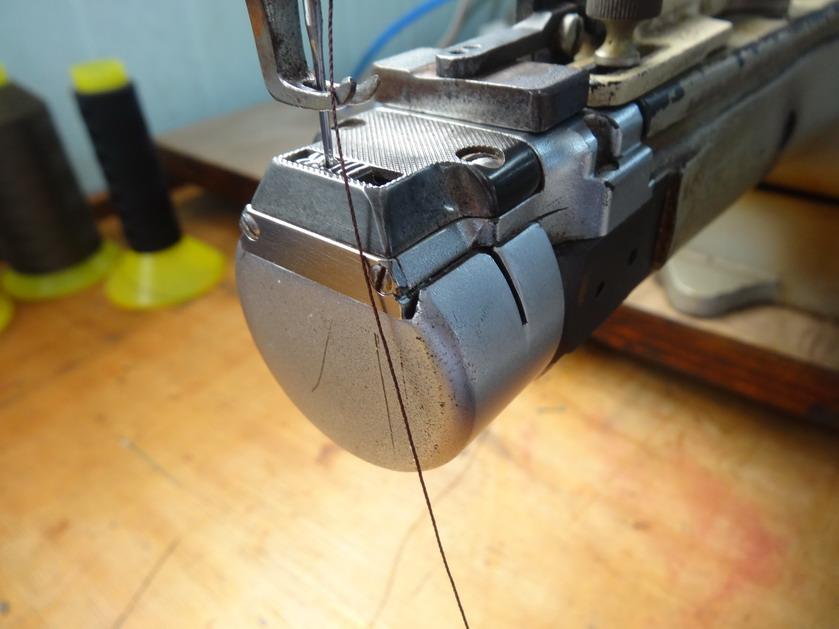
This is the part that still worries me. I see that the pin 11 is free moving and able to slide back and forth OK and you have had the little pin 25 out and I assume that that also slides back and forth OK so .....I have to ask when you have it all together and thread between the tension discs is the thread firm to pull through or does it slide through almost loosely? The thread going to the bottom normally would mean lack of top tension which could be caused by the top tension discs not coming together enough. If the thread is firm to pull through the discs then the problem is most likely at the bobbin side. Also I have to ask when you lift the foot by hand lever is there any catching when you lower it down. Are you getting a good pressure down on the leather with it. I generally check by seeing if I can lift the foot upward with my fingers and usually that will just be possible on most jobs. If it lifts easily then sometimes looping on the bottom happens and the foot pressure needs to be increased. I am sorry that I don't have one of these exact machines to check the measurements for you but I can offer that I have used a small nail cut down to length to get the right movement happening where pin 25 goes on another similar machine. The screws you loosened on the back plate in your video will further distance that pin 25 from working and I would do them up firm before making a pin up. That pin can be loose fit but definitely not tight. See if there is a difference in that pin 25 length from your old to new set as well first.
-
Clear acrylic is often used and has the advantage of being able to be seen through as you use it. Laser cutting makes this a quick and easy job but alas if it is a small diode laser normally they will only cut black or red colours and not clear. If you can say what state or town in the world you are in it would help others to suggest where you can get it and who could cut it etc. It is very available all over the world but the sheets are large and it is usual to get the sheets cut to a size you want locally. Here in Rockhampton I have a supplier that cuts what I want to size and I can laser cut the finer stuff after myself.
-
I think to get the differences between a 58 and 72 you may be better to post this question in the sewing machine section. I have had both but that was quite some time ago and both were quite good in use. I think there was a difference in the thread take up knob adjustment section but the 72 may have had a larger bobbin capacity. I seem to recall the 58 was a little smaller around the arm and a little better for tight spots. @Constabulary is one person I think may know better than me.
-
Hand quality stitching on a machine
RockyAussie replied to sbrownn's topic in Leather Sewing Machines
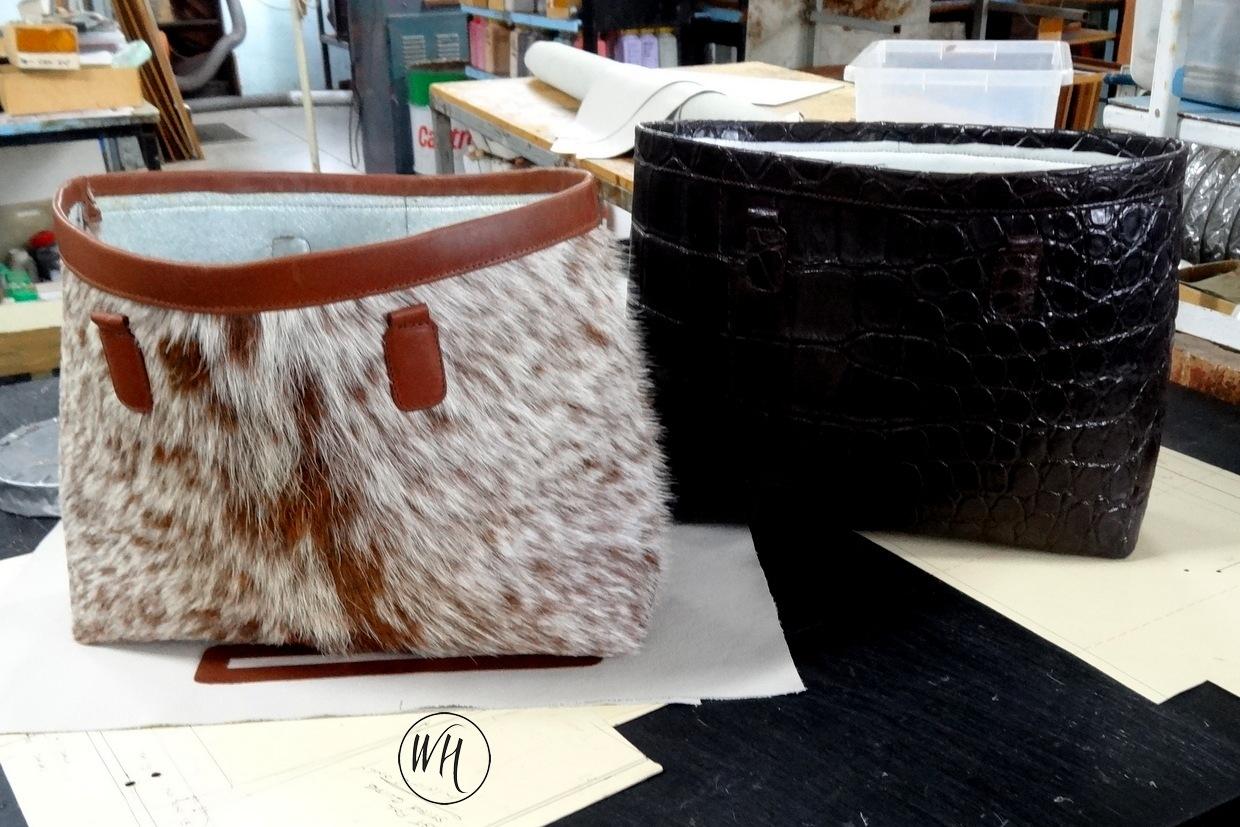
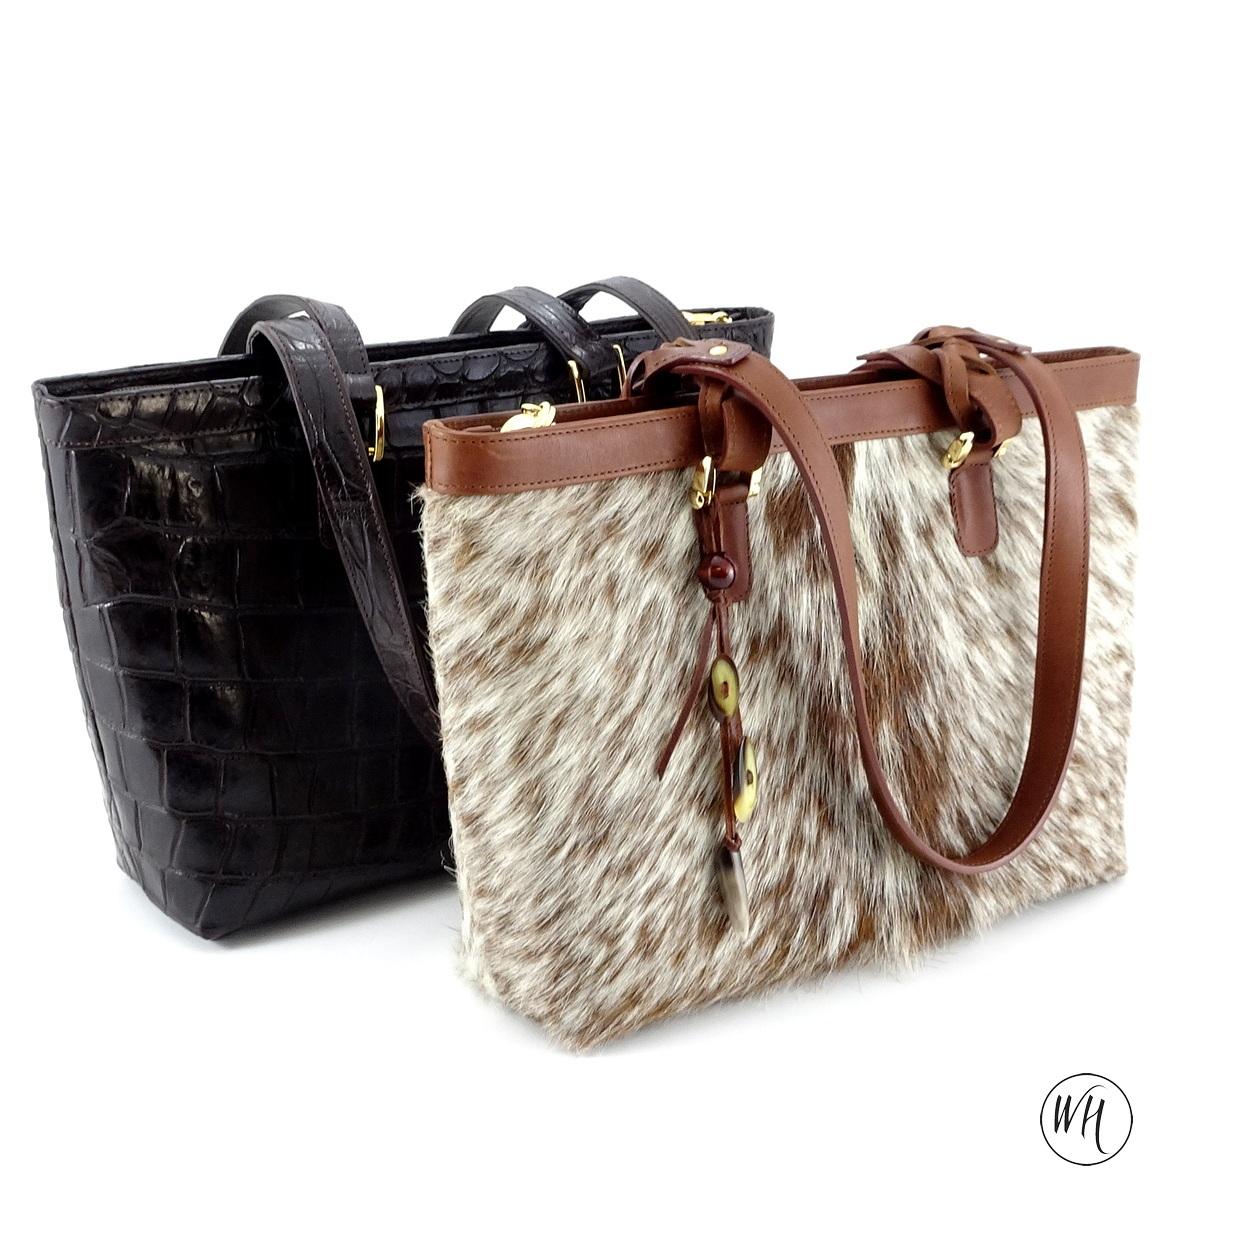
Agreed and likewise I am always looking to improve the quality and speed of the work I do. A softer oil tan type leather should give a better result for a journal cover but all the same, one thing that is fairly common in the work I do is padding. Sometimes the padding is foam sometimes a soft leather and sometimes a sort of felt material. What this can do aside from a nice padded feel or structure form is allow the thread to pull down into the leather a little more and this can improve the overall stitch appearance. The foam compresses as the sewing machine goes across and as it uncompresses the stitch is then tighter down in the leather. The padding/foams I use are generally attached a couple of mm short of the edge and sometimes they are skived as well. Below are a couple of pictures to show how foam can give structure and aid to pull in the stitching. This first one shows the bags before their liners are put in and the foam is visible and stitching is sunken in. This one shows the liners installed and now stitched up. I would like to suggest doing the same trials you did with a little padding and compare the results. Sometimes it can take a bit of sorting to get the best results.

-
2 things I can think of to check. 1. Do you have a good foot pressure down on the job. If it is too light/soft for the leather than the job can lift up a bit with the needle and you will get that look your getting. 2. Are you sure that the top thread is going down in between the tension discs properly and are the tension disks closing properly even with no thread in them? If they are not securely closing you need to find out why.
-
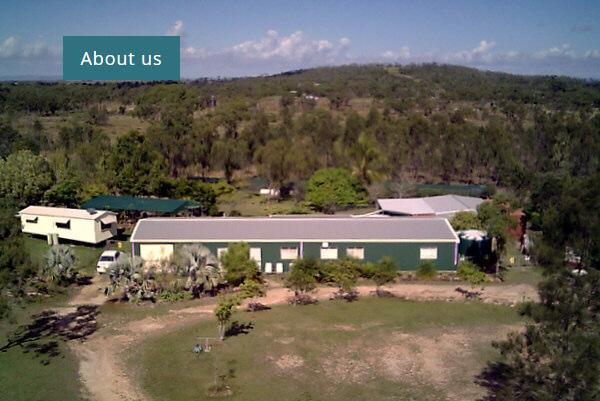
They are probably trying to get their work done. It is difficult to find time to serve customers and design and make and deal with all of the other things that business let alone personal needs require you to do. I don't think the internet is as you say "where it is at" but having a web page of your products can be like having a catalogue that can show off your wares and save a little time before they show up or occasionally order online. I am 20 minutes out of town and have no advertising signs here and nor do I advertise in any local way yet I still get people track me down too regularly. Speaking for myself I would be embarrassed to say how long it takes for me to get to any special customer orders and nearly as much time is spent talking about a product as the time to make it. When I had a shop in town and sold leather craft gear and tools it generally cost me more in labour than the sales ever made. Nowdays 95% of the work I do is contact making for a few brands that do their own advertising and marketing. This is my place in the picture below.
-
Hand quality stitching on a machine
RockyAussie replied to sbrownn's topic in Leather Sewing Machines
Normally if the leather is not to dry and hard I don't seem to have much problems with the underside appearance as long as the tensions are reasonably tight top and bottom. I do use mostly normal lockstitch machines for my work. A good sharp needle does not tear its way through medium to soft temper leathers. If the leather is soft enough (Upholstry type) it can be sometimes hard to tell the top from the bottom stitch. If I was doing a lot of firm temper I just might think about making a spike on the dog foot as a pre hole presser but that may create unwanted marks around the corners and ends. Equally I suppose you could also create a bump at the back of the dog foot at the same stitch spacing that pushed the leather back up and into the knot hole area. All the machines I have, have dog feet that have a hole. On the large 441 style there is a long needle plate slot option but as I have a small dog foot and plate set for it I have not needed to use the long slotted plate one to date. I think there are some improvements being worked on for this narrow dog foot/needle plate set up at the moment over here in Aus.