RockyAussie
-
Posts
3,265 -
Joined
-
Last visited
Content Type
Profiles
Forums
Events
Blogs
Gallery
Store
Everything posted by RockyAussie
-

Elk Hide Gun Sheath
RockyAussie replied to garypl's topic in Gun Holsters, Rifle Slings and Knife Sheathes
Thanks Bob. I started pla+printing something along that line about 5 hours ago. My printer will only allow a 7" x 7" jig but I may give it a go later on my laser as well. I will pop some more pictures in the morning as it will be printing for a couple of more hours yet. I am going for 4.5mm (.177 of an inch)spacing for this one at the moment. I am going for 4mm height and solid with a 5% outward lead in for the knife and a .5mm gap at the bottom. That is for a quicker line up in the slot. More info tomorrow-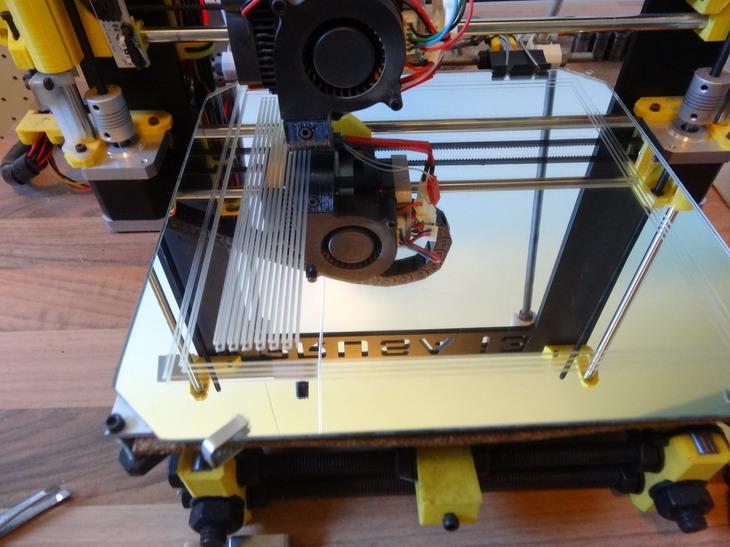

-
Elk Hide Gun Sheath
RockyAussie replied to garypl's topic in Gun Holsters, Rifle Slings and Knife Sheathes
Thanks Garry, I am still getting used to the idea of using a rotary cutter on leather as yet. I have only used in on the fabric face masks as yet which was the reason I bought it. I will have to give it a go as that sounds like a good idea for that sort of cutting. -
Elk Hide Gun Sheath
RockyAussie replied to garypl's topic in Gun Holsters, Rifle Slings and Knife Sheathes
I am getting tooo old I think. 2 hours for me to do the frills maybe. How do you do them @garypl? -
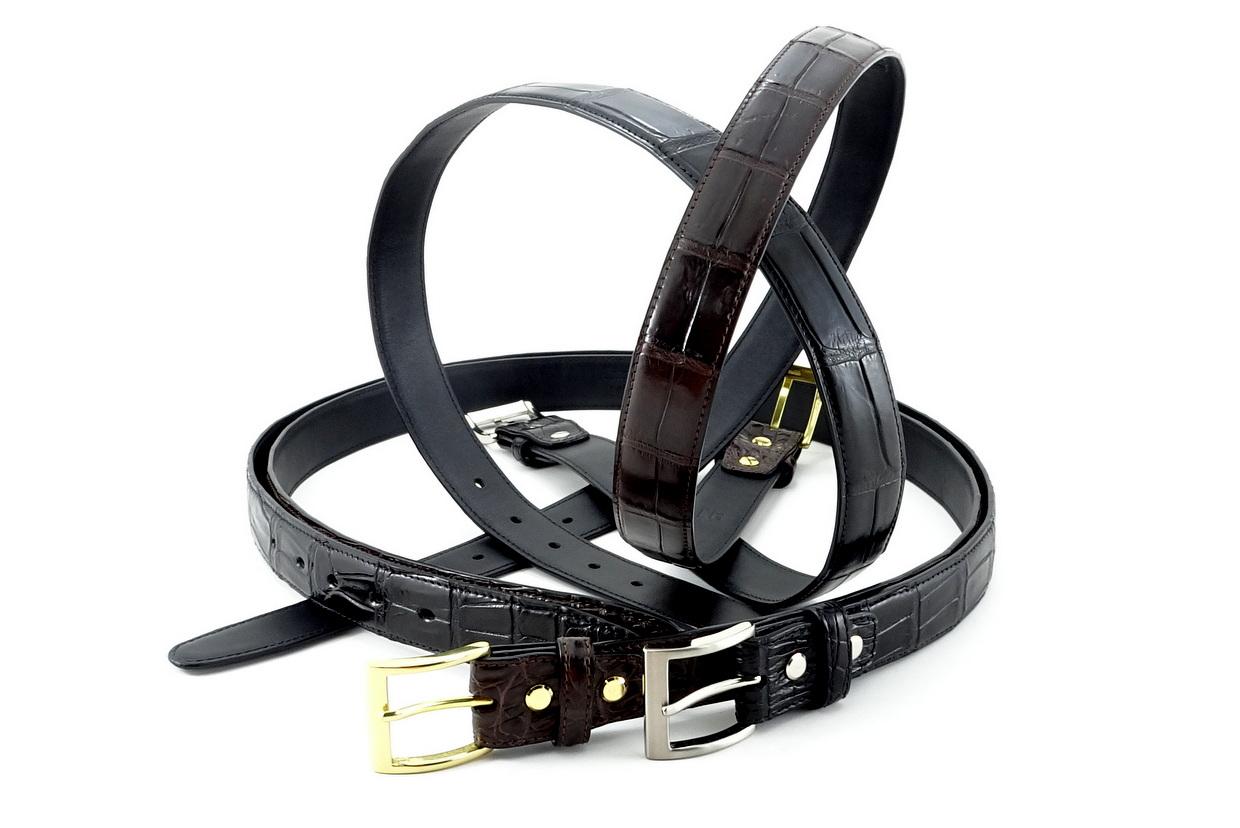
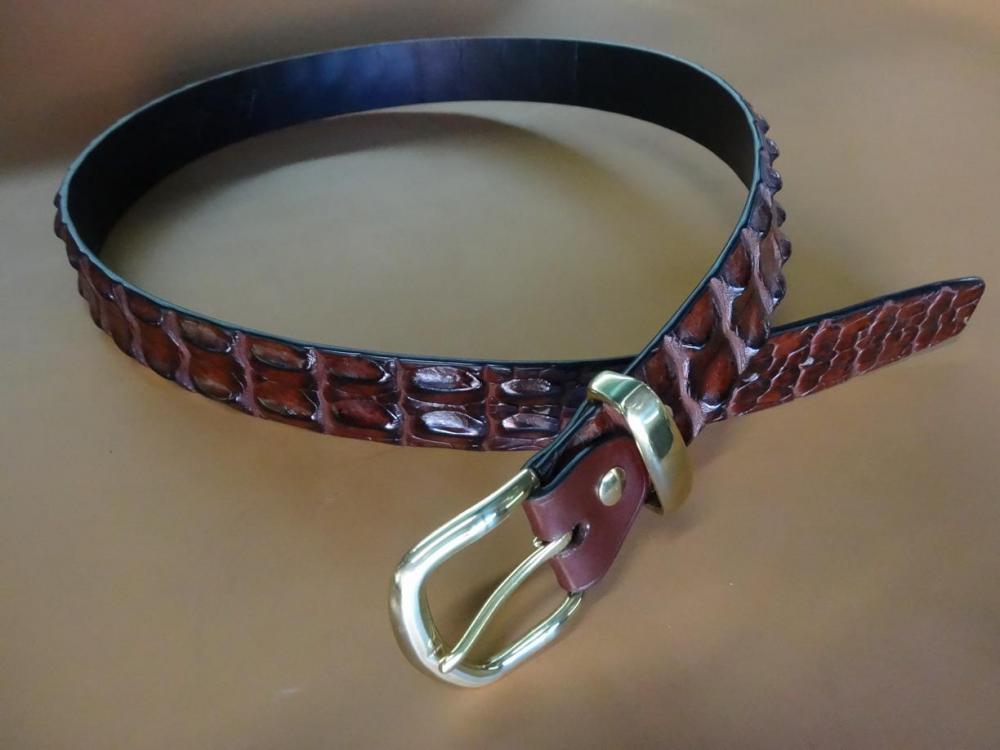
This is just a copy of one of my larger customer's orders that I have been supplying for 10+ years now. You will have to percent it down to your own needs. 30" - 10 32" - 60 34" - 115 36" - 220 38" - 220 40" - 220 42" - 215 44"- 110 46" - 60 48" - 55 50" - 25 52" - 25 54" - 25 Up until about 5 years back the longest belts stopped at 48" but as times have gone a fast foods more available this seems to be more now the size range required. 34" back then was closer to the 36" numbers. I would think about making a removable extension version in order to have a lesser stock range. A lot of shops like them as they can then sell a longer belt and have it shortened easily if needed. This comes in handy when people are buying someone other than themselves a belt as a gift. This is a couple of my versions below-

-
First Purse Ever
RockyAussie replied to crmiller84's topic in Purses, Wallets, Belts and Miscellaneous Pocket Items
Well done @crmiller84 I think she will enjoy it for many years to come -
I do the dip dye similarly except I like to use 2 bottles with lids. I drop the product into the bottle with the dye and give it a shake to get the air out of the leather quicker and then pour the dye carefully into the other bottle and then drop the product out onto some already laid out paper towel. I then quickly wipe over the surface to be sure not to get any dye accumulation spots. I let them dry out on top of a new lot of paper hand towel flesh side down. Like @fredk said, I also thin down the mix a fair bit depending on the colour and strength required.
-
If you are talking about only storing the strips meaning without any buckles, keepers and hardware I've found that you can store large amounts in a small area by coiling them together into cardboard boxes and you can go 10 or more layers high on top of each other. Quite a few boxes can then be stacked on top of each other.Just be careful not to make the ones in the middle to tight. I usually leave a hole no less than 8".
-
A little similar to @fredk method but could be a little quicker. I have done this before and it worked very well under clicker press usage for copies going into a few thousand. Seal the leather piece first then when well dry coat will a spray mould release agent then build your box or blu tack wall. Follow by pouring in some high impact casting epoxy to a height of 1/4" to 3/8" height and then put a piece of steel cut about 3/8" thick on top of the epoxy whilst still wet and then let dry 24 hours or more. Only bad thing I found is that it gets a bit hot and is likely to take off your sealer off of the leather master piece. Talc powder may work better than the mould release spray but I cant say for sure. This is the stuff I used https://www.barnes.com.au/rigid/md60-2017#/399-sizes-750g
-
I would be following the advice as Bob Kovar advised above. As long as the pipe is a fairly close fit to the shaft it will work quite easily pushing downward.
-
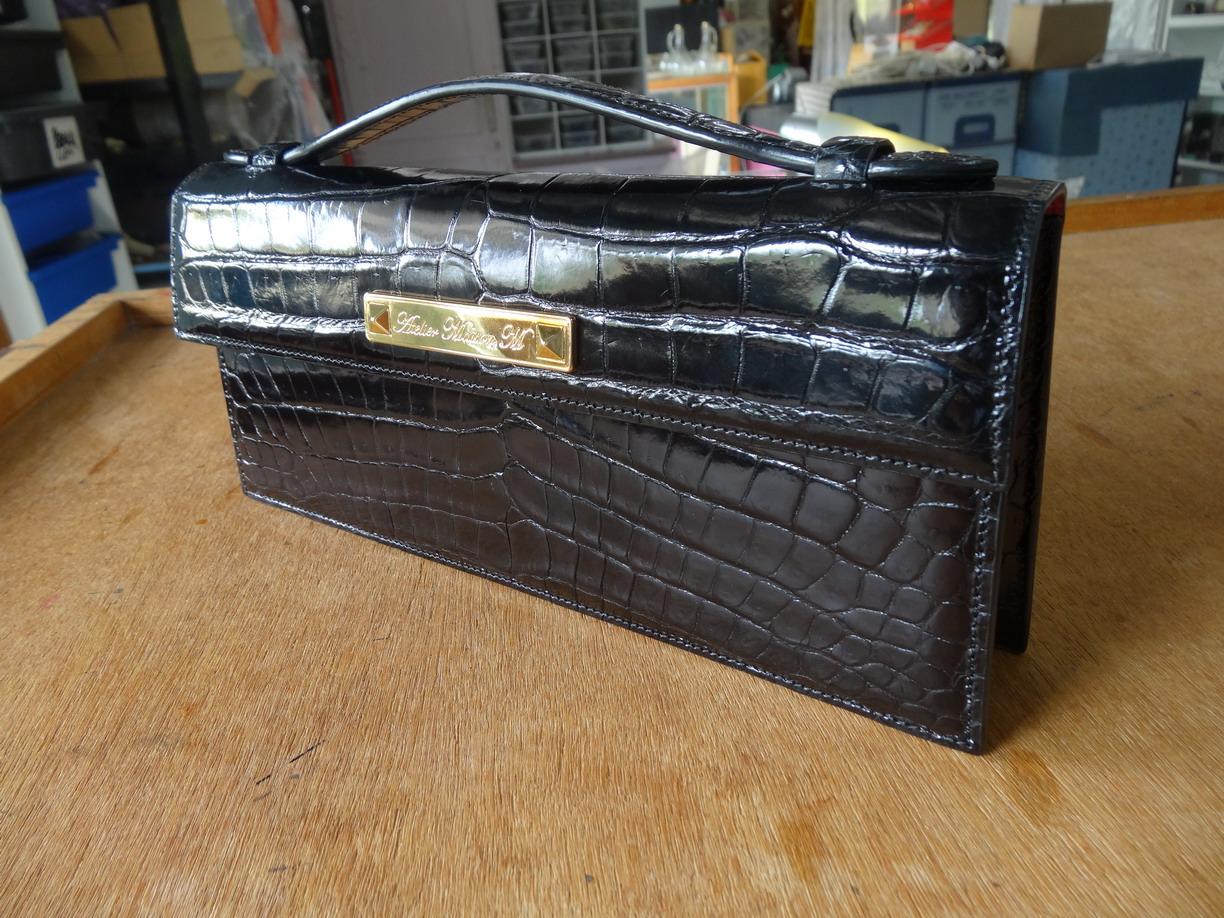
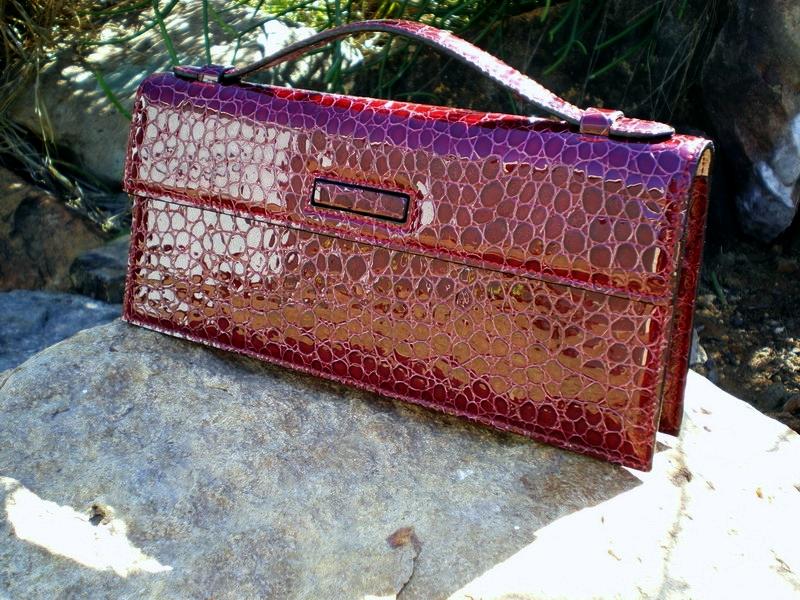
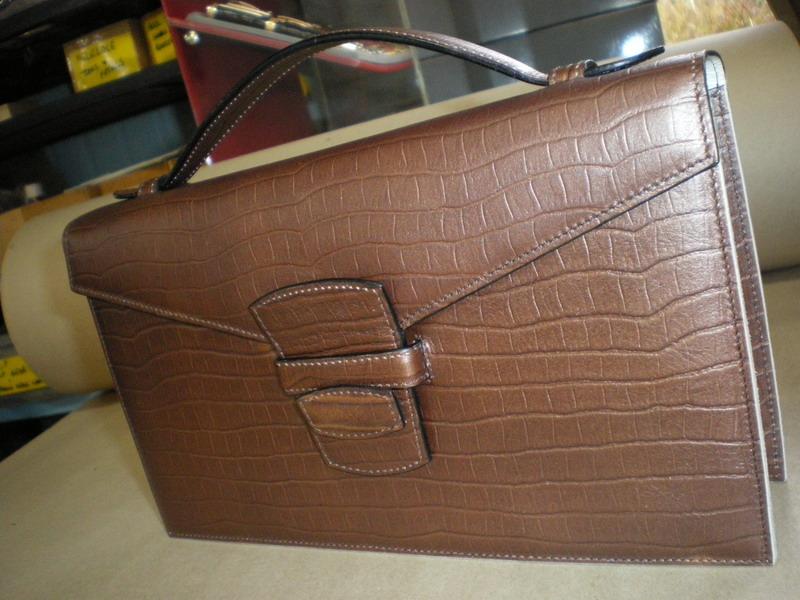
Thanks @Tugadude I wish I could have done it up in real croc but the customer wanted something different in the end. She didn't want any visible hardware originally and then paid a heap to have some hardware made which I also designed and had made in Japan. This is the end result croc version after another failed one in between. This is the other failed prototype below

-
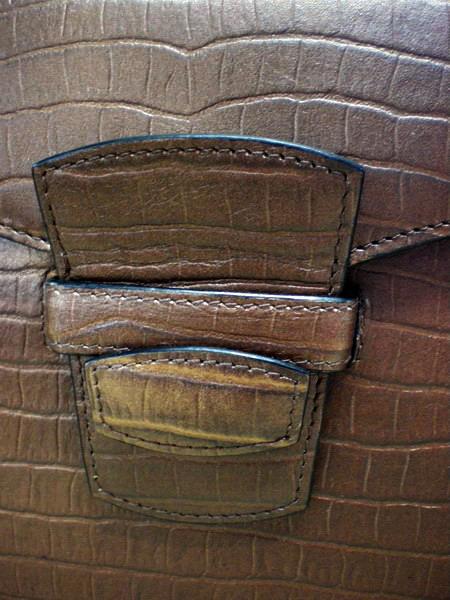
These form of closures can be quite successful but if you want to go a step further you can do as I have done on some jobs previously add in a metal strip into the leather loop as shown below. Not the same but is a similar idea. This is just a prototype one I never progressed on with.


-
441 Type Foot Set w. Edge Guide
RockyAussie replied to Constabulary's topic in Leather Sewing Machines
This post here shows a little on these feet and what they can do. https://leatherworker.net/forum/topic/44002-spring-loaded-edge-guide-presser-feet-compensating-guides/?tab=comments#comment-275142 I mostly find that the dog foot and needle plate are very useful as they allow a lot closer stitching to the edge without all the wobbling around.This post I believe shows what I am saying quite well. https://leatherworker.net/forum/topic/77229-cowboy-cb4500441-narrow-feed-dog-needlethroat-plate/?tab=comments#comment-510835 -
Stitch length not the same in reverse?
RockyAussie replied to DavidMillsSaddlery's topic in Leather Sewing Machines
Thanks Bob. I am now thinking it may be a good improvement if the stitch length indicator plate had a V section in the middle when cast in order to allow the plate to swivel in and out and thereby allow precise adjustments if needed . It probably would need a spring behind the screws as done in the shuttle race body or perhaps a couple of small O rings to stop any loosening off. That would be something an operator could do quite easily without any complicated instructions and perhaps avoid the need to send machines back etc. -
Stitch length not the same in reverse?
RockyAussie replied to DavidMillsSaddlery's topic in Leather Sewing Machines
That is what I would have thought. It is interesting on these that the bottom side is adjusted out to get the backstitch stitch longer or so it seems. I guess that it is really shortening the forward stitch in comparison to the back stitch in this case. The Cowboy one is wedged and wider at the top. -
That is true. My BAD.
-
If you are using Curra I think you may be able to just increase the scale in the Y direction to 1.5
-
I have no idea if this video by Uwe is any help but I have found it useful by following right through the steps to get every thing going as it should.
-
Guidance Needed replicating compendium
RockyAussie replied to Leathermann00b's topic in How Do I Do That?
-
Good Guide Gary
-
I would recommend taking the thread stand off of the patcher as the vibration of those machines in use would do that. Try putting the thread spool off to one side and see how it goes. I think I remember running the thread down onto the floor once to stop that happening on a patcher.
-
Guidance Needed replicating compendium
RockyAussie replied to Leathermann00b's topic in How Do I Do That?
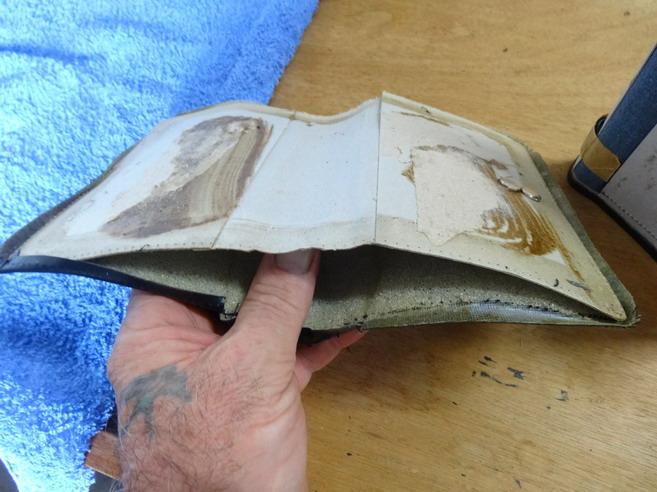
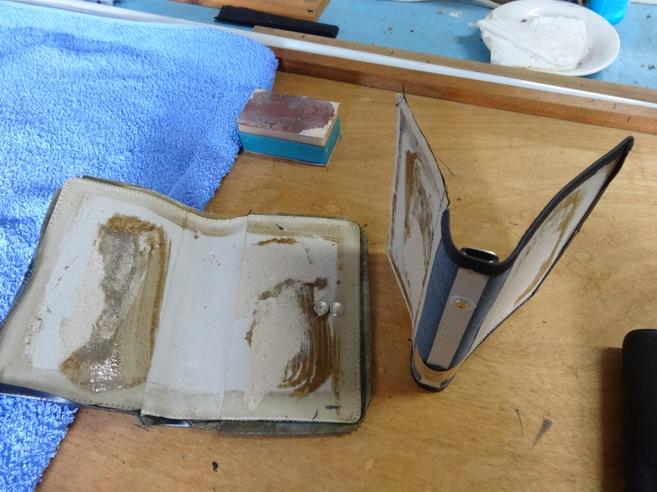
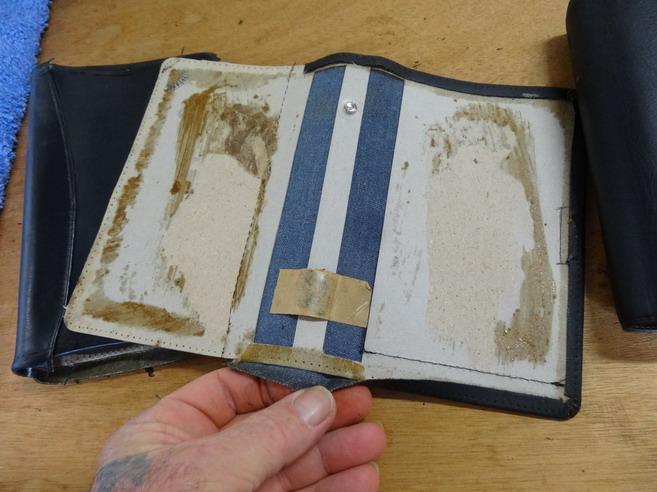
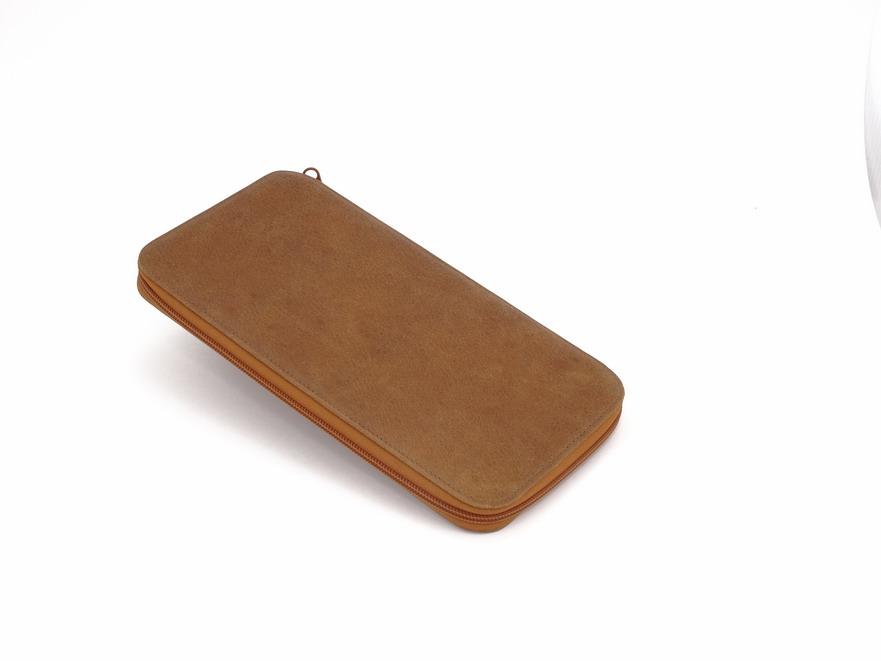
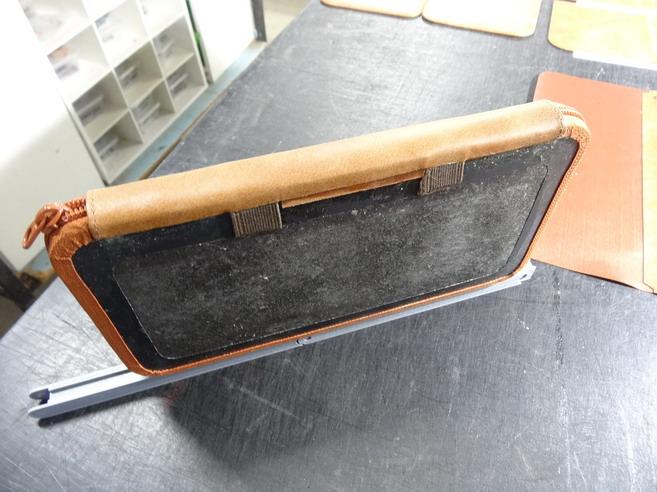
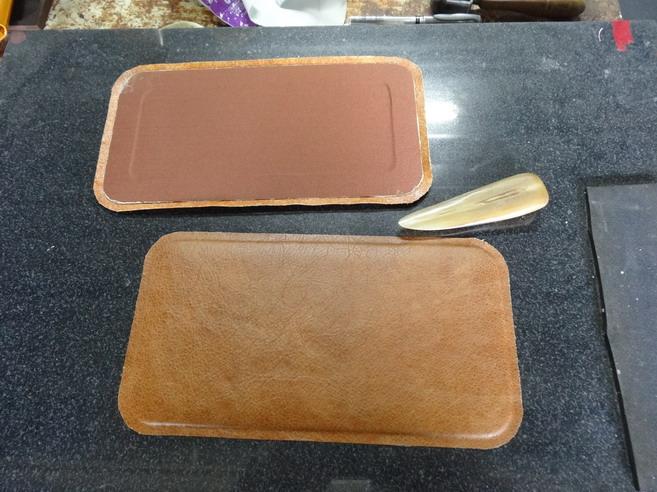
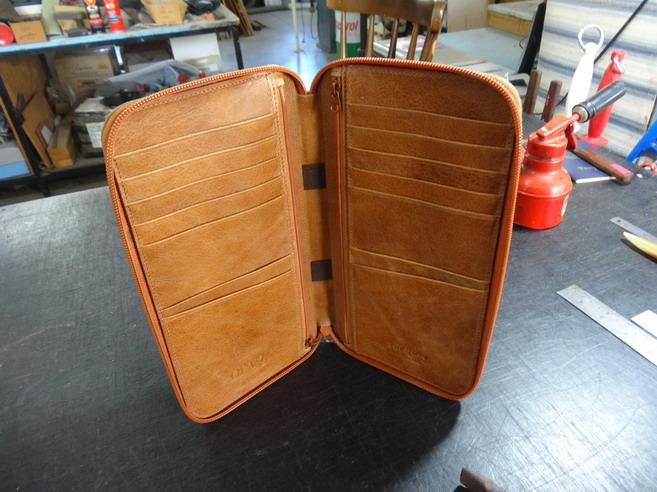
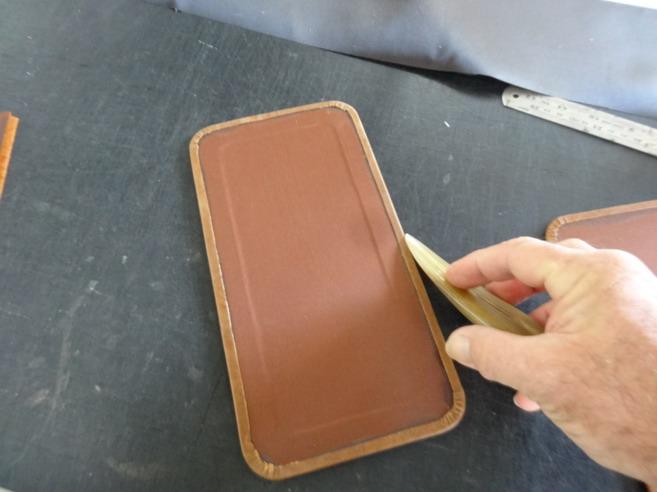
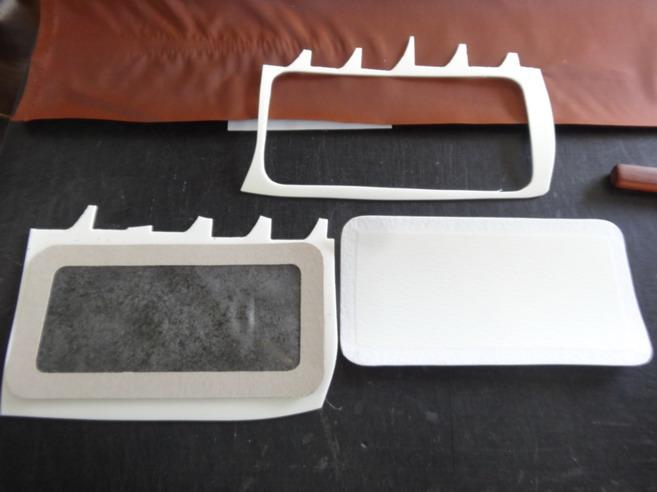
Can you elaborate? Do you mean adding something stiff in between the back and front cover? Perhaps instead i could achieve the same result by using a thicker veg tan? But perhaps that will make opening and closing a problem..? I have been giving this a bit more thought and as a newbie to this leather work stuff I think adding the binder clip will create a lot of headaches for you. Getting the tablet to clear the binder clips as you slide it in would entail putting a gusset section in place I believe. As well a binder clip normally has to have a solid stiffener behind it to spread the load. Rivets just through the leather will quickly tear it apart and wobble all over the place. Below I will attach a few pictures showing a prototype Filofax cover I made ages ago and you can see the construction of the type of stiffening that is required. First pic is the finished prototype Outer cover removed from inner section Outer cover has thinner stiffener right across and note the extra thicker sections on either side. This helps to keep everything in place as it opens and closes. Note also the foam attached to the outer cover inside. Note in this pic showing the lining section, that the stiffener is one complete piece with cut out sections for improved folding when shutting and opening. Now this design although good for a filofax that needs to be firm to be able to write inside of... it will not be so good for holding something like a tablet inside of it. You would still need the stiffening in the centre but you may need to cut away some in the outer sections to allow a more flexible cover. The pics below show some of how I go about achieving this for phone purses and in this case shown a passport/document holder. Ist and second pics shows the finished product Here you can see the cut out section in the stiffener before the outside is attached. Showing outside stiffener,foam and material to be attached together. Here you see the cut out section before I fold the outer covers. I hope that this is making some sense now. Re the 20 mm strip of leather is a tape measure idea of sorts. When I need to get a distance around something like a tablet, phone or product lining I like to have the correct weight of leather for the job because the thicker the leather used in the job the longer the outer cover needs to be. Saves a lot of maths is all. If you want to call/phone me just send us a pm and I will give you my number there.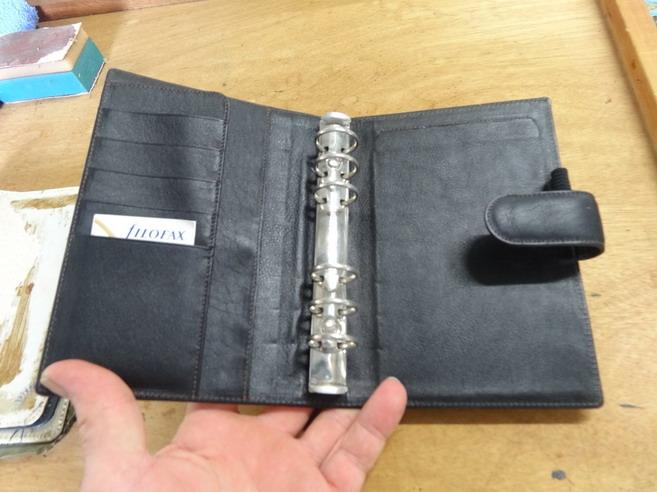
-
My best yet
RockyAussie replied to AussieMade's topic in Purses, Wallets, Belts and Miscellaneous Pocket Items
I have got to ask what your hole punches look like after doing the lace holes? Works slowed down a lot at present so sort of a holiday. I look forward to you dropping in if you make it up this way again. I don't have any brass swivel snaps but do have a few brass 25mm buckles if that helps. -
My best yet
RockyAussie replied to AussieMade's topic in Purses, Wallets, Belts and Miscellaneous Pocket Items
Good looking stuff there Damien. What hardware you needing, dees and buckle? Is that beady ray you fought you way through or a roo print? -
Guidance Needed replicating compendium
RockyAussie replied to Leathermann00b's topic in How Do I Do That?
If your around the Brisbane area I would check out this link https://www.theleathershed.com.au/ They run workshops and such as well sometimes I believe. I have sourced leather from them for 20+ years and they are normally pretty good to deal with. Tell Trevor and Tracey Brian sent you and expects a big discount on his next order - Re the ring binder they will take a fair bit more work to do right and the cover will need stiffeners added into it. I would start of getting one from office works and pulling it apart. To get your length of leather measure, cut a strip about 20mm wide of the thickness you have and use it like a ruler going over the shut folder allowing for about 6+mm overhang on both sides for your stitching and trimming up. Getting the rivets out can be tricky and a sharp drill bit would help. You will need to get some rivets to replace so check if they have them while you get your leather. Mac-lace https://maclaceleather.com.au/ will have some if they don't and is another place where you can get leather and other leather craft supplies. -
Good job