RockyAussie
-
Posts
3,265 -
Joined
-
Last visited
Content Type
Profiles
Forums
Events
Blogs
Gallery
Store
Everything posted by RockyAussie
-
VERY ....VERY ...VERY NICE. I LIKE A LOT. sorry to shout but that is BEAUTIFUL. I want one now!!!!!
-
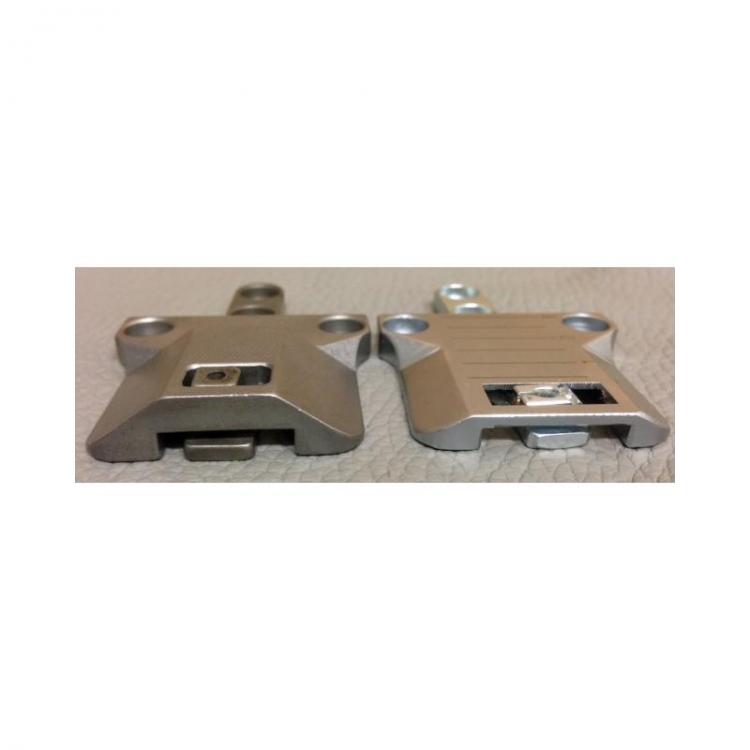
I think that the needle plate would be OK but as for the foot build up I don't know and I think a cheap metal set might be a better bet. The foot would need to be ground smaller on the front and back sides but adding a little plate on top and then drilling the hole out from the bottom should be pretty easy I think. It could be worth printing the needle plate as that would allow you to test all sorts of extremes I reckon. You could print out a smaller bobbin cover case as well which will give you a bit more manoeuvring room. here is an stl if you dont have it already - It fits the 335 as well Adler Bobbin Cover.stl This one on my 69 adler note that I have sanded back a fair bit out of the needle plate as well which helps.
-
This set may be getting a bit too small in stitch length but maybe - http://www.kwokhing.com/2003foot/page32e.html Some info in this post may be worth a read as well.
-
Another thought if necessary is to get a cheap set and build them up with some plate and silver solder on top. A quick look found this set for under $20.00 US https://www.ebay.com.au/i/142504673433?chn=ps&norover=1&mkevt=1&mkrid=705-139619-5960-0&mkcid=2&itemid=142504673433&targetid=894943437993&device=c&mktype=pla&googleloc=9069152&poi=&campaignid=9773406700&mkgroupid=100117145936&rlsatarget=aud-786643580366:pla-894943437993&abcId=578876&merchantid=7364522&gclid=CjwKCAjw8df2BRA3EiwAvfZWaCkXW-D8EGF8md8ArJf4h56G39u-5ixbKEaBze3yYRwKBoa0MJKq_RoCTHMQAvD_BwE I would think about making up a new plate as well for the stitch increment adjustment so as to limit the up and down movement in order to not accidentally make the stitch length go too long.
-
I found these pictures some time ago and saved them in case I felt the need to one day make them or try and buy them. I will have to try a google search and see how I go. It is for a 669 Adler............. found something - https://mando.fr/index.php?dispatch=products.view&product_id=2134 HERE IS ANOTHER SCARY ONE PIC BELOW https://mando.fr/index.php?dispatch=products.view&product_id=2176 Now we just need some French speaking person to chime in here...
-
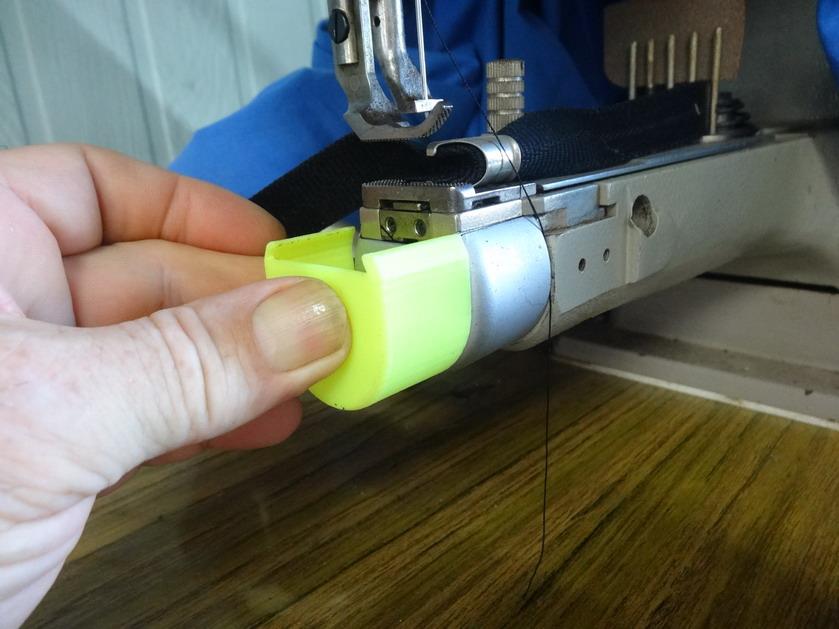
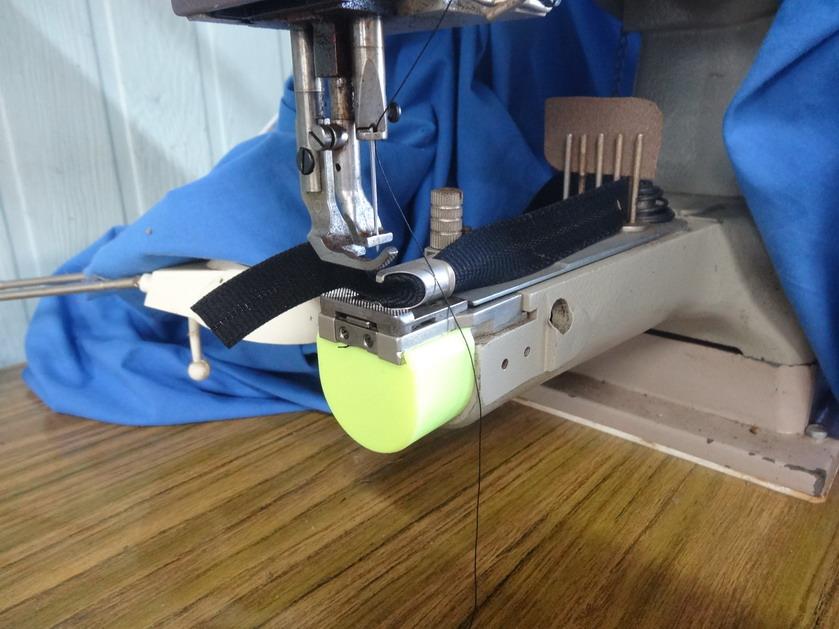
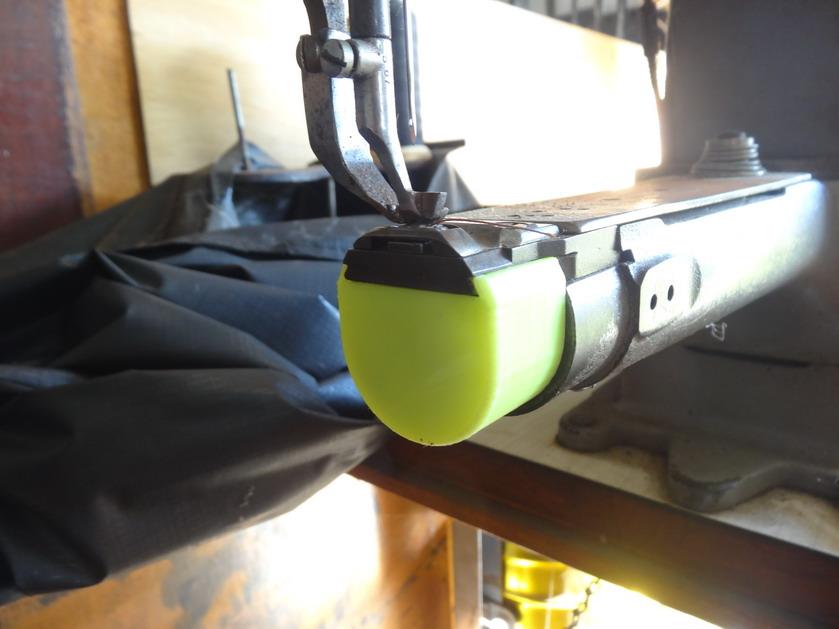
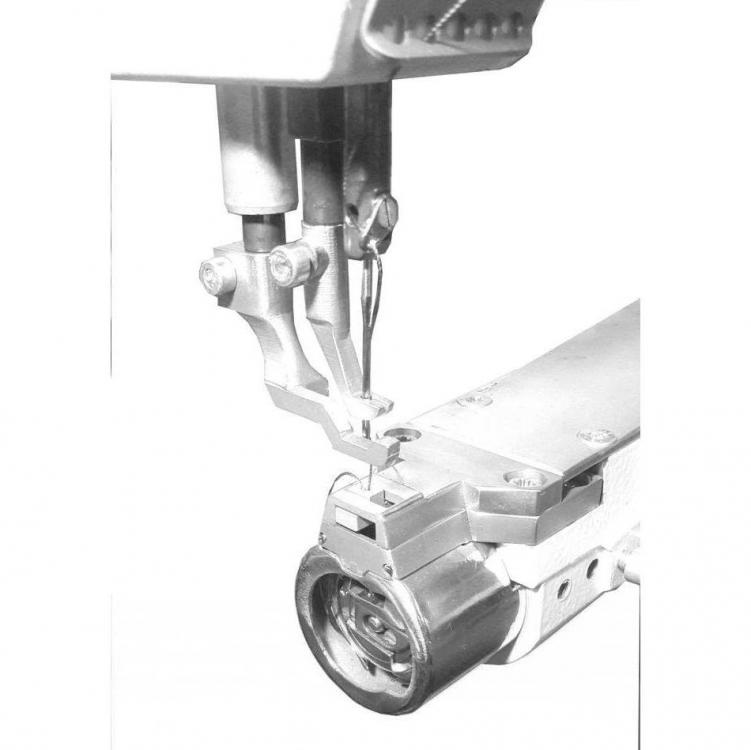
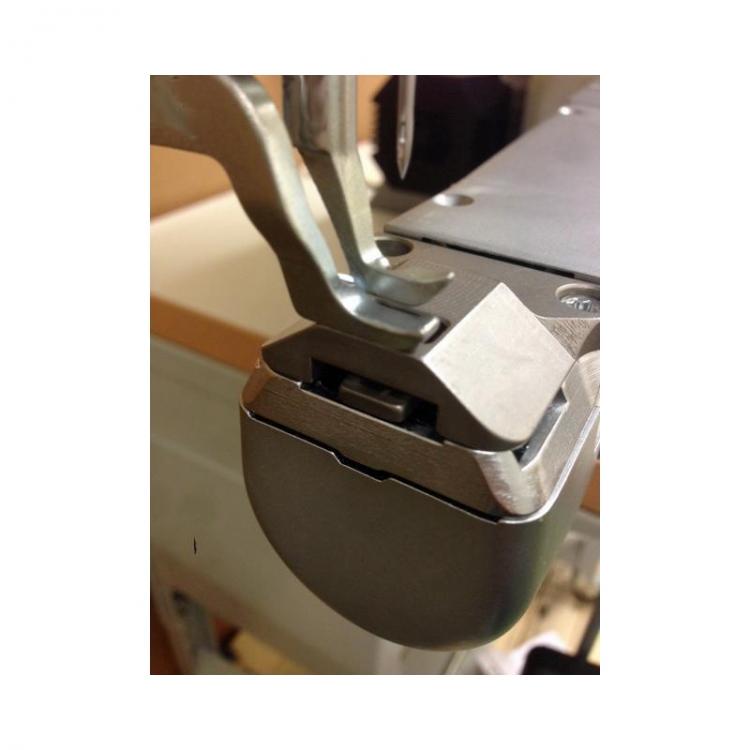
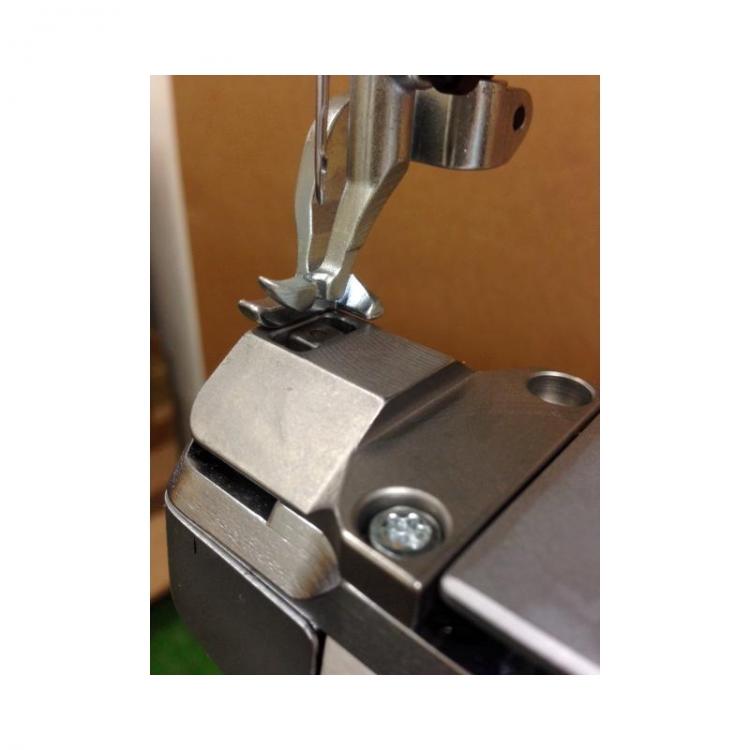
I would avoid designing in such tight corners if possible but a few things come to mind. Any stiffeners would have to be left out until all the stitching has been done.A small cylinder end with a raised needle plate piece and higher feed dog would be desirable similar to the pictures below.Note that this will impact on the stitch length possible and obviously the thickness of the product will be lessened than usual but is unlikely to be a problem.
-
 Thanks @Bert51 Mostly I like to feel I am helping some along the way.
 -
Not sure if this will help but you may be able to measure the needle and ask on here - https://www.schmetzneedles.com/needle-facts-how-to-read-the-needle-package-2/
-
Elk Hide Gun Sheath
RockyAussie replied to garypl's topic in Gun Holsters, Rifle Slings and Knife Sheathes
Just ordered yesterday Gary and eta is a couple of weeks. I have still to find a few of the other modification pieces locally as yet so hopefully that wont be too long in the getting. . -
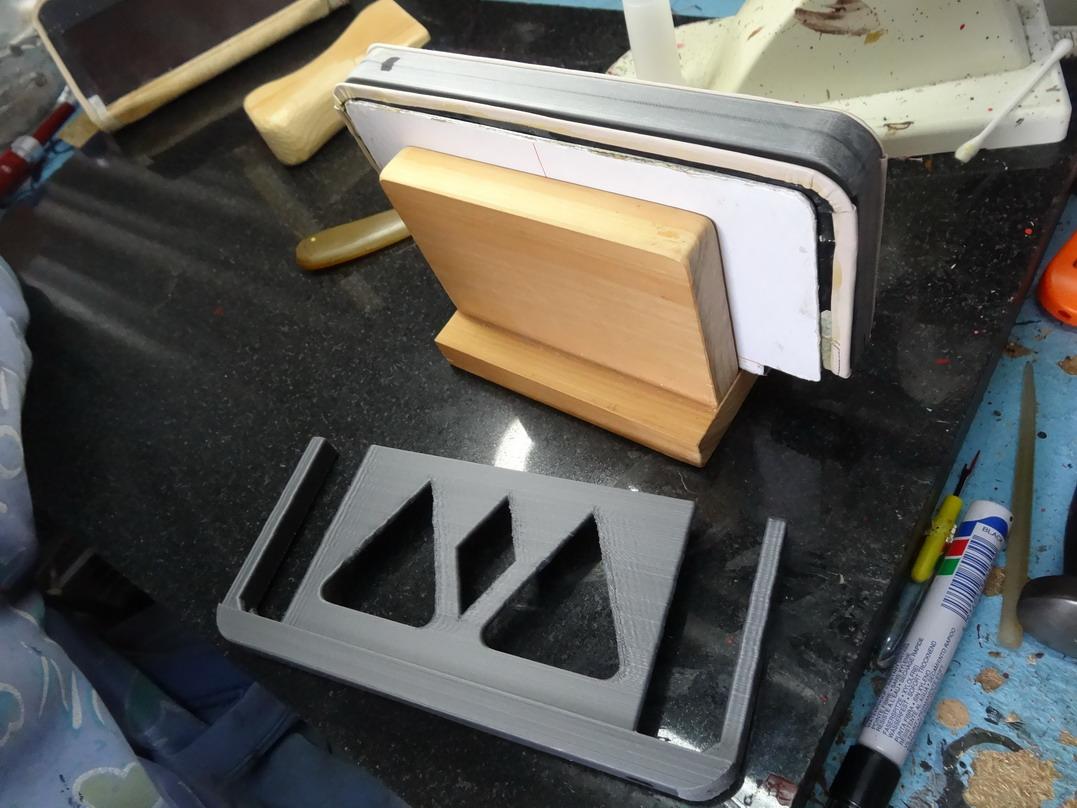
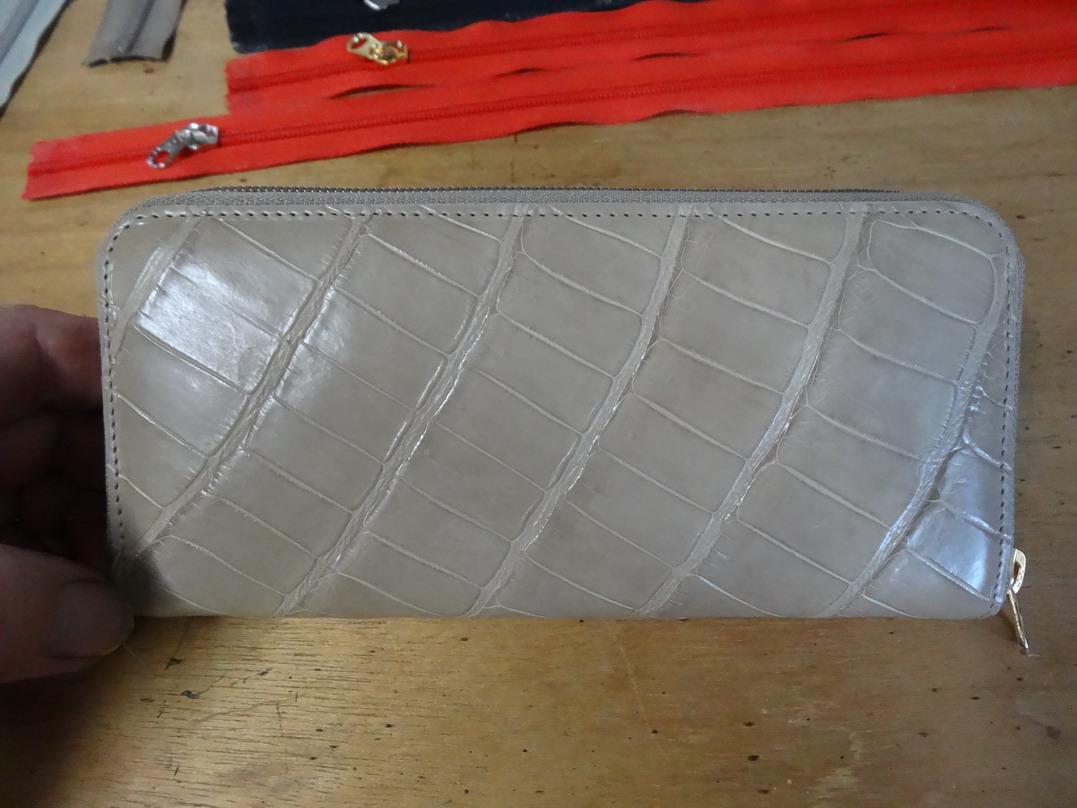
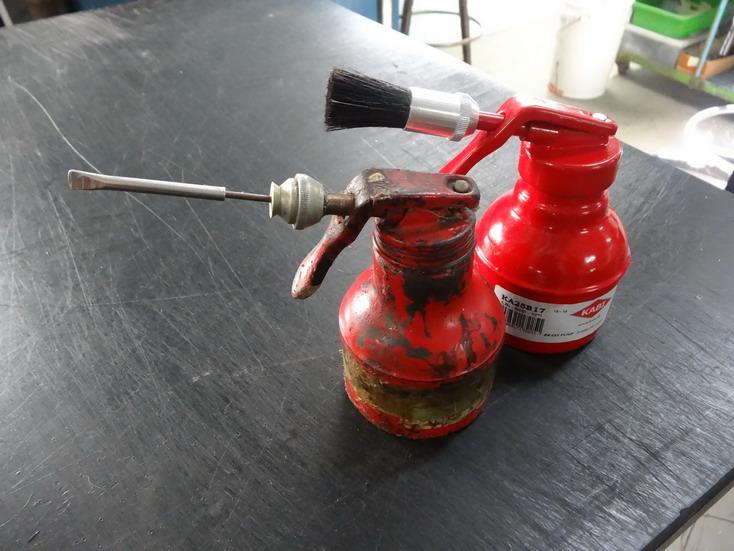
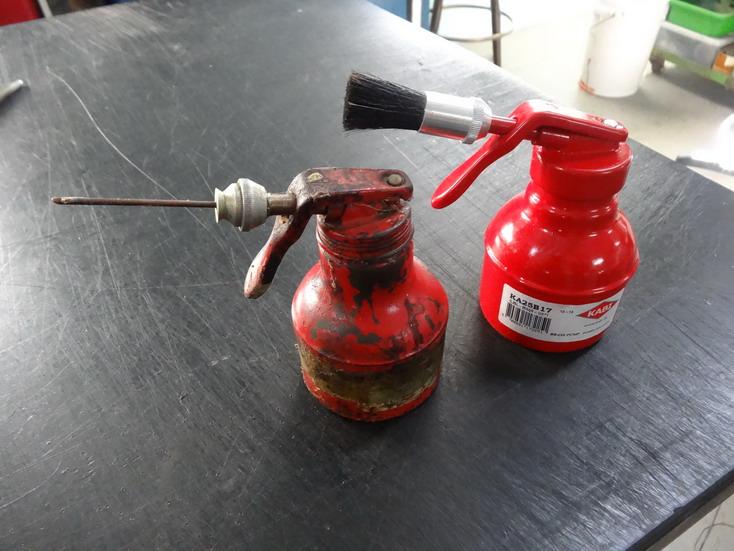
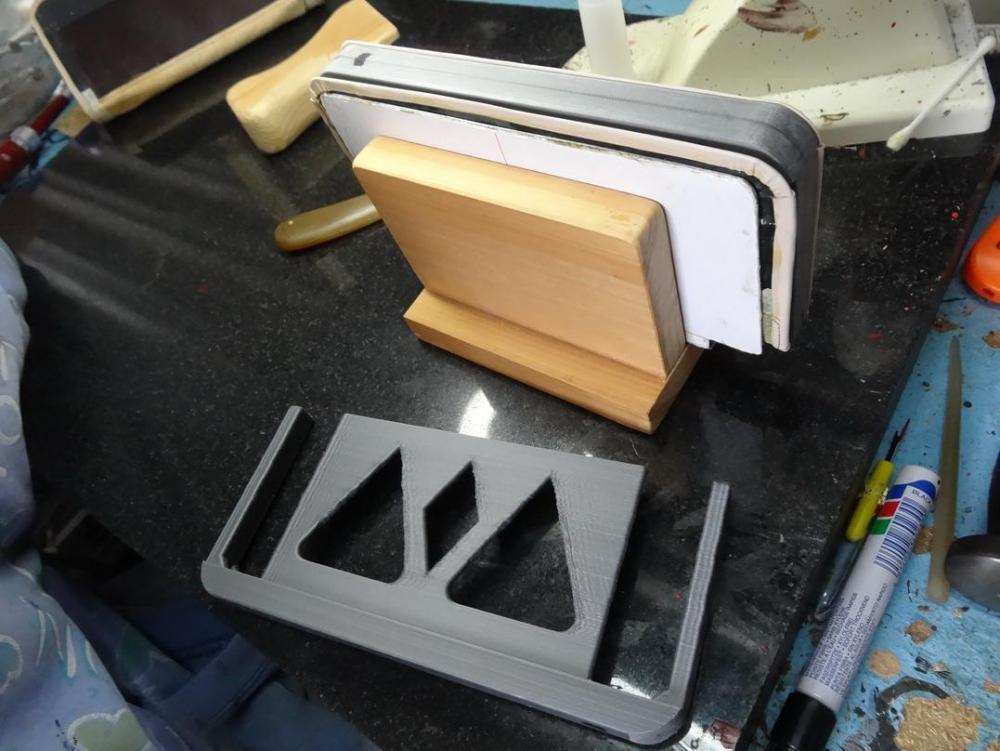
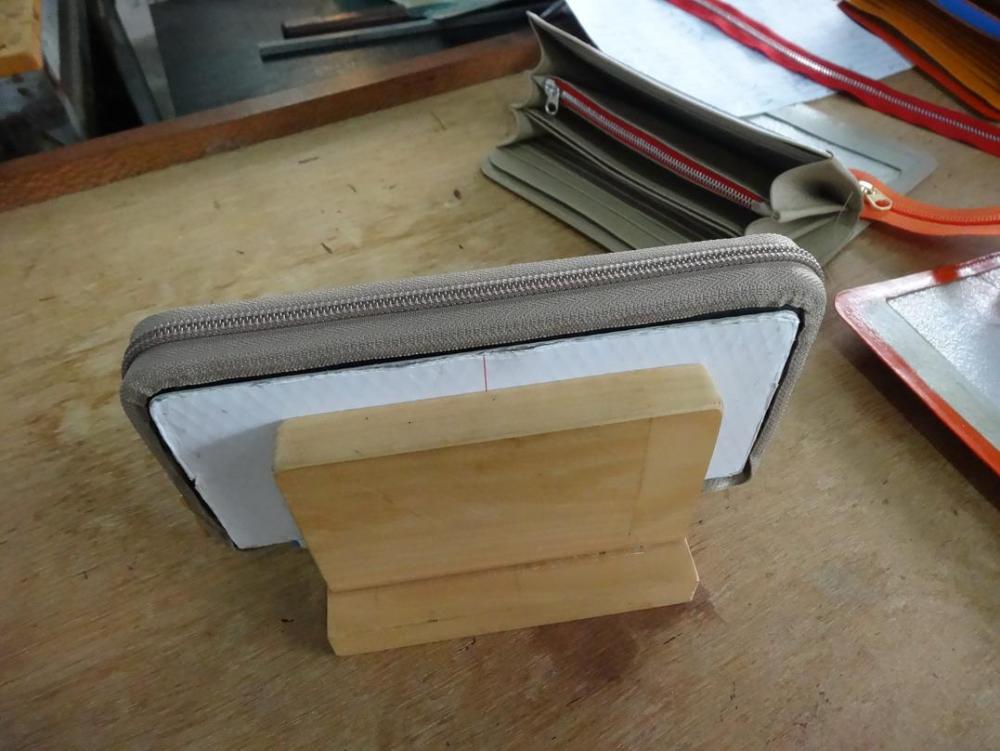
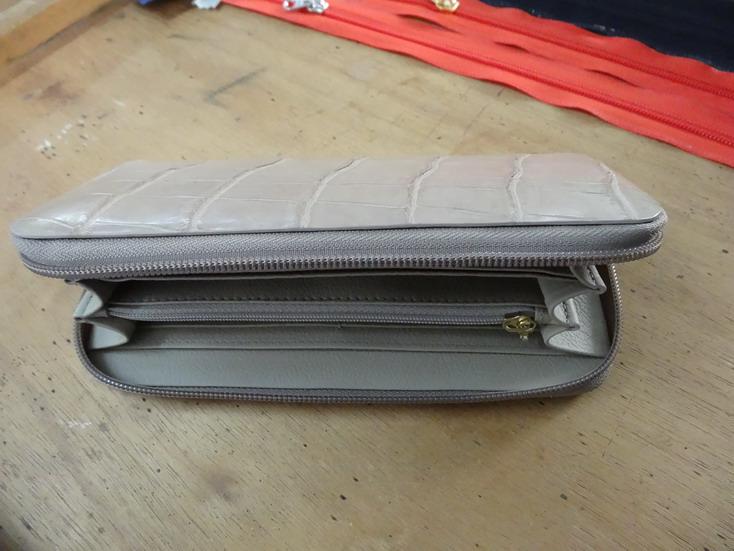
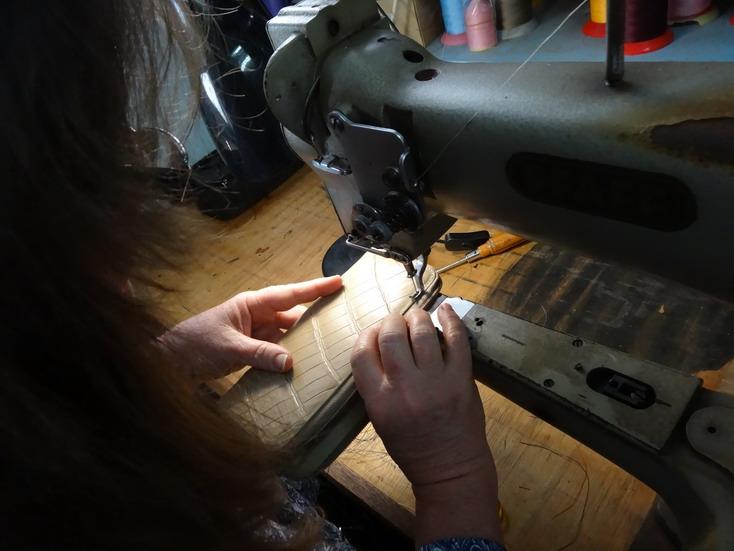
I do a similar construction as per the zipper attaching and I do think that trying to use the tape method around the corners would not work very well in this type of product. There is a fair bit of tight folding around those corners and a contact glue helps to keep every thing tight and in place. I have converted a hand operated glue applicator to have a thin brass spike in order to give me good control when putting the glue down onto the zip. I will attach a some pictures below that may help to understand better - The glue gun on the right shows the standard version and the one on the left I have removed the brush and put in a thin brass tube which gets covered with a piece of stainless brake line tube to keep the glue from drying out between uses. This picture shows the product about to have the zip put on with a 3d printed jig in place to assist in keeping the spacing correct. This shows the zip in place and then it gets reglued and then tapped down with extra attention to the corners, before the outer cover is put into place Outer cover now ready to be stitched with the jig removed Hope that this helps some

-
Elk Hide Gun Sheath
RockyAussie replied to garypl's topic in Gun Holsters, Rifle Slings and Knife Sheathes
I am looking hard at a Tronxy X5SA PRO this years model. They are a pretty cheap (about $700au)kit but have a lot of bad reviews as well. I expect it will chew up a couple of extra dollars to get it all running well.To get a name brand one that size and with good reviews is like $12,000+ so I wont be going that way. My current prusa i3 was pretty shaky to start with but after a few stabilising bars were added she does a better job than what most of these reviewers call a GOOD print and faster as well. Made in China but I am looking at getting one out of Sydney at the moment. I expect to order it shortly but some of the upgrade corner supports and so on may hold it up a bit as I normally order that stuff out of China. I may have to pay some extra to get some stuff locally this time. I will do a post on it when I get it and let you know all of the tweaks and upgrades as I do them. Fingers crossed it will not be a disaster. A big platform and volume sounds good but if it takes tooo long to print then it will be a failure. I am wanting it to go at least 80mm a second and do a good job for the majority of my stuff. -
Keeper mould / form Amish made loop blocker
RockyAussie replied to Annie977's topic in Leather Tools
Exactly - I thought I must be missing something but you just confirmed it.......I hadn't. A heavy weight atop may help but you'd still need to address the steel staining amongst a few other things.... -
Elk Hide Gun Sheath
RockyAussie replied to garypl's topic in Gun Holsters, Rifle Slings and Knife Sheathes
I could go a to a 200x300 base with my current one but I am looking at getting a bigger one which does not have to have the extra weight of the base plate moving around other than just downward as it prints the filament. The top extruder then does all of the back and forward movement (X and Y movements). This is also a good move as the printed job does not have to move around with the base plate in those often very quick changing directions. It should be able to print jobs a fair bit quicker because of this as well.Some jobs like the frill guides above can take me 8 hours each to print and I have had some jobs take a way lot longer than that. -
Elk Hide Gun Sheath
RockyAussie replied to garypl's topic in Gun Holsters, Rifle Slings and Knife Sheathes
Thanks Gary. I only designed the basic bag, the wife is mostly responsible for what she does with ornamentations and so on. Forgot to mention I used .2mm layers on the print. And more than twice as much leather to make Yeah ...looks like I gotta print a whole heap of new widths and lengths of them now. On the plus side I got the OK top get a bigger printer now. I've been wanting to make a mould for a fancy handbag design for sometime and this should help to make it a reality at last I think. 330x330x400mm build area. -
Man you must sure like a challenge doing the stigray that way. WELL DONE.
-
Elk Hide Gun Sheath
RockyAussie replied to garypl's topic in Gun Holsters, Rifle Slings and Knife Sheathes
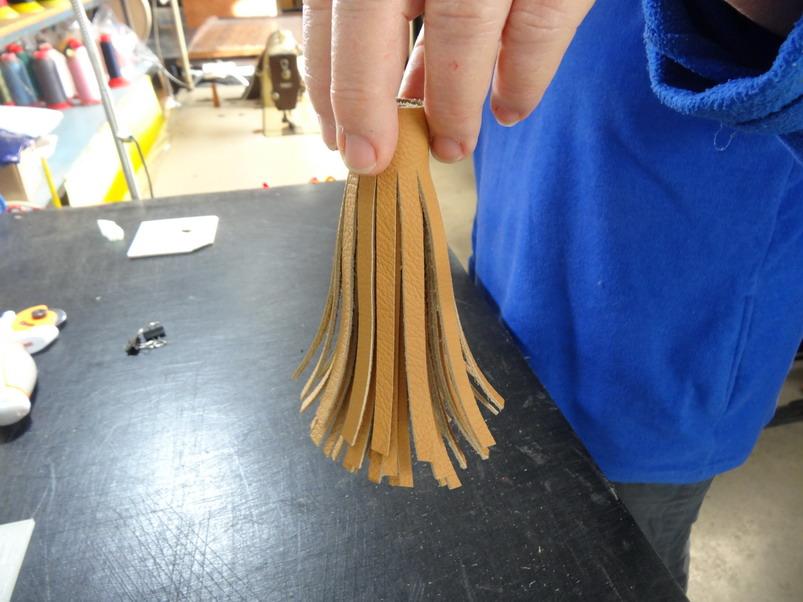
Agreed. I will do a separate post on it in that section. I haven't got much fringe work products to show as yet though. Probably the one with the most would be this one on my web site - https://wildharry.com.au/collections/tote-bags/products/emily-medium-leather-tote-bag-burnt-orange-with-taupe-fringing Now it can be done a lot easier with these guides we should be doing a fair bit more of it.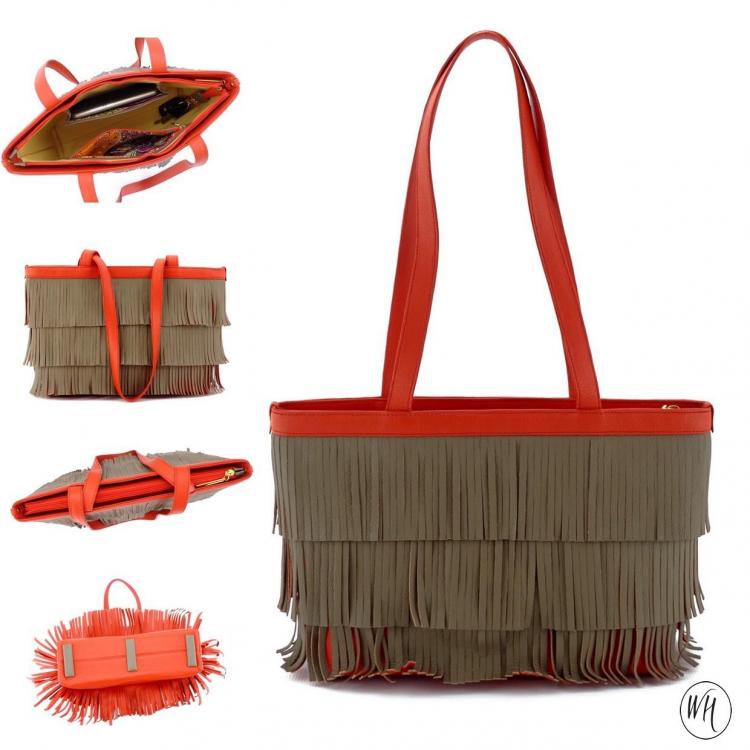
-
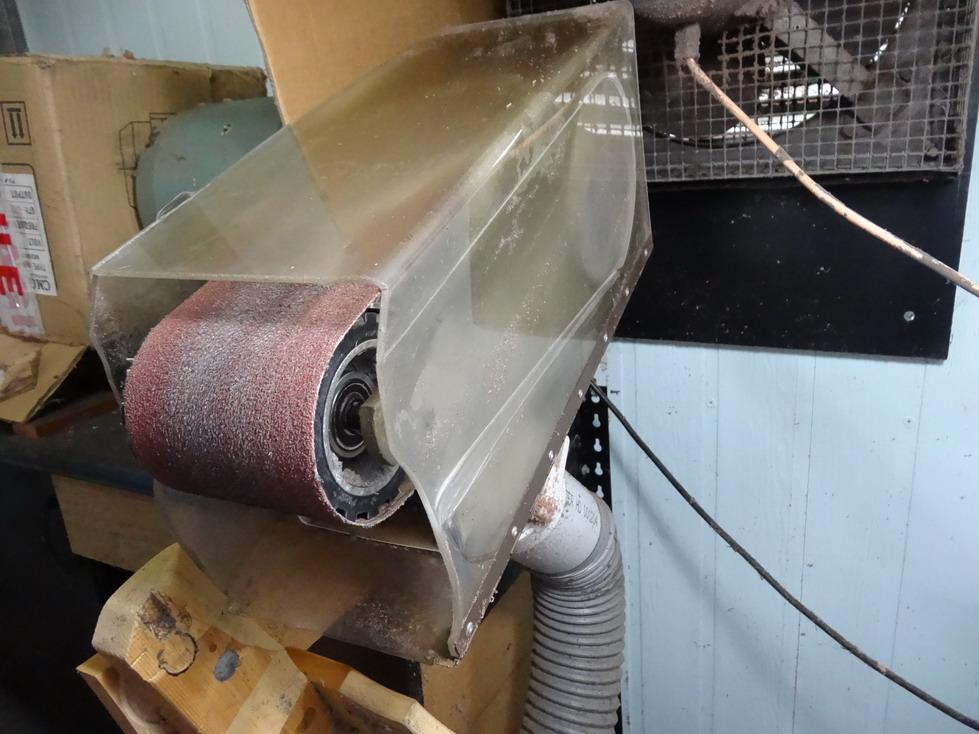
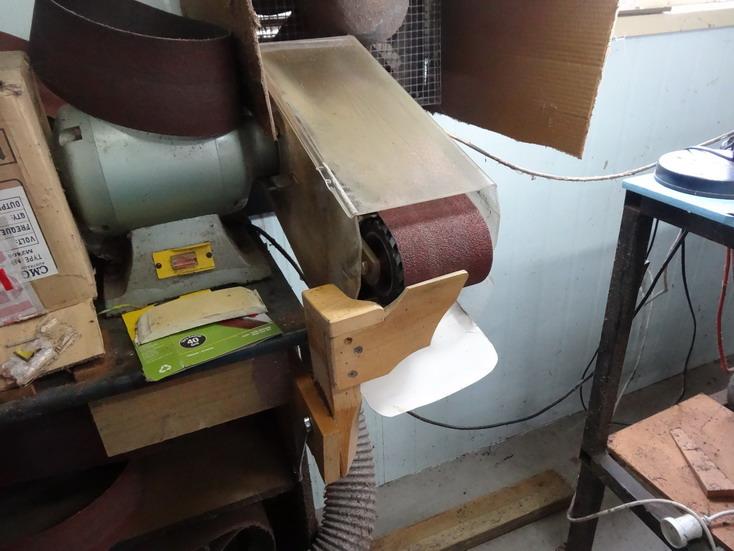
Thanks for that Spryos. I had a large wing nut where the spanner is before but I keep snapping them. The sandpaper I use between the wood works well and I was only thinking that it might be of help with the swivel on yours if it were needed. I have an adjustable screw at the bench to set the distance from guide/fence from the sandpaper. I can not use the star nut idea to clamp it as I also have top be able to swing it right down and back out of the way sometimes for sanding. The sandpaper is glued to one side and when the bolt is tightened the extra friction stops it revolving. This picture shows the fence fully down -
-
Hey @Spyros I love your work. I have been wondering how where this clamp swivels it stays tight and in place over time. I have worked on a little similar swivelling job in wood awhile back and found that by cutting out a washer from some rough sandpaper it worked to stop any unwanted rotation. This was done on a fence for one of my sanding machines. I often use it up and often out of the way as well. See the picture below. You can just see the sandpaper to the right of the spanner and above. As you see sometimes it gets a fair bit of force exerted on the pivot point. Mostly it gets used in this method below
-
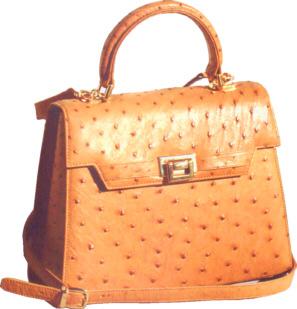
@AlamoJoe2002 Working with ostrich and working with cowhide leather are a way different world of experience and way more so for a beginner. I would look for someone that has a good amount of experience with working with ostrich and do some trade deal for the skins if possible. Ostrich skin on the back is normally not that well smoothed for working with and without splitters and skiving machines and the experience to not cut through the quill areas when doing these operations takes a lot of time and experience. I in no way want to curb your enthusiasm to make something from it but I warn you that without a lot of specialist equipment you are going to have a very hard time. Skiving by hand will be near to impossible and if the edges are not folded then you will have a very rough and soft edge to try and make look any good. A 12 sq' skin will normally be thinner and perhaps easier to do something with but your average 15' sq' up will generally be a lot thicker and challenging to work with. Note that in the picture of this bag below that all of the edges have been folded in after skiving and doing all of this without cutting the quill mussel area area is not very easy. This would have been around a 15 sq footer. I hope that you find some solutions that work for you.
-
Elk Hide Gun Sheath
RockyAussie replied to garypl's topic in Gun Holsters, Rifle Slings and Knife Sheathes
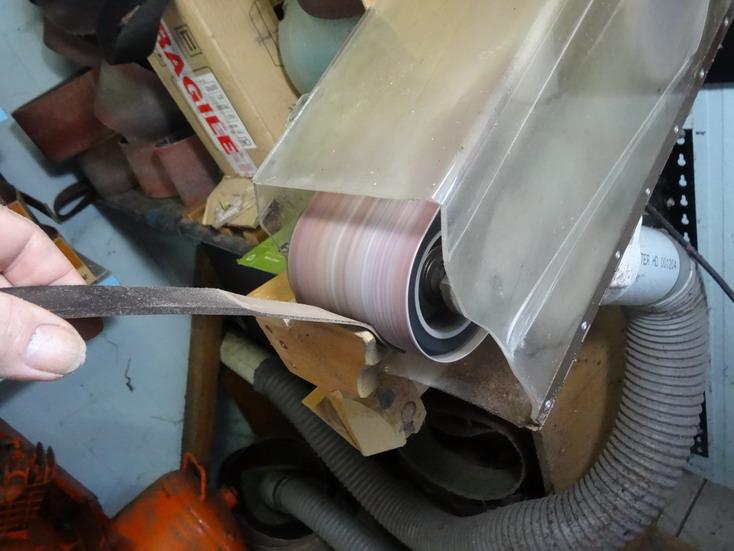
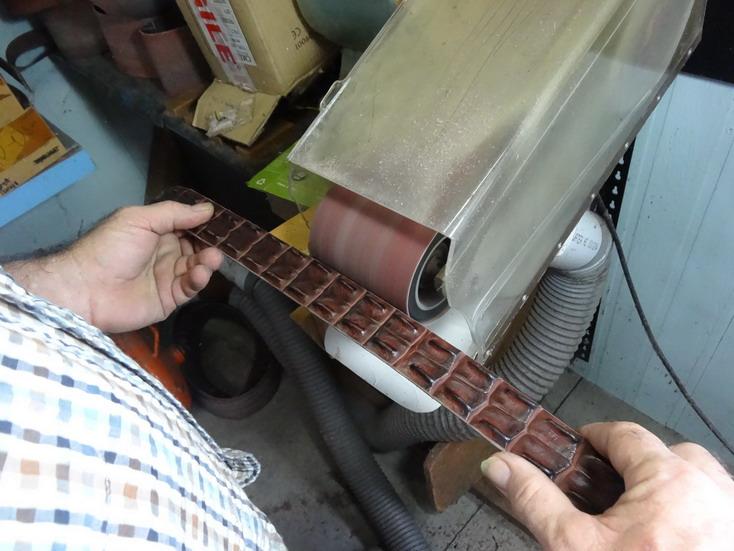
Here a some pics of the 6mm jig as against the 4.5mm jig. My finger is showing where the change in width is-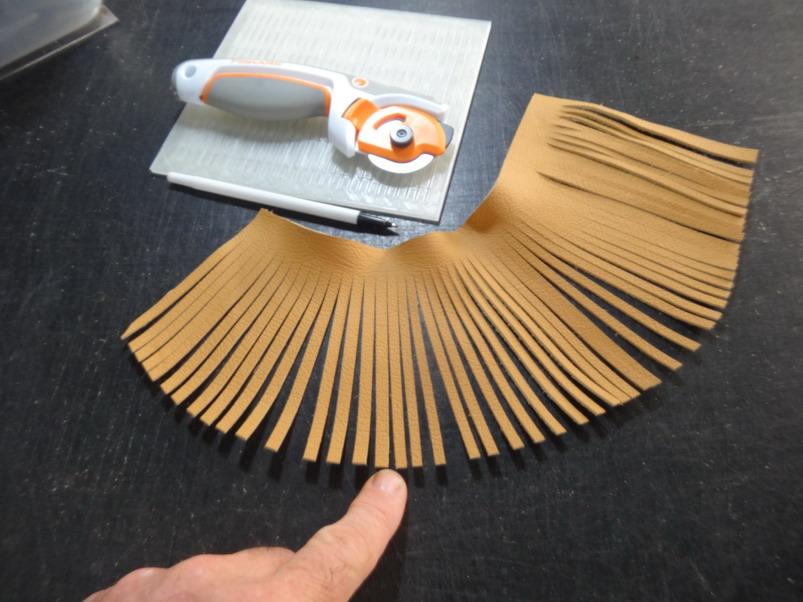
-
Elk Hide Gun Sheath
RockyAussie replied to garypl's topic in Gun Holsters, Rifle Slings and Knife Sheathes
Hi Gary, I will send them both through to you in a few minutes.I did the 6mm one last night and tested it this morning successfully. I forgot to say that I used a solid print but I think around 25% with around 1.1mm walls would work well. your slicer will question 1.1 not being relevant to the nozzle size, but it will work better. The length of my jig in the Y direction is 180mm so if in the scale section you increase this to 220 you would get around 8" length cuts. If that is difficult I can do it in a few minutes if you want. Regards Brian -
Elk Hide Gun Sheath
RockyAussie replied to garypl's topic in Gun Holsters, Rifle Slings and Knife Sheathes
Shhhhhhhhsh, I am trying to convince the powers to be I need a larger 300x300 base printer I think the sliding up or down could work but would you would need to be O so careful doing it. The head knife would work but there are a lot of different width blades and I think the rotary cutters do a good job and a cheaper ass well and more standardised in the blade thickness. -
Elk Hide Gun Sheath
RockyAussie replied to garypl's topic in Gun Holsters, Rifle Slings and Knife Sheathes
I will pm you the file Gary. I have started a 6mm(1/4") with a few more features to help in lining up which I will send as well. (Wife's request). It is still in print to test as I type this so I will send them once it has proven to work in the morning I hope.. I could easily do a longer one to suit your 250mm bed but could you let me know what the outer limitation size is? I think for the rifle sheaths you will want the guide a bit longer than this one which only goes about 6 1/4 long in the cut". Wish my printer was at least that size. Hey Bert let me know what width fringe you would like to have.... -
Elk Hide Gun Sheath
RockyAussie replied to garypl's topic in Gun Holsters, Rifle Slings and Knife Sheathes
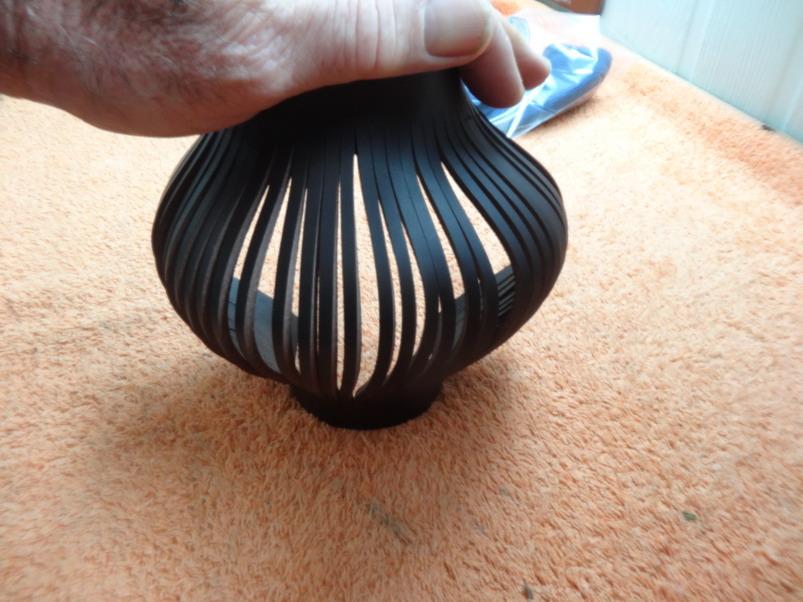
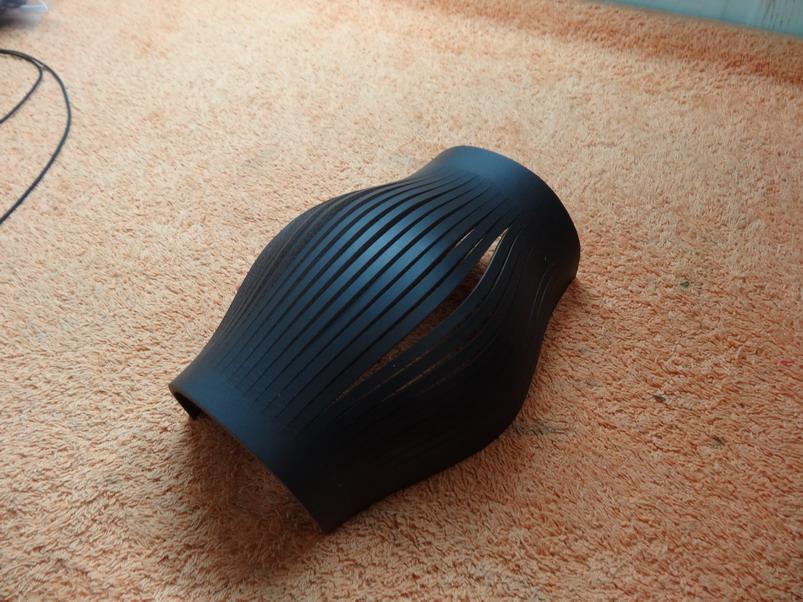
Yep she worked and better than I thought possible. To clean up the print from any connecting strands I thought I would cut down into a bit of stiff veg and this below is what I got.I didn't think I was pushing all that hard. A little push and WOW A light shade or bottle cover who knows- Back to cutting a fringe now Bit hard to see at this stage Still took a couple of minutes to do though first time and all Gary if want to give me whatever spacing you would prefer I will do you up an stl file if you like or you could try this size if that works for you. Regards Brian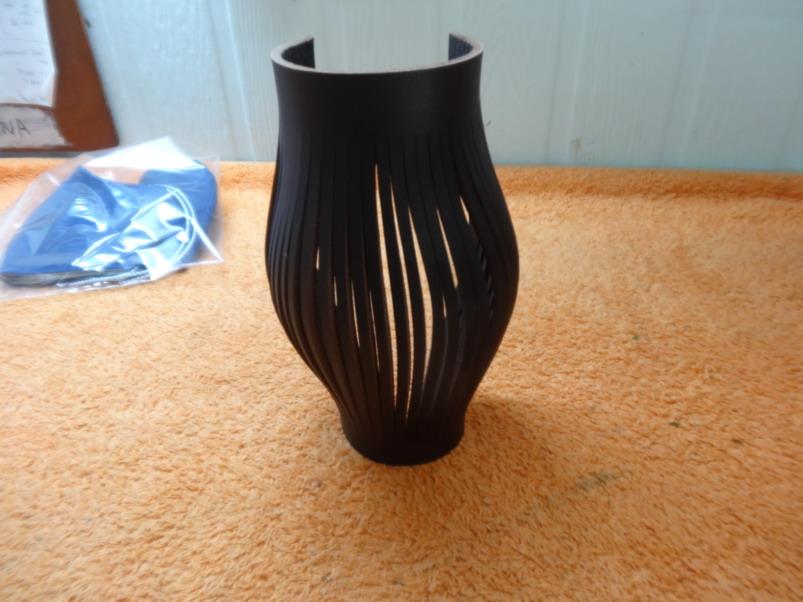


-
Weaving Pattern Bifold
RockyAussie replied to hockeykspiky's topic in Purses, Wallets, Belts and Miscellaneous Pocket Items
Wow ....that weaving is neat and I like it.