RockyAussie
-
Posts
3,265 -
Joined
-
Last visited
Content Type
Profiles
Forums
Events
Blogs
Gallery
Store
Everything posted by RockyAussie
-
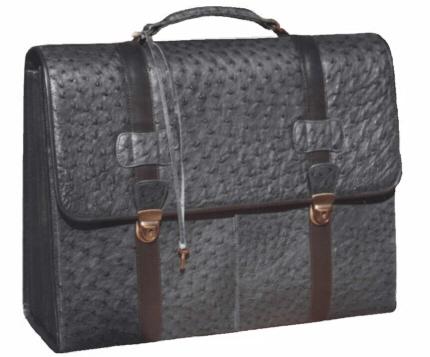
 Excellent improvement I would only think to add a little extra support piece onto the back of the front flap that finishes just short of the top front edge, Next one maybe?
 -
Set up CB 3500 for light work or buy dedicated flat bed?
RockyAussie replied to cpirtle's topic in Leather Sewing Machines
Very well done show piece of both the machines and the operator's quality I believe. I think using a cylinder machine for getting around those rounded corners is a lot easier than using a flat bed but I just hate using flatbeds myself for almost anything except long lines of fabric credit card pockets bottoms and stuff like that. -
Singer 29K60 Walking Foot Not Lifting
RockyAussie replied to Superduty's topic in Leather Sewing Machines
Probably nothing to do with it but I don't recall ever seeing the screws that hold the head on sticking out like that except for once. That once was where this complete novice believed that this was how you should adjust the needle to be closer to the hook. Amazingly he would not let me show him where the needle should be adjusted from..... -
My first purse
RockyAussie replied to Albob's topic in Purses, Wallets, Belts and Miscellaneous Pocket Items
So very well put. -
Looking for a 3/4” binder for leather binding tape
RockyAussie replied to JeannieH's topic in Old/Sold
It does work better if the leather has been split or run through a skiver as that tends to make it a little more slippery smooth and less friction going through. I have found that the leather can actually go through and stitch better than a lot of the tapes they make and can accept the inward curves better due to the leather being able to stretch more. JeannieH has a skiver If I remember so that should not be much of an issue. -
My first purse
RockyAussie replied to Albob's topic in Purses, Wallets, Belts and Miscellaneous Pocket Items
Can I assume that the gusset is done in one piece? I suspect so by the rounding at the corners at the base. There is an easy design change that can make that work a lot easier if you are interested, I can put in a couple of pictures with some description if you like. The other thing is what foot and needle plate combination did you use? I am guessing that you don't have a narrow feed dog /needle plate set and that you may have used the narrow slotted needle plate without feed dog and perhaps a left back foot.....or? A picture would be great if possible. -
My first purse
RockyAussie replied to Albob's topic in Purses, Wallets, Belts and Miscellaneous Pocket Items
Do you mean 2500 or 3200 Cowboy? Very nice tooling and colour but as you said the stitching is not so good. I am curious as to whether you had no guide or just what gave you this problem. I do very much like the tooling as I said but if I can help with the sewing part with any tips I would if I knew which machine you are using. P.S> I am only 62 yr as well though. -
Client Cost Sharing for Custom Stamps
RockyAussie replied to odekami's topic in Leatherwork Conversation
Exactly. I will add that it should always be advised to ask for their artwork to be in black and white as well. Some multicoloured logo's take a lot of time to work out how to separate the sections without losing anything in the process. -
Simple really .....to me anyways. Those ads at the top are one of the reasons that Joanna the owner of this site is able to let thousands of people including myself and JLS to come and get whatever it is we get out of coming and posting on here. Some have over the years been privileged to do this thousands of times and for this I have to thank Joanna, Wiz and Nortmount in particular. What a job having to keep an eye open for any that may want to tear this all down and post stuff for all the world to see when ever they sleep or are otherwise distracted. Their tolerance for this is way beyond my own and a good reason why I would never make a suitable moderator. Because I am a follower I have seen one section of this thread deleted already and that was a disgraceful rant I must say. It is still in my notification emails. To put this another way ....A person comes to dinner whenever they like have a feed and say whatever at no cost and then feel the right to poo on the dining room floor right next to their chair, cause the toilet is tooo far down the hallway and is painted the wrong colour. That's alright though cause they are important. Normally I wont touch anything political or religious and other stuff like that but when you talk about stuffing up one of the few things in life I enjoy along with others I will bite. If you want to go off and start your own website and rant.... go ahead and I would be interested to see how you handle it when your members go about destroying it.
-
Client Cost Sharing for Custom Stamps
RockyAussie replied to odekami's topic in Leatherwork Conversation
This is how I normally go about it. Customer sends their logo design to me in high res. As this stamp to be made has to go on 1 or more products I put the outline into corel draw and make the stamp size down to suit. This often has to have some modifications and wording added as well. I send this art work for them to agree on and request any changes they may want. All up I know that the stamp is going to cost me something like $65.00 au to be made so I round the customer cost to $100 or $120 which is a separated cost to them. They get 10 pieces or a hundred pieces is their business and I don't have to do any more factoring in. In over 25 years and many hundreds of stamps I have only ever had one customer ask me for their stamp. Most times you are left to hold stock of the leather,thread, zips, fittings and such so for them to fully cover the cost of their own logo is more than fair. -
How bout posting some pictures of it and any details. I know someone over there might be interested.
-
Starting off wise I would go with the 2600 but for the bags eventually the 2750 will be better sometimes but not so much for wallets. If you check my web page you will see a lot of tote bags and such and most of these have been accomplished on a small cylinder arm machine.
-
Set up CB 3500 for light work or buy dedicated flat bed?
RockyAussie replied to cpirtle's topic in Leather Sewing Machines
If room is an issue why not sell the 3500 and replace it with a machine that can still cover the large end a bit and cover the middle ground as well. As you have Cowboy range the CB 341 might suit better https://www.tolindsewmach.com/cb341.html . I like the tapered cylinder end for getting around those tight areas on wallets and bag gussets and such way more than a dumbed down 3500 with an overlong needle that has no leather point size for the lighter threads. I agree with Wiz on the Techsew 2700 but I would prefer I think the Techsew 2750 for the tighter areas I stated earlier. https://www.techsew.com/us/techsew-2750-pro-cylinder-walking-foot-industrial-sewing-machine.html I would think that you would be able to sell the 3500 here for enough to make the changeover very affordable. -
Took me a bit to work that out but in case it helps the lifting rod should be to the right of the main shaft not the left. Good pick up there @JJN
-
Do a little light sanding along the edge of the needle plate slot. Round it a bit. other than that the right thread tension needle and thread mix should pull everything back into place pretty well. I just use a bone slicker to rub in a bit if needed.
-
Sometimes I 3D print it sometimes I cut it out in ply or craftwood and sometimes I just cut it out in thick veg and keep adding layers and trimming until I get what I want. Give the leather a wax polish and she's good to go. For measurements from that cut some strips at the same thickness you intend to make it from about 20mm(3/4") wide and use that as a ruler to get your lengths laid over your mould piece.
-
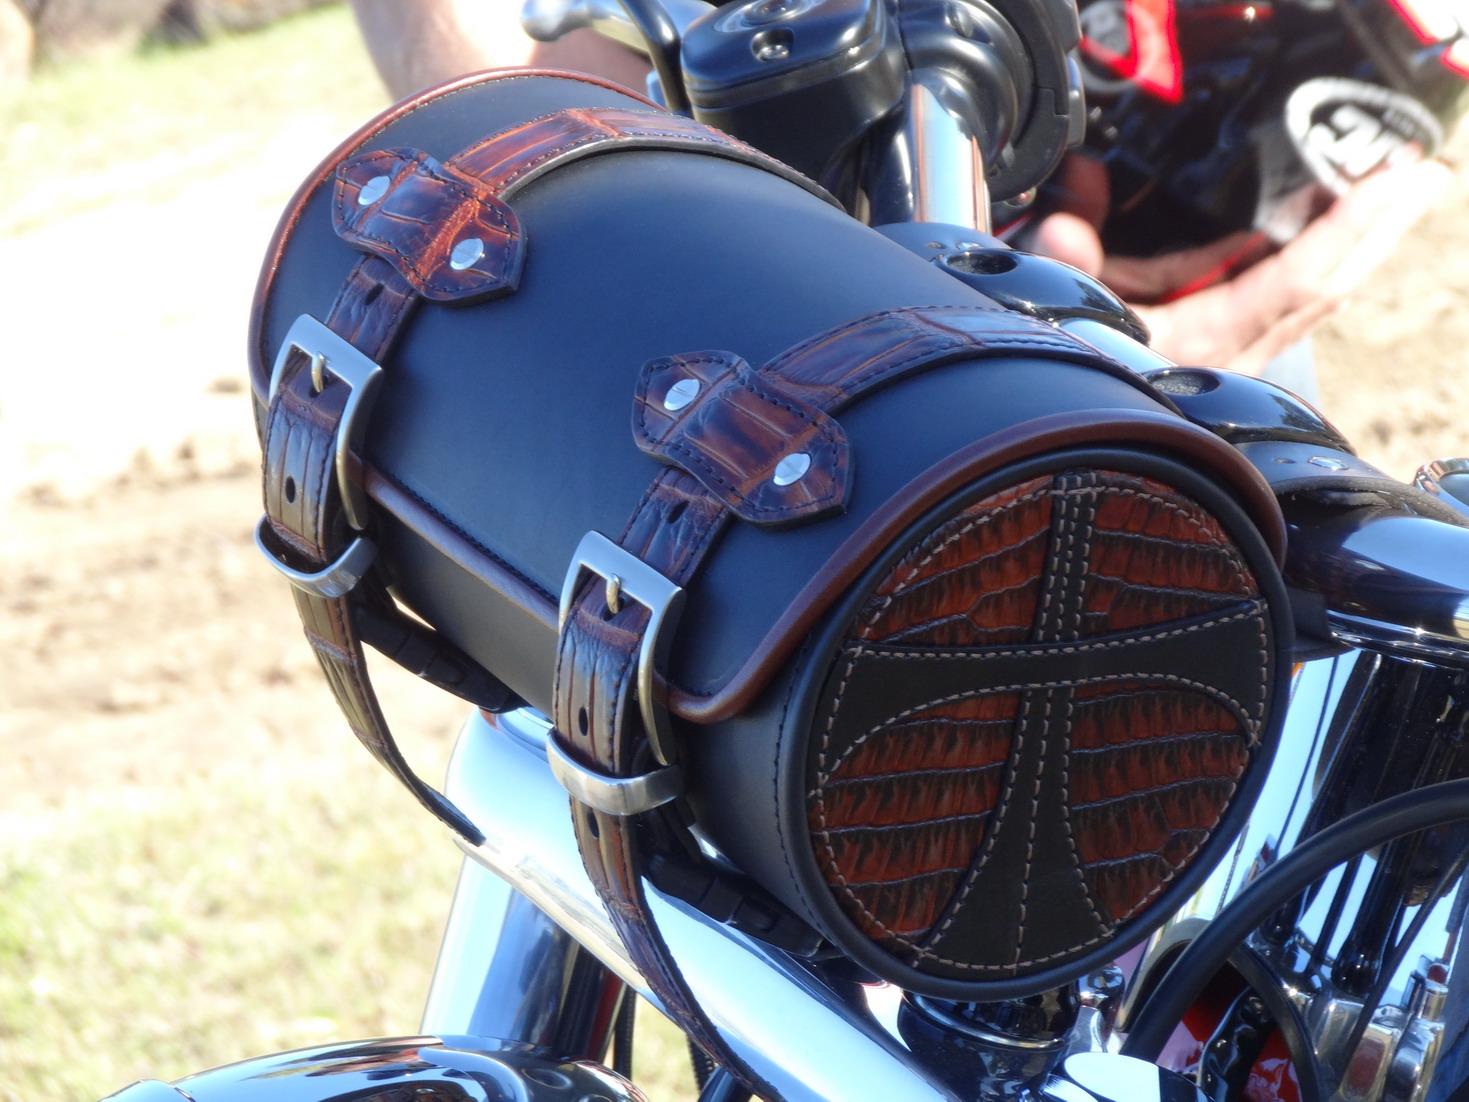
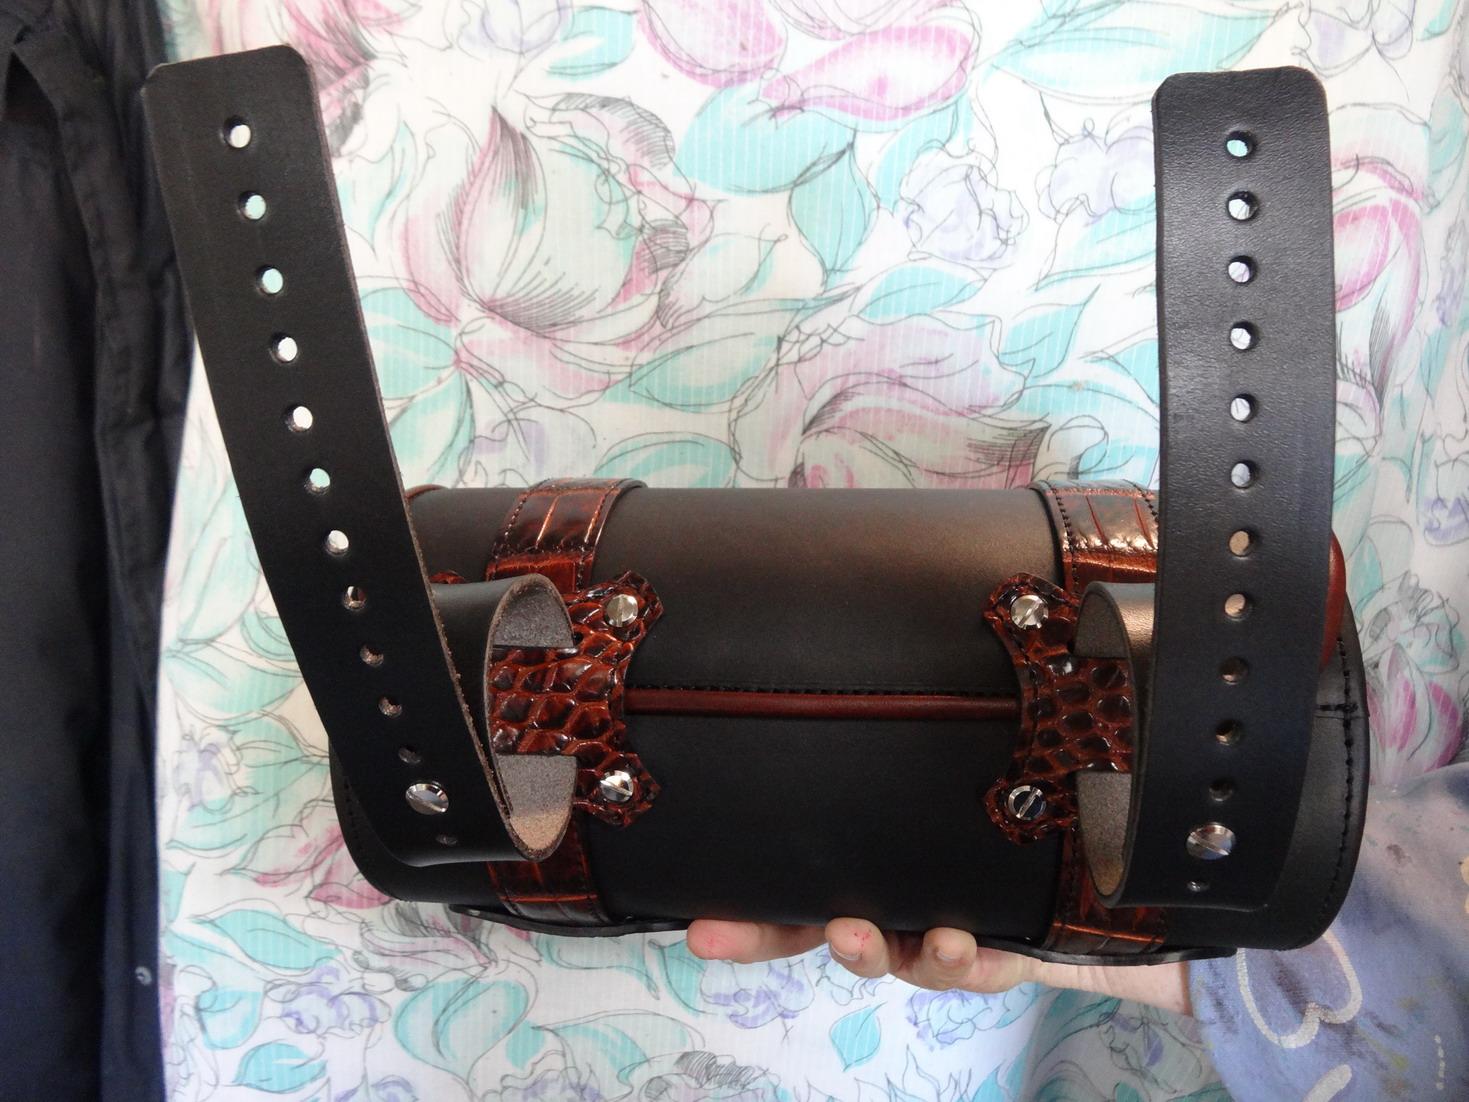
Thick or thin I have never had to do and v shape slits or cutting at all except when going into a tight right angle corner. This pic of the bag below is done with what I call the french edge method which starts off with the edge of the leather edge strip being sewn level with the product edge about about 3mm (1/8") in and then glued around covering all of the strip and then folded over the product edge. This then gets restitched with the needle tight up to the rolled edge of the strip. This motorcycle tool bag in the following pic has the edge of the lid section done that way and may be a clearer picture.

_resize.thumb.JPG.f522436f8279e6a87e7a459647f4aa74.JPG)

-
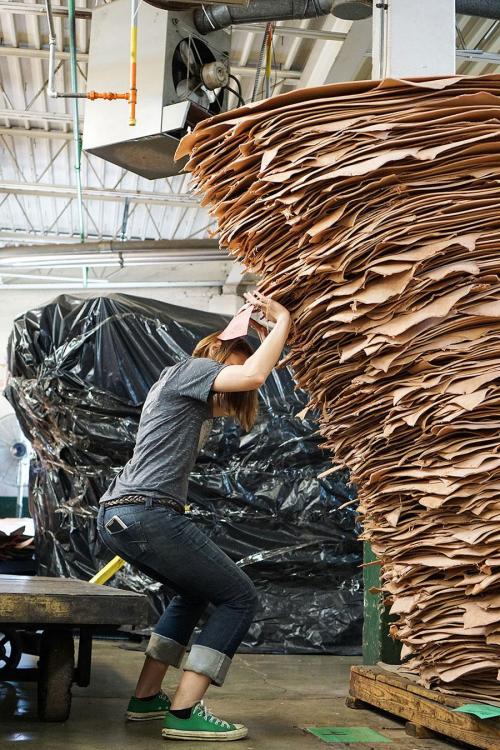
Fair enough. I had a look at their new banner thing at the top about HO and that is amazing that you guys can get it even by the square foot or even just the size and shape you need ......and as you see in this picture finding the best ones can be a little tricky. Here is a link to the story - https://www.springfieldleather.com/hermann-oak
-
Seems to me that when you do good business you grow bigger and gotta also get good staff to keep gettin better still. ( that can be hard) Being a paying site sponsor here ( helps keep the lights on) and a frequent contributor I have to say that having a supplier that is prepared to pay the shipping back if they get it wrong is a very GOOD sign of wanting to get it right. I have to thank @TonySFLDLTHR for sending me out (For Free) some snaps to try out awhile back and report that they were a lot better than the ones I bought here in Australia in recent times. I guess they can try to apply pressure on the original suppliers to mark the hides better but somewhere down the line them hides gotta go. Being able to go and pick through the best will of course leave the more suspect ones behind. If I get something crappy I just give em a ring and normally they knock the price way back or tell me to keep it and send me another one if I need it. Sugar catches more flies than vinegar is what I have found. A free banner at the bottom sort of thingy if you get what I mean. As for followers and any influence that that may have, I have a bit more than a couple myself and maybe this may help give some balance perhaps. AS to who I follow ...I do that with a few but only those whose skills I admire and JLS is one of them few.
-
Solar Leather out of business ???
RockyAussie replied to Constabulary's topic in Leather Sewing Machines
Aside from any warranty type issues of which I would suspect to be very few I am more concerned that all of the good work on instructional type video's is now gone as well. I would very much like to thank @SolarLeatherMachines for all of the work that they put into making these and feel sad that they have felt the need to remove them all. I wish them well and hope that one day they may be able to re-release them for the benefit of any past customers at least. -
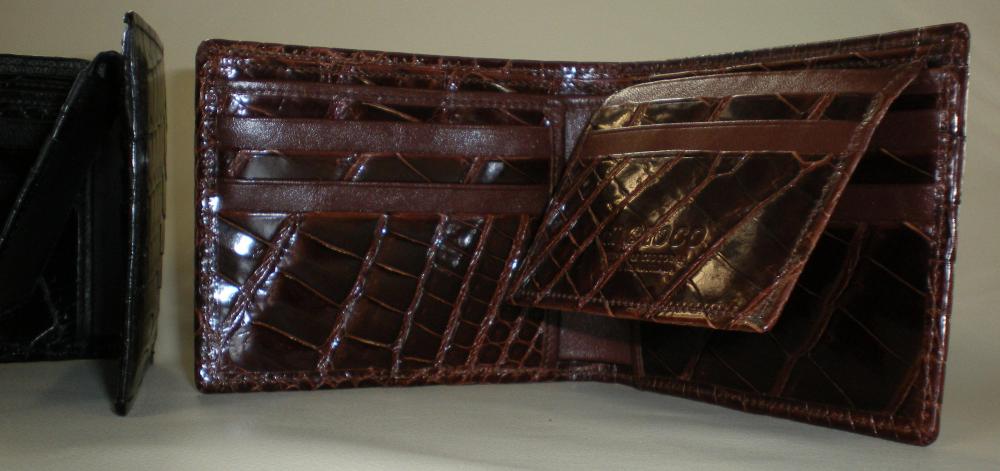
I find that the EPS function comes in extremely useful when doing tight curves as in wallets when they are stitched all the way around gussets in handbags and such for the reason that as the curve gets tight it is necessary to take the foot pressure off and let the top relax. If you were hand stitching you would need to have the holes inside the curve closer together than the outside curve of the article. When I stitch the bottom of the gusset in these clutch bags I lift the foot maybe 15 or so times and the needle stays in to keep every thing straight. The leather that has the pressure taken off then allows the needle on the next step to go slightly further on top. With out this happening the bag would deform quite badly and end up twisted. You can do this with a knee lift or foot pedal but the time and attention would make it way slower. This pic shows some of my typical clutch bags with a fairly tight gusset area. This wallet shows how I prefer to stitch all the way around if possible and that requires 2 or 3 foot lifts in the tight area and is handy for the corner turning as well. A bag like this one requires many foot lifts in many places and although quite thick and hard did not need any speed reducer. I can only add that if you can take a bit of firm/hard leather and try out one with an EPS it should help make a decision that suits you best.


-
I remember that post and there were quite a few other good points in it as well.
-
I thought to warn you to allow a bit of free movement but the Kansas weather is a whole heap cooler on average than over here where 100 F is not unusual. Here a bloke gets loose tension on the bottom side pretty quick running with them set ups. Good to allow for a 1 to 11 o'clock before it moves if you get what I mean.
-
Buying my first machine - Cowboy CB3200
RockyAussie replied to TaylorM's topic in Leather Sewing Machines
I think that would be a way better machine for the jobs. 1/2" capacity is good. Size 18 leather point needle which do not wander around going through the job and can still handle some pretty tough stuff as well. The 3" cylinder end is about my only reservation on the gusset work but smart designing will overcome most of that most of the time. -
Welcome @Tulsa and thanks for your input. Anybody offering advise to help in any way on LW should never ever be considered stupid. The fact that you're here looking says you gettin smarter.
_resize.JPG.15a3d7f9d3e888a3c42bf8616a178c90.JPG)