RockyAussie
-
Posts
3,265 -
Joined
-
Last visited
Content Type
Profiles
Forums
Events
Blogs
Gallery
Store
Everything posted by RockyAussie
-
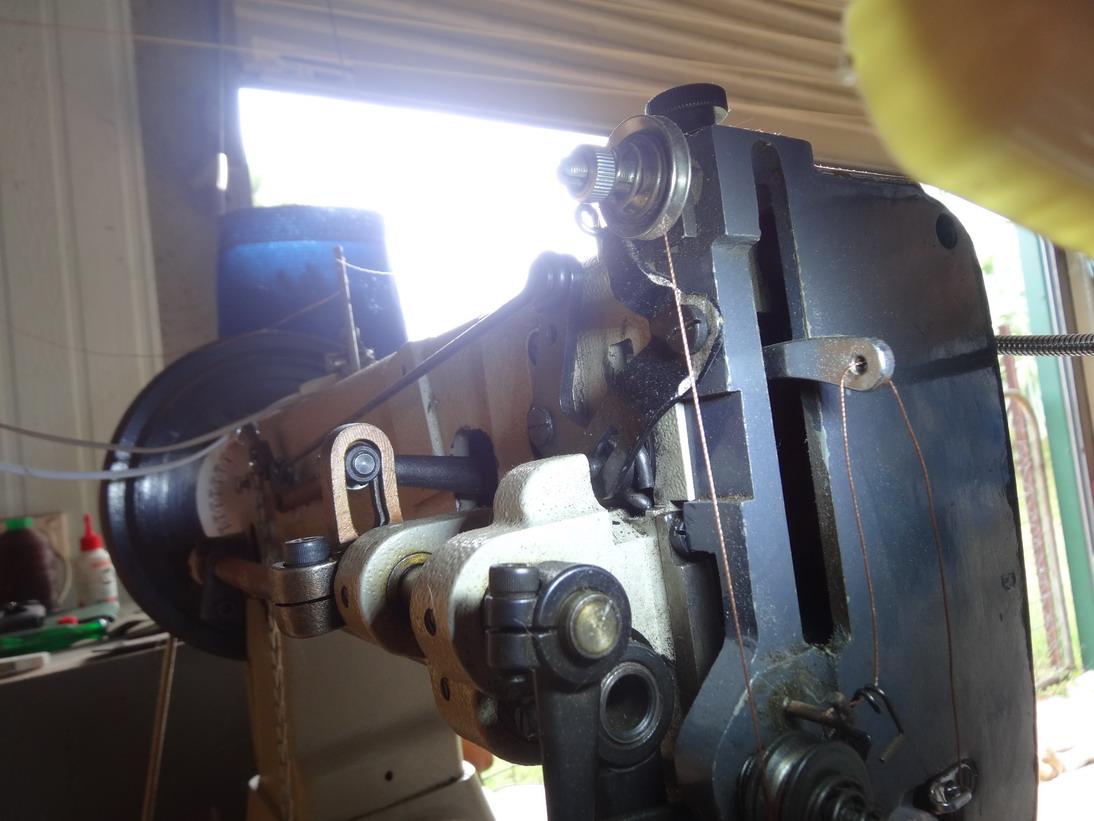
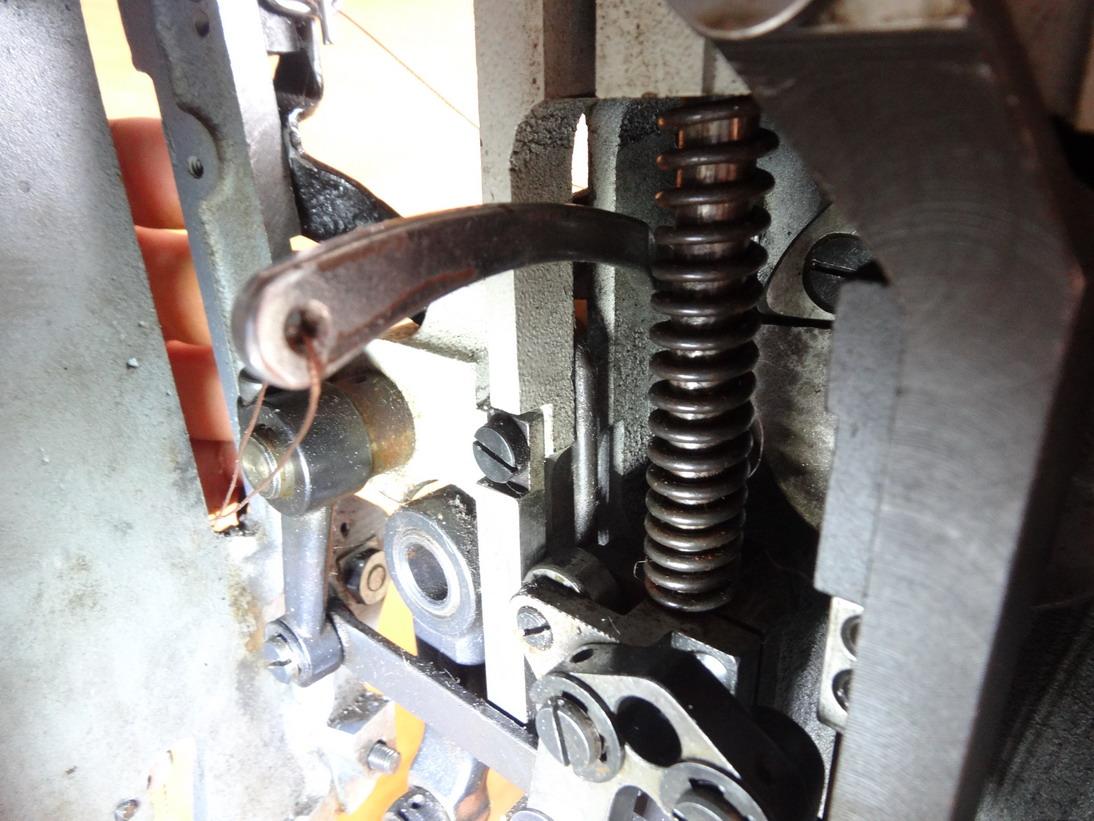
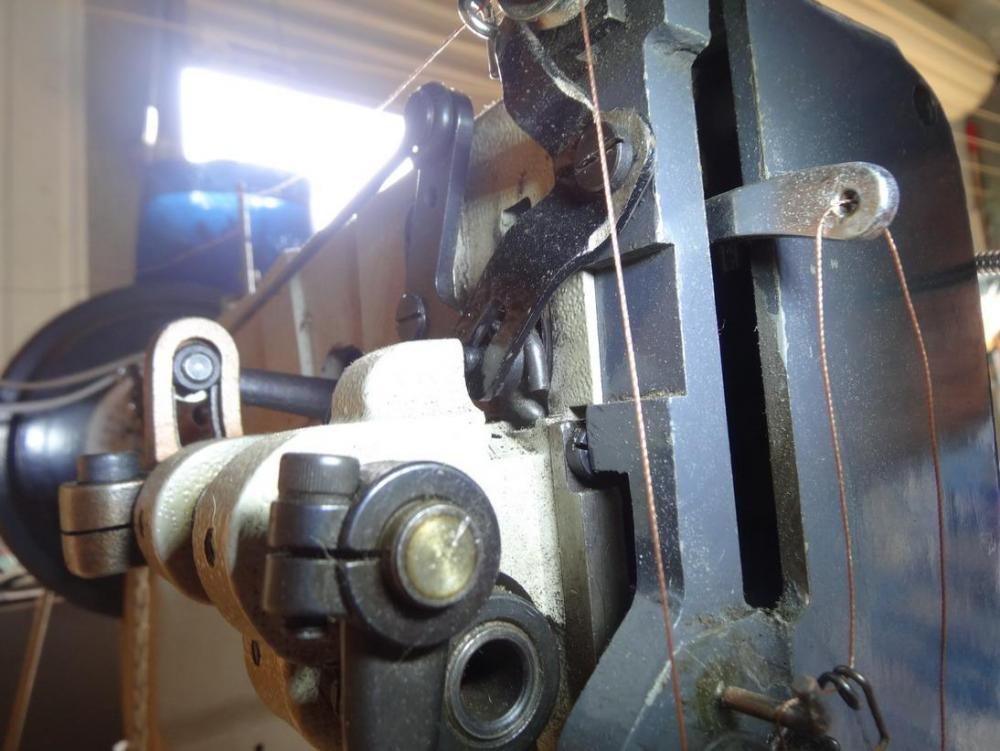
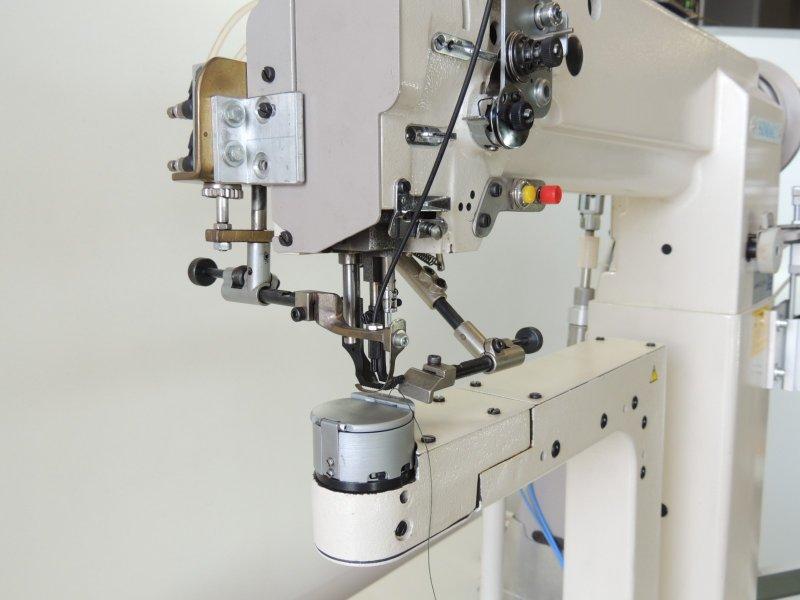
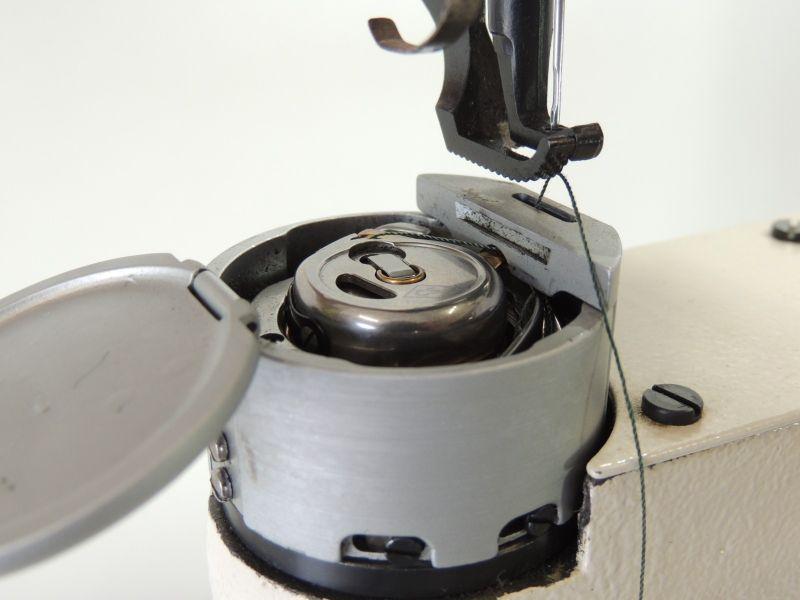
I remember having some similar issue with mine when I got it and I cant say for sure what I have is right or not but here are a few pics that may help anyway.


-
I had to check out the timing templates.........Thanks to @Uwe I still have one stuck onto my big pulley. I would like to recommend that if you a new owner of one of this breed that you check out Uwe's video that goes with these templates. Made mine work a whole lot better.
-
And it must be a comfort to know that you are not having to deal with some reselling dealer in China going through the Language barrier and the dubious not understanding you theme.
-
You left your daughter in the Pilbara?
-
I have to cut in and say that I had the pleasure of meeting face to face Jessica and Mitchell, the new owners of the Cowboy leather machines here in Australia. They are very new to this and I can assure you that they are very eager to learn every thing they can to be knowledgeable about their new business. There was a LOT of note taking and picture taking and discussion on various machinery whilst they were here and I know that if they don't have an answer to help you they are the type of people that would find out from people who know and get back asap. It would take a little time for them to get on their feet but I have no hesitation in recommending them already. They have also left a variable speed sanding burnishing machine for me to check out and I will get back in another post with my findings on that in the near future.
-
Dammm....I been drinkin that stuff.......I knew it wasn't the beer
-
Can you take a picture from the back showing the linkage fully down? Could it be just that the chain needs to be a little shorter? Is it just that the foot pedal can not go any further down? Is the bar that separates the upper tension discs hitting the tension disc rod?
-

Pfaff 335, Adler 69 type Cylinder arm caps.
RockyAussie replied to RockyAussie's topic in 3D Printers and Lasers
Hi jimi, Yes I have seen that one before and it is the style of thing I was thinking about doing except on the big 441 machine and the pressure of this type of work I will need to build in a lot of support structure where possible to take that kind of load. I may end up trying it on an old 69 Adler first I think once I get a servo motor hooked up to it. I do have a few bags that need these handles to do so........ -
I will have to check and get back to you later.
-
Pfaff 335, Adler 69 type Cylinder arm caps.
RockyAussie replied to RockyAussie's topic in 3D Printers and Lasers
It is a sort of walk up the arm and cylinder arm combination. Best I can tell the arm can swivel 360 which means that you could sew all the way around a bag without the gussets getting in the way. Very lacking in information that can be found on it. I did find another similar machine which has a dog foot feed as well but again Very lacking in information. Come on Folker.........Give it a go. The best stuff will always come from the people like you. -
Pfaff 335, Adler 69 type Cylinder arm caps.
RockyAussie replied to RockyAussie's topic in 3D Printers and Lasers
Maaaann you shore jumped into it on the printer stuff. LOVE it. I have been considering making up something but I would like to use some little motors like on the printer to keep the roller turning continious. Some paints dry onto the rollers very quickly and you will quickly get dry lumpy problems if it does not keep the paint moving. Yep. On pla+ I usually run mine at 65 degrees.Aluminium heather plate under the mirror and cork under that to keep the heat more even and stable. I think the mirror is holding up better than the original. Mind you I use a separate cooling fan for when the job is done and make sure that it all but pops off of the plate when I remove the job. Are you using Cura? If so what version? You did real well printing that foot as you did. I think I would have added more sidewall thickness and printed it the other way up with light supports though. Looks more original like the way you did it. I think you are going to be coming up with some amazing stuff and I hope to see it. Is that leather stuck on the bottom of the centre foot? 335? Hey ...here's something I found last night ...I WANT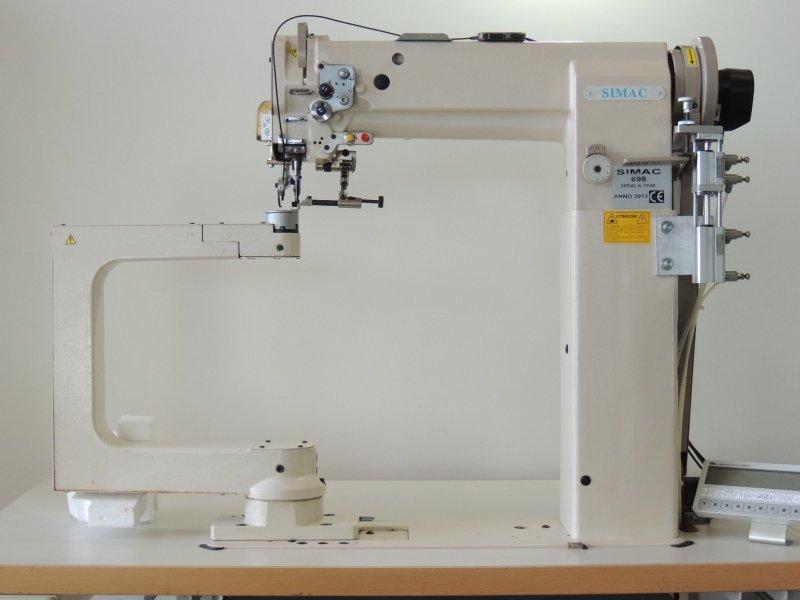
-
This help? Might help to talk to Tim from his experience before buying perhaps the wrong thing. I got one and for purses I reckon not.
-
I dont think the bracket goes anywhere on the machine head but I have seen something like it before. It may belong under the adjustable foot pedals. or......
-
Pfaff 335, Adler 69 type Cylinder arm caps.
RockyAussie replied to RockyAussie's topic in 3D Printers and Lasers
Lousy pics but help to explain better ......a bit This one is the first on the combining machine. Here I am stripping a belt filler which turned out exactly wrong. I forgot in the drawing to account for the knife thickness. Worked beautifully though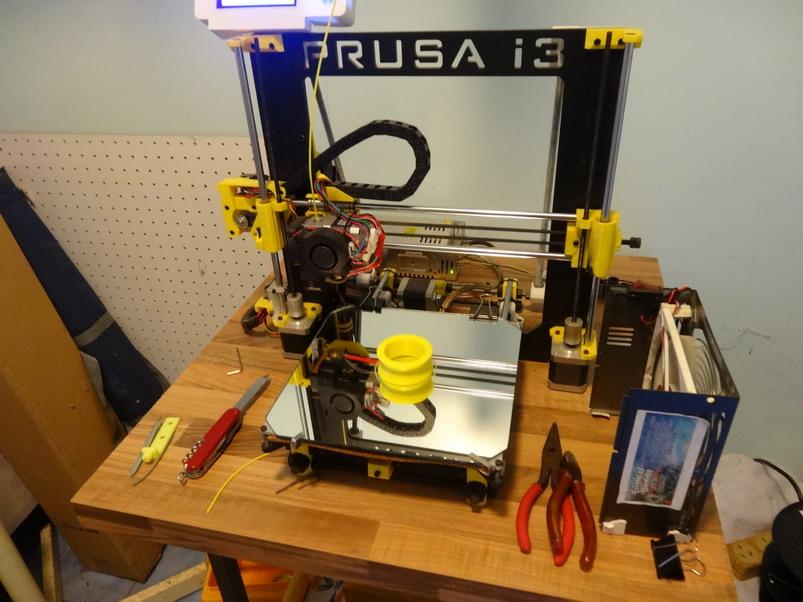

-
Pfaff 335, Adler 69 type Cylinder arm caps.
RockyAussie replied to RockyAussie's topic in 3D Printers and Lasers
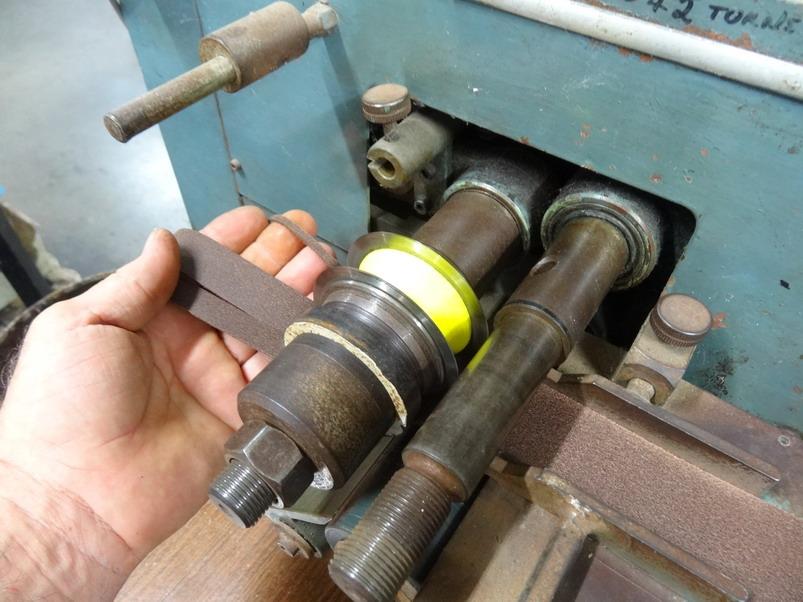
Hey thanks for the thought jimi and Folker, I am interested to have a play around on some of this stuff soon. Just at present I have a large scale operator wanting me to high tech up their belt making department and that is allowing me to come up with a heap of interesting stuff. Today I worked out I can print spacers for the various width strap cutting as well as the belt combining machine. The pla+ is way quicker than me on the lathe to print and I reckon their going to be better as well. I will check and see if any of these pics I been taking work out or not and get back shortly. -
Pfaff 335, Adler 69 type Cylinder arm caps.
RockyAussie replied to RockyAussie's topic in 3D Printers and Lasers
Any pictures? I am curious of the sewing machine model. -
Pfaff 335, Adler 69 type Cylinder arm caps.
RockyAussie replied to RockyAussie's topic in 3D Printers and Lasers
There are a lot of variables and I would need to see the type of thing that you would want to make to give any worthwhile advice. -
Pfaff 335, Adler 69 type Cylinder arm caps.
RockyAussie replied to RockyAussie's topic in 3D Printers and Lasers
I've been thinking about doing a little bit of that to make up some for special jobs like leather covered rope handles with a shaped needle plate and feet etc. I think the feet would need to be bulked up in areas compared to steel but I doubt that would create too big an issue. Zipper guides should be another interesting one to look into. -
441 Foot Tension Adjustment
RockyAussie replied to RemingtonSteel's topic in Leather Sewing Machines
From my experience I would firstly grind smooth and polish the sharp edges off of the needle plate. Next check that the feet also don't have any sharp edges on the inside edges in particular but outside edges as well. Setting so that the feet lift barely above the job as they travel is best and should look to be lifting the same hight as they alternate. Putting in a smooth dog foot for some things would be an advantage but more for bulky uneven products. The hole in the dog foot will leave little pop out bumps instead in comparison. grind and polish first the needle plate but don't go extra wide. With regards to the pressure on the feet....you should be ab;e to get your thumbs under the feet and be able to lift them up without too much trouble if set for the type of project shown. Sometimes the shaft can be a little bent or rough and an easier lift on the presser feet can be found by turning the adjuster a 1/4 turn looser or tighter. Push up with your thumbs and see if you can feel any pressure difference. Drop a drop of oil down that hole anyway if you haven't already. Wider top feet as in the original Juki model leave less of an impression in veg leather and therefore more top down foot pressure can be applied with less damage. You may be able to get some wider feet out of China if you can't get what you want after smoothing things out. Let us know how you go. -
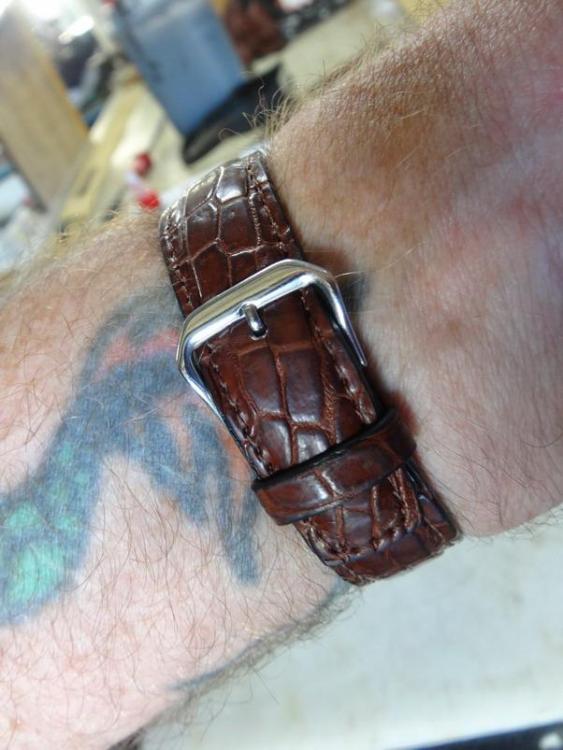
Thanks Nick, I should have thought to mention a post I made awhile ago that shows a method of how I make one of these bands above. Here's the link in case anyone has not seen it - https://leatherworker.net/forum/topic/86069-how-to-make-a-watchband-with-edge-coating-tutorial/
-
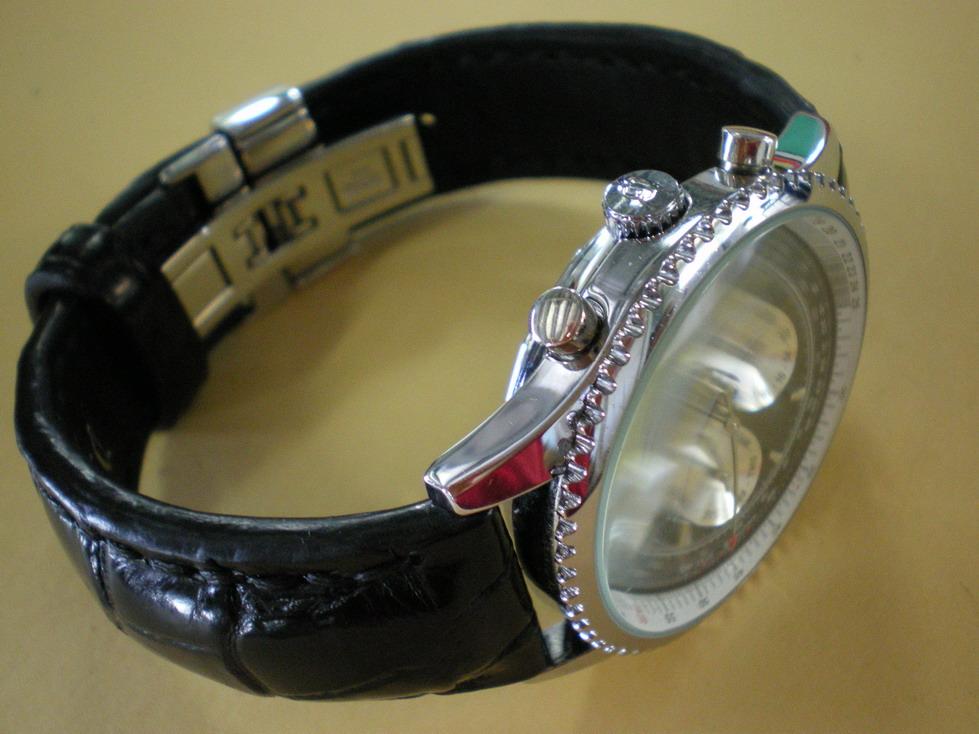
Not always but in most cases for me the skin I want to display as against the skin touching my skin are not always that comfortable to wear. Couple a pics should help answer better maybe -


-
If you can post some pictures that show a few shots of how you have the machine set up might help. In particular the area of where the feed stone is in relation to the bell knife for being parallel and then the presser or roller above it from the bell. All these would need to be parallel with each other firstly. The feed stone would need to be all but touching the bell knife for distance. The spring pressure applied by the adjustment knob at the far back on the left may need to be loosened a little to stop any sudden grabbing as it feeds in. Get plenty of scrap and make sure that the bell is sharp and play with them knobs until they start to make sense. Campbell Randall has a few videos showing adjustments with these machines and I would study through them first.
-
(first post) Used Sewing machines
RockyAussie replied to Donkeykong's topic in Leather Sewing Machines
The prices to me look incredibly cheap and many are good name brand machines. I would find someone that is familiar with a variety of industrial machines and offer to pay them to check them out with you and advise which ones are going to do the jobs you would want to do with them. At those prices I am sure they would be interested to have a good look themselves anyway. There are many every day use machines that are generally easy to get new parts for as well. I would be there looking with ya cept Australia's a little bit toooooo far away. -
yr welcome
-
Your joking......Right?????