motocouture
-
Posts
475 -
Joined
-
Last visited
Content Type
Profiles
Forums
Events
Blogs
Gallery
Store
Everything posted by motocouture
-
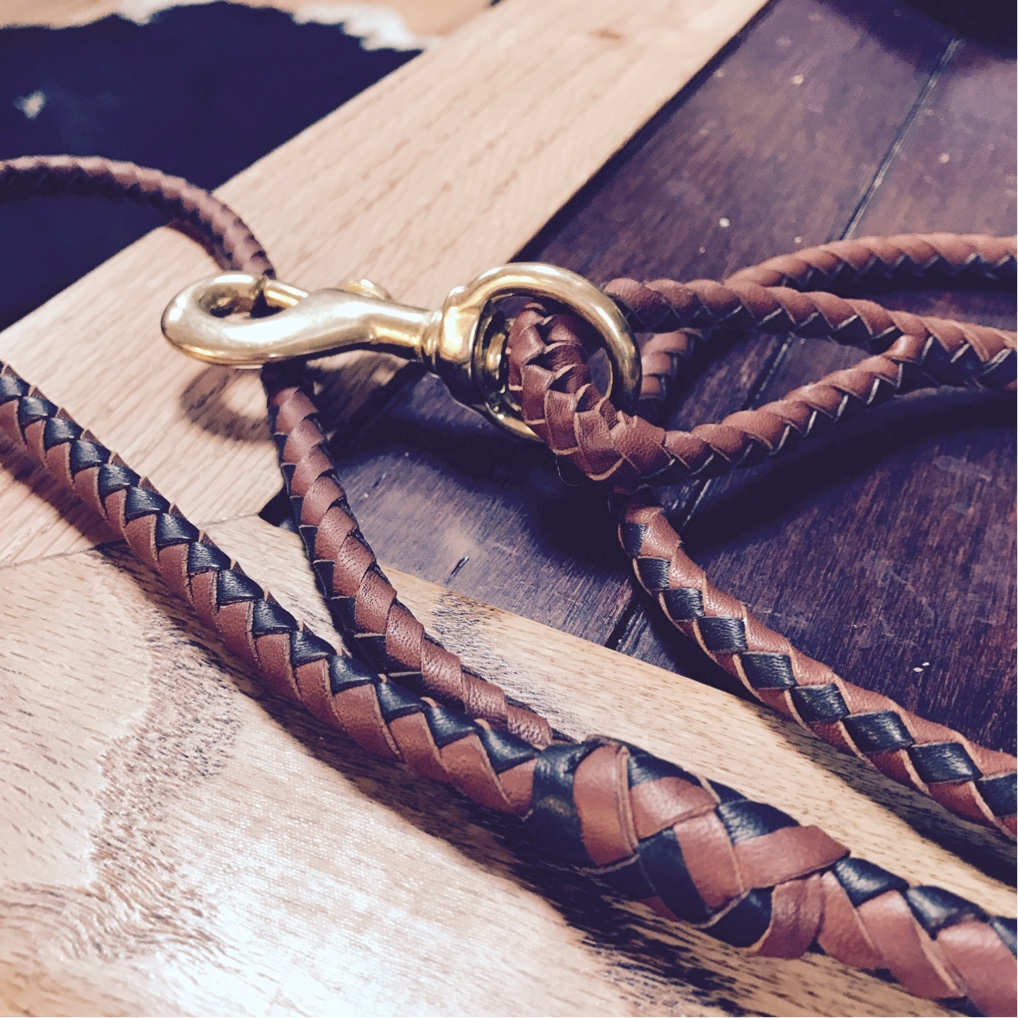
 Beautiful bags, look like they’ll last two lifetimes, and thanks for the link to your source.
 -
Tinkering To Save Cash...aka....keeping The Tool Budget Down
motocouture replied to TinkerTailor's topic in How Do I Do That?
Sounds like that was a great trade! Love the idea of the tile saw, though I don’t have a 12 ton press, so I think my slab should be safe for a while -
Tinkering To Save Cash...aka....keeping The Tool Budget Down
motocouture replied to TinkerTailor's topic in How Do I Do That?
My latest addition was a slab of beautiful marble (?), for the princely sum of $20. Stopped by a local granite / marble countertop place, and they stack cutouts and smaller pieces outside. A quick cash transaction later (which I’m sure made it into the books ), and hubby and I took it home. Probably could have got some of the smaller / less evenly cut pieces for free, but what can I say, I’m fussy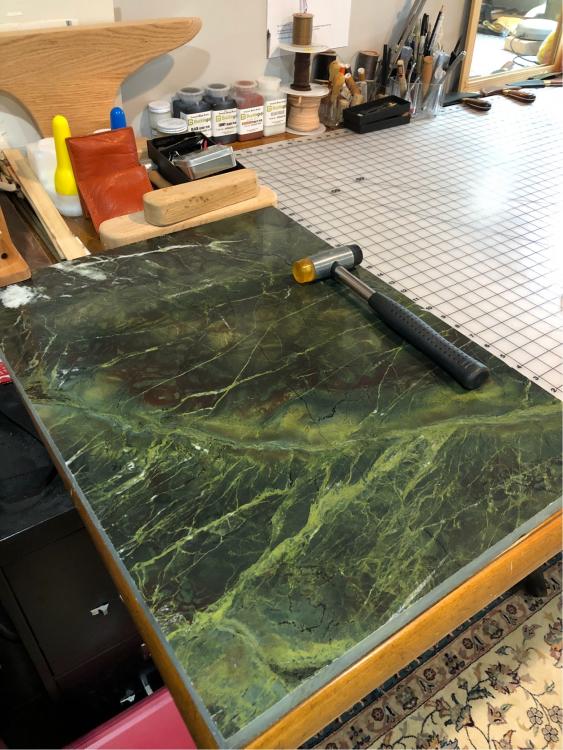
-
For what it’s worth, I don’t bevel my edges. I follow a very similar process to @Ferg, and I find the sanding gives as much gentle ‘rounding’ as I need. I find that without bevelling, the surface tension of the edge paint combined with the sharper edge of the leather helps keep a nice straight line. Then again, I also learn something new at this every day, too....
-
Croc clutch!
motocouture replied to motocouture's topic in Purses, Wallets, Belts and Miscellaneous Pocket Items
Bwahahaaaaaaa!!! Luv it! -
Stunning work!
-
I figure a clutch is just a bigger cuff with a couple of extra bits . Your work is fantastic by the way, and has definitely been an inspiration for me. As for the coaster, to quote an old family friend who kindly taught me the basics of jewelry making, “there’s nowhere to hide in simplicity”. I think in its own way, a coaster could be harder than a bag....and thank you!!
-
Croc clutch!
motocouture replied to motocouture's topic in Purses, Wallets, Belts and Miscellaneous Pocket Items
Thank you so much! -
Leather Briefcase / Leather Satchel
motocouture replied to BattleAx's topic in Satchels, Luggage and Briefcases
Lovely, clean work! -
Croc clutch!
motocouture replied to motocouture's topic in Purses, Wallets, Belts and Miscellaneous Pocket Items
Thank you, and not a problem at all, glad it was of interest! I love seeing how things are made as much as the end result... Thanks! Appreciate your encouragement along the way, ‘specially when it comes to stitching every day Thank you, and my pleasure! Least I can do given what everyone shares in this forum. -
Croc clutch!
motocouture replied to motocouture's topic in Purses, Wallets, Belts and Miscellaneous Pocket Items
Appreciate the kind words! really happy with how it turned out. Of course, now hubby is bugging me for his watch band lol. Good idea on the YouTube vids, at the very least should be entertaining ! -
Croc clutch!
motocouture replied to motocouture's topic in Purses, Wallets, Belts and Miscellaneous Pocket Items
Thank you! The straps are a little fiddly to undo but they’re fun Ha! Thank you so much! Leaned heavily on your sage advice, tips and tricks. Owe you a beer...or four! -
Croc clutch!
motocouture replied to motocouture's topic in Purses, Wallets, Belts and Miscellaneous Pocket Items
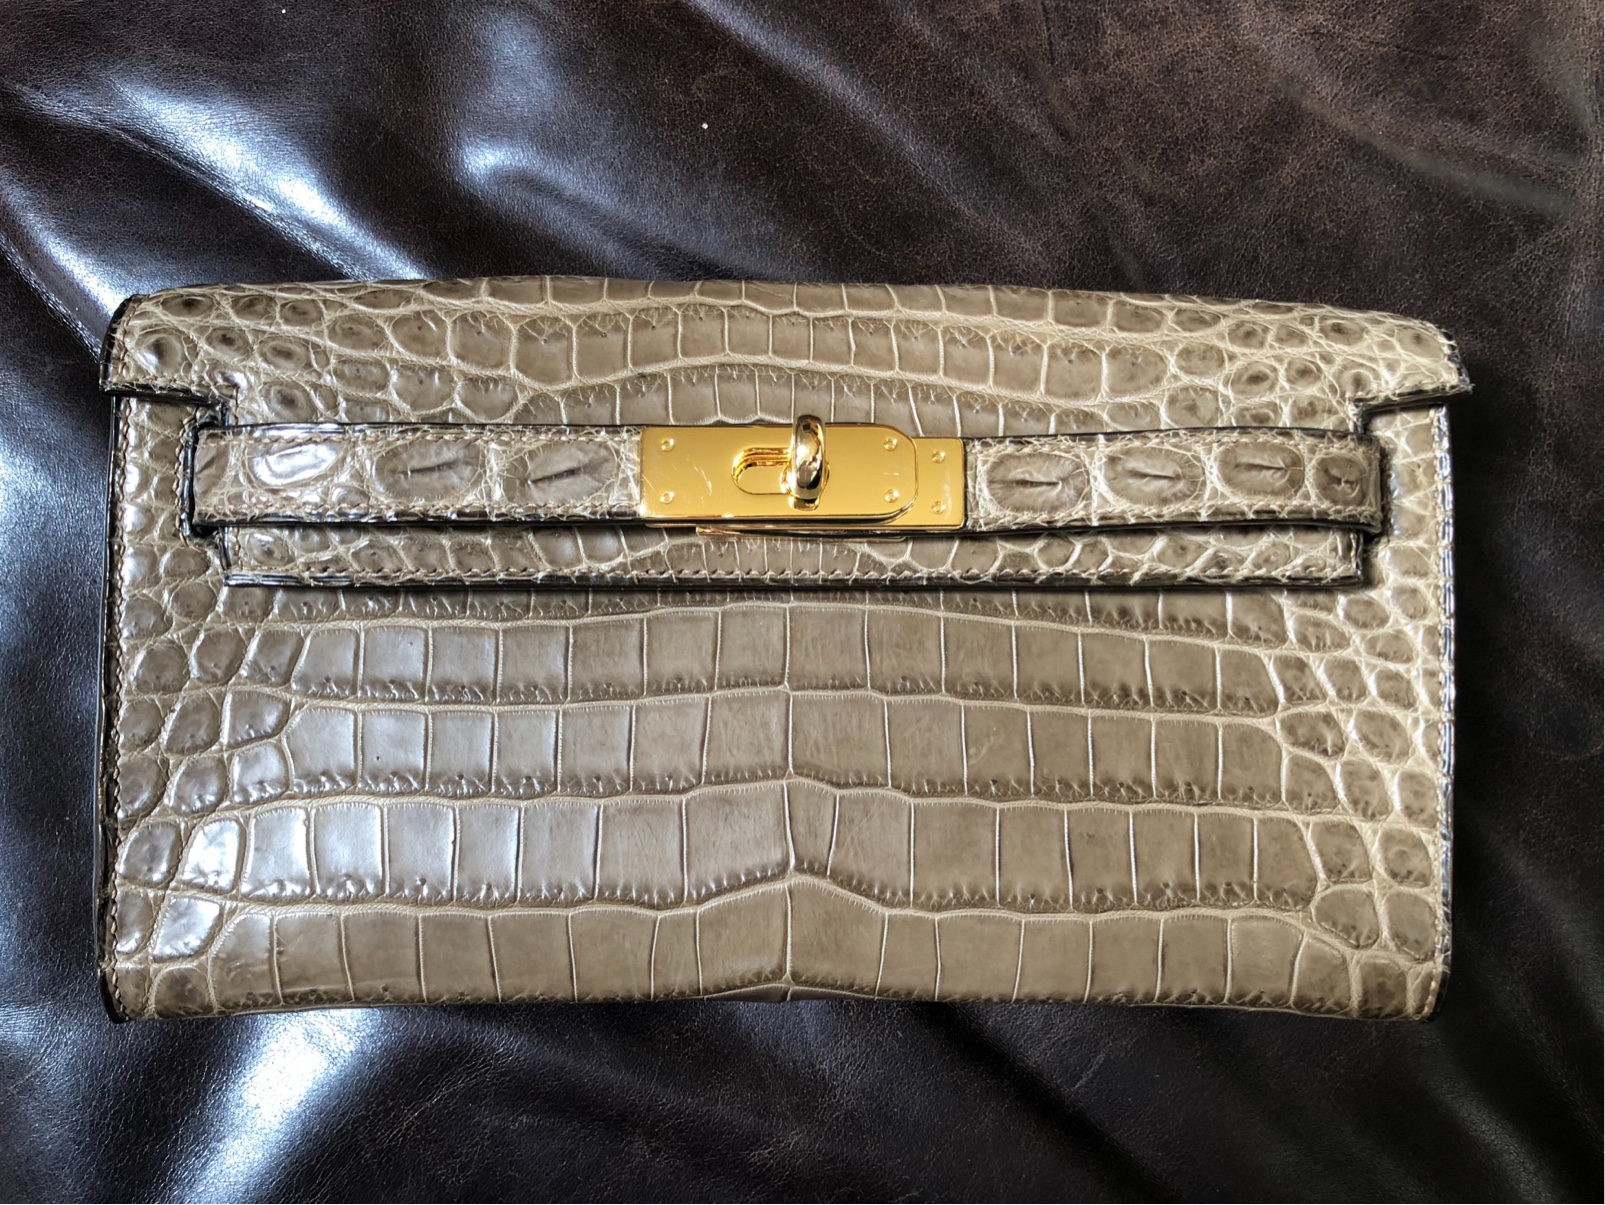
Finally all done! Stitching complete and edges edged . Really happy with how this one turned out, though as always, there’s things I want to do better next time round. Enjoyed working with the croc.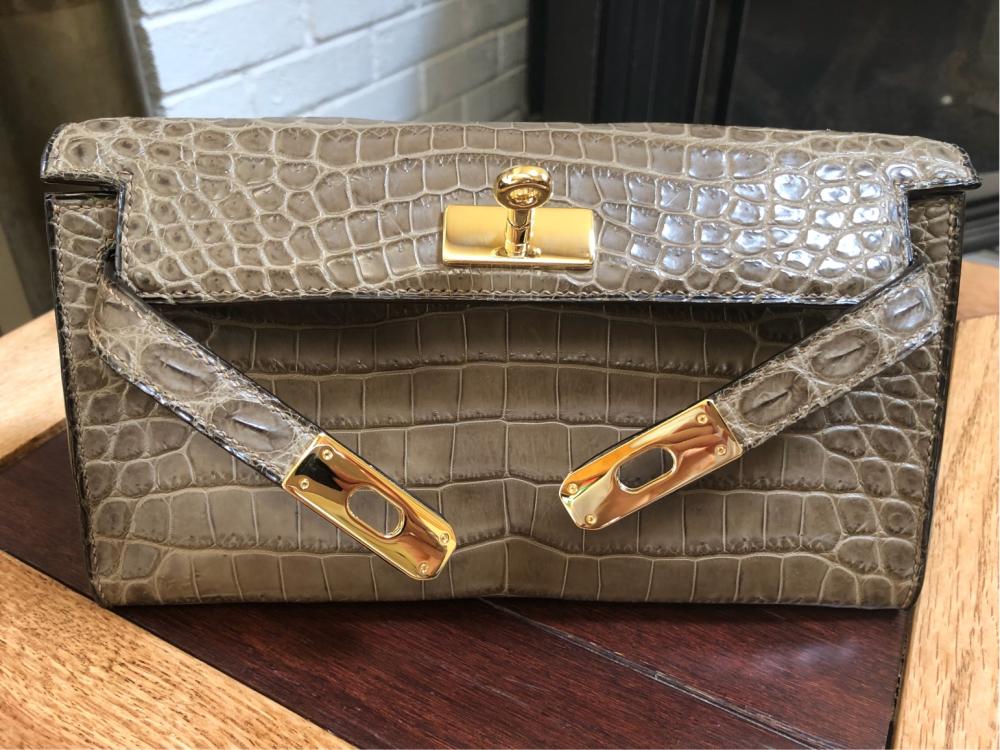

-
Croc clutch!
motocouture replied to motocouture's topic in Purses, Wallets, Belts and Miscellaneous Pocket Items
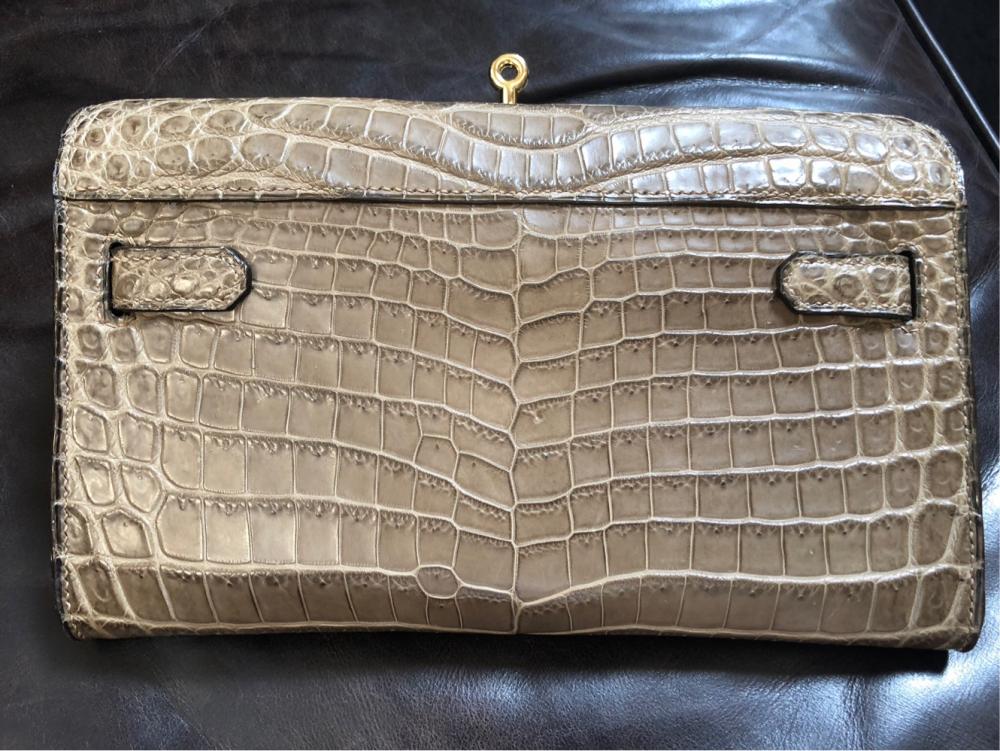
Here’s a shot of the gusset being stitched, using a few needles to line up the stitching holes. I also dampened the bottom of gusset and the bend in the main body, and shaped both a little to help ease the leather through the curve.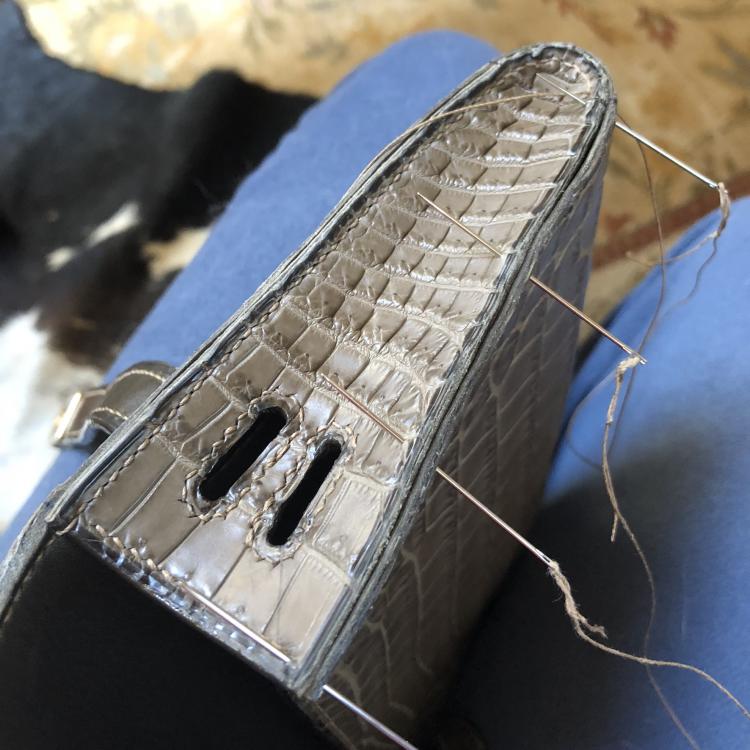
-
Croc clutch!
motocouture replied to motocouture's topic in Purses, Wallets, Belts and Miscellaneous Pocket Items
Thank you so much! I’m really enjoying working with the croc. Needs a little more TLC, but works up beautifully. Been thinking about the inverse chisels, definitely on my wish list... -
Croc clutch!
motocouture replied to motocouture's topic in Purses, Wallets, Belts and Miscellaneous Pocket Items
Yes, it is, drafted it from scratch. I hadn’t, but if there’s appetite for it, would be willing to give it a shot! -
Croc clutch!
motocouture replied to motocouture's topic in Purses, Wallets, Belts and Miscellaneous Pocket Items
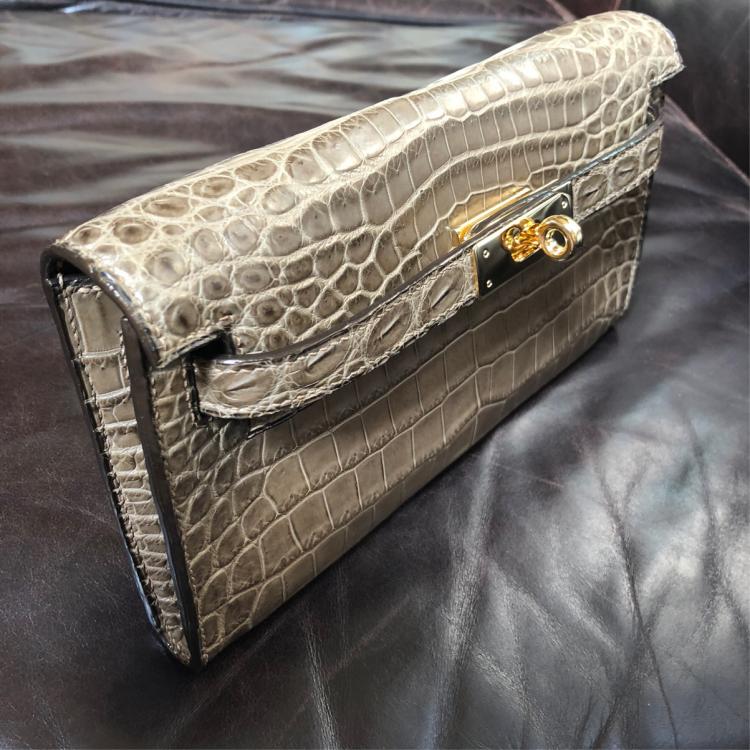
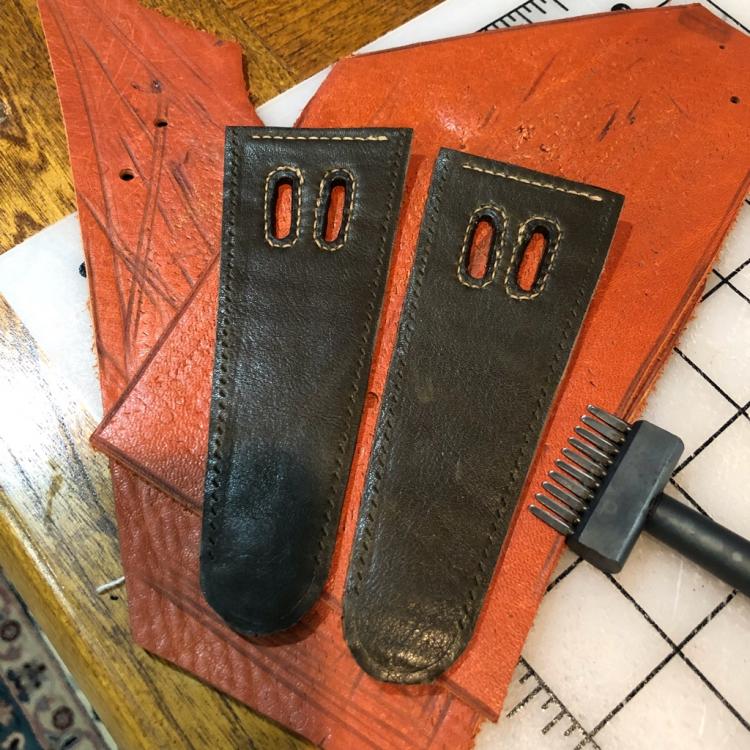
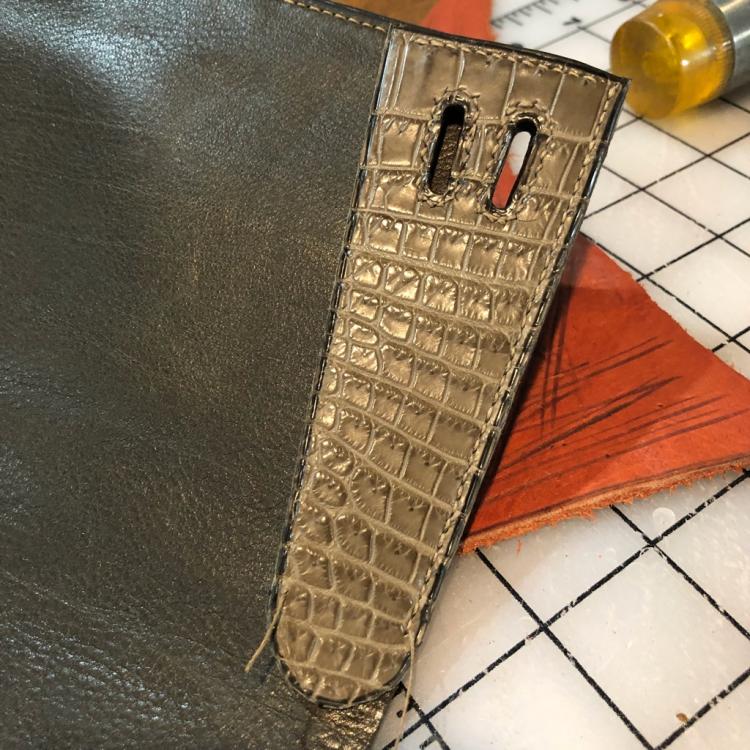
So, getting close to the end now! Made some good progress last day or so, on edging the straps and stitching in the gussets. Using a slightly different approach on the gussets this time; I’m making the stitching holes on both the main body and the gusset (using my KS irons) the whole way around. I designed the gusset so that the stitching line is (theoretically) the exact same length as the stitching line on the main body. I made the stitch holes on the gusset pieces from the inside, to keep the slant aligned. Then, I just lined up the pieces and stitched, no glue. Started on the straight stretches on both sides so that I could hold the piece in the stitching pony for as much as possible before folding around the rest of the gussets.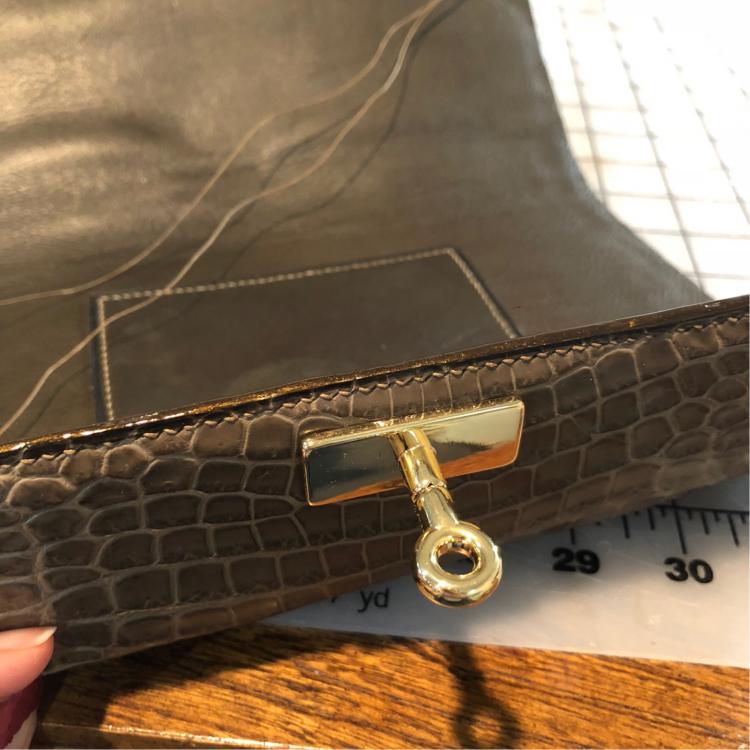

-
Croc clutch!
motocouture replied to motocouture's topic in Purses, Wallets, Belts and Miscellaneous Pocket Items
I like that strategy! -
Really nice work. I like the idea of Chicago screws for non-competing contrast, and maybe stitching instead of leaving for the same reason. That way the focus stays on the tooling. and yes, pondering these types of things, or steps in my project, are how I survive long meetings
-
A few projects the last couple of months
motocouture replied to A Finch's topic in Archery Quivers and Bow Cases
Welcome aboard, and nice work. Love the matching set concept -
Clever! Thanks
-
Bag stiffener - Anyone know this product?
motocouture replied to KingsCountyLeather's topic in Leatherwork Conversation
-
Bag stiffener - Anyone know this product?
motocouture replied to KingsCountyLeather's topic in Leatherwork Conversation
That’s right up there with using her special dressmaking scissors..... Exactly what my hubby says! Absolutely lol -
Bag stiffener - Anyone know this product?
motocouture replied to KingsCountyLeather's topic in Leatherwork Conversation
If one is, say, distracted, and forgets that the slightly bumpy side has the fusible glue, puts it upside down on the fabric, and starts ironing. Then you get to peel the gooey mess off the plate of your iron lol. -
Croc clutch!
motocouture replied to motocouture's topic in Purses, Wallets, Belts and Miscellaneous Pocket Items
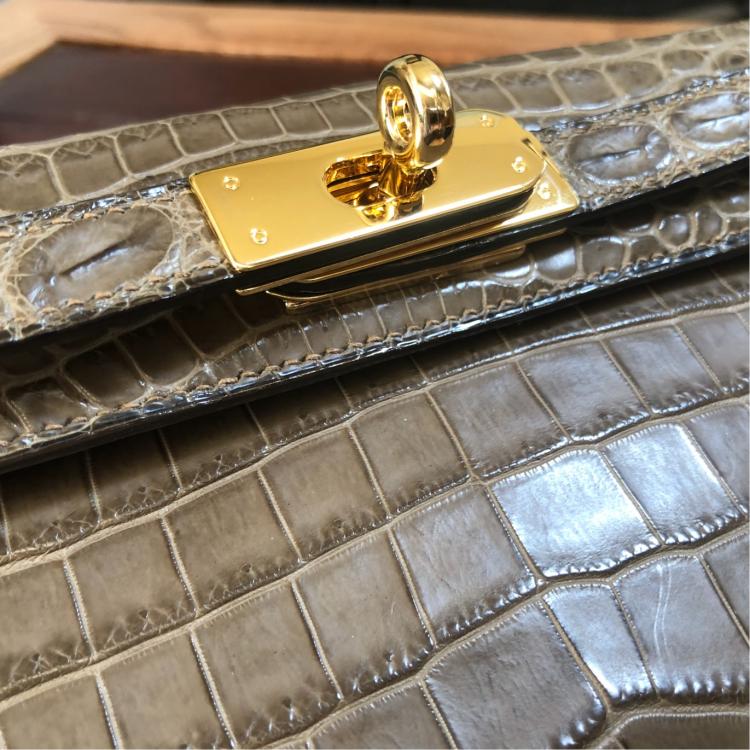
Ah ok! My apologies! I think that is from unintentionally being a little too slow with my heated edge creaser, which left the edge black. It may also have to do with the angle I held the creaser at. Good news is, it didn’t seem to damage the edge at all!