hidepounder
-
Posts
1,808 -
Joined
-
Last visited
Content Type
Profiles
Forums
Events
Blogs
Gallery
Everything posted by hidepounder
-
Roo, you've done it again! Beautiful! I'm blown away every time you post these beautiful masks! Bob
-
Another good looking saddle, Steve! Bob
-
Very good design concept! If it were me, I think I would add more petals to the vines. I like less background than others do. Great flow and balance! Bob
-
Wallet Final test
hidepounder replied to AgronZoti's topic in Purses, Wallets, Belts and Miscellaneous Pocket Items
I think you've done a very good job here. Everything is nice and clean. Stitching looks good also. Bob -
Johnny, I think you should eliminate the start point all together. I still think you should make the vine around the center flower a continuous one. The vine for the flower on the right should branch off of the center vine, just like you have it, and then continue on around the flower on the left. Right now the vine on the center flower does not make a continuous circle around the flower. I'm having a hard time explaining what I mean...if I had my computer back I could post a picture of what I mean. Still need to add more petals on all of the vines also. When I start drawing in the petals, I try to make the background area between petals slightly less than the width of the petal. That can vary of course, it's a matter of personal taste, but it gives you an idea of how frequently a petal occurs along the length of the vine. You're almost there! Bob
-
That looks really nice, Art! I like the design idea a lot...that's thinking outside the box. Interior looks great. Nice clean work! Bob
-
It's been kind of fun seeing what everyone else is driving. Here's mine...it's a 2000 F350 deisel. We use it to haul a three horse living quarters trailer around to ropings and horse shows. I've started to sell it on a couple of occasions to get into a newer model, however it pulls so well and we've never had a problem with it, so now, considering the economy, I think I'll just put another 100K on it and save the money!

-
Johnny Great progress! I would use the pattern on the left. However you need to make the vine go completely around the center flower and then branch off to the two other flowers. That will fix the direction problem with the vine around the flower on the right. The pattern on the right is good except that your starting point is awkward. By drawing the vine in a complete circle around the center flower, your starting point is hidden and the pattern will be balanced. Also, you need to add about twice as many petals to your vines in order to fill in the pattern so that there is not too much background. Take a look at some of the work that's been posted and compare it. You will be able to see what I mean. Also, elongate the petals need to be more elongated. You've done a great job Johnny, just a little tweaking and your there! Bob
-
How about Pictures of Your Workshops
hidepounder replied to Jordan's topic in Leatherwork Conversation
Thanks Dually! -
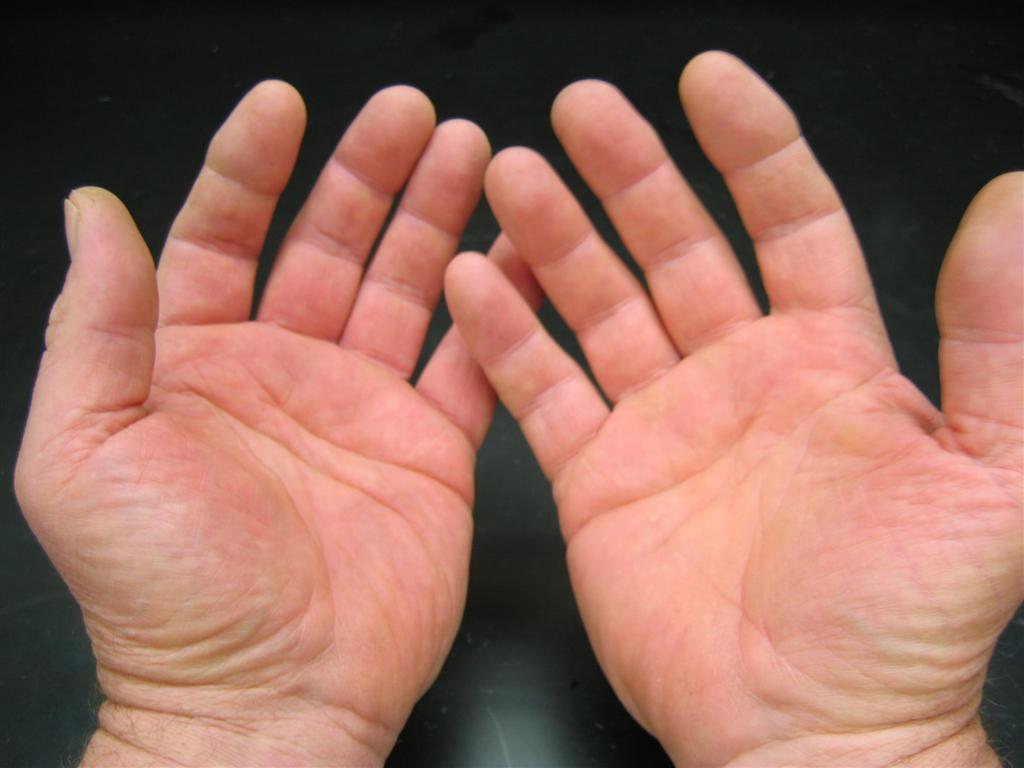
Sure wish I did! I could sure use an extra every now and then! My wife just informed me, however, that if we did have an extra pair, she wouldn't let them go!
-
Josh, I don't know anything about sewing machines. About half the time Art is talking so far above my head I don't even see a shadow as he passes by. He is definitely the one to recomend a first machine! But these are the machines that I have and there is not much I can't sew with them. That is not to say that I am good with them because I'm not. But I'm learning and I'm happy with them. I have an Adler 205/370 and I can sew thin material (3-4 oz) with 69 or 92 thread or very heavy material (5/8" is no sweat) with 345 or 415 thread. It was my very first machine and I had never sewn a stitch in my life before getting that machine. I just love it! However, every time I want to change from sewing heavy material to lighter material, I have to change out the needle and then make a few practice runs to get my tension and stitch length adjustments made. It's a pain in the rear to make that radical of a thread change, but the machine will definitely handle them. I have since added an Artisan 797AB which I now leave set up to sew the lighter materials (2 oz) and I leave the Adler set up to sew the heavier materials. I sew 10-12 oz belts all the time with the Artisan. I usually use a 138 thread for belts, sometimes a 92...I like a smaller thread with a shorter stitch length. The Artisan 797AB will sew up to a 207 thread but I almost always use the Adler for that thread weight. The Artisan also has about a 1/2" foot lift, but it is not pratical to try to sew that heavy a material in that machine. Just bucause the foot will raise that high, doesn't mean you can sew that thick. If I had to have just one machine it would be the Adler...maybe because I've had it longer and have more confidence with it. I have no idea if this will be helpful or not...I hope so. Bob
-
Saddle Bag Purse
hidepounder replied to Butch's topic in Purses, Wallets, Belts and Miscellaneous Pocket Items
That came out really nice Butch. The finger carving on the back is very good and really lends a professional touch! Bob -
He may be at a show or conducting classes somewhere, Bob. I would definitely call him! If he is gone, his helper, Johnny, can tell you and let you know when he will be back. Johnny can take your order and give you the lead times also. It typically takes a while to get tools from Bob, but I think they are well worth waiting for! The best thing of course is to go see him at a show where you can try them out. They are all custom orders, however, and his expertise is more in the field of figure carving. Bob
-
Darc, Great little tutorial! I would like to know who's knives you are using...I didn't recognize them. Bob
-
You all are going to think I'm some kind of weirdo! but, while running up and down the road going to horse shows and ropings, I discovered I could drive all day and night if I had a good audio book to listen to. When I got home I would finish listening to whatever story I had going and that became a habit. Now I listen to them all the time while I work. I just love good mysteries and westerns! I sometimes find myself tooling and listening until three o'clock in the morning! I can check out ten books at a time from the public library and so that is what I listen to while I work. When I don't have a good story going I listen to talk radio. I find Rush, Laura Ingram, Michael Medved, Dennis Prather and a few others interesting to listen to. Bob
-
Mine too Chuck!
-
Johnny, you're on the right track with your approach. If it were me doing that piece, I would make the vine run continuously around the center flower. Then branch off that center vine and run it around the flower on the right. The flower on the left can run the way it is, initiating out of the intersection of the center flower and where it branches off to the flower on the right. Then you would just fill in the area below the center flower with a leaf or two....like you have it now. I think you're going to need to reduce the size of what you have now to make it look right. By doing that, you would be able to run a vine around the flower on the left, making everything a little more symetrical. The link below may be helpful to you when designing a pattern.....at least I hope it is helpful! It is where I was explaining to Alan my approach to laying out a pattern. I would use that same method if I was doiing that seat. http://leatherworker.net/forum/index.php?a...=&pid=89371 Bob
-
Rickey, I use Goliger Leather also. They do a really good job for me. They're fast, knowledgable and do a great job of sorting. I've received a lot of grade "B" HO sides that were considerably better than the grade "A"s I've received from other sources. No resale # required. When you don't buy any kind of quantity, then it's worth a little extra to get exactly what you want. I buy from Weaver also...they are definitely handy to buy from, but you do have to have a resale #. Bob
-
Use it up, wear it out, make it do or do without!
hidepounder replied to Johanna's topic in Leatherwork Conversation
I only buy used tools...I get them from Bob Douglas! (doesn't seem like I'm saving a lot money, though,..go figure!) -
How about Pictures of Your Workshops
hidepounder replied to Jordan's topic in Leatherwork Conversation
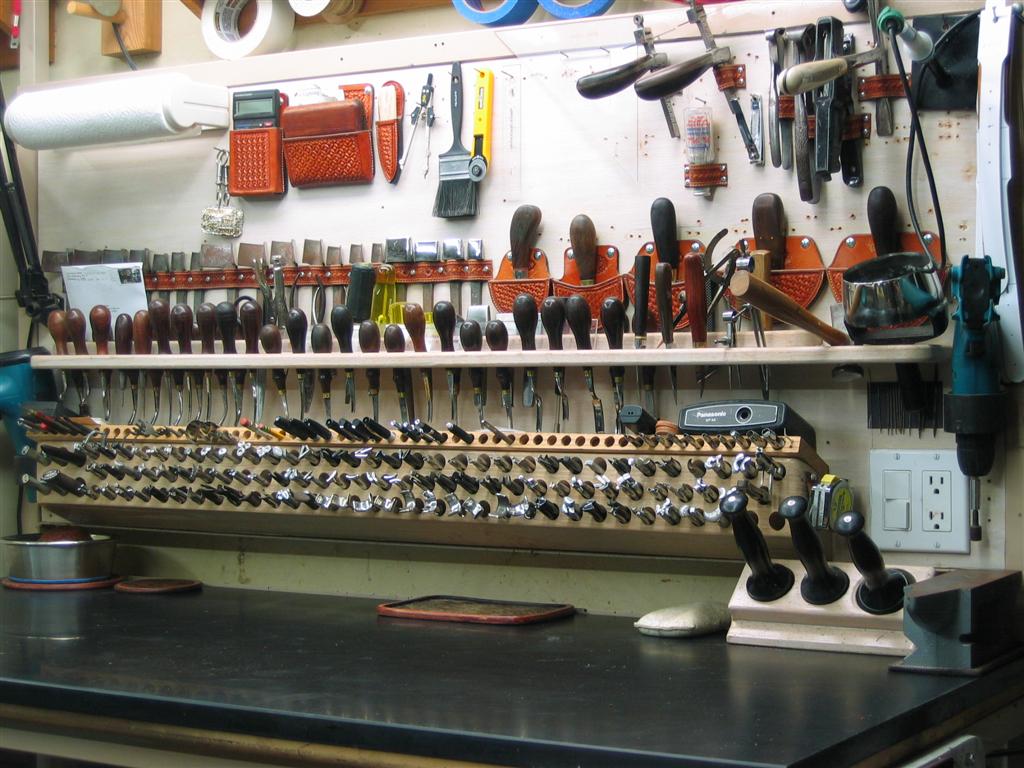
Hi Doug...yes I did make it...several pieces of scrap oak, drilled with 3/4" holes. Mounted with flathead screws from the back. All of the wood slots and blocks and the backboard are made of oak which had a white pickled finish. It's been modified and so many times over the years that you can't tell from the photos. The top of the bench is open in the back so that large pieces of leather can hang over the back. The top is a scrap piece of laboratory counter top that I scrounged up somewhere. I tool right on it. It needs to be a solid granite top, however, which is what I'll do on the next one.I welded the frame out of 1-1/2" steel tubing which is set on heavy duty swivel casters. The flourescent and the track lights are mounted on a frame which telescopes up out of the back panel. I also integrated a light switch and utility outlets right into the bench with a heavy duty cord to plug into an outlet. The reason for all this was so that the flourescent light could be lowered and the whole bench could be wheeled thru a standard door opening. Just plug in and I'm ready to go. It's very easy to move around if I need to. Unfortunately I've seriously outgrown it! -
How about Pictures of Your Workshops
hidepounder replied to Jordan's topic in Leatherwork Conversation
Here's my little work space. I do almost everything on this bench. It's way past time to expand and update, but for now this is where I spend my time. I have a couple sewing machines and some storage on the opposite wall. I've really enjoyed looking at everyone elses shops...lots of great ideas!

-
As I looked around my little space I couldn't find much in the way of old machinery to post pictures of...and then I saw these! They've served me pretty well over the years, however, I am not always able to control them the way I'd like to. Manufactured in the early 50's they have seen some wear, tear and abuse, but are still pretty serviceable. Bob

-
I can see it better with the close up photo...I think your right. And I agree about antiqueing without a resist...dangerous! If you talk to Rick I'd like to know what he did. I did some experimenting using copper leaf for highlights a while back. It looked real good, especially in flower centers! it was tedious though and not durable enough. Hadn't considered copper paint until this thread. Interesting idea! Bob
-
Steve, I'm jealous...website looks great! Can't wait to see it finished. Now how about some background on you, pics of the ranch and country. I think future clients should know that you are an experienced hand, applying your cowboying and horsemanship experience to build better saddles for other experienced hands! Bob
-
I use a breast collar and a back cinch also...it is gear used by everyone out here and I always assumed that everyone used both. As a roper, breast collars and back cinches are important gear for me. However, if a person was just doing casual trail riding, I can understand why a breast collar or back cinch could be eliminated. I've never seen a working cowboy out here without them...they wouldn't consider stepping in the saddle without them, and I wouldn't either, no matter what I was doing...but I can't say that I have always needed them...just hadn't considered not using them! In my humble opinion, however, I think that if you hang a rope on your saddle, you should be equipped with both...that's how I was taught. Through this forum, interestingly enough, I've discovered that quite a few people don't use either one...and in situations that I wouldn't consider being without them...but they're not wrong...they were just taught differently than I was. This leads me to believe that things are differrent in various regions for no other reason than tradition. And that's okay! There is always more than one way to skin a cat! If your saddle fits properly and you haven't found it necessary to add either piece of gear...don't worry about it! Personally, I would rather have have them and not need them, than need them and not have them! So, as was mentioned earlier, I guess the answer to the question is, it just depends! (I couldn't find that earlier thread either...it had a lot of good arguments worth considering!) Bob