cowboysaddlemaker
-
Posts
49 -
Joined
-
Last visited
Content Type
Profiles
Forums
Events
Blogs
Gallery
Store
Everything posted by cowboysaddlemaker
-
Nice job, know doubt he will love it! Alan
-
Utility case for the Explorer...
cowboysaddlemaker replied to nick's topic in Satchels, Luggage and Briefcases
Hi Nick, Your project turned out nice! I like the even dyeing of the piece sometimes dyeing turns out kinda blotchy not so with yours. I don't know about others but for myself no matter how well the project turns out I always see something that I could have done better, it's all part of the learning process! and pushes us to do better! As far as hand sewing goes the best reference out there is a book by Al Stohlman entitled " Hand Sewing" and if you follow the steps in there, your stitching will turn out better than machine stitching! When people look at the stitching on many of my projects can't believe it is sewn by hand, I have a hard time convincing them that it is hand sewn! It is not perfect mind you but it looks real good, the best thing one can do is to use the overstitch wheel to lay out your spacing and to run over the stitching after it has been sewn. Keep up the good work, Alan -
That looks very professional! What type of machine did you sew it on? Alan
-
Very nice, if this is your first pair wow, where tog from here! I have never seen anyone incorperate a mini mag & leatherman to a pair of chinks, what a neat idea! I know I am lost if I don't have those 2 tools with me all the time. Thanks for sharing, Alan
-
WOW that looks professional Art! No doubt that is going to make stitching the edges faster & more professional looking. Invention is the mother of necessity! Way to go, Alan
-
I made quite a few (out of necessity) out of coat hanger & they work real well! Alan
-
How big of pieces do you need? How much ? Alan
-
http://i427.photobucket.com/albums/pp358/T...pg?t=1227470267 http://i427.photobucket.com/albums/pp358/T...pg?t=1227470399 http://i427.photobucket.com/albums/pp358/T...pg?t=1227470458 This is a replica of a 1875 Denver saddle in 1/2 scale you will notice the cantle binding has been torn off and sewn back with bailing wire as was on the original, you will notice variation in the color for aging effect. The bedroll was made from aged canvas with a wool blanket inside. This was the original I made for reference to sculpt the same thing in clay and had cast in bronze for a series I am doing called Saddles as Art, which will have 10 historical saddles in the series. Two have been completed in bronze, this one and the pony express. THANKS ALAN
-
Some of my older stuff
cowboysaddlemaker replied to HarryB's topic in Gun Holsters, Rifle Slings and Knife Sheathes
Really nice work. Nice balance on the buscadero rig! Thanks for sharing, Alan -
Some recent stuff
cowboysaddlemaker replied to bruce johnson's topic in Satchels, Luggage and Briefcases
OMG Bruce, Your work looks great! Glad to hear your on the mend, Alan -
Hi Becca, Welcome I am new as well. This site is great isn't it? Lots of great knowledgeable people! Nice work, thanks for the pics. Alan
-
WOW! Thats amazing! Alan
-
Youth roper saddle
cowboysaddlemaker replied to cowboysaddlemaker's topic in Saddle & Tack Maker Gallery
Yes that is for the breast collar, I have done quite a few this way, sandwiched in between the rigging leathers is a piece of rawhide that reinforces it, I have never heard of anyone having any trouble with it at all. Thanks, Alan -
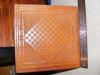
Hi Kani, attached is a picture of a mouse pad I made my wife about 8yrs. ago, it works well. It is made out of 12-14 oz skirting leather. It is 8 5/8" square, with 2 creases around the perimeter, one is in about 7/16" from the outside edge, the other is in 3/4" in from the outside with a 4 prong barbed wire stamp in between the 2 creases, 1/2" pillow ticking in the center set on a diagonal then I used a Horseshoe brand block stamp 67-6303 to fill in the corners bordered by another Horseshoe brand tool 67-6529 (which is kind of a fancy sunburst. I glued and stitched dark brown split leather on the back so it can be used on either side! Edge and burnish all 4 sides. For the finish I just oiled the tooled side and then applied a lacquer finish. Feel free to use, let me know if you have any ?. Happy tooling, Alan
-
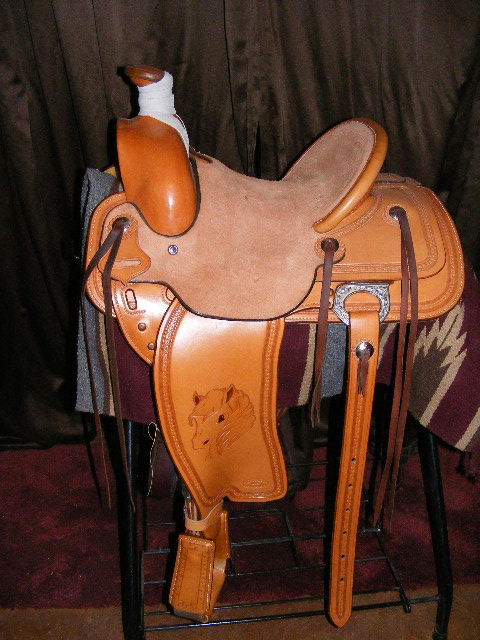
Hi everyone, Here is a 12" youth roper I just finished for a 9 year old boy in McAlester Okla. I built a 15" roper for his Dad about 4 years ago, this is a smaller version with different tooling.

-
Thanks that sounds like a viable solution, I know that Dick Sherer has repaired many of this type of saddle so he should have a pretty good idea of what might work the best. Alan
-
Nice saddles! I haven't had much experience with english saddles but that one looks awfully nice! Keep up the good work! Alan
-
Thanks Don, I really appreciate the pictures, that really helps!
-
I am not sure if this is where I go to reply, but thanks for the info, the pictures really help. I built a 1/2 scale 1875 Denver saddle that I say in the book "Saddles" very similar to the one you built and I did it the same way, but I was just winging it and didn't no if it was right, Thanks alot, Alan PS. I like the design in the seat, did you draw that?
-
That's a really neat, simple idea, Thanks for sharing, I am definetely going to use that idea! Alan
-
I was needing a little help with a saddle project. I have a Frank Meanea tree to build on for a customer but have never had a chance to get a close look at how the seat and swell cover are put on. It will be a 1/2 seat with exposed stirrup leathers, no seat jockey so I guess my question is where does the swell cover stop? I have only got a chance to look at one of these types of saddles and that maker stopped the swell cover in the center of the stirrup leather ( underneath it). I was thinking of taking the swell cover all the way to the ground seat. Any suggestions? Also where the finished seat rolls over the front of the ground seat how do you secure it on the bottom? Any help would be appreciated! Thanks, Alan
-
Just wanted to say HI and I look forward to getting to know everyone! I was born and raised in NM and left for 14 yrs to Colorado which was great because thats where I got into saddlemaking! I am totally self taught, I say self taught but thats not entirely true I took full advantage of Stohlmans Saddlemaking Encyclopedia's, as well as a few other saddlemaking books. I had taken one class in high school for leatherwork and remember really enjoying it the only problem was I noticed girls about that same time and so didn't pursue leathercraft at that time! But I had an oppurtunity to get back into leather in 1996, and am glad to have found a site such as this with people of the same interests. I really enjoy seeing pictures of others work and patterns, I look forward to expanding my knowledge through this site! Thanks, Alan PS. I hope this works, I am not that computer literate! I look forward to figuring out how to post pictures, I probably will need to enlist the help of my teenager!
-
Hi, I had been using craft tool edgers in the past and just recently bought a set of edgers from Weaver's the master tool edgers, they are really good edgers without breaking the bank! I also have one of J. Watts saddle skirt edgers and OMG it is great! The absolute best I have ever used! All of Watts Horseshoe brand tools are really well made and work great. I would expect nothing less though from someone who has been around leather as long as he has. LOL, Alan
-
Hi Troy, I just found out about this site it is great! I have always enjoyed seeing pictures of your saddles, as usual your tooling is exquisit. Alan