Leatherimages
-
Posts
417 -
Joined
-
Last visited
Content Type
Profiles
Forums
Events
Blogs
Gallery
Store
Everything posted by Leatherimages
-

sewing AZ boot vamp2011-01-15_1.JPG
Leatherimages posted a gallery image in Our Leatherwork Galleries

From the album: Tejas Design Arizona Flag Boot
-
AZ boot top back side2011-01-12.JPG
Leatherimages posted a gallery image in Our Leatherwork Galleries
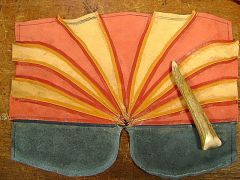
From the album: Tejas Design Arizona Flag Boot
-
AZ Tejas top pattern boots2011-01-11_1.JPG
Leatherimages posted a gallery image in Our Leatherwork Galleries
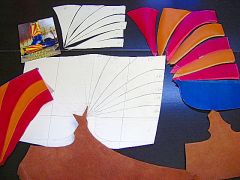
From the album: Tejas Design Arizona Flag Boot
-
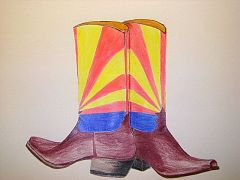
From the album: Tejas Design Arizona Flag Boot
-
Pickin' Stitches
Leatherimages replied to rawhidebystretch's topic in Shoes, Boots, Sandals and Moccassins
First off, I think you need to be commended for caring enough to pick them at all. You should see the local stuff! Depending on the wax in the wax pot of the stitcher, or the placement of the lock on the stitcher, even with a picker attachment, problems can still be encountered pickin' stitches. I've found it very helpful to use cement thinner to loosen things up so it's easier to get the job done. I use a dauber to control where the thinner is going. Sometimes I'll wet the welt with it before I cut the sole off. This will make it easier to cut it off, as well as pick stitches. Other times, on brands of boots I know are just rubber cemented on, I'll cut the sole free, sand the bottom of the welt, being careful as Rick cautions, and apply the thinner. Then the stitches will usually just fly off of the welt with the picker. Lexol or some other conditioner ought to be used to freshen up the welt when you're done. Something I've tried with those double stitched soles, is to cut the sole loose, pick only the outer row, and stitch only that row, leaving the inside row untouched. Easier said than done, but sometimes it works ok. But I've also found that if you stay in business in one place long enough to get to see the same boots repeatedly over the years, that you'll save alot of work for yourself, by placing your lock high enough in the sole leather so that it doesn't get worn off. Adjust your tensions to position the lock so that by just sanding the sole enough to break the bottom thread, you'll leave the lock in the sole leather. Then use the thinner, letting it set for a bit. Now you can lift the stitches off of your welt in one piece. You just stick your awl under one of the heather looking stitches and pick the thread up off of the welt. I've found better success with this approach using the synthetic 6 1/2 cord thread. Try it. You'll like it. -
For some reason mine says I'm in Afganistan! How do I correct that? TIA, Paul Name: Paul Krause UserName: Leatherimages IP Address: 71.209.160.52 Email Address: pkmaker1@hotmail.com
-
Goatman, I admit to being one of the "views" who didn't reply. The deal for me is not knowing the right answer. But I can give a reply that may serve. The higher the heel is the the more toe spring you ought to have, maybe that's obvious. I'd say 1/2" is good for heel heights from 1 1/4" to 1 1/2", and up by an 1/8" or so per 1/2". I think much more than 3/4" is getting close to the limit. IMHO There may well be a right answer, but there's only a few who could really claim to have it. Heel height on a last is generally measured in the area where the side seam would be. At that point, a last that is properly balanced will be making contact with the floor at the tread line, the line from the 1st metarsal to the 5th, the widest part of the foot. Each last is properly set for a certain heel height. There really is only a small margin of variance beyond optimal. But the factories appear to pay little attention to this. I get my rubber heels from Southern Leather in Denver. The phone number is out in the studio, so no help on that part here and now. But if you're after just a couple of pair, you could probably get them from a shoe repair shop, if one is local. PM me if you have trouble getting them, maybe I can help. Your intention to replace the insole is pretty ambitious. Do you have anyone guiding you through this operation?
-
Advice On Lasting Boots
Leatherimages replied to sepulverture's topic in Shoes, Boots, Sandals and Moccassins
Wow Nick, you've got some skills, I'll say that. Very Good! Fantastic! These really look good. Your insole looks really good. You took those notes impressivly. I like your french turned top line. And I like your lacing technique and the tongue. That's an interesting sole material. What is it? Chrome leather? I do see what you mean about the short counter/heel stiffener. It ought to be about 1 7/8" to 2 1/8" above the feather, depending on the size of the foot. You've also got a pretty good edge on them. Did you sand that by hand? Is that artificial sinew you have there for thread? It looks like you've used that same thread for the whole boot? I'm sure you're just glad the have what you do. Do you have any choices of thread so as to change the stitching, to attain greater water resistancy? (I don't say water proof. No such thing). There are good combinations of which leathers and which treatments wiil provide the most water resistancy,but technique can do alot in that regard also. If I may address the stitching you've done on these: There indeed is a certain visual style to this size thread size on something for outdoor wear, but it ought not to be used on basic component seams. It's also likely to be subject to more abrasion, because of standing so proud. There's evidence that you've done alot of stitching on leather, but for upper closing (where water resistancy is critcal) the holes and thread need to be smaller. The awl one uses has alot to do with this. I say awl, because the shape of the "hole" is important. It looks like you're making a round hole with a punch? Try instead an awl, preferably with a tapered blade shape, so you make a cut like this / instead of a hole like this o. You can use a pattern wheel may have 8-10 stitches per inch (spi), as a guide, which should be about right for an ankle boot. A silver ink pen works good to reveal the stitch line on the dark leather, but baby powder will highlight it for you too. Another thing, use as small a thread as possible. If this is what you can get, you could use the thread you have there and cut the length you need, and "untwist" and separate a few stands for your work, and then retwist and wax it closed. And of course the needle should be right for the hole you "cut", and the length of the stitch and distance from the edge adjusted. I am very proud to have been involved with you as you made these. Thank you for the exchange. Good luck with you next projects. Paul -
I should amend that and say that sections of an alligator skin can be very thick and fleshy. That's ok, it's very tough. However it makes for a poor edge. Without really thinning it at all, one can do a narrow skive, maybe about 1/4" wide and about half way through the tickness of a section like this, And then cement. you can also run a course paper over the back of 'gator to improve it's adhesion. A glass edge is suggested for items done with alligator, as with all ones work, but especially when charging 'gator prices.
-
I don't change anything about the way I treat the edges of "gator when glued to say a holster. I edge, sand (this makes a difference, especially if you sand down to using wet/sand paper 1200 grit or so),. Then dye, (maybe wetsand again), followed by edge coat. Resolene to taste. BTW, have there been any reports on how the new harder? edge coat from Fiebings is holding up?
-
Ostrich is a very tough leather. The tensile strength of the grain is unbelievable. But the inner fibers are very long. And not tight by any means. So care is needed. As much as possible, keep it out of the direct sunlight. There are many choices for conditioners. I like Bee Natural's product line, their Leather Amour is a great all around leather conditioner. Using it monthly should do the job for a long time.
-
Advice On Lasting Boots
Leatherimages replied to sepulverture's topic in Shoes, Boots, Sandals and Moccassins
Congratulations Nick. I'm eager to see them. I was told to always look for three things I could do to improve on each pair I make. Never more - never less. To find more than three is just too discouraging. To find less is kidding yourself. Oh, and not to point them out to everybody I meet. I'm looking forward to seeing pictures. OK, what's next? -
Your work really deserves all the praise here. Very clean.
-
Advice On Lasting Boots
Leatherimages replied to sepulverture's topic in Shoes, Boots, Sandals and Moccassins
I like your perspective. I like your whole attitude toward learning, I think you could be a great shoe/boot maker. You're on your way. Your thinking is good for a repair to a breakout like that. You can also (with your insole probably tempered) back up 1/4" and come at it from a little deeper. A sharp, polished, inseaming awl, with it's bigger curve than a stitching awl, gives the job a better chance. I was shown to place my inseaming awl into my channel convex curve rather than concave, if you know what I mean. Point down, enter and twist, coming out at the base of the holdfast. The more consistent you are, in making the hole, the better the stitch line will be clean and straight. Allowing, that is, the thread to awl sizes are compatible. There's a chart or something in the Colloquy archives, but the important thing is to use what you have a practice good technique while you look for better tools. It's aprocess. Show the pair when you're done. Happy New Year! -
 Really nice looking bags!
 -
Picture 793.jpg
Leatherimages commented on leatherman1457's gallery image in Our Leatherwork Galleries
 All of these which you have put up are really marvelous. Great looking work!
 -
Advice On Lasting Boots
Leatherimages replied to sepulverture's topic in Shoes, Boots, Sandals and Moccassins
Nick, A very respectable job. I'm eager to see the mate. Your next pair will be a completely different experience. Keep up he good work. And Happy New Year From Stateside! -
 I like what you make. You have an innovative style.
 -
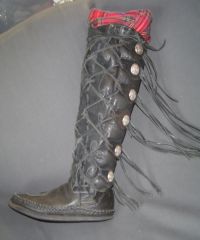 These look very well constructed. The counter looks real sturdy. Is the plaid a liner?
 -
Don't make it hard for yourself. No doubt you've seen Fiebings has a Cherry Leather Stain. Also that there is a Black Antique stain. After stitching and oiing with Leather Oil (not Neatsfoot) Use the former first. Allow that to dry. Use the latter second. Allow that to dry. Follow with Super Sheen spray or top coat of your choice. Sprayed is prefered over liquid sponge wipe, as the wipe will lift the black stain. Do a good job on your edges. Post pics.
-
It doesn't look to me to be a "color" that would have enough pigment to be a dye. Looks like a rough out holster would be a match. You might need to try different leathers, but that's what I'd recommend. Good Luck.
-
Advice On Lasting Boots
Leatherimages replied to sepulverture's topic in Shoes, Boots, Sandals and Moccassins
"I think the book mentioned a 15 mm lasting allowance for economy when doing pattern designing for factories and the like, not sure though." Your conclusion on this is right. I'm with DW on this. Give me an inch. I'd rather just trim the extra away, rather than worry about it. (Interestingly there is a current conversation going on right now on the Colloquy in the Lasting thread. You might identify with the issues. Check it out) Your welt shouldn't be over 6 1/2 oz. I don't really see how the heft or strength of the welt would help with damaged lasting allowance. If the upper has a weakness it could just pull out or continue to tear along the welt line. What might be better, is to glue in a thin patch of skived leather reinforement on the flesh side of your vamp or liner (wherever your tears are along your welt line) and take another go at it. Your idea with the pig skin has merit. I use that technique when I'm doing repairs to a weak or damaged insole. I use a "rip stop" type fabric (picture attached), but I probably have used a thin pig before. It is a good fix if you're worried about your holdfast tearing out. But of course an appropriate insole leather is always better. But I understand you are working with what you can get. You're on the right track about how to prepare the toe box leather, casing it like that. You want to work with leather from about 5 oz. to maybe 6 1/2 oz, idealy. Too much over that will be too diificult to shape. When preparing the toe box, you want a full 3/4" to 1" skive along the edge that will go across the toe. The by laying it atop your toe and bending it over to the edge of the last, you can determine where to begin to skive the lasting allowance edge which will be sewn into the inseam. From this determined edge, you want to skive the lasting margin down to about 3 oz. That's a pretty awkward instruction, I hope you understand. But yes you should try to catch the edge of your toe box in your inseam. I think I've got a picture for you. Maybe you can see how I worked the edge of the box. Stiffening the veg leather toe box is usually done with celluloid cement. Is that something you can find there?

-
Advice On Lasting Boots
Leatherimages replied to sepulverture's topic in Shoes, Boots, Sandals and Moccassins
You've done a good job. This is coming together real well. Good on you! I'm one for more lasting allowance than 15mm. Sometimes it's way more than necessary. It's better to throw a bigger scrap in the bin, than wish and regret. I don't think there's any reason to skive your lasting allowance. Did I read that right? As to welt, you want veg tan for that. I actually prefer horsehide for it's tighter fiber. Sole leather is bettern than necessary, but that would deffinitly be better than upper leather. All in all, you're doing a great job on this first pair. It looks to be sitting on the last well. Are you using a leather toe box? That's the next challenge. Keep up the good work. -
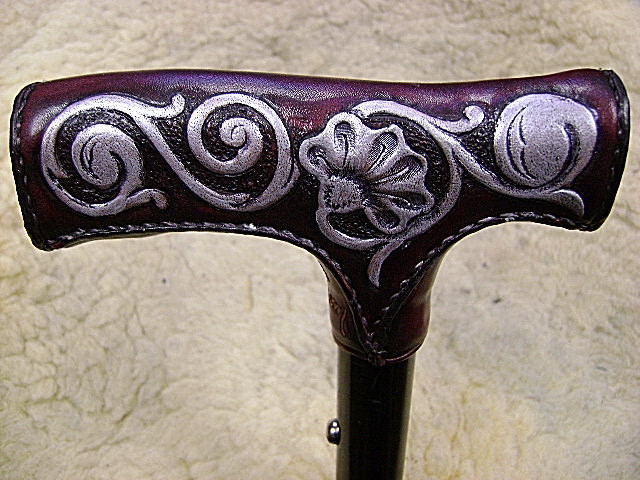
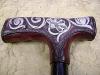
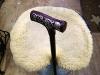
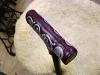
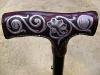
This almost came out just like I envisioned it. Pattern-making-wise, this is the second such pattern for the second (different style) cane. I still need a way to layout holes (without using a computer) more efficiently. But I figure it's all 'by the seat of your pants' kinda stuff when you try something like this anyway. Five ounce milled tooling from WC. Artificial Sinew for thread, Butt seamed with the edges cut at an angle, holes punched at an opposing angle with a Union Lockstitch Machine awl. Same as Al shows for French Box Seam. It took maybe about 8 hours. But you know what we say, "the second one would be faster". (But nobody ever asks for another to have a second.) It's for Mom, so it's all a labor of love anyway. Questions and comments welcome.
-
For new lasts, manufatured here in the US, call Allen at Jones and Vining. 1 870 866 6621 x18. They have a catalog of models you can obtain, and are very helpful if you know what you want. Tell the we sent you.