-
Posts
1,292 -
Joined
-
Last visited
Content Type
Profiles
Forums
Events
Blogs
Gallery
Store
Everything posted by TomE
-
Good suggestions, @jcuk. Thank you.
-
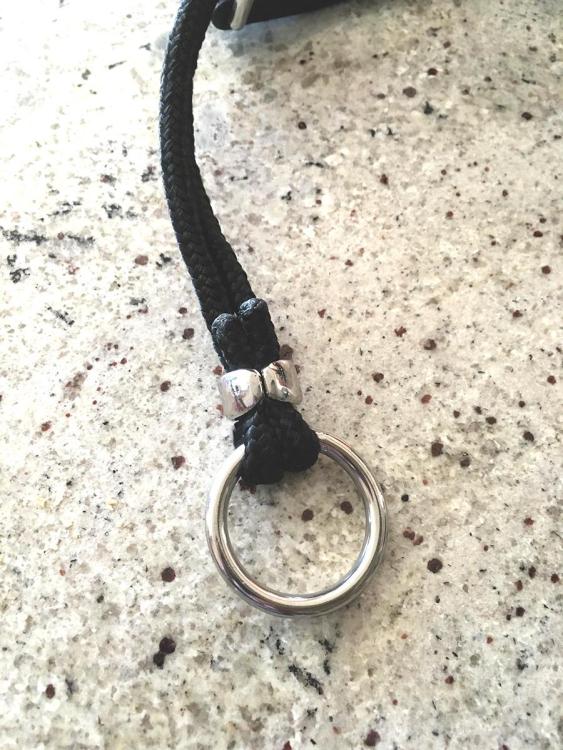
Yes, that concerns me as well. I made the rope noseband several inches longer than the fixed noseband behind it, in an effort to keep the hardware out of the way. Copied the design of the Monty Roberts dually halter that the client owns - it uses a similar rope clamp made of brass but client wanted stainless to match. She reports that my leather halter is working well. She competes in dressage and is using this device to correct some bad habits of a horse with a sensitive mouth.
-
Thanks for your comments, @jcuk. For now I have settled on 12 oz Hermann Oak harness leather for billets. It is firm and clients have been satisfied with the job. The shipping costs from Abbey England kill my ability to be competitive on price for the billets. I've been pre-punching the billets with a #00 mini punch (drive punch) from CS Osborne and sewing with doubled up 0.040" waxed polypropylene thread using a single needle backstitch.
- 33 replies
-
- panel
- jumping saddle
-
(and 2 more)
Tagged with:
-
@Mulesaw Thanks for the tip, Jonas. I used a brass YKK zipper for riding boots but it didn't close smoothly until the sharp edges had worn off the teeth. Meanwhile, I coated the teeth with pencil lead to lubricate them. The Vislon zipper sounds like a better deal. Do you install a metal stop at the bottom of the zipper after trimming to length?
-
Holes look good. Thank you for the haft info. Been looking for a sturdier handle for a jerk needle.
-
Looks like a winner! Can you show us the holes the awl makes? Where did you get the haft? It looks very sturdy.
-
No, I made it like the original. The rope is looped through the other ring, I think to even out the pressure from both segments when the reins are applied.
-

C.S. Osborne quality control thru the years.
TomE replied to DieselTech's topic in Leatherwork Conversation
Thanks, @bruce johnson. I enjoy learning from you and appreciate you taking the time to put the information out there. -
That is nice stuff. I don't have much experience with Western tack, and most of my connections are in the English riding community. Perhaps it's an area for future growth.
-

C.S. Osborne quality control thru the years.
TomE replied to DieselTech's topic in Leatherwork Conversation
I don't have experience with older Osborne tools but I've been happy with those I purchased new in the last 10 years, after doing a bit of finish work and sharpening. In my experience, any shortcomings were superficial and fixable. The tools have been a good value. @bruce johnson is the expert. He can sell you vintage and new Osborne tools that are tuned up and ready for work. -
Thanks, Jonas. The lead is 1" wide. Client wants a heavy lead for Western Showmanship in Hand classes. She wanted the 3/4" straps for the halter to show off her horse's refined head. Thanks @DieselTech! I like the brass but I have a growing number of clients who do dressage and want black leather with silver hardware. Beiler's and Zach White Leather have a nice selection of stainless hardware. Thank you, @DJole. Love the TBs. They have improved many of the modern horse breeds, including the warmbloods that we breed.
-
Thank you, Jonas. Replaced the flexible noseband today. Trainer said my leather covered nose band didn't slide easily with rein pressure, so I swapped it out for braided rope to match the Monty Roberts Dually training halter. The client has a Dually halter but wanted something nicer looking. It took me a while to find a rope clamp to match the stainless hardware. Found stainless steel rope clamps at Beiler's, cut one in two and ground/polished it for looks. Learned that the steel rope clamps are A LOT harder to close than the brass clamps.
-
Beiler's Manufacturing and Supply in Ronks PA is an Amish company without a website. Call them at 717-768-0174 for a catalog.
-
Right you are! 12 square feet.
-
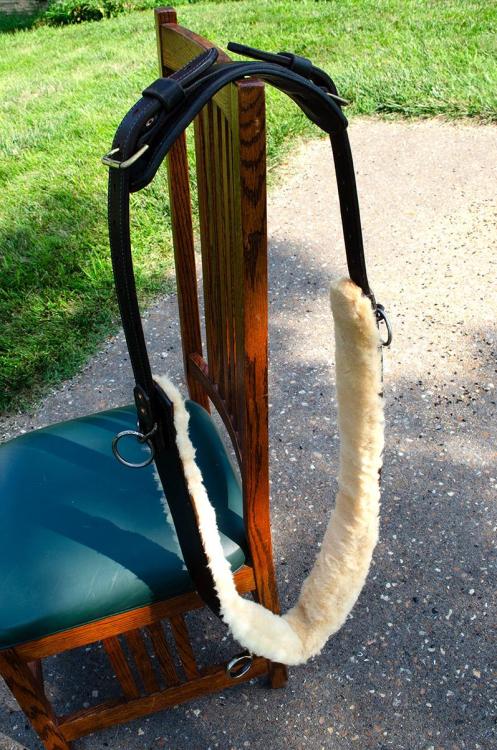
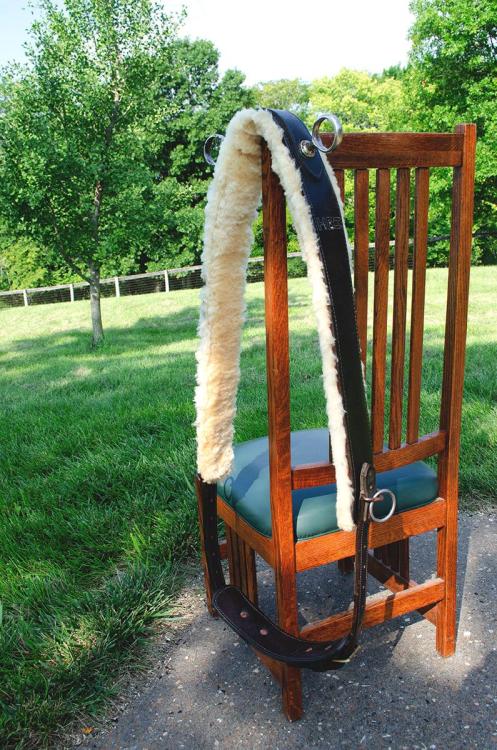
For reference, I paid $90.38 for a 12 foot long cream colored sheepskin ordered this summer from Beiler's Manufacturing and Supply. They have golden and cream colors in different sizes.
-

Narrow feed dog FLAT Plate for Cowboy CB4500 and Cobra 4
TomE replied to Patrick1's topic in Leather Sewing Machines
You can order from his website. https://heprecision.com/ -
Beiler's has veg tanned sheep skins in golden and cream colors, and different sizes. The wool is about 3/4" long and I've been pleased with the quality. If you're new to hand sewing shearling, be sure to burnish the wax by drawing the thread through some heavy brown wrapping paper to smooth and remove excess wax. Otherwise the wool will stick to the thread and get pulled through the holes in your leather.
-
Happy birthday, @DieselTech. Looks like a very useful knife.
-
The drum sander can smooth/even out curves and flat edges. There is a reason why most burnishing machines include a drum sander. I use a drum sander frequently to ease the transition from a strap edge to an end point made with a strap end punch. The end punches are usually a bit uneven or not quite the correct width. I make items with 2-3 layers of 9-10 oz leather and the drum sander makes quick work of leveling out the layers prior to hand sanding and burnishing.
-
That bag is a work of art! I particularly like the handle, and the contrasting piping is lovely. Takes time to become known but there is a demand for such high quality work and they will find you.
-
Thank you, Ron. The round nose strap for reins is a separate piece that can slide across the nose. There is an additional, fixed noseband behind the halter square to support the halter on the nose. The throatlatch round is 7 oz leather wrapped around a filler strip of 7 oz leather, sewn, trimmed, and shaped in a rein rounder. It is described in the PDF linked to this post:
-
Thanks, @DieselTech. I don't use a stitch groover. I mark the stitch lines with a divider for machine sewing, and use pricking irons for hand sewing. I tap the stitch lines on the backside to flatten the blowout from the machine needle. When repairing tack it's typically the leather that breaks, usually where it wraps around hardware, not the thread. The only thread I've seen fail is old linen thread that rotted.
-
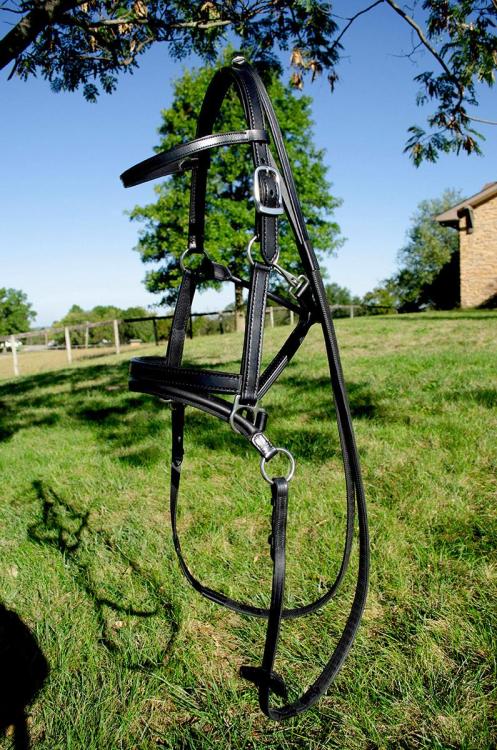
Halter or bridle? This training halter has an additional noseband that attaches to reins, functioning as a bitless bridle. The flexible noseband is made from woven rope wrapped in soft leather. A browband was added to secure the crown. Made from Hermann Oak bridle leather, nappa leather for the padding, stainless steel hardware from Beiler's Manufacturing and Supply, and Equus rubber grips on the reins from Abbey England.
-
I haven't had that outcome with Effax Leder Balsam, but it does happen with Blackrock Leather N' Rich conditioner. I buff repeatedly with a soft cloth, and finish with a soft brush for polishing shoes. Applying some heat with a hair dryer might improve penetration into the leather so there's less buildup on the surface.
-
That's a good looking belt. I would use an edger on both sides, flesh and grain, for a more finished look. You will learn whether or not your edger is sharp when you work on the flesh side. There are lots of recipes for finishing edges, depending on thickness, type of leather, and how to item will be used. Here's some ideas


