


AlZilla
-
Posts
1,476 -
Joined
-
Last visited
Content Type
Profiles
Forums
Events
Blogs
Gallery
Store
Everything posted by AlZilla
-
That looks like a serious upgrade to me. Nice job!
-
My kydex holsters are certainly stiff. It comes in sheets in various thickness. My thinking was a piece running the entire length from the very bottom (inside) and up an inch or two - to steal Digits term, a reinforcement, glued to the inside of the bag. But I think Digit is on to something with taking that bottom seam apart. If there is as liner, you could do a reinforcement hidden between the liner and shell. Totally hidden, very professional.
-
Is it that there's a setting for startup speed and 500 is the lowest? I *think* my Eagle 550's have a setting that let me adjust minimum speed. Mine start at 200.
-
I'm wondering if it can be accessed deep enough inside to reinforce it with something like kydex?
-
Speed reducing that 66 was my first thought but I wanted to see what others offered. Here's a pic of a speed reducer for an industrial. A little big but it illustrates the concept. You can also homebrew a unit with a couple of pillow blocks, 2 pulleys and some bar stock. Reducing the speed also increases the torque. I've got an industrial that I can run as low as 11 stitches per minute. Way too slow but very controllable as it increases in speed. If that 66 can be controlled enough to work for you, it lets you work while you decide on and fund a genuine glove machine. You could go here https://www.blocklayer.com/pulley-belteng and play with the potential speed reduction. I guessed at a 1/2" motor pulley, driving a 4" pulley that in turn drives a 1" pulley and then a hypothetical 3" hand wheel pulley. Driving the motor at 300 rpms gets 13 stitches per minute. Obviously, you can change any of that. It's the 3rd calculator down on the page. If you do something like this, I'd make sure the foot controller is 100%. Those things can cause a lot of problems.

-

What sewing machine should I purchase?
AlZilla replied to J Kellar's topic in Leather Sewing Machines
You'll get plenty of good feedback here. For the moment, let me direct you to an epic thread on this very subject that should get you started: -
@Ghoust6 I slid you over to the sewing machine sub forum. We'll probably get more attention here.
-
I've reported you to the Society for the Prevention of Cruelty to Sewing Motors.
-
spring flowers and good food
AlZilla replied to chuck123wapati's topic in All About Us and Off Topic
If the stitch holes are part of the die then I'd say the holes don't follow well. You might alleviate some of it by tying the ends off and burying the knot between the layers instead of double stitching. Just leave long tails and do a square knot that you pull tight. -
spring flowers and good food
AlZilla replied to chuck123wapati's topic in All About Us and Off Topic
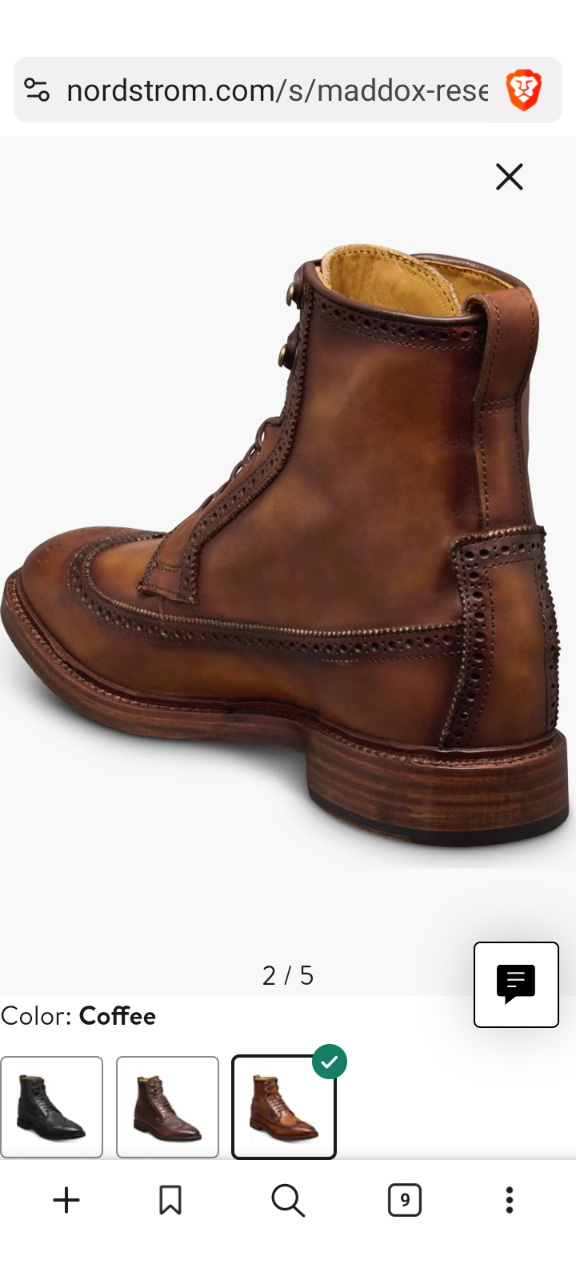
I've been eyeing up various wing tip work boots from Shoebank.com (which won't load for me at the moment), which is the outlet site for Allen Edmonds shoes. At best they'd be a couple hundred bucks and up to several hundred. But, it's an itch that I'll scratch one day.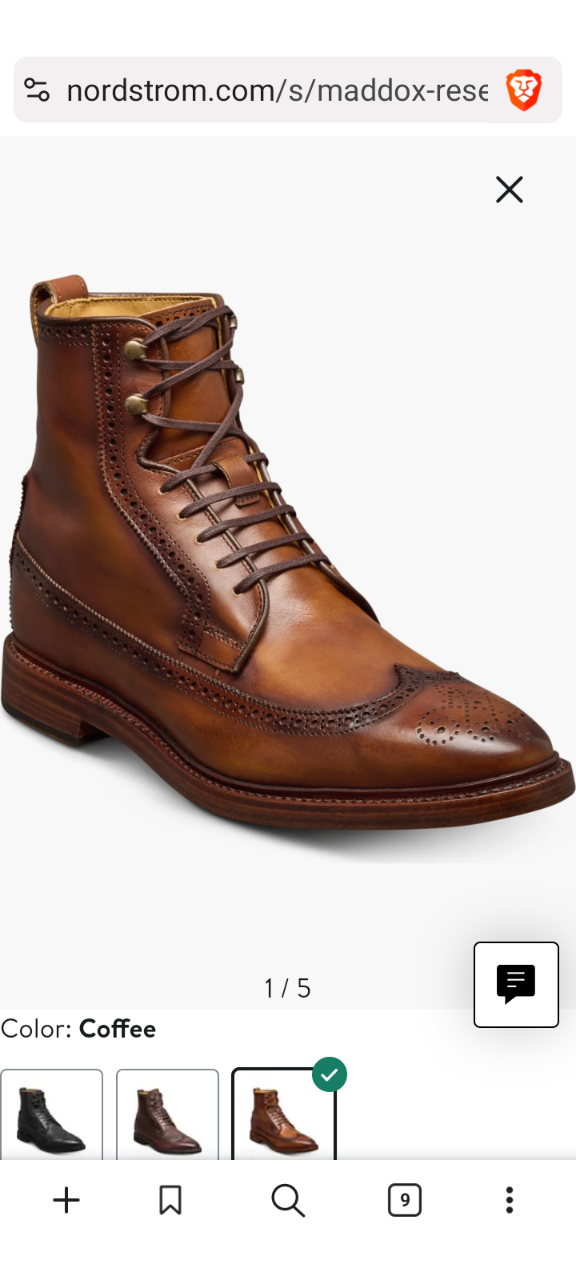
-
The basics never go out of style. When I was getting started with industrials I took the advice to "hold back hard" to heart and I was splitting the thread on the hook of my 111w. I think that advice was meant for bigger machines. Caused me a lot of frustration until I figured it out. Just gentle pressure.
-
spring flowers and good food
AlZilla replied to chuck123wapati's topic in All About Us and Off Topic
Good call. I have some experience of grants. My motto, "If you take their money, you give them control". This applies to anyone who wants to contribute to your cause and for all values of "they, their and them". -
Building on Chuck's theme, here's an archive dot org link for a basic Leathercraft book. I glanced quickly at it and it seems to cover the basics. https://ia903202.us.archive.org/29/items/basic-leathercrafting/Basic Leathercrafting.pdf
-
@Bunb You're welcome to place a proper For Sale ad in our For Sale section: https://leatherworker.net/forum/forum/82-machinery-sewing-and-stitching/ Please review the rules linked below and comply so we don't have to chase you down for further information. They're linked here: https://leatherworker.net/forum/forum/71-items-for-sale/ We're basically looking for a decent description, statement of condition, pictures, location, price and shipping info. We'd all hate to see a sewing machine go to waste. Good luck with it!
-
Welcome to the forum! You need only post the details of what's happening or not happening, relevant details like thread and needle size, thickness of leather you're trying to sew. Any pictures will help. Do that and our global network of leather sewing consultants will offer the best advice anywhere.
-
Welcome to the forum. Not knowing the history of that piece makes it tough It might be that it had something applied or spilled in those spots that prevents the conditioner from soaking in. It might evaporate with time. Maybe some time sitting out in the sun? How about a picture? Smarter people that I will certainly weigh in presently. Don't be in a rush.
-
Maybe you could post that kit you found and get some opinions. They're are a bunch of them. Here's a post by a guy doing some amazing work with a $50 amazon starter kit: https://leatherworker.net/forum/topic/125186-leather-projects-using-50-dollars-of-amazon-tools/#comment-771141 Maybe it'll give you some inspiration. Keep us posted as you progress!
-
Quite nice, I think. I appreciate the fact of the natural creases in the non-carved face. I like my items to look like the genuine full grain leather they they are, just like the animal wore it. Well, dye, finishes, etc. are fine.
-
Ideas for intro to stamping/carving class
AlZilla replied to oddball's topic in Leatherwork Conversation
Well, Wallets, Hatbands and Coasters all give an opportunity for stamping and carving. Here's an interesting post from an old leather hand stranded away from his tools and how he scratched the leather crafting itch with starter tools: https://leatherworker.net/forum/topic/125186-leather-projects-using-50-dollars-of-amazon-tools/#comment-771141 Trolling WalterF's posts on his profile page should turn up more than a few ideas. -
I'm guessing that machine is what we would call a "441 clone". In other words, a clone of the Juki 441. Breaking the needle could mean you knocked the timing off. After making sure it turns freely all the way around, I'll suggest you start with the 2 videos below to see where your hook timing is at. Also notice when you turn it over if the feed dog and hook move. It might be as simple as a popped safety clutch. https://m.youtube.com/watch?v=ZT3AVgj_HLI https://m.youtube.com/watch?v=_f3yszCKBAg&pp=ugUEEgJlbtIHCQkVCgGHKiGM7w%3D%3D Report back and smarter people than me will be on standby...
-
In 1835, a guy named Walter Hunt moved the eye of a sewing needle to the pointy end for the sewing machine he was working on. The very next day, he caught a load of grief about the stupid BOBBIN from some guy on Reddit. It still rages today ...
-
This exact thing has been on my mind for my multitude of vintage machines. The link redirects me to the US site, where they're 99 cents today. I'll be ordering several. Thanks, this is a great find.
-
OK, where does this thread come from? How does it get into the "center of the space that the bobbin used to occupy"?
-
Is the loop going around the bobbin any different than the bobbin itself passing thru the loop? No. The top thread can pass around it because there's no stray thread feeding into the bottom. If the bobbin thread is coming from somewhere else and going thru the bobbin case ... The loop can't go around the bobbin case. The bobbin thread would be in the way. You must have a sewing machine around there somewhere. Open it up and see for yourself. Watch the thread go around the bobbin case and ask yourself how that would happen if there were a thread passing into it. No mas.
-
Exactly - you should study just what's happening when the stitch is formed. Then you'll see that you can't just wrap a single strand of top thread around the bobbin thread without the entire bobbin spool passing thru the loop of the top thread. I want it to be possible. Maybe your lack of understanding why it can't be done has allowed you a fresh perspective. I'd love to see a drawing or a model.