


BlackDragon
-
Posts
502 -
Joined
-
Last visited
Content Type
Profiles
Forums
Events
Blogs
Gallery
Store
Everything posted by BlackDragon
-
I agree. Some time ago MS released an AI to the public so it could learn from the general public. Within one day it turned into a vial racist that agreed with the third reich. They had to pull the plug on it and added moral rules to the AI so it wouldn't do it again. The question comes to, who becomes the AI's moral law giver? As a search engine or if you want to play around with AI it's fine but don't count on it if you really want solid advice. It's helped me keep my projects in order because I suffer from squirrel moments LOL
-
Great idea.
-
That's the rub. AI is made to be friendly and to be gentle so unless you tell it to be brutally honest or entirely objective you will get things like "That's a great idea! No one has thought of something so unique!" but then you can run into a scenario where it will be a contrarian. If you say the sky is blue it will tell you it's actually a shade of cyan that resembles blue but is not actually blue.
-

an alternative
BlackDragon replied to chuck123wapati's topic in Gun Holsters, Rifle Slings and Knife Sheathes
Now that's ingenuity! -
AI needs specific prompts. If you don't feed it enough information it's like giving a 2 year old a marker and turning your back. Sure, it'll be funny to see what happens but then you'll have a mess to deal with when it's a done. LOL I decided to create an amusement park using AI. I began with "I was thinking of creating an amusement park" and I accidentally hit enter before giving it any guidelines or what theme I wanted the park to follow. It went into a LONG list of all the things I needed to put in the park. By the time it was done it had 25 roller coasters, 3 teacup rides, a hunted house, and much much more. Cedar Point had nothing on this thing LOL
-
I do use AI but am very careful of it. Mostly I use AI for searches but sometimes I use it to help me with thought experiments. Many times AI is going to tell what you want to hear so it's good to get human input rather than rely on just AI. Currently I'm rebinding a series of books but don't know anything about them. I asked AI for summaries on the books so I can get a feel for them and I can design the artwork.
-
What is this called and how to install them?
BlackDragon replied to Jen the Canuck's topic in How Do I Do That?
Usually they call them Decorative Spots or just Spots. They're used a lot in headstalls and other tack. https://leathercrafttools.com/spots/list/ -
Dyeing leather
BlackDragon replied to Samalan's topic in Dyes, Antiques, Stains, Glues, Waxes, Finishes and Conditioners.
OK who actually puts dye on like that. I understand dipping it but the other technique are... odd. It would take an hour to finish dying something. lol -
Really well done!
-
Also if you can tell us where you pulled the pic from, link would help, we may be able to track it down better.
-
Wow. One very large thread to hold the pocket down. At the very least you have a wallet to use as a template. There are a lot of youtube videos on making different types of wallets. Watch several different makers because everyone has a little different way of making their wallets. Corter leather is a good one, Don Gonzales is also very good.
-
Alternative Leather Tool Source: Bookbinding
BlackDragon replied to RidgebackCustoms's topic in Suppliers
Yes they do overlap a bit but Talas is one of the last companies I would buy from. I've priced their stuff for my books but when you factor in the shipping it makes it unfeasible. That $5 bone folder is $9 for shipping. I ordered $40 in bookcloth and the shipping was going to be over $30. Out of curiosity I added in some Davey's Board and the shipping went up to $71 through Fedex, they didn't give me any cheaper option to ship. So when looking at the "cheap" prices be careful of the shipping. -
Along with what Fred said it also looks like they didnt skive the lower parts of the inner pockets making it bulge out. They didnt glue the layers down so it lools like it's separating along the bottom. Some of the stitch holes arent evenly spaced. Personally, I wouldn't have put stitching along the top unless there was a liner.
-
Decorative Stitching/Embossing on a Driving Bridle
BlackDragon replied to TomE's topic in How Do I Do That?
Not sure why I didn't remember using thread as a filler, I do this on the spine when I rebind books. I looked Catrien Coppens up a little and she does some amazing work! That would be so cool if she could do that. Maybe she would be will to do a basic webinar on the embossing. -
Decorative Stitching/Embossing on a Driving Bridle
BlackDragon replied to TomE's topic in How Do I Do That?
I believe it's known as trapunto-style leather stitching. Basically it's similar to making a raised brow band but much more elaborate. You need a core made out of leather or cork, then you mold and glue your leather around the core, then stitch in place. -
Practice, practice, practice and steady hands.
-
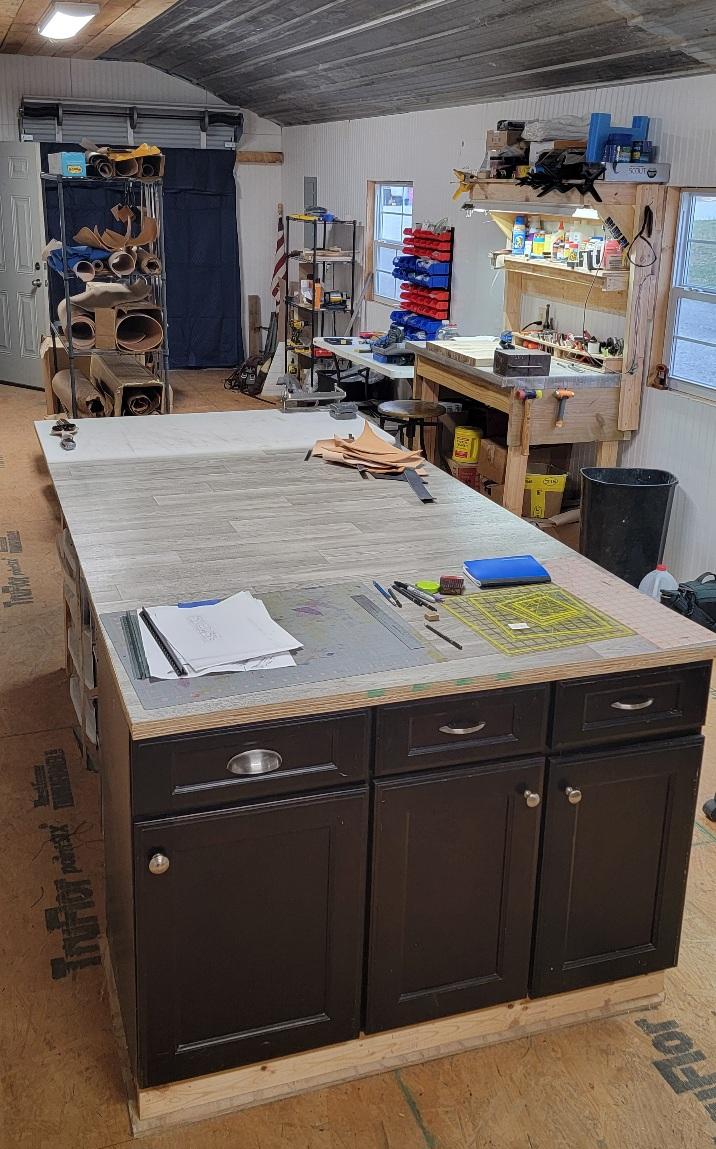
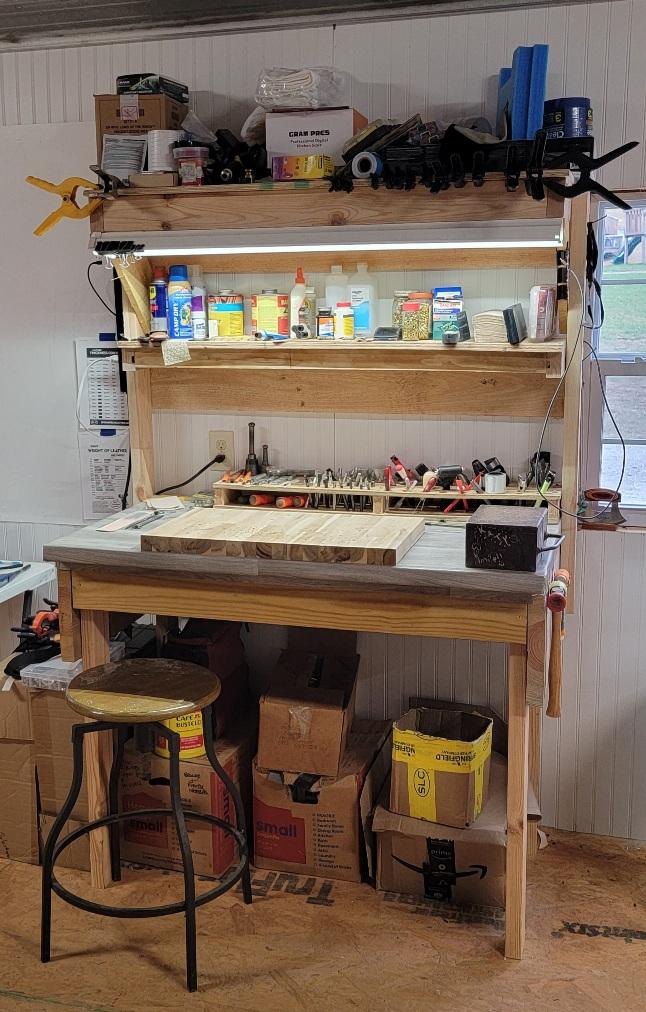
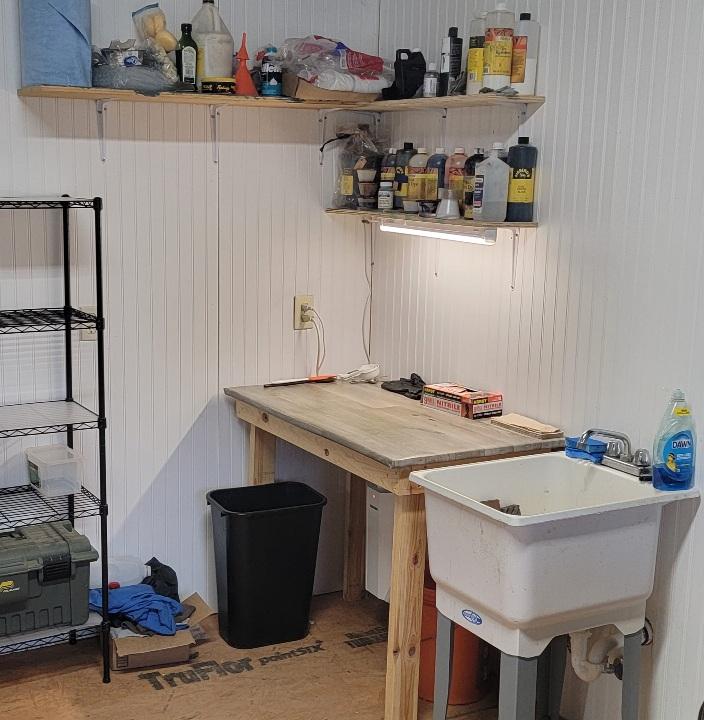
Setting up & organizing the work bench
BlackDragon replied to cspeedyrun's topic in Leatherwork Conversation
It's really going to depend on what you do the most. If you do a lot of tooling then your stamps and mauls should be easiest to access on your bench. I use drawers for storing supplies and things I don't often use. I have stations. I have a dedicated tooling bench where I do tooling and the occasional hand stitching. I have a large station where I can roll out a side to cut. My knives are usually sitting on my cutting board. I do most of my layouts and design work on here as well. I have a hardware area where I do things like rivets and anything that requires a little more aggressive work. I also have a dye area where I do any wet work.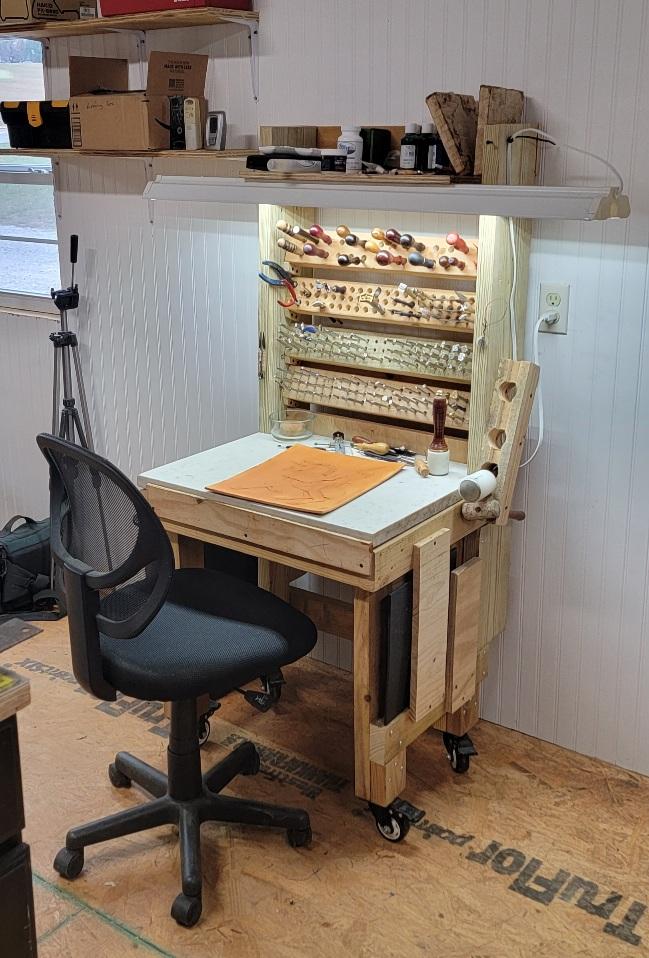
-
Wow! Wish I had one of these when I was in construction!
-
Internship and maybe a new start
BlackDragon replied to Tove09Tilda's topic in All About Us and Off Topic
Not sure why I didn't see this thread until today. I've been in the work force since about the age of 15, I started out in a company that made sails for all types of sail boats. I sewed banner flags and bags for the sails, then slowly worked up to laying out the sails on hardwood floors to later on sewing them together. It was great and it taught me a lot and still carry much of that experience to this day. I understand completely the frustration about getting a degree and not having that degree produce a job. I got a degree in advertising design in Florida and after graduation I applied to a lot of companies to try to find work, I even tried Disney & Warner Brothers (Bugs Bunny). Most of those companies were very small roles and they all had similar statements "You don't have enough experience". Which didn't make much sense to me because they were jobs for starting out. I couple companies actually stole some of my ideas during the interview process. I did a few small odd jobs here and there as a freelance artist but not enough to pay for fuel, lol. I went to work in various manufacturing companies over the years and most of those companies are not for people that want to express their artistic talents. This would include a company that manufactures saddlery. They have a set way to make a saddle and unless you get into a company that actually wants to change the way it used to be done you're not going to have much say in how to change it. When I worked in manufacturing I've seen the dead look in peoples eyes as they did the same repetitive jobs over and over, every day, for years. I've even had that look myself. I learned to balance my time outside of work to counter that feeling. I was a bit of an adrenaline junky, jumping out of planes, became a dive master, cave diver, deep diver, and did beta testing for various companies. If you can't find something you love to do as your career it's not the end of the world. Do your passion while you're in the job you need to survive. You can still follow your passion without it being your career, just balance your life. Even if you're following your passion as a career you'll have to do the things you hate in order to do that career. Like taxes! LOL -
Fender repair...
BlackDragon replied to Brokenolmarine's topic in Saddle Identification, Restoration & Repair
Best way I've found to straighten leather when it comes in to the shop is to dampen it a little and letting it lay flat. You can cut it while it's slightly damp, the knife will go through it easier too. It's not going to hurt the leather just like when you case it for tooling. I like the tooling options 2, 5, and 7 and would be happy with which ever matched my saddle the closest. -
Looks great!
-
Fender repair...
BlackDragon replied to Brokenolmarine's topic in Saddle Identification, Restoration & Repair
One trick I learned about taking a picture of something I want to color match is to take the picture along side of a known color. I would take a colored object like red playing card and take a picture of the item next to the card. When you have the picture and the card in hand you know know the amount of difference between the two. -
Pigskin liners
BlackDragon replied to ThisIsMyFirstRodeo's topic in Exotics, Reptiles, Furs and others
That's one of the issues with gluing in an interior. The wrinkles will even happen with fabric. One way to combat this a little is to glue the liner into the shape of the bend. The issue you'll have with this is that it will be harder to open because the liner won't give when you try to straighten it out. So it's a bit of a balance you can try less of a bend and hope you strike a good balance so when you open it you don't see wrinkle and it's not fighting the user to keep it open. This just came into my shop for a little TLC on the piping and other leathers. Notice the stains and grime. Since I'm removing the piping the liner (cotton canvas) will be free and I may be able to clean it up a little but the ink probably won't come out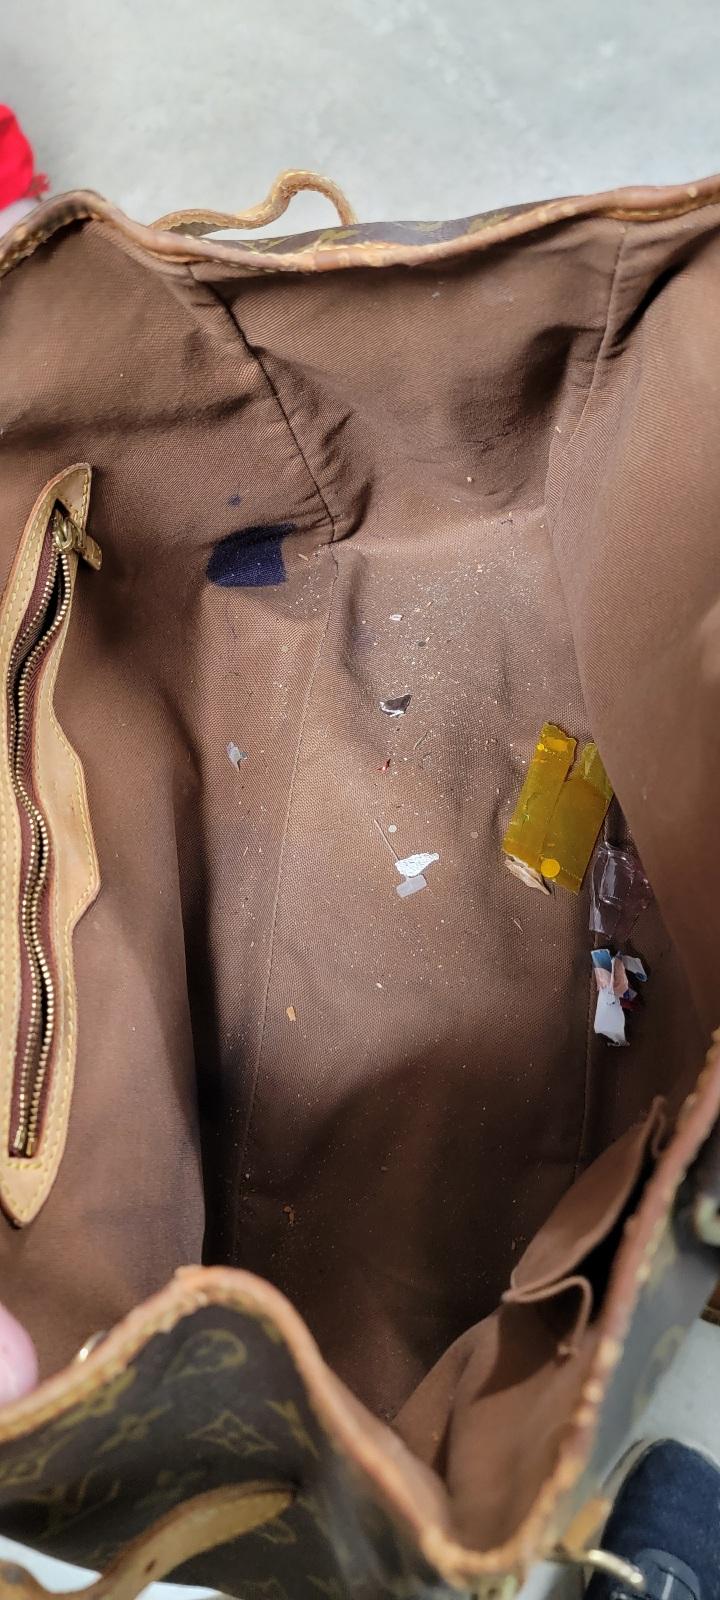
-
Fender repair...
BlackDragon replied to Brokenolmarine's topic in Saddle Identification, Restoration & Repair
Great beginning! One thing that will make it a little easier for you on the next fender. To remove the rivets on the Blevins buckle I take a large slotted screwdriver and use it like a chisel. I put it in between the leather and buckle and give the rivet shaft a couple of hard wacks and it'll cut right through the rivet.
-
Great craftsmanship! My hands were screaming at the thought of hand stitching all of that. lol You can find harness leather split to your liking from Wickett & Craig. I've been using their leather for a while and it's great quality.