BlackDragon
-
Posts
471 -
Joined
-
Last visited
Content Type
Profiles
Forums
Events
Blogs
Gallery
Everything posted by BlackDragon
-
Here's thread started in Sept about knives.
-
The first post on that link has the photos attached but you have to become a member to see them
-
They work good for thin leathers, under 3oz. If you try to cut thicker leathers its harder to control the blade and you may end up cutting yourself. I have 3 x-acto handles and usually use the #2 handle for small jobs
-
I speak spanish but my family says I sound like an American I can barely write in spanish. I rarely drink mate but I'm always ready for an asado. Lets throw in some home made empanadas too.
-
Welcome! I was born in Buenos Aires and moved to the US 54 years ago.
-
It looks like a high gloss shine
-
 Can you have the person take a picture of the badge with a ruler? You can then print it to the correct size.
 -
From his website "Copyright info: You can sell a maximum of 10 items made with this pattern each year." I could sell limited runs of his patterns but I can do that with my own designs.
-
That looks like Japanning or Tool Black. It's a protective lacquer coating against rust, mostly for tools. Lacquer thinner should remove it but I would redo the blacking or use cold bluing to protect your tools.
-
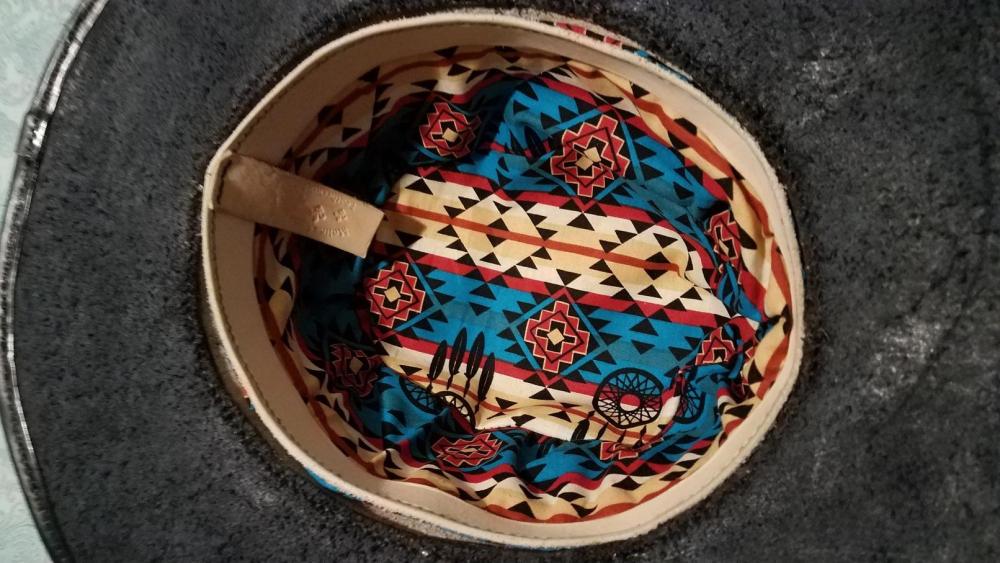
I hand stitched it all. I punched the holes in the brim then just pushed the needles through the thin leather I used for piping while feeding the wire.
-
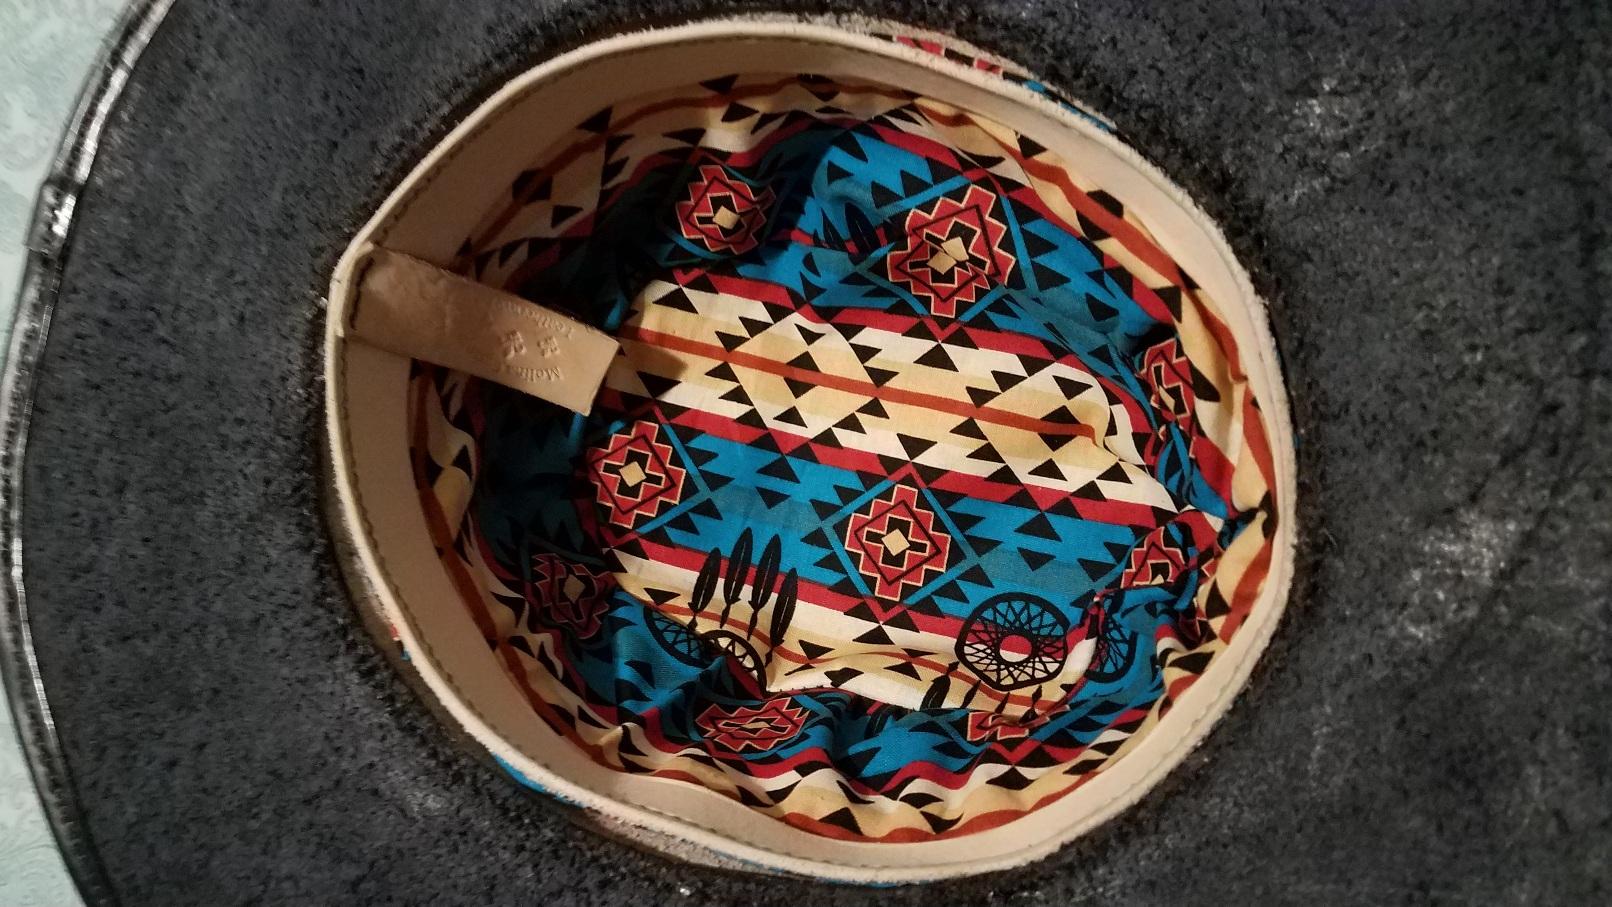
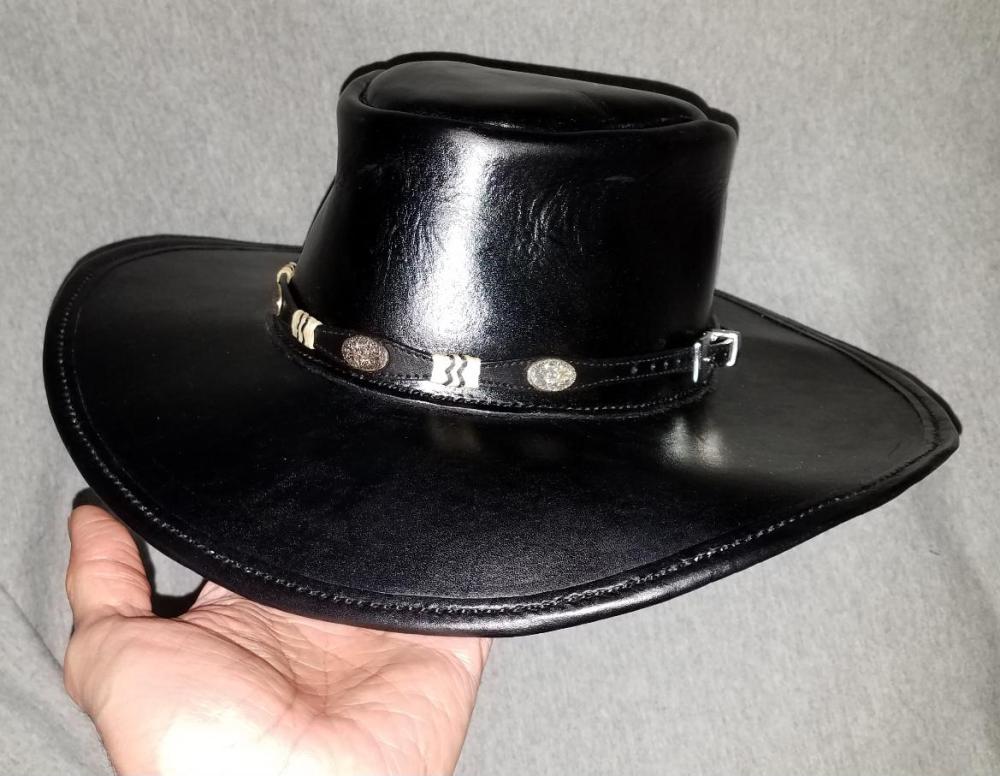
I made a hat a while back. I used galvinized wire for the brim so I could shape it. I made the crown a little bigger than I needed so I could make a leather band on the inside to size it better. I used several coats of undiluted resolene to seal it. The only real regret was I made it to round.
-
Look great! To avoid the skipped stitches on turns make sure your needle is beginning its up stroke before you turn your leather. This will ensure your stitch made a knot.
-
Fudging stitch length @ a border/corner: Cobra class 4
BlackDragon replied to DieselTech's topic in Leather Sewing Machines
I never do the math, mostly because I'm bad at math. As I get to the tip I will begin to adjust for the gap. By hand cranking I get the needle just above the leather then lift the foot to move the leather to the desired spot. I'll do this over 3 or 4 stitches. -
Who to purchase CB 4500 / Cobra Class 4 / Techsew 5100 from?
BlackDragon replied to CdK's topic in Leather Sewing Machines
The closest dealer was ZackWhite so I figured it was a good excuse to go to a local leather supplier to save $400 in shipping just to spend it buying more supplies while I was there. Whether I needed it or not. Lol -
Who to purchase CB 4500 / Cobra Class 4 / Techsew 5100 from?
BlackDragon replied to CdK's topic in Leather Sewing Machines
I bought the Cobra over the Cowboy because I could pick it up a couple of hours away to avoid shipping costs. -
Welcome!
-
I've bought a couple of his patterns in the past. But at this point since the pattern is copyrighted I can't use his patterns for sales unless I change them. So I just make my own.
-
My Cobra came with that oil bottle and oil
-
Congrats on the Cobra! I've had mine for about a year and it's a beast. Tip: When putting it together don't put the handwheel on backwards like I did. As far as power
-
Wow! Beautiful work!
-
Thanks this helps. The shop the Amish farrier has is going to be for horse supplies. He just started breaking ground for a new building to move his feed sales into and wants the current building to be tack and general needs. This guy is not traditional Amish. He's a mover and a shaker lol. He's said that he mostly wants headstalls, reins, wallets, purses, etc. I think he wants to create his own version of Muddy Pond. The headstalls he wants to stock are different sizes and mostly for working horses. Buggy horses and draft horses.
-
I stopped working with leather back in Oct. so I could go to NY to take care of my mother (she's 93) until we could bring her to NC. It was supposed to be a couple of weeks and it turned out to be a month and a half. While I was in NY I was building a website and designing things for the site. In that time my sister and BIL bought property in TN. My sister was a counselor for the military at MARSOC near camp lejeune and wants to start up her own practice using horses. My BIL and I have been working on the property since the end of Jan and it's slowly coming together. We're currently working on a living space for my sister and BIL, I'll be in a tiny home in the woods. I'm hoping I'll have a shop built in the next couple months. My BIL and his sister have been letting people know that I work with leather, including people in the Amish community. One Amish ferrier wants me to supply horse tack for his new supply shop and other people are already asking when will I be ready for orders. The closest place for them to buy tack is a place called Muddy Pond. I went there yesterday, their saddles were beautiful but some of their other things aren't that well made. The holsters were 4/5oz leather in the $50 range. Headstalls were in the $50-$110 range. The biggest complaint from people was that they were to expensive. I was thinking my prices arent going to be that much different and probably more but the quality would be better and they wouldn't need to travel as far. I've been told I should make cheaper tack for the Amish but I'm not keen on that idea. My name is going to be on my products and I don't want people thinking I make a cheap product that doesn't last. In my younger years I worked at a riding stables and worked a lot with horses but I haven't made horse tack so I'm hoping to pick people's brains about it. Are there good templates out there that I can purchase? What's the best leather for horse tack harness, bridle, or...?
-
I use glue spreaders similar to these. https://www.amazon.com/dp/B09WN9B99J?ref_=cm_sw_r_apan_dp_1090BHT31SVQCGA5XCHJ&language=en-US They work great for putting tokonole on edges.
-
The trick to painting with acrylic on leather is to thin it way down and apply many coats. It'll allow the paint to set into the leather and reduce cracking.
-
Wow! Beautiful work!